Homemade Peanut Butter Cups
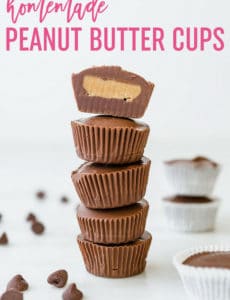
A homemade version of Reese’s peanut butter cups. This easy recipe comes together quickly and is great for gifting or stashing in your freezer!
There is absolutely no question about where my heart lies when it comes to candy. Reese’s Peanut Butter Cups and Reese’s Pieces are it for me. Reese’s cups were my favorite Halloween candy as a kid, so it’s only natural that I immediately cozy up to recipes that merge together two of my favorite ingredients – chocolate and peanut butter.
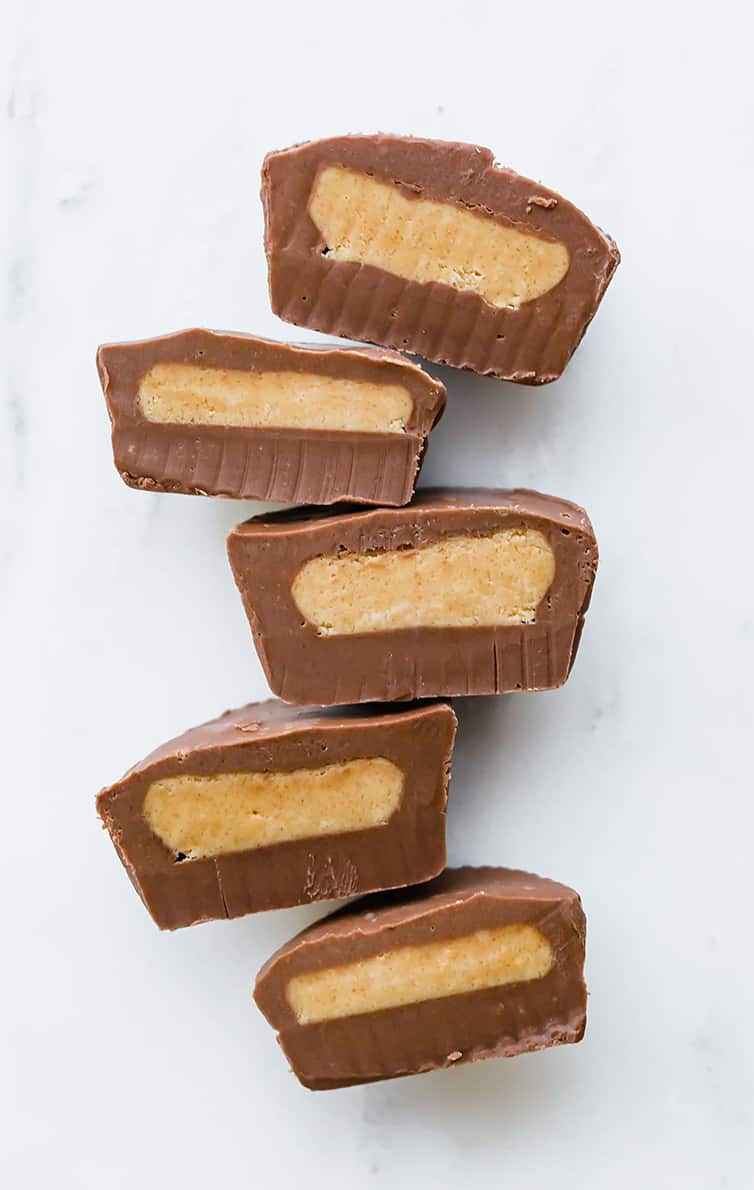
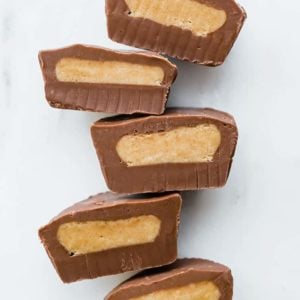
Over seven years ago, a reader of mine, Lissa, shared this peanut butter filling recipe with me, citing that she used it as a base for peanut butter bars. At the time, I already had a go-to recipe for peanut butter bars, but what she sent me sounded like a perfect filling for homemade peanut butter cups. After doing some testing, I discovered that it really WAS a perfect recreation of Reese’s peanut butter cup filling.
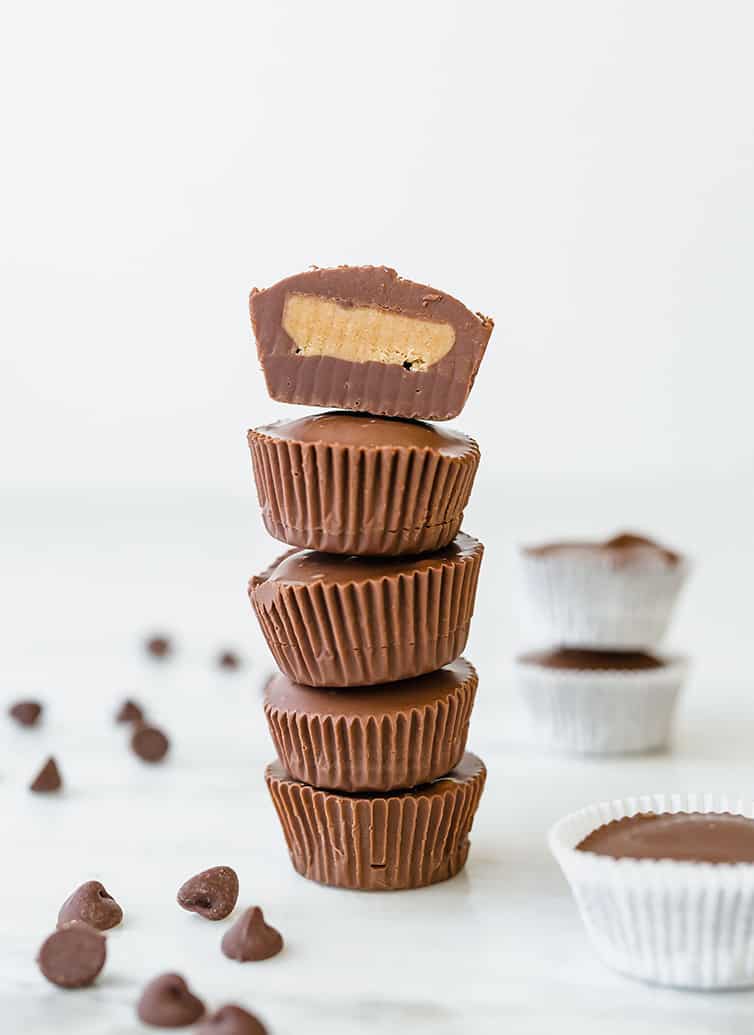
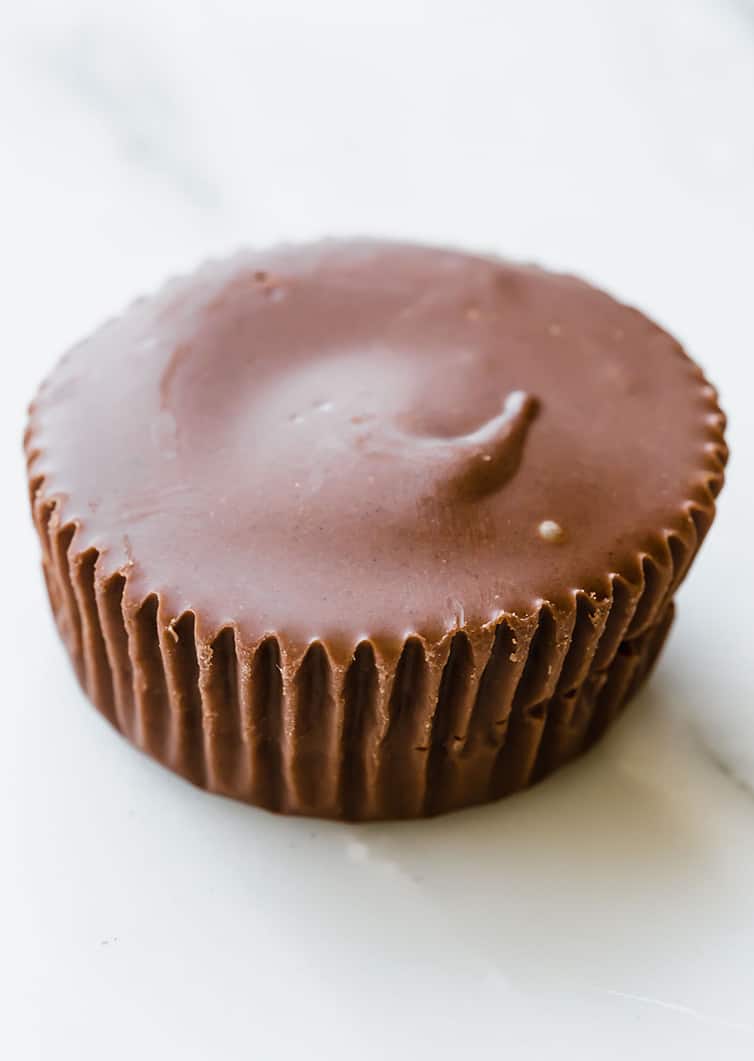
Behold! The most amazing homemade peanut butter cups – super easy and a great project to do with kids!
How Do You Make Homemade Peanut Butter Cups?
They’re super easy and just require a few steps!
First up, you mix melt together peanut butter, butter and brown sugar in a saucepan until bubbling, then take it off the heat and add the powdered sugar a little at a time until it’s completely absorbed, then set it aside to room temperature.
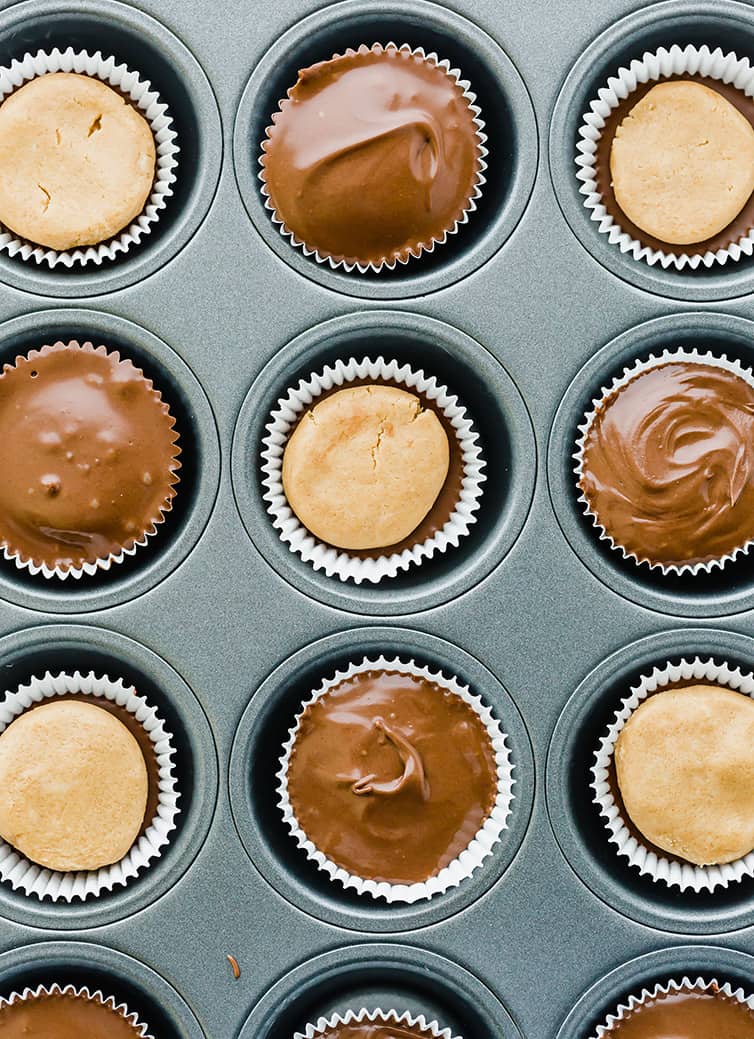
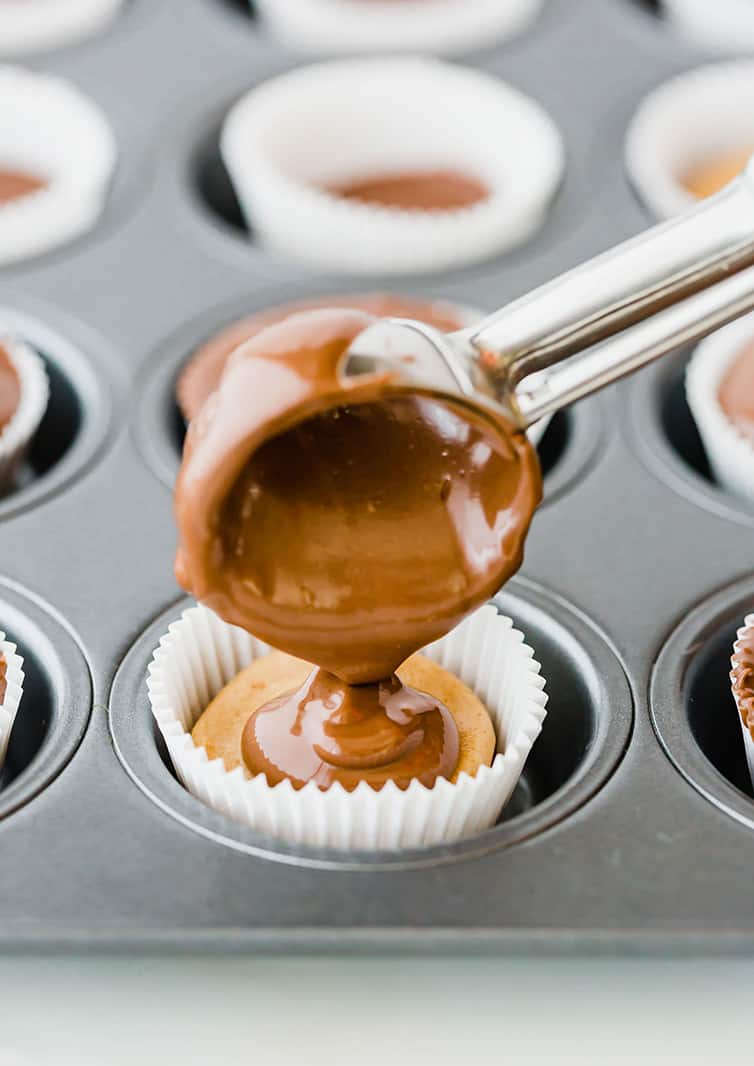
Meanwhile, melt milk chocolate together with vegetable shortening and line the muffin cups with some of the chocolate. Scoop balls of the peanut butter filling and press into a patty, then place on top of the chocolate in the muffin cups. Top with more of the melted chocolate and chill until set.
That’s it!
I’ve seen some people use a pastry brush to brush the sides of the cups with the melted chocolate so you don’t have any little naked spots on the sides, but I’ve never had an issue with glaring open spots, so I’ve never done this.
Save This Recipe
But consider it an option!
Substitutions for Homemade Peanut Butter Cups
This is my all-time favorite version of peanut butter cups (peanut butter + milk chocolate), but there are tons of variations you can try. Some ideas:
- Substitute semisweet or dark chocolate for the milk chocolate.
- Substitute almond, cashew or another nut butter for the peanut butter.
- You can use chocolate chips instead of the the chopped chocolate.
- You can substitute refined coconut oil for the vegetable shortening.

If you are a fellow chocolate and peanut butter lover, then homemade peanut butter cups are a must in your kitchen!
They make a fantastic gift for Halloween or Christmas, a great addition to cookie trays, and are also perfect for stashing in your freezer for peanut butter cup emergencies (because I’m fairly certain that’s an actual thing, right?).
If You Like Peanut Butter Cups, Try These:
- Homemade Peanut Butter Eggs
- Peanut Butter Buckeyes
- Salted Peanut Butter Cup Chocolate Chip Cookies
- Peanut Butter Cup Overload Cake
- Buckeye Brownies
- Peanut Butter Cup Cookies
- The Best Soft Peanut Butter Cookies
Four years ago: Bacon Jam
Five years ago: Ricotta Cake with Fresh Berries
Six years ago: Tamale Pie
Homemade Peanut Butter Cups
Ingredients
- 1 cup (258 g) creamy peanut butter
- ¼ cup (56.75 g) unsalted butter
- ¼ cup (55 g) light brown sugar
- 1¼ cups (150 g) powdered sugar
- 24 ounces (680.39 g) milk chocolate, finely chopped (or substitute milk chocolate chips)
- ¼ cup (51.25 g) vegetable shortening
Instructions
- Line a mini-muffin tin with paper liners; set aside. Line a baking with parchment paper; set aside.
- In a medium saucepan, combine the peanut butter, butter and brown sugar over medium heat. Heat until completely melted and starting to bubble a little, stirring constantly. Remove from the heat. Add the powdered sugar a ¼ cup at a time, stirring until completely combined with the peanut butter mixture after each addition. Set aside and let cool.
- Meanwhile, melt the chocolate chips and shortening together in the microwave on 50% power in 30-second increments, until completely melted, stirring after each burst.
- Using a small cookie scoop or a couple of teaspoons, spoon melted chocolate into the bottom of each lined muffin cup.
- Use a heaping teaspoon to scoop out the peanut butter mixture. Roll it into a ball, and then flatten it slightly into a disk. Place on the prepared baking sheet lined with parchment paper. Once finished with all of the peanut butter mixture, refrigerate both the muffin tins and the peanut butter patties for about 30 minutes.
- Place a peanut butter patty on top of each chocolate-lined muffin tin. Then use a scoop or spoon to add more melted chocolate on top and around each peanut butter patty. (If the melted chocolate firmed up, just pop it back into the microwave at 50% power for 30 seconds or so to re-melt.)
- Refrigerate again for 30 minutes, then they're ready to serve! Store in the refrigerator for up to 1 month or in the freezer for up to 3 months. You can keep at room temperature in an airtight container if you're going to serve them the same day, but they'll start to get soft if not at cool room temperature.
Notes
- You can substitute milk chocolate chips for the chopped milk chocolate.
- You can substitute refined coconut oil for the vegetable shortening.
- You use different nut butters, I recommend using "processed" versions; the "natural" version of nut butters will be too oily for the filling.
Did you make this recipe?
Leave a review below, then snap a picture and tag @thebrowneyedbaker on Instagram so I can see it!
This recipe was originally published on August 2, 2011.
[photos by Whitney Wright]


oooo my husband would love these!! he just loves Peanut Butter Cups! he’s birthday is coming up! I’ll have to make these for him! :)
My husband’s favorite candy is Reese’s so I should make of these for him
This look wonderful! I made a version of homemade peanut butter cups last Halloween and sent them to my sister because they are her favorite candy too! It is such a special treat to make your favorite candy at home!
These look so tasty. Reeses have always been my favorite candy so I cannot wait to try out a homemade version!
Wow, those look great! And way cheaper than buying the premade candy all the time! Thanks!
BEB: You should make some Buckeyes! I’m sure you know that they are chocolate coverd peanut butter balls =]
Oh I definitely know buckeyes, love them!! I actually linked to the ones I make in the post above: https://www.browneyedbaker.com/2007/12/18/christmas-baking-buckeyes/
I am soooo making these at Christmas time. Santa tends to stuff our stockings to the brim with reeses pb cups (crazy why he’d choose my most favorite candy ever). I must say…I might just eat a few less if I know how much work it takes to make them. lol. Maybe not. They look delicious!
Gratson Top 9! Love this.
Can I use butter in place of the vegetable shortening? If so, how much butter should I use? thanks! These look soooooooooo good!
Hi Erin, You really can’t; for the purposes of thinning out melted chocolate for coating and candies, the butter doesn’t have the same properties as the shortening.
Oh my word! Chocolate and pb is my favorite combo ever!!! :D
Wow..these look great. So easy and so delicious!
These look awesome, good enough to sell in a candy shop.
How did you get over your peanut allergy? Just out grew it?
I was diagnosed with multiple environmental and food allergies in my mid-20’s. I avoided all of the food completely for 5 years and underwent allergy shots for a full year. I re-tested five years after I was diagnosed, and there was no trace of any of the food allergies. I gradually started trying the foods and haven’t had a problem with them since!
Thud! Awesome!
My absolute favorite combination… my sisters would love this one!
I am SOOO making these…there’s NOTHING I love more than peanut butter and chocolate…Reeses ALL the way!!! I’m SO excited to make these…Thank you!
whoa, these look fantastic! can’t wait to try them! i just had a pb+chocolate+banana quesadilla and that was good, but these look even better!
My hubby loves these and especially the ones at the chocolate candy stores. I’m trying really hard not to make these right this moment, but i might be fighting a losing battle. Might just have to find something sweet to hold me over.
Oh my! These look fabulous and so easy to make!
Just like you my husband loves Reese’s Peanut butter Cups. I will definitely be trying these soon.
Oh there goes my diet! Simple and easy adn I can’t wait to give them a try!
Michelle, congrats on getting posted on Foodgawker! I can’t wait to try these…this weekend I think!
This sounds soo good!! I can’t wait to try it!
Does the shortening add something to the chocolate shell? Basically, can you just eliminate it, and just have more chocolate?
Hi Ashley, I always add shortening to melted chocolate for things like this, buckeyes, chocolate-dipped strawberries or pretzels, etc. It thins out the chocolate a bit, gives a smoother consistency and keeps it from being a bit “gloopy”. I’ve found it’s much easier to work with.
Hi! I know this post is on the older side but this recipe looks delish and my sister and I are planning on making homemade Reese’s for Christmas. The only problem is that we live in Switzerland and shortening isn’t available. any ideas how we could replace it??
Hi Emilie, You could replace it with coconut oil.
I think I’ve died and gone to heaven. These are one of my favs and knowing I can make them at home could be quite dangerous! They look just like the Reece’s ones!
No special equipment? Hmmm, well, I don’t think everyone has a mini-muffin tin and mini-paper liners. . . or is that just me? haha I guess I will have to get some special equipment to make these cups when I have more time. They look fantastic. Your photos are always so amazing.
Wow! And the recipe makes three dozen! Probably way cheaper to make these than shelling out $4 for a little bag at the store. Yum!
Oh man! My 2.5 year old appears to have outgrown his peanut allergy (he was anaphylactic just 17 months ago), and once we go through the testing with his doctor to know 100% for sure, I’ll be making these. I have a feeling I’ll be ODing on peanut butter goodies!
These look like the real deal! I’m so excited to try to make them!
I’m with you; peanut butter cups are the best candies around. Swedish fish take a close second, but nothing can beat Reeses. Except maybe these.
Is it just me, or did anyone else notice the 3-d effect as you scroll quickly by the empty muffin tin picture? Try it – back and forth…..you’d swear you had embedded some cool effect! Even my high-school aged boys were impressed when i showed them – well done! However, we all like the pic of the finished product better :) and now that they know i have a Reese’s PB cup copycat recipe, they’ll not let me rest until they taste it, too! Thanks for sharing. Love all your recipes. Gonna try the Primanti Bros. sandwich tonight. Can’t wait.
This looks both simple and so amazing. I see you suggest melting choc chips, but do you think you could use any chocolate? Melting a good belgian milk chocolate for example?
Rats. I see too you’ve already answered that. Thanks for such a brilliant food site. I love how you embrace the fact that there’s not only one way of doing something, and how you research and celebrate the diversity. So inspiring.
Thank you so much for the very kind words! Much appreciated :) I’m so happy that you enjoy the site!
These look fantastic! I love the peanut butter and chocolate combo and to top it off it’s no bake. i feel these already adding to the junk in my trunk ;)