Chocolate Soufflé
Chocolate soufflé can sound intimidating, but all you need is a basic list of ingredients and a little technique know-how, and you’ll feel like a kitchen all-star when you pull this dessert out of your oven. It’s light and decadent at the same time, plus you can make a large one or individual ramekins, and prepare in advance for an easy dinner party dessert.
About five years ago, I had never made chocolate soufflé before, but I set out on a quest to not only make one, but to nail the perfect recipe! I churned so many out of my kitchen over a six-week period that, at one point, my husband declared that he couldn’t eat any more chocolate soufflé (I always had room for a little bit more chocolate, ha!).
I tried different ratios of ingredients and different techniques and finally settled on my very, very favorite version. And I LOVE it.
I’ve included tons of information, tips, and photos below (as well as a video!) to help you rock your chocolate soufflé!
Why Is Chocolate Souffle So Amazing?
This tastes like a slice of heaven!
Seriously though, I love that it has multiple layers of texture going on.
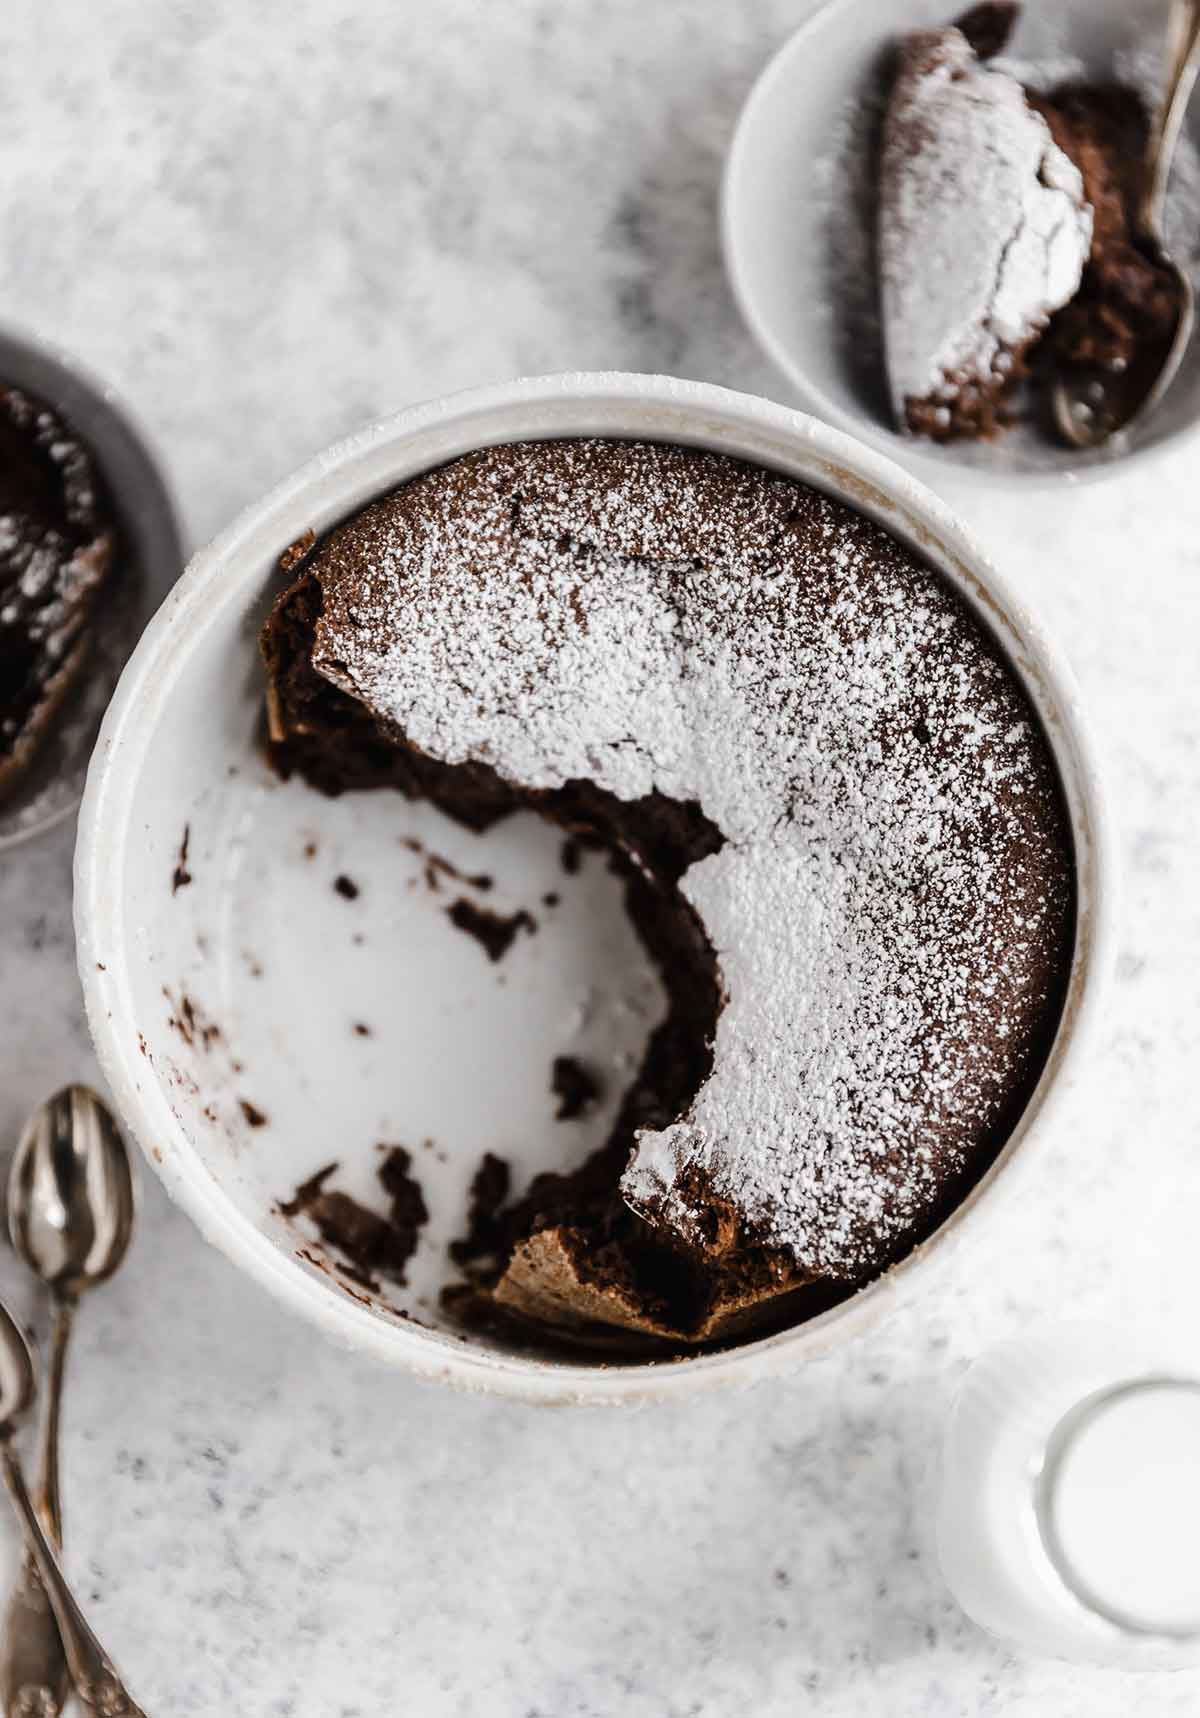
- The outermost layer of the soufflé is caked in a sugar from the coating on the pan, giving it a sweet crust.
- The next layer is light and airy, almost sponge-like.
- Finally, the center is a firm, yet creamy texture that melts in your mouth.
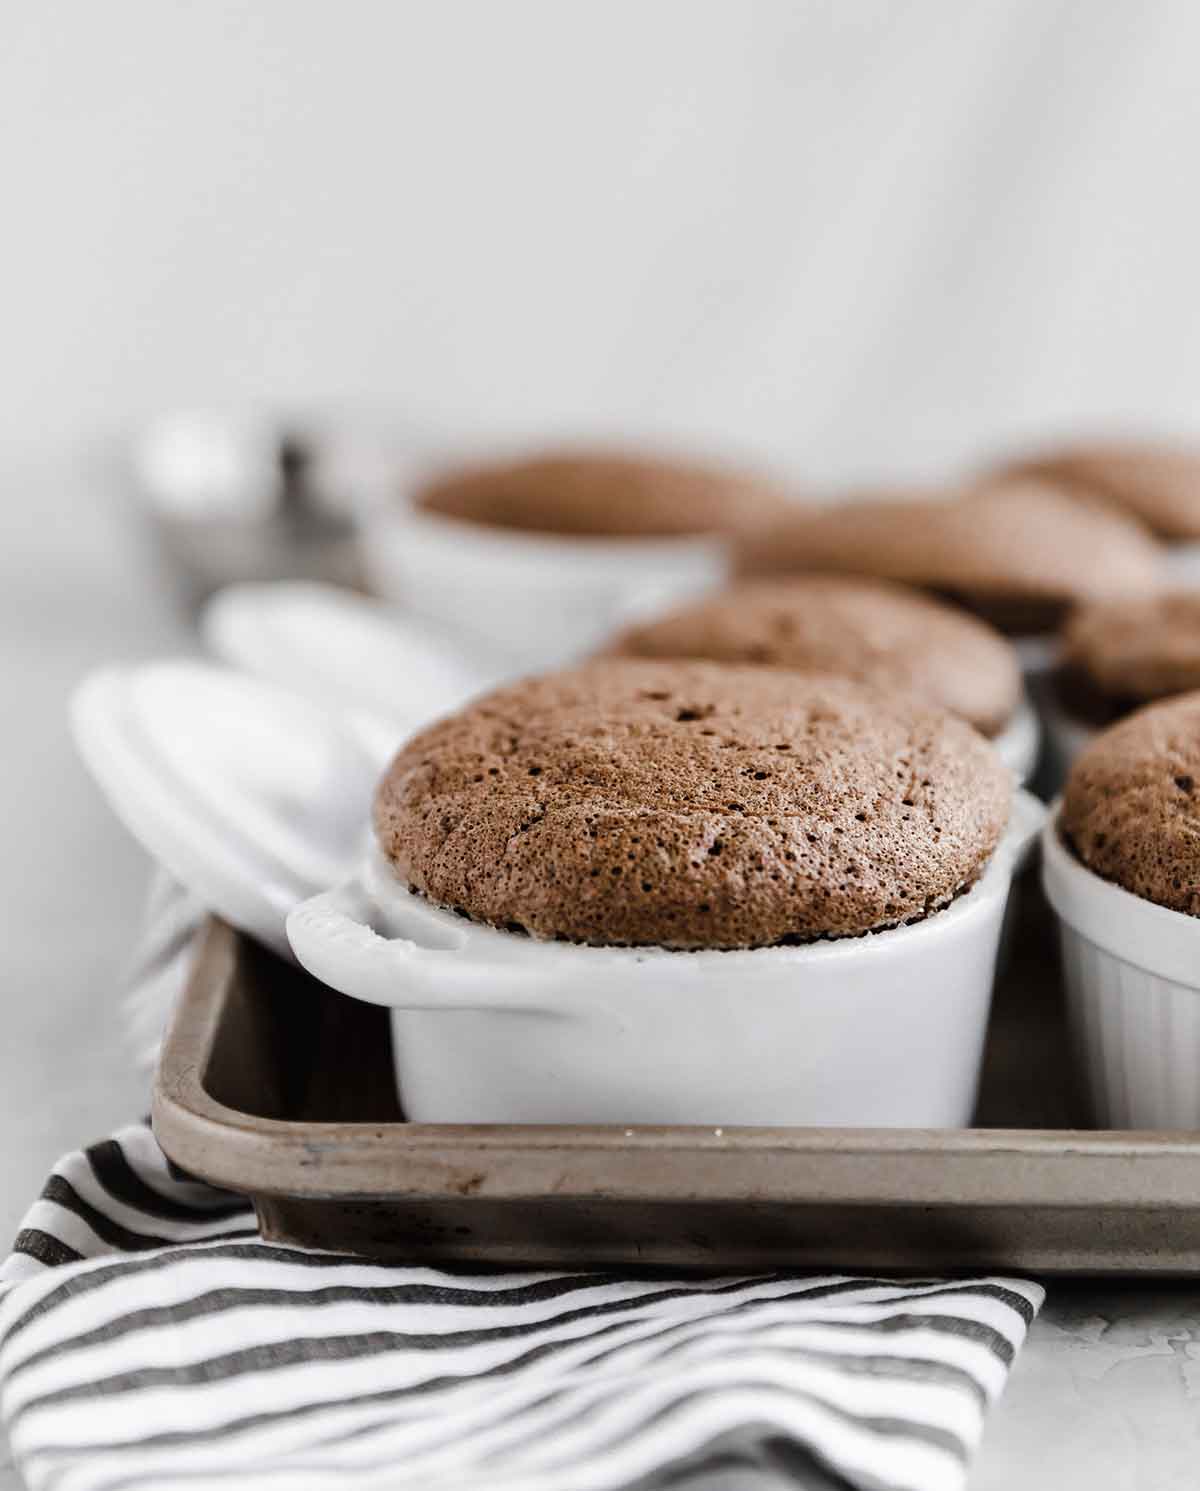
You may be wondering if there is a big difference between making one large soufflé and multiple individual soufflés in ramekins… well, after tons of trial and error, my official personal preference is an individual soufflé.
While both are delicious, I like that you can really get a sense for the varying textures when you eat a smaller one, versus a scoop out of the larger dish.
The Ingredients
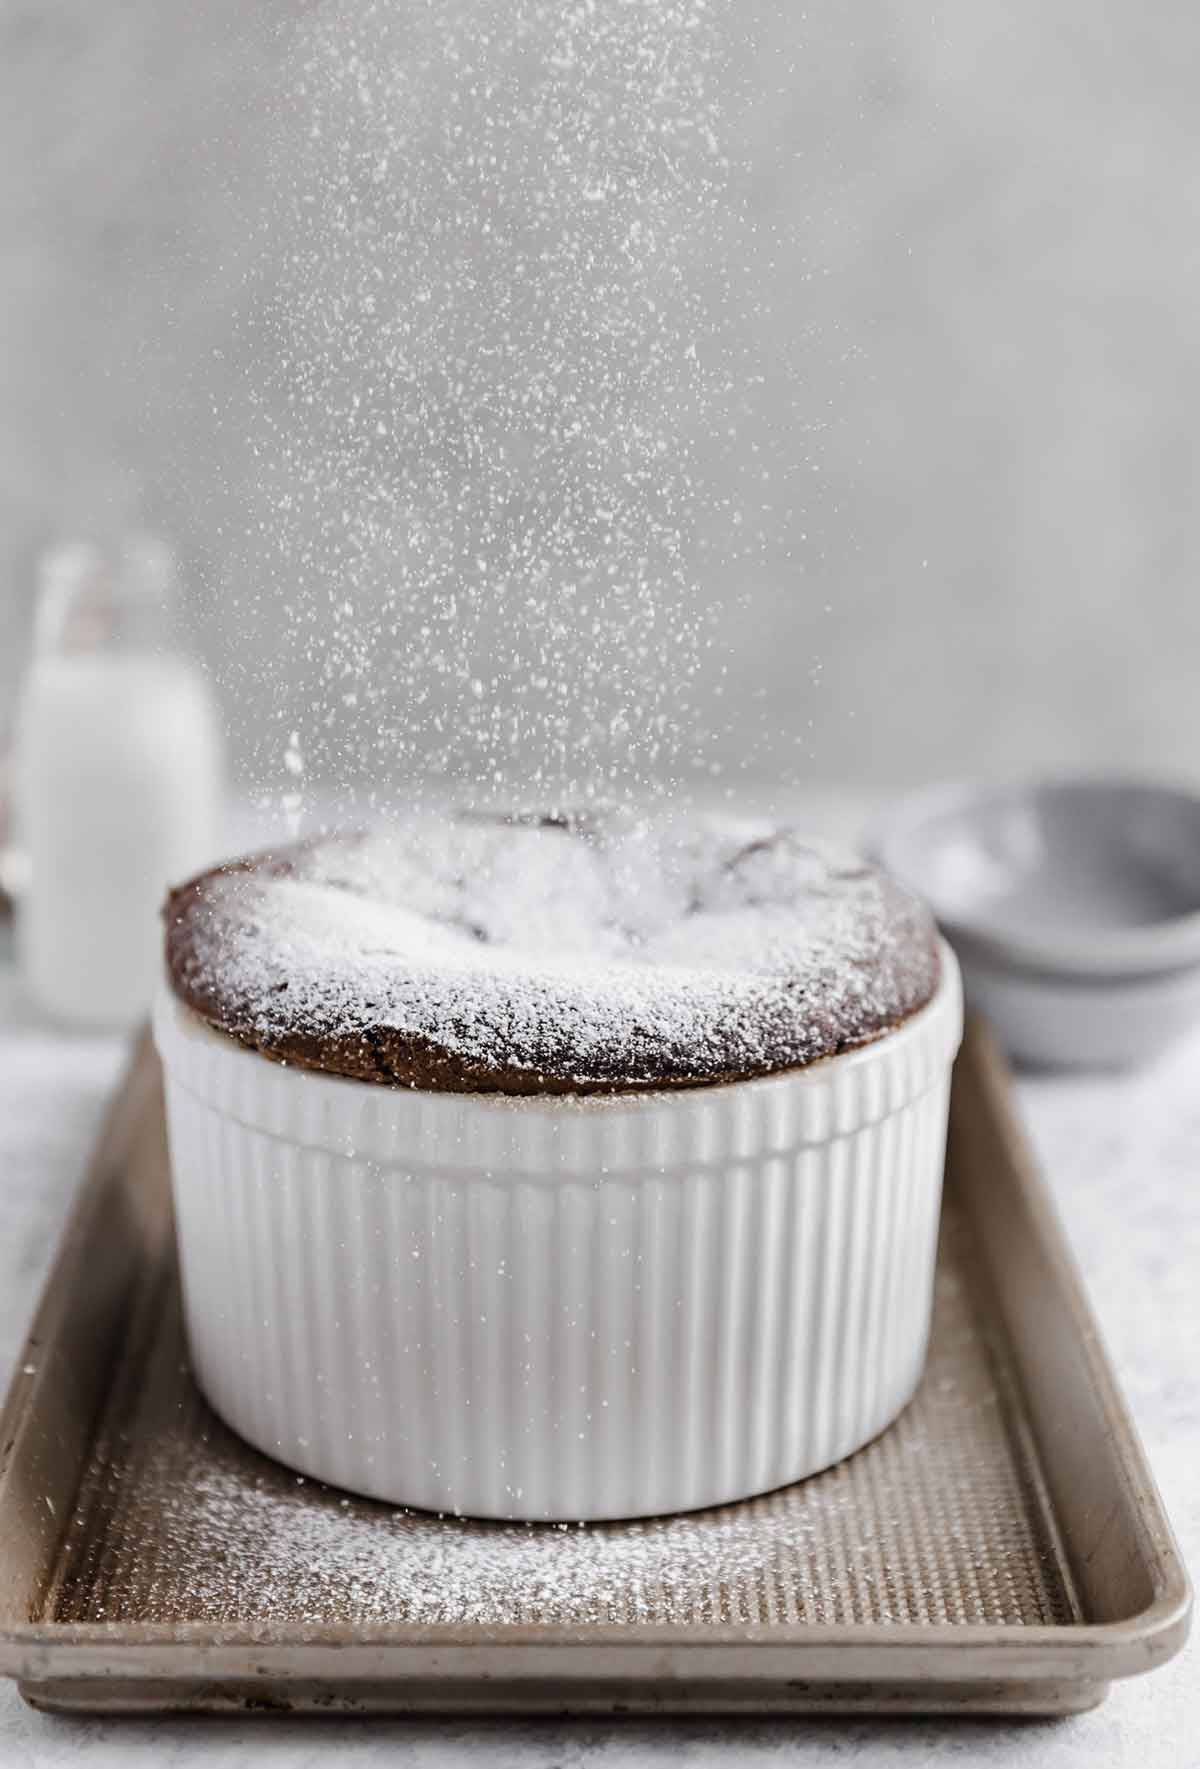
This is a short but sweet list! Let’s review:
- Unsalted Butter – Many recipes don’t include butter, but I liked using it to ratchet up the decadence level. It gives the center of the soufflé a the texture of chocolate ganache. If you prefer a lighter dessert, you can reduce the amount of butter by half.
- Dark Chocolate – You can also use milk chocolate or semisweet chocolate. While chopped bar chocolate is preferred (sometimes you will see this in the grocery store labeled as “baking chocolate”), you can also use chocolate chips.
- Vanilla + Salt – Provides an oomph of flavor and balance!
- Egg Yolks + Egg Whites – Eggs are separated for this recipe; the yolks are beat with the sugar, then mixed in with the melted butter and chocolate, while the egg whites are whipped to stiff peaks to give the souffle that wondrous volume.
- Sugar – Regular granulated sugar is all you need for this recipe.
- Cream of Tartar – Helps create strong, stable whipped egg whites that won’t deflate easily.
How to Make Chocolate Soufflé
A soufflé has a very basic set of ingredients, but the key to making a phenomenal soufflé is the technique that is used to mix them all together.
- Grease the pan and coat in sugar – MOST IMPORTANT! Coating the pan with sugar gives the batter something to cling to as it rises and prevents it from slipping down the sides of the pan. This allows the soufflé to keep rising and rising, getting above the rim of the pan.
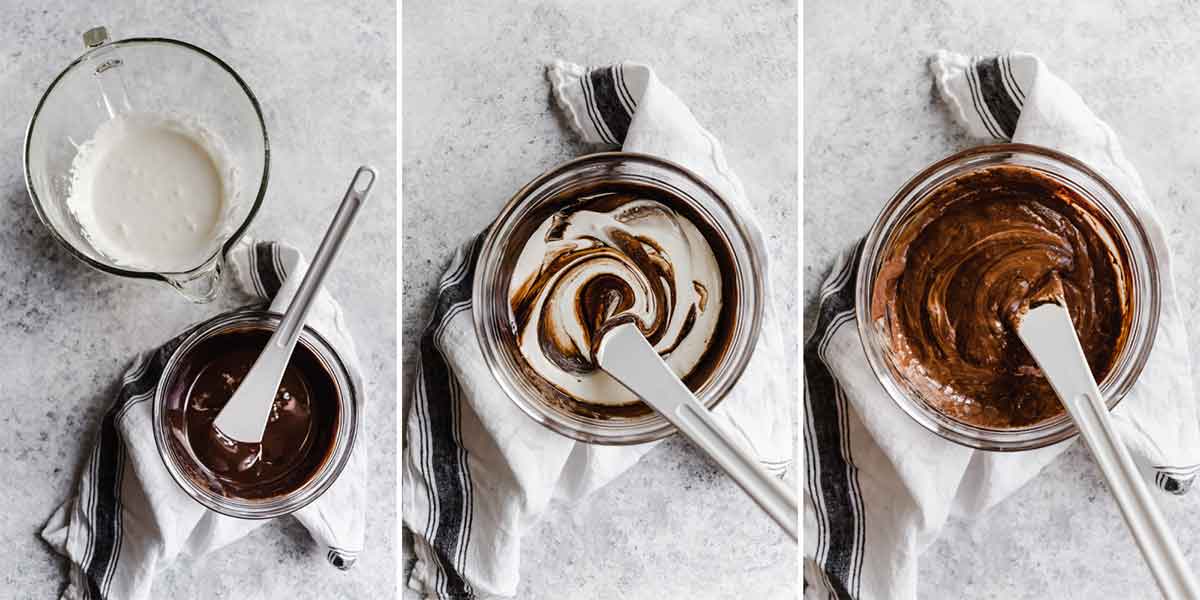
- Melted butter and dark chocolate – Once the butter and chocolate are melted together, whisk in a little vanilla and a pinch of salt, then set aside to cool a bit.
- EGGS! Eggs are the key to the castle here. You need to work with the eggs in two steps. First, we are going to mix together egg yolks with sugar and beat it until it’s really thick and very pale yellow, almost ivory in color. This takes a good few minutes and helps to set the stage for all of the volume we’re trying to get into the batter. Then, we’ll fold in the melted butter and chocolate mixture with the egg yolk mixture and set aside.
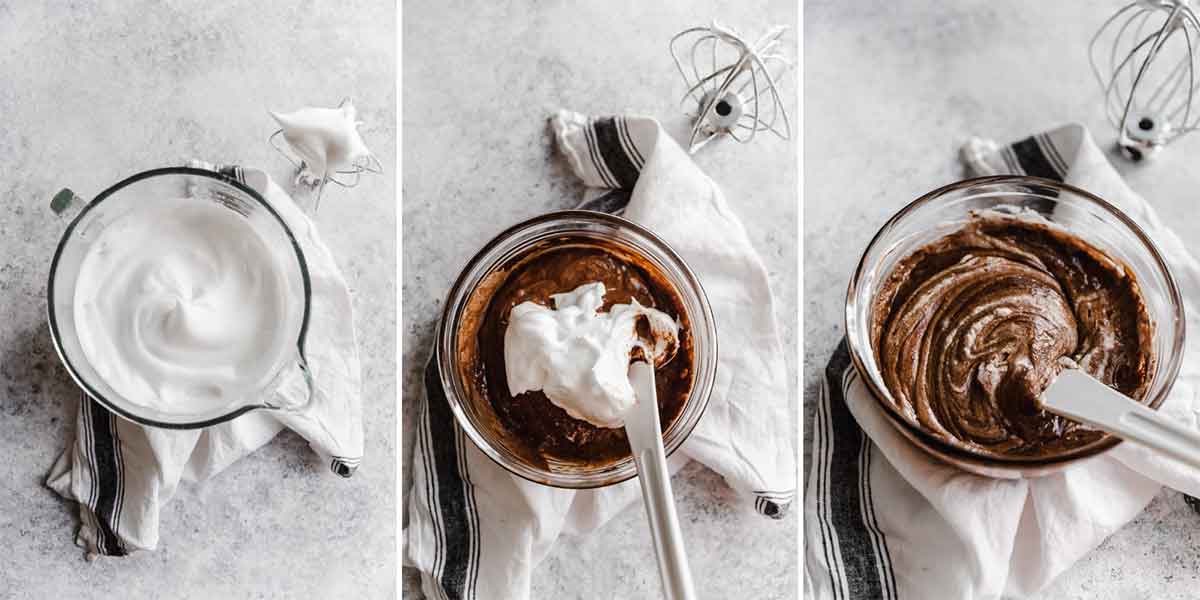
- Next, we will beat egg whites with cream of tartar and a little sugar until they reach stiff, glossy peaks. Once they’re ready, a quarter of the mixture gets stirred into the egg yolk/chocolate mixture to loosen it up. Then the rest of the egg whites are added, and we very gently fold them in, taking care to be easy so as not to deflate the whites – they are the key to that amazing rise we’ll get in the oven.
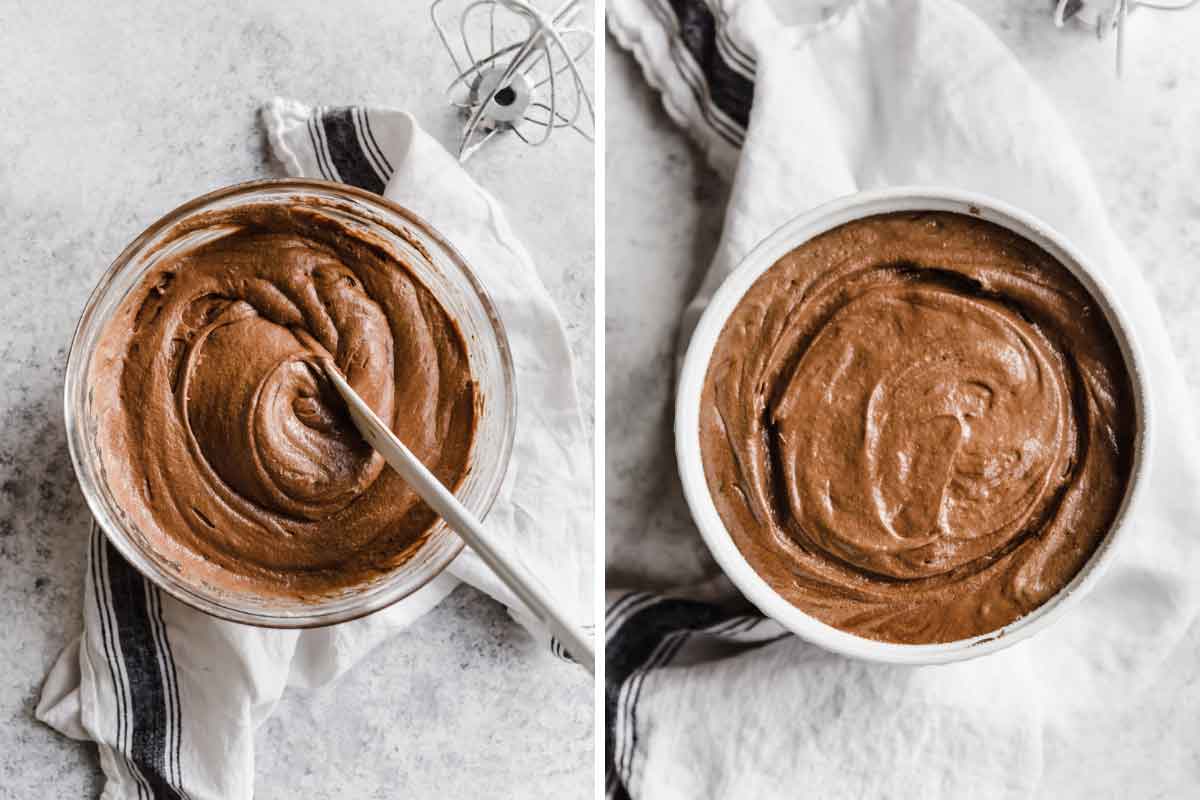
- At this point, you can put the batter into a 2-quart soufflé dish or individual ramekins and run a finger, butter knife, or offset spatula in a circle through the batter (it helps with an even rise! Watch the video below and see the photos for an illustration) and pop in the oven.
How Will You Know When the Soufflé is Done?
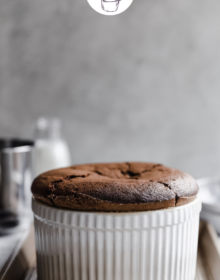
You want to ensure it’s done enough so you don’t end up with a soupy center but not overdone with burnt edges. I found that when the outer part of the soufflé is completely set, and the center still jiggles just a tiny bit, then it’s a good time to take it out of the oven.
Why It Falls
Your soufflé WILL fall about 5 to 10 minutes after it comes out of the oven, so don’t panic and think you did something wrong. It’s the sheer force of gravity; the hot air in the oven keeps that delicious chocolate dessert nice and high, but once it is removed, it will start to shrink back down.
You have a few choices here:
- Rush the soufflé to the table to place before your guests before it falls so that they can marvel at all its glory;
- Do not worry about the soufflé sinking, but fill the cavity with something delicious like ice cream, whipped cream, creme anglaise, and/or a caramel sauce.
- If you make a single large soufflé, scoop it out into serving dishes without worrying about how it looks.
At some restaurants, they will take two forks and split open the top of the soufflé and pour in a dessert sauce prior to serving (this sounds phenomenal!).
I personally am happy to let anyone see the soufflé fresh from the oven and then explain why it sinks back down. Wow them with science and don’t worry about perfection :)
Serving and Topping Ideas
While this chocolate souffle recipe will be delicious all on its own, you can certainly add toppings; these would all be wonderful choices:
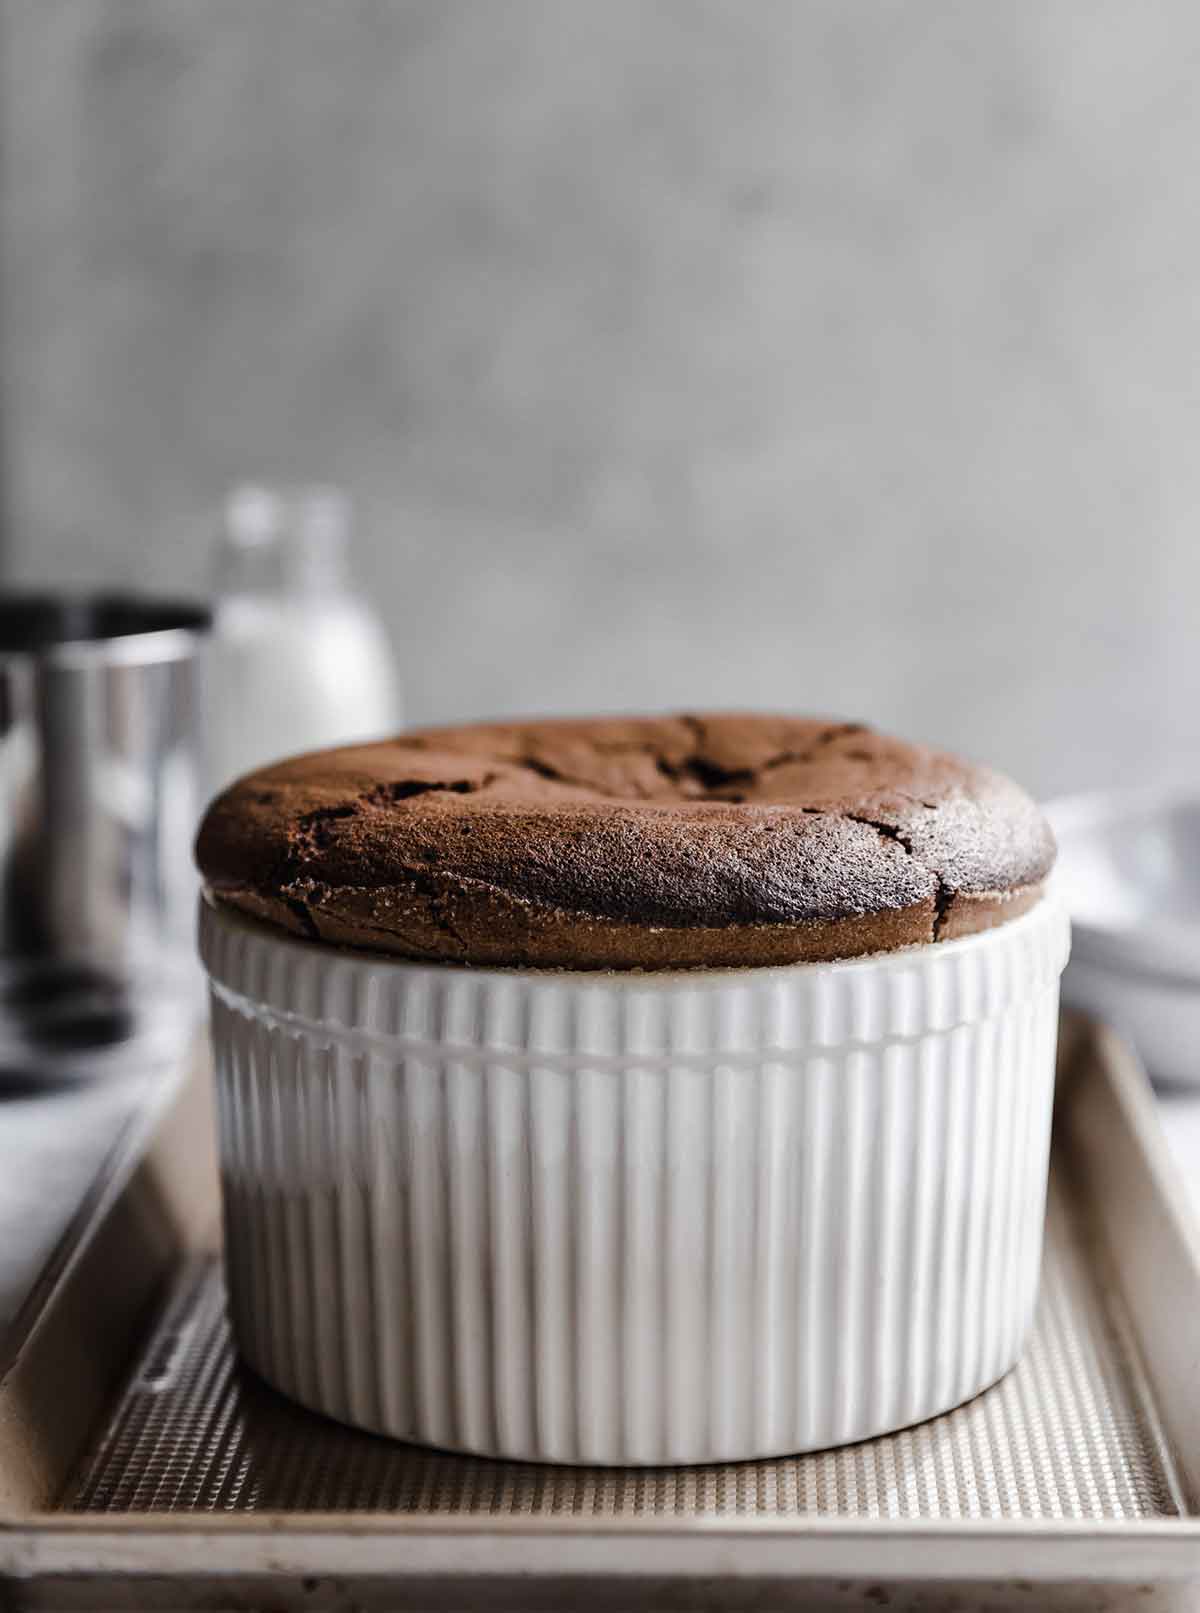
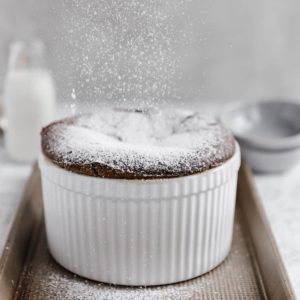
- A simple sprinkle of powdered sugar
- Homemade hot fudge sauce (or store-bought!)
- Homemade salted caramel sauce (or store-bought!)
- Fresh whipped cream
- A scoop of vanilla ice cream
Recipe Notes & Success Tips
Below are a ton of tips on how to make the absolute best chocolate souffle, as well as notes on pan sizes, making it ahead of time, and storing it properly.
- Pan Sizes: You will need either a 2-quart soufflé dish or individual ramekins (you can use whatever size you like, but I think 8-ounce ramekins produce a nice-sized individual dessert).
- Mixing: All of the mixing can be done by hand with a whisk, but will take some elbow grease! A hand mixer with a large mixing bowl or a stand mixer with a paddle attachment (for the eggs and sugar) and whisk attachment (for the egg whites) will make this recipe easier to prepare.
- Whipping Egg Whites: If you’re new to whipping egg whites to stiff peaks, you may find my how to make meringue tutorial helpful to read.
- Halving the Recipe: To cut this recipe in half, use 3 egg yolks (and half of all of the other ingredients) and a 1-quart soufflé dish (or 4 ramekins).
- Make-Ahead Instructions: Chocolate soufflé can be made ahead! Prepare the batter, transfer it into the soufflé dish or ramekins, cover it in plastic wrap, and refrigerate it for up to 1 day. Bake as directed.
- Storing Leftovers: Soufflé is best served immediately to get the full effect of the varying textures, but leftovers can be covered and kept at room temperature for up to 3 days. They settle and become a little more dense but are still oh-so-delicious!
More Favorite Chocolate Desserts:
- Chocolate Bread Pudding
- Chocolate Pots de Crème
- Homemade Chocolate Pudding
- Chocolate Pavlova with Mascarpone and Raspberries
- Dark Chocolate Mousse
Watch the Recipe Tutorial:
If you make this chocolate soufflé recipe and love it, remember to stop back and give it a 5-star rating – it helps others find the recipe! ❤️️
Chocolate Soufflé
Ingredients
- ½ cup (113 g) unsalted butter
- 8 ounces (227 g) dark chocolate, finely chopped
- 1 teaspoon vanilla extract
- Pinch salt
- 5 egg yolks, room temperature
- ⅓ cup (67 g) + 2 tablespoons granulated sugar, divided
- 8 egg whites, room temperature
- ¼ teaspoon cream of tartar
Instructions
- Preheat oven to 375 degrees F and adjust the rack to the lower-middle position. Generously butter a 2-quart souffle dish (or eight 8-ounce ramekins), then sprinkle with granulated sugar, tapping and turning the bowl until the sugar has completely coated the butter. Place in the refrigerator until needed.
- In a medium heatproof bowl, melt together the butter and dark chocolate (microwave on 50% power, stirring every 30 seconds OR place over a small saucepan of simmering water, stirring occasionally until melted). Off heat, whisk in the vanilla extract and salt; set aside.
- Using an electric mixer on medium speed, beat the egg yolks with ⅓ cup of the sugar until the mixture is thick and very pale yellow, 3 to 4 minutes. Use a rubber spatula to gently fold in the chocolate mixture; set aside.
- Using an electric mixer on medium-low speed, beat the egg whites and cream of tartar until frothy. Increase the speed to medium and beat until soft peaks form. Increase the speed to medium-high and gradually add the remaining 2 tablespoons of granulated sugar; continue to beat until stiff, glossy peaks form.
- Add one quarter of the egg whites to the chocolate mixture and vigorously stir it in to lighten up the mixture (the chocolate egg mixture will have thickened a bit). Add the remaining egg whites all at once and use a rubber spatula to gently fold them in until no white streaks remain.
- Transfer the chocolate mixture to the prepared souffle dish and smooth the top into an even layer. Trace a circle with your finger in the batter about ½-inch from the edge of the pan (this will help give it a nice even rise). Place the souffle dish on a rimmed baking sheet and place in the oven. Bake until it has fully risen, the outside is set, and the center just barely jiggles when the pan is moved, 30 to 40 minutes (20 to 25 minutes for 8-ounce ramekins). Remove from the oven, dust with powdered sugar, and serve immediately.
Notes
- Unsalted Butter – Many recipes don’t include butter, but I liked using it to ratchet up the decadence level. It gives the center of the soufflé the texture of chocolate ganache. If you prefer a lighter dessert, you can reduce the amount of butter by half.
- Dark Chocolate – You can also use milk chocolate or semisweet chocolate. While chopped bar chocolate is preferred (sometimes you will see this in the grocery store labeled as “baking chocolate”), you can also use chocolate chips.
- Pan Sizes: You will need either a 2-quart soufflé dish or individual ramekins (you can use whatever size you like, but I think 8-ounce ramekins produce a nice-sized individual dessert).
- Whipping Egg Whites: If you’re new to whipping egg whites to stiff peaks, you may find my how to make meringue tutorial helpful to read.
- Halving the Recipe: To cut this recipe in half, use 3 egg yolks (and half of the other ingredients) and a 1-quart soufflé dish (or 4 ramekins).
- Make-Ahead Instructions: Chocolate soufflé can be made ahead! Prepare the batter, transfer it into the soufflé dish or ramekins, cover it in plastic wrap, and refrigerate it for up to 1 day. Bake as directed.
- Storing Leftovers: Soufflé is best served immediately to get the full effect of the varying textures, but leftovers can be covered and kept at room temperature for up to 3 days. They settle and become a little more dense but are still oh-so-delicious!
Did you make this recipe?
Leave a review below, then snap a picture and tag @thebrowneyedbaker on Instagram so I can see it!
[photos by Ari of Well Seasoned]


Michelle, I was trying to watch the video for this, but it stopped quickly and switched to banana pudding. I have no ad blockers or anything, so unsure what happened. I usually do not watch videos, but wanted to be sure of the technique. Thank-you.
Hi Karin, I just watched through the video and the whole thing played, but there is a spot halfway through where it prompts you to keep watching or it defaults to the next video… just be sure to click the “stay” button. Enjoy the souffle!
Just an excellent recipe. (Your comment that soufflés can be made in advance was a game changer!) That said, this is a horribly designed website! I respect that you get your money from advertising; but the bombarding degree to which the ads appear is by far the most distracting I have ever experienced. And sadly, for that reason, I will not be returning.
Making this for Valentine’s dinner. What size eggs (large?) or does it matter? If so, can you provide a weight in grams? Thanks much. Will report results!!
Hi Linda, Large eggs!
This is my go to recipe and number one request from the family. I almost have this memorized!
I’ve made it twice so far and AMAZING both times. I’m gonna keep this recipe forever and have already delegated 10lbs gained in the future just for this soufflé. Thank you so much for sharing. Sharing is Caring 😁
ABSOLUTELY SUBLIME, pure perfection! Thank you so much! They came out amazing!
I did a half batch with duck eggs and 72% chocolate. It turned out perfect. Not to sweet, and a fabulous texture. Thanks for the wonderful recipe.
This was easy and great! I actually made this in early February but forgot to post it! Thank you! This will be a ‘regular’ recipe!
Souffles are some of my favorite desserts. Grand Marnier is my favorite, but I love chocolate too. I wish more placers served them. Many people are actually not familiar with them. For some reason they’s gotten the reputation of being difficult to make.
I had so much fun making the Chocolate Soufflé from the this month’s Baking Challenge.
I’ve never made it before, I was always afraid it’d come out flat. It came out beautifully!! I feel liberated, I feel fearless!! Ok, a little over the top, but seriously, I am super excited I was finally able to make this decadent dessert!! Woo hoo!!!
Should the inside be liquid like, dry or like custard?
Hi Michelle,
I’m going to prepare the soufflés ahead of time (tomorrow), and bake them Thursday for dessert. I’m making half the recipe, as I don’t need a large amount. For the half recipe, you said to use 3 egg yolks. This may seem logical, but Since the whole amount is 8 egg whites, would I use 4? I’ve made chocolate – Grand Mariner soufflé before, and it’s heavenly. Can’t wait to make this one!
Question:
Hi… just checking re halving the recipe…. I use 3 yolks, but how many whites? I assume 4 as that is half of the 8 in the original recipe… correct? thanks… it’s in the fridge for tonight, and I cannot wait to put them in the prewarmed oven for company after dinner…
Phyllis
Hi Phyllis, Yes, use 4 whites for a halved recipe. Enjoy!! :)
Where can I watch the video? There is a pink link at the bottom that says Chocolate Souffle. Watch how to make it, but it won’t open and I can’t find anywhere else to click for a video.
If you have an adblocker on, you won’t be able to access the video. Turn it off, reload the page, and you’ll see where to watch the video.
Thanks, did not know that. Will give it a try.
I have always wanted to make a souffle and when I seen the bake along I was excited turned out good nice rise and inside creamy I am not on inststagram or Twitter but I do Facebook will post pictures when get get accepted into group your recipes are always a success thank you
Jacob
You read my mind! I was just thinking about a special Valentine’s Day dessert to make for my husband (Mr. “Is there any chocolate in the house?”) and I thought about chocolate souffle! I’ve never made one but they’re delicious and seem special occasion. Thanks for the step-by-step instructions.
If you cut the recipe in half how much chocolate and butter do you use?
You soooo have to do the creme anglaise w soufle… it is almost the best part of getting to enjoy a chocolate soufle… and we soooo have similar tastes in foods…be still my heart when I saw gougeres… then chocolate soufle….I just need to buy the ramekins. Is there a brand you prefer or is any ramekin just fine?
Hello!
This is a pretty random question, but has anyone heard the rumor that corn meal is no longer going to be made? There’s a rumor going on that because the corn crop has been so bad that there isn’t enough to make it anymore and will soon become completely unavailable. What would be an alternative for corn meal in baking/cooking if that were true?
My mom used to make chocolate soufflé for my dad and me when I was a kid. It would always feel like a special day when she did. Maybe I’ll give this a try if I can find someone to share it with me. 😂
Aww I love that memory! And I’m sure someone will be happy to have some chocolate with you! :)
I made this for the first time last weekend and it was a huge hit in my house! Im a chocoholic as my husband calls me, but even my husband liked it! I will be making this again! Thank you!
Can I use dark chocolate chips for the dark chocolate? If I need dark chocolate bars, what % cocoa is best? There were several choices when I looked. Looking forward to trying this one.
Yes! I did this for a couple of my test souffles and it worked just fine. As for %, I think this is personal preference based on how dark you like your chocolate. I buy the bars that are 60%. I hope that helps! :)
This looks so good which makes me excited to try it. You mention it can be whisked by hand but does it have to be for any reason? Thanks for all of the effort you put into your recipes, your blog and your readers .
Hi Marla, Thank you for the kind words :) As for whisking by hand, no reason at all to do it if you have an electric mixer, I just don’t want to discourage anyone from making it if they think they absolutely need a mixer to do it :)
Is there a substitute for cream of tartar? I cannot seem to find that here (Switzerland), though it may just be that I don’t know what name to look for.
On the other hand, the cheese (I’m about 45 minutes from Gruyere) and chocolate of these first two recipes play right into my areas strengths :)
Hi Julie, The cream of tartar helps to stabilize the egg whites and maintain those stiff peaks; you can substitute the same amount of lemon juice or white vinegar in its place. Enjoy the souffle!! I bet your chocolate is amazing!!
I’m very excited to try this challenge. Do the ramekins bake for the same amount of time as the bigger baking dish?
Hi Ilene, Can’t wait to see your souffle! The ramekins will bake for less time (for 8-ounce ramekins, about 20-25 minutes); I’ve updated the recipe to include that information.
How many I 8oz ramekins should be prepared? And how full should they be filled? Thank you!
Hi Shannon, You should be able to fill eight 8-ounce ramekins. They should be filled up to right under the rim (about 1/2 inch from the top). Enjoy!