Chicken Pot Pie

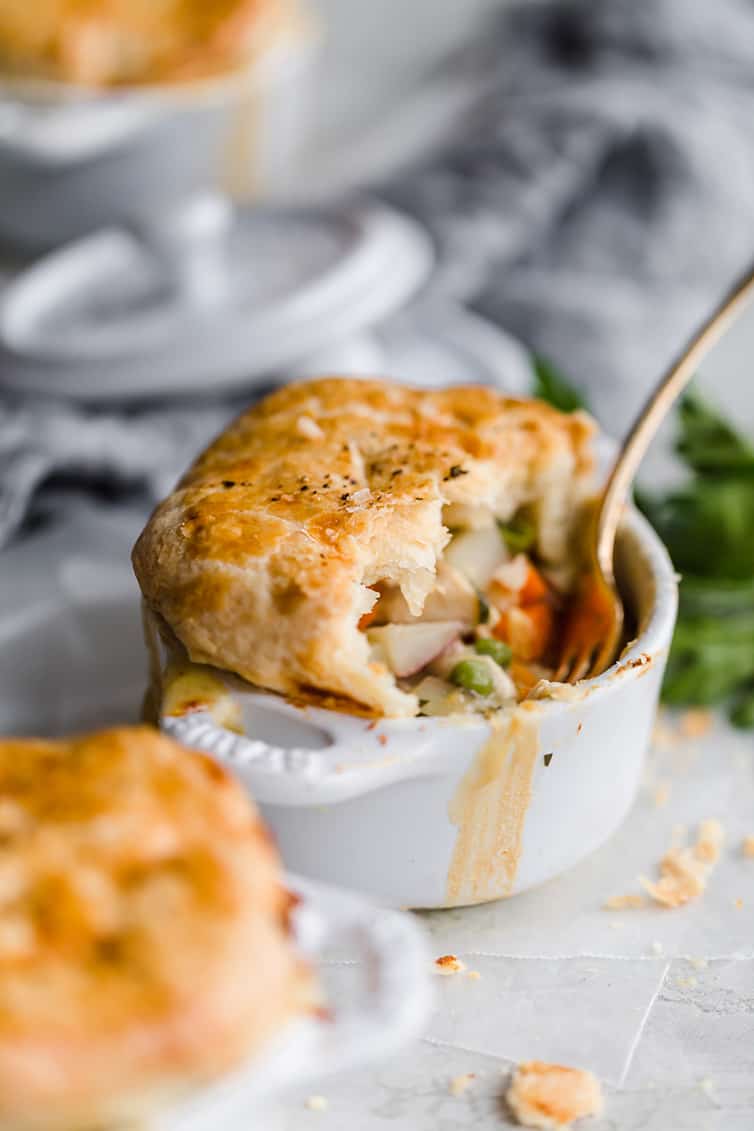
This classic Chicken Pot Pie recipe starts with a creamy filling full of chicken, potatoes, carrots and peas, and is topped with homemade pastry crust. Absolute comfort food at its finest; make it for dinner tonight!
Chicken pot pie really is one of the ultimate comfort food dishes, is it not?
A creamy filling full of chopped chicken, carrots, potatoes, and peas topped with a homemade crust that is so buttery and flaky it melts right in your mouth. This is a stick-to-your-ribs type of meal that tastes so incredibly good going down.
I was first introduced to making chicken pot pie at home with a quick and easy Bisquick chicken pot pie my grandma shared with me probably 15 years ago, using a frozen veggie mix and Bisquick for the crust and filling. It is DELICIOUS, but I started to crave a truly homemade version a few years later, and found a decent one with a puff pastry topping.
Still not totally and completely satisfied, I wanted a thick and creamy filling with a totally homemade pastry crust on top. I am thrilled to tell you that THIS is the absolute best chicken pot pie I have ever tasted!

How to Make Chicken Pot Pie
There are two main components for chicken pot pie: the crust and the filling. Let’s discuss!
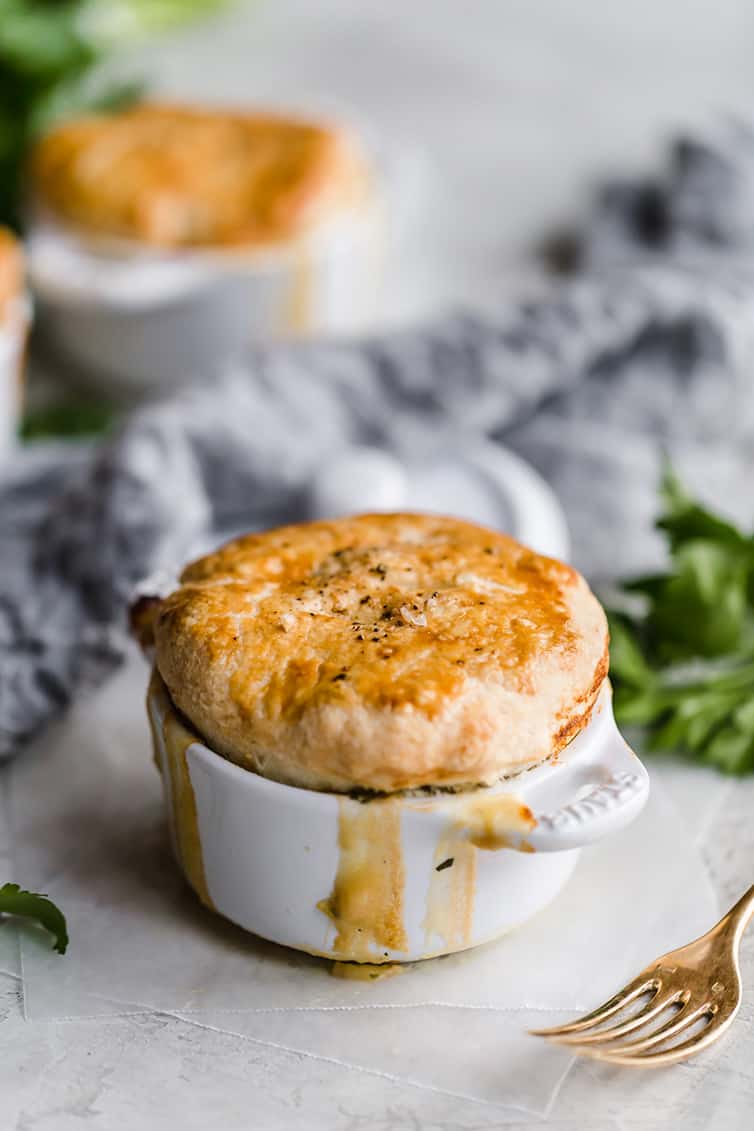
The Crust – This crust recipe is super flaky, yet sturdy enough to stand up to the creamy filling below. It’s a pretty standard crust recipe, using flour, salt, butter, shortening and ice water, but with one key addition – baking powder. This one little twist gives the crust a bit of lift and really transforms it into a next-level crust you are going to be thinking about for dayssssss.
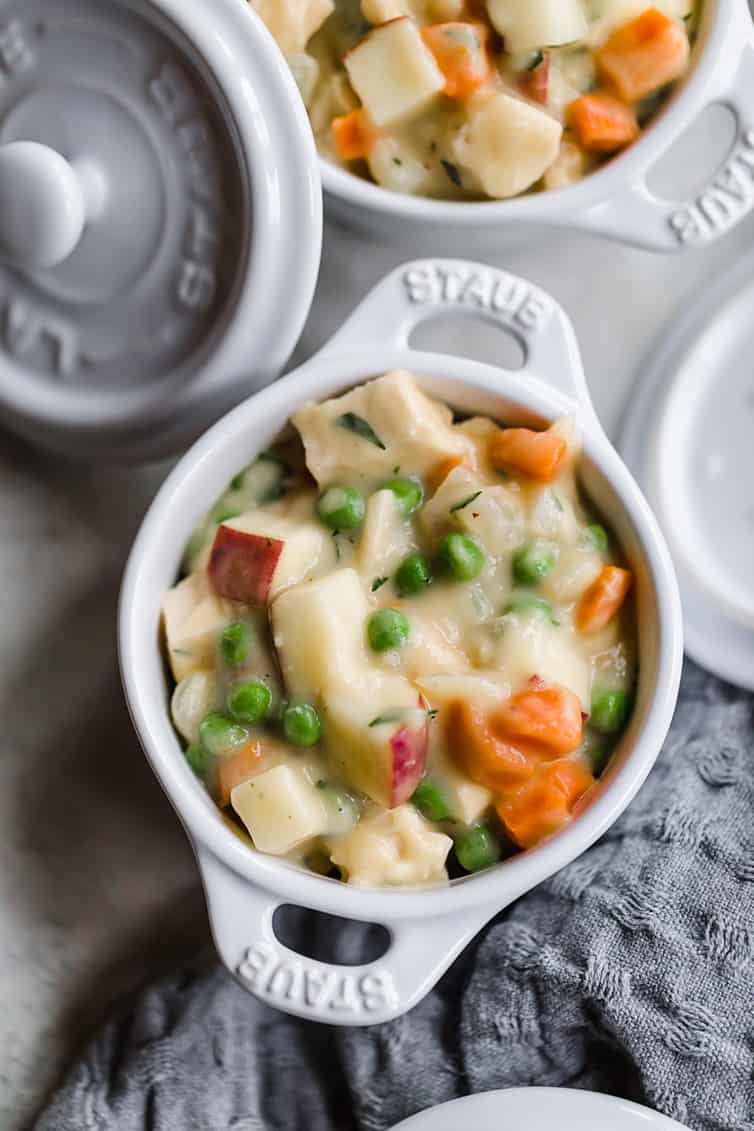
The Filling – My goal was to create a filling that was super creamy (no thin fillings here!) and packed with tons of delicious add-ins such as chicken, carrots, potatoes, and peas. In order to create this dreamy filling, here’s what I did:
- Sauté the onion and carrots – Sautéing onions at the start of a recipe is pretty typical, but I added in the carrots as well to give them a jump-start on cooking and keep them from being too al dente when the pot pie was done baking.
- Make a simple roux – Once the onion is translucent, flour is stirred into the vegetable mixture to coat everything and prime the mixture to be thickened.
- Chicken stock – This is the liquid we need for the roux to come together into a beautiful, silky sauce. Stirring it in slowly ensures that the sauce will thicken nicely and without lumps. A tiny bit of heavy cream gives it an extra punch of lusciousness.
- Add the flavor – Season with salt and pepper, then stir in the chicken, potatoes, peas and parsley. I love the varied flavors and textures that all of these ingredients provide.
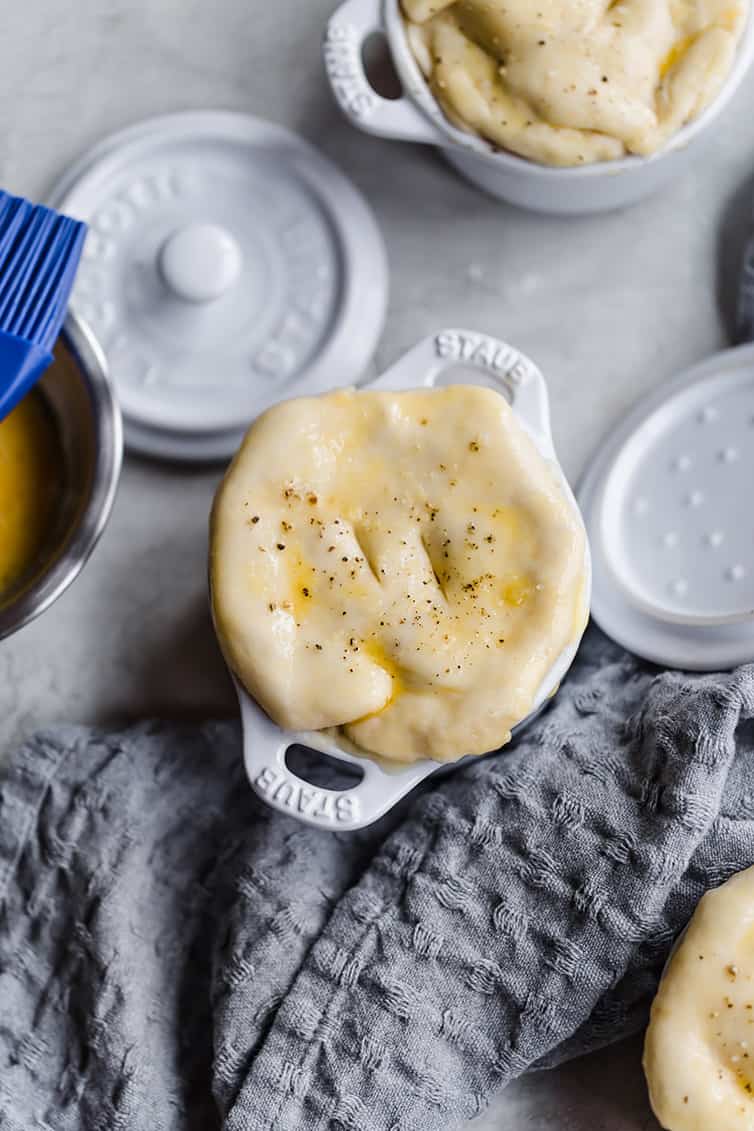
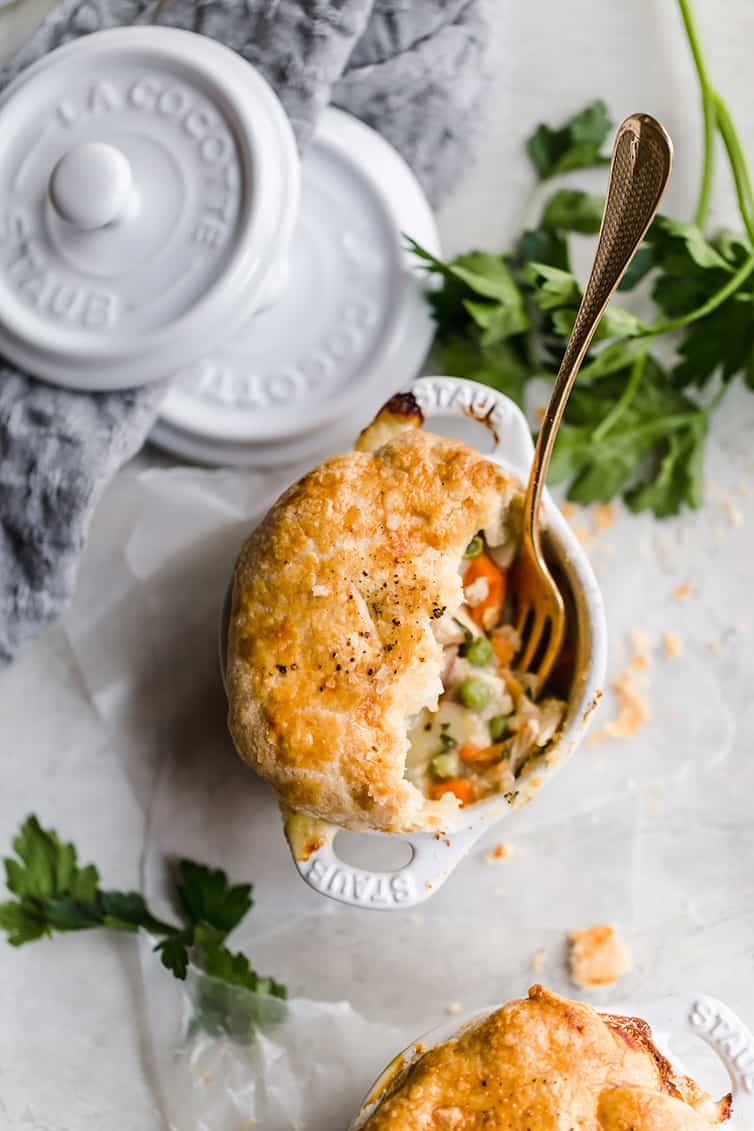
- Put it all together – Transfer the filling to a casserole dish or individual ramekins (for a main dish, I think 10 to 12-ounce ramekins work best!), then roll out the dough and place it on top of the filling. Brush it with an egg wash and sprinkle with flaked sea salt and pepper. Bake until the crust is beautifully browned and the filling is bubbling. Let it rest for a bit so the filling sets up and doesn’t run too much, then dig in!
While this recipe doesn’t take too long to assemble (and comes together even more quickly with store-bought rotisserie chicken!), be sure to check out the make-ahead notes for some tips!
Chicken Pot Pie Recipe Notes
A few quick tips and tricks to make this your best chicken pot pie ever!
- The vegetable shortening in the crust can be substituted with an equal amount of butter, if desired, but be aware that it will change the texture of the crust slightly (it will be slightly less tender).
- I cut up one whole rotisserie chicken for this recipe, which yielded approximately 1 pound of cooked meat.
- To save on prep time, you can substitute frozen vegetables for fresh vegetables. Simply stir them all in with the chicken in step #4.
- You can use different types of potatoes; I used red since they tend to keep their shape and not get mushy when cooked.
- Feel free to swap out different vegetables to suit your tastes.
- You can make individual pot pies by using 10 to 12-ounce ramekins (you will yield about 8 to 10 pot pies depending on the size you use). Divide the dough into the number of ramekins you have, then roll into a circle about 2 inches larger than the diameter of your ramekin (i.e. if it is 4 inches across, roll the dough into a 6-inch circle). Proceed with the rest of the recipe as directed.
- Make-Ahead and Freezer Notes: The filling and the pastry can each be made ahead and refrigerated (separately) for up to 2 days before assembling and baking the pot pie. They can also be frozen as follows – place the filling in an airtight container and place the plastic wrapped pastry dough in a freezer bag; both can be frozen for up to 2 months.
Winter is still hanging on here, so warm and cozy comfort food is still on the menu!
If you’ve ever found yourself thinking that chicken pot pie from scratch is too time-consuming or difficult, please, please, please try this recipe! It’s simple and satisfying and utterly delicious.
If You Like This Chicken Pot Pie, Try These Recipes:
- Quick & Easy Chicken Pot Pie
- Chicken and Dumplings
- Italian Easter Pie
- Cheesy Chicken, Broccoli & Rice Casserole (From Scratch)
- Copycat Chipotle Chicken Recipe
- White Chicken Chili
Five years ago: Paczki (Polish Doughnuts)
Six years ago: Meyer Lemon Loaf Cake
Ten years ago: Triple Chocolate Chip Oatmeal Cookies

Chicken Pot Pie
Ingredients
Pastry Ingredients
- 3 cups (426 g) all-purpose flour
- 1½ teaspoons kosher salt
- 1 teaspoon baking powder
- ½ cup (113 g) unsalted butter, cold and diced
- ½ cup (92 g) vegetable shortening
- ⅔ cup (80 ml) ice water
Filling Ingredients
- ½ cup (113 g) unsalted butter
- 1 yellow onion, finely chopped
- 4 large carrots, peeled and cut into 1/2-inch dice (about 2 cups)
- ½ cup (71 g) all-purpose flour
- 3 cups (360 ml) chicken stock
- ¼ cup (30 ml) heavy cream
- 2 teaspoons kosher salt
- ½ teaspoon black pepper
- 4 to 5 cups (454 g) cooked chicken, diced small
- 8 ounces red potato, 1/2-inch dice (about 1 1/2 cups)
- 10 ounces frozen peas, about 2 cups
- ½ cup (23 g) minced parsley
For the Egg Wash
- 1 egg
- 1 tablespoon water
For Finishing
- Flaked sea salt and ground black pepper
Instructions
- Make the Pastry: In a large bowl, whisk together the flour, salt, and baking powder. Add the butter and shortening and cut into the dry ingredients until the mixture is no larger than the size of peas. Sprinkle the ice water over the mixture and, using a rubber spatula, fold and mix until the dough comes together into a rough ball. Turn the dough out onto a lightly floured surface and knead lightly into a cohesive ball. Wrap in plastic wrap and refrigerate for at least 30 minutes while the filling is prepared.
- Preheat oven to 375 degrees F.
- Make the Filling: Place the chicken stock in a small saucepan and warm over low heat.
- In a large pot or Dutch oven, melt the butter over medium-low heat. Add the onion and carrot and saute until the onion is translucent, 10 to 15 minutes. Add the flour and cook for 2 minutes, stirring constantly. Slowly add the hot chicken stock, stirring constantly, and simmer over low heat until thickened, about 1 minute. Stir in the heavy cream, salt, and pepper. Remove from heat and stir in the chicken, potato, peas, and parsley. Transfer the filling to a 9×13-inch casserole dish.
- Assemble the Pot Pie: Remove the pastry from the refrigerator and place on a lightly floured surface. Roll into a 12×16-inch rectangle. Brush the outside of the casserole dish with egg wash, then transfer the pastry to cover the filling. Crimp as desired and press the dough onto the outside of the casserole dish.
- In a small bowl, whisk together the egg and water for the egg wash. Brush the entire surface of the dough with the egg wash, then cut five slits into the surface of the dough. Sprinkle with flaked sea salt and cracked black pepper.
- Bake until the filling is bubbling and the pastry is golden brown, about 1 hour. Allow the pot pie to sit for at least 20 minutes before serving.
Notes
- The vegetable shortening in the crust can be substituted with an equal amount of butter, if desired, but be aware that it will change the texture of the crust slightly (it will be slightly less tender).
- I cut up one whole rotisserie chicken for this recipe, which yielded approximately 1 pound of cooked meat.
- To save on prep time, you can substitute frozen vegetables for the fresh vegetables. Simply stir them all in with the chicken in step #4.
- You can use different types of potatoes; I used red since they tend to keep their shape and not get mushy when cooked.
- Feel free to swap out different vegetables to suit your tastes.
- You can make individual pot pies by using 10 to 12-ounce ramekins (you will yield about 8 to 10 pot pies depending on the size you use). Divide the dough into the number of ramekins you have, then roll into a circle about 2 inches larger than the diameter of your ramekin (i.e. if it is 4 inches across, roll the dough into a 6-inch circle). Proceed with the rest of the recipe as directed.
- Make-Ahead and Freezer Notes: The filling and the pastry can each be made ahead and refrigerated (separately) for up to 2 days before assembling and baking the pot pie. They can also be frozen as follows – place the filling in an airtight container and place the plastic wrapped pastry dough in a freezer bag; both can be frozen for up to 2 months.
Did you make this recipe?
Leave a review below, then snap a picture and tag @thebrowneyedbaker on Instagram so I can see it!
(Recipe adapted from Ina Garten)
Update Notes: This recipe was originally published in September 2008; it was completely overhauled with a much improved recipe (and new photos) in February 2019.
[photos by Ari of Well Seasoned]


I made this recipe last weekend. What sweet pot pies. I used individual ramekins and they were a big hit. Beautiful browned crust and perfect filling. Next time try will try freezing and prepping a day I advance. I’m not the fastest cook.☺️
Double checking, you don’t cook the carrots or potato ahead? Thanks!
I want to have a secret blogspot page, but some people I know have been able to find my URL via a Google search…is there a way I can prevent this? I don’t want anyone to be able to realistically find the URL unless I give it to them. . . (Please don’t suggest that I switch to another blog site.) . . Thanks!.
How long do you cook the pot pies if they’re mini?
BEST chicken pot pie ever!!! I added another 1/4 cup Crisco to the recipe because the flour-butter-Crisco mixture looked a little dry.
This is so easy to make. This recipe will become a regular at my house!
Wow it turned out perfect. Plus it came out looking like it was made by a professional. Thank you!!
Add some thyme. Really adds to the flavor. Alton Brown style. But I cheat and use frozen pastry crust (thawed) so I am going to have to try yours.
Made it last night at hubby’s request. Only changes I made was to half the recipe (just the two of us) and to add in some red pepper flakes and thyme. Delicious, will definitely make again!
Can’t wait to try making this myself! I love that the pastry and filling can be prepped ahead.
Comfort food? I’m even comforted just reading this post. Looks amazing. Definitely think my family would enjoy this.
I absolutely LOVE chicken pot pie…reminds me of being a kid. My favorite restaurant version (Atria’s) makes their filling and adds sherry to the cream sauce. It has made a world of difference to the pot pies I make at home now. Try adding some next time you make yours and see if you like it. It really changed the dish for my husband (who was not a fan of traditional chicken pot pie).
What a good idea!
I make a chicken stew based on Ina’s recipe plus one from Martha Stewart (from her One Pot cookbook). From that I make chicken and biscuits. chicken pot pie and chicken and dumplings (my favorite). They’re all so good!
Delicious ! Just made this for my family and friends. Had to double recipe. It was a hit. Thank you for a great recipe I will make again and again.
I used your filling recipe for this month’s Daring Bakers Challenge! It was fabulous!
http://myninjanaan.wordpress.com/2013/10/27/daring-bakers-chicken-pot-pie/
YUM!!! I just made this and it was so good, awesome recipe! I can’t wait to make it during the holidays, would be great to sub chicken for turkey left over from Thanksgiving, or a cozy night in near Christmas. Thank you for this recipe and I love the puff pastry!
Thanks so much for this recipe, it turned out wonderfully :)
Hi Katy, So sorry I didn’t get to your previous question in enough time! I was going to say, same amount of time – until the puff pastry is golden. So glad you loved it!
How long would you bake it if you made one large pie?
i love pot pie. every recipe i’ve tried from WS is great so that’s no surprise to me but you should also try the pastry queen’s pot pie recipe in my blog – wow! it’s a cream cheese pastry topping!
This looks fantastic and so comforting. I have never made chicken pot pie before. That will be my goal for this winter.
Cute story. I guess everything else fades to the background when puff pastry is around, huh?
hi, just visited ur wonderful blog. chicken pot pie is my favorite & urs looks so yummy.
Bwahahahahaha!!! I’m STILL laughing every time I think about this story. SO FUNNY! This looks great. I may need to give it a try since my last pot pie was not so successful.
wow — this looks delicious!!
This looks *really* good!
What a comforting dish! This will be perfect for the fall/winter!
oooh. that looks tones better than what i get from the boston market.. :)
How funny! I’m chuckling. I love a good pot pie and I’ve never made one. Perhaps its time. As for the puff pastry, I’m with you. I’ve buttered, sliced into squares, sprinkled with sea salt, herbs or sesame before, and baked it up as bread with dinner. Seriously. It’s a REALLY fast way to have some “homemade bread” on soup or casserole night, without defrosting or baking bread dough or rolls. I confess I’ve also seperated those layers and made tea sandwiches with it. It makes a darn fine bread, although you have to eat it all right away. What a pity!
I love chicken pot pie and this looks wonderful, but I don’t know how I feel about a scented candle….
I love chicken pot pie…I know the recipe with the Bisquick, and I love it. I even eat frozen premade CPP. This one looks great and I do like puff pastry!
Hi Michele – I boiled the chicken and then cubed it.
Are you sure we’re not related? Because that story is totally me – oblivious to everything except what’s going into the mouth!!
The best thing about homemade pot pie is that you can control what goes in – always a good thing, especially with the kids!!
THhis recipe and story makes me happy. I’m so into the fall this year and I love all cool weather foods. I’ve never made a pot pie before, I’ve been afraid to make my own pastry but this has solved my problem! One question, how did you prepare your chicken?
Chicken pot, chicken pot, chicken pot piiiieeee! :)
I LOVE chicken pot pie and we had it for dinner last night too. mmmmmm And that story is priceless!
OMG……haha classic Michelle! I love it.
Hahahahahaha! LOVE the storry. whatever, chicken pot pie = AWESOMENESS! THis looks FAB!