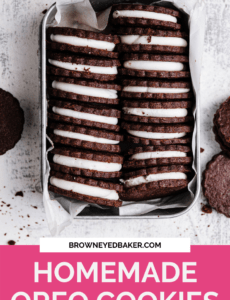
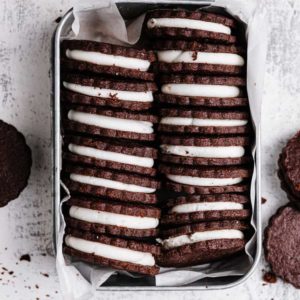
Homemade Oreo Recipe
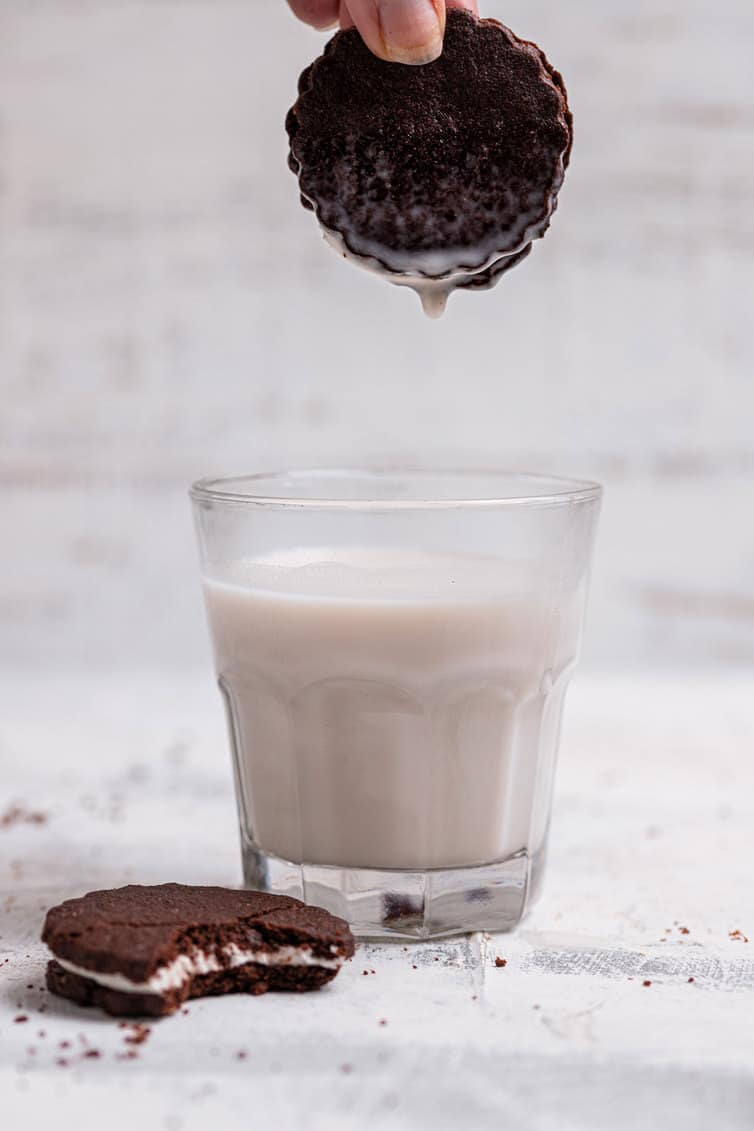
Have you ever wondered if it was possible to make Oreos at home? The answer is a resounding YES! These homemade Oreos are easier than you think, with a dark chocolate wafer cookie and creamy, somewhat stiff filling that will make you wonder why you never tackled chocolate sandwich cookies at home before! As someone who loves to incorporate Oreos into recipes whenever possible, I am here to tell you that they are even BETTER than store-bought, so get a big glass of milk ready and let’s bake!
One word: Amazing.
If you have any affinity for Oreo cookies at all, you will happily devour these without looking back.
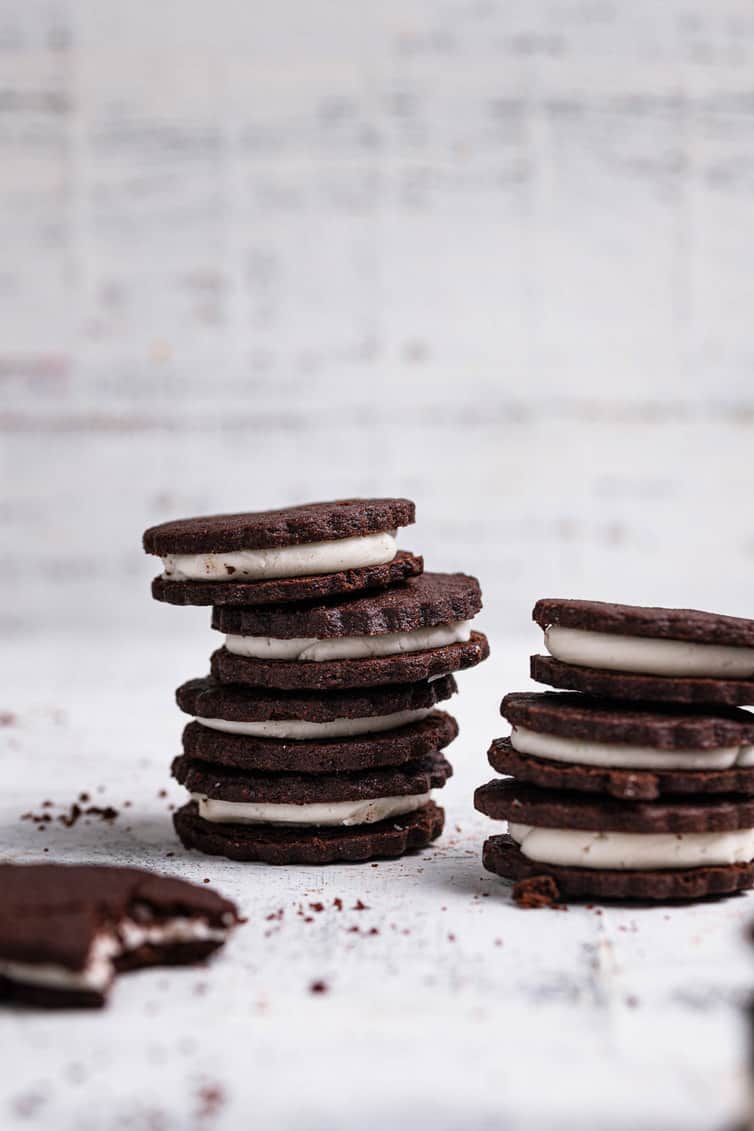
The familiar chocolate wafer packs an insane amount of richness and a perfectly balanced flavor, thanks to the use of Dutch-processed cocoa powder. And the vanilla cream in the middle? The texture is perfect and you can easily twist these apart just like you did when you were a kid.
How to make Oreo cookies from scratch
While it might sound daunting, like most copycat recipes, making your own homemade Oreos is easier than you think!
We start with the chocolate wafer cookies and then add in the filling. Let’s talk about each one in a little more detail…
The chocolate cookies
There are two very distinct characteristics of store-bought Oreo cookies:
- They are very dark, pretty much black.
- They are super crispy, not at all soft.
So how do we achieve these? It’s actually quite simple!
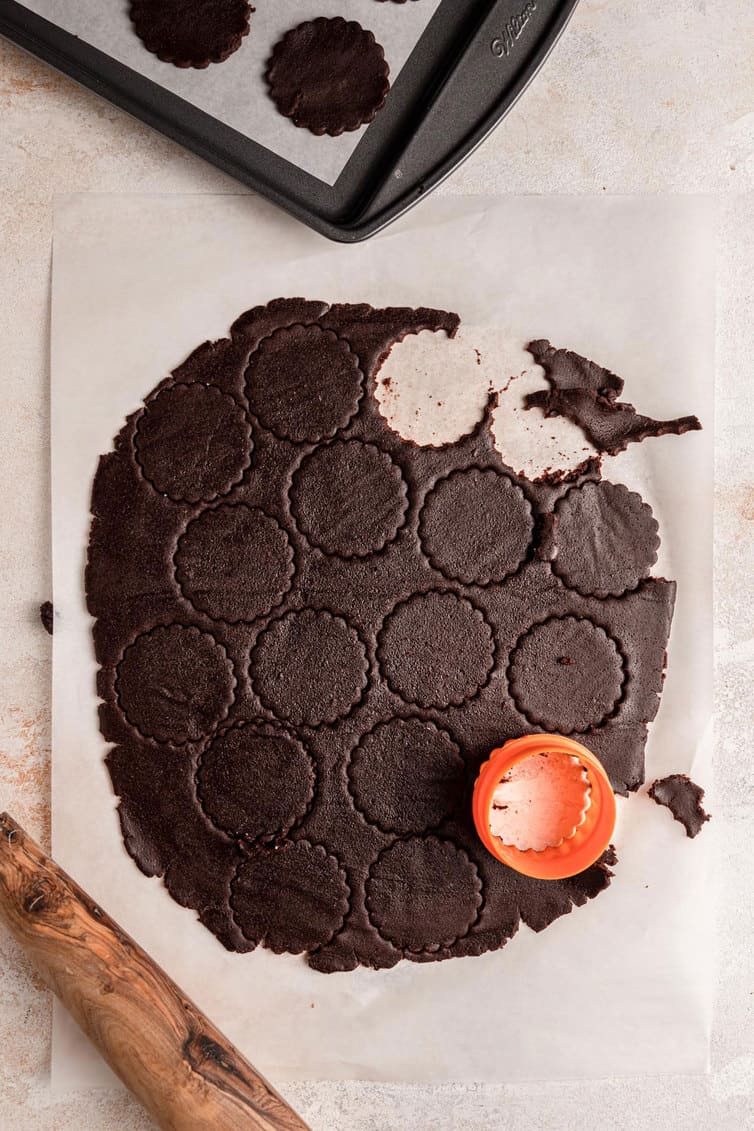
First things first – the black color of the Oreo cookies. Dutch-process cocoa powder is much darker than your traditional unsweetened cocoa powder and gives these cookies that unmistakable dark color. If you want to get black cocoa powder, then you can use that for even darker cookies!
Now, on to that crisp texture. While I am usually all-in on soft cookies, that is not Oreo’s game. They are light and crisp, which we replicate here by using a combination of Dutch-process cocoa and baking powder, as well as all granulated sugar (we skip the brown sugar, which usually adds softness and moistness to cookies).
Save This Recipe
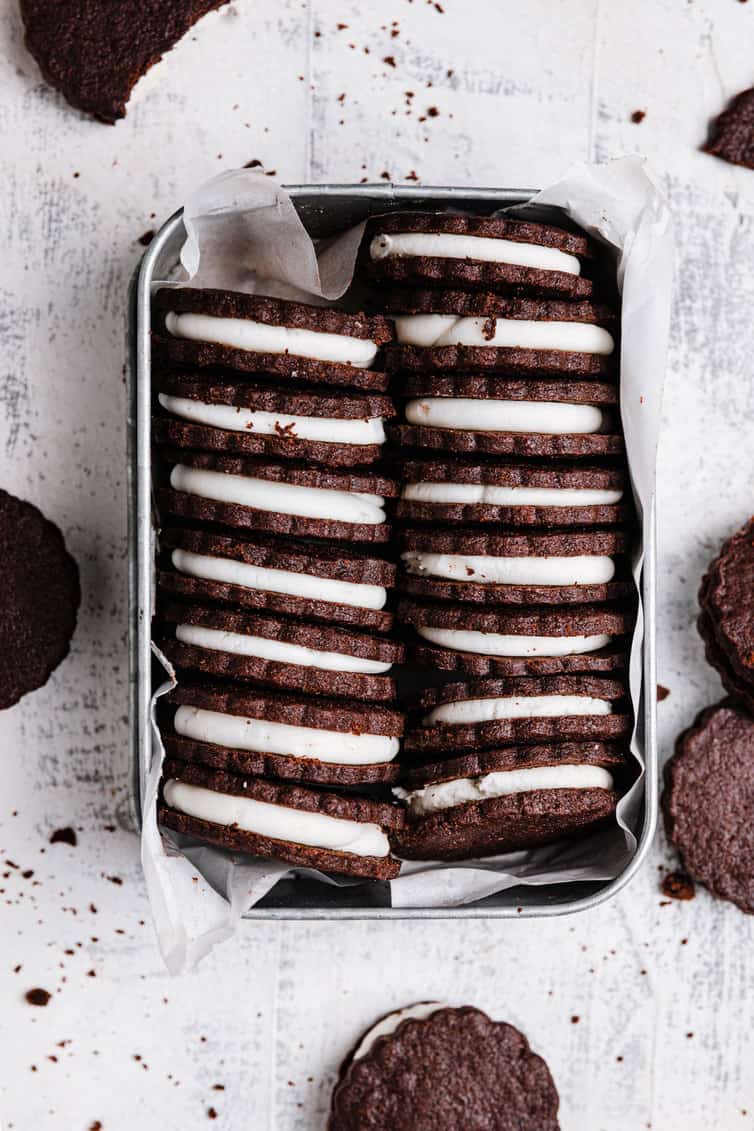
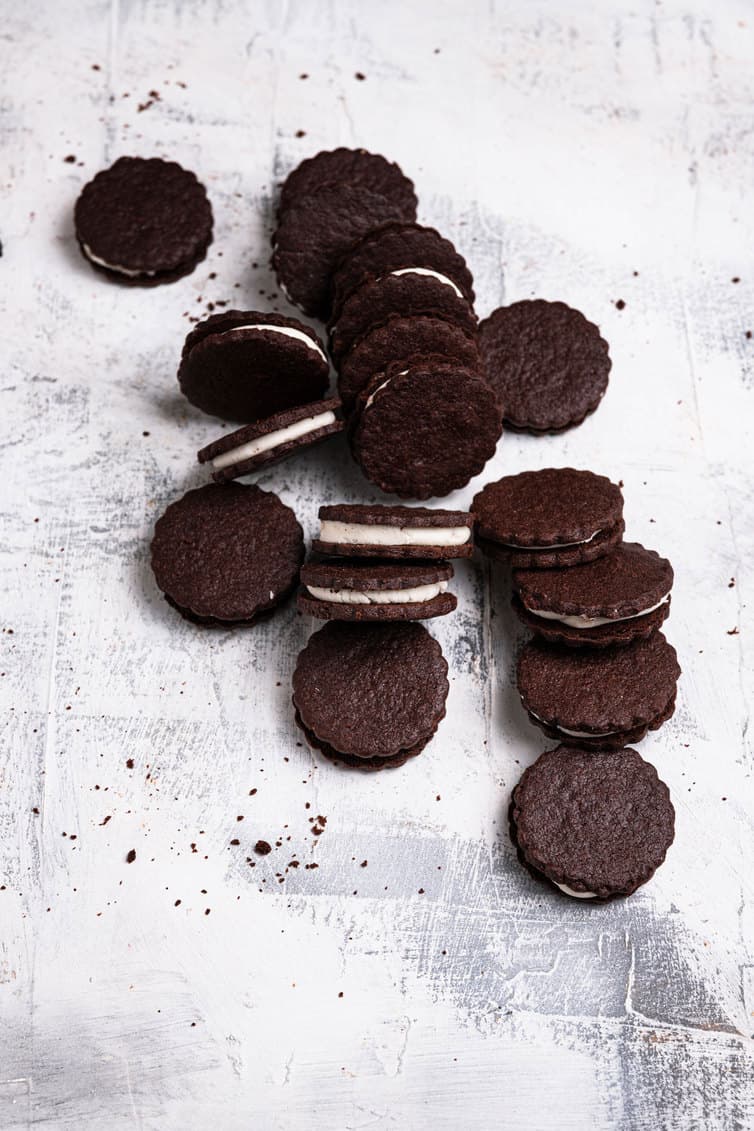
The results are a sort of chocolate shortbread wafer that has a deep chocolate flavor and the perfect amount of crispiness – there is no hint of softness, but they are sturdy and don’t crumble apart when you bite into them.
The Oreo cream filling!
Now on to everyone’s favorite part of the Oreo cookie: the filling!
While many homemade Oreo cookies use a white chocolate ganache or a simple buttercream, I didn’t find a ganache authentic enough and I needed to tweak my buttercream to get the consistency juuuuust right.
I ended up adding some vegetable shortening to a simple vanilla buttercream to get a slightly stiff consistency to make the filling more along the lines of what you would find in the middle of those oh-so-addicting cookies. If you want a filling recipe without shortening, you can omit it and go with an all-butter option, but I do find that the shortening goes a long way in getting the filling super close to tasting just like traditional Oreo cookies.

A few cookie tips
- While I loved the scalloped-edge cookies, you can definitely use straight-edge cutters, or do different shapes!
- Another gorgeous option – use a cookie stamp! Oreos have their own design on top, so why not give yours one, too?
- While piping the filling is quick, you can totally slather it on with an offset spatula.
Storage and freezing instructions
These cookies are a magnificent candidate for making ahead of time or freezing whole.
- Make-Ahead Dough: The dough can be refrigerated for up to 3 days before being rolled out, or frozen for up to 3 months. Wrap the dough tightly in plastic wrap and then place in a resealable bag.
- Make-Ahead Filling: The filling can be made and refrigerated for up to 2 days ahead of time (give it a good mix with a rubber spatula before using).
- Make-Ahead Chocolate Cookies: You can bake and cool the chocolate wafer cookies, then freeze them in an airtight container for up to 3 months. Fill and assemble when ready.
- Cookie Storage: Once the cookies are baked and assembled, they can be stored in an airtight container at room temperature for up to 1 week, in the refrigerator for up to 1 month, or in the freezer for up to 3 months.
More Oreo-inspired recipes!
If you make these homemade Oreos and love them, I would so appreciate it if you would take a moment to leave a rating below. Thank you so much! ❤️️
Homemade Oreo Recipe
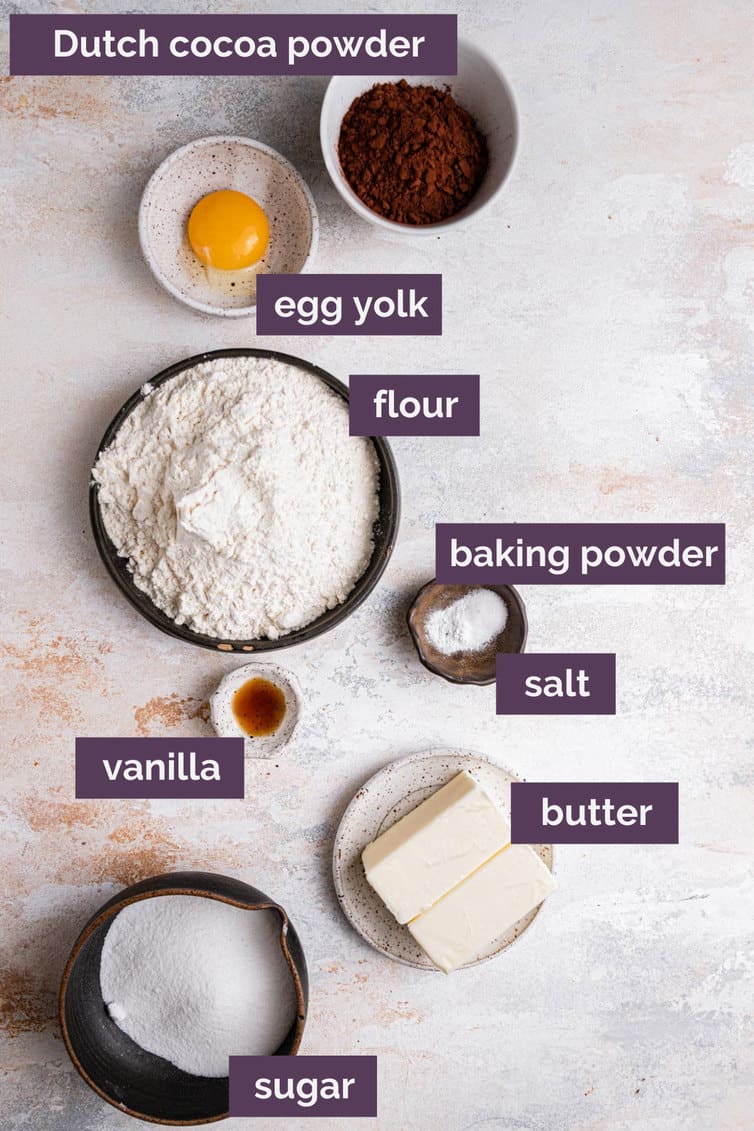
Ingredients
For the Dough:
- 2 cups (250 g) all-purpose flour
- ½ cup (43 g) Dutch-process cocoa powder
- ½ teaspoon (0.5 teaspoon) baking powder
- ½ teaspoon (0.5 teaspoon) salt
- 2 sticks unsalted butter, softened, (8 ounces)
- ¾ cup (150 g) granulated sugar
- 1 egg yolk
- 1 teaspoon pure vanilla extract
For the Filling:
- 2 ounces (0.5 stick) unsalted butter, at room temperature
- ¼ cup (51.25 g) vegetable shortening
- 2 cups (240 g) sifted confectioners' sugar
- 2 teaspoons vanilla extract
Instructions
- Whisk together the flour, cocoa powder, baking powder and salt.
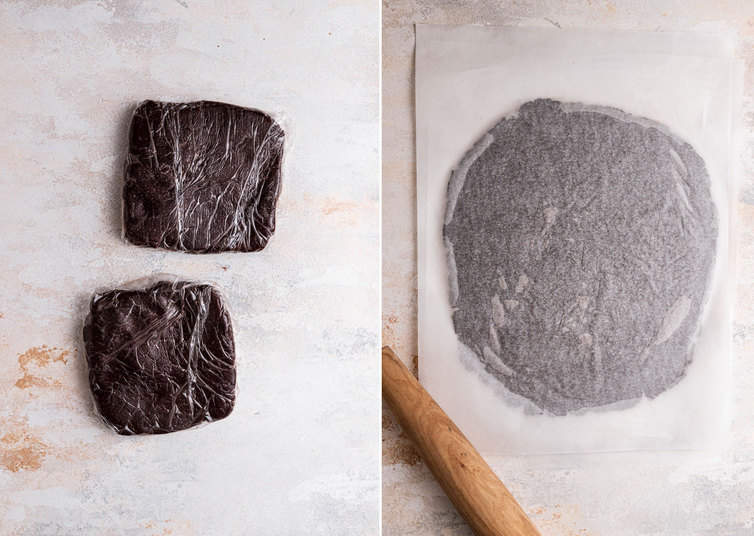
- Beat butter and sugar with an electric mixer until pale and fluffy, then beat in yolk and vanilla. At low speed, mix in flour mixture in 3 batches just until a dough forms. Divide dough in half and form each piece into a 6-inch square, then chill, wrapped in plastic wrap, until firm, 2 to 3 hours.
- Preheat oven to 350 degrees F. Grease two baking sheets or line with parchment paper or a silicone baking mat.
- Roll out 1 piece of dough between sheets of parchment paper into a 14x10-inch rectangle (1/8-inch thick). Slide dough in parchment onto a tray and freeze until dough is firm, about 10 minutes. Repeat with remaining dough.
- Cut out as many rounds as possible from first chilled square with a 2-inch fluted or round cutter, reserving and chilling scraps, then quickly transfer cookies to a buttered baking sheet, arranging them ½ inch apart. (If dough becomes too soft, return to freezer until firm.)
- Sprinkle half of cookies with decorative sugar (if using), then bake cookies until baked through and slightly puffed, 10 to 12 minutes. Cool on sheet on rack for 5 minutes, then transfer to rack to cool completely (cookies will crisp as they cool).
- Make more cookies with remaining dough and scraps (re-roll only once).
- Make the Filling: Beat the butter and shortening together at medium speed until combined and smooth. Reduce the speed to low and gradually beat in the sugar and vanilla. Increase the speed to high and beat for 2 to 3 minutes until the filling is light and fluffy.
- Assemble the Cookies: Pipe a heaping teaspoon of filling onto the flat side of the plain cookies. Top with the sugared cookies to make sandwiches. Store in an airtight container at room temperature.
Notes
- Recipe adapted from Gourmet.
Did you make this recipe?
Leave a review below, then snap a picture and tag @thebrowneyedbaker on Instagram so I can see it!
[Photography by Dee Frances]


Hi Heather,
Yes, I think the chocolate cookies would freeze just fine. Hope you enjoy the cookies! :)
Oh boy. I am truly addicted to Oreo cookies and these look incredibly addictive! SO delicious though, I think it may just be worth the many many cookies I will surely end up eating :D
Oh pure LOVE! I was feeling uninspired for holiday baking and I may have to do this with a minor twist — add a bit of peppermint extract in the filling and maybe some red/white sprinkles or super-crushed peppermint candies for crunch. These cookies mean so many childhood memories for so many people!
I would probably skip the cream and eat them just like this!
Good Evening!
Can you made these sugar-free? Swapping out regular sugar for sugar free 1-1? Thanks
I have not tried using sugar substitutes, but if you give a try, let me know how it works out!
How yummy! Very nice!
Enjoy!
Wow. Can’t wait to try these!
Oreos are one of my favorite cookies. I can’t wait to give these a try!! :)
oh no! another amazing recipe!! i just can’t keep up! :)
yummy! thanks for adding another to my list… can’t wait to make some!
Girl, it’s like one mind! I made this exact recipe a few weeks ago, used the same cookie cutter, and even stacked them similarly in my pic! I haven’t posted mine yet because I think I’m doing a comparison post. Craziness!
You have no idea how happy this post makes me! My grandma gave me a huge box of cute cookie cutters just this last weekend, what better way to break them in with a great recipe like this? I’m sure I’ll be making these in red and green for the next several weeks!
Another beautiful concoction!
Love these cookies… I think they look much, much better than Oreos!
Great recile that brings back so many memories of being a kid, and dunking my oreos until mushy, then making an oreo milkshake, well kinda….
Thanks for recreating the Oreo.
and yet another fab one – great looking sandwich cookie and I know it is better that it looks, if that is possible…
I *love* Oreos and can’t wait to try these. Since I’m hosting a cookie exchange on Saturday, this might be the perfect time. Thanks!
How often do you bake? Daily?
These look great! Do you think the baked cookies would freeze well for a couple weeks? (Without the icing?)
I bet it would be cute to color the middle red/green for Christmas!
These look lovely! Didn’t get my act together for this month’s Gourmet Unbound but will do next month!
Wow, these look unbelievably good. I’m saving the recipe to my holiday cookie file.
Well, these look amazing! Can’t wait to try them! Or, you could send me some … ;)
These are not only beautiful, but they look delicious! I’d love to make my own “Oreos!”
Ohhhhh myyyyy!!!! Those look amazing, I bet they are awesome!
Thanks for posting this recipe! I can’t wait to bake these!!
Those look fantastic!! Stick one in the mail to me!! :)
These look wonderful! Both of my kids love Oreos. I bet they’d think it was super cool if we made them ourselves. I will have to give this recipe a try. Thanks!
Love homemade Oreos! I have made some before and they beat out the boxed kind BIG TIME!
Yours look delicious and the pictures are brilliant, as usual!
Oh, yum! So gonna make these. Homemade Oreos = amazingness!
Hi Carrie, whoops, sorry about those omissions! I have edited the recipe above to include them. You will get about 3 dozen cookies out of this recipe, and I used a 2-inch fluted cutter (you could also just use a plain round).
What size cookies cutters did you use? And if you could let me know how many completed cookies this batch made? Thanks! They look delicious, I may try these this weekend!
I love that you changed the filling – I think I’d like that filling better than white chocolate, too. They are so pretty and look delicious. These are a Christmas baking must!