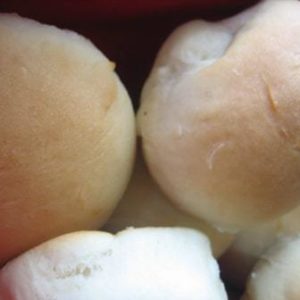
Sweet Dinner Rolls

What goes better with a big bowl of warm beef stew, than a soft and sweet roll fresh from the oven? Since work was a little slower yesterday I took advantage of the extra time to make homemade rolls to go with our stew for dinner. While I have made yeast bread before, I had never tackled any type of roll, and now I’m sorry that I didn’t try them sooner! This was a very simple recipe to put together – the ingredients came together quickly and the dough only needed about 5 minutes of kneading time on my Kitchen Aid. It was very easy to work with and I simply divided the ball of dough into 16 semi-equally shaped balls.
Save This Recipe
Sweet Dinner Rolls
These homemade rolls make a perfect side
Ingredients
- ½ cup (125 ml) water
- ½ cup (122 ml) milk
- 1 egg
- ⅓ cup (75.67 g) butter, softened
- ⅓ cup (66.67 g) white sugar
- 1 teaspoon salt
- 3 ¾ cups (468.75 g) all-purpose flour
- 1 package active dry yeast, (.25 ounce )
- ¼ cup (56.75 g) butter, softened
Instructions
- 1. Place water and milk in microwave safe bowl and microwave for 1 minute or until liquids reach (110 degrees F/45 degrees C). Pour liquids into mixer bowl; add sugar and stir to dissolve. Add in yeast and let set for 10-20 minutes to proof (the mixture will be foamy).
- 2. Mix on low speed adding the salt, butter and egg. Once well mixed add in the flour 1/4 cup at a time. Remove the paddle attachment and attach the dough hook. With the machine, knead the dough for 5-10 minutes or until smooth and elastic.
- 3. Remove the dough from the bowl and shape into desired shapes (I cut the ball of dough into quarters, and then quartered each of those, and then rolled each piece into a ball). Cover with a clean towel and let rise in a warm place for an hour. Gently brush the tops of the rolls with half of the softened butter.
- 4. Preheat oven to 400 degrees F (200 degrees C) and bake for 10-15 minutes or until golden brown. Upon removing the rolls from the oven brush them with remaining softened butter once again.
Calories: 192kcal, Carbohydrates: 27g, Protein: 3g, Fat: 7g, Saturated Fat: 4g, Cholesterol: 28mg, Sodium: 212mg, Potassium: 49mg, Sugar: 4g, Vitamin A: 235IU, Calcium: 17mg, Iron: 1.4mg
Did you make this recipe?
Leave a review below, then snap a picture and tag @thebrowneyedbaker on Instagram so I can see it!


I tried and it came out ok. I like the white bread recipe more the one which is your favorite too ;)
I notice there is not much of proofing time? So no rise before making the balls?
Hi Kelly, That is correct!
This is great . my wife loved it and she have faith in me as a cook !
Not the best recipe I have made. Pretty disappointed. Wondering only one rise using a non rapid rising yeast. Many roll recipes uses rapid rise yeast with 2 rises. It was pretty flat and dry. Followed to the T. The dough was nice but just not as good as others I have tried.
I would love to try this recipe but it makes too many for us. Can I freeze the dough and if so, how would I go about doing that. Thank you for your response in advance.
Hi Camille, I haven’t tried it, but I think you could. I would put them in a freezer bag after shaping them, then thaw and let rise at room temperature before baking. Enjoy!
I see two types of yeast in the store. active dry yeast and instant quick rise yeast. is there a difference? I purchased instant quick rise by accident. how would you adjust the recipe for using a different yeast?
Hi Greg, There is a difference. Active dry yeast needs to be activated in a warm liquid (usually water or milk) before being added to the rest of the ingredients. Instant quick rise can be mixed right into the dry ingredients and does not need to be “bloomed” in a warm liquid first. It also tends to make the dough rise faster than active dry yeast. You can use the instant yeast in place of the active dry without any modifications to the recipe, it may just rise a bit faster than indicated in the recipe.
These were great! Followed directions to the letter and baked on parchment paper and they turned out perfectly.
I made this recipe as directed (except that I switched to broil for the last two minutes to brown the tops) and it turned out FABULOUS! So yummy fresh out of the oven with that delicious buttery top! I made them to accompany a whole slow-roasted apple-wood chicken. Superb!
Thanks so much for this recipe, it’s one I’m going to keep in the books.
Tried these twice following the recipe exactly. They failed to rise both times. Not sure what went wrong.
Fantastic! I’ve tried several bread recipes this past year and thought I’d try this roll recipe. My, oh, My they’re great! My husband, two boys and I each ate three a piece! Oink Oink Easy to follow. I did use Kitchen aid mixer. Concentrate when adding 1/4 c flour at a time and count. I’m a non-cook and a beginner baker. These turned out yummy for me!
I made these tonight just to put butter and cinnamon-sugar on them. My fave way to eat any kind of bread :) So yummy! However, mine didn’t really rise during the hour but got nice and puffy when I baked them. Also, I baked them in a dark nonstick round cake pan with about 1in space between them and the bottoms were darker than I wanted, though not burned. What type of dish do you use to bake them and how to you arrange them?
Hi Jessica, Anytime you use dark non-stick bakeware, you should reduce the oven temperature by 25 degrees to keep from over-browning. I bake these on a regular baking sheet with parchment paper, a few inches apart.
Hi Michelle,
Do you think these could be made several days in advance, frozen, and then reheated? Or would it be better to make just the dough in advance and then bake the day of?
Thanks for your help. I adore your site.
Zena
Hi Zena, Yes, you could make and freeze these, then reheat for dinner.
Hi Michelle, I tried making these and I really enjoyed the flavor. My rolls turned out nice and light and fluffy…and crumbly. I don’t think the last part was supposed to happen. Do you have any idea what I may have done wrong? Thanks!
Hi Alexis, Hmm crumbly could be due to a few different factors – not kneading the bread long enough, letting it rise too high, or using too much flour when kneading/mixing.
Hmm, I kneaded for 10 minutes, so I don’t think that was the issue. It may have been the extra flour I used when kneading (the dough kept sticking to my counter) or the rising. My rolls were about 3-4 times larger by the end of the hour long rise. Is that about right? Or too much? Thanks for your help!
Hi Alexis, The rising could definitely be it. They should be about 2x larger when done rising.
This recipe is a keeper. I did not have any milk so used !/2 & 1/2. Came out great. I made a pan of rolls (a dozen good sized) then formed the rest of the dough into a small loaf shape and baked that. I topped the small loaf with an orange blossom honey, butter and coarse sea salt after baking… served with honey butter as an appetizer. I was able to get one piece of it before it was devoured by guests (only 2 plus my DH).
I don’t have a stand mixer so is it ok if i mix and knead the dough by hand?
I have a 600W stand mixer but NEVER use it to make my bread. I prefer the hand method all the way. SO Yes, It is ok to do by hand. If you are not use to working with dough you may find it hard to know when you have kneaded enough. Just need for at least 5 minutes and keep going if the dough is still too sticky and ‘flat’. No matter, just try it. Bread making has simple ingredients however, it is a learning process. You will not learn if you do not try :-) .
Absolutely!
Hi, I’m in the midst of making these and I was wondering: when you add in the yeast to let it set should you stir it in or just leave it?
Hi Riley, You can give it a quick stir, but it should be fine either way.
This is a beautiful dough to work with. They are rising on top of the stove as I write. Soup is in the crockpot and I believe I have the perfect meal for a cool, overcast day. Thank you for sharing!
Just wondering what kind of pan you used, and was it greased? And do the rolls rise in the pan they will be cooked in? Thanks.
Hi Charlotte, I’ve used regular baking sheets as well as a 9×13. On a baking sheet, I use parchment; glass pan would be buttered. Yes, you can let the rolls rise on the pan they will bake on.
I needed a simple dinner roll recipe, and as always, I came to you for my baking needs. Oh my goodness… I can’t stop eating these!!! They came together gorgeously… did not rise much during the hour, but puffed up perfectly while baking. I added a bit of salt, pepper and garlic to the butter I brushed then with, but everything else was done to the letter. Now I need them out of my house so I don’t eat them ALL!