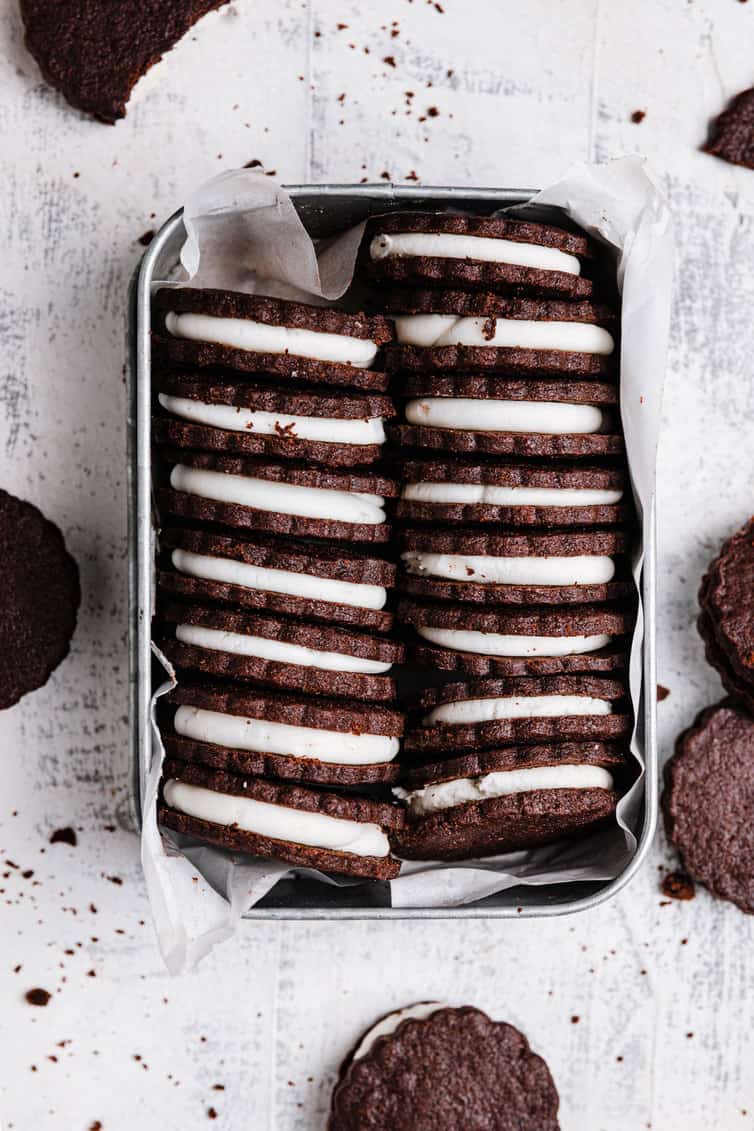
Homemade Oreo Recipe
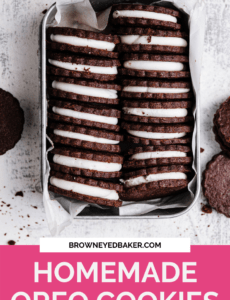
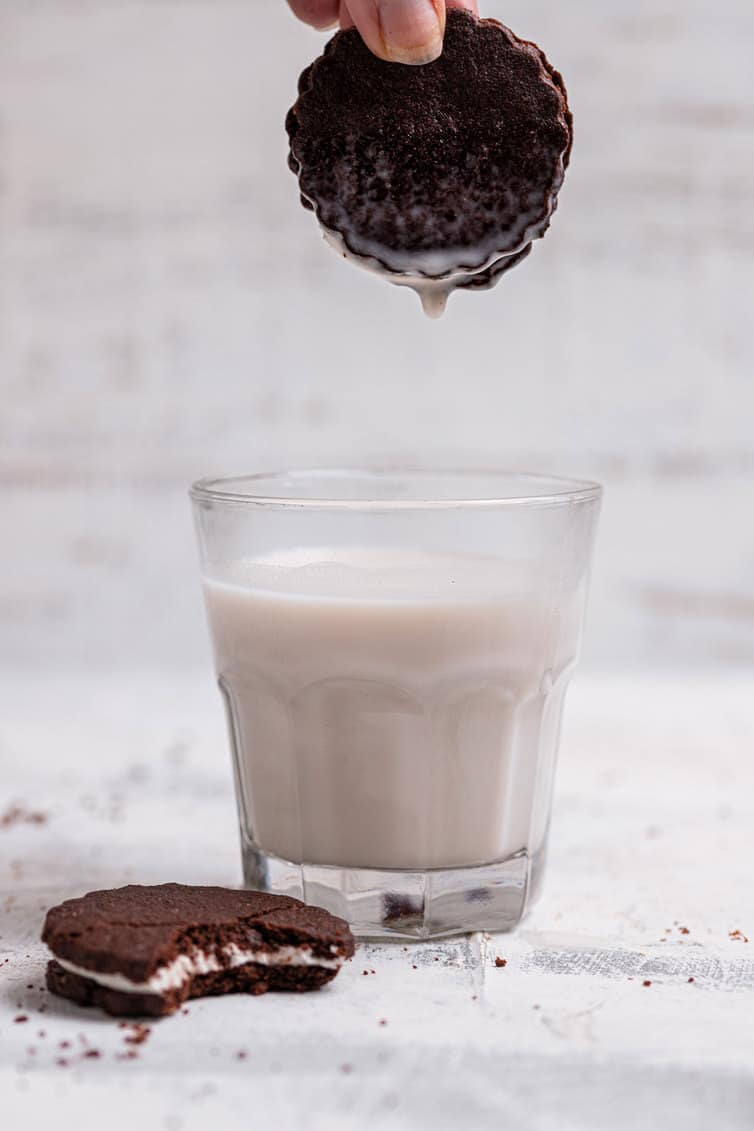
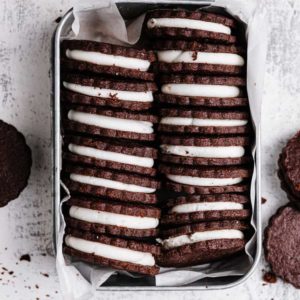
Have you ever wondered if it was possible to make Oreos at home? The answer is a resounding YES! These homemade Oreos are easier than you think, with a dark chocolate wafer cookie and creamy, somewhat stiff filling that will make you wonder why you never tackled chocolate sandwich cookies at home before! As someone who loves to incorporate Oreos into recipes whenever possible, I am here to tell you that they are even BETTER than store-bought, so get a big glass of milk ready and let’s bake!
One word: Amazing.
If you have any affinity for Oreo cookies at all, you will happily devour these without looking back.
The familiar chocolate wafer packs an insane amount of richness and a perfectly balanced flavor, thanks to the use of Dutch-processed cocoa powder. And the vanilla cream in the middle? The texture is perfect and you can easily twist these apart just like you did when you were a kid.
How to make Oreo cookies from scratch
While it might sound daunting, like most copycat recipes, making your own homemade Oreos is easier than you think!
We start with the chocolate wafer cookies and then add in the filling. Let’s talk about each one in a little more detail…
The chocolate cookies
There are two very distinct characteristics of store-bought Oreo cookies:
- They are very dark, pretty much black.
- They are super crispy, not at all soft.
So how do we achieve these? It’s actually quite simple!
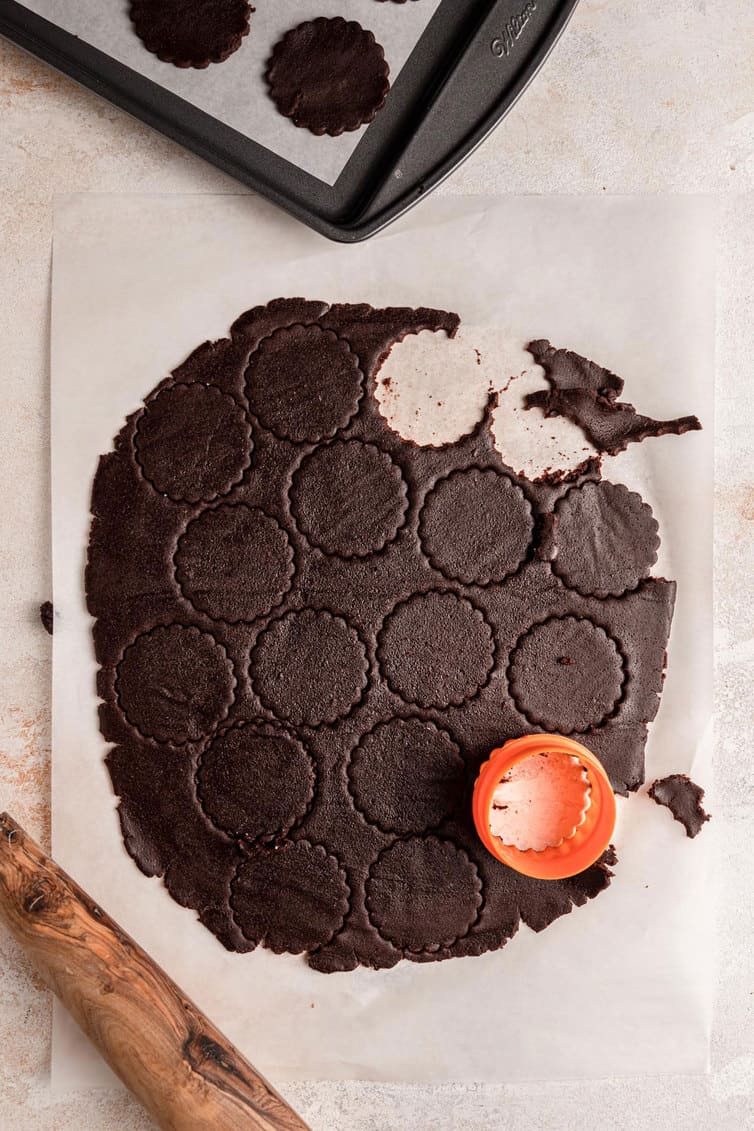
First things first – the black color of the Oreo cookies. Dutch-process cocoa powder is much darker than your traditional unsweetened cocoa powder and gives these cookies that unmistakable dark color. If you want to get black cocoa powder, then you can use that for even darker cookies!
Now, on to that crisp texture. While I am usually all-in on soft cookies, that is not Oreo’s game. They are light and crisp, which we replicate here by using a combination of Dutch-process cocoa and baking powder, as well as all granulated sugar (we skip the brown sugar, which usually adds softness and moistness to cookies).
Save This Recipe
The results are a sort of chocolate shortbread wafer that has a deep chocolate flavor and the perfect amount of crispiness – there is no hint of softness, but they are sturdy and don’t crumble apart when you bite into them.
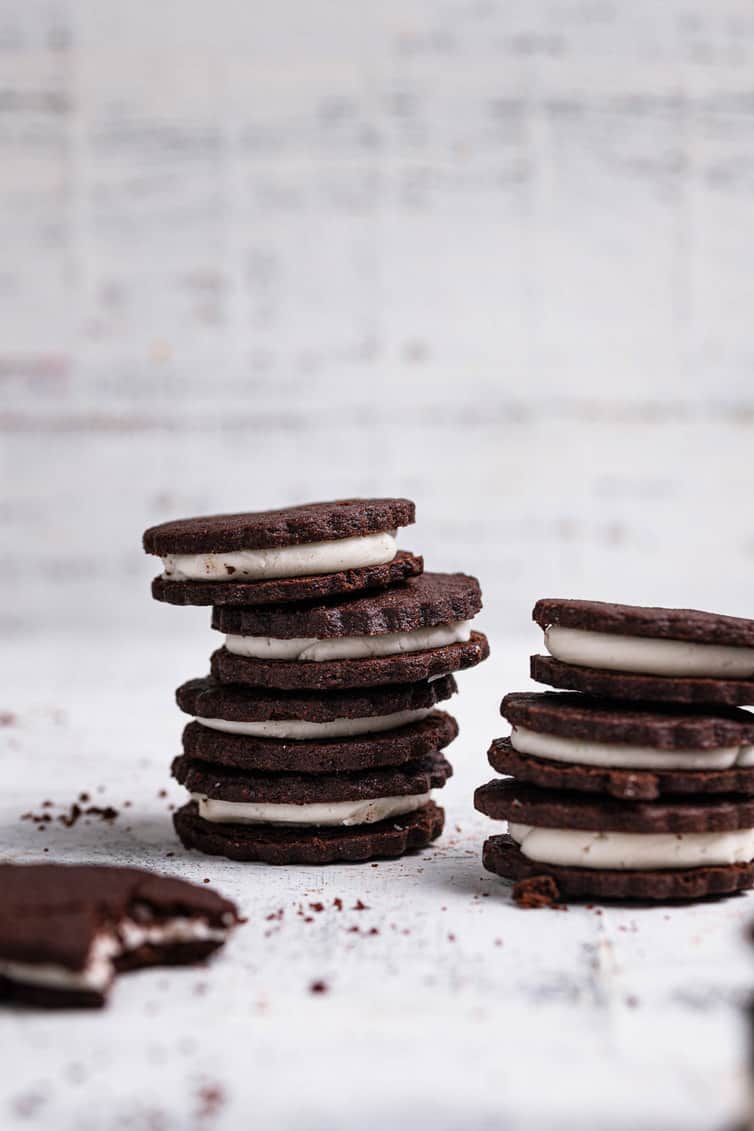
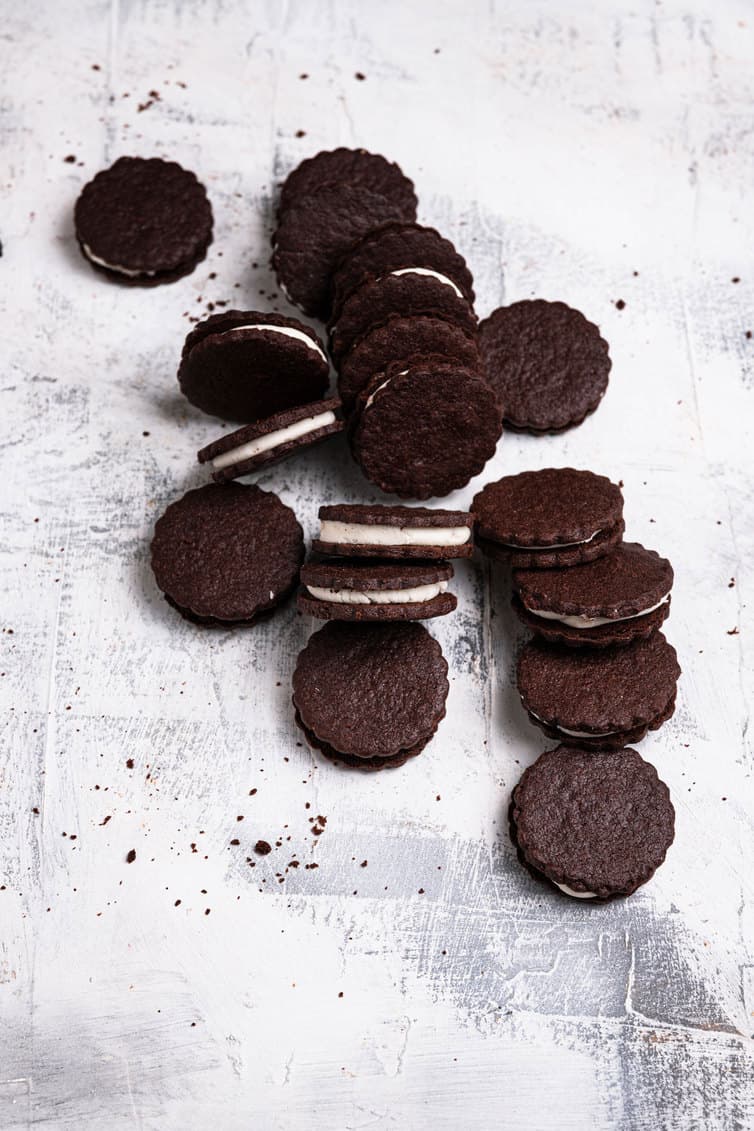
The Oreo cream filling!
Now on to everyone’s favorite part of the Oreo cookie: the filling!
While many homemade Oreo cookies use a white chocolate ganache or a simple buttercream, I didn’t find a ganache authentic enough and I needed to tweak my buttercream to get the consistency juuuuust right.
I ended up adding some vegetable shortening to a simple vanilla buttercream to get a slightly stiff consistency to make the filling more along the lines of what you would find in the middle of those oh-so-addicting cookies. If you want a filling recipe without shortening, you can omit it and go with an all-butter option, but I do find that the shortening goes a long way in getting the filling super close to tasting just like traditional Oreo cookies.

A few cookie tips
- While I loved the scalloped-edge cookies, you can definitely use straight-edge cutters, or do different shapes!
- Another gorgeous option – use a cookie stamp! Oreos have their own design on top, so why not give yours one, too?
- While piping the filling is quick, you can totally slather it on with an offset spatula.
Storage and freezing instructions
These cookies are a magnificent candidate for making ahead of time or freezing whole.
- Make-Ahead Dough: The dough can be refrigerated for up to 3 days before being rolled out, or frozen for up to 3 months. Wrap the dough tightly in plastic wrap and then place in a resealable bag.
- Make-Ahead Filling: The filling can be made and refrigerated for up to 2 days ahead of time (give it a good mix with a rubber spatula before using).
- Make-Ahead Chocolate Cookies: You can bake and cool the chocolate wafer cookies, then freeze them in an airtight container for up to 3 months. Fill and assemble when ready.
- Cookie Storage: Once the cookies are baked and assembled, they can be stored in an airtight container at room temperature for up to 1 week, in the refrigerator for up to 1 month, or in the freezer for up to 3 months.
More Oreo-inspired recipes!
If you make these homemade Oreos and love them, I would so appreciate it if you would take a moment to leave a rating below. Thank you so much! ❤️️
Homemade Oreo Recipe
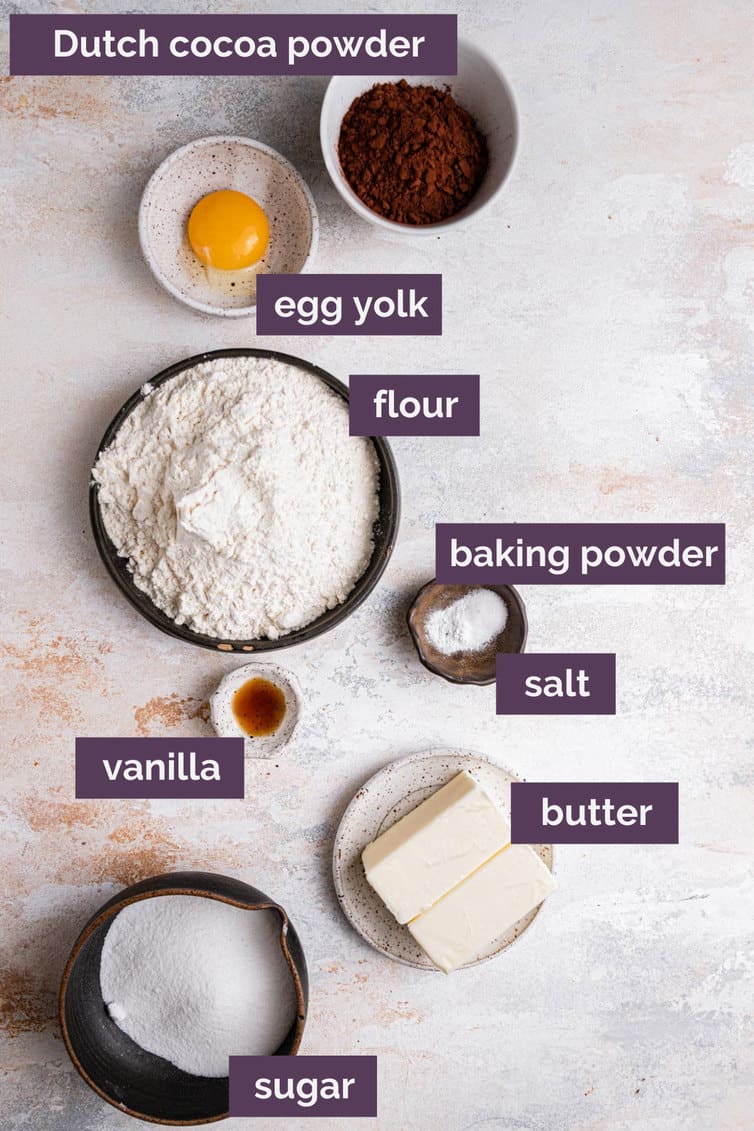
Ingredients
For the Dough:
- 2 cups (250 g) all-purpose flour
- ½ cup (43 g) Dutch-process cocoa powder
- ½ teaspoon (0.5 teaspoon) baking powder
- ½ teaspoon (0.5 teaspoon) salt
- 2 sticks unsalted butter, softened, (8 ounces)
- ¾ cup (150 g) granulated sugar
- 1 egg yolk
- 1 teaspoon pure vanilla extract
For the Filling:
- 2 ounces (0.5 stick) unsalted butter, at room temperature
- ¼ cup (51.25 g) vegetable shortening
- 2 cups (240 g) sifted confectioners' sugar
- 2 teaspoons vanilla extract
Instructions
- Whisk together the flour, cocoa powder, baking powder and salt.
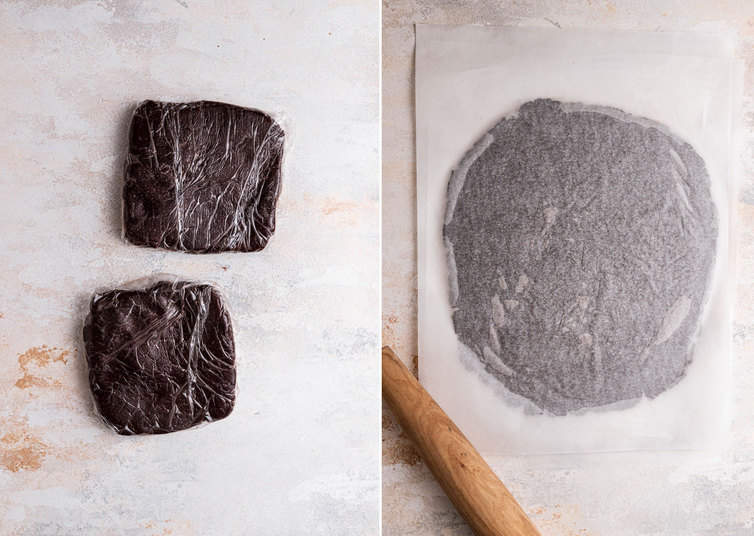
- Beat butter and sugar with an electric mixer until pale and fluffy, then beat in yolk and vanilla. At low speed, mix in flour mixture in 3 batches just until a dough forms. Divide dough in half and form each piece into a 6-inch square, then chill, wrapped in plastic wrap, until firm, 2 to 3 hours.
- Preheat oven to 350 degrees F. Grease two baking sheets or line with parchment paper or a silicone baking mat.
- Roll out 1 piece of dough between sheets of parchment paper into a 14x10-inch rectangle (1/8-inch thick). Slide dough in parchment onto a tray and freeze until dough is firm, about 10 minutes. Repeat with remaining dough.
- Cut out as many rounds as possible from first chilled square with a 2-inch fluted or round cutter, reserving and chilling scraps, then quickly transfer cookies to a buttered baking sheet, arranging them ½ inch apart. (If dough becomes too soft, return to freezer until firm.)
- Sprinkle half of cookies with decorative sugar (if using), then bake cookies until baked through and slightly puffed, 10 to 12 minutes. Cool on sheet on rack for 5 minutes, then transfer to rack to cool completely (cookies will crisp as they cool).
- Make more cookies with remaining dough and scraps (re-roll only once).
- Make the Filling: Beat the butter and shortening together at medium speed until combined and smooth. Reduce the speed to low and gradually beat in the sugar and vanilla. Increase the speed to high and beat for 2 to 3 minutes until the filling is light and fluffy.
- Assemble the Cookies: Pipe a heaping teaspoon of filling onto the flat side of the plain cookies. Top with the sugared cookies to make sandwiches. Store in an airtight container at room temperature.
Notes
- Recipe adapted from Gourmet.
Did you make this recipe?
Leave a review below, then snap a picture and tag @thebrowneyedbaker on Instagram so I can see it!
[Photography by Dee Frances]


These are amazingly delicious, but if you find yourself running out of the filling, put some ice cream between the cookies — wow! I keep the unfilled cookies in the freezer until I’m ready to fill them because they tend to break apart with any pressure.
I love this recipe. I made the cookie part and put them in the freezer. A couple days later I made the filling and filed the cookies and put them back in the freezer. They really freeze well and they do have a snap when you eat them. If everyone would just follow the recipe it would turn out terrific!! If the dough is hard to roll, just keep it on the counter for a little bit and it will be fine. If it gets way too soft stick it back in the fridge. I have never gone wrong with the brown eyed baker!.. Recipes are the best!!!
How long will they stay?
Can you freeze these cookies? Also, I find it hard to roll the dough. Any tips?
Can I use these Oreo’s instead of real Oreo’s in a recipe??
Can these be successfully made with Allulose for diabetics?
The shortening in the frosting is terrible!
Also, the cookies didn’t have the right snap and were a strange flavor- maybe too salty.
Just made these and they were excellent! Truly all the refrigerating dough steps were worth it :) And I subbed 2 TBSP cream for the shortening. So so good!
I made these at Christmas and they turned out great !!..so many compliments – to be honest i didnt want to give them away! 😅
Thinking of making them for the super bowl…if I used a football shaped cookie cutter, do you think they’ll hold that shape ?
WOW! Me and the hubs literally jumped up and down like giddy 10 yr olds when we tased these!
Oreo perfection for the 70s and 80s babies who know what a REAL Oreo tasted like from back in the day!
I have made almost every Oreo recipe there is out there and they all were committing a crime to even remotely think they were like an Oreo! These were so perfectly crunchy alone that I will bake and stash these plain in the freezer for those times I need the chocolate wafer cookies. The stuffing is as close to the Oreo stuffing flavor that I have tasted…I used reg vanilla bc I didn’t have clear so it was not as white, but perfect consistency and flavor!!
Once stuffed and sandwiched, they become a tad bit softer, but the way and Oreo should so that when you take a bite they don’t shatter! I am gushing bc they are worthy of the gush! They are dunkable, but didn’t turn our teeth black – BONUS!
I used all black Dutched cocoa to get that Oreo flavor and instead of re-rolling scraps, I formed them into log and did slice and bake – they turned out just as nice so going fwd I will slice rather than roll.
All in all THE BEST Oreo copy cat I have found!!! Thanks Michelle for great recipe!
Hi Miriam, So awesome to hear how much you and your husband loved these!!! Thanks for stopping back to share your feedback, it’s much appreciated! :)
These cookies were amazing! I’m not a fan of Oreos but my daughter is so I made them for her and we all just couldn’t stop eating them.
I’m so thrilled to hear that your family enjoyed these!
Hi,
Is is absolutely necessary to put the cookies in the freezer before baking? I
My freezer is not only full, but it is a bottom freezer which is smallish. Might I put them in the refrigerator? I am excited to try your recipe, as I have made homemade Oreos before and they were really delicious! Happy Holidays to you and your family!
Hi Michele, You can use the refrigerator, but will need to do so for longer to get the dough chilled and firm – probably closer to 45 minutes or an hour vs 10 minutes. Enjoy!
Definitely try this recipe! Thank you!
Easy recipe, my family LOVES them! Will definitely be making again, thank you so much for the awesome recipe!
Have you tried these with black cocoa powder?
After dough was mixed, I rolled these into same sized balls, evenly placed them on parchment paper lined cookie sheet, covered them with cling wrap, and pressed each one into a flat circle using a wide-bottomed glass. Flash froze them for 10 minutes before baking as instructed.
How long can the dough be stored in the freezer?
Hi Lindsay, I would say up to 1 month.
They look so good! Wow!
Loved this recipe! I made them for a holiday cookie exchange. Although I made peppermint filling with extract and crushed peppermint candies, and then dipped half the cookie into dark chocolate. Decadent!
This recipe is so amazing, I think is necessarily detailed and the fact that you changed the filling to something more economic and accessible is cool too.
I have a batch cooking in the oven right now! I also wanted to say that the dough can also be rolled into a log and then refrigerated, then just slice off the 1/8 in circles. Not as pretty as the fluted edges, but does speed up the process, and worked well when sub-ing in GF flour that doesn’t roll out as well. I also then just keep the dough log and frosting in the fridge/freezer and slice off a few as needed. Thanks again!
How do these keep? I’m planning to ship them across the country.
Hi Rachel, They keep really well at room temperature. I would say they’re good for up to a week or so. You should be fine shipping them.
Wow, do these look amazing. Speechless. I am going to have to get my wife to make these :-)
I made these as part of a huge batch of christmas baking that I share to friends and family…except…these were so good that I refused to share any.