How to Decorate Cookies with Royal Icing
Welcome to the first in what I plan to be a recurring “How-To” series here on Brown Eyed Baker. While recipes are all well and good, there are some techniques that are best explained in a step-by-step method, with pictures included (at least this is how I learn best). As I was decorating my Stanley Cup Playoffs cookies last week I thought that doing a tutorial on how to decorate cookies with royal icing would be a great first How-To post.

I was always very good at baking snowmen, Christmas trees, angels and the like in December, slapping on some buttercream, a few sprinkles and calling it a day. Not that it isn’t good. It is definitely good. But then royal icing came onto my radar. The possibilities seemed endless – a completely smooth finish to the cookies and intricate designs? Now THAT looked fun! I’m here to guide you on a step-by-step tutorial on how to achieve any design you want on any shape cookie. Ready? Let’s begin!
Step 1: Find a Good Sugar Cookie Recipe
This might seem obvious, but not all sugar cookie recipes stand up well to heavy-duty decorating. If you don’t already have a favorite, let me point you to mine: Dorie Greenspan’s All-Occasion Sugar Cookies. They’re incredible.
Step 2: Cool Cookies Completely
Again, maybe elementary, but we’re going step-by-step here. You can’t decorate cookies that have just come out of the oven. Or even cookies that are slightly warm. They need to be completely cool before you can move on to decorating.
Step 3: The Equipment
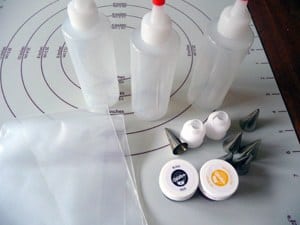
Now, you don’t necessarily need fancy equipment for decorating with royal icing, but investing in just a few decorating tips and couplers, some disposable pastry bags and squeeze bottles will make your cookie decorating experience exponentially more pleasant. Here is a run-down of what I typically use:
♦ 12″ disposable pastry bags. So easy to just throw away when you’re done instead of washing them!
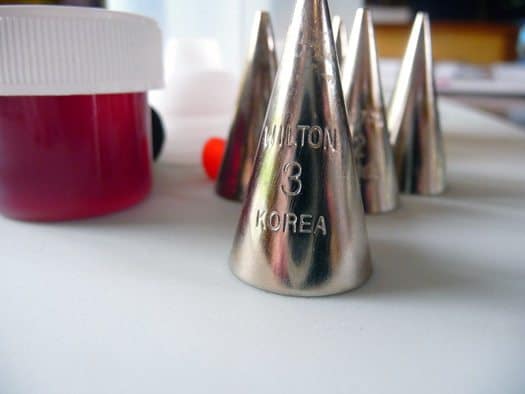
♦ Decorating tips. For outlining the cookie I use a #3 tip and anything from a #1 to #3 for intricate designs on the cookie. It’s not a bad idea to have a few of each number, as I find myself using them a lot.
♦ Couplers. These make it easy to switch the size tip you are using in the same color.
♦ Squeeze Bottles. I use these for flooding my cookies. Since the royal icing is very thin at this point, it’s a much neater alternative to a cut-open pastry bag. Plus you can put the cap on and save any extra icing for next time.
♦ Small bowls or Tupperware (to color your icing)
♦ Toothpicks.
Step 4: Prep, Prep, Prep!
This got me the first time I decorated with royal icing, and is especially important if you are going to be using multiple colors and different tips. I flew by the seat of my pants and ended up making a huge mess, it took twice as long as it should have, and I was trying to fish used tips out of pastry bags to re-use them somewhere else. Your plan of action:
♦ Write down how many different colors you will be using and take out that many pastry bags and couplers and prepare them. Also figure out what size decorating tips you will be using and fit them to the pastry bags.
♦ If you don’t have squeeze bottles for flooding, add additional pastry bags for however many colors you will use for flooding, in additional to the bags of that color you will use for detail work (if any).
♦ Have your icing colors ready and as many small mixing bowls (Tupperware works great for this) as you have colors planned.
Step 5: Make the Royal Icing
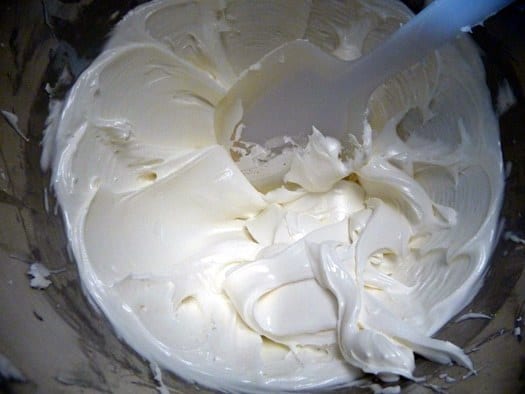
The recipe for royal icing is very simple:
Save This Recipe
4 cups powdered sugar
2 tablespoons meringue powder
6 tablespoons water
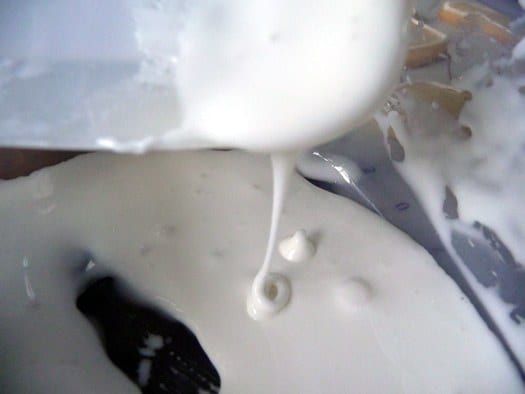
Mix all ingredients on low speed for 7-10 minutes or until the icing loses its shine. Add more water by the teaspoon if it appears too stiff. At this stage you want to be able to pipe it easily:
Step 6: Color the Icing
Divide the icing into your containers based on how much you will need of each one. Proceed to color the icing and then cover each container with a damp paper towel. It is key when working with royal icing not to allow it to dry out.
Step 7: Outline the Cookies
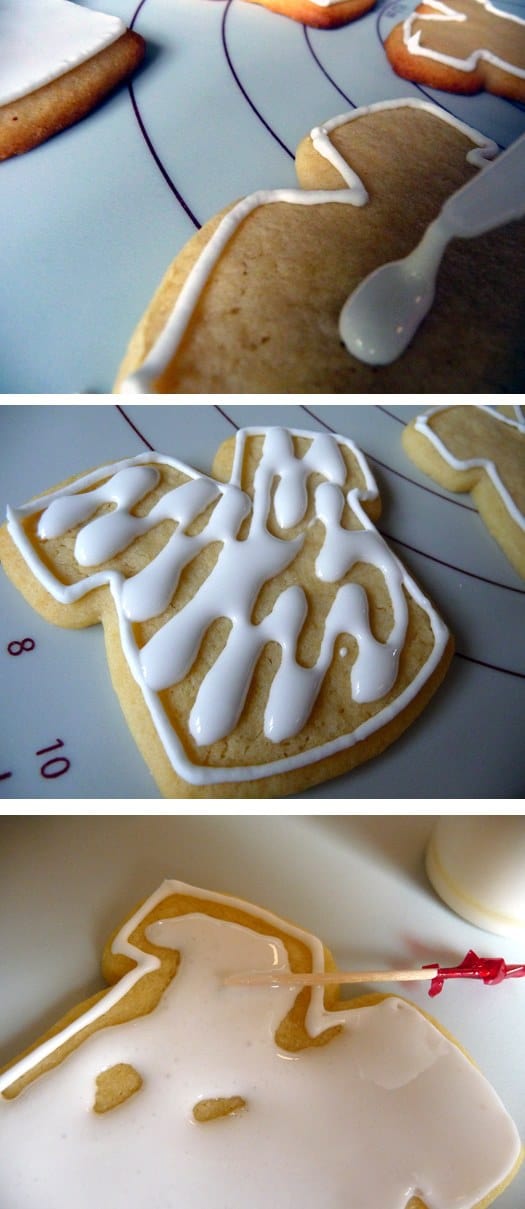
You will want to outline the cookies with whatever color you will be using to fill them in with. Place some of the icing into a disposable pastry bag fitted with a #3 tip and outline the outside of the cookie. I find that keeping the tip about ½-inch above the cookie while moving it allows the icing to lay on the cookie more easily.
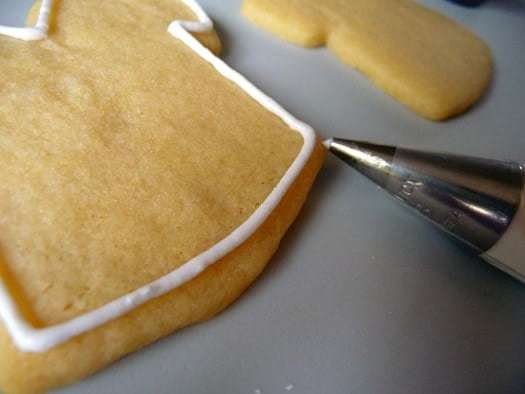
You’ll want to make sure that the outline is pretty well set before moving on to flooding the cookies, but I generally find that by the time I am done outlining the first ones are already dry.
Step 8: Flood the Cookies
Take whatever color you are using to fill in the cookies and slowly start adding a few drops of water at a time, until the icing reaches an almost liquid consistency. The test here is to pick some icing up with a spoon and let it drizzle back into the bowl – the drizzle should disappear into the bowl within 10 seconds. Once you have achieved this, you are ready.
Either fill a squeeze bottle with the thinned icing or transfer it to a disposable pastry bag with a ¼-inch hole cut off the end.
Now squeeze in the icing to almost completely fill the inside the cookie.
Then take a toothpick and gently use it to distribute the icing to any empty spots.
Once you are done the cookies need to dry completely before moving on to any intricate piped designs. Some bakers will let them sit overnight but I generally find that a 2-3 hour rest will do the trick.
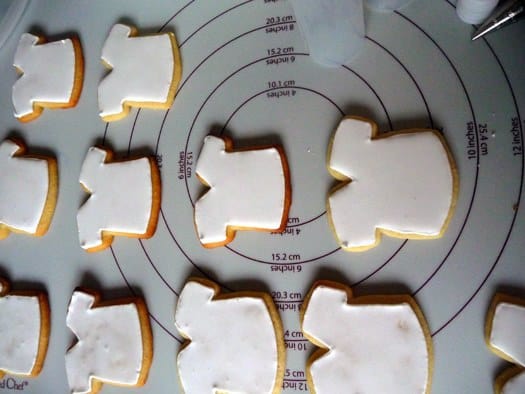
Now use whatever colors and tips you’d like to achieve the design you want!

♦ ♦ ♦
Was this helpful? I’d love your feedback on this post since it’s the first of its kind on Brown Eyed Baker! Any questions or additional tips to share?
What do you want to learn? I’d love to hear what you would like to see featured in the How-To series. A reader has already mentioned that she’d like to see a tutorial on baking bread with yeast. What’s on your list?
![]() Don’t forget to subscribe to the Brown Eyed Baker RSS feed to ensure you don’t miss any upcoming posts!
Don’t forget to subscribe to the Brown Eyed Baker RSS feed to ensure you don’t miss any upcoming posts!


The detailed instructions were great! I never would have guessed that it was so easy to decorate cookies like that, I made some for July 4th and they went over really well!
Chenyin – I purchased the cutter in the “Football Theme” cookie cutter set by Wilton at Michael’s craft store. I imagine you could find the same product at any arts and crafts store that sells Wilton products like Hobby Lobby or JoAnn Fabrics. You can also buy them off of Wilton’s website here:
http://www.wilton.com/store/site/product.cfm?id=696917E9-1E0B-C910-EAC4A9E24C060793
where you buy the cutter?
BigSis – You are welcome, so glad that you found it helpful!
Thanks so much for a great tutorial! I’m bookmarking it on Delicious so that I don’t lose it!
CATHY — Consistency depends on which part of the decorating phase you are talking about. The original consistency should be good enough for piping an outline with a #3 tip (remember that temperature and humidity levels will affect the consistency so you may need to add more or less water). Aside from outlining, if you are doing detailed work with a #1 or #2 tip the icing will need to be a little thinner to keep the icing from breaking. And then of course for flooding the entire cookie you will need the icing even thinner still (see Step #8). I hope this was helpful!
This is super helpful. Step 2 seems like a no-brainer, but you’d be surprised how many times I’ve let my impatience get the best of me and cause me to dive into the decorating before the cookies were completely cool.
Love it! I’ve been wanting to tackle royal icing but have been a bit scared, thanks for the easy step by step!
Great tutorial Michelle! Thanks. I always seem to have problems when it comes to the ‘flooding’ part.
I really enjoyed your interview with Donna Diegel on the Examiner.
I am rooting for the Penguins – Go Crosby!
Thank you so much for a such a wonderful tutorial. I have been wanting to make them but have been a little scared. Thanks for the detailed steps.
Oh yes, very helpful! I’d love to see more posts like this.
How purty! You did a beautiful job! I’d never be able to make mine so neat. I’m impressed!
Great how-to for cookie decorating! I am more of a cookie baker than cookie decorator and admire the patience and artistic abilities this takes.
Great tutorial! Cookie decoration is my weak point. Great instructions and photos too! Thanks, looking forward to more wonderful tips tutorials and of course recipes too!
From a Fellow Pittsburgher. GO PENS! This time the cup is ours!
Thanks for taking the time to put together such a helpful post! I’ve never decorated sugar cookies like this before and I really enjoyed all your tips! So cute!
I have been really curious about how to decorate cookies nicely, so thanks for sharing. It also helps that I should already know how to do most of it! :)
I’ve been trying to put together a “how-to” for decorating sugar cookies but I’m horrible at preparing for it so I’ve never felt to expert-like to post about it. I think I’ll scratch the draft I have in my blog and instead just link to this! Thanks!
I always wondered how everyone got their cookies to look so neat. Mine always look like a 2 year old did them. Thanks for the tips.
this is great! I was planning on making decorated sugar cookies but didn’t know where to start. Might be a dumb question, but when you decorate it, do you use the original consistency of the royal icing or the thinned out one?
Hi Cathy, I just wanted to tell you that, I believe she said to use the icing as per the recipe for the outline, then add drops of water Until an almost liquid consistency to fill in. It is step 8 ” flood the cookies. :) . Good luck! I made some cookies a few hours ago and wish I had read this before I did. One other great tip is to ice the bottom if the cookie instead of the top. The top of the cookie edges slope down, whereas the bottom of the cookie is flat. Not only is it easier to ice and looks neater, but the bottom is pretty as well. ( no little crumbs ). Hope this helped you. Crista
Crista,
i just discovered Brown Eyed Baker while doing a “royal icing for sugar cookies” google search. I loved this instruction and plan to text my skills tomorrow night.
But after reading your comment, i just had to respond and THANK YOU for the suggestion to ice the cookie bottoms. I grew up in a family of cookie bakers, i.e. my mom and her mom. They would start making cookies the saturday after Thanksgiving and wouldn’t stop till the week of Christmas. thousands upon thousands of cookies would be made in my grandmother’s avocado green kitchen.
Great memories I hope to share with my family.
sorry for the brief family history of a perfect stranger but as a fellow baker i thought you would appreaciate the traditions baking can create.
Thank you again for the tip.
Nicole
Thank you for the tip on decorating the bottom of the cookie. We made round sugar cookies today and are decorating as “softballs” for an end-of-season party tomorrow. I used ready made cookie dough and the top is not smooth….the bottoms are. Thank you!
To flood cookies you make your royal icing just like the recipe says for the outline. Save some of the same for detail work after you flood the cookie. When you thin your icing you want to do it just a teaspoon of water at a time and stir it. When you lift the icing up you want it to stream back down into your bowl. When the stream hits the icing in the bowl you want the stream to disappear in about two and a half seconds. Less is too runny and three seconds or four is harder to look with.
I love this post!!! Please keep giving details that might seem obvious because it’s those things that most bloggers leave out and some of us (me) need the extra help :)
I especially like seeing the supplies needed. Back in March I bought some disposable bags and some tips but didn’t know I needed couplers. I still am not clear on how the bag will attach to a coupler and tip, but I’m thinking the coupler might come with instructions for how to do this?
Thanks again!
Thank you, Thank you! I’ve always wanted to know how to do this and now I can! Can’t wait for more How-to’s from you.
Great job and tutorial. Mine never look this good!
Well done, I think you did a great job explaining how to decorate sugar cookies. You were detailed and organized in your presentation. The pictures gave visual instructions for those, like myself, who are visual learners.
Thank You
This was very helpful! Your step by step instructions and the pictures were great! Now I feel that I know what I will be doing when I try it myself. Thanks!
This was really helpful. I look forward to reading the rest of your “How To’s”
Awesome! I tried decorated cookies just once and it took me forever.
Yours are great.
Susie
Love the Pens cookies! I’m a born and raised Pittsburgh fan- love em!
Oh, and I would love to learn about meringue. Do you have any experience with that? My grandma made a chocolate pie with meringue on top and I never got the recipe. Thought I would attempt that this summer. Any info you have to share would be appreciated.
This is really great—thank you for sharing! I love sugar cookies but my icing always drips down the sides. These are awesome tips:) Thanks again.
Loved the step by step instructions and the tips you have given.
I have a question regarding coloring the royal icing. Do you use gel paste or liquid food color to tent the icing? I haven’t tried your decorating suggestions, but it’s exactly what I was looking for and I appreciate the in-depth expalantions.
Thanks so much!
I use the paste or gel to tint mine. You can add whichever you want. The key to using royal icing is to make sure you don’t have any oils or grease touch it or else it won’t set up. Store it in glass or metal bowls, not plastic, as plastic will hold on to fats. Good luck!