How I Refinished My Grandma’s Old Dough Board
[donotprint]
My earliest memories of my grandma are of her in her kitchen. Whether she was at the sink washing green beans freshly picked from the garden, at the stove stirring a big pot of sauce, or sitting on her stool at her kitchen table mixing dough for biscotti – she was most at home in the kitchen. Each week she would make a feast for Sunday dinner (which was actually lunchtime). After spending a morning cooking nonstop, she would plop herself down at the head of the table, announce that she wasn’t hungry, and would watch everyone else, smiling. She cherished every moment spent watching her kids and grandchildren enjoying her food. Although it really was never about the food. The food is what brought everyone together, and that’s what she loved. It was the casual conversation, the playful teasing, friends coming and going. She loved seeing everyone happy and content. It was what made her happy and content.
At the heart of my grandma’s kitchen was her large wooden dough board, which some could have easily mistaken for the top of her kitchen table, since it rested there so frequently. My grandfather made it for her right after they got married over 70 years ago, and she used it her entire life. She used it to knead dough, roll out ravioli, cut gnocchi, shape biscotti, and for just about any other kitchen task you can imagine. A couple of years ago when she was no longer able to do much cooking she gifted the dough board to me, knowing that I would cherish it and get much use out of it. I had used it a few times, but while kneading a batch of blueberry bagel dough, I noticed that there were little pieces of wood coming off of the board and into the dough. Unfortunately, I had to throw the entire batch out. I figured I would have to refinish the board, but it ended up getting put on the back burner. Last October, when my grandma passed away, the board took on much more significance and restoring it became a priority. I did some research on what needed to be done, gathered my supplies, and a few weeks ago my mom and I spent a Saturday together making the dough board look brand new. I took photos and documented the process so that I could share it with you, as the process can be used on any old dough boards or wooden butcher blocks you may have that are in need of some TLC.
The Supplies
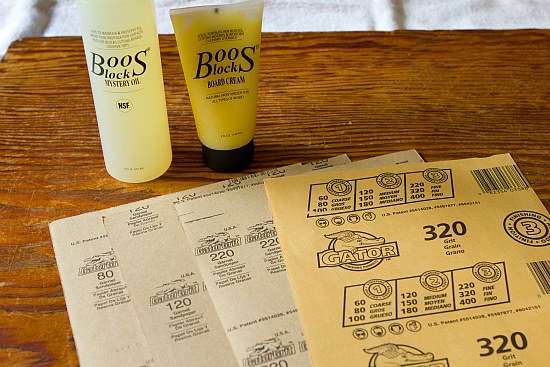
The list of supplies you will need is relatively small:
- Food-grade mineral oil (sometimes also referred to as “mystery oil”)
- Beeswax cream
- Sandpaper, varying grades of coarseness (we used 80, 120, and 320 – I also bought 220 but it wasn’t needed)
The mineral oil helps to keep the wood from drying out. When wood dries out it can shrink and crack, which can cause splintering and the potential for bacteria to seep in. The beeswax coating not only provides a smooth finish, but it also fills in gaps and pores and repels water, keeping the wood safe from rotting and mold.
I have seen mineral oil and beeswax cream at kitchen supply stores such as Sur la Table and Williams Sonoma, however I found ordering them on Amazon.com to be less expensive. I purchased Boos Block Mystery Oil and Boos Block Board Cream with Beeswax.
Getting Ready
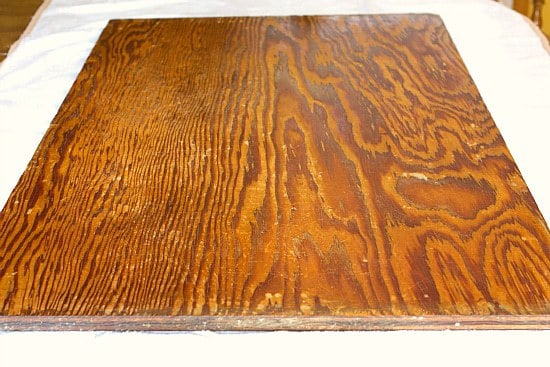
Make sure you have a nice big area on which to work. Arrange some old towels underneath the board or butcher block you plan to refinish, with a good bit of space around all of the sides to catch the sandpaper shavings.
Cut your sandpaper into squares to make them easier to work with.
If your board is dirty or has some caked-on food residue, you may want to take a bench scraper and scrape off any pieces that can easily come off. Once you are done, wipe down the board with a dry rag.
Step 1: Sand, Sand, Sand
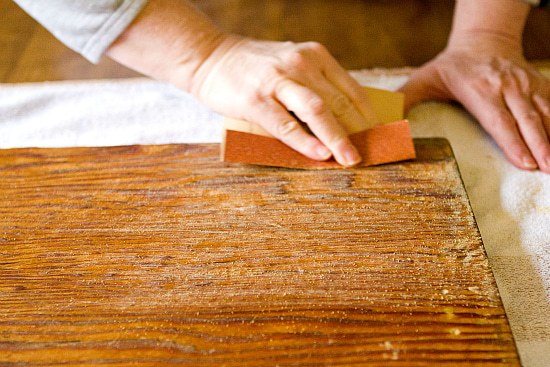
Get your elbow grease ready! Start with the coarsest sandpaper that you have. In our case, that was an 80 grit paper (the higher the number, the finer the grit). Working along the grain with long, even strokes, sand down the board to smooth out any splinters, rub out any residue, and smooth over any holes or divots.
Look at my mom go! I learned one thing during this process – I am awful at sanding, and my mom has the black belt equivalent in it. She is definitely a master! She attributes it to the fact that her and my dad sanded and stained every last piece of woodwork (trim, doors, etc.) when they built our house. I can’t even fathom how much patience that took!
I was amazed at how smooth the surface of the board became after just the first pass at sanding!
When you have finished doing the first pass with the coarse sand paper, use a damp towel to wipe down the wood and let it dry completely before moving on (it took about 20 minutes for the board to dry for us, sitting on the kitchen table, with a light on above it).
Once the board is dry, repeat the sanding with the medium-grit sandpaper (in our case, the 120) to continue smoothing the board. It’s getting there!
When finished, again wipe the board clean and allow to dry. Repeat the process with the finest grit sandpaper to put the final smoothing touch on the board. Wipe the board completely clean and allow to dry.
Look at how nice at smooth the surface of the board ends up being – all of the bubbles, cracks, divots, and valleys have been smoothed out. I loved sliding my hand across it!
Step 2: Apply the Oil
Once the board has dried completely, treat it with the mineral oil. Use a clean rag or a sponge to apply a liberal coat of the oil to the wooden board. Depending on how dry the board is, it may soak it up immediately. Continue applying oil until the board won’t absorb anymore. At that point, let the board sit for about 10 minutes, then gently wipe up any excess oil that has not been absorbed.
In my research, some places said to apply the beeswax cream immediately, while others said you could let the board sit overnight to soak up more oil. We waited about an hour and then proceeded.
Step 3: Apply the Cream
Using your fingers and moving in small circles, massage the beeswax oil into the board, working on a small section at a time. Once you have covered the entire board, let it sit for at least an hour or up to overnight. Using a clean cloth, wipe off any excess cream.
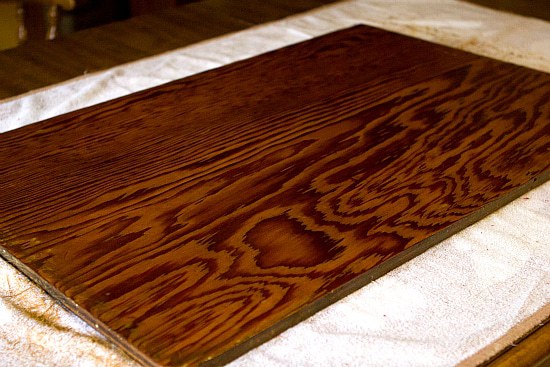
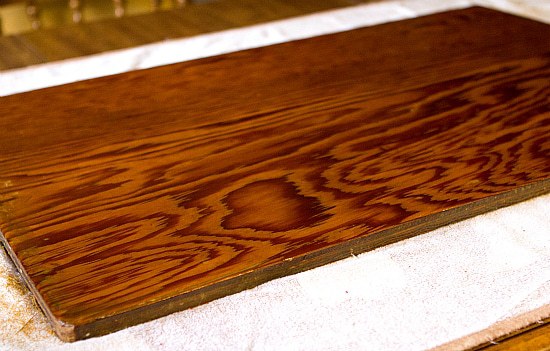
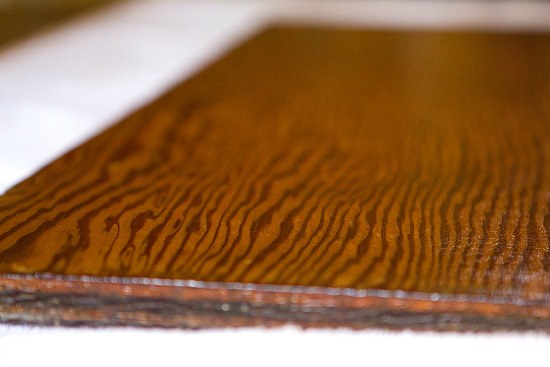
You’re done! The board is now ready to be used. Look at how healthy that wood looks, and what an awesome, sealed surface we’ve created:
Step 4: Maintenance
If you are using your board often, it is recommended that you reapply the mineral oil and the beeswax coating about once a month. It will keep the wood in healthy shape and protected from bacteria that could seep in.
Before & After
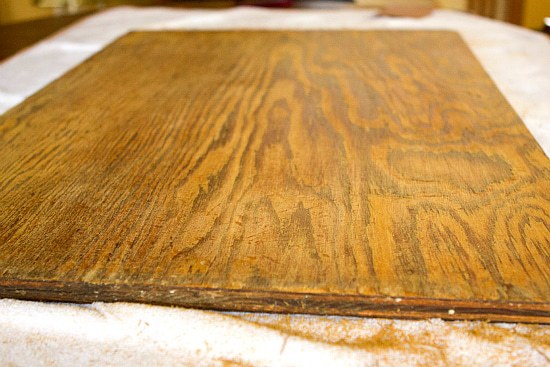
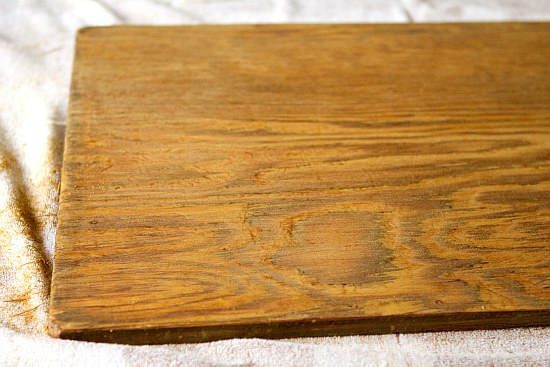
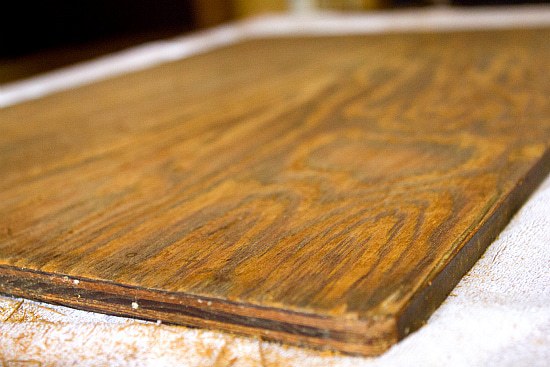
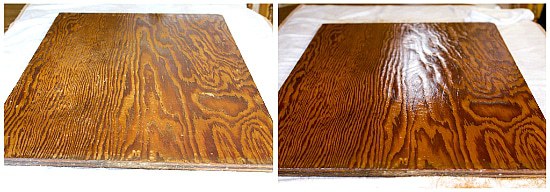
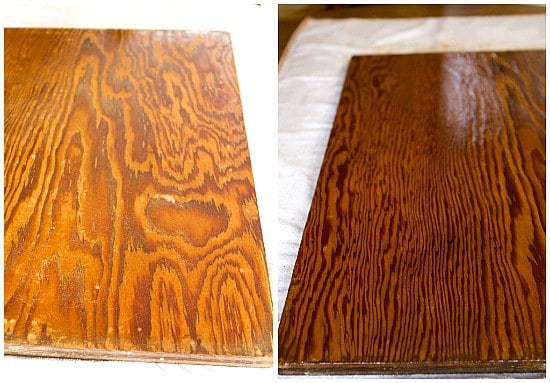
The official before and after photos of the dough board:
My mom and I couldn’t believe the transformation after we had finished – you’d never know that the board had been hand-crafted over 70 years ago! I’m so happy to now be able to use my grandma’s dough board; I know she’s with me each time I step foot in the kitchen. She was my biggest fan, and even as her appetite began to wane and she would announce she wasn’t hungry, she would never, ever turn down something that she knew I made. I know she’s thrilled that I’m able to use her cherished dough board on an almost-daily basis, just as she did.
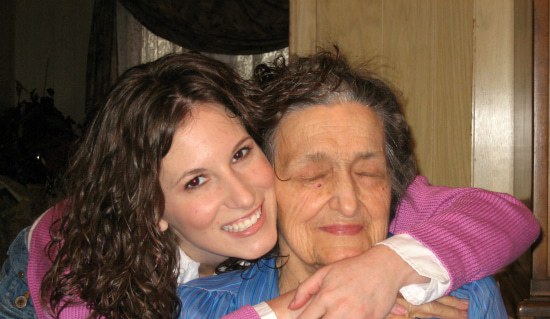
(My grandma hated having her picture taken, so I’m still digging around for one of her sitting at her dough board, but this is one of us from Christmas 2005.)




Really enjoyed your story of your grandmother and her dough board.
I bought one and needed to season it.
The directions you shared was just what I needed.
It is the story, the history, not the type of wood (TONY). Gandma did not ask for mitered joints, maple, etc. She was happy with what you grandfather made for her. By the way, I just made a Stonica, which is a traditional polish perogi board for my wife. When I got on line, I found that the wood that is used traditionally is Pine.
My grandma had a similar board, but even larger. She used a large wooden dowel (which everyone thinks was a broom handle sanded down to bare wood) to roll out large batches of noodles for soups. I don’t know what happened to them after she passed. But, I got her ‘every day’ cutting board that must be at least 75 years old. It’s so full of memories and character. I don’t know if it would be quite the same if it was refinished… Great article though!
I had a smile on my face as I read this story. My earliest memories are of, yes, my Gramma baking! Although she didn’t have a dough board, I do. I plan on passing it to my daughter and then to my granddaughter. It’s a large butcher block piece (about 18’ x 24.’ I put a screen door handle on one end (side) for ease of moving about. I use one side as a cutting board when fixing large quantities of veggies… like for soups. The other side is ONLY for dough. I have a leather tag nailed in stating such. Although I have kept it oiled I’m excited to do this restoration process. I have other things of my Gramma’s. And someday my precious granddaughter will have this board which I bought new about 45 years ago! THANK YOU… for the tips and THANK YOU for sharing the bond between you and your Grandma. My Gramma has been gone since 1978. Not a day goes by that I don’t miss her and long for her. I ADORE her!! ❤️
Hi! Just found your blog while searching for tips in how to create my own dough board like mums..and just wanted to say your story about grandmothers tradition of cooking is just beautiful and reminds me of our family ancestry which i too hope to upkeep! Anyhow i think yourr great so keep up the great work! Kind regards Kristina
I also have a baking board. My mom used it to roll out the dough for ravioli on it. I used it last week to make cinnamon rolls, and knew I had to do something to get it back into shape. And, lo and behold! I found your instructions on your website. I am so very happy! My son just restored my mom’s old cast iron skillet for me, and now I’ll bring her baking board back to life, too. It’s so nice to know that my mom is still in the kitchen with me.
Way to rain on her parade there Tony, jeeze.
True enough it’s plywood and a contemporary board would most likely be solid maple, but I think it was more about refurbishing an heirloom of sentimental value.
We’re both a bit late to the party here though.
I just wanted to mention, from a woodworking point of view, it’s a lot faster to use a machine. It kind of pained me to read about the hand-sanding, to that degree anyway. A woodworker would use a belt-sander, and start with the coarsest grit necessary to remove the deepest marks, then work up through the grits. The theory is, get down to a clean unscratched wood as fast possible, then remove the scratches that you made yourself using the coarse grit belt. A machine palm sander might work but still it’s fairly slow compared to a belt sander. Not everyone has one of those available though.
Anyway, looks great and the photo is absolutely charming.
I hate to say it, but your board is just a piece of plywood. It isn’t even food grade. A dough or bread board is made of maple and glued together. Most are at least one inch thick. A good cleaning is all a good dough board needs. That means a little soapy water and a scotchgard pad. Rubbing in the direction of the grain of the wood. Let it dry. Then apply your mineral oil wiping in the direction of the grain. Don’t forget the ends, sides and the other side. Let it dry for a few days. If the board was really dry, reapply. You should only have to do this once a year. The have a good table sized board go to a workshop and they will build you one. I realize in the old days they used what was available, but your splintering problem has probably been a regular occurrence. Dump the old one. It’s dangerous.
Let’s dump Tony. Grandpa made this for her Grandma. Can’t see the forest for the trees!
Thanks so much for sharing. I’ve been searching all over the internet for this exact same thing – I too have an old table top that was converted into a pasta/pastry board that was my Nona’s and I am now so excited to refinish it. She would be so happy to know that I did and will continue to use it, always thinking of the times she did. I miss her so much but those memories are priceless. Thanks again!
Lisa
Thank you for your instructions on how to refurbish a wood dough board. I just recently inherited my mother-in-laws wood board. I am excited to use it, but wanted to deep clean and refinish it first since it has many years of built up use. I was wondering if it would be okay to use a small electric hand sander instead of using elbow grease to do the sanding? I figured that would help the process go quicker, but didn’t know if that would be to harsh on it. What do you think? Thank you in advance for your response. Peace.
Hi Briget, I think that would work just fine (and be a lot easier – the sanding was the hardest part!). Enjoy :)
Beautiful job, beautiful picture of you and your grandma, heartwarming! She is smiling down on you
Beautiful story….beautiful Grandma…beautiful board
I loved reading your story. And that picture of you and your beautiful Grandmother is awesome – I know you cherish it. And I see you in her face – I know that makes you happy, too. Thank you for sharing this – brought tears to my eyes.
This is plywood, everybody at home can make one of these for about 10.00 and pass it down in their family. Ask for it at the hardware store
I have my great-grandmother’s cast iron Dutch oven, it means more to me than any other gift she could give me.
Loved this tutorial. I have my Grandmother’s board that came from Hungary 100 years ago and it is in need of some loving. This was a great idea!
This is such a wonderful and sentimental post. I love that you did this. Having objects like this are so important. You did a beautiful job refinishing it.
I just love this post. I have a dough board from my husband’s grandmother, and I know how wonderful it is to have something like this to remember her by. I’m definitely keeping this post bookmarked so that I’ll be able to restore hers one day when I need to. Thank you!
Wonderful to have something meaningful. Everytime you use it, you will be reminded of her. My mother loves to cook, and I’m putting together her recipes so everyone can make them when she’s gone.
I can’t wait to do this to my bread board. It belonged to my husband’s grandmother and I’ve been wanting to use it since we were married, but with the cracks and peeling wood I haven’t been able to. This will be our weekend project this week.
Thanks so much for this post.
Grandmas are very special. Mine passed not long ago too. Both of mine made their own bread and I’m practicing to try to replicate the recipes (of course they went by feel which takes years to fine tune). My aunt found my granny’s cookbooks and mailed them to me, said that as the one who is passionate about food in the family I should be the keeper of her books. There are pieces of note paper stuck in the pages, while the books hardly keep themselves together. At one time, these books were used often, you can feel the love in these artifacts. I imagine the bread board holds similar sentiment :)
I LOVE this, Michelle!
I have some old dough boards from when my mother-in-law passed away. They aren’t flaking off though, so I don’t plan to refinish them–I like that they look the same as when she used them. Nice to know that others feel like I do about these handed-down kitchen items-I cherish hers.
What an absolutely beautiful post and what a heartwarming exercise. Its a wonderful story you have about the cherished bread board and how the generations have used, worn and now restored it. This is truly one of the best nostalgia-factor posts I have ever read (as well as being very practical!) and I hope you get as many years and as many happy memories from the board as your grandmother did!
I love this post! You and your grandmother look a lot alike:-)
It is so good to take of such valuable things, I really appreciate what you have done.
What a fantastic project! It turned out beautifully. Thanks for detailing the process.
My grandma is going to be 91 next month and when she moved from her house to an appartment she gave me her dining room table. So many family dinners were shared over that table and I have all the same happy feelings when I sit at it — especially when she is visiting and able to share it as well. What a tribute to your grandma — she’s a beautiful woman!
what a wonderful project and great way to keep such a treasure in the family!
What a treasure! My mom had a dough board, just a simple piece of plywood that came out every time she made ravioli or noodles. She wasn’t much of a cook but ravioli was great. We often had “ravioli parties” where my mom, sister, nephews, my girls, and great nieces and nephews would first make dozens and dozens of ravioli, while a large pot of sauce and meatballs was simmering, then enjoy the fruits of our labor. I didn’t inherit the cooking gene but my girls are pretty good at it. Unfortunately, my mom had to go to a home last summer and no one claimed the board. You look a lot like your Grandma.
What a wonderful story….I am sure you will cherish the board forever :)
thank you for sharing such a great story
Such a gift. The board, the story and your relationship with your grandmother.
Happy baking!
Janet
what a sweet story.i have VERY little counter space and want my hubby to make me a bread board for the stove.
I’m not sure what I’d be like without the loving influence of my Grandma’s and their culinary impacts! Nice work on the beautiful keepsake.
Loved…loved…loved this post!
I love this story; I had a similar lovely and close relationship with my Grandma and my prized possession is her rolling pin. She wisely gave me a few of her special items before the hordes descended when she was put into a home as I was too young at the time to count as someone the adults would think worthy of any of her goods. That rolling pin must be over a hundred years old now and it’s what I always use; it’s as if she is still there with me whenever I make a pie. I’m sure having this board for your use will do the same Michele; always a happy memory.
You and your mom did a great job; I LOVE to re-purpose old things and make them viable. I wonder if your readers would be interested in the product I started to use that they can make themselves. I affectionately call it wood butter, but it’s a combination of mineral oil and beeswax melted together.
It’s funny some of the comments I’ve had about using mineral oil since it’s a derivative of petroleum but food grade mineral oil is perfect…odorless, tasteless and won’t spoil. Substituting cooking oils is a big mistake because most can go rancid but something about that word petroleum freaks people out…and it shouldn’t. One lesson I learned? Food grade mineral oil is about $2/bottle or less at the drugstore in the pharmacy where it’s actually labeled as a laxative. The same thing, in the same proportion at Home Depot where it’s labeled as a food safe product for wood? $9 for the same amount!
If anyone is interested; here my home remedy; I use it on cutting boards, wooden utensils and bowls; it really does make them like new again!
http://www.creative-culinary.com/wood-butter-helps-renew-wood-utensils-and-bowls
Thanks for sharing how to do this! Your board looks BEAUTIFUL!
As an avid genealogist, your story brought tears to my eyes. Restore, re-purpose, re-use is my motto … don’t ever give up the family past. You did good ‘Brown Eyed Baker’!
Thank you so much for sharing! What a wonderful story and the board looks gorgeous :) I would really love to have my husband make one for me now!
what a very special & sensitive person you are! thanks for sharing!!
What a lovely project and post. Thank you for sharing this with us.
What a cherished piece of your grandma! I too draw much of my love for cooking from my dear grandma. We lost her a month ago & your post really touched my heart. I love that you took the time to loving restore such an important piece of your history. My condolences on your loss.
Kristen
Hi Kristen, I am so sorry for your loss as well. Grandma’s are the best, aren’t they?
What a great post. Nothing better than having something to use that’s from a loved one. Every single time I use one of my spatulas and cooking forks, I think of my grandma. They were hers and I use them all of the time.
It looks beautiful! So wonderful that you were able to preserve it for all the years to come! It will make bread making so much more meaningful!
How beautiful the board looks! My grandma had a dough board too and I wish I had it! Thanks for the tutorial!
Beautiful picture of you and your grandmother! Grandparents play such an important role in our lives, and our childrens lives, I always feel really fortunate to have been able to be close with my grandmothers as well as my great grandmother(who by the way cooked at the well known “BROWN HOTEL” in Louisville, KY. as well as cooked with and for “Colonel Sanders” of Kentucky Fried Chicken) needless to say she was the best cook I have ever met.
What a treasure that board is! Thanks for sharing the details of how to do this.
I adore kitchen accessories that have been passed down and well-loved. My favorite thing in my kitchen is my 100+ year old cast iron skillet from my great grandmother.
Michelle, thanks for such an informative tip. Could this be useful on wooden spoons?
I have some pieces of my grandparents’ furniture and household items and feel like they are with me all the time, but I still miss them.
Hi Annie, Yes, I don’t see why not!
Great job! You can totally see the difference! What a nice way to remember your Grandma. Enjoy using your board!
I love to salvage things. Especially when they have such fond memories attached to them. Even if it’s not from my family I figure it meant something to someone at one point in time. Great job refinishing the board!
It came out beautifully
Aw, what a fun DIY project. What a sweet post :)
Do you know what kind of wood this is? Or what types of wood work best? I’d love to make one for my kitchen!
Leanne, The board is made of plywood. Perhaps 5/8″ thick. Home Depot will cut plywood to your exact size if you don’t have the means. Then all you have to do is finish it. Good luck!
Thanks Eileen, I honestly had no idea!
Awwww! Your grandma would of loved it! Thats so sweet! This is such a wonderful post!!
What a nice thing you have done to preserve you Grandmother’s dough board. I’m sure you feel her presence everytime you use it. I had a pie making Grandmom and she had a board just like this….I have no idea what happened to it. What a pity we didn’t do what you did. Happy Baking!!!
It seems like the correct time of year for this treasure to be reborn doesn’t it?
You resemble your lovely Grandmother.
Thanks for sharing this useful information. I know that using that board will keep you close to your Grandmother’s memory. I feel that way every Christmas. My great grandfather owned a bakery and I make his stollen every year. It’s part of my heritage and my mother and I are the last ones still making his recipes.
Hopefully, you will one day see your granddaughter cherishing her nan’s bread board! Lovely post.
Looking at the picture of you and your grandmother made my heart feel good. Hold on to all the wonderful memories. My mother passed away three years ago and I have her “noodle board”. After watching her all those years making homemade noodles, I’m the one who carries on our Christmas dinner tradition. My grandson requests the noodles before the holidays!
It looks so great now! So happy you could put an old treasure to use! :)
What a great job you did with that board. I think grandparents have a special place in our lives and hearts and you honoured her by taking care of one of her most valued possesions. That board will have more meaning to you in the future. Well done.
That is so sweet and so special!
It turned out gorgeous!! My Italian grandmother also has a bread board (made by my grandfather), and it’s be used to make hundreds of dozens of fig cookies and loaves of homemade sandwich bread. Such good memories in my grandma’s ktichen. :)
I love that you took such time and TLC with your Grandma’s board…so sweet and wonderful!
Thank you for the excellent story and show and tell. I have two large dough boards in excellent condition. I will order the products and have them handy to use. Both these boards were built into individual wooden sleeves installed as part of the cabinetry 56 years ago when the house was built. I use them for nothing but dough products.