Soft Cheese and Pepperoni Bread

I have been waiting to share this recipe with all of you for about 10 months now, and am excited to finally unveil it. I was lucky enough to serve as a recipe tester for Peter Reinhart’s new book, Artisan Breads Every Day, and this was by far my favorite recipe of all those that I tested and now that it’s out and in the book, I can share it with you! I have a huge soft spot in my heart for pepperoni bread, as my grandma used to churn out a dozen at a time and we would gobble them up almost as quickly as they came out of the oven. The only way I had ever seen them made was with frozen bread dough – a recipe that I shared in this post. It’s great because it’s quick and you can make large quantities in a short amount of time, but it certainly lacks that distinct homemade bread taste. Using Peter’s cheese bread recipe, I was able to really perfect (if I may say so myself!) pepperoni bread and have to keep myself from making it all the time or I would be in trouble!

I have made the recipe a couple of different ways – both dividing the dough into two as the recipe states and also dividing the dough into four (which is what I did this last time) so as to make four slimmer loaves instead of two large loaves. This is good to do if you want to have more to share! In both instances I made freestanding loaves, or batards. All that I do to transform the recipe below into pepperoni bread is to use shredded mozzarella (or a mozzarella and provolone blend) and add a layer of sliced pepperoni on top of the cheese before rolling it up. Some other variations that I have tried:
♦ Sprinkle dried oregano over the dough before spreading the cheese and pepperoni. Once baked, serve with a side of pizza sauce for dipping.
Save This Recipe
♦ Add sliced olives on top of the pepperoni.
♦ Use shredded mozzarella, layer on sauteed mushrooms, thinly sliced proscuitto, and basil. (I made this to mimic an awesome appetizer that my Chief Culinary Consultant and I had at Dish Osteria.)
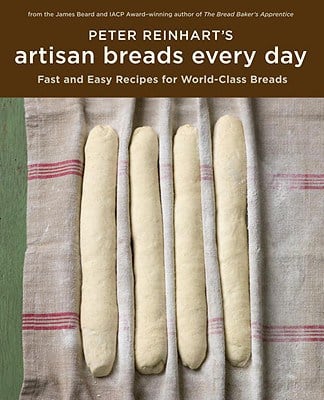
As many of you who visit my site regularly know, I am a huge Peter Reinhart fan. I have made many recipes from his book Bread Baker’s Apprentice and they all have become regular recipes of mine, especially the Cinnamon Raisin Bagels. It goes without saying that if you have any interest at all in making homemade bread Peter’s books deserve a spot on your cookbook shelf. Much like his previous book, his new one, Artisan Breads Every Day, is full of wonderful background information that will make bread baking much less stressful, especially if you are new to yeast breads. Included in this book are not only tons of traditional bread recipes, but also a number of pastry recipes and non-yeast recipes such as biscuits. A trend throughout the book is the way that recipes have been formulated with no poolish or pre-fermenting needed, so that you can enjoy freshly baked bread in a fraction of the time. Certainly a wonderful book that you’ll want to add to your collection.
(Click picture to go to the book’s Amazon page.)

Soft Cheese and Pepperoni Bread
Ingredients
- 6¼ cups (794 g) unbleached bread flour, (28 oz)
- 2 teaspoons salt, or 1 Tablespoon coarse kosher salt
- 5 Tablespoons (64 g) granulated or brown sugar, or 3½ Tablespoons honey or agave nectar, (2.25 oz)
- 1 cup (227 ml) lukewarm water or beer (about 95°F or 35°C), (8 oz)
- 1 cup (255 ml) plus 2 Tablespoons lukewarm buttermilk or any other milk (about 95°F or 35°C), (9 oz)
- 1½ Tablespoons (0.5 Tablespoons) instant yeast, (0.5 oz)
- ¼ cup (56.5 ml) melted unsalted butter or vegetable oil, (2 oz)
- 1¾ cups (198 g) diced onion (about 1 medium onion) or 1 small bunch of fresh chives (1 oz/28.5g), minced (optional), (7oz)
- 2½ cups (340 g) grated, shredded, or cubed cheese, (12 oz)
Instructions
- 1. In a mixing bowl, whisk the flour, salt, and sugar together (if using honey or agave nectar, dissolve it in the lukewarm water instead). Separately, combine the water and buttermilk, whisk in the yeast until dissolved, then pour the mixture and the melted butter into the dry ingredients. If using a mixer, use the paddle attachment and mix on the lowest speed for 2 minutes. If mixing by hand, use a large spoon and stir for about 2 minutes. Let the dough rest for 5 minutes.
- 2. Switch to the dough hook and mix on medium-low speed, or continue mixing by hand, for 3 minutes, adjusting with flour or liquid as needed. The dough should be soft, supple, and tacky but not sticky. Add the onions and mix on the lowest speed or continue mixing by hand for 1 minute, until the onions are evenly distributed.
- 3. Transfer the dough to a lightly floured work surface and knead for 1 or 2 minutes to make any final adjustments, then form the dough into a ball.
- 4. Place the dough in a clean, lightly oiled bowl, cover the bowl with plastic wrap, and immediately refrigerate overnight for for up to 4 days. (If you plan to make the dough in batches over different days, you can portion the dough and place it into two or more oiled bowls at this stage.) The dough should double in size in the refrigerator. If you want to bake the bread the same day you mix the dough, don't refrigerate the final dough; just let it rest at room temperature for 60 to 90 minutes, until it doubles in size. Then proceed to shaping and baking as described below.
- 5. Remove the dough from the refrigerator about 2 hours before you plan to bake. Transfer the dough to a lightly floured work surface and divide it into 2 equal pieces, each weighing about 2 pounds (907 g). Dust each piece with flour, then use a rolling pin to roll them into rectangles about 8 inches wide and 12 inches high. Spread half of the cheese over the surface of one rectangle and roll the dough up like a rug, from the bottom to the top, to form a log. If any cheese falls out, tuck it back in or save it for the second loaf. Seal the seam with your fingertips. For a sandwich loaf, proof in a greased 4½ by 8-inch loaf pan (or a 5 by 9-inch pan if using onions, which increase the volume of the dough). For a freestanding batard or rolls, proof on a sheet pan lined with parchment paper or a silicone mat. Another option is to cut the log into 1½-inch slices to make spiral rolls; place spiral rolls about 1 inch apart in greased round pans or on a parchment-lined sheet pan. Mist the shaped dough with spray oil and cover loosely with plastic wrap, then let the dough rise at room temperature for about 90 minutes, until increased to about 1½ times its original size. In loaf pans, the dough should dome about 1 inch about the rim.
- 6. About 15 minutes before baking, preheat the oven to 350°F (177°C), or 300°F (149°C) for a convection oven. Because of the cheese, there may be air pockets or tunnels in the risen dough that could cause it to separate in the spirals (cubed cheese creates fewer air pockets than grated or shredded cheese). To minimize this, poke through the top crust in a few spots with a skewer or toothpick. The dough may fall a bit, but it will recover in the oven.
- 7. Bake loaves for 20 minutes, then rotate the pans; rotate rolls after 10 minutes. The total baking time is about 50 minutes for loaves, and only 20 to 25 minutes for rolls. The bread is done when it's a deep golden brown and the internal temperature is about 185°F (85°C) in the center.
- 8. Remove from the pans and cool on a wire rack for at least 15 minutes for rolls and about 1 hour for loaves before slicing or serving.
Did you make this recipe?
Leave a review below, then snap a picture and tag @thebrowneyedbaker on Instagram so I can see it!


An interesting discussion is price comment. I believe that it’s best to write extra on this topic, it might not be a taboo subject however usually people are not sufficient to speak on such topics. To the next. Cheers
There are certainly plenty of details like that to take into consideration. That may be a nice level to bring up. I supply the thoughts above as common inspiration but clearly there are questions like the one you deliver up the place crucial factor can be working in honest good faith. I don?t know if greatest practices have emerged round things like that, however I’m positive that your job is clearly identified as a fair game. Each girls and boys really feel the impact of only a moment’s pleasure, for the rest of their lives.
I keep listening to the rumor talk about getting boundless online grant applications so I have been looking around for the best site to get one. Could you tell me please, where could i get some?
Good blog! I truly love how it is easy on my eyes and the data are well written. I’m wondering how I might be notified when a new post has been made. I’ve subscribed to your RSS feed which must do the trick! Have a nice day!
Wow! Thank you! I continually needed to write on my website something like that. Can I take a portion of your post to my site?
Hello. Great job. I did not anticipate this. This is a impressive story. Thanks!
Thanks for any other wonderful post. Where else may just anybody get that kind of info in such a perfect way of writing? I have a presentation subsequent week, and I’m at the search for such info.
I appreciate, cause I found exactly what I was looking for. You have ended my 4 day long hunt! God Bless you man. Have a nice day. Bye
My brother recommended I may like this website. He was once entirely right. This post truly made my day. You can not consider simply how so much time I had spent for this info! Thanks!
Very good written post. It will be useful to everyone who utilizes it, as well as me. Keep up the good work – for sure i will check out more posts.
I would like to thnkx for the efforts you have put in writing this web site. I am hoping the same high-grade web site post from you in the upcoming also. In fact your creative writing skills has encouraged me to get my own blog now. Really the blogging is spreading its wings fast. Your write up is a great example of it.
whoah this weblog is magnificent i really like studying your articles. Keep up the good paintings! You recognize, lots of persons are looking around for this info, you could help them greatly.
I’ve read some good stuff here. Certainly price bookmarking for revisiting. I wonder how a lot effort you put to make this kind of fantastic informative web site.
Wow! This can be one particular of the most beneficial blogs We’ve ever arrive across on this subject. Basically Excellent. I am also a specialist in this topic therefore I can understand your effort.
Hiya, I am really glad I’ve found this info. Today bloggers publish just about gossips and internet and this is actually irritating. A good web site with interesting content, that’s what I need. Thank you for keeping this site, I will be visiting it. Do you do newsletters? Can not find it.
After research a number of of the weblog posts in your website now, and I really like your means of blogging. I bookmarked it to my bookmark web site record and might be checking again soon. Pls take a look at my website online as nicely and let me know what you think.
Is it possible to use a bread maker on the “dough” setting to make the dough for this recipe?
Hi Michelle,
I have this book and I thought it was amazing until i tried to make bread, i followed the recipes, but it never came out right. after the fifth intent I was so frustrated that I search the web for new recipes, and some were ok, until I found your recipe for french bread I made it and the first try was absolutely amazing, I was so proud of myself thanks to you, of coarse. But my husband accidentally closed the computer tab with your webpage and of coarse i couldn’t remember the name, so let me just say I was really upset so he look very hard for your webpage again going with whatever key word i could remember and lucky me I found you again. I make bread every week twice a week sometimes, and I only use your recipe, so THANK YOU, You have a fan for life.
I pulled this bread out of the oven about an hour ago and it is perfect! I added pepperoni (about a half ounce), used whole milk, water, onions, brown sugar and 8 ounces mozzarella cheese. Just wanted to say, in case anyone else wants to try this recipe, that when I added the onions to the dough it made everything super soggy and I was a little worried I was going to have to throw the whole thing away. I dumped the dough out on the counter, added probably a half cup or so of flour, kneaded a few minutes by hand, and it started to look like “normal” bread dough again. It rose really well in the fridge overnight and I was really happy I didn’t throw the whole thing out! When you roll out the dough into rectangles, just make sure to lightly flour both sides of the dough (flip a few times) so it doesn’t stick to your counter when you try to roll it up. I didn’t have any cheese leaking out the side of my loaves (left about a centimeter or two of dough uncovered with cheese on both sides), and this bread tastes and smells awesome!
The picture made me want to try this and I am soooo glad I did. This bread was delicious. My husband ate an entire loaf by himself. I do not use instant yeast so I dissolved the yeast and sugar in the milk ( I used whole at 120 deg F) for about 10 min. I also made sure the water and butter were 120 deg F also. I sifted 4 cups flour with the salt, then added in the combined wet ingredients. After mixing a few minutes I added in about 1.5 more cups flour for a total of 5.5 instead of the 6.25. Added in 1 cup chopped green onion then let dough rest for 10 min. I then kneaded for about 5 minuntes, divided the dough in two, put half in a ziplock bag to rise overnight. The other half I let rise and followed the recipe from there. When forming the loaves I sprinkled italian seasoning on the rolled sheet before I put on the cheese and pepperoni. Next time I will only roll the dough out to about .5 in thick bc I had it about .25 in and the cheese busted out of the sides but still delish! I will definitely make this again. Thank you for this recipe. I am trying the cinnamon pull apart bread next. :-)
Hi! First I want to say I love you, and your recipes! You are an amazing person and you inspire me to create, and bake recipes better! This was delicious, and so easy to make too! I found this website the other day and I’ve already made over 10 of your recipes for my family of 7! I’m 16 years old and one day I hope to own my own bakery and be the head pastry chef in it! Thanks again for the awesome recipes! :)