My Favorite White Bread Recipe
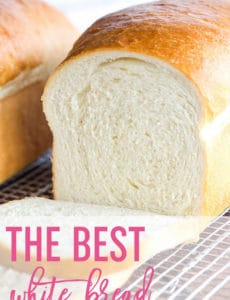
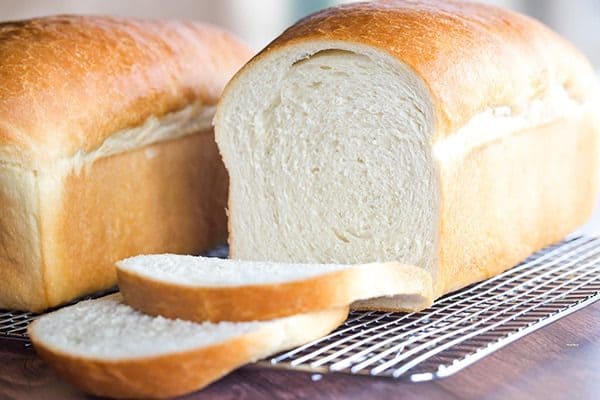
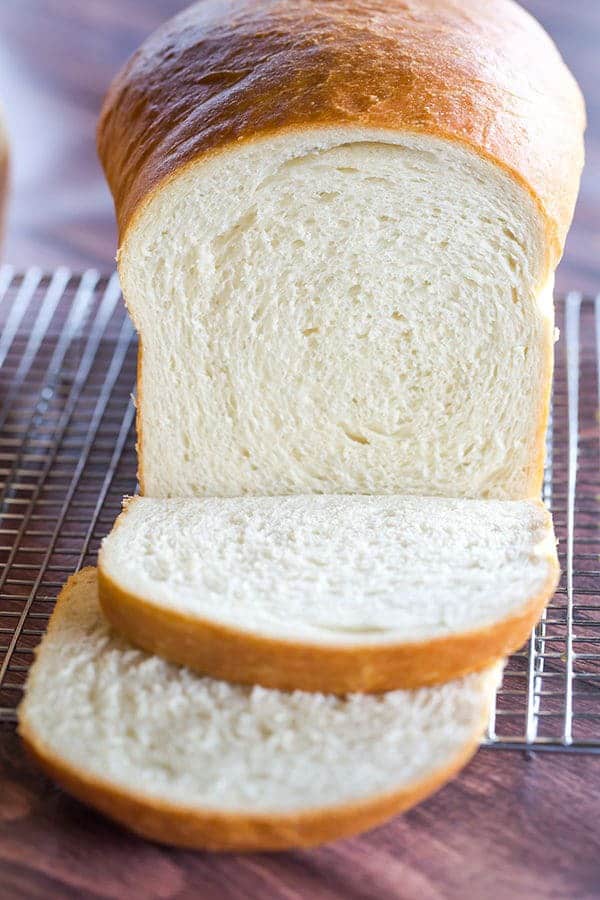
This is a classic white bread recipe, and so easy! The loaves bake up incredibly tall, soft and fluffy… the perfect white bread!
Are you a bread fanatic? Isn’t there something fantastic about a great piece of bread? Whether you’re making a peanut butter and jelly sandwich, grilled cheese, a big sandwich piled high with fixings, or simply slathering a piece with butter… I’ve always found it to be great comfort food.
While I’ve made quite a bit of homemade bread in the past, we’ve really cut back on carbs significantly, and have pretty much nixed sandwiches from our diet, so I haven’t been buying or making any for the last six months or so. However, Joseph would eat grilled cheese and some other things with bread (depending on the day – we’ve hit the picky toddler stage!), but once we found out about his allergies, anything store-bought was pretty much out of the question (why does bread need soybean oil?!). Luckily, he was cleared of his wheat allergy, but we’re avoiding soy, so homemade it was! I had a previous favorite white bread recipe, but had this recipe bookmarked for AGES, so I decided to finally try it. I’m so glad that I did because…
Best. Bread. Ever.
There are so many reasons you need to hurry up and make this bread immediately:
- It comes together incredibly quickly for a yeast recipe requiring two rises. In about 2 hours you’ll be smelling fresh bread wafting from your oven.
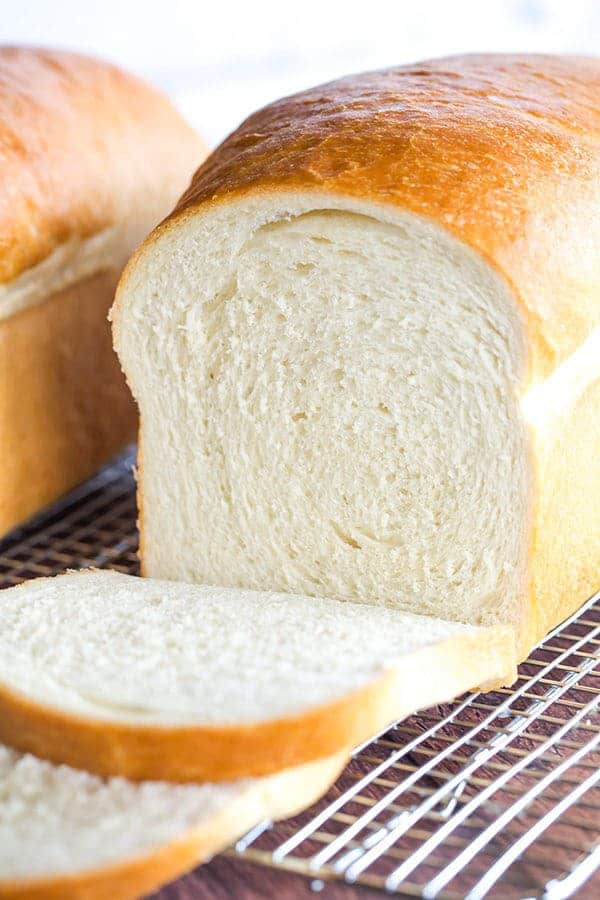
- These are the largest loaves of a simple white bread I’ve ever seen! I’ve made too many disappointing loaves of bread that have turned out short and squat, especially those made in a 9-inch pan (p.s. these are my very favorite loaf pans!). However, these are incredibly tall, full loaves – beauties!
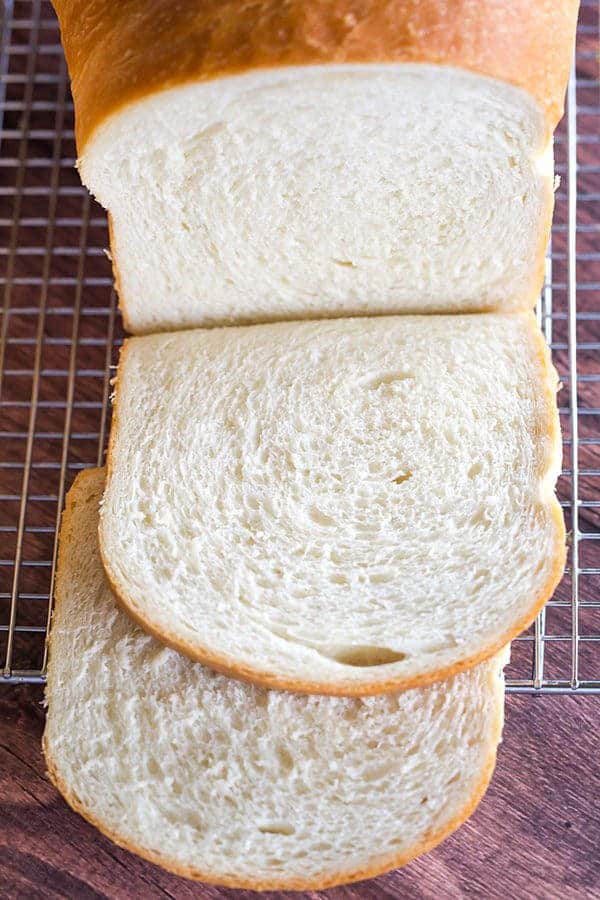
- I was surprised at how incredibly light, fluffy and soft this bread was given that there isn’t any milk in the recipe, just water (thanks butter!). It’s honestly the perfect texture.

I was honestly blown away when I made it, my husband was as equally thrilled, and much to my delight, Joseph was a huge fan too! This makes phenomenal peanut butter and jelly sandwiches, awesome grilled cheese, and I have eaten way more than I should just slathered with butter.
Save This Recipe
I should have known how good this would be since it came from someone’s grandma… those are always the BEST recipes!
I’ve made this three times now, and I love that it makes two loaves… I immediately slice and freeze one and leave the other one out for us to eat throughout the week.
The frozen slices reheat exceptionally well – just 20 seconds in the microwave is all they need.
You only need one great white bread recipe and this is it!
Grab that yeast and get baking!
Three years ago: Kentucky Derby Pie Cupcakes
Four years ago: Chile con Queso
Watch How to Make My Favorite White Bread Recipe!
My Favorite White Bread Recipe
Ingredients
- 4½ teaspoons instant yeast, two 0.25-ounce packets
- ¾ cup + 2⅔ cups warm water, divided
- ¼ cup (52 g) granulated sugar
- 1 tablespoon salt
- 3 tablespoons (43 g) unsalted butter, cubed, at room temperature
- 9 to 10 cups (1200 g) all-purpose flour
- 3 tablespoons (43 g) unsalted butter, melted, for brushing
Instructions
- In the bowl of a mixer, stir to dissolve the yeast in ¾ cup (180ml) of the warm water, and let sit for 5 minutes. Add the remaining 2⅔ cups (640ml) water, sugar, salt, room temperature butter, and 5 cups of the flour and stir to combine.
- Using a dough hook, mix on low speed and gradually add the remaining flour until the dough is soft and tacky, but not sticky (you may not need to use all of the flour). Continue to knead until a soft ball of dough forms and clears the sides of the bowl, about 7 to 10 minutes.
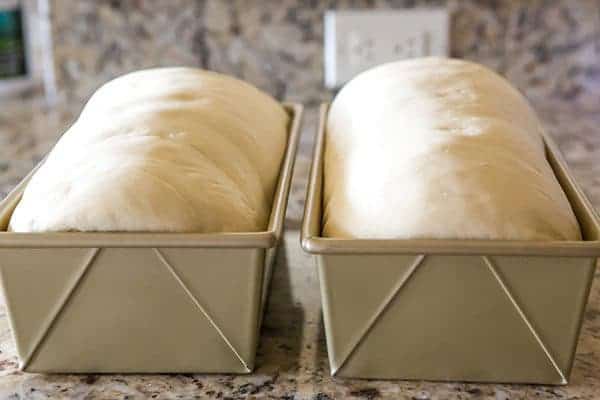
- Place the dough in a lightly greased bowl and turn it over so it is completely coated. Cover with plastic wrap and set in a draft-free place to rise until doubled in size, about 45 minutes to 1 hour.
- Turn the dough out onto a clean, lightly floured surface. Gently press it all over to remove any air pockets. Divide the dough in two and, working with one piece at a time, gently pat it into a 9x12-inch rectangle. Roll up the rectangle, starting on the short end, into a very tight cylinder. Pinch to seal the seams and the ends, tuck the ends of the roll until the bread, and place into greased 9-inch loaf pans. Cover the loaves loosely and place in a draft-free area until doubled in size, 30 to 45 minutes.
- Position an oven rack on the lowest setting and preheat the oven to 400 degrees F.
- Brush the loaves with some of the melted butter. Bake the loaves for 30 to 35 minutes, rotating halfway through, until golden brown (an instant-read thermometer inserted into the center should read 195 degrees F).
- Remove from the oven and immediately brush with more of the melted butter. Allow to cool for 10 minutes, then remove from the pans and cool completely before slicing. The bread can be stored in an airtight bread bag or wrapped tightly in plastic wrap at room temperature for up to 4 days. It can also be frozen for up to 1 month.
Notes
Did you make this recipe?
Leave a review below, then snap a picture and tag @thebrowneyedbaker on Instagram so I can see it!


I can only find Active dry yeast. how exactly do you activate it? I am a good baker, but yeast really scares me and I would like to overcome that fear.
Thank you
It’s easy to do. Take 1/2 cup boiling water pour in a bowl add 1 cup cold water to the boiled water. Check temp . It should be between 100 and 110 degrees . Put in 2 teaspoons of yeast stir to dissolve add 1 teaspoon of sugar stir to dissolve sugar. Set aside for 30 minutes to an hour. If liquid foams and bubbles form your yeast is good!
I usually stick a finger in my warm water to make sure it’s warm but not too hot. I added the yeast evenly over the water, stirred then added a tsp of sugar and had frothy yeast in less than 5 minutes! Ive never seen a recipe that says to wait more than 5- 10 minutes for your yeast to froth!
Hi Linda, The first step (letting the yeast sit in the warm water) should activate it. You can include a teaspoon of the sugar in there, which sometimes can help give the yeast a boost. Enjoy the bread!
What if you have your own starter yeast? How much of that would replace the dry yeast?
I am not sure, I’ve never used a starter for this recipe. If you have a rule of thumb you’ve used for other recipes, I would start there.
I have made this recipe three times and it is the best. I used one half of the dough for a loaf of bread and the other half for hamburger buns or sandwich rolls. Fabulous.
This is the first bread recipe that I didn’t screw up! My kids love it, thank you :)
Do you use the WS 1 lb. pan or the 1.5lb pan?
The 1.5 lb pans!
I am a beginner in baking bread bur every time I do it, it calms my senses. Baking is indeed therapeutic and my family loves it too. Thank You for a fail-proof recipe, looking forward to be a good baker soon!
My loafs came out super pretty but very very dense. They smelled wonderful but the dough is chewy and they feel zvery heavy! WHAT DID I DO!? I though i followed thr reipe to T. This is my firat attempt at bread so any thoughts will br appreciated!
Did you activate the yeast first?
I had so much fun making this bread! This is my third time ever baking bread of any kind, and I had some issues, but in the end, it all worked out! Next time I’ll halve the recipe, because my kitchen aid mixer wasn’t quite big enough. The dough kept trying to escape, and after several attempts at pushing it back down, I gave up. There was flour everywhere! So it wasn’t kneaded for more than 4 or 5 minutes, max. I put it in my super big glass bowl, and it got so big it nearly overflowed! When I shaped the loaves I thought they were too big for my pans, so I made three instead of two. I only had active dry yeast, but it seemed to rise fast anyway. I got a big bag of bread flour at the wholesale club, so I used that. In the end, it made beautiful loaves and tasted wonderful. Despite my blunders. Thanks for the recipe!
Took me a few tries, because I am always fiddling with recipes. I subbed out part of the water for evaporated milk, only because I have so much of it to use up. It was delicious (but prob totally unnecessary). Super important to butter the bread as directed, and keep it in the pan after pulling out of oven for about 10 minutes like directed. It ensures your bread will be soft. Not only is this great sandwich bread, it is really delicious toasted. It toasts up light and crunchy and is a total treat! Thank you for this wonderful simple and delicious recipe.
Came out great! Definitely going to be a weekly thing in our house. Have made it 2x now. A longer second proof made it fluffier, compared to the first time I made it. And I didn’t bother to dissolve the yeast first, and it still came out perfect. Just mixed everything minus the melted butter in a bowl, kneaded by hand, and left to rise.
In case anyone out there prefers weights to volumes, here it is converted:
[ Makes 2 Loaves]
7g yeast
177ml water + 631ml water (808g total)
50g sugar
18g salt
42g unsalted butter at room temperature
1080 – 1200g APF
42g unsalted butter melted for brushing
[ Halved for 1 Loaf ]
3.5g yeast
88g water + 315g water (404g total)
25g sugar
9g salt
21g butter at room temp
540-600g APF
21g unsalted butter for brushing
That isn’t the correct weight for the yeast. It should be 14g or .50 oz
Good catch! You’re correct.
Aaron , you legend!
Thank you so much… I don’t have US cup measures, and wanted to halve the recipe… it was a conversion nightmare… Thank you so much!
Thank you so much for these conversions! I was just about to start doing the maths myself but you’ve saved me all that hard work.
Has anyone tried subbing milk or almond milk for the water to make it even softer? This bakes up soft for me but over the course of a few days gets dry and crumbly (though still soft, its not as soft as store bread)
Also, has anyone baked it with a pan of water in the oven?
Neither my husband or I are bakers by any stretch of the imagination so if we could do this, so can anybody! We were like two school children marvelling at how the ball of dough formed in the mixer and were on pins and needles waiting for each rising. We followed the instructions until the part where you divided the dough into two equal amounts. We both prefer the look of 3-bun bread so that’s what we did….dividing the dough, of course, into 6 equal amounts before placing in the greased pans. It was an absolute success! Thank you for sharing.
Great recipe, actually makes three loaves!
I have made this three times and my dough is always sticky. I follow the recipe exactly. What am I doing wrong?
It’s still delicious and bakes beautifully but dough is hard to work with.
Hi Sam, If it’s super sticky, you should add a bit more flour to get the correct consistency. Glad you’re enjoying the bread!!
can this recipe be made in a bread maker on the dough cycle using half the ingredients ?
Hi Selma, I’ve never used a bread maker, so I’m not 100% certain, but I would think it SHOULD work?
This is a GREAT recipe. I have used it three times already and the result is always the same – perfect loaves. Thank you for sharing it!
I don’t have a mixer with a bread hook. I would need to knead the dough. Any pointers?? I am a complete novice. Also, why is unsalted butter called for? My ex used to make bread and almost always “forgot” to add salt and his bread was SO boring!
In baking you generally use unsalted butter so you can control how much salt is in the recipe- there is less consistency when using salted butter as you really don’t know how much salt is in that particular stuck of butter
If you’ve never kneaded by hand, I would check out YouTube for a few videos – it’s helpful to see it done, but you basically fold the dough over itself, quarter-turn, do it again… then repeat over and over until you have a nice, smooth consistency. I’ve made and kneaded this by hand many times, so it can definitely be done! And yes, unsalted butter so you can control the salt. You use unsalted butter but then add a significant amount of salt to the bread. Enjoy!
This is now my go to bread recipe! These make large puffy delicious bread. I have a 4.5 quart Kitchenaide the doesn’t generally fit this, so I hand knead the last minute or so. I may try to divide this into 3 loaves as some have mentioned. We like the large rise it gets, I just slice thin with a serrated knife for toast & sandwiches. Perfect flavor perfect density everything.
If one doesn’t have loaf pans, can you just form the loaves and bake on a Silpat on a baking sheet? I want to bake this for making mini hot browns for Derby tomorrow, but the loaf pans I ordered won’t be here til late tonight. Or is it okay to let the dough rise longer, maybe knead twice?
That would work! I know others have baked it free-form without an issue.
Do both loaves of bread have a total of 253000 calories? That seems like a bit much.
I tried on a rainy day and we will see how it came out, so far it hasn’t been working so well. I followed the recipe to a T and have had to add a TON more flour than originally asked for because it was so sticky and not even forming into a dough. With the original 9-10 cups of flour my mixer also was easily overwhelmed by the quantity and I had to keep stopping it because the dough would be “crawling” up the dough hook and out of the bowl on to the top of the mixture. After adding so much flour to make it into an actual bread dough I now have MUCH more than 2 loaves worth and am frustrated that I had to utilize so much flour . We will see how it will bake up but not so happy with this recipe so far.
Maybe baking is not cut out for you…
Wow, Jay. What a completely rude and unhelpful response. I’ve been a successful baker for almost forty years and, just like Julie, I had to add a significant amount of flour to this recipe. Luckily, I had halved the recipe to make a single loaf. If I hadn’t, I can easily imagine having the same mess on my hands that Julie described!
My husband and I LOVE this recipe! This was my first time baking bread from scratch, without a box or bread machine. I immediately halved it and replaced most of the water for buttermilk (except for what bloomed the yeast).
A few other suggested alterations:
1. I used Active Dry yeast for this, because I didn’t have Instant yeast, which took a bit longer to “wake-up” without adding sugar.
2. I would suggest adding 1 tsp sugar to the yeast and water mixture at the start, as this encouraged much better yeast development when I made this recipe a second time.
3. I added an extra ½ tsp of salt, which boosted the flavor a bit more.
4. I lightly coated the dough and the bowl for the first rise, with a small amount of olive oil and then covered it tightly with plastic wrap and put in the closed oven for 1.5 hrs. This helped prevent the dough from developing a “skin”.
5. For the second rise, I coated the loaf pan with butter flavored Crisco, before pressing and rolling up the dough. I also covered this with plastic wrap after coating the dough with the melted butter
6. Additionally, I had to reduce my baking time by more than 5 minutes; I think my air-circulating oven baked the bread much faster than the time suggested.
Side Notes:
• I used a 12″/30cm loaf pan and was able to get about 28 slices using a manual bread slicing wheel (my old house has one built into a counter drawer – It’s pretty awesome for this purposes). This amount of bread was great fresh for the first 4-5 days and after, was great for making morning toast. This loaf lasted my husband & I about 7 days when stored in a bread bag (I re-used the bag from our last store bought loaf of bread).
• Halving the recipe was still a lot, so my next attempt will be to make ¼ of the original recipe and use a medium size loaf pan.
• Since I’m having some challenges getting all-purpose flour, I will try my next batch with semolina flour, as I have a lot of that available.
Overall, this is a great recipe, especially for a first time bread baker and gave me enough encouragement to try making more complex breads for Philadelphia-style treats, as I’m currently living as an ex-pat.
Thank you for sharing this recipe!
I made this with bread flour and it came out great. How big is a serving size? I can’t figure out the nutritional info.
Hi Jess, About a ½-inch slice of bread.
Have made bread before, but not a plain white bread. Tried your recipe for the first time a couple days ago and both loaves turned out wonderfully! Thank you so much for sharing this with all of us. I definitely plan to make it again; I’m also going to try it with some minced garlic and fresh rosemary thrown in and see how that works. #CARBSFOREVER
Hi
Would you please send me the recipe for My Favourite White Bread Recipe…looks so easy I would like to make it but want to make sure the measurements are correct for 1 loaf.
These are the measurements I used and it worked great in a 12″ loaf pan:
* 2 ¼ tsp Active Dry or Instant yeast (one – 7g packet)
* ⅓ c. (for yeast) Warm Water (110*f or 40*c)
* 1 c. + 2 Tbsp + 2 tsp Warm Water or Warm Buttermilk (110*f or 40*c)
* 1 tsp + 2 Tbsp Granulated Sugar (divided – 1 tsp for blooming yeast)
* 2 ½ tsp Salt
* 4 Tbsp (2 oz) Unsalted Butter, cubed, at room temperature
* 4 ½ c. + ¼ c. (for flouring surface) All-Purpose Flour #550
* 3 Tbsp (1.5 oz) Unsalted Butter (melted, for brushing)
I substituted Buttermilk in place of second amount of 1 c. + 2 Tbsp + 2 tsp Warm Water; 1 to 1.
Hope these measurements work out for you as well as they did for me. :)
Thanks for posting the measurement for 1 loaf! I used this but i think the butter is the full amount intended for 2loaves? Hope my loaf still comes out ok
This is the BEST recipe..and easiest I have found. After we finished off the 1st loaf (sent the 2nd loaf home with our daughter) my husband asked me to make another loaf.. this hasn’t happened before! The 2nd time I started out by added 3 cups of whole wheat flour. After that I added all purpose a cup at a time. That time I only used 7 to 7.5 cups of total flour. Don’t know if it was the wheat flour or the weather that made a difference. The bread was DELICIOUS!!!! I don’t think I will be buying store bought bread ever again!!!
Dude, this is the second of your bread recipes that I’ve made in a week (cause everyone is baking in quarantine) and it’s amazing! I’ll be using all your others from now on. No ones recipes seem to come together or have such clever instructions as you do so thank you!
You’re welcome, so glad you’re enjoying the bread! Happy Baking!
Hi! I’m going to try this recipe tomorrow, do you know how much active dry yeast I should use for this recipe? And I would just proof it in a 3/4 cup of warm water?
Hi Kelly, Yes, same amount and same process, the rising will just take a bit longer. Enjoy!
Awesome recipe! Making it again now for the second day in a row!
Thank you!
Can anyone help me please? I’m a total novice bread maker but this recipe looks the best I’ve found. However, I’ve only been able to get hold of fresh yeast. How would I change this up to work in the recipe? Many thanks.
Julie I had the same experience as you. Don’t listen to anyone who tells you that baking isn’t for you… like any skill, it takes practice, trial and error before finding success. And in this case, learning from each other’s experience. For me, it didn’t sit well that the amount of flour needed wasn’t exact. So when my VERY sticky dough ball started crawling up the dough hook and loose flour still sitting at the bottom of the bowl, and even more still left to pour in, I decided to just remove the bowl from the mixer, added in a bit more flour to the dough (totaling like 8 C.) and kneaded it with my hands in the bowl until all the flour was sticking to the dough ball. Then I continued to knead by hand on the lightly floured countertop surface until it was nice and tacky but not sticky. Mine dough is in it’s first rise so we’ll see how it turns out. I hope you have great luck! And don’t give up!
This was exactly my experience and I ended up kneading the bread on the counter top instead. Probably only needed to use about 7.5 cups of the flour. I used half of the dough in a 9 inch tin and made the rest into rolls. It all turned out great!
It was my experience, too, and I thought it was just me. Following the recipe to the letter got me 2 loaves from an 8-inch loaf pan and an additional loaf for a 9 inch loaf pan (all I have on hand). I’ve used less flour since, but more when it’s rainy (and less water).
I made this bread today…..amazing. I have always wanted to try to make bread. It made 2 beautiful loaves that are currently being devoured by everyone in the house. Easy recipe. Dont think i will be buying bread anymore. This is by far better than store bought
How does the yeast/water situation work if you are halving the recipe? Do you half both amounts of water? Also, how would using bread flour affect the outcome? I have both but would rather save my all-purpose flour for other things. Thanks!
Hi Morgan, Yes, you should halve everything. Bread flour will give you a bit of a “chewier” texture; many have used it and loved it!
Marvelous, this time I added bread conditioner, which made the dough easier to knead n drier. I also added sunflower seeds N poppy seeds. N the final result is spectacular 😋😋
What is a bread conditioner?
Bread conditioner or bread improver improves the kneading n fermentation of dough n provides excellent volume, texture, n color while also extending freshness. Text from the box. Think u can get it from bakery supplies shops.