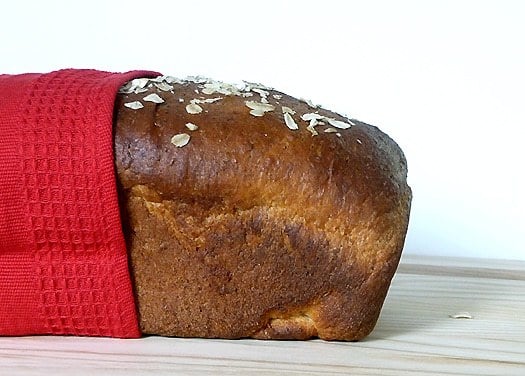
Honey-Oatmeal Sandwich Bread
Honey-wheat bread was the second loaf of bread that I ever baked from scratch, behind my beloved white bread. As a result, it naturally holds a special place in my heart. What I was hungry for this week was some type of oat bread, so I went off flipping through my cookbooks, magazines and websites to see what I could find that would inspire me. When I flipped open King Arthur Flour Whole Grain Baking and saw a recipe for honey-oatmeal bread I knew I would be in love. And I am.
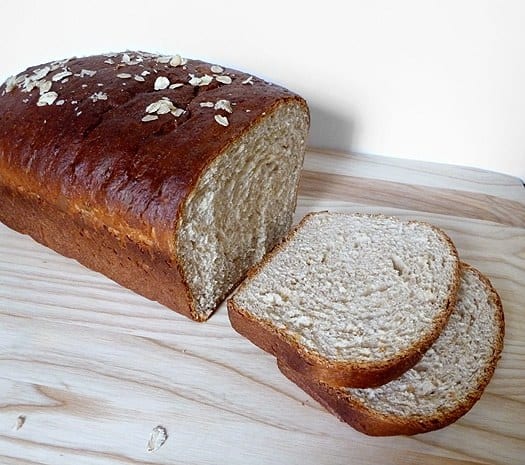
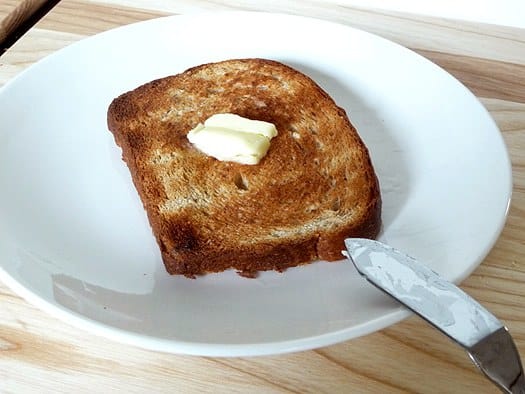
The addition of oats adds a sweet, nutty flavor that really enhances the taste of an already magnificent honey wheat bread. This is a typical sandwich loaf, so the crust is on the soft side, but the bread is firm and has a tight crumb that makes it sturdy and perfect to build the biggest of sandwiches on. It’s also fabulous toasted with butter and jam, or a drizzle of honey!
This is a really simple yeast bread recipe, and would be a great one to try if you are new to yeast or tend to be intimidated by it. Since it uses instant yeast there is no “blooming” of the yeast that you need to worry about and the dough itself is very workable – I actually chose to knead it by hand instead of in my Kitchen Aid and it came together very easily. You may need to sprinkle a few extra teaspoons of flour if it’s a little sticky, and you will be good to go!
For those that are new to bread-baking, sometimes shaping the dough can provide one of the biggest challenges. I have included some photos below within the recipe to illustrate the best way to shape a loaf of bread that will be baked in a loaf pan. The explanation is as follows:
To shape a loaf of bread:
Save This Recipe
♦ Gently pat the dough into a rectangle about 5 inches by 8 inches.
♦ Starting at the short side, begin to roll the dough into a tight cylinder, one section at a time, pinching the crease with each roll using your thumb or the back of your hand.
♦ Once at the end, pinch it closed tightly and pinch the ends as well.
♦ Rock the cylinder back and forth to ensure that it is even all the way across (the ends should not be tapered).
Enjoy the bread! :)
Three years ago: Chicken Salad
Honey-Oatmeal Sandwich Bread
Ingredients
- 1¼ cups (312.5 ml) boiling water, (10 ounces )
- 1 cup (81 g) old-fashioned rolled oats, (3½ ounces )
- 2 tablespoons unsalted butter, cut into 3 pieces, (1 ounce )
- 1½ teaspoons (1.5 teaspoons) salt
- ¼ cup (84.75 ml) honey, (3 ounces )
- 1 cup (120 g) whole wheat flour, (4 ounces )
- 1 ⅔ cups (208.33 g) all-purpose flour, (7 ounces)
- ¼ cup (61.25 g) nonfat dry milk, (1 ounce )
- 2 teaspoons instant yeast
Instructions
- 1. Place the boiling water, oats, butter, salt and honey into a medium bowl, stir, and let the mixture cool to lukewarm.
- 2. Mix the remaining dough ingredients with the oat mixture, and knead – by hand, mixer or bread machine – until you’ve made a soft, smooth dough. Place the dough in a lightly greased bowl, cover it, and let it rise for 1 hour; the dough should be doubled in bulk.
- 3. Lightly grease a 9×5-inch loaf pan. Gently deflate the dough – it’ll be sticky, so oil your hands – and shape it into a 9-inch log. Place it in the prepared pan. Cover it gently with lightly greased plastic wrap, and allow it to rise until it has crowned 1½ inches over the rim of the pan, about 1 to 1½ hours. Near the end of the bread’s rising time, preheat the oven to 350 degrees F.
- 4. Uncover and bake the bread for about 45 minutes, tenting it with foil after 20 minutes to prevent over-browning. The bread is done when it’s golden brown and an instant-read thermometer inserted in the center registers 190 degrees F. Remove it from the oven, and after a minute or so turn it out onto a rack. Brush with melted butter and sprinkle with additional oats. Cool the bread completely before cutting it.
Did you make this recipe?
Leave a review below, then snap a picture and tag @thebrowneyedbaker on Instagram so I can see it!


I have made this recipe many times and everyone loves it
Hi! Is there a way to make this without salt (would I need to adjust any other ingredients)? Thx!
Michelle, I truly thank you for your yummy recipes. So easy to follow, so easy to eat. Magda