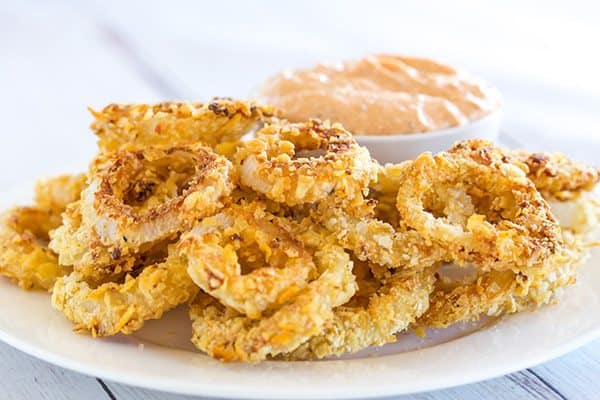
Oven-Fried Onion Rings
These oven-fried onion rings are less mess than the deep-fried version, but just as crunchy and delicious!
Yesterday, I teased you with a recipe for a copycat version of the dipping sauce that is served alongside the bloomin’ onions at Outback Steakhouse… today I’m back with a killer recipe for oven-fried onion rings. All of the fabulous flavor and crunch but without the hassle of deep frying!
These onion rings are absolutely delicious – crunchy and full of authentic fried flavor without needing to actually boil a vat of oil and smell up the house. I baked them up for an appetizer a couple of Sundays ago and everyone absolutely raved about them – they couldn’t believe how crunchy they were, and all agreed that the accompanying dipping sauce definitely put them over the top.
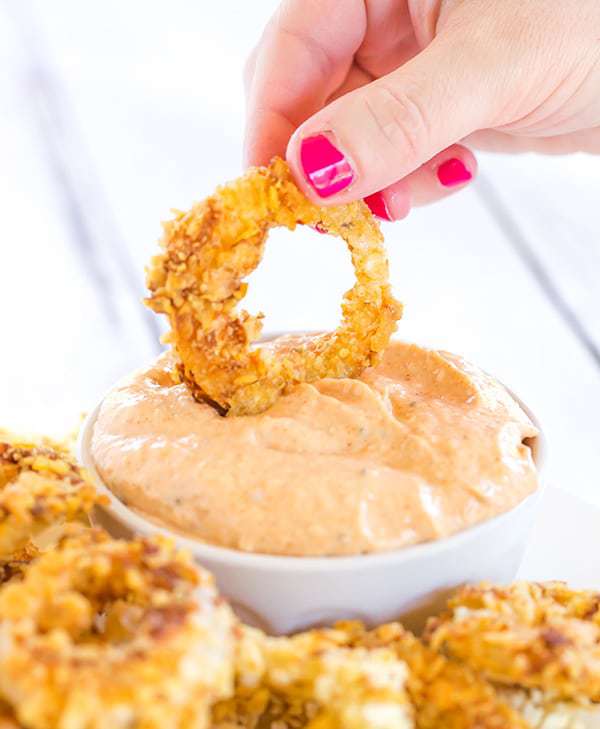
The secret to these amazing onion rings? The breading is made from crushed saltines and kettle-cooked potato chips! The saltines help to absorb extra grease from the potato chips, which keeps them from becoming too oily while still retaining a great “fried” consistency and flavor. Genius!
Save This Recipe
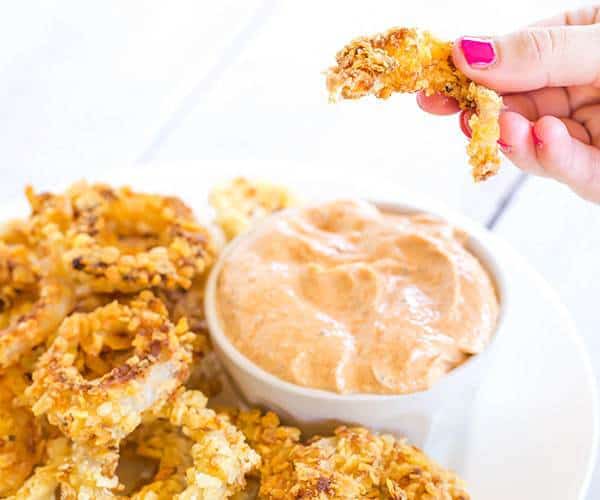
I also love that the seasonings (cayenne, salt and pepper) are added to the buttermilk mixture instead of the initial flour dusting. I think this helps give the onion rings great flavor, as the buttermilk batter adheres in a much more pronounced way than the initial dusting of flour does.
If I haven’t convinced you that these are amazing, I have a killer recipe for beer-battered onion rings that’s amazing, but I think you’ll be pleasantly surprised by how great this recipe is. More than one person said that these were the best onion rings they’d ever had!
One year ago: Banana Cream Pie
Four years ago: Cookies and Cream Ice Cream Cake
Five years ago: Strawberry-Rhubarb Pie
Six years ago: Black Forest Cake
Oven-Fried Onion Rings
Ingredients
- ½ cup (62.5 g) all-purpose flour, divided
- 1 egg, at room temperature
- ½ cup (120 ml) buttermilk, at room temperature
- ½ teaspoon (0.5 teaspoon) salt
- ¼ teaspoon (0.25 teaspoon) ground black pepper
- ¼ teaspoon (0.25 teaspoon) cayenne pepper
- 30 saltine crackers
- 4 cups (340 g) kettle-cooked potato chips
- 2 large yellow onions, cut into ½-inch rings, discarding any less than 2 inches in diameter
- 6 tablespoons vegetable oil
Instructions
- Adjust oven racks to lower-middle and upper-middle positions and heat oven to 450 degrees F. Place ¼ cup of the flour in a shallow baking dish. Whisk the egg and buttermilk together in a bowl. Whisk the remaining ¼ cup flour, salt, pepper and cayenne into the buttermilk mixture. Pulse the saltines and potato chips together in a food processor until finely ground; about 8 to 10 pulses. Place the crumb mixture in a second shallow baking dish.
- Working one at a time, dredge each onion ring in flour, shaking off excess. Dip rings in buttermilk mixture, allowing excess to drip back into bowl, then drop into crumb coating, turning rings to coat evenly. Transfer coated onion rings to a large plate or tray.
- Pour 3 tablespoons oil onto each of two rimmed baking sheets. Place the baking sheets in oven and heat until just smoking, about 8 minutes. Carefully tilt the heated sheets to coat evenly with oil, then arrange onion rings on the sheets. Bake, flipping onion rings and switching and rotating position of baking sheets halfway through baking, until golden brown on both sides, about 15 minutes. Briefly drain onion rings on paper towel-lined plate. Serve immediately.
Notes
Did you make this recipe?
Leave a review below, then snap a picture and tag @thebrowneyedbaker on Instagram so I can see it!
This recipe was originally published on June 16, 2010.


I love onion rings, and what a great way to make them! Can I get the same result using pans lined with parchment paper, or does the oil in the pan add to the recipe?
Thanks!
Hi Donna, The oil in the pan definitely helps them crisp up and I don’t think you’d get the same result with parchment paper.
Wowsers!!! I made these yesterday, mostly out of curiosity, and they were mind-blowingly, out-of-this-world fabulous! I soaked the rings for several hours in the buttermilk, only because I had sliced them and then had a drop-everything chance to hit the beach. So I quickly poured enough buttermilk over them to cover in a casserole dish, covered it and set in the fridge. Then I later used some of that same buttermilk to make the dunking batter. Not sure if it changed anything, but they turned out so sweet and delicate in flavor, you’d swear I had used Vidalias (I used huge Spanish onions.) That might be something people who work could consider. Slice up in the morning, pour over buttermilk, cover and refrigerate, then go to work. Finish up coating and baking before dinner. The most extraordinary part, however, was hands-down the coating. I could honestly not have been able to tell the difference between these and traditionally deep fried rings. And in a mere 3 Tb oil. Unreal. The contrast between the shatteringly crunchy exterior and the sweet, tender onion was nothing short of addicting. And the crunch stayed that way, even a few hours later (couldn’t finish everything immediately.) I swear, the coating never gets soggy. Try doing THAT with deep fried rings! The only downside is the long prep time, making all the various components, and the resultant mess. But for an occasional treat, this blows most every other snack clean out of the water!
These sound tasty. No deep fried mess.
I am a HUGE fan of onion rings. They are on of my favourite treats, for sure. These look delicious :) !
Love that these onion rings are not deep fried. I’ve never been a fan of deep frying at home, so this is definitely a recipe that I would try. How do you think Vidalia onions would work, even though the recipe calls for yellow onions? Or even the large sweet Spanish onions once the Vidalias have gone out of season?
Hi Michelle, I think Vidalia or Spanish onions would work as well!
Those look even tastier than the restaurant kind because they look crunchy!
Kari
Where is the recipes for the sauce?
https://www.browneyedbaker.com/bloomin-onion-dipping-sauce/
Onion rings are one of my favorite foods, but they are such a calorie splurge! Love this no-doubt more waist-friendly version, and the breading looks amazing!
Thank you for your recipes. I happened upon your site while searching for a recipe for a great cupcake and found Mocha Cupcakes with Expresso cream frosting. Wow! The best! Since then, I have found your site to be a place I count on. You have fabulous photo’s and you present the directions in such a concise and helpful way and the recipes always come out terrific for me. It is also refreshing and impressive that you take the time to respond to some of your readers. Bravo! Quite admirable work! I am one of those people who RARELY chooses to place a comment so it’s high praise from me (even though I am only a lowly “at home cook & baker” for 35 years.) You should be very proud of your efforts. By the way I just bought my first food processor and am excited this year to use it. I will be surfing your recipes for ideas. Thanks again so much. I appreciate your site.
Hi Cindy, Thank you so much for the kind words and for taking the time to share your feedback. I’m thrilled to hear that you’re loving the site!
What type of food processor do you have or would you recommend. I’d like to get one, but there are so many variations and types out there!
Hi Rebekah, I have an 11-cup Cuisinart food processor. I have also heard a lot of great things about the KitchenAid 12-cup (Cook’s Illustrated recommended) and the Breville Sous Chef 16-cup (Consumer Reports recommended).
I’ve made these last night for dinner. They were great! But a couple of comments: dipping the rings one at a time took forever, so I put the flour and onion rings in a ziploc bag and shook them. They were probably better coated than the ones I did individually. I also put the buttermilk mixture in a bowl with a lid – and dipped where needed to fully coat them. Also after coating a number of rings, the chips get soggy and don’t stick as well, so save some of the coating for a second batch. Lastly, for my 2 large (really large onions!), I needed to double the buttermilk mix and the chip/cracker.