How to Make a Rainbow Cake
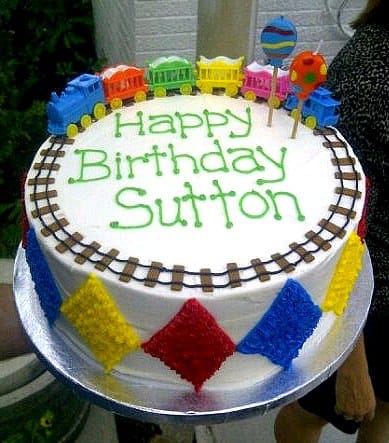
This past weekend I made a 2nd birthday cake for the nephew of one of my best friends. The decorations they wanted were fairly simple – a lot of bright, primary colors (much like what was used on the clown smash cake), with a train track running around the outside of the cake. The train set on the cake was used on birthday cakes when the little boy’s mom and aunt were little, and they wanted to continue the tradition. The track ended up being the perfect size to set the train on! But the real magic of this cake was on the inside… a rainbow cake!
I have made a few children’s cakes like this before, and have been asked how it’s done, so I thought it was high time that I put together a tutorial for you. It’s such a fun, whimsical way to brighten up a child’s birthday cake, and is incredibly easy to do. Below are the step-by-step instructions with photos. Have fun!
First up, you’ll want to have your favorite white cake recipe handy. My personal favorite is the Perfect Party Cake, but any of your favorite recipes will work, and you could always use a box mix too, if you prefer.
A quick note on cake recipes… I always use this Cake Batter Chart from Wilton when baking cakes that I’m going to decorate. They call for more batter than you would typically use, but the cakes bake up nice and tall and, once leveled, create wonderfully high layers. Not only is more cake better for everyone, but you have more space on the sides for decorating! To give you some perspective, a typical recipe for a 2-layer 9″ cake yields anywhere from 4 to 5 cups of batter.
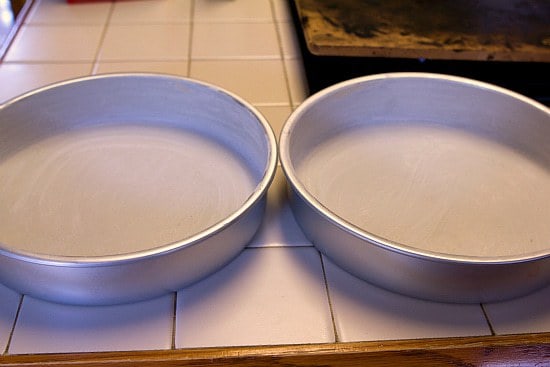
Now, grease and flour those cake pans!
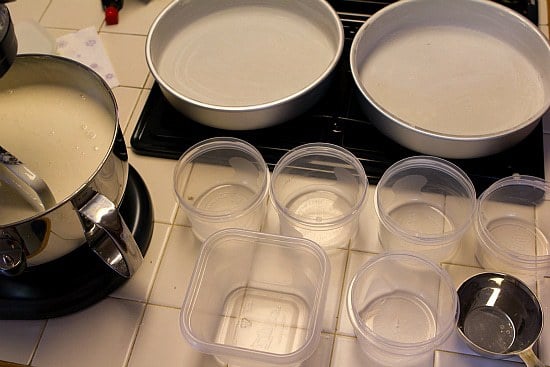
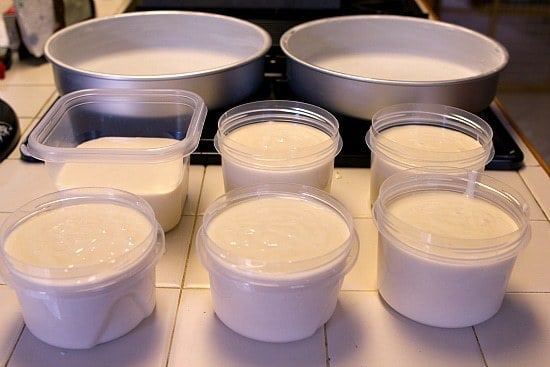
Next, mix up the batter for your cake and get 6 bowls (or your fanciest plasticware) ready…
You want to evenly divide your cake batter between the 6 bowls/containers. The best way to do this is to measure the batter into a large (4-cup) measuring cup (might have to do this two or three times) or to weigh the batter, and then do a quick “divided by 6” to get the amount you should be scooping into each container. This is probably the hardest part of the whole process ;-)
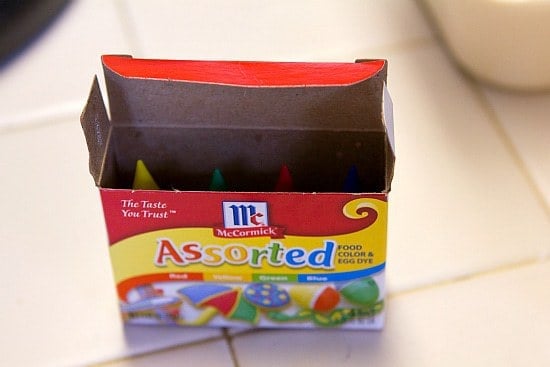
Now, round up your food coloring – liquid or gels. A lot of people have said they have great success with the AmeriColor gels, but I still had some liquid food coloring from other recipes to use up, so I went that route.
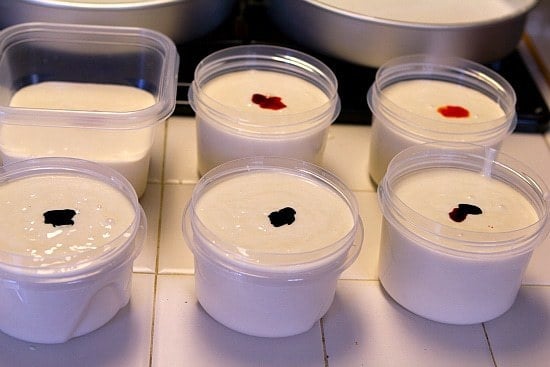
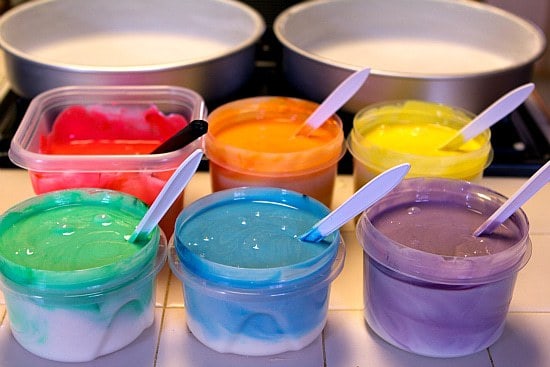
Time to color away! You’ll want to make the fun rainbow colors, naturally: red, orange, yellow, green, blue and purple. If you’re using the little 4-color kit like me, just combine red + yellow for orange, yellow + blue for green, and red + blue for purple.
Use as much as needed to get the color hue you’re going for. (Alternately, you could really do this for any color combinations you’d like. You can keep half plain white and the other half brown to do a zebra. Reader Julie on Facebook mentioned she saw a cake like this with varying shades of pink, and you could definitely do that as well.)
Now, we’re ready to load up the cake pans. You have two options here:
Option #1: You can make one cake layer red, orange and yellow, and make the second layer green, blue and purple. I chose to do the cake this way so that the individual colors really popped and you could see all of them really well.
Option #2: You can do all six colors in each layer. To do it this way, divide each color in half between the pans. So, half of the red would go in one pan, and the other half in the other pan, and then proceed the same way.
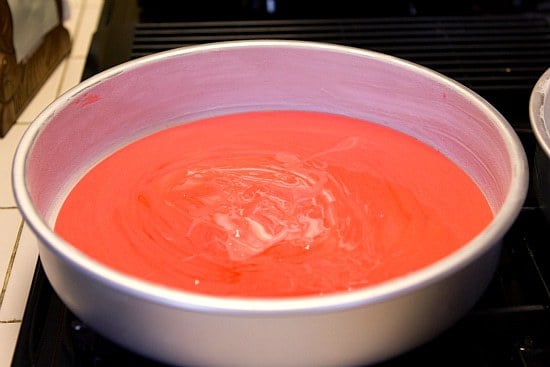
As I mentioned, I used Option #1, so that’s what you’ll see illustrated here. First, pour the red batter into the bottom of the cake pan.
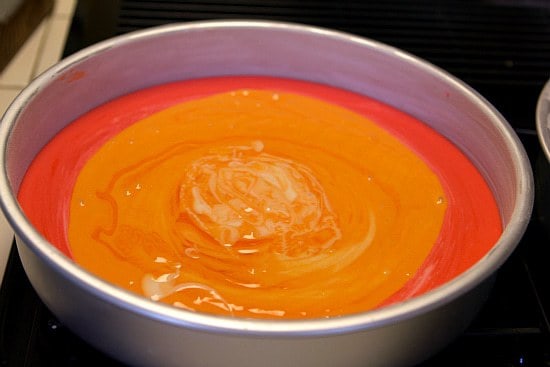
Next, add the orange batter on top of the red. Slowly pour the batter into the middle of the pan. As you do so, the red layer below it will spread out.
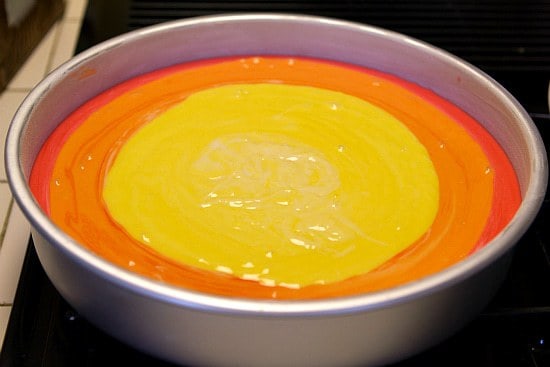
Finally, pour the yellow batter in the same way you poured the orange.
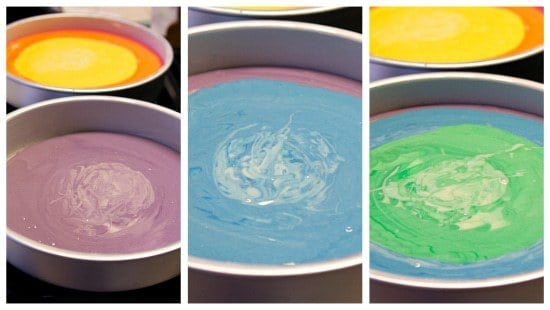
Repeat the process in the other cake pan, starting with the purple, and then adding the blue and green.
Bake those babies up!
Once the cakes have completely cooled, I like to wrap them in plastic wrap and refrigerate them for at least an hour. I find that it’s much easier to level cold cakes then room temperature ones. They are firmer and don’t crumble, making for a cleaner cut.
I use this Wilton Cake Leveler to level my cakes. It’s super cheap (less than $5 – you can find them at a place like Michael’s), and makes it incredibly easy to make sure the cakes are sliced evenly and cleanly.
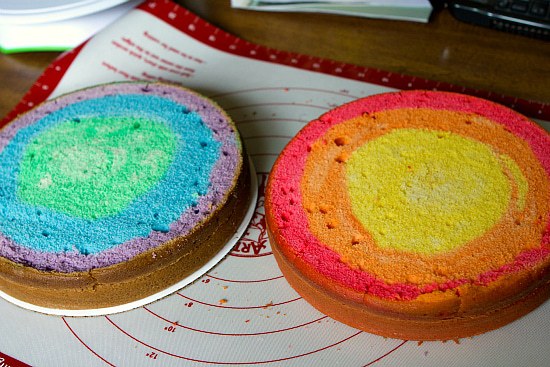
Here’s what the tops of the cakes looked like after they were leveled… so colorful!
At this point, I went ahead and filled the cake and then decorated it.
I received a couple of questions on how to make the train tracks on top of the cake, so I’ve included that short description below as well.
How to Make Train Tracks
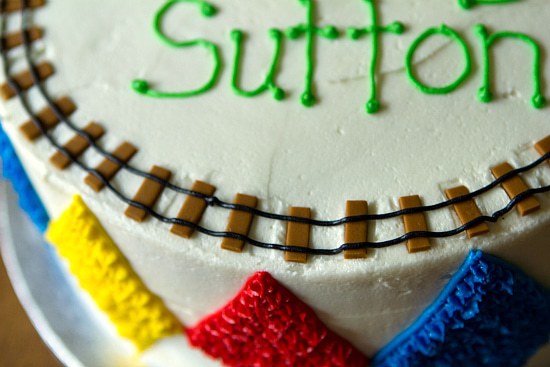
My friend told me that the tracks needed to be ¾-inch wide in order to accommodate the plastic trains that they wanted to decorate the cake with. I used brown fondant rolled out to about 1/16-inch thickness, and then cut a long strip ¾-inch wide. From there, I cut across the strip in ¼-inch increments until I had as many “tracks” as I needed.
Once I was ready, I spaced them evenly around the cake. To make the rails, I used a #2 decorating tip with black icing.
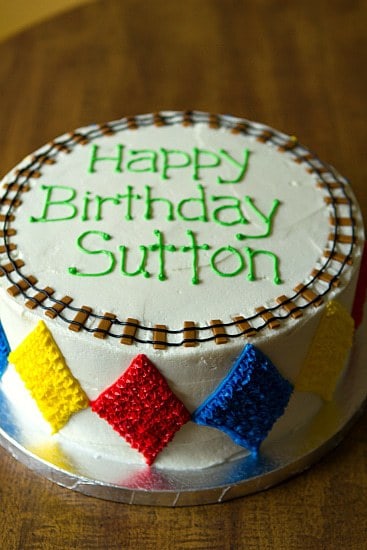
And here was the finished cake, before it went out for delivery and got adorned with the adorable train set that you saw in the first picture.
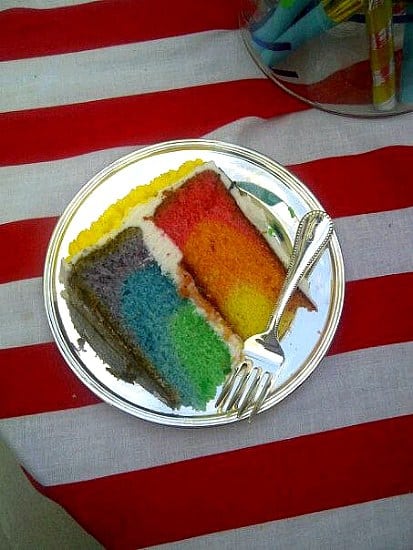
(Thank you to my friend Renee for snapping those pictures for me so I would have photos of the cake with the train on it, and the inside of the cake once it was cut!)
I hope you enjoyed the tutorial!




Hi Michelle! Long time reader, shy poster :). I made your rainbow cake this weekend and it turned out so cute! Fun to make too. I used gel food coloring – the colors turned out really vibrant. Thanks for the inspiration! Hope you’re feeling well. I love reading about little brown eyed baker baby!
Hi Stacy, I’m so glad you enjoyed your rainbow cake!! I have been feeling really well, thank you! :)
It’s very nice
really i love it so beautifuul
Love it ! Check out another simple recipe of a Rainbow Cake Roll at http://www.facebook.com/osugarbakes
Is there any specific brand of cake mix that you recommend using?
Hi Courtney, No brand in particular. Whatever you’d like!
Hi need your advise.. I have a rectangle cake pan 15x10x2 – need to bake a cake for my sons birthday – how much boxes of cake mix do you think i woudl need. OR if i followed your pefect cake recipe how much would i need to increase it by to get a perfect cake! thanks Sharon.
Hi Sharon, I am not sure how much of the perfect party cake batter you would need, as I have never measured that batter out. For the amount of cake mix you would need, I would check that link above to the wilton chart. I think that a box usually yields 4-5 cups of batter.
I love the look of Rainbow cake. Great step by step on making this rainbow cake.
hey, great tutorial, thanks!
I have a different question, about the frosting. every time I make a cake and try to frost it, I mess it up and the plate the cake stands on get dirty and its never clean as in this picture. so how do you do it? first you put the cake on a plate i guess (here with tin foil), then use a spatula to cover it up? cause if I do it that way the plate gets dirty and when I clean it I damage the frosting, and if I do it on a different plate and move the cake, I have to touch it and then the frosting gets messy again. so I am lost…thanks !
Hi Carmel, Try placing four strips of wax paper on the plate, around the edges, before putting your cake down. When you’re done icing, simply slide the wax paper out from under the cake. The plate will be perfectly clean. Here is an easy illustration of how to do it: http://www.recipetips.com/kitchen-tips/t–1643/cake-frosting-basics.asp
Thanks a lot. Ill give it a try.
Trying this out as we speak! I’m doing it with a hoe recipe though, so it may not come out as vibrant or fluffy, but hopefully the results will be similarly beautiful and delicious. : ) News on it later!
COOOOOOOOOOOOOOOOOOOOOOOOOOOOOOOOOOOOOOOOOOOOOOOOL!!!!!!!!!!!!!!
Hi Michelle. I just found your blog, and i love it! The rainbow cake looks stunning. Im definitely going to try baking it for my niece’s birthday next week. Wish me luck :)
Hi,
Just wondering what was used to make the decorations around the outside of the cake?
Thanks
Hi Emma, I used a star tip for the inside of the diamonds. I don’t remember the exact size now, but it was probably a Wilton #16 or #18.
is’t okay to use a cheesecake pan’s?
or will the batter get through ?
Unless that’s the only pan you have in your kitchen, I wouldn’t use a springform pan; go with a regular cake pan.
i really like how u gave details..the cake looks yummy..but i wanted to know if i used the box cake mix how many boxes would i need??? i want to try it for my daughters 2nd b-day
Hi Marissa, I think most box mixes yield about 4.5 cups of batter. It all depends on the size cake you need – I would use the 4.5 cups as a starting point and consult the cake batter chart linked to in the post and figure out what you need based on the size cake you are baking.
hi,
is this cake sturdy enough for fondant icing? my son’s birthday is coming up and i would like to try this. thanks so much.
Hi Maria, It all depends on the recipe that you use, as this is merely a tutorial on making the inside colored.
hi, what did you put in the middle of the cake? butter icing? or could you put nothing? love this recipe and the cake looks lush!
x
Hi Aimee, Yes, I just put a vanilla buttercream frosting. You could add your favorite filling, as well. I would put at least a very thing layer so the cakes don’t slide off of each other if you stack them and aren’t planning a full filling.
So glad I found this! I wanted to make a special dessert for my mom’s birthday (I planned out the dinner and not the dessert!), but didn’t want to go out to the grocery store again. I had a white cake mix on hand, so I made this in cupcakes – 12 regular and 24 mini. I just cut into a mini cupcake and they look awesome! Tomorrow I’ll be frosting them :)
This was extremely helpful!! The step by step instructions for the cake were awesome!! My rainbow cake turned out fabulous:) It was a big hit! So THANK YOU very much! :)
ABSOLUTELY INCREDIBLE!!
EVERY BODY MUST TRY!!!
SO EASY!!!!
Is it possible to use a square pan instead of a round one?
Hi Monique, Yes, you can, but square pans typically hold more batter than round ones. I would consult the cake batter chart (linked to above in the post) to make sure you have enough batter.
Hiya, I’m Makeing this cake tomorow for my friends who haven’t tasted this cake since infants/nusary, hope this recipe works for me, if it does I will defiantly recommend you to my friends and family if baking a cake :) xx thanks a bunch xx
hi its such a cute cake i have been planing to bake for very long time .. thnks for sharing this great tutorial.. but i wanna sk about the frosting i checked the the frosting u add .. and i dpnt have shorting i mean its not available where i live .. so how can i have white butter cream frosting or do you recommend any other kind of frosting .. we have here cream chantee i am not sure about the splling but its teasty and white but it milts so quiqly and i need to take the cake for a party where is no fridge .. what do u recommend ??
I would recommend this frosting: https://www.browneyedbaker.com/2010/10/28/vanilla-cupcakes-vanilla-buttercream-frosting/. If you can find clear vanilla extract that, use that, otherwise it won’t be perfectly white. But, it will be delicious!
I love this cake! I just made it 20 minutes ago. I am so excited to decorate it. I am going to make it look like a girl scout cookie box!
So you only need 1 box of cake mix?
Hi Ashlynn, That would depend on how large of a cake you are making. I think that most cake mixes yield 4.5 cups of batter or so (but I would measure to double check) – I would use that as a starting point and then consult the cake batter chart (link above) to make sure you have enough for the size cake you want.
You suggested your recipe for “the perfect party cake” for this cake. In that recipe you explained that you put parchment or waxed paper down at the bottom of the pan. In the pictures for the rainbow cake it appears that you did not do that. It looks like you just greased & floured it. Is the parchment/wax paper necessary? Does it help so that the cake doesn’t stick?
Hi Sonia, I do typically use parchment rounds – I find that they help to make sure the cake doesn’t stick. I think I remember running out of parchment for the rainbow cake, so I used a heavy hand greasing and flouring.
I love the idea of this cake :) but are the edges always that brownish color?
Hi Jojo, Usually they are just from the baking process and the coloring. However, I find that it never matters because the outside is always covered in frosting and when you cut into the cake all you see are the vibrant colors on the inside!
Hi Michelle
I have made the rainbow cake today and it wasn’t successful. I made it twice but still wasn’t rising at all. It went flat. I followed your recipe and instructIons but not sure why didn’t help. When it says in the instruction, whisk together egg whites and buttermilk, did you mean whisk until light and fluffy or just well blended? Did you make the batter double portion? I also used milk with with 1 tbls of lemon juice and all purpose flour cause I cannot get buttermilk and cake flour here. I lived in middle east.
Please, if you could help me. I will try to make one more time tomorrow. I was very
disappointed as this is a birthday cake for my daughter. Her birthday is this sat.
Thank you for your help.
Best regards
Cassandra
Hi Cassandra, I’m sorry that you had some problems with the cake. The egg and buttermilk only need to be whisked briefly to be combined. Not using cake flour could also have been an issue, since all-purpose flour is significantly heavier.
This looks amazing! Never heard of rainbow cake before but will now have to make up a child-related excuse to make it (but it will be just that. an excuse :D)
This reminds me a lot of the rainbow ice cream.
Did you have to double your perfect party cake recipe, or was it enough batter for the two layers?
Hi Jenni, This particular cake was a 10″ round, and I can’t remember if I doubled or tripled the recipe.
That is the coolest cake. Looks psychedelic.
Thanks for an incredibly cool tutorial. Smashing cake! :-)
I just saw on good morring America the other day, b-day parties and one had a rainbow cake so i googled how to make a rainbow cake and i came across your page. very cool cake by the way! so my question is what kind of frosting did you use to frost the cake was it store bought or home made? If i was homemade do you mind giving the recipe? =) Thanks!
Hi Jennifer, I use Wilton’s buttercream icing recipe when I do formally decorated cakes since it holds up really well to decorating. Here is the recipe: http://www.wilton.com/recipe/Buttercream-Icing
Thank’s so much! =)
Well confetti cake is just a box mix with little sprinkles inside the white cake mix
Ahh, well then yeah sure, I don’t see why not.
I am just so impressed by these rainbow cakes. I have seen them a lot lately and I just don’t think I would be good enough to make them. You make it look so easy! I am sure the cake was thoroughly enjoyed!
So cool! And it doesn’t seem too difficult to make!
Happy belated birthday to your nephew. Beautiful cake.
This is the 2nd time I’ve heard the name Sutton. It’s the main character of a new ABC Family drama, and that was the first time. I love the name.
This is so awesome! Thank you for sharing – I think I will be making a rainbow cake for my birthday party this weekend!
Does this work with confetti cake?
Good question, I have never made confetti cake, so I don’t know what is involved??
love it! i will never get over the awesomeness of rainbow cakes… the only annoying part is the clean up, hehe. thank goodness for dish washers is all i can say! :)
I’m so glad you posted this – now I know what *my* birthday cake will be later this month! ;)
What a great tutorial! Way easier than I imagined it could be =)
I made a rainbow cake for my daughter 2 years ago for her Birthday. OMG..You would have thought that Justin Bieber was jumping out of the cake when I cut into it!!! The kids went crazy!
Oh, I wish you had posted this last month. I tried making a rainbow cake for my son’s first birthday that involved making like four different cakes and piecing them all together like a puzzle. It was a disaster. This looks so much easier!
I think I may be having a blonde moment, so could you explain a little more how you use that cake batter chart? Was curious how you calculate whether you need to double (or reduce) the cake recipe to correlate with the chart.
Love the cake and perfect for a bday party. I’ve seen people do camoflauge cakes before so I assume they use a similar technique and maybe just swirl the colors.
Hi Emily, You need to know how many cups of batter your original recipe makes. For instance, if it makes 4.5 cups and you want to make a 2-layer 8-inch cake recipe, you’d need to double it (you could make cupcakes with the extra).
What a beautiful and creative cake! I have yet to make a cake like this as there haven’t been any opportunity for it. Thanks for the tutorial. This truly is perfect for children’s cake. I’m sure they love it!
Great tutorial and such a fun birthday cake!
What a beautiful….tempting and playful cake…
What a beautiful cake especially the inside! So cool!
This is beautiful! I was just looking at a cake leveler in Michaels, now I know it’s a good investment!
Nice job! I have made the tie dye cupcakes, but didn’t think about making a whole rainbow cake like that. Thanks!
How adorable is this?! Will be putting this on my ‘to do’ list.
~ Carmen
You did a great job with this cake, it turn out so adorable. I love the train tracks!
an explosion of color and a train too what more could a kid want
Thank you for teaching me this..I work with children, and I know they would love this as a special birthday surprize!!! You are awesome girl!!
This is a great tutorial! I’ve seen rainbowcakes that have each layer as a different color with kind of thin layers, but I really like the way you did it rings or circles. The cut piece of cake looks really awesome with the colors like that! :)
Love it! That is so pretty! Can’t wait to make one for my grand-princess!
Adorable cake. The decorations look very professional. I’d love to learn how to do it.
I love those little train tracks! So cute!
What a pretty cake! I think everyone needs a rainbow cake in their life.
So pretty! Is there something around the purple? Or is that just crusty part from baking?
I’ve made one of these before and confirm that it’s simply the crust. Due to the Maillard reaction the original colour will darken, brown and possibly discolour so you may want to be careful with what colour you have on the outside.
Just the crusty part from baking.
If this isn’t the cutest most original rainbow cake I’ve seen then I don’t know what is. What a lucky little birthday boy. I’m sure he was grinning from ear to ear when this arrived.
wow and once again wow thats all I can say!! It is my first time when I see such a beautiful rainbow cake, and I plan making it for my husband birthday it will be something different! it looks really yammy!
Incredible!!! I’ve been wanting to try this. Thanks for the detailed tutorial! :)
Wow, this is beautiful. The colors are so vibrant! Now I am craving some cake. :)
you’re an old pro!! this looks amazing!
WOW! Yours is much easier than mine. I did mine in each layer, which made my cake REALLY tall – almost too tall to transport well and made it take much longer since I had to bake the layers in pairs because that’s all the cake pans that I had. Well done!
This is so cool! There’s not many food items that I say that about :) What a fun idea…I’m sure the birthday boy loved it!
This is so awesome! I made rainbow cupcakes a little while ago the same way :) Love your blog!
bsweetdreaming.wordpress.com
I’ve always been fascinated by rainbow cakes! This recipe makes them feel achievable! Thanks.
:)
http://allykayler.blogspot.com/
Can you do this for cupcakes? If so how many would you get?
Hi Dawn, Yes! You would just divide the difference colors between the cupcake liners. Lisa shared how she did this (with a picture) on the Brown Eyed Baker Facebook page: http://www.facebook.com/photo.php?fbid=10150796845745247&set=o.91519478473&type=1&theater
This is so adorable and seems so manageable. I love the idea of surprising people when they cut into the cake. Can’t wait to try it! Do you think it could also work for cupcakes?
Yes, absolutely!
Gorgeous! Can’t wait to try this!
Fabulous, this is definitely on my to bake list – thanks for the tutorial!
I’ve wanted to make one of these for a while! They look so yummy!
I love the rings of colours. Thank you!
Wow, it looks great and so simple! I’m definitely going to try this next time I have to make a cake for a small child. Or indeed a big one ;)
This is the coolest cake I have seen. This tutorial came in the nick of time. My god daugther wants confetti cake for her birthday so I am thinking this will probably be my guide for her cake. Wonderful cake once again. Saved it
Such a adorble cake. :)
This is such a cool recipe. It looks so fun and delicious too! Love the colors!
Wow that looks fantastic and a real surprise when you cut into it. I think this is much prettier than having multiple layers. It really looks swirly and rainbow like. Beautiful
Wow – that is such a beautiful cake! Love it!
Such an adorable birthday cake! I really love all the colors in rainbow cakes…I just need to break down and make one! :-D