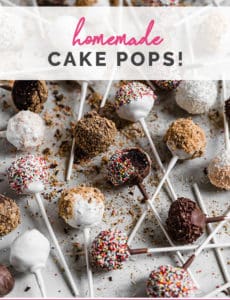
How to Make Cake Pops
Brighten your day with these fun and festive homemade cake pops! Made completely from scratch, these vanilla and chocolate cake pops are an absolute treat! From baking to rolling and topping I am walking you through everything you need to know about making the perfect cake pop.
Today we are talking all things CAKE POPS!
These were all the Internet rage about a decade ago, with special machines and molds popping up at Target, and Starbucks sells a gazillion of them every day, so I think people are still in love with these little cake-and-frosting-balls-on-a-stick. Truly, what’s not to love? You get a combination of cake and frosting, rolled into a ball, covered in a chocolate-flavored coating, and it’s easy to eat since you hold it on a stick!
I’m going to take you through the ins and outs of how to go about making cake pops completely from scratch, using homemade cake and homemade frosting, and then how to assemble these for picture-perfect cake pops. While none of the components are inherently hard, they do take a bit of time to form into balls, chill, and do all of that dipping! If you are short on time you can go the route of boxed cake and canned frosting but I think the from-scratch cake and frosting tastes a million times better.
Let’s do this!
How to Make Them
Technically, cake pops require only a few ingredients:
- Cake (for this recipe, we use a single layer)
- Frosting (this amount is pared down from a full frosting recipe, as we don’t want soggy cake pops!)
- Candy Melts (to coat the cake pops in a smooth layer)
Cake pops follow a pretty simple formula:
- The Cake – Bake a cake, let it cool, then crumble it into a bowl.
- The Frosting – Mix frosting into the cake crumbs.
- Forming – Scoop the mixture into balls, place on a baking sheet, and chill.
- Dipping – Insert a lollipop stick into the coating (this first quick step helps the cake ball not slide off the lollipop stick!), then insert the stick into the cake balls and dip them into the coating.
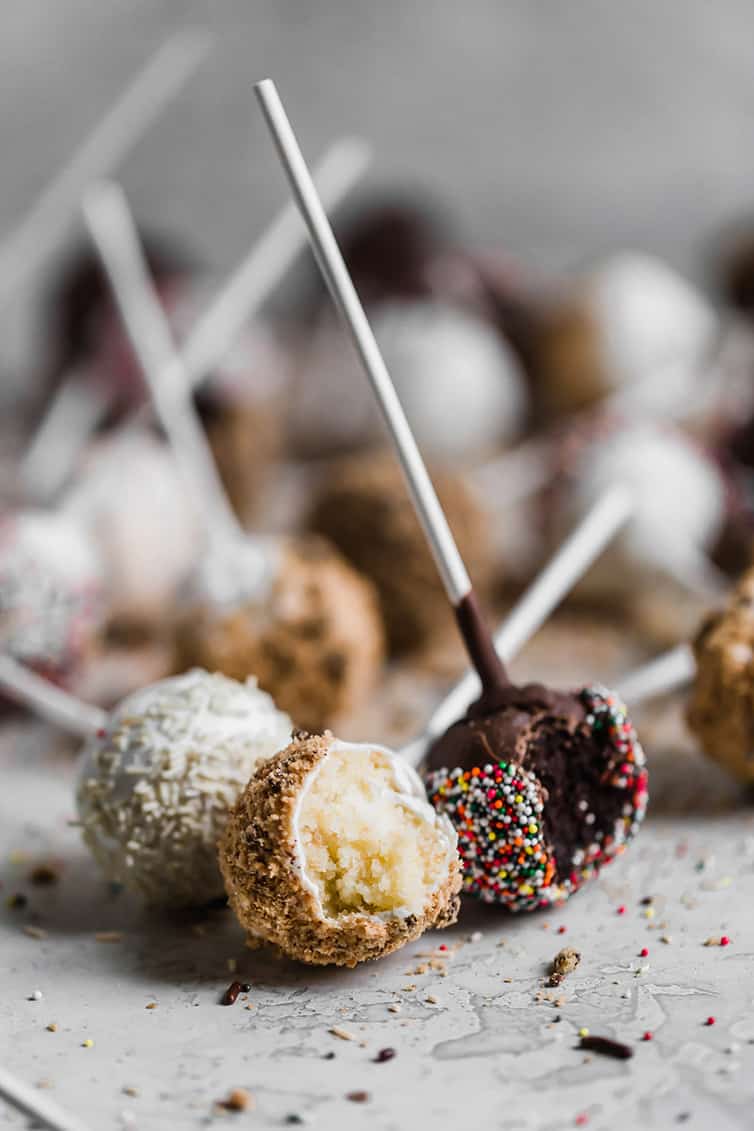
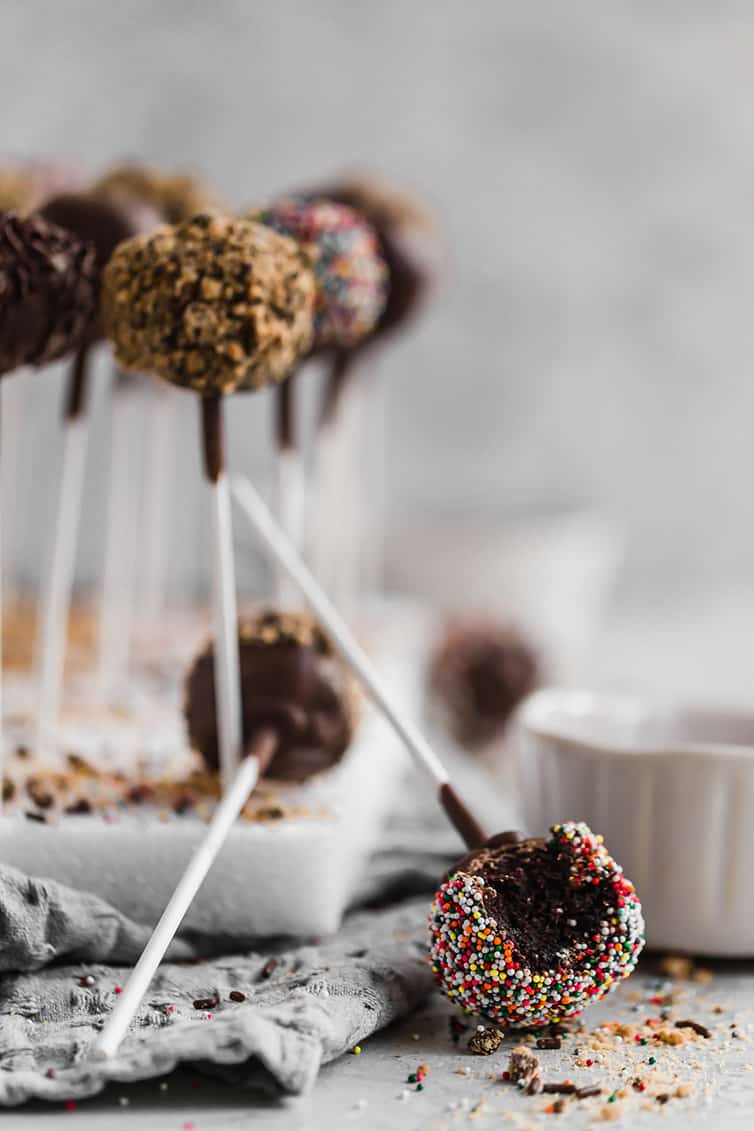
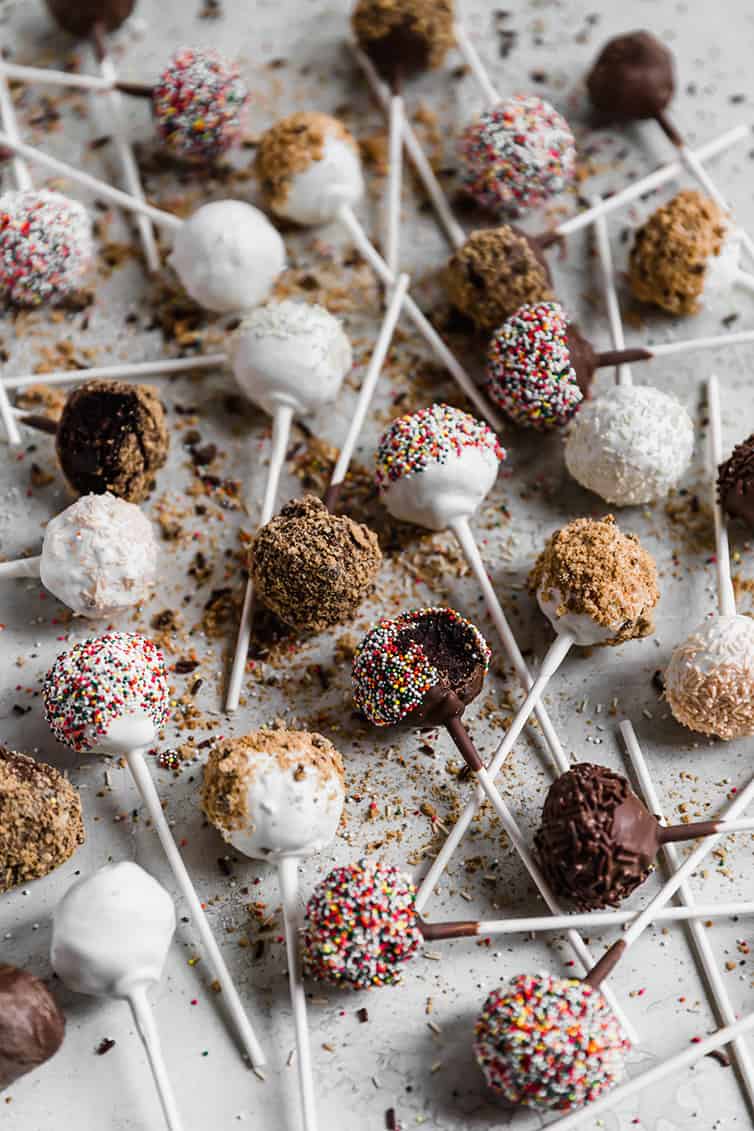
- Embellishments – After coating the cake balls, leave them as-is, or dip into sprinkles, crushed cookies, etc.

Step #1: Bake The Cake
- Prepare for baking: Preheat oven to 350°F and grease and flour a 9-inch round baking pan. Set aside.
- Mix dry ingredients together: Whisk flour, sugar, cocoa powder, baking powder, baking soda, and salt.
- Add liquid ingredients: Add eggs, milk, oil, and vanilla, and beat on medium speed for 2 minutes.
- Stir in water: Using a rubber spatula, gently stir in the boiling water. Th batter will be thin.
- Bake: Pour into the prepared pan and bake about 30 minutes, until a toothpick inserted in the center comes out with moist crumbs attached.
- Cool: Allow the pan to cool for 10 minutes, then remove to a wire rack to cool completely.
Step #2: Make The Frosting
- Melt chocolate: Place the chopped chocolate in a microwave-safe bowl and microwave in 30-second intervals on 50% powder, stirring after each until the chocolate is melted and smooth. Set aside to cool to room temperature.
- Beat butter: In an electric mixer, beat butter on medium-high for 5 minutes, stopping to scrape the bowl once or twice.
- Add sugar + vanilla: Reduce the speed to medium-low and gradually add the powdered sugar. Once all of the sugar is incorporated, all the vanilla and mix until incorporated.
- Whip in chocolate: Add the melted chocolate and whip at medium-high speed until light and fluffy, about 2 minutes, scraping the bowl as needed to incorporate all of the chocolate.
Step #3: Forming the Cake Pops
- Break the cake: Crumble the cooled cake into a large bowl, leaving no large chunks of cake.
- Mix with frosting: Add the frosting to the bowl and, using a rubber spatula, fold and stir in the frosting until it has evenly coated all of the cake crumbs.
- Scoop + roll: Using a small cookie scoop (or 1 tablespoon), scoop out the cake mixture and roll into a ball. Place on a lined baking sheet.
- Chill: Cover with plastic wrap and refrigerate until firm, 2 to 3 hours.
- Smooth the balls: At this point, you can smooth out the balls, if you’d like, If you smooth them out, return the balls to the refrigerator for at least 30 minutes.

Step #4: Assembling Cake Pops
- Melt topping: Melt the coating in a tall cup (a 2-cup measuring cup or mason jar works well for this!) If using waters, follow the melting instructions on the package. If using chocolate and vegetable shortening, microwave on 50% power, stirring every 30 seconds, until completely melted and smooth.
- 🌟 Helpful Tip: Work with only a few cake balls at a time and leave the remainder in the refrigerator.
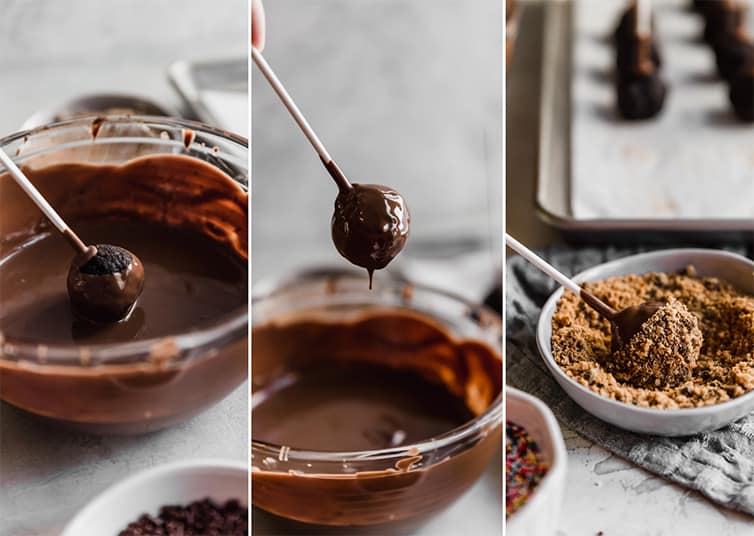
- Prep the stick: Dip a lollipop stick about 1/2 inch into the melted coating, then insert about halfway into the cake ball. This helps the cake pop stick without falling off the lollipop stick while dipping.
- Coat the cake ball: Dip the cake ball the entire way into the melted coating, ensuring that the coating meets the coating on the lollipop stick, which will secure the cake pop. Allow excess coating to drip off. At this point, you can decorate with toppings, see suggestions below.
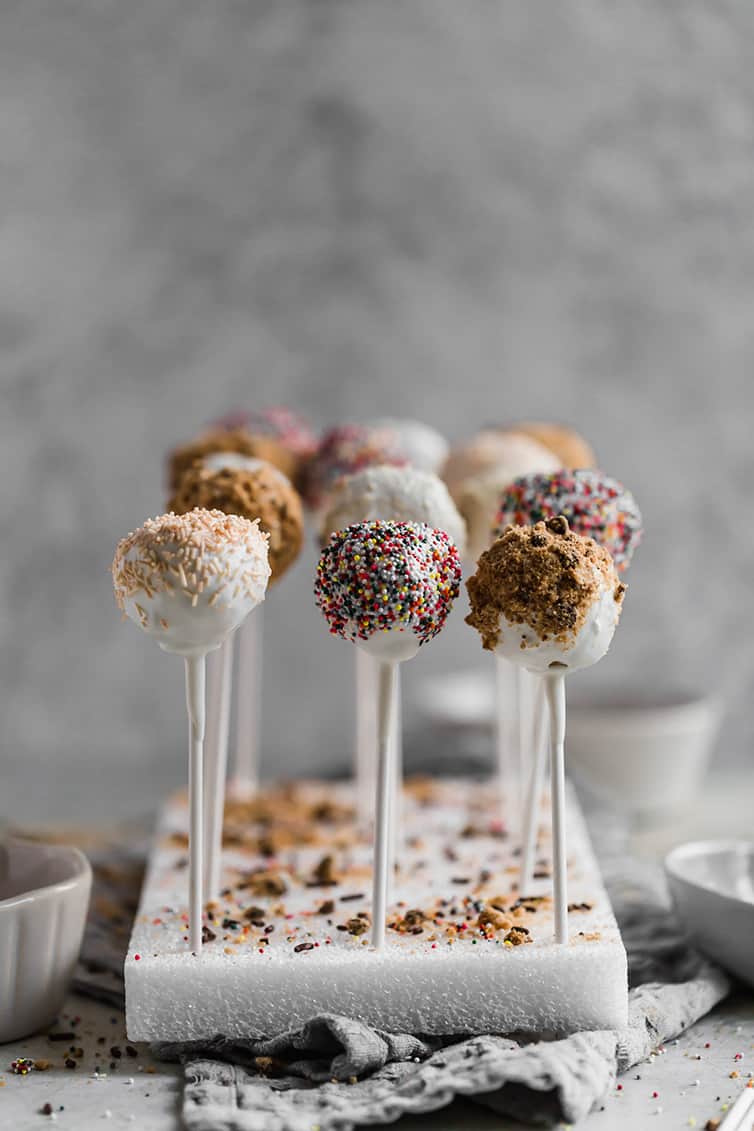
- Cool completely: Insert the cake pop upright in a styrofoam block. Allow to set completely (about 1 hour at room temperature) before removing.
Save This Recipe
Mix-ins and Toppings
If you want to add a little crunch to your cake pop you can always toss some mix-ins into the frosting cake mixture before rolling into balls. Some fun mix-ins to try include:
- Mini chocolate chips
- Sprinkles
- Crushed oreo
- Graham cracker crumbs
- Mini M&Ms
- Shredded Coconut
Once you coat the cake pops, you can roll them in anything you’d like! Some suggestions:
- Sprinkles
- Nonpareils
- Crushed chocolate chip cookies
- Graham cracker crumbs
- Crushed Oreos
- Drizzled chocolate
- Extra cake crumbs
- Finely chopped nuts
- Coconut
Combo Ideas
This is where cake pops can go from delicious to fun and festive! From cake and frosting combos to mix-in and topping options there are unlimited possibilities for your cake pop creations!
- Cookies and Cream: Vanilla cake + vanilla frosting + oreo cookie crumbs + chocolate dip
- Reeses Cups: Chocolate cake + peanut butter frosting+ chocolate dip + crushed Reeses pieces on top
- Lemon Cake Pop: Lemon cake + vanilla frosting + white chocolate dip + sprinkles
- Red Velvet: Red velvet cake + vanilla frosting + mini chocolate chips + white chocolate dip + red velvet cake crumb topping
- Funfetti Cake Pops: Vanilla cake + vanilla frosting + rainbow sprinkles + white chocolate dip + nonpareils
Shelf Life, Storage, and Making Ahead
- Storing: Keep cake pops in an airtight container in the refrigerator for up to 1 week.
- Freezing: Finished cake pops can also be frozen in an airtight container for up to 2 months.
- Making Ahead: I like to make the cake and frosting the night before I plan to assemble cake pops to save on time. Alternatively, you can make your cake pops up to 2 months in advance and simply store in the freezer.
Occasions for Cake Pops
These are such a fun addition to any party or celebration. Switch up the cake and frosting flavors (red velvet and cream cheese for Valentine’s Day, for instance!), use different colors for the candy melts, and you can go all out for whatever you want to celebrate… some ideas:
- Baby showers
- Bridal showers
- Christmas
- Thanksgiving
- Valentine’s Day
- Birthdays
- Baptisms
- Graduation parties
- Sports parties
Tools for Cake Pops
There are only a couple of special things you’ll need to purchase in order to make cake pops:
- Lollipop Sticks – You need these to insert into the cake balls to make them official cake pops!
- Styrofoam Block – This makes it so easy to allow the cake pops to dry without smudging – simply push the sticks into the styrofoam block and they can dry upright. If you don’t have one or don’t want to buy one, you can always poke small holes in a cardboard box.
- Small Cookie Scoop- This will help you make evenly sized cake balls with roughly 1 tablespoon of dough.
Try These Recipes Next:
Delicious, made from scratch, cake pops have never been easier! Homemade cake mixed with sweet frosting is rolled and dipped into your favorite chocolate coating and sprinkled with delicious toppings. These fun and festive treats are an absolute delight!
If you make this recipe and love it, remember to stop back and give it a 5-star rating - it helps others find the recipe! ❤️️

Cake Pops
Ingredients
For the Chocolate Cake
- 1 cup (200 g) granulated sugar
- ¾ cup (106 g) + 2 tablespoons all-purpose flour
- ⅓ cup (28.67 g) unsweetened cocoa powder
- ¾ teaspoon (0.75 teaspoon) baking powder
- ¾ teaspoon (0.75 teaspoon) baking soda
- ½ teaspoon (0.5 teaspoon) salt
- 1 egg
- ½ cup (120 ml) milk
- ¼ cup (50 g) vegetable oil
- 1 teaspoon vanilla extract
- ½ cup (120 ml) boiling water
For the Chocolate Frosting
- 4 tablespoons unsalted butter, room temperature
- ⅔ cup (76 g) powdered sugar
- ½ teaspoon (0.5 teaspoon) vanilla extract
- 2 ounces semisweet chocolate, finely chopped
For the Vanilla Cake
- 1 ½ cups (213 g) all-purpose flour
- 1 ½ teaspoons (1.5 teaspoons) baking powder
- ¼ teaspoon (0.25 teaspoon) salt
- 4 tablespoons unsalted butter, room temperature
- ¼ cup (50 g) vegetable oil
- ¾ cup (150 g) granulated sugar
- 2 eggs, room temperature
- 1 ½ teaspoons (1.5 teaspoons) vanilla extract
- ⅔ cup (160 ml) buttermilk, room temperature
For the Vanilla Frosting
- 6 tablespoons unsalted butter, room temperature
- 1 cup (113 g) powdered sugar
- 1 teaspoon (1 teaspoon) vanilla extract
- 1 teaspoon (1 teaspoon) heavy cream
For the Coating
- 24 ounces (680.39 g) candy melts
Instructions
- Make Chocolate Cake: Preheat oven to 350 degrees F. Grease and flour a 9-inch round baking pan.
- In a mixing bowl, whisk together the sugar, flour, cocoa powder, baking powder, baking soda, and salt. Add the eggs, milk, oil, and vanilla, and beat on medium speed for 2 minutes. Using a rubber spatula, gently stir in the boiling water (the batter will be thin). Pour into the prepared pan.
- Bake until a toothpick inserted in the center comes out with moist crumbs attached, about 30 minutes. Cool in the pan for 10 minutes, the remove to a wire rack to cool completely.
- Make the Chocolate Frosting: Place the chopped chocolate in a microwave-safe bowl and microwave in 30-second increments on 50% power, stirring after each, until the chocolate is melted and smooth. Set aside to cool to room temperature.
- Meanwhile, using an electric mixer, beat the butter on medium-high speed for 5 minutes, stopping to scrape the bowl once or twice.
- Reduce the speed to medium-low and gradually add the powdered sugar. Once all of the powdered sugar is incorporated, add the vanilla, mixing until incorporated. Add the melted chocolate and whip at medium-high speed until light and fluffy, about 2 minutes, scraping the bowl as needed to incorporate all of the chocolate.
- Make the Vanilla Cake: Preheat oven to 350 degrees F. Grease and flour a 9-inch round baking pan.
- In a medium bowl, whisk together the flour, baking powder, and salt.
- Using an electric mixer, cream together the butter, vegetable oil, and sugar until creamy and well-combined, 2 to 3 minutes.
- Add the eggs, one at a time, beating well after each addition and scraping the sides of the bowl as needed. Beat in the vanilla extract until combined.
- Using a rubber spatula, alternate adding the flour mixture and the buttermilk, starting and ending with the flour mixture, and mixing until just combined.
- Transfer the batter to the prepared pan and smooth into an even layer. Bake until a toothpick inserted into the center comes out clean, 25 to 30 minutes. Cool the cake in the pan for 10 minutes, then remove to a wire rack to cool completely.
- Make the Vanilla Frosting: Using an electric mixer, beat the butter on medium-high speed for 5 minutes, stopping to scrape the bowl once or twice.
- Reduce the speed to medium-low and gradually add the powdered sugar. Once all of the powdered sugar is incorporated, add the vanilla, mixing until incorporated. Add the heavy cream and whip at medium-high speed until light and fluffy, about 2 minutes, scraping the bowl as needed.
Assemble the Cake Pops
- Crumble the cooled cake into a large bowl, leaving no large chunks of cake. Add the frosting to the bowl and, using a rubber spatula, fold and stir in the frosting until it has evenly coated all of the cake crumbs.
- Use a small cookie scoop (or 1 tablespoon) to scoop out the cake mixture and roll into a ball; place on a lined baking sheet. Cover with plastic wrap and refrigerate until firm, 2 to 3 hours. At this point, you can smooth out the balls, if you’d like. If you do so, return them to the refrigerator for at least 30 minutes.
- Melt the coating in a tall cup (a 2-cup measuring cup or mason jar works well for this!). If using melting wafers, follow the melting instructions on the package. If using chocolate, combine the chocolate and vegetable shortening and microwave on 50% power, stirring every 30 seconds, until completely melted and smooth.
- Work with only a few cake balls at a time and leave the remainder in the refrigerator. Dip a lollipop stick about ½ inch into the melted coating, then insert about halfway into a cake ball. Dip the cake ball the entire way into the melted coating, ensuring that the coating meets the coating on the lollipop stick, which will secure the cake pop. Allow excess coating to drip off (at this point you can decorate with sprinkles, if desired), then insert the cake pop upright in a styrofoam block. Allow to set completely (about 1 hour at room temperature) before removing.
- Cake pops should be stored in the refrigerator in an airtight container for up to 1 week. Finished cake pops can also be frozen in an airtight container for up to 2 months.
Notes
- Equipment: Lollipop Sticks / Styrofoam Block / Small Cookie Scoop
- Semi-Homemade Option: If you want to save time and/or ingredients, you can use a box cake mix and canned frosting. Just follow the same directions for assembly!
- Mix-Ins and Toppings: See the post above for tons of mix-ins and topping ideas.
- Combo Ideas: See above for how to make the following - Cookies and Cream, Peanut Butter Cup, Lemon Pops, Red Velvet, and Funfetti.
- Storing: Keep cake pops in an airtight container in the refrigerator for up to 1 week.
- Freezing: Finished cake pops can also be frozen in an airtight container for up to 2 months.
- Making Ahead: I like to make the cake and frosting the night before I plan to assemble cake pops to save on time. Alternatively, you can make your cake pops up to 2 months in advance and simply store them in the freezer.
Did you make this recipe?
Leave a review below, then snap a picture and tag @thebrowneyedbaker on Instagram so I can see it!
Photography by Ari Laing.


It was delicious, but when I was dipping the cake pops, a few fell off into the chocolate. I don’t know if it was the type of chocolate I used or if the cake wasn’t firm enough…
I have tons of chocolate buttercream left over from making cupcakes. How much prepared frosting would this recipe be?
Do the vanilla and chocolate recipes make 48 cake pops each or 48 cake pops when making both recipes?
Hi Lottie, The vanilla and chocolate recipes make 48 cake pops each.
So how do you keep the chocolate coating from cracking due to the cold cake pop meeting up with the super warm chocolate? I struggle with this every single time!
Same here. But I freeze my cake balls before dipping – so I wonder if they’re too cold when they hit the melted chocolate, causing it to cool too rapidly and crack. But if they’re not chilled enough, they fall off the stick when dipping! Such a dilemma!
Hmmm this has never happened to me! Are you using candy melts or chocolate?
I was looking for the cake pops recipe for a long time but I did not find any article as helpful as yours they did not explain as well as you but after reading yours I made cake pops they really are good and my children like them a lot thanks for your work keep doing it
Hi, I’m wondering if I can use vanilla frosting in the chocolate cake pops. Would they mix well or would you be able to see white frosting in the pops? Just got extra vanilla frosting sitting at home and trying not to make extra chocolate frosting… lol Thanks!
Hi Katie, I think that would work just fine!
Do you think these can be frozen prior to coating with chocolate?
Yes!
made the chocolate cake pops for my wedding in April and everyone loved them. used the same recipe today to make a layer cake. it ended up being two small layers but really the perfect size and taste.
I have to say that cake pops never excited me much but seeing yours I think it I am going to give them a go. They will be perfect for the upcoming party I am planning!
I love cake pop recipe so much! Thank you for sharing! Can’t wait to try it.
fun recipe, love all of these creative ways to sprinkle, fun to make too, thank you
Ok..I’ve yet to have a good cake pop..sorry. I’m sure yours are the exception as everything u make or like is usually great and the things I like. The ones I’ve tried almost seemed wet inside…ewe. but regular cake..bring it..
I’ve made thousands of these little beauties over the years. We started making and selling them at the bakery where I worked as a way of using up tons of cake scraps. For my 50th bday party in December, I made Oreo (using black cocoa for the cake and crumbled cake crumbs), burnt almond torte, and Milkbar birthday cake. I have found the Ghiradelli melting wafers give the most professional look and taste the best. You can find them at our local grocery store, but in bulk at Costco and Sam’s Club.