Homemade Cannoli
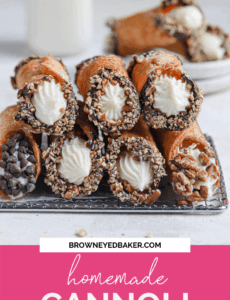
Light and crispy cannoli shells filled with a sweet, creamy ricotta filling make these homemade cannoli an absolute treat. Learn how to make cannoli from shell to filling for a family-favorite recipe you will want to make again and again.
This recipe is super special to me, as it hails from my husband’s family. I had enjoyed cannoli many, many times, but I never knew anyone who actually made the whole pastry (shells AND filling!) completely from scratch. Not only were the shells and filling homemade, but my husband’s grandfather used to work at an aluminum plant and crafted the cannoli forms himself!
Over 10 years ago, on New Year’s Eve day, we gathered at my in-laws’ house to make cannoli. I watched his Nana roll out the dough and wrap it meticulously around the forms, watched his dad stir the filling patiently, and then got to enjoy the fruits of their labor.
What are Cannoli?
If you are not familiar, cannoli are a traditional Sicilian pastry that is made by rolling out a circle of dough and wrapping it around a metal cylinder or “form” and then deep-frying.
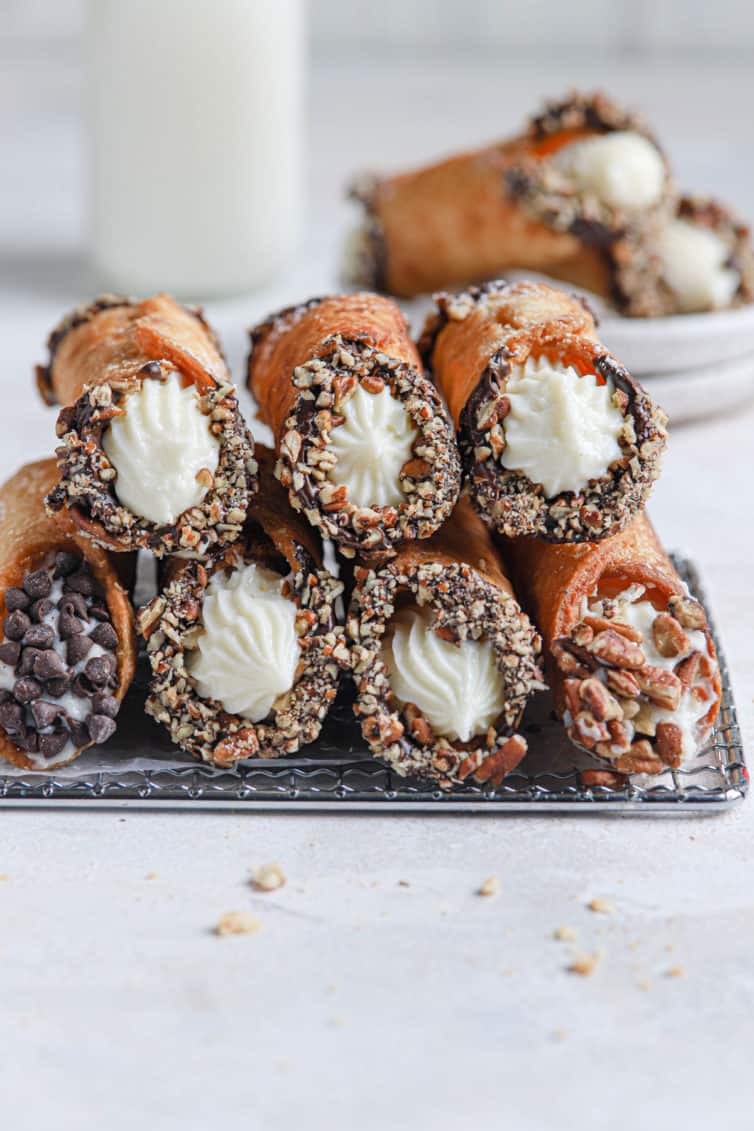
Once cool, the shells are filled with a sweetened ricotta filling. Sometimes nuts or dried fruit are added to the filling and sometimes the ends are dipped into crushed nuts or chocolate chips.
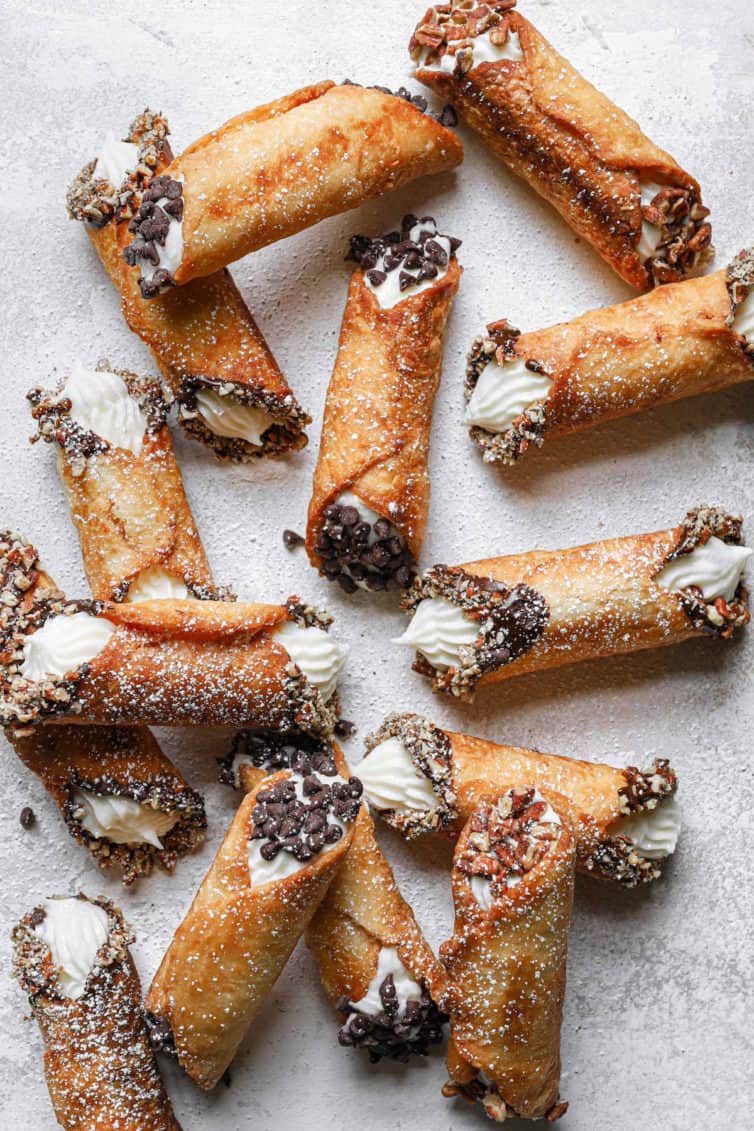
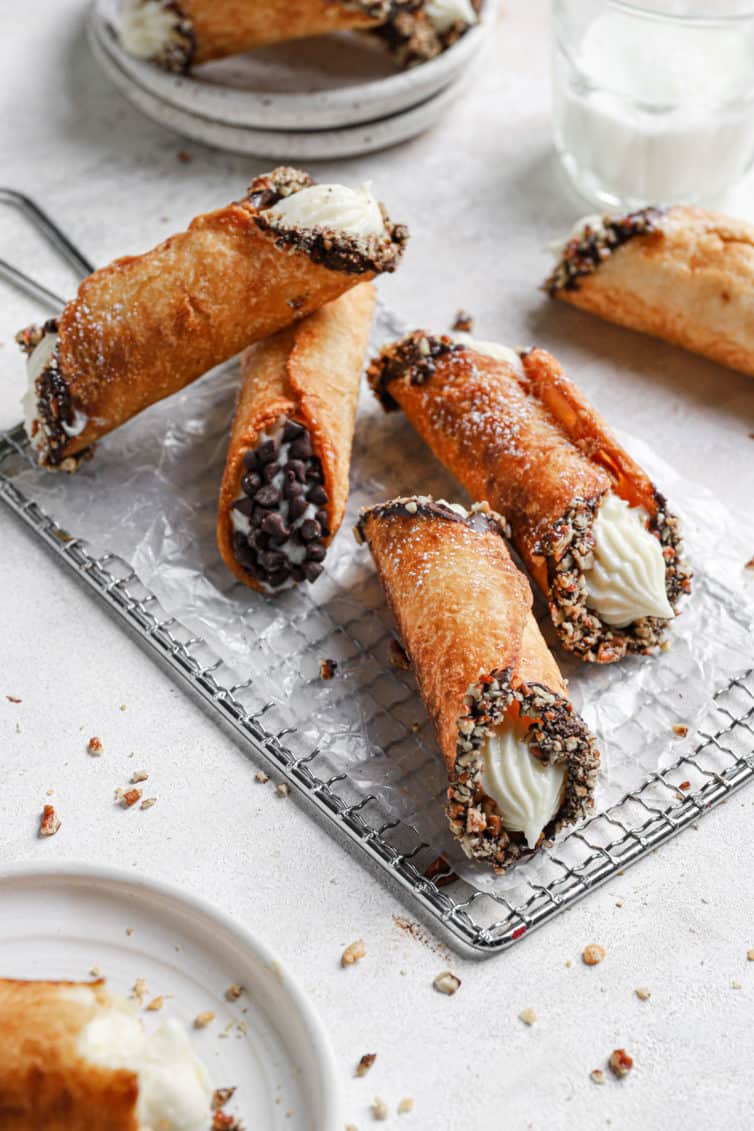
There are two components to cannoli: the shells and the filling. They are made separately and then the filling is piped into the shells adorned on the ends with things such as mini chocolate chips, chopped nuts, citron, etc. and the whole thing can be dusted with powdered sugar before serving.
Let’s take each one separately and discuss…
The Shell Ingredients
Homemade cannoli shells are made with a dough that is similar to pie crust, though slightly more stable thanks to egg yolks, which also make it easier to roll out. You’ll need:
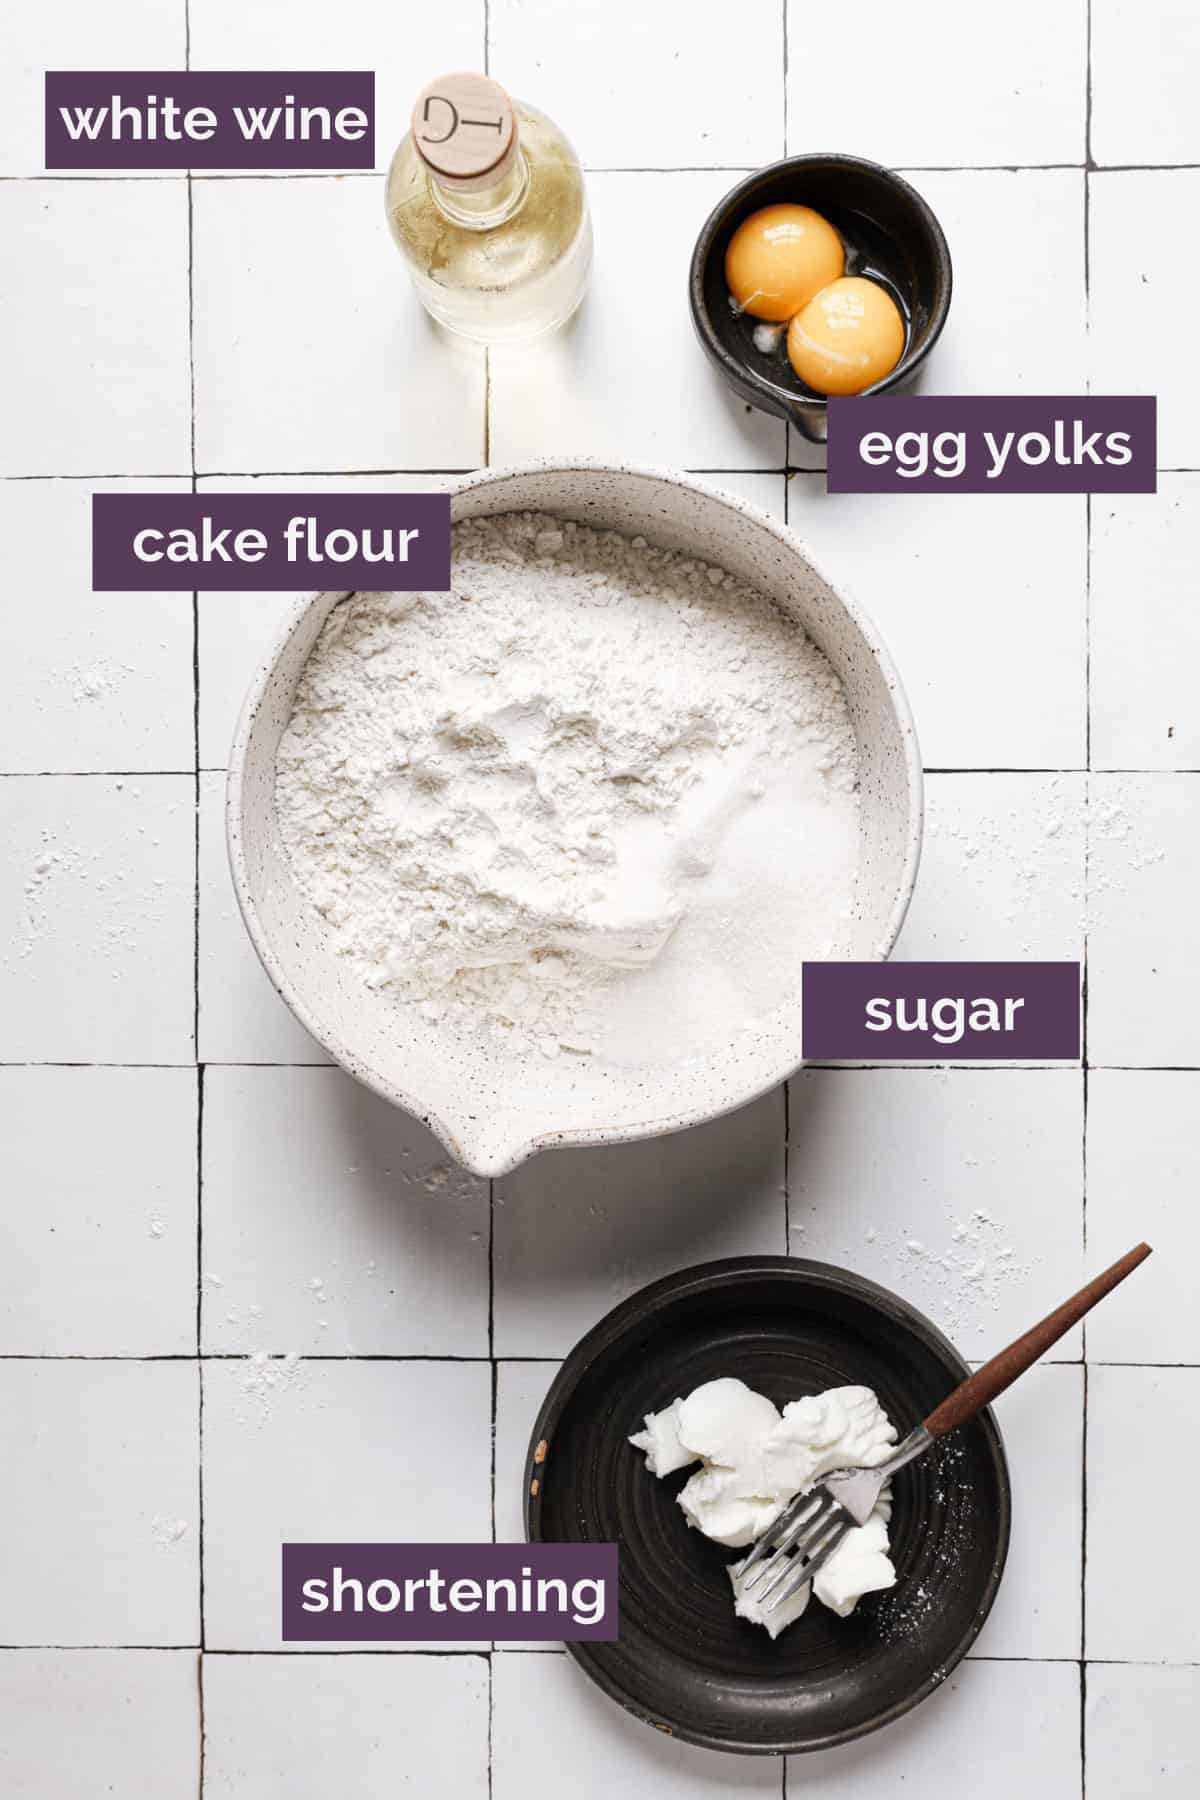
- Cake flour: Used to make a more delicate dough that crisps up in the frying process.
- Sugar: To sweeten the shell.
- Vegetable shortening: With a higher melting point than butter the shortening will hold its shape during the frying process.
- Egg Yolks: Binds the dough together and gives it a little color.
- Wine: Adds flavor and acidity to soften the gluten and make the shells light and crisp.
- Vegetable oil: Used for frying the shells.
The Filling Ingredients
Traditional cannoli fillings are made with sweetened ricotta cheese. Some fillings call for draining the cheese or beating the cheese, then mixing in the sugar and other add-ins in various ways. For this filling you will need:
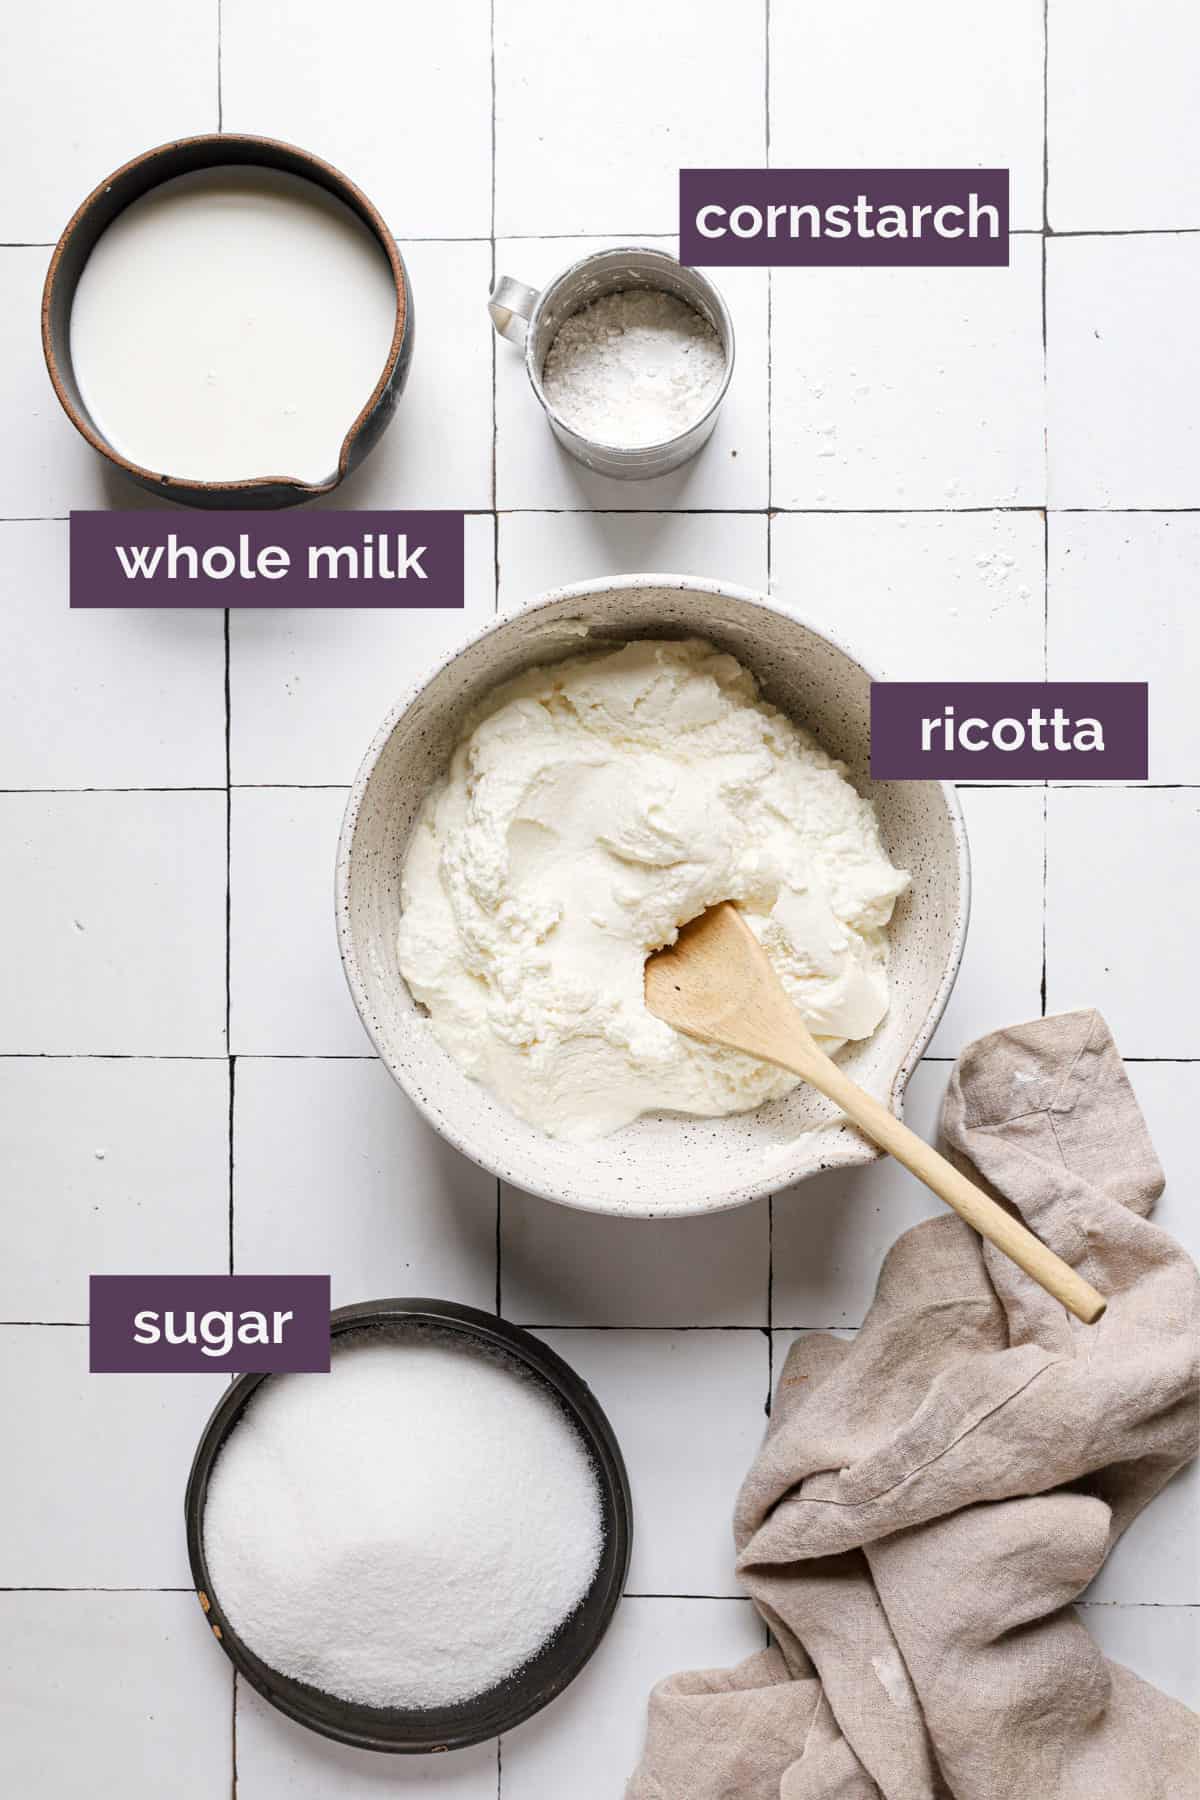
- Ricotta cheese: Gives the filling a creamy texture.
- Milk: I use whole milk to thin out the filling while still keeping it rich and creamy.
- Sugar: Sweetens the filling.
- Cornstarch: Used to thicken the filling and make it hold its shape in the cannoli shell.
Mix-In Ideas
Want to add some extra flavor to your cannoli filling? Here are some fun additions you can mix into the filling before piping into the shell:
- Orange or lemon zest
- Finely chopped nuts like pistachios, peanuts, pecans, or almonds
- Mini chocolate chips
- Crushed Oreos
How to Make the Shells
Homemade cannoli shells are made with a dough that is similar to pie crust, though slightly more stable thanks to egg yolks, which also make it easier to roll out.
Save This Recipe
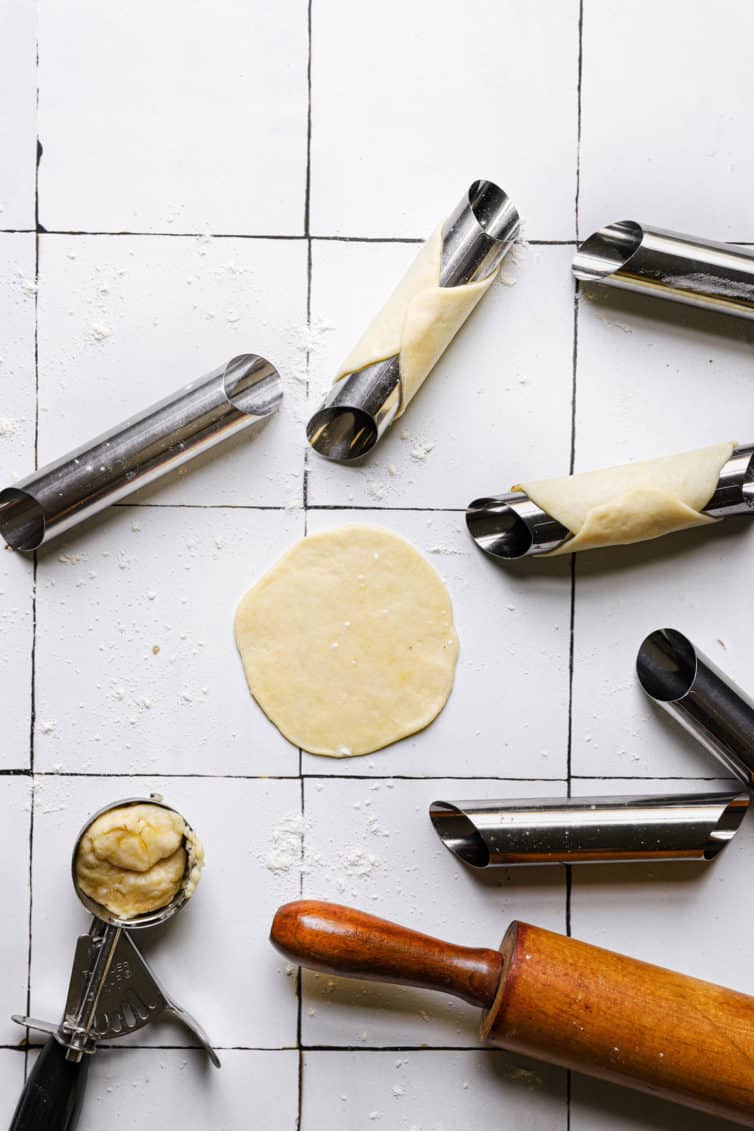
The dough should be rolled out incredibly thin; this ensures that they are flaky and light and don't take on too much oil during the frying process. Once the dough is rolled out, it is wrapped around individual cannoli forms.
The shells are traditionally fried to create a super light and flaky consistency.
How to Make the Filling
Traditional cannoli fillings are made with sweetened ricotta cheese. Some fillings call for draining the cheese or beating the cheese, then mixing in the sugar and other add-ins in various ways.
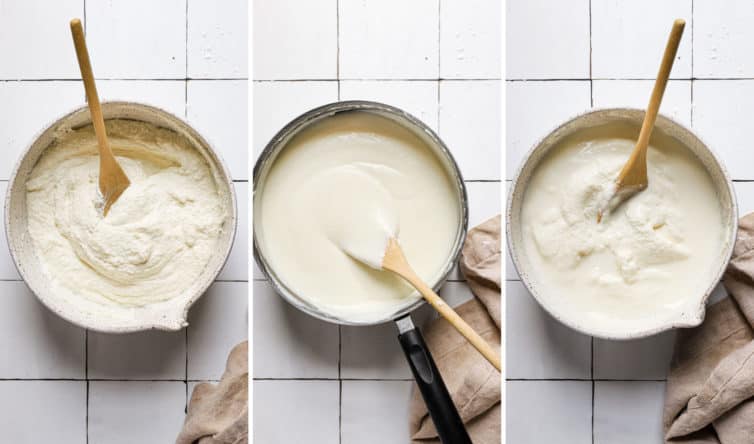
This particular recipe is for a cooked ricotta filling - the ricotta is beat with a mixer to smooth it out, and then cooked into a sweet ricotta pudding of sorts with sugar, milk, and cornstarch. It's chilled completely before being used to fill the cannoli.
How to Fill a Cannoli Shell
- Prep the piping bag: When you are ready to serve the cannoli, fit a large piping bag with a large round (Ateco #806), or star tip (Ateco #828) and fill it with the ricotta filling.
- Note: If you do not have piping bags you can put the filling in a large ziplock plastic bag and simply snip off one corner.
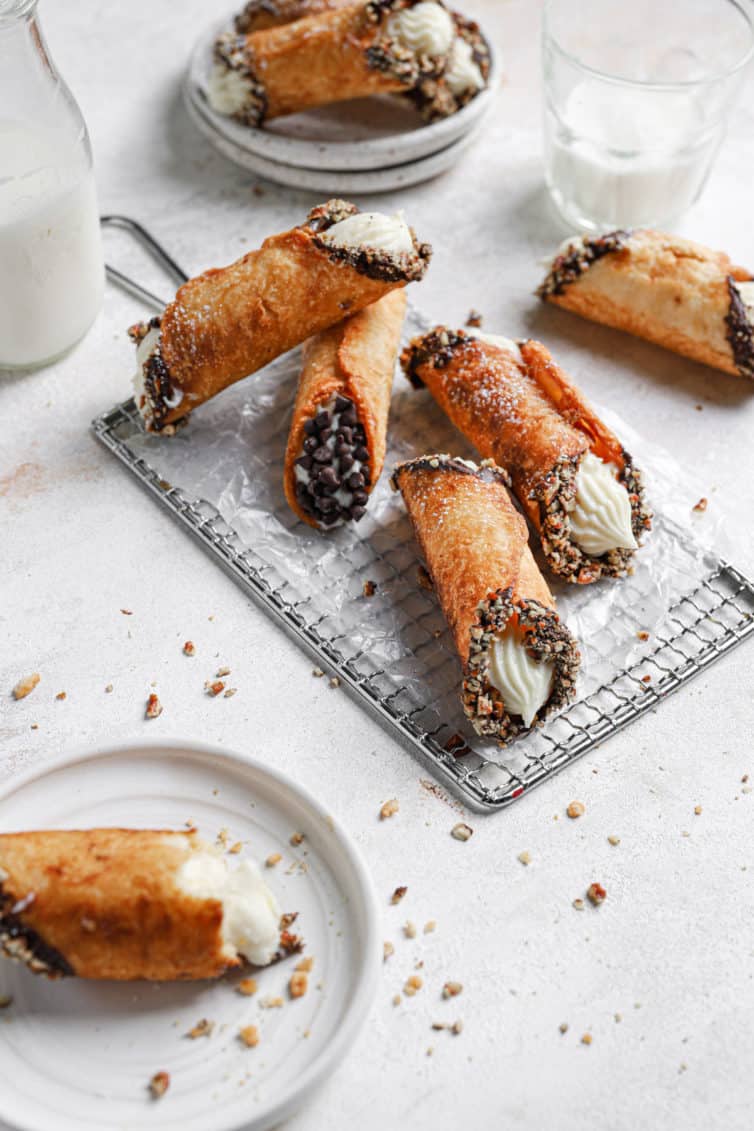
- Fill the shells: Squeeze the bag to pipe filling into each end of the cannoli shell, making sure it’s completely filled inside.
- Garnish the cannoli: Dip the ends into mini chocolate chips or chopped nuts and dust with powdered sugar if desired.
FAQ and Troubleshooting
In each of these instances, it’s due to the ricotta cheese not being smoothed out enough. Usually beating it with a mixer before incorporating the other ingredients is enough, but if your ricotta cheese is particularly watery, you may want to drain it through cheesecloth overnight before using it.
If you store the cannoli shell with the filling, it will cause the shell to absorb moisture from the filling. To prevent a soggy shell, store the shell and the filling separately until you are ready to serve the cannoli.
If your shells are not filled but still seem soggy, put them in the oven at 250 degrees F and bake for 5 to 10 minutes to crisp them up.
You can use red or white, although red will alter the color of the dough. Use whatever you have on hand; I typically use pinot grigio, sauvignon blanc, or marsala.
If you do not drink alcohol or do not want to use wine in the dough, you can use buttermilk as a substitute.
While they are best fried, you can bake the shells in the forms in a 350-degree oven for 15 minutes, or until golden brown.
Making Ahead & Storage Tips
- Make-Ahead Shells: The shells can be fried, cooled, and stored in an airtight container for up to 7 days before filling. They can also be frozen for up to 1 month in an airtight container.
- Make-Ahead Filling: The filling can be kept in an airtight container in the refrigerator for up to 5 days. Freezing is not recommended, as it can become watery when thawed.
Other Italian Desserts to Try Next:
- Cannoli Dip
- Grandma’s Fried Dough
- Cucidati Cookies
- Italian Walnut Pillow Cookies
- Zeppole (Italian Doughnuts)
There is truly nothing better than homemade cannoli. From the creamy ricotta filling to the crispy fried shell, you will love everything about this traditional cannoli recipe.
f you make this recipe and love it, remember to stop back and give it a 5-star rating - it helps others find the recipe! ❤️️

Homemade Cannoli
Ingredients
For the Ricotta Filling
- 32 ounces (907.19 g) ricotta cheese
- 2 cups (488 ml) whole milk
- 2 cups (400 g) granulated sugar
- ½ cup (64 g) cornstarch
For the Shells
- 16 ounces (453.59 g) cake flour
- ¼ cup (50 g) granulated sugar
- 2 ounces (56.7 g) vegetable shortening, 5 tablespoons
- 2 egg yolks
- ¾ – 1 cup (180 – 240 ml) white wine
- Vegetable oil, for frying
Special Equipment
Instructions
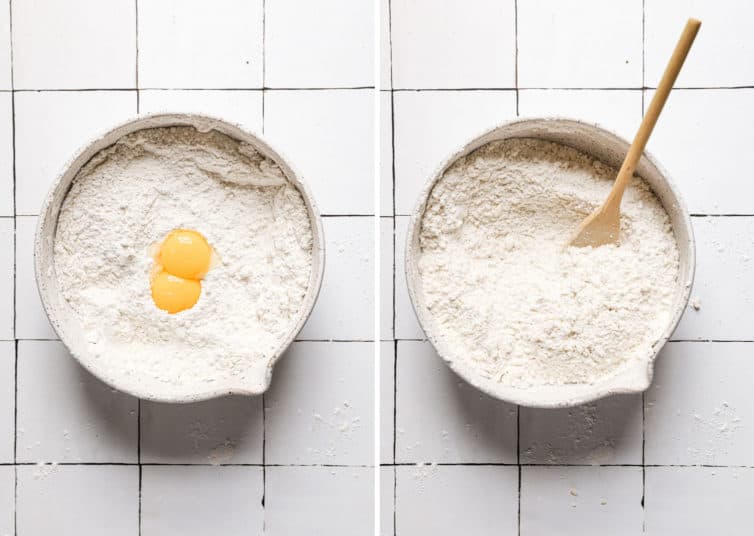
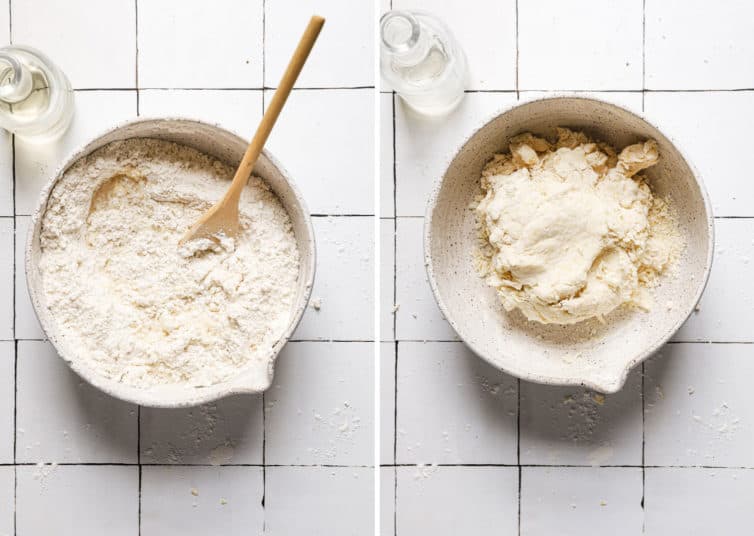
- Make the Dough for the Shells: In a large bowl, whisk together the cake flour and the sugar. Using a pastry blender or two knives, cut the shortening into the flour mixture until it resembles coarse meal. Add the egg yolks and stir with a wooden spoon until mostly combined (the dough will look shaggy). Add 2/3 cup of the wine and stir and fold using a rubber spatula. You want the dough to come together like pie dough, so if it is still dry and shaggy, add more wine, 1 tablespoon at a time, until the dough holds together when pinched between your fingers. Cover the bowl with plastic wrap and allow to rest at room temperature for at least 4 hours.
- Make the Filling: Place the ricotta in a large mixing bowl and beat on medium speed until completely smooth, about 1 to 2 minutes; set aside. In a medium saucepan, whisk together the sugar, milk and cornstarch. Place over medium heat and cook, stirring occasionally, until the mixture is smooth and the sugar is totally dissolved. Gently stir the heated sugar mixture into the ricotta until combined. Return the entire mixture to the saucepan and continue to cook over medium-low heat, stirring constantly, until the mixture thickens (a few large bubbles should pop at the surface when it has thickened), about 20 minutes. Cool to room temperature and then refrigerate for at least 2 hours before using. The filling should be completely chilled when used to fill the cannoli shells.
- Make the Cannoli Shells: Using a small cookie scoop, tear off about 1 tablespoon of dough at at time. Roll to 1/8-inch thickness, about 4 to 5 inches in diameter. Wrap the dough around a cannoli form, overlapping the dough and press to seal together. Repeat with the rest of the dough.
- Line baking sheets with a double layer of paper towels.
- Fry the Cannoli Shells: Add vegetable oil to whatever you are going to use for frying (a Dutch oven or deep cast iron skillet work great), ensuring you have at least 1 to 2 inches of oil. Heat the oil to 375°F and, a few at a time (or however many fit in your frying vessel without crowding), place the prepared forms into the oil. Fry until light golden brown, about 3 to 4 minutes, using tongs to move them around as necessary, especially if using a skillet, so they don't settle in one spot. Remove the forms from the oil (being careful to drain out any oil inside the form) and set the shells on paper towels to drain. Once they are cooled enough to handle, slide the shell off of the form.
- Assemble the Cannoli: When you are ready to serve the cannoli, fit a large piping bag with a large round or star tip, and fill it with the ricotta filling. (If you don't have piping bags and tips, you can put the filling in a large ziploc bag and simply snip off one corner.) Squeeze the bag to pipe filling into each end of the cannoli shell, making sure it is completely filled inside. Dip the ends into mini chocolate chips or chopped nuts and dust with powdered sugar, if desired.
Notes
- Wine: You can use white or red, any variety, but the red will tint the dough (it won’t alter the taste). If you cannot consume wine, substitute buttermilk.
- Baked Shells Option: If you want to bake the shells instead of frying, bake at 350 degrees for 15 minutes or until golden brown.
- You should only fill the cannoli right before you are planning on serving them so the shells do not get soggy. Only fill as many cannoli as you plan on eating!
- Make-Ahead Shells: The shells can be fried, cooled, and stored in an airtight container for up to 7 days before filling. They can also be frozen for up to 1 month in an airtight container.
- Make-Ahead Filling: The filling can be kept in an airtight container in the refrigerator for up to 5 days. Freezing is not recommended, as it can become watery when thawed.
Did you make this recipe?
Leave a review below, then snap a picture and tag @thebrowneyedbaker on Instagram so I can see it!
Photography by Dee Frances.


This recipe is simply delightful! Light and crispy cannoli shells filled with sweet ricotta cream create a magnificent treat. Definitely a must-make family favorite you’ll want to revisit!
SO GOOD! I don’t have cannoli forms (yet!) so figured I’d just make the shells as little cookies and dip/top with the filling…of course, when I fried the “cookies” they became puffs. Which totally worked! I made cannoli puffs instead of cream puffs! I dipped the bottoms in melted chocolate, piped the filling in (added a bit of vanilla to the filling) and oh my gracious! There *might be some left by the time dinner rolls around…maybe. Thanks for the great recipe! I love this as a New Year’s tradition!
They look delicious, I’ll definitely try them out. Thank you, you’re a great.
Business Directory
Hi, I can’t use wine due to dietary restrictions so will it be 1 cup buttermilk instead?
Thank you!
Hi Michelle – I gave me husband the link to the cannoli forms, that you included in the recipe, to purchase for my birthday. When I opened my gift I discovered that they were mini forms. The link does indeed go to the mini forms on Amazon. Could you please provide the link to the full size forms? Thank you’
Absolutely delicious! I am definitely going to try this recipe this weekend for my family. Thanks for sharing. Looking forward to more yummy from you.
Years ago I knew an Italian baker named Anna Vaccaro. She told me that her family brought cannolis to this country. Would you happened to have known her or have heard of her?
Hi Ronna, I do not know her or have heard of her!
Haven’t tried this yet but can’t even imagine the mixture not being a soupy mess. That is the issue I have with my filling, only sometimes though. ? Your recipes haven’t done me wrong in the past so I’m gonna give it a try.
Is it possible to make the cannoli dough and then Freeze it?
I’ve never done it, but I think it should work just fine.
Hi, I can’t use wine due to dietary restrictions so will it be 1 cup buttermilk instead?
Thank you!
Yes, same amount!
Thank you so much for this delicious recipe. I made it today and it was just perfect. At some point i thought the filling was too liquidy, but left it in the fridge overnight and it was perfect. It requires a technique for sealing them correctly. A few opened when we fried them. I found that when rolling them just put the egg white on the side that will overlap. Dab the seam with your finger until the dough almost blend together. If it opens it might be because it has too much egg white. The moisture will not let it stick.
It is a recipe that i will make again for sure. Something i can make for really special people cause it’s one of those recipes that you have to put love in to it. But the final result is just amazing.! Wish we can add pictures this review!
Thanks again!
Wow
I did it
Cannoli!
What a flavorful recipe
The came out wonderful. Great dough to work with.
The only issue I had was they wanted to unroll when frying , is there a trick I’m missing?
I only had merlot so the dough looked like a slice of baloney when rolled out – lol
But the taste was on point. Thank you for sharing this heritage recipe!
What exactly does 3/4-1cup mean?
I’m not understanding how much wine I need for the recipe. It says 3/4-1cup. What exactly does that mean?
Wow your cannoli look really great, look at all the blisters. And you made so many of them. Nice job!
Hello! I had a question about the cannoli forms. Do you think I could make them out of aluminum foil instead of buying them? Thanks so much for the recipe my parents are going to love these:)
Hi Julia, I think it would work, just make them as smooth as possible since you’ll have to slide the cooked pastry off of them. Enjoy1
I cannot print your recipes !! Why not?
Are you clicking the “print recipe” button above? It’s working just fine for me.
I really appreciate that you include a photo and recipe notes/tips on the printed recipes. Thank you!
You’re welcome! :)
Wow these looks amazing!
Your cannoli look delicious! Since I returned from Italy I’ve been meaning to make them myself but been putting it off. Seeing how easy the dough is to make I might give it a go finally!