Homemade Strawberry Pop Tarts
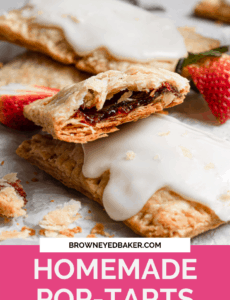
These easy, yet totally impressive homemade strawberry pop tarts are the perfect addition to your morning breakfast. Flaky pastry surrounds strawberry filling for a tender breakfast pastry that will disappear in a matter of minutes. Get ready to go completely berserk over this amazing homemade version of one of my childhood favorite treats!
Growing up, my parents kept our home relatively junk food- and sweets-free. We weren’t allowed to have the “cool” sugary cereals, no fruit rollups, no potato chips, no pop. So naturally, no Pop Tarts.
BUT! There was a steady supply of frosted brown sugar cinnamon Pop Tarts at grandma’s house, and they were always my breakfast of choice during weekend sleepovers. I hadn’t had them in probably decades and then got hit with a serious craving for them when I was pregnant with Joseph. They totally hit the spot, but they definitely weren’t as good as I remembered.
Enter: Homemade Pop Tarts!
How to Make Homemade Pop Tarts
Quite a long time ago, I tackled homemade pop tarts and in the process learned that they are not at all difficult to make, and they will absolutely, positively blow your mind.
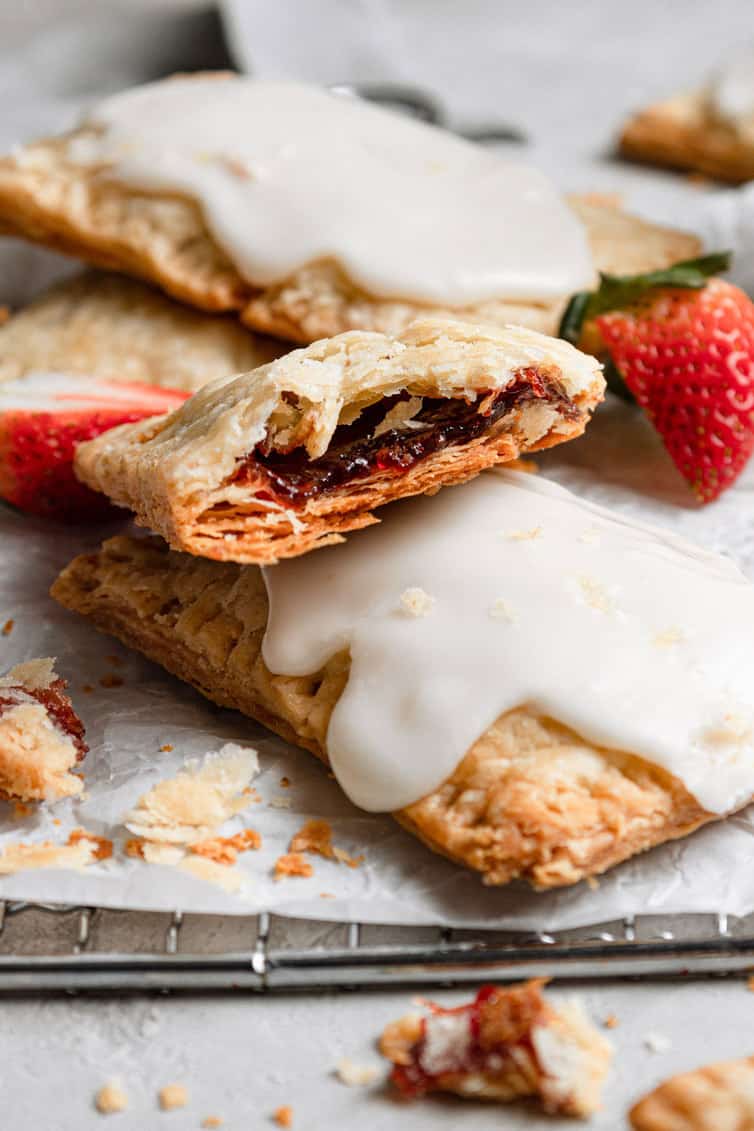
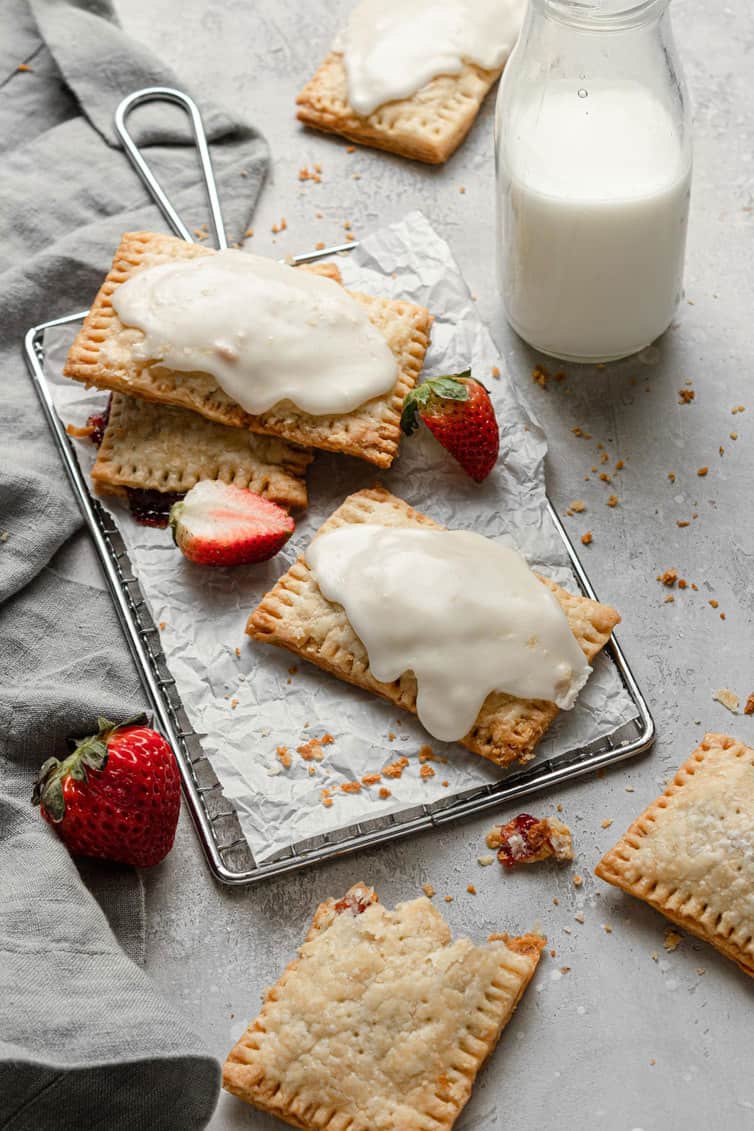
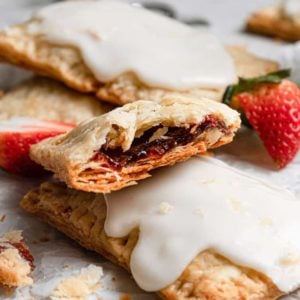
The pastry crust is flaky and buttery, little pieces breaking and fluttering off when you take a bite. Each little pastry pillow is full of sweet strawberry filling, and then frosted with an optional simple vanilla sugar icing.
Prepare the Filling
Everyone seems to have an old favorite when it comes to pop tarts – strawberry or brown sugar cinnamon. For this homemade pop tart recipe, I provide you with instructions to make either or both!
Brown Sugar-Cinnamon Filling
- In a medium bowl, whisk together brown sugar, cinnamon, and flour.
- Set aside until ready to assemble.
Strawberry Filling
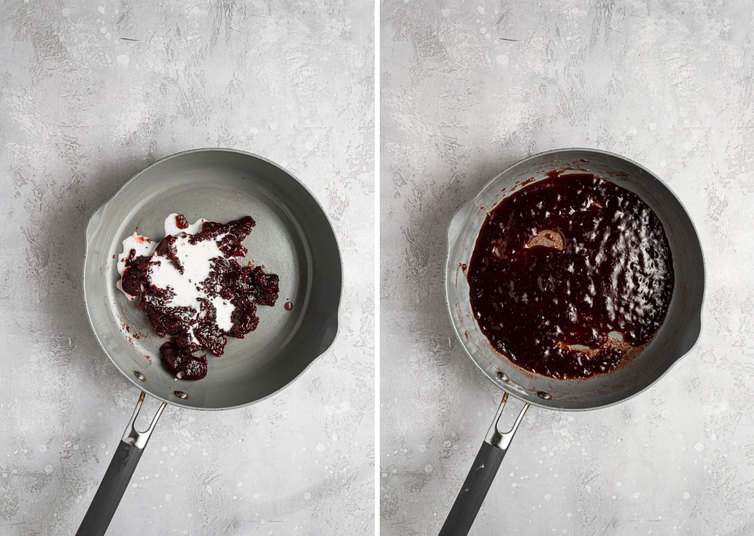
- In a small bowl, whisk together cornstarch and water.
- Combine the cornstarch water with strawberry jam in a small saucepan over medium heat.
- Bring to a boil and simmer for 2 minutes, stirring frequently. Remove from heat and allow to cool.
- Set aside until ready to assemble.
Pastry Crust
For homemade pop tarts, I used a flaky pastry crust. It’s flaky and buttery with little pieces breaking and fluttering off when you take a bite. To make this flaky pastry you will need:
- Flour: The base of the pastry dough, this flour gives structure to the flaky pastry.
- Sugar: Sweetens up the dough, just a bit.
- Salt: Adds a little flavor and balances out the sugar.
- Butte: Unsalted butter that is cold and cubed gives the pastry little pockets of butter that bake into the flakiest dough.
- Egg + Milk: Used to bind the dough together and provides a soft finish to the dough.
Make the Pastry
- Mix together dry ingredients: In a large bowl, whisk together flour, sugar, and salt.
- Cut the butter into the flour: Using a pastry blender, cut the butter until it is the size of peas and the mixture holds together when you squeeze it.
- Add wet ingredients: In a small bowl whisk together the egg and milk and add to the dough. Mix together with a fork until everything is evenly moistened.
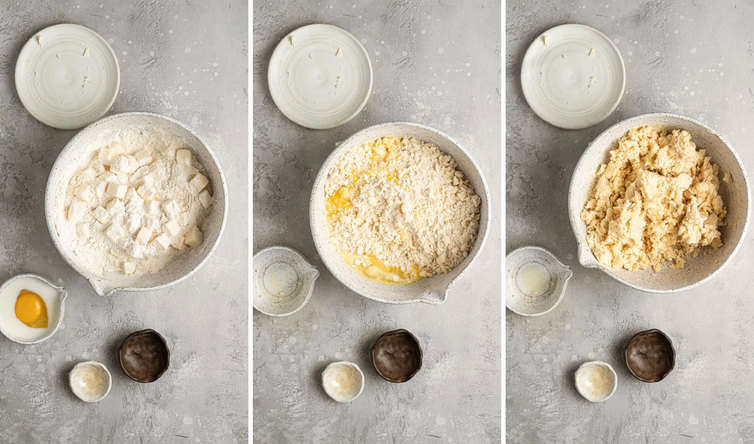
- Knead the dough: OIf necessary, knead until the dough comes together.
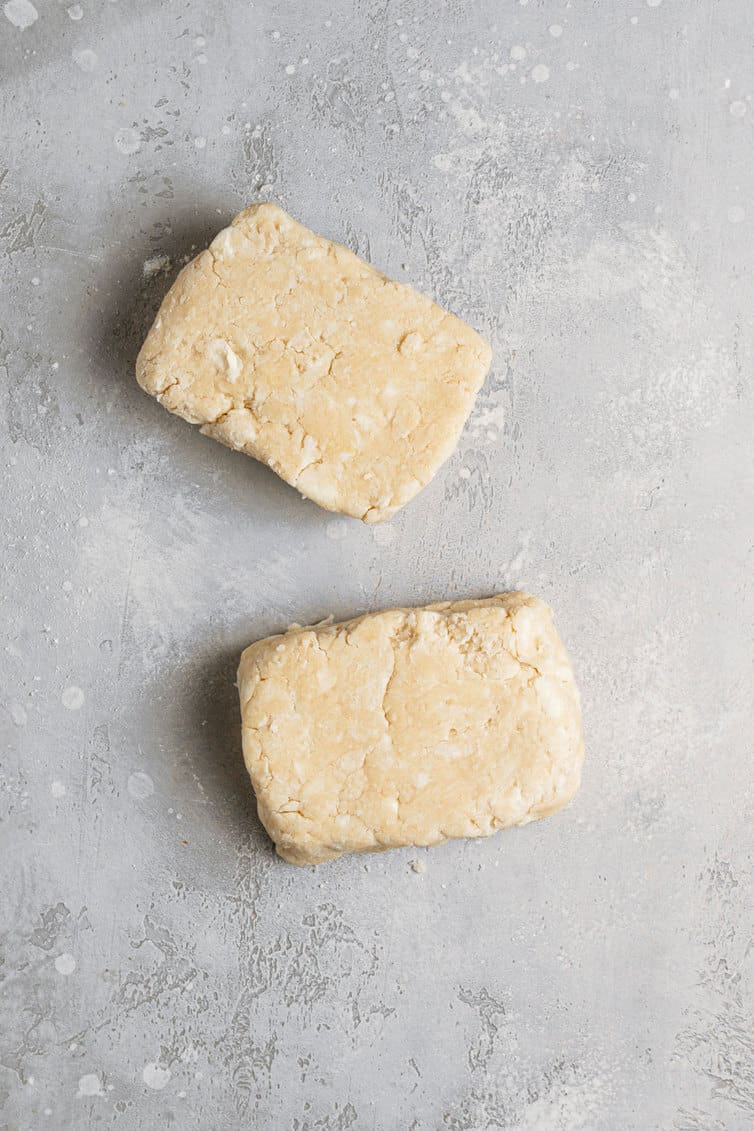
- Divide + store the dough: Divide the dough in half. If you are making the dough in advance, wrap each half in plastic wrap and store it in the refrigerator for up to 2 days. If you are making the pop tarts in one go, prepare to roll the dough.
Save This Recipe
How to Cut the Pastry Dough
- Thaw before rolling: If you made the dough in advance, allow it to come to room temperature for about 15 minutes before rolling and cutting.
- Roll out the dough: Using a rolling pin, roll out one piece of dough to about ⅛-inch thick, in a 9½ by 12½-inch rectangle.
- Trim the edges: Using a sharp knife, pastry wheel, or bench scraper, trim the rectangle to a 9 by 12-inch rectangle.
- Slice into small rectangles: Cut the sheet of dough into nine 3×4-inch rectangles.
- Transfer the dough: Using a spatula, transfer the rectangles to a baking sheet that has been lined with parchment paper or a silicone baking mat.

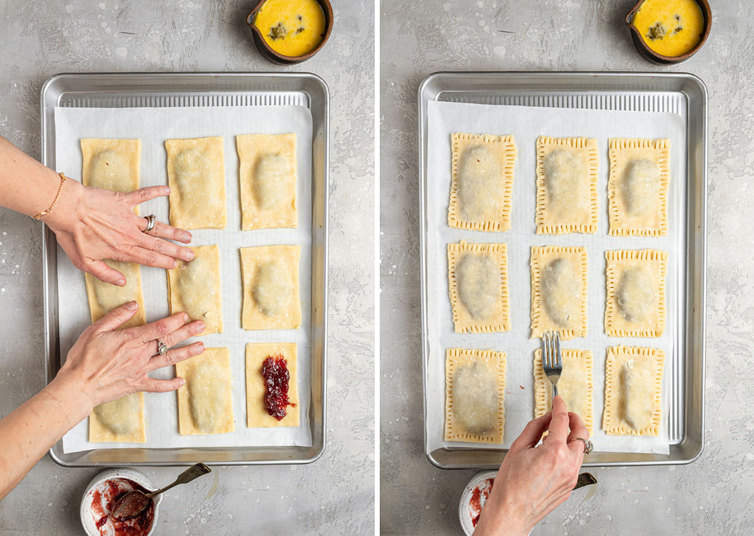
Filling + Sealing
- Make the egg wash: In a small bowl whisk together egg and milk. Brush the egg wash on each of the rectangles.
- Fill the base: Spoon a tablespoon of filling into the center of each rectangle, leaving a 1/2 inch space around the edges.
- Cut the tops: Roll out and cut the second piece of dough in the exact same manner as you did the first.
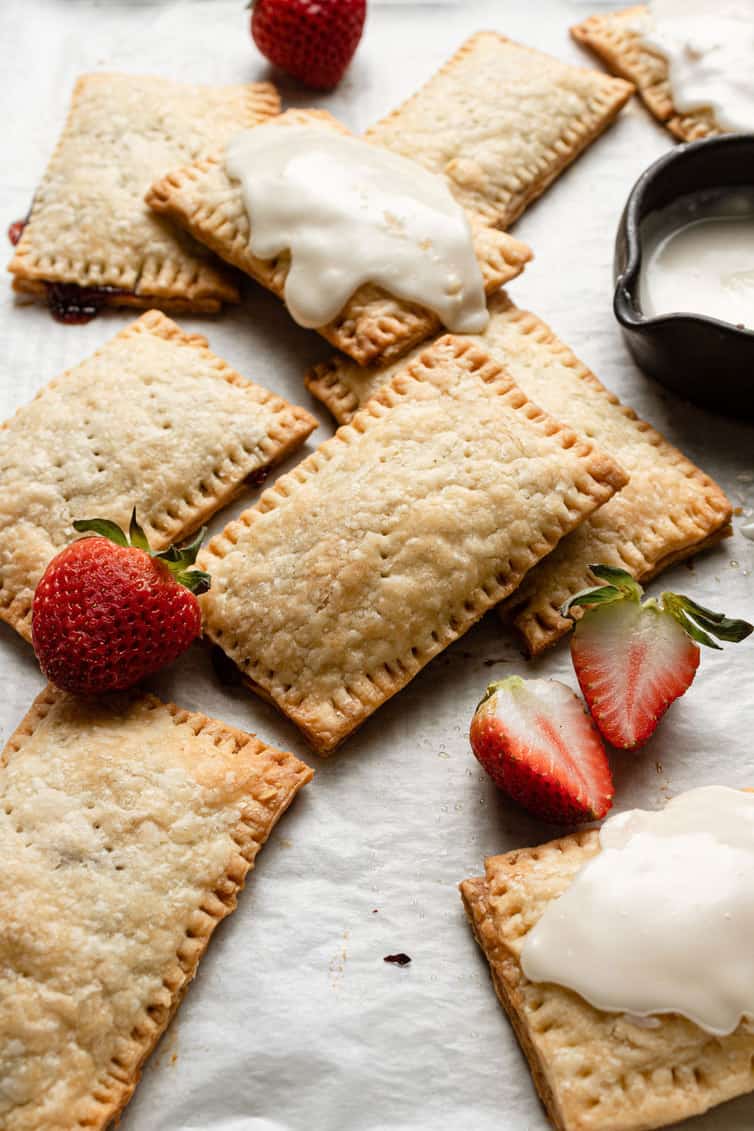
- Cover the filling: One at a time, place the second rectangle of dough on top of the nine filled ones.
- Press the seams: Using your fingers, press around the seams of the dough to make sure they are sealed. Press the tines of a fork around the edges of the rectangles.
- Vent the dough: Prick the tops of the rectangles in multiple spots to allow steam to escape.
- Chill the pop tarts: Refrigerate the pan with the pastries, uncovered, for 30 minutes.
Baking Homemade Pop Tarts
- Heat the oven: Preheat the oven to 350°F.
- Bake the pastry: Bake the homemade pop tarts for 25 to 30 minutes, or until lightly browned.
- Cool and serve: Cool slightly before serving if you are not using icing on them. If you plan to ice the pop tarts, cool completely before icing.
Tips for Glazing
When I originally shared these, they were not frosted, and while it’s not TOTALLY necessary, I think it really ratchets them up a few notches, so I’ve included both a vanilla icing for the strawberry pop tarts and a cinnamon icing for the brown sugar cinnamon ones. Feel free to eat them plain or slather some frosting on!
- Mix together the icing: In a small bowl whisk together powdered sugar, milk, and vanilla extract. Add cinnamon if you are making icing for the brown sugar cinnamon pop tarts.
- Check the consistency: The icing should have a very thick, but still spreadable, consistency. If necessary, add a splash of milk at a time, until a spreadable consistency is reached.
- Ice the pop tarts: Spread a spoonful of icing over the top of each pastry and allow to sit for at least 30 minutes so the icing can set.
Serving Your Pop Tarts
If a pop tart or two won’t be enough to keep you full for the morning, here are a few other recipes you can serve with your pop tarts:
- Scrambled Eggs
- Breakfast Sausage, Egg, and Cheese Casserole
- Cheesy Sausage and Spinach Breakfast Casserole
- Sausage and Cheddar Bites
Making Ahead + Storing
- Make-Ahead Dough: You can save time in the morning by prepping the pastry dough up to 2 days in advance. Store pre-made dough in the refrigerator wrapped in plastic wrap for up to 2 days.
- Make-Ahead Baked Pop Tarts: Follow the recipe through baking and cool completely. Store uniced, baked pop tarts in an airtight container for up to 1 week. When you are ready to serve, ice and enjoy!
- Storing Iced Pop Tarts: Keep iced pop tarts in an airtight container for up to 3 days.
- Freezing Unbaked Pop Tarts: Prepare through step #6, then instead of placing the pan in the refrigerator, place in the freezer for up to 2 hours until completely frozen and firm. Transfer to an airtight ziploc bag or container and freeze for up to 3 months. Bake as directed from frozen, allowing for an extra few minutes bake time.
- Freezing Baked Pop Tarts: Bake the pop tarts and allow to cool completely. Place the cooled pop tarts in a single layer on a baking sheet and place in the freezer for 2 hours or until completely frozen. Place in an airtight ziploc bag or container and freeze for up to 3 months. Reheat in the toaster, toaster oven, oven, or microwave.
More Sweet Breakfast Pastry Treats
- Sticky Buns
- Danish Pastries
- Homemade Croissants
- Best-Ever Homemade Cinnamon Rolls
- Monkey Bread (From Scratch)

No toaster required! These homemade pop tarts with a generous heaping of vanilla glaze are perfectly crisp and flaky. Filled with sweet strawberry filling, these pop tarts are sure to go fast!
If you make this recipe and love it, remember to stop back and give it a 5-star rating - it helps others find the recipe! ❤️️
Homemade Strawberry Pop Tarts
Ingredients
For the Brown Sugar-Cinnamon Filling
- ½ cup (110 g) light brown sugar
- 1½ teaspoon (1.5 teaspoon) ground cinnamon
- 4 teaspoons all-purpose flour
For the Strawberry Filling
- ¾ cup (255 g) strawberry jam
- 1 tablespoon cornstarch
- 1 tablespoon water
For the Pastry Crust
- 2 cups (250 g) all-purpose flour
- 1 tablespoon granulated sugar
- 1 teaspoon salt
- 1 cup (227 g) unsalted butter, cold and cubed
- 1 egg
- 2 tablespoons milk
For the Egg Wash
- 1 egg
- 1 tablespoon milk
For the Plain Icing
- ¾ cup (90 g) powdered sugar
- 1 tablespoon milk
- ¼ teaspoon (0.25 teaspoon) vanilla extract
For the Cinnamon Icing
- ¾ cup (90 g) powdered sugar
- 1 tablespoon milk
- ½ teaspoon (0.5 teaspoon) ground cinnamon
- ¼ teaspoon (0.25 teaspoon) vanilla extract
Instructions
- Prepare the Brown Sugar-Cinnamon Filling: In a medium bowl, whisk together the brown sugar, cinnamon, and flour.
- Prepare the Strawberry Filling: In a small bowl, whisk together the cornstarch and water, and then combine with the jam in a small saucepan over medium heat. Bring to a boil and simmer for 2 minutes, stirring frequently. Remove from the heat and let cool.
- Make the Pastry Crust: In a large bowl, whisk together the flour, sugar, and salt. Using a pastry blender, cut in the butter until it is the size of peas and the mixture holds together when you squeeze it. In a small bowl, whisk together the egg and milk and add to the dough. Mix together with a fork until everything is evenly moistened. Knead briefly on a floured surface, if necessary, until the dough comes together.
- Divide the dough in half. (At this point you can wrap each in plastic wrap and refrigerate for up to 2 days. If you refrigerate the dough, let it come to room temperature for about 15 minutes before rolling out.) Roll out one piece of dough to about ⅛-inch thick, in a 9½ by 12½ rectangle. Using a sharp knife, pastry wheel or bench scraper, trim the rectangle to 9×12 inches. Cut the sheet of dough into nine 3×4-inch rectangles. Using a spatula, transfer the rectangles to a baking sheet that has been lined with parchment paper or a silicone baking mat.
- Assemble the Pastries: In a small bowl, whisk together the egg and milk. Brush the egg wash on each of the rectangles. Spoon a tablespoon of filling into the center of each rectangle, leaving a ½-inch of space around the edges.
- Roll out and cut the second piece of dough in the exact same manner as you did the first. One at a time, place a second rectangle of dough on top of the nine assembled ones. Using your fingers, press around the seams of the dough to make sure they are sealed. Press the tines of a fork around the edges of the rectangles. Prick the tops of the rectangles in multiple spots to allow steam to escape.
- Refrigerate the pan with the pastries (you don’t need to cover them) for 30 minutes.
- Preheat the oven to 350 degrees F.
- Bake the pastries for 25 to 30 minutes, or until lightly browned. Cool slightly before serving if not using an icing. If you plan to ice the pastries, cool them completely before doing so. Store pastries in an airtight container at room temperature for up to one week.
- Make the Icing: In a small bowl, whisk together the powdered sugar, milk, cinnamon (if using), and vanilla extract. The icing should have a very thick, but still spreadable, consistency. If necessary, add a splash of milk at a time, until that consistency is reached. Spread a spoonful of icing over top of each pastry and allow to sit for at least 30 minutes so the icing can set.
Notes
- Filling: Each filling recipes makes enough for a whole recipe (nine pastries). If you are planning to make a variety of fillings, you can scale them up or down as needed. Same goes for the icing recipes!
- Make-Ahead Dough: You can save time in the morning by prepping the pastry dough up to 2 days in advance. Store pre-made dough in the refrigerator wrapped in plastic wrap for up to 2 days.
- Make-Ahead Baked Pop Tarts: Follow the recipe through baking and cool completely. Store uniced, baked pop tarts in an airtight container for up to 1 week. When you are ready to serve, ice and enjoy!
- Storing Iced Pop Tarts: Keep iced pop tarts in an airtight container for up to 3 days.
- Freezing Unbaked Pop Tarts: Prepare through step #6, then instead of placing the pan in the refrigerator, place in the freezer for up to 2 hours until completely frozen and firm. Transfer to an airtight ziploc bag or container and freeze for up to 3 months. Bake as directed from frozen, allowing for an extra few minutes bake time.
- Freezing Baked Pop Tarts: Bake the pop tarts and allow to cool completely. Place the cooled pop tarts in a single layer on a baking sheet and place in the freezer for 2 hours or until completely frozen. Place in an airtight ziploc bag or container and freeze for up to 3 months. Reheat in the toaster, toaster oven, oven, or microwave.
Did you make this recipe?
Leave a review below, then snap a picture and tag @thebrowneyedbaker on Instagram so I can see it!
Photography by Dee Frances


Have you tried to freeze these at all? If so how did you reheat them? Or would you freeze then thaw and bake?
I see that you have replies to questions like this. You said maybe add a few minutes if frozen before being baked. How long would you put it in the oven to reheat if already cooked and then frozen?
Hi Katy, If you already baked them and then froze, maybe 5 to 10 minutes in the oven.
My son asked for homemade pop tarts this morning. I decided on your recipe because they looked light & flakey & we were not disappointed. Thank you for sharing!
At the refrigeration stage, could they be refrigerated for 24 hours and then baked?
Just saw where this has already been answered! I will freeze them!
It’s beautiful flaky!!!! I hope that I can share my result in this website.
Mine has layers and very crunchy.!!
Need to be patient to make this ( 2 days the pate in refrigerator)
But, it worth it!
Thanks for sharing!
Whenever I attempt to make pastry of any kind, I always figure out a way to ruin it. This was by far the easiest and most successful recipe I have ever attempted. I used a food processor for the dough and added a tiny bit more milk to it because it was a little dry. But everything else was spot on. The dough was flaky and buttery and exactly like a pop tart! I did the strawberry filling and nutella filling for others (which was pretty awesome).
I’m looking for an excuse to make these again….do I need an excuse? Is Tuesday a good excuse?
I just made these this weekend for New Year’s Eve and they were truly incredible. I made the two versions above and a third that was a goat cheese/fig combo. Everyone loved them all! Thanks so much for the recipe!
This dough recipe is the bomb! I used it for some chicken pot pie hand pies.
Can you use this dough you think for a Berry pie.
Thank you!
Yay glad you loved it! I think you could!
I made this dough for poptarts filled with pomegranate jam. This dough worked out really well! Even with excess working, the poptarts were flaky and light. Thanks!
Have you ever made these and frozen them for a quick out the door breakfast? I was thinking they would be a great Sunday morning breakfast before church.
Thanks!
Ok so didn’t see this has already been asked and answered! So sorry!
Mary
I’ve always called myself a terrible baker… and really, most things I bake turn out awful. But somehow every recipe of yours always turns out great. I’m eating this right now wondering how in the world I managed to make a delicious, flaky pop tart pastry when every pie crust I have made in my life has been a failure. Can I use this as pie crust??
I don’t have a pastry cutter so I used my cheese grater to grate the butter into the flour, and then I used a metal whisk to pound/whisk it into pebbles. Worked super fast and easy.
Awww I’m so thrilled you made and enjoyed these! I haven’t used this exact recipe as pie crust, but I definitely think it could work!
Do these freeze well? I’d love to make them on the weekend for easy week day breakfast. Maybe freeze in parchment paper and toast in a toaster oven?
Oops! It’s answered already! Thanks!
My husband loves pop tarts, me on the other hand? I never had them as a kid and trying them now? they just don’t do it for me, they make me feel like i’m eating cardboard with frosting.
But these gorgeous homemade ones absolutely have to happen!!! you have convinced me that i need to make these!
Thanks for sharing. If you were to freeze these, in which step would you do so? (For example, after assembling, but before baking; after baking but before icing; etc.)
Oops, I saw this same question addressed a bit earlier. Sorry!
Anyone who says they don’t love a good poptart is downright lying. These look SO, so good!
Honestly, nothing is better than homemade pop tarts!
I’ve been wanting to give homemade poptarts a try for years now! They’re one of my favorite guilty pleasures!
Paige
http://thehappyflammily.com
I also did not have my first pop tart until college, but my favorite flavor was definitely S’mores! Do you think that some marshmallow creme and chopped up chocolate chips would do the trick, or should I slightly melt the chocolate or make a quick, thick ganache first?
I think if you chopped up the chocolate fine enough it would melt without an issue!
Ahhhh . . . . homemade pop tarts! I don’t know how long I’ve been following your blog; feel like it’s been forever! But I missed this recipe the first time around. Growing up, we, too, never had “junk food” in the house. Everything was grown in the garden, frozen or canned for the winter. Even homemade baked goods were a rare treat. But ahhh!, Grandma’s house – that was all together different.
My son is a huge fan of brown sugar cinnamon pop tarts, so this momma will be on your recipe VERY soon. I almost dismissed it thinking the dough would require an involvement of time, but after reading your recipe I see that you’re quite accurate in saying that it doesn’t, thanks to the lack of chilling time after mixing the dough. And my girls like the fruit pop tarts, so we’ve got a double win going on. I would even say these homemade pop tarts look even better than the store-bought variety because of that flakey dough.
Thanks for bringing this recipe back around!
Yessss! I sometimes get Pop Tart cravings, too, but they’re never as good as I expect. I haven’t made homemade ones in years, but now I want to do it again! These look awesome :)
Could I use refrigerated pie dough or puff pastry? Which would be better?
Hi Anne, You could! I think the pie dough would be a closer match to this dough.
Would like to know your thoughts on freezing these pop tarts?
Absolutely! You could freeze them assembled and unbaked, then bake them from frozen (add a couple minutes), or bake them, cool and then wrap and freeze. I wouldn’t freeze them with the frosting, though.
I’ve made these twice and had real problems rolling out the dough. It sticks so mine look really sloppy but taste good.
They look so good. Is it possible to make these with oat flour? My daughter cannot tolerate regular flour. TIA!!!
Hi Amy, I’ve never baked with oat flour, so I can’t give you a definitive answer, but if you’ve had luck substituting it for all-purpose, then I would definitely give it a try. Let me know how it turns out!
Michelle, can I make these ahead and freeze? If so, how would you reheat – assuming toaster? If not frozen, do you think they’d last a day or so without getting soggy? I usually bake the afternoon before giving my boyfriend treats to take into work the next day. Would love to send these…
Hi Wendy, Yes, you could freeze them. I would heat them in the oven or toaster oven. They would also be fine for a day or two after baking.
I just made these for valentine’s day. I used a heart cookie cutter and made them heart shaped. They turned out perfect! Thank you for the recipe.
These looked sooo good, but when I tried to bake them, the butter seemed to melt right out of them, making them look kind of soggy. I’m going to try baking them some more..I hope they will turn out to look like your’s! I wonder what I did wrong…?
Hi Charlotte, Did you refrigerate the pan before baking? Making sure they are totally chilled before baking. That should help the butter not to melt, but rather create little steam pockets of pastry.
I’d love to make a big batch soon, I have four kids and usually quadruple recipes to always have extra for another day. My question is could I freeze these after baking so all that hard work lasts for more than an afternoon?!
Yes, absolutely!
How does the brown sugar-cinnamon filling get that gel like consistency? It says it is made of sugar, cinnamon, and flour, but the picture shows a goopy texture. Did you add milk or water?
Please reply to: ds_wesley28 (at) hotmail dot com
The brown sugar-cinnamon ones don’t have a gel-like consistency; the only ones that had photographs of the interior were the strawberry. I didn’t add milk or water; only the ingredients you see listed in the recipe above.
hi urgent question here!
is it possible to do up to the assembly step (with the crimping edges and all) and refrigerate it, say with cling wrap, then bake the following day?
Thanks :)
I made these as a Sunday morning treat for my family! They were just as delicious and flaky as I ad hoped! Thanks or sharing!