Jewish Apple Cake
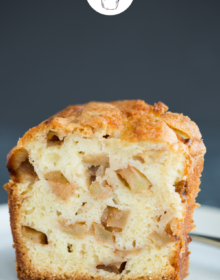
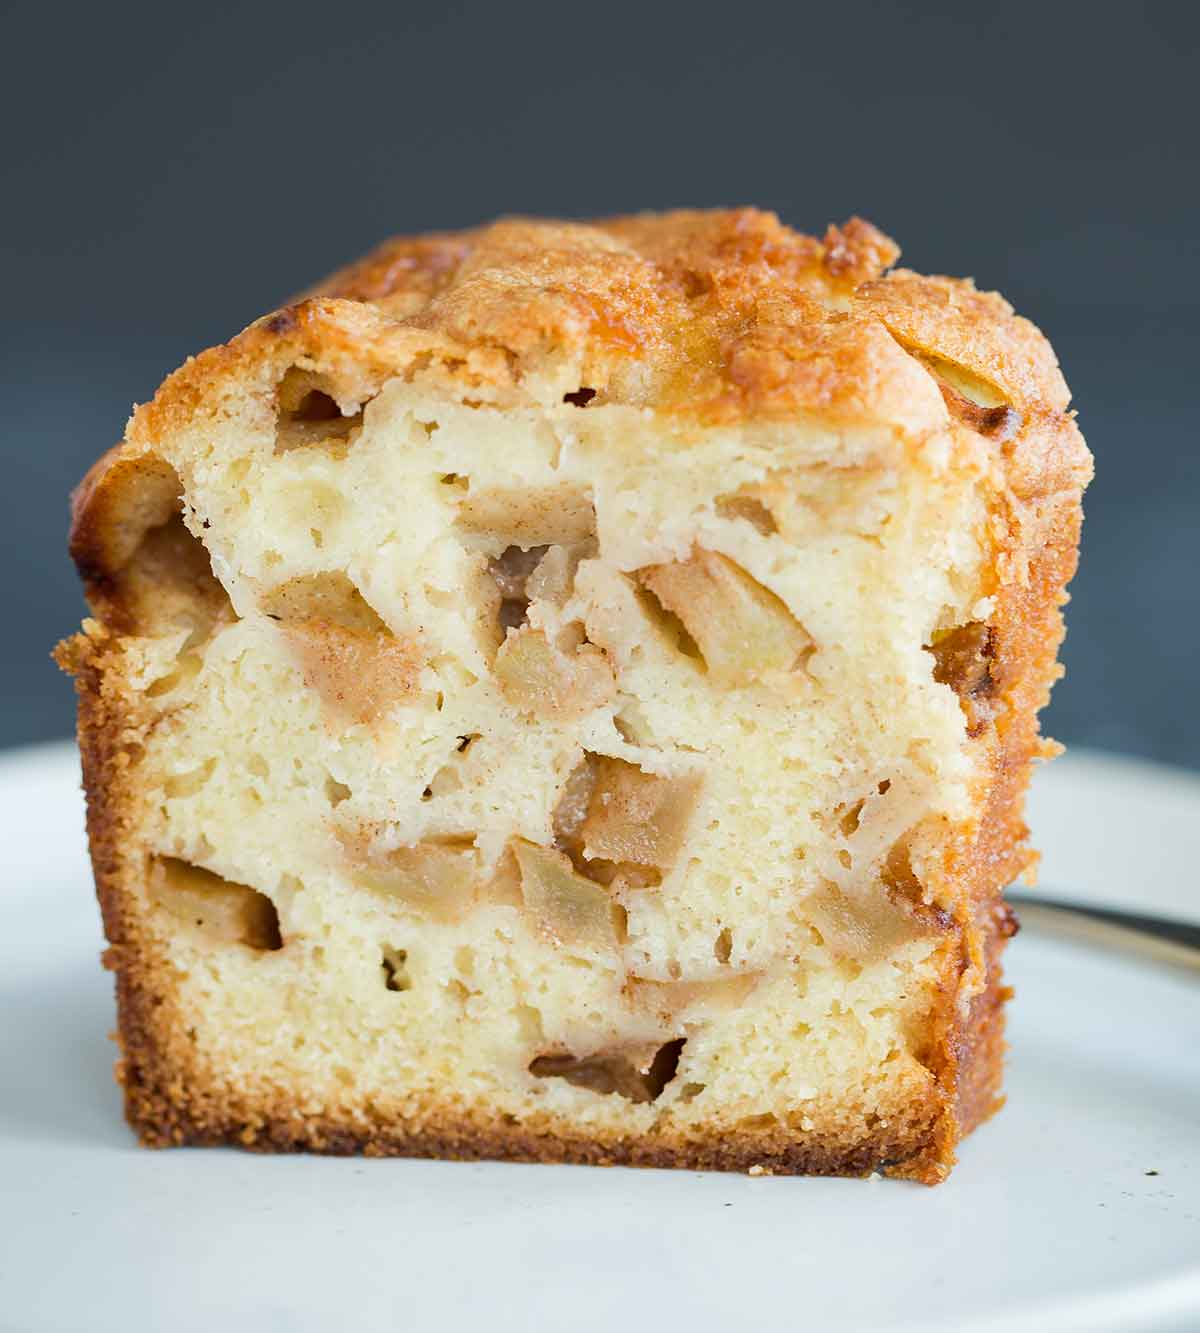
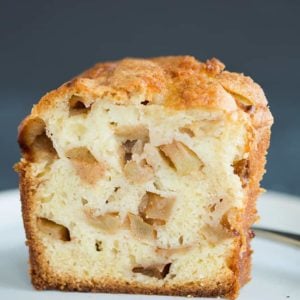
This Jewish Apple Cake is a wonderfully dense and moist cake batter studded with tons of cinnamon-sugar coated apples. It's the perfect fall dessert for any occasion, especially if you are celebrating the Jewish holiday of Rosh Hashanah.
This Jewish apple cake recipe was sent to me years ago by a reader, Linda, who said she had been making it for years and that it's a big family favorite.
Linda said that this particular recipe is from Chef Robert Bennett of Classic Bakery in Cherry Hill, New Jersey; when I Googled "Jewish apple cake" I found tons of recipes nearly identical to this one, so it may be one of those recipes that have been floating around in grandmas' kitchens for decades!
Why We Love It…
The crumb of this cake is compact but OH SO velvety smooth and super moist.
Linda talked about how much her family loved the crust on this cake and I agree - I think it was my favorite part!
The texture of the cake really reminded me of the Russian pound cake that my aunt and grandma used to make around the holidays.
When It’s Served
Jewish apple cake is a popular dessert during Rosh Hashanah (the Jewish new year); since the cake is made without any dairy products (see the ingredient notes below), it can be eaten as a dessert with meals made with meat, keeping with Jewish dietary laws of not mixing meat and dairy in the same meal.
If you need something a little extra special in the dessert department this fall, give this Jewish apple cake a try - it's dessert comfort food at its best.
Key Ingredients
This cake does not require any fancy ingredients, but let’s talk through some of the key ones you’ll use and potential substitutions:
- Apples – The star of the show! This recipe calls for Granny Smith apples, but Gala apples and Honeycrisp apples are also wonderful alternatives. Instead of sliced apples, this recipe calls for chopping them, which I love! I feel that they are better dispersed through the cake and it’s easier to eat.
- Vegetable Oil – This cake uses vegetable oil instead of butter, which keeps the cake dairy-free and kosher, as well as produces a wonderfully moist crumb.
- Orange Juice – This takes the place of milk (keeping the cake free of dairy products), and adds a punch of flavor to the cake batter. A store-bought orange juice with no pulp is a great option! If you need to substitute, pineapple juice is a wonderful choice; otherwise, water will work.
How to Make Jewish Apple Cake
Below is a quick overview of how this recipe comes together:
Save This Recipe
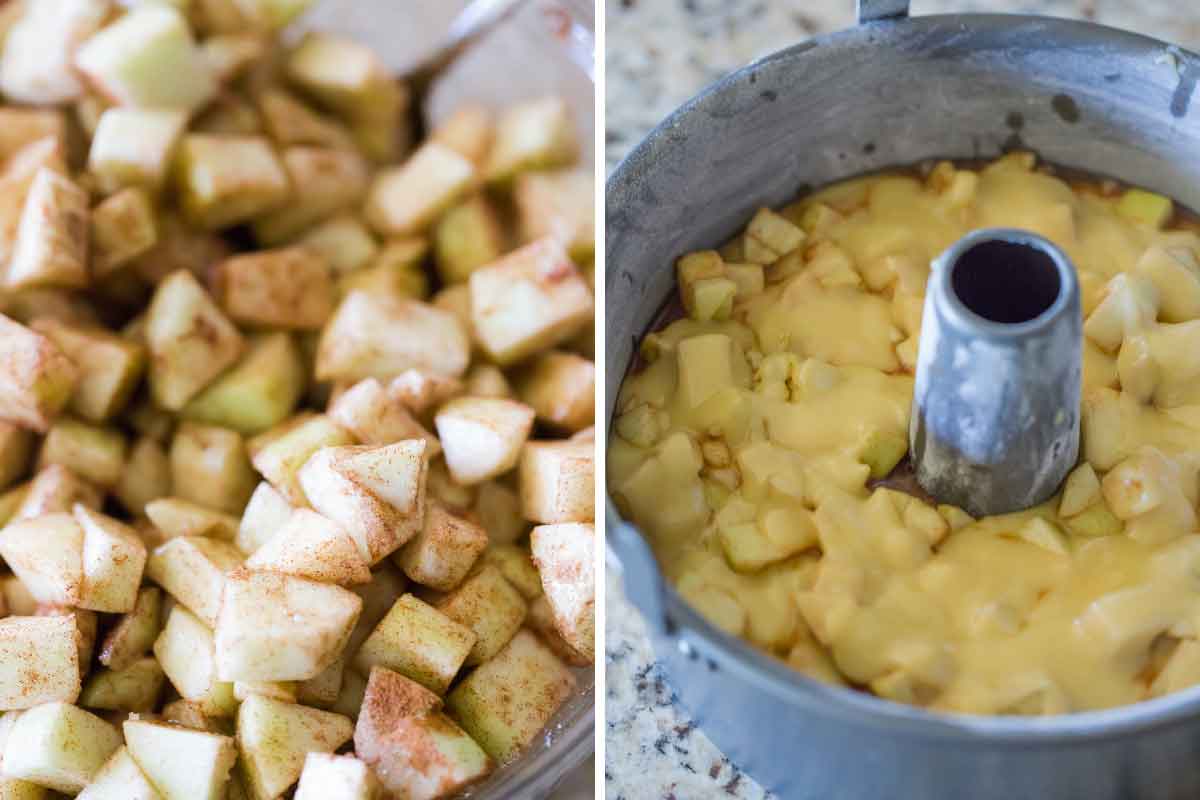
- Toss the chopped apples with cinnamon and sugar, then set them aside.
- Whisk together the dry ingredients in a large mixing bowl.
- In a separate bowl, whisk together the sugar, vegetable oil, orange juice, and vanilla extract.
- Add the wet ingredients to the dry ingredients and stir to combine with a rubber spatula.
- Add the eggs one at time, mixing well after each.
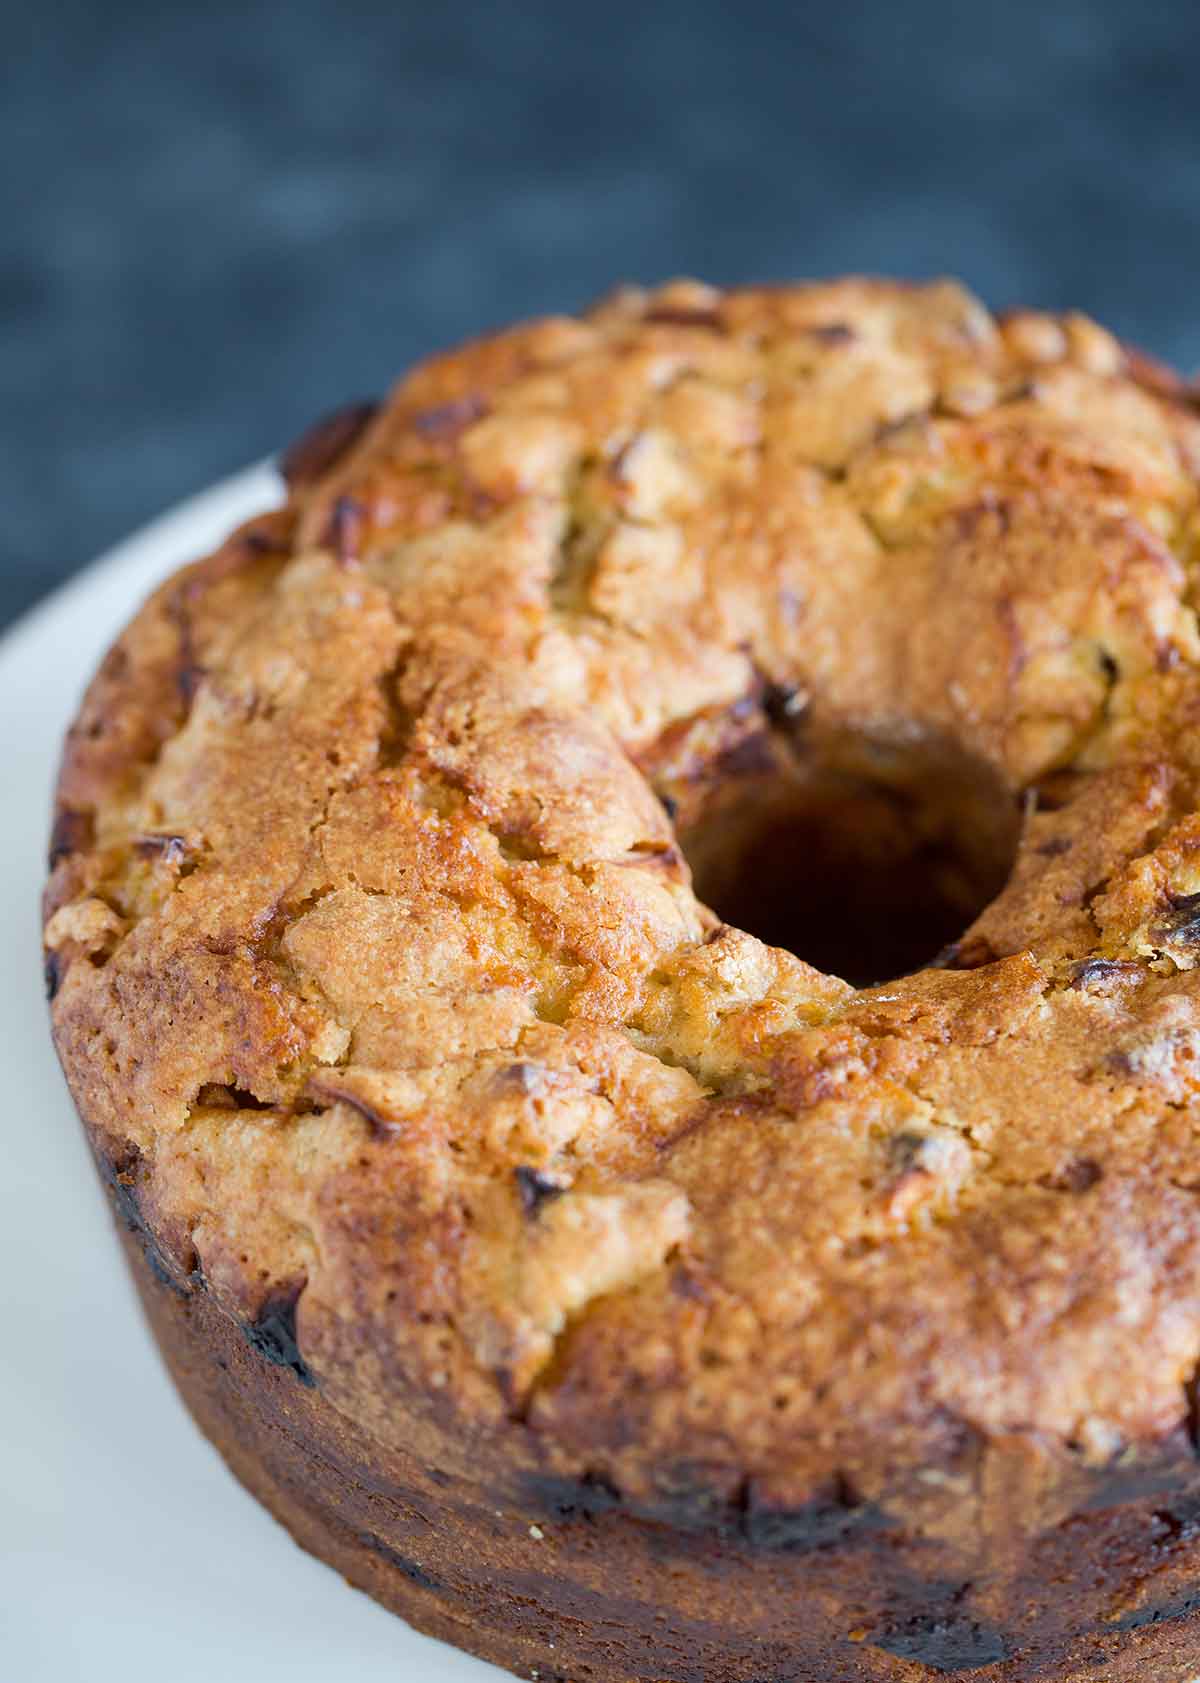
- Layer the cake batter and chopped apples in a 10-inch tube pan.
- Bake until a skewer comes out clean (takes around 90 minutes).
When Linda emailed me the recipe, she said that she intentionally "ribbons" her batter in layers over the apples without covering them completely so that the cake has apples all throughout and not distinct layers of cake and apple. I just loved having chunks of apples in every single bite!
Recipe Notes
A few quick tips on making a wonderfully delicious Jewish apple cake:
- I used a slotted spoon to transfer the apples from the bowl to the prepared pan so that not too much accumulated juice was transferred, but there still was some and it didn’t appear to negatively affect the cake at all.
- The Pan – A 10-inch tube pan is perfect for this recipe, but you can also substitute a standard 10 to 12-cup Bundt pan. I would recommend a standard-style pan and not one that is overly intricate; the chunks of apple throughout the cake could cause some sticking in those fancy pans.
- To Serve – This cake is absolutely delicious standing on its own, but you could certainly serve a slice of it with a dollop of whipped cream, a dusting of powdered sugar, a scoop of vanilla ice cream, or a drizzle of salted caramel sauce.
- Storage – Once completely cool, leftover cake can be stored in an airtight container for up to 4 days.
- Freezing – This cake freezes wonderfully! Once the cake has cooled completely, wrap it tightly with plastic wrap, and then a layer of aluminum foil and freeze for up to 3 months. Thaw overnight in the refrigerator before serving.

Enjoy More Apple Recipes:
- Classic French Apple Cake
- Dutch Apple Pie
- Old-Fashioned Apple Dumplings
- Easy Apple Crisp
- Salted Caramel Apple Pie
If you make this Jewish apple cake recipe and love it, remember to stop back and give it a 5-star rating - it helps others find the recipe! ❤️️
Jewish Apple Cake
Ingredients
For the Apples
- 6 medium granny smith apples, peeled, cored and chopped (about ½-inch pieces)
- 5 tablespoons (62 g) granulated sugar
- 1 tablespoon ground cinnamon
For the Cake
- 2¾ cups (358 g) all-purpose flour, sifted
- 1 tablespoon baking powder
- 1 teaspoon salt
- 2 cups (396 g) granulated sugar
- 1 cup (198 g) vegetable oil
- ¼ cup (60 ml) orange juice
- 2½ teaspoons vanilla extract
- 4 eggs
Instructions
- Preheat oven to 350 degrees F. Grease and flour a 10-inch tube pan.
- Prepare the Apples: In a large bowl, toss the chopped apples with the sugar and cinnamon. Set aside.
- Prepare the Cake Batter: In a large bowl, whisk together the flour, baking powder and salt.
- In a medium bowl, whisk together the sugar, vegetable oil, orange juice, and vanilla extract. Add the wet ingredients to the flour mixture and stir to combine with a spatula or wooden spoon.
- Add the eggs to the mixture one at a time, mixing well after each addition (the batter will start out very thick, but will get looser and easier to mix as you continue to add the eggs). Scrape down the sides and bottom of the bowl to ensure that all of the ingredients are fully incorporated.
- Add a thin layer of the cake batter to the bottom of the pan, then add one-quarter of the apples on top of the batter. Ribbon one-quarter of the remaining cake batter over top of the apples; the batter should not completely cover all of the apples (it will spread when baking). Repeat three more times with the remaining apples and cake batter, ending with a layer of cake batter, but again it will not totally cover the apples, that’s okay!
- Bake for 1 hour 30 minutes, or until a skewer inserted into the center comes out clean. Place the pan on a wire rack and for 20 minutes, then invert the pan and remove the cake. Cool to room temperature before serving. Leftovers can be stored at room temperature for up to 4 days.
Notes
- Apples – This recipe calls for Granny Smith apples, but Gala apples and Honeycrisp apples are also wonderful alternatives.
- Orange Juice – This takes the place of milk, and adds a punch of flavor to the cake batter. A store-bought orange juice with no pulp is a great option! If you need to substitute, pineapple juice is a wonderful choice; otherwise, water will work.
- I used a slotted spoon to transfer the apples from the bowl to the prepared pan so that not too much accumulated juice was transferred, but there still was some and it didn’t appear to negatively affect the cake at all.
- The Pan – A 10-inch tube pan is perfect for this recipe, but you can also substitute a standard 12-cup Bundt pan. I would recommend a standard-style pan and not one that is overly intricate; the chunks of apple throughout the cake could cause some sticking in those fancy pans.
- To Serve – This cake is absolutely delicious standing on its own, but you could certainly serve a slice of it with a dollop of whipped cream, a dusting of powdered sugar, a scoop of vanilla ice cream, or a drizzle of salted caramel sauce.
- Storage – Once completely cool, leftover cake can be stored in an airtight container for up to 4 days.
- Freezing – This cake freezes wonderfully! Once the cake has cooled completely, wrap it tightly with plastic wrap, and then a layer of aluminum foil and freeze for up to 3 months. Thaw overnight in the refrigerator before serving.
Did you make this recipe?
Leave a review below, then snap a picture and tag @thebrowneyedbaker on Instagram so I can see it!


Please disregard the egg question. I see that part of the directions under the ads.
The ingredients say 4 eggs yet I am not seeing eggs in the directions. Does this cake have eggs in it?
Love this recipe! Making it for over a decade.
Would this recipe work using a spring form pan
Delicious and love the heaviness. Would it work in standard cake pan like 9 x 13? Would the baking time change?
I’m making this for Thanksgiving dessert instead of apple pie because my family and I love this cake (and this recipe) SOOOO much!
As a novice baker, this cake was very easy to make! It does take some prep time. Cooking time is probably less than and hour and half. I wasn’t successful in removing the cake, but it was very delicious!
This is a delicious cake. I’ve made it several times. I use half the sugar and sub olive oil to make it a little healthier. I also use a mix of green and red apples. You can’t go wrong. Thanks!
Thank you for sharing this recipe. My mother made it all the time and I used her church cookbook oil as my reference. I lost the cookbook and she passed away. I could remember the ingredients but not the proportions. Now I can make it again and pass it down to another generation of bakers. I’ve subbed out the oil and orange juice with all kinds of things if I didn’t have them on hand. Dairy is ok here so buttermilk and butter have worked in a pinch as have apple juice and apple cider. My mom used canned apples but I prefer fresh and invested in a peeler/slicer/corer just to make this recipe even easier.
Absolutely loved this moist apple cake! It was a big hit with my friends!
I always go to “The Brown Eyed Baker’s” Website, because all of your recipes are amazing!
Excellent tecipe. This is the only one I use.
Awesome !
This cake is absolutely delicious. I will say though, that it’s a bit of a pain to make, for such a simple cake. Three bowls, lots of peeling and chopping. Just give yourself plenty of time. Currently I’m waiting to go to bed because I forgot it bakes for an hour and thirty! I’m adding a tip I recently learned: When you grease the pan, put it in the refrigerator while you make the cake so the shortening firms up and doesn’t disappear when you pour the batter into it. Makes removing it a little bit easier.
Delicious! Delightful! Excellent for Rosh HaShanah! Mine did not come out of the pan very well, but you did warn me about using a fluted bundt pan, so I’m going to say that one’s on me. Still ate the whole thing, though!
Michelle, I made this cake in the tube pan last year for Rosh Hashana and it was so amazing and I commented here about it. I decided this year to make it again and I wanted to double the recipe so I would have some to give out to friends and family. Instead of the tube pan, I used 6 disposable loaf pans using the same method of layering the apples (honey crisp and granny smith) and ribboning the batter. It was absolutely perfect. I gave one pan each to my 2 daughters and their families and 1 each to 2 friends that we shared holiday meals with. It was so well received by all and these are all very accomplished home bakers. I still have 2 pans in the freezer. They freeze beautifully but you have to allow time to defrost them. One pan is definitely ours but who shall be the lucky one to get the last pan?? By the way, I enjoy seeing your lovely children growing up and thriving even through some very difficult times. My youngest granddaughter is the same age as your Isabel (her birthday is April 11) and I feel that they would be friends if they were living nearby. On Rosh Hashana we wish all our family and friends a Happy and Healthy New Year and that is what I wish for you and your family. Best wishes from NYC