Grandma’s Pizzelle Recipe
My grandma’s easy and delicious pizzelle recipe for the classic Italian cookie. Lightly sweetened and flavored with vanilla and whiskey (with options for anise and other flavors), they are wonderfully crisp and buttery, and perfect for holiday gift-giving!
I have a huge soft spot in my heart for pizzelle. Growing up, it was extremely rare to walk into my grandma’s house and not find a large tin of pizzelle waiting to be eaten (they were usually sitting right next to the huge tin of biscotti that were also a staple in her house). I can still picture her, sitting on her stool at the kitchen table with her pizzelle iron, churning out dozens upon dozens, usually for no reason whatsoever other than her stash was getting low.
After she passed away, I went through all of her old recipes and was thrilled to find her beloved pizzelle recipe, labeled as “Pearl’s Mother’s Pizzelle”. It’s a bit untraditional in that it doesn’t include anise, but rather a combination of whiskey and vanilla, which I obviously love since I grew up eating these, but don’t worry! If you love anise, I have instructions below for how much to use.
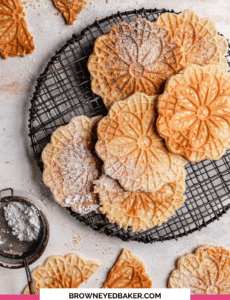
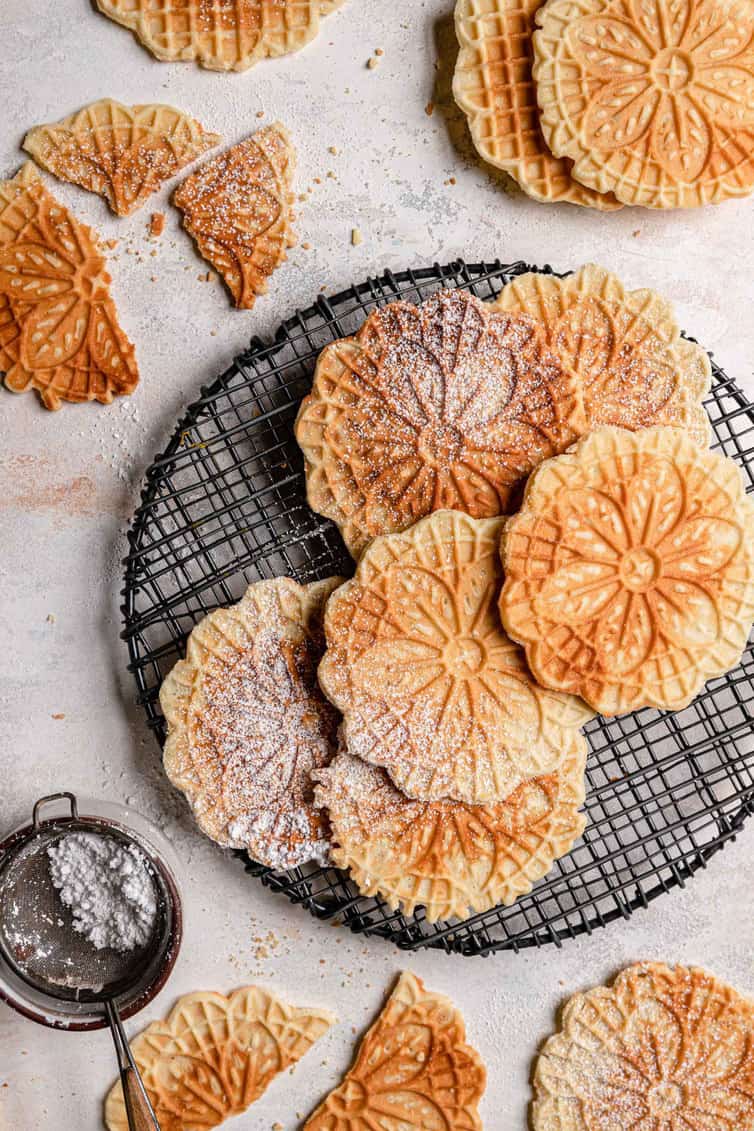
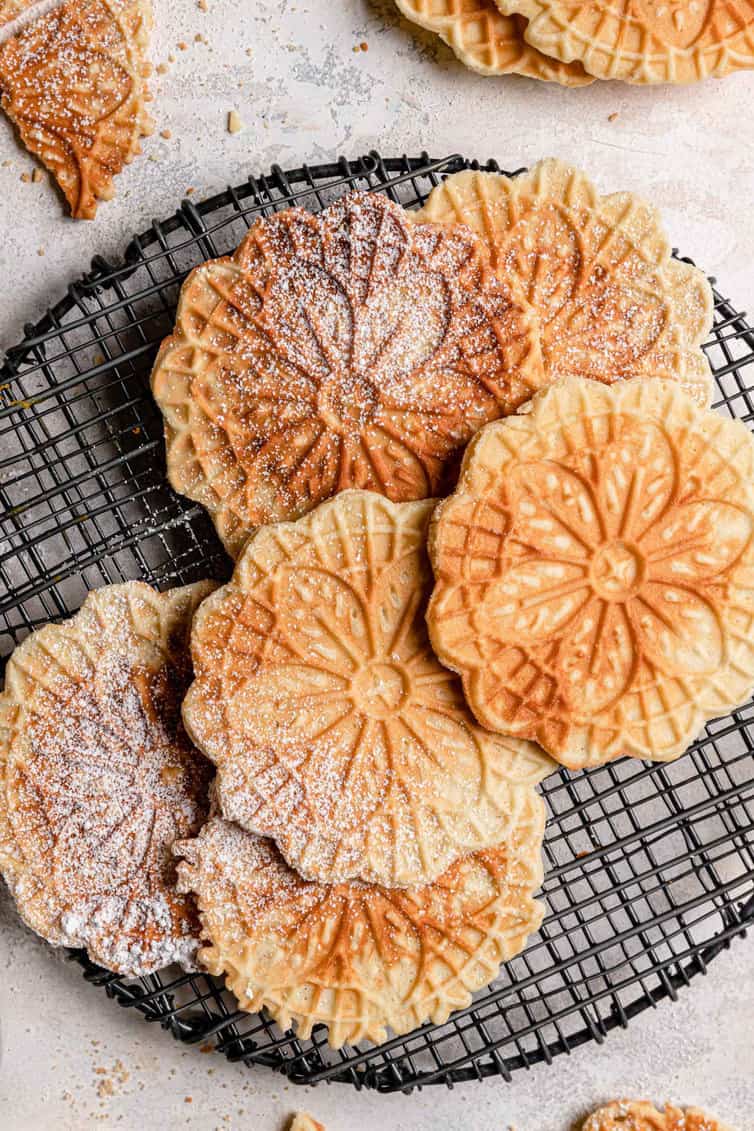
For those not familiar, pizzelle are traditional Italian waffle cookies made from flour, eggs, sugar, some type of fat (butter, shortening or oil), and flavorings (the most popular are vanilla and anise). The name pizzelle translates to “small, flat, and round”. They are considered to be one of the oldest cookies ever created, dating back to ancient Rome.
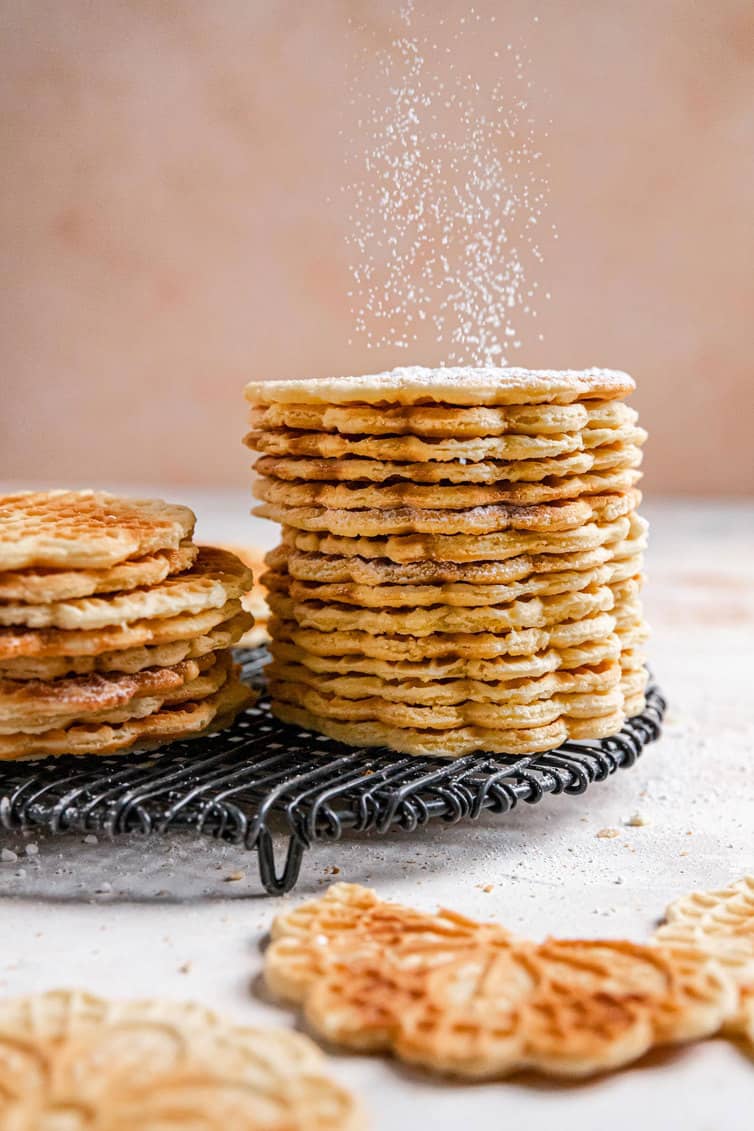
Depending on the ratio of ingredients, you can make them thin and crispy or thick and soft, or any variation in between. This recipe (which is my personal favorite!) is for pizzelle that fall in the middle in terms of thickness and that have a nice crunch but do not crumble when you bite into them.
How to make them
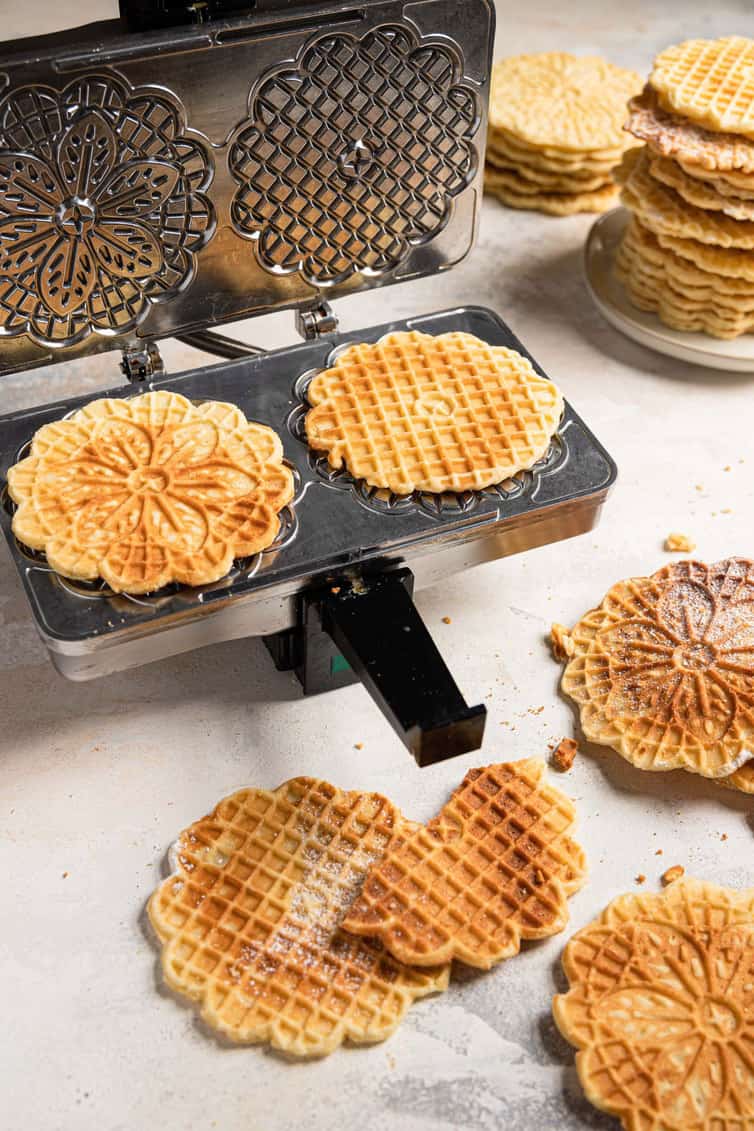
You do need a pizzelle iron to make these, but they are fairly inexpensive and available almost anywhere you can buy kitchen goods. My grandma’s came from a local Italian grocery store, and this is the one I use now.
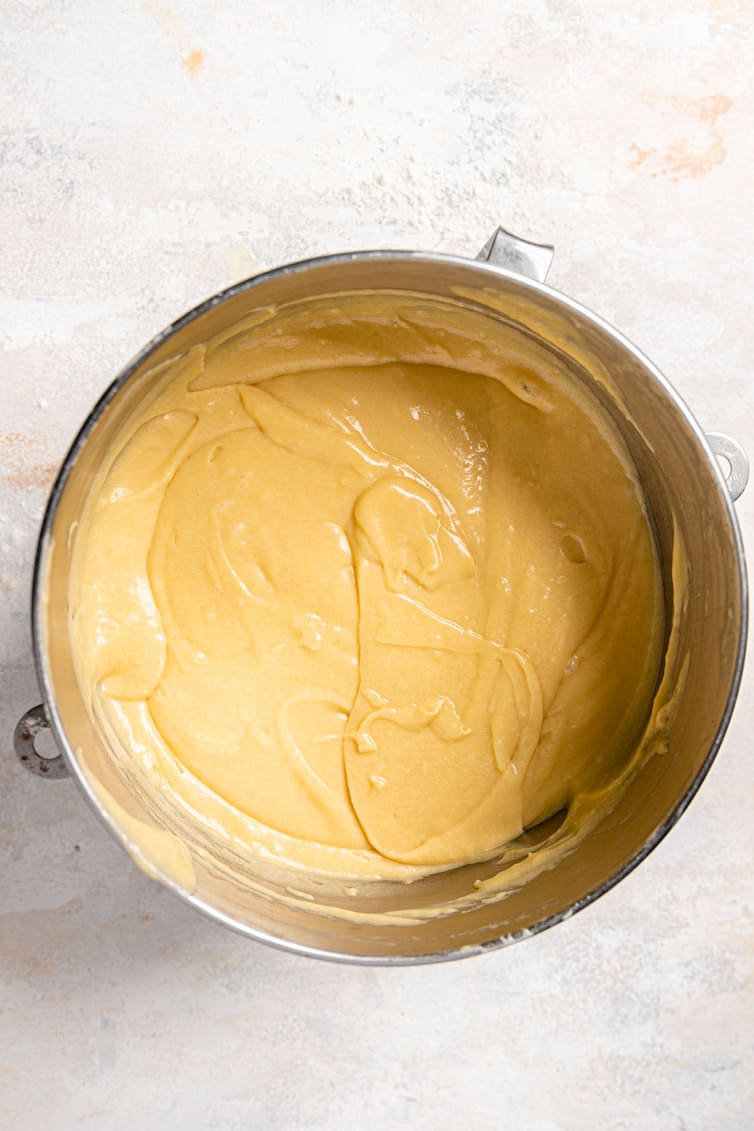
The batter can be mixed together quickly in one bowl, and then you’re ready to roll!
I give my pizzelle iron a quick spritz with non-stick cooking spray and then use a cookie scoop to start portioning the batter onto the iron. Most irons close down and have a clamp you can use to seal it shut while it cooks, which doesn’t take long at all! Only about a minute, give or take, for one batch.
It can take some trial and error and all irons are a bit different, so you might need a little less or a little more batter, and find that you need a little more time or a little less time to get the pizzelle to your desired degree of doneness.
Different flavors
My grandma’s pizzelle had a very distinct flavor from the combination of whiskey and vanilla. However, I know many families find anise to be the traditional flavor; you can absolutely mix and match flavors to make these your absolute favorite! Some suggestions:
- Alcohol: You can substitute brandy, Sambuca, or any other liquor for the whiskey called for in the recipe, or you can omit it entirely.
- Butter: My grandma used butter, but many other recipes (including my mother-in-law’s) call for vegetable oil instead. You can also use margarine or shortening. The texture and taste will differ slightly, but will still work!
- Anise: If you prefer anise-flavored pizzelle, substitute 2 teaspoons anise oil (oil is more concentrated than extract and provides more flavor). If all you can find is anise extract, use 2 tablespoons. You can also still use some whiskey and vanilla to balance out the flavors.
- Other Extracts: Play around with others such as mint, coconut, almond, maple, etc. if you’d like to experiment with some non-traditional flavors!
- Anise Seeds: Some people like the flecks of anise seeds in pizzelle; you can add 2 to 4 tablespoons of anise seed.
- Citrus Zest: Add lemon or orange zest to brighten up the flavor!
- Chocolate: Replace ¼ cup of the flour with cocoa powder. Give it a test and if you’d like more chocolate flavor, add more!
Save This Recipe
Troubleshooting tips
- Pizzelle Sticking: If your pizzelle iron is stainless steel, you will want to spray it lightly with Pam (or whatever oil spray you prefer) before you start. I find that one spray, in the beginning, is sufficient since the fat from the recipe usually will act as a non-stick agent as well.
- Soggy Pizzelle: To keep the pizzelle nice and crisp, follow a few guidelines. If you do not have central air conditioning, be aware that humidity can inhibit the pizzelle from completely firming and crisping up as cools. I do not recommend making these on a humid or rainy day (my grandma never did!). Next, be sure not to use too much batter, and allow the pizzelle to cool completely on a wire rack before stacking or storing them. They don’t take long to cool and set, but it’s imperative that they aren’t stored or stacked before doing so.
- Batter Oozing Out: I find that when I drop the batter onto the iron, putting it slightly above the center of the circle ensures that the batter spreads evenly over the mold and doesn’t seep out. Again, be sure not to use too much batter and adjust if necessary.
How to serve pizzelle and other ways to use them
While I’ve always enjoyed pizzelle plain and as-is, some people dust them with powdered sugar before serving. Here are some other ideas for you:
- While still warm, roll into a cylinder and fill with cannoli filling.
- While still warm, roll into a cone shape and use as a waffle cone to fill with ice cream.
- Sandwich a layer of chocolate ganache or Nutella between two cooled pizzelle.
- Dip half of the pizzelle in chocolate (you can then sprinkle with chopped nuts, coconut, sprinkles, etc.).
Storing and freezing
Given their natural dry and crunchy texture, pizzelle are a perfect candidate for long-term storage and getting a head start on holiday baking!
They can be stored in virtually any type of storage container from Tupperware-style to cookie jars and tins and resealable bags. They will easily keep well for at least 1 month.
To freeze the pizzelle, make sure they are completely cool, then store them in an airtight container or resealable freezer bag and freeze for up to 3 months. Thaw briefly at room temperature.

More favorite Italian recipes
- Panettone Recipe
- Italian Sesame Seed Cookies (Giuggiulena)
- Italian Easter Pie
- Italian Walnut Pillow Cookies
- Grandma’s Biscotti Recipe
- Zeppole (Italian Doughnuts)
I would absolutely love it if you tried this pizzelle recipe; if you do, please stop back and leave a rating and let me know how you liked it! ENJOY! 😍
Grandma’s Pizzelle Recipe
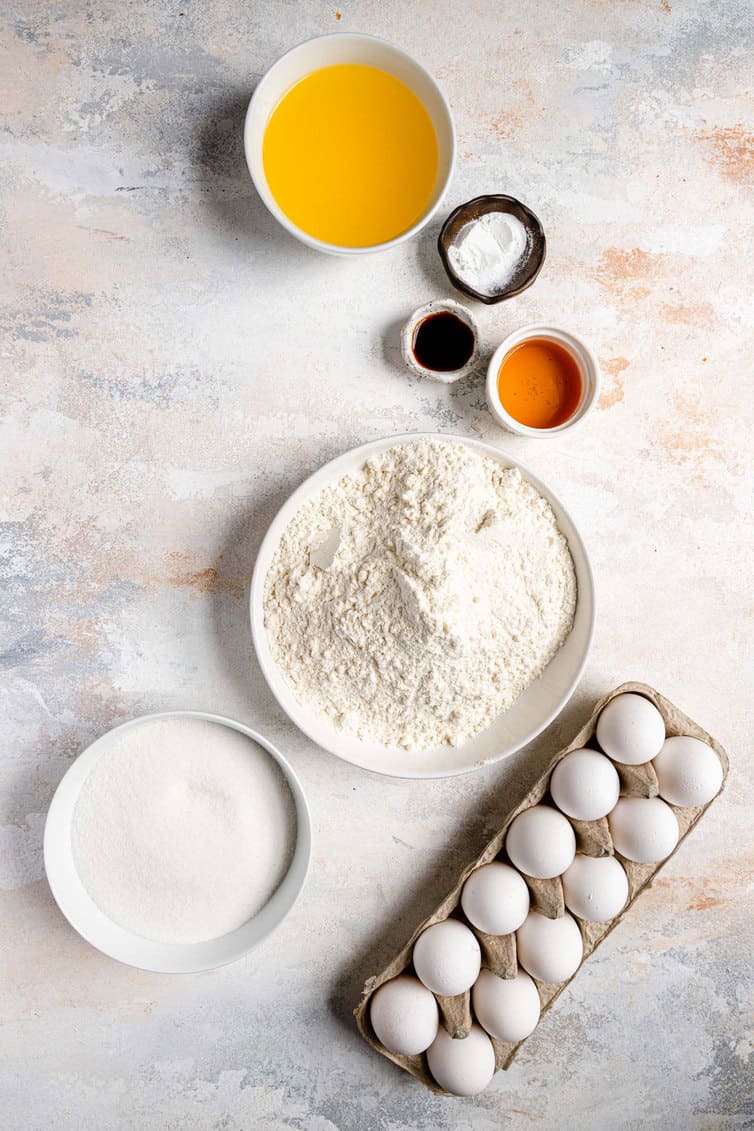
Ingredients
- 12 eggs
- 2 cups (397 g) granulated sugar
- 2 cups (454 g) butter, melted
- 3 tablespoons whiskey
- 3 tablespoons vanilla extract
- 5 cups (600 g) all-purpose flour
- 2 teaspoons baking powder
Instructions
- Using an electric mixer on medium speed, beat the eggs and sugar together until thick and pale in color, 2 to 3 minutes. Add the melted butter and beat until thoroughly combined and incorporated, 1 to 2 minutes. Add the whiskey and vanilla and beat to combine. Reduce the mixer speed to low and add the flour and baking powder, mixing until thoroughly combine and smooth.
- Follow the instructions of your pizzelle maker for cooking the pizzelle (this is the one I have). I drop 1 heaping tablespoon of batter using this scoop and then cook to desired doneness (about 1½ minutes for me, but time can vary based on machine and personal preference).
- Remove pizzelle from the machine using a thin spatula and transfer to a wire rack until cool. Serve plain or dusted with powdered sugar. Pizzelle can be stored in a container at room temperature for up to 1 month.
Notes
- Equipment: Pizzelle Maker
Did you make this recipe?
Leave a review below, then snap a picture and tag @thebrowneyedbaker on Instagram so I can see it!
[Photography by Dee Frances]


My grandmother (who I never met as she died 13 years before I was born) and my aunts used to make pizzelle. My siblings and I, and now my son, have continued the tradition. We use the handheld rectangular scissor-style cast-iron pizzelle iron my grandfather ordered from Italy in 1926. It makes one pizzella at a time. Apparently my grandmother made them on her own, though I can’t imagine how. It takes us 3 people to do it properly: 1 to hold the iron (which weighs at least 10 pounds) over the burner and open and close it, 1 to place the batter in the iron, and 1 to remove the finished cookie.
Each pizzella has an imprint on one side with my grandfather’s initials, and on the other side with the year 1926. Our family recipe uses oil rather than butter (but we’re not against trying alternative fats!) and anise oil, and no baking powder. They are shatteringly thin. I’ve never had machine-made pizzelle as thin as the ones we make by hand.
Do you use salted or unsalted butter in this recipe?
Batter was extremely thick – decided to thin it down with heavy cream.. left my pizzelles in the iron for 2+ minutes. Came out more like waffles, than the thin cookies I had as a child.
In regards to the comment about “Properly Thin Pizzelles” it should be noted that the thinness or thickness of the pizzelle differs greatly depending on the region of Italy. My Italian grandmother’s pizzelle were notably thicker and more dense than the light, crispy ones you usually find. The recipe booklet that came with my pizzelle maker specifically stated that one specific recipe, which originated in central Italy, produced a thicker, more dense pizzelle. That is how I love my pizzelle because they remind me of my grandmother. My advice is to find a recipe you like and go with it….don’t let people tell you the pizzelles you make are wrong!
My Italian husband bought me a pizzelle iron 25 years ago. I got up the courage when I saw your recipe. You make everything look easy. I made pizzelle today. Yay! I did it! I used whiskey and vanilla and I love the subtle flavor. Not overly sweet either. Bravo well done
Is the nutrition per serving information for 3 cookies, or 1 ?
If you want Properly Thin Pizzelle cookies you need to go to ebay. You will need to find a Vintage Pizzelle Maker from the 1960s or 1970s that is in working condition, has its plug, & has “Made in USA” engraved on its shiny metal bottom. The two 5 inch cookies plate machine with the Waffle plate on its flipside is what I got today in the mail from ebay, only paid $40 dollars & looks like it is brand new & it is from the age of the baby boomers. …if I was 6 months older I’d be a boomer too.
When a Pizzelle is held up to a light source light should shine through the cookie where it is thinnest.
Should I double the vanilla if I’m leaving out the whiskey?
Hello question about batch size. Recipe says the yield is 76, but I wanted clarification if this meant “servings” or the total number of pizzelles it makes. I am making a large batch for a party, and I want to make sure my math is correct when I double or triple this recipe. Thanks!
Hi Ellen, It is the total number of pizzelles (around 76). I hope that helps! Enjoy!
Can’t do dairy. Try almond, cashew, oat or coconut milk. Best whiskey? Try Jim Beam, Seagrams, Henessey, ask friends for a good drinking type. Mabye bourbon, Brandy, Grandpa liked the chocolate brandy filled candy. For butter, try vegan cashew butter.
Tried other recipes in the past and none tasted like my Baba’s. This one is PERFECT! I omitted whiskey and did plain/vanilla for my husband and kids and a second batch with anise seed. I halved the recipe each time, so in a half-recipe I used 2 tablespoons anise seed (no other oil or extract) and it was a nice hint of anise. If you like a stronger flavor I would add another 1/2 tbsp
You mentioned substituting anise for those that like the licorice flavor. But what am I substituting it for? Do I leave out vanilla and whiskey? Or do I add it to the original recipe keeping all the other ingredients. Thanks. Just wanted to be clear before I begin! I want to try half as is, and the other half with anise.
Wondering if I should use salted or unsalted butter.
My mom ‘s recipe had more sugar and the flour depending on size of eggs.I will try yours .I also used coloured sugar and kindof fill the centre and then press.The children
Called these fireworks and they reall are pretty!
How can i make pumpkin pizzelles
I didn’t see your options for anise, which is my favorite flavor.
Do you use anise oil or extract and how much of each would you use in this recipe?
Thank you,
M. G.
Hello! If you read under the “Differenet Flavors” section above, the directions are listed there:
Anise: If you prefer anise-flavored pizzelle, substitute 2 teaspoons anise oil (oil is more concentrated than extract and provides more flavor). If all you can find is anise extract, use 2 tablespoons. You can also still use some whiskey and vanilla to balance out the flavors.
Your pizzelle’s look and sound delicious! I can’t wait to try this recipe. I also love the black round cooling rack the pizzelle’s are displayed on. Would you mind sharing where you purchased it? Thank you!
Hi Manda, It’s from Pottery Barn from a few years ago and unfortunately I can’t find it on their website anymore :( I hope you’ll try and enjoy the pizzelles!
Hello! I was wondering what Pizzelle maker you used. I’m looking for one and your Pizzelle look so lovely! Thank you!
Hi Tricia, Thank you! This is the pizzelle maker I use: https://www.bedbathandbeyond.com/store/product/cucinapro-trade-polished-pizzelle-maker/1041533741
I’m trying to make your puzzle recipe but my husbands loves them thicker and chewier please let me know how to tweak your recipe to make them that way
Thank you
You mentioned the pizzelle could be made softer and thicker. Is it the same recipe. My mom’s friend made soft thick ones at Christmas. Sadly everyone haa passed and I can’t find this recipe anywhere. Haven’t had them since I was a kid. Appreciate any suggestions you might have.
Hi Diane, My sister prefers soft pizzelle, so I asked her how she makes hers soft since she uses this same recipe from my grandma. She said that when she closes the pizzelle iron, she doesn’t immediately clamp it shut, so it sort of “steams” for about 30 seconds, then she closes it the whole way to finish baking. I hope that makes sense!
My daughter is staying away from dairy. I’ve made her some biscotti and would like to make some Pizzelles using oil. You mentioned your mother-in-law‘s recipe, does that turn out as well?
Hi Susan, Yes, they are delicious! Definitely an easy swap you can make.
Hi can you halve this recipe?
Yes, absolutely, I do so often!
Every year I use the same recipe and I could’ve sworn it was brown eyed baker and the picture had a red ribbon around the pizzelles, but this is not the recipe that I always follow. Am I crazy or did you switch things up?
I made a batch of these yesterday. You can sprinkle them with cinnamon sugar as soon as they come out of the pizzelle maker and the sugar will stick to the hot cookie. That gives a little fall flavor to them. They are very good.