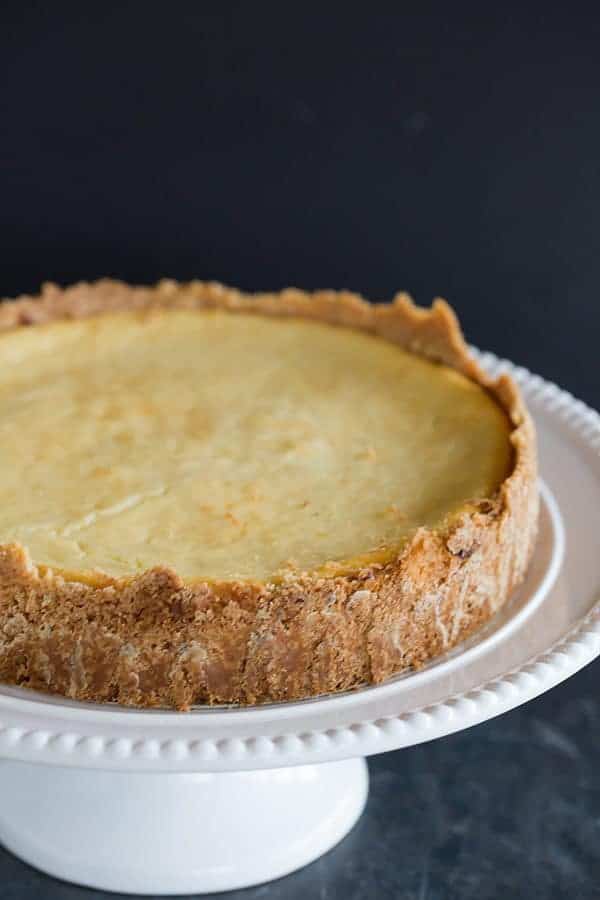
Hidden Berry Cream Cheese Torte
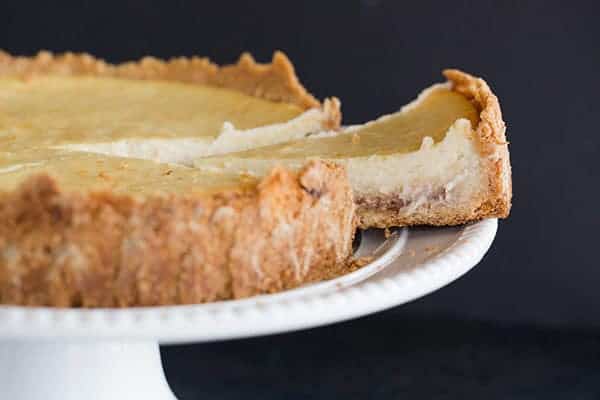
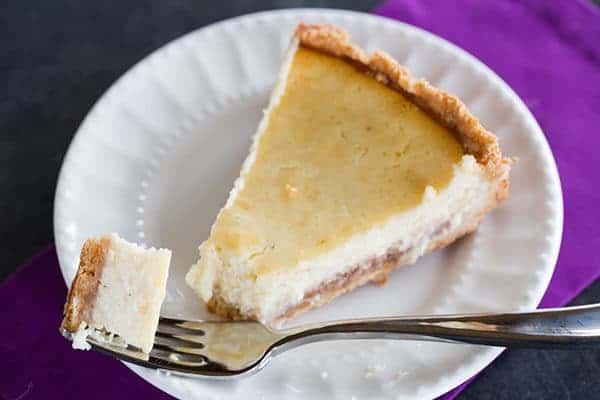
This luscious cream cheese torte sits on a shortbread crust and a hidden layer of strawberry jam.
I first made this dessert over eight years ago (!) when I belonged to the group Tuesdays with Dorie; a small group of bloggers that baked one recipe a week from Dorie Greenspan’s Baking: From My Home to Yours. I had received that cookbook for Christmas just a few weeks prior and instantly fell in love with the lovely, conversational tone that each recipe and headnote was written in. I’ve baked countless recipes from that book, and this recipe remains one of my top three favorites – a shortbread crust is topped with strawberry jam and a silky smooth cheesecake layer. Divine!
There’s a sneaky little ingredient in this recipe that surprised me and made me a little suspicious – cottage cheese!
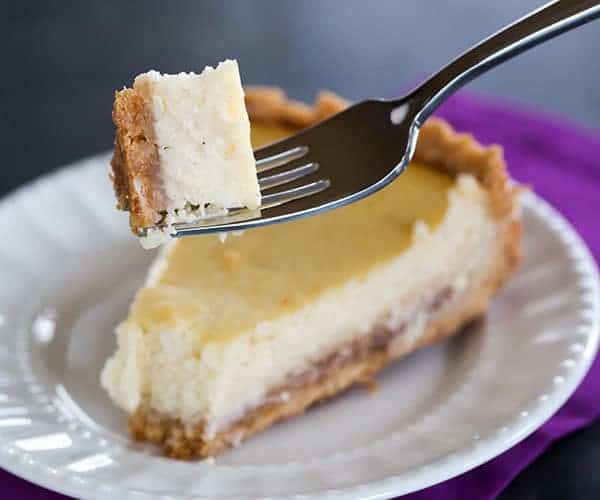
I had never made a cheesecake previous to this one, or since, that used cottage cheese. Since you use a food processor to make the filling, the texture is silky smooth and you really have no idea that anything other than cream cheese is in there.
Save This Recipe
I made this for dessert last Sunday since no one else other than me had tasted it before, and I realized that it had been far too long since it graced my kitchen.
Everyone fawned over it and the majority went back for seconds. My husband said that it was the best dessert I’d made recently, along with the chocolate bread pudding. A few people specifically mentioned the flavor and texture of the cheesecake layer and how amazing it tasted; they couldn’t believe it when I told them what the “secret” ingredient was!
If you love cheesecake, make an excuse to get this into the oven as soon as possible!
Four years ago: Focaccia Bread

Hidden Berry Cream Cheese Torte
Ingredients
For the Crust:
- 1¾ cups (218.75 g) all-purpose flour
- ½ cup (100 g) granulated sugar
- ¼ teaspoon (0.25 teaspoon) salt
- 12 tablespoons unsalted butter, cut into small pieces and chilled
- 2 egg yolks, lightly beaten
- 1 teaspoon vanilla extract
For the Filling:
- ⅓ cup (113.33 g) strawberry jam, or your favorite flavor
- 9 ounces (255.15 g) cream cheese, at room temperature
- 8 ounces (226.8 g) cottage cheese, at room temperature, (1 cup)
- ¾ cup (150 g) granulated sugar
- ¼ teaspoon (0.25 teaspoon) salt
- Pinch of ground cinnamon
- Pinch of ground nutmeg
- 2 eggs, at room temperature
Instructions
- Butter a 9-inch springform pan, dust the inside with flour and tap out the excess. Place on a baking sheet lined with parchment or a silicone mat.
- Make the Crust: Put the flour, sugar and salt in a food processor and pulse just to blend. Add the pieces of butter and pulse until the mixture resembles coarse meal. Add the egg yolks and vanilla and continue to pulse until the dough comes together in clumps and curds - don't allow the dough to form a ball.
- Turn the dough out into the pan and press an even layer over the bottom and about 1½ inches up the sides of the pan. Refrigerate for at least 30 minutes.
- Preheat oven to 375 degrees F.
- Fit a piece of buttered aluminum foil against the crust, covering it completely. Fill the crust with rice, dried beans or pie weights and slide the sheet into the oven. Bake the crust for 20 minutes, then remove the foil and weights and bake for an additional 5 minutes. Transfer to a rack to cool while you make the filling.
- Reduce the oven temperature to 350 degrees F.
- Make the Filling: Stir the jam so that it's completely smooth, and spread it over the bottom of the crust (you can do this while the crust is still warm).
- Put the cream cheese and cottage cheese into the food processor and process, scraping down the sides of the bowl a few times, for 2 minutes, until the mixture is smooth and satiny. Add the sugar, salt and spices and process for another 30 seconds. With the machine running, add the eggs and process, scraping the bowl as needed, for an additional minute. Pour the filling over the jam.
- Bake for 60 to 70 minutes, or until the filling is uniformly puffed and no longer jiggly. Gently transfer the springform pan to a cooling rack and allow the torte to cool to room temperature, during which time the filling will collapse.
- Run a knife between the crust and the sides of the pan, then remove the sides of the springform. Chill the torte for at least four hours before serving. Leftovers should be stored, covered, in the refrigerator for up to five days.
Notes
Did you make this recipe?
Leave a review below, then snap a picture and tag @thebrowneyedbaker on Instagram so I can see it!
This recipe was originally published on January 15, 2008.


In South Africa we have nightshade jam, not sure if you have it, its the most delicious jam ever! Gonna make this with that next week! xx
Katie – you’re absolutely right! The berry flavor and cheesecake went perfectly together.
Best regards,
Sabine…
I’ll try to make this cream cheese. I hope to succeed…Thanks!
I made this yesterday for a work party, and it was a big hit! Delicious, and I loved that the food processor was the only dish I needed. And co-workers loved that, with the cottage cheese, it had less fat than an all-cream-cheese recipe. I stuck very closely to the recipe, except I used a few more spoonfuls of jam. But when it came time to put the cheesecake in the oven, the bake time of 60-70 minutes seemed very long for a 350 oven! Sure enough, the center was perfecrly set in just under 40 minutes. If I’d left it in the whole time, I’m sure it would have been ruined. Anyway, this recipe is highly recommended – just check it halfway through the bake time.
Regarding the “secret” ingredient: I’ve been using the Classic Cheesecake recipe from an Argo Corn Starch box for at least 25 years, and that’s my “secret”! Yes, it calls for cottage cheese as well. I’ve tried other cheesecakes over the years, but keep coming back to it since everyone raves about it! Not even going to try another one. But, I may try this one since it is similar, or just add the strawberry jam on top of my crust (I deviate from their recipe on this–I use crushed butter cookies instead of graham crackers that I mix with butter to make a true “crust”). Also, it all gets blended up in a blender which does create the silkiness you describe.
This was delicious! I followed the recipe exactly, however, my crust was nearly burnt!! Could I skip pre-baking the crust? I used apricot, and really liked the combination. I’d add more than 1/3 c next time.
THANK YOU!
Hi Marcia, You should still pre-bake the crust a little bit, but you could take it out sooner, while it’s still pale. Glad you enjoyed this!
First of all – I love your blog and I often try the muffins and brownies…. even if the oz. and cups in the recipes are driving me crazy – I am german and I am living in Germany.
My comment for this recipe: it is quite close to a german classic: “Käsekuchen”. And yes, we call it “Kuchen”, which literally means cake and we never ever would call it “Torte”, which is cake with biscuit and layered with whipped cream or butter cream or other creamy things and fruit. Is it actually an american name that I have never heard of?
The filling with cottage cheese (that I used as a substitue for “Quark” that we use in Germany for the filling) is the normal way for us to make Käsekuchen. And it comes it dozens of varieties. See for example.
http://www.essen-und-trinken.de/kaesekuchen/kaesekuchen-mit-quark-1007209.html?eid=1007395
I love cream cheese and fruit together! There’s also been a can of homemade jam that’s been staring at me from the fridge, asking me to use it.
look delicious, thanks for share recipe
Looks delicious! Thanks for sharing :)
There really is no cookbook quite like a Dorie cookbook! I ‘filed’ this recipe in my mental to-cook recipe box when I got that book and then forgot about it. I may have to give it a try today. Maybe with some of Sarabeth’s Blueberry Cherry preserves!