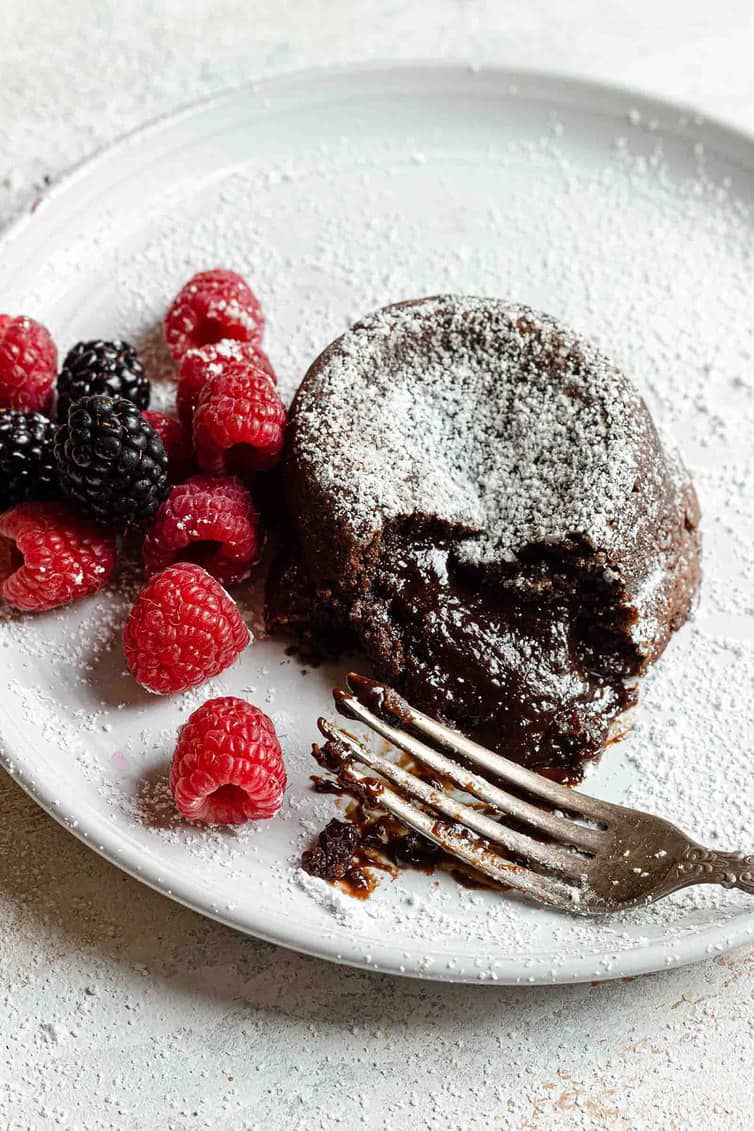
Chocolate Lava Cakes

Chocolate lava cakes are rich and decadent but only require six ingredients. Make this recipe for a date night dessert or to impress your dinner guests!
These beautiful cakes are the embodiment of embracing the simplest of desserts – easy, flourless chocolate cakes that can be scaled up or down to serve however many you need. They can be prepped up to an entire day in advance, but if you want an immediate chocolate fix, you’ll have one in less than 30 minutes if you head to the kitchen right now!
For all of my fellow chocoholics out there, let’s do this!
What is lava cake?
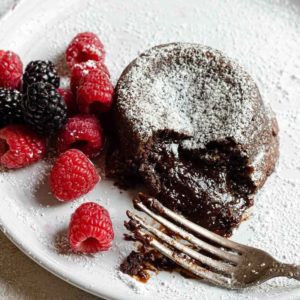
Simply put, it's a chocolate cake with a gooey, molten center. They're baked long enough for the outer layer to set, while the center remains soft.
Because chocolate lava cakes combine a flourless chocolate cake with a soufflé, they can feel complicated and intimidating. The good news is – they're not!
Here's some proof of how easy these are to make:
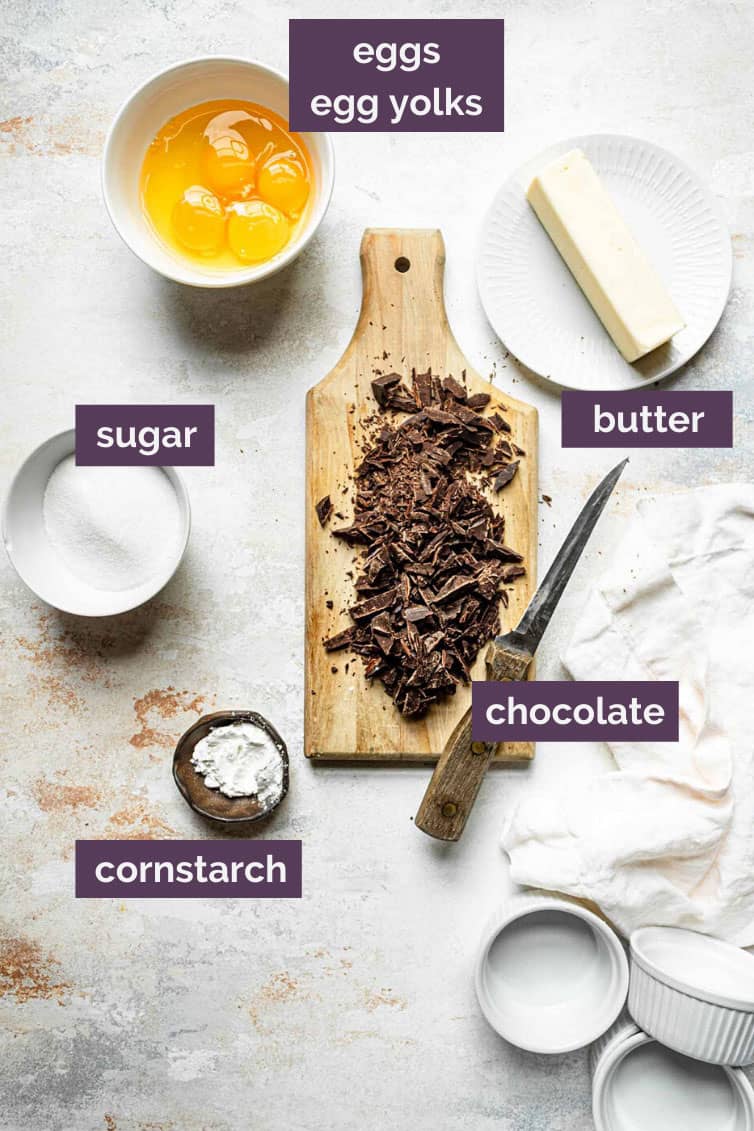
- Simple ingredients – you should have most, if not all, of what you need already
- No special tools – mix the batter by hand and pour directly into your ramekins
- Easy baking – set the timer and remove when done
- No cooling or frosting – serve as soon as you remove them from the oven
Is it safe to eat lava cake?
Yes! It may seem concerning to eat a cake that isn't cooked all the way through, but it's not the same as eating raw batter.
The temperature while baking cooks the eggs enough to make the molten center perfectly safe to eat.
How to make chocolate lava cakes
Step by step instructions
Prepare the ramekins
You'll need four ramekins for this lava cake recipe. Coat the inside well with butter so you can easily remove the cakes.
I also like to add a layer of sugar over the butter to carmelize the outside of the cakes. It gives it some extra texture and a pretty gloss to the outside.
Melt the chocolate
Add about an inch of water to a saucepan and bring to a light simmer. Don't let it come to a full boil, or the chocolate will overheat and not melt properly.
Place a heatproof bowl over the top, then place the chopped chocolate and butter in the bowl.
Save This Recipe
Melt them together, stirring frequently. It's best to remove the bowl just before the chocolate is completely liquid, then continue stirring until it's melted all the way.
NOTE: It's extremely important not to get any water or condensation into the bowl during the process. Any contact with water causes the chocolate to seize, which basically means it becomes hard and lumpy. If this happens, you will need to start over with new chocolate and butter.
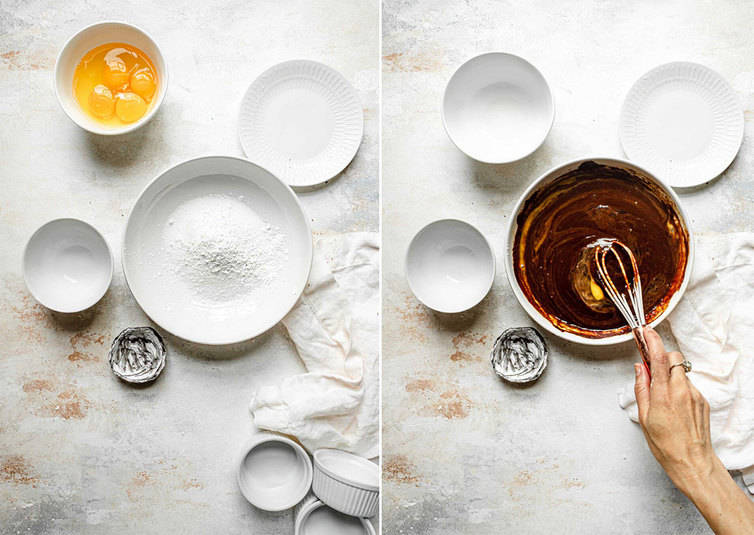
Mix the batter
In a large bowl, combine the sugar and cornstarch. Whisk in the melted chocolate and butter, then add the remaining ingredients. Continue whisking until well combined.
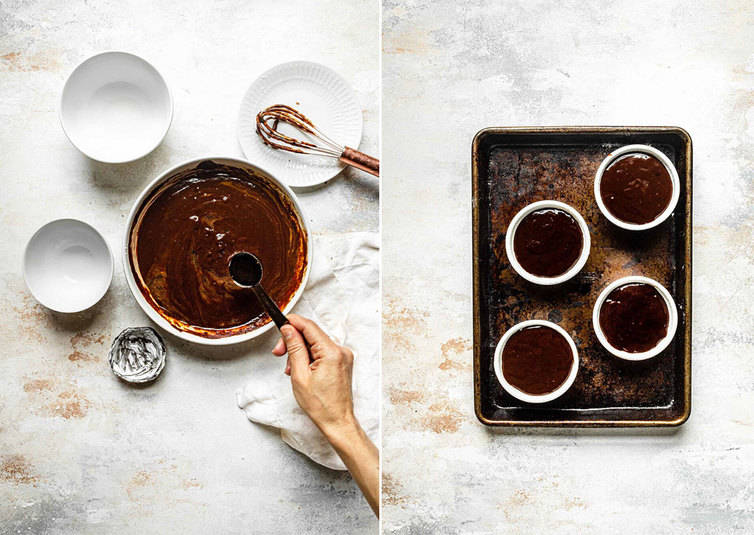
Bake and serve
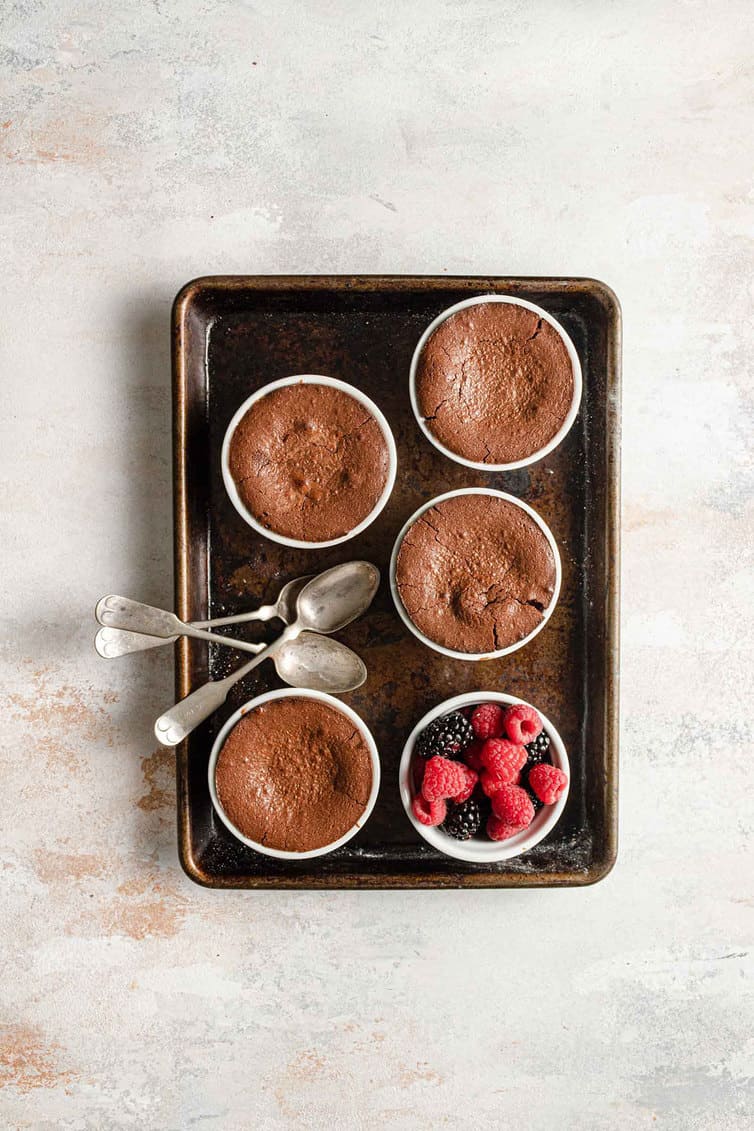
Pour the batter into ramekins so they are evenly filled. Bake on a rimmed baking sheet – this makes it easier to get them in and out of the oven, as well as keeps them level to avoid spills.
When they're done, the tops should be set but the cake will still be a little jiggly.
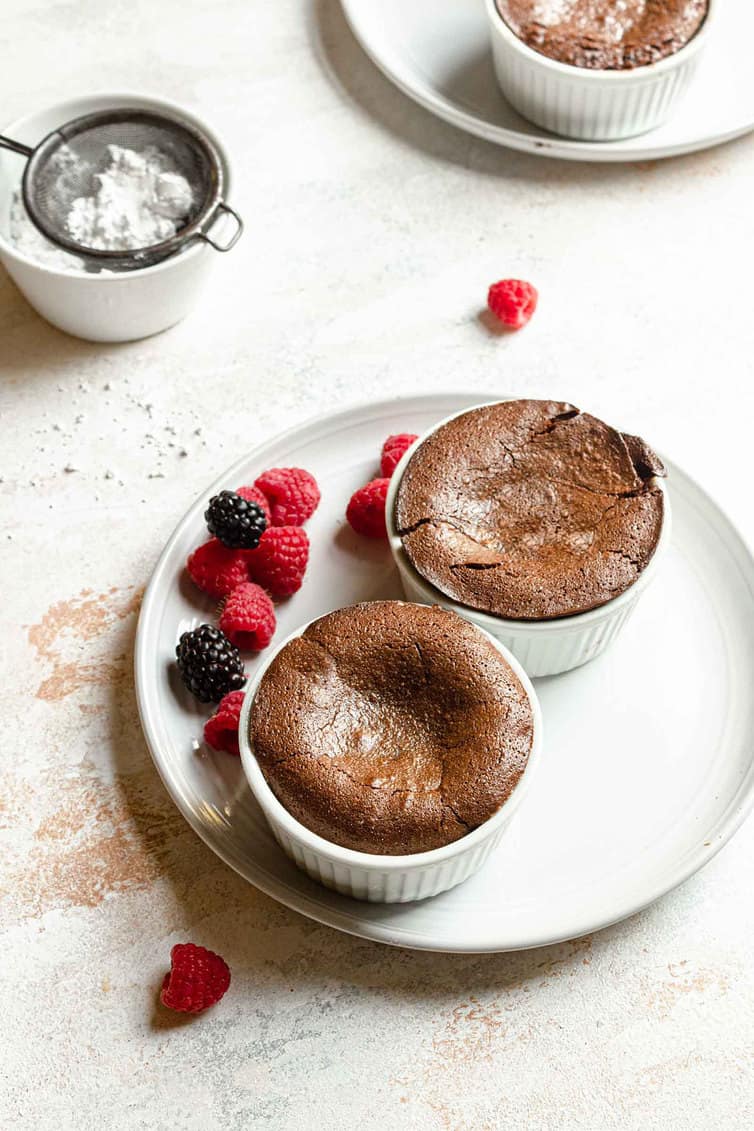
Cool for a couple of minutes, then place a plate upside down over each ramekin and flip to remove the cake. You make need to run a small knife around the edges first to loosen things.
Serve immediately as is, or add some fresh whipped cream and berries.
Recipe Notes
- Chocolate: You can substitute semisweet chocolate if you prefer a sweeter dessert. However, DO NOT substitute chocolate chips for the chopped chocolate; chocolate chips have an emulsifier in them that helps them keep their shape, which inhibits their ability to totally melt into that "lava" or "molten" consistency.
- Using a Muffin Tin: If you don't have ramekins, you can divide the batter between 6 cups in a muffin tin. The bake time will be slightly shorter, so begin checking sooner. To remove them, carefully use a fork to lift them up, then invert onto plates.
- Adding Liqueur: Feel free to add 1 teaspoon of liquor for an extra punch of flavor in place of the vanilla. Some ideas include Grand Marnier, brandy, or rum would be delicious.
- Serving Suggestions: These cakes are fabulous on their own, or you can top them with fresh fruit, whipped cream, or ice cream (vanilla or coffee ice cream is awesome!).
- Make-Ahead Instructions: The lava cakes can be prepared and the batter placed into the ramekins, then covered with plastic wrap and refrigerated for up to 24 hours. Remove the plastic wrap and bake as directed.
- Freezing Instructions: Prepare as directed in the make-ahead instructions above. Cover with plastic wrap, then with foil, and freeze for up to 1 month. The cakes do not need to thaw; bake as directed from frozen, adding a minute or two to the baking time.
Watch the Recipe Video:
If you make the chocolate lava cakes and love them, please take a moment to stop back and leave a review below; they help out fellow readers so much! Thank you! xo
Chocolate Lava Cakes
Ingredients
- ½ cup (99 g) granulated sugar
- 1 tablespoon cornstarch
- 6 ounces bittersweet chocolate, finely chopped
- ½ cup (113 g) unsalted butter
- 2 eggs
- 2 egg yolks
- 1 teaspoon vanilla extract
Instructions
- Preheat oven to 425 degrees F and adjust the oven rack to the upper-middle position. Grease four 4-ounce ramekins with butter, then coat with granulated sugar, tapping out the excess.
- In a large bowl, whisk together the sugar and cornstarch.
- In a medium heatproof bowl set over a pan of barely simmering water, melt the butter and chocolate together.
- Add the chocolate mixture to the sugar mixture and whisk to combine. Add the eggs, egg yolks, and vanilla extract, and whisk until thoroughly combined.
- Divide the batter between the prepared ramekins, place them on a rimmed baking sheet, and bake until the tops are set and look shiny on top, 13 to 16 minutes.
- Remove from the oven, cool for 2 minutes, then run a paring knife around the edges of the ramekins. Carefully invert each cake onto a plate and serve immediately.
Notes
- Chocolate: You can substitute semisweet chocolate if you prefer a sweeter dessert. However, DO NOT substitute chocolate chips for the chopped chocolate; chocolate chips have an emulsifier in them that helps them keep their shape, which inhibits their ability to totally melt into that "lava" or "molten" consistency.
- Using a Muffin Tin: If you don't have ramekins, you can divide the batter between 6 cups in a muffin tin. The bake time will be slightly shorter, so begin checking sooner. To remove them, carefully use a fork to lift them up, then invert onto plates.
- Adding Liqueur: Feel free to add 1 teaspoon of liquor for an extra punch of flavor in place of the vanilla. Some ideas include Grand Marnier, brandy, or rum would be delicious.
- Serving Suggestions: These cakes are fabulous on their own, or you can top them with fresh fruit, whipped cream, or ice cream (vanilla or coffee ice cream is awesome!).
- Make-Ahead Instructions: The lava cakes can be prepared and the batter placed into the ramekins, then covered with plastic wrap and refrigerated for up to 24 hours. Remove the plastic wrap and bake as directed.
- Freezing Instructions: Prepare as directed in the make-ahead instructions above. Cover with plastic wrap, then with foil, and freeze for up to 1 month. The cakes do not need to thaw; bake as directed from frozen, adding a minute or two to the baking time.
Did you make this recipe?
Leave a review below, then snap a picture and tag @thebrowneyedbaker on Instagram so I can see it!
[Photography by Dee of One Sarcastic Baker]


This web site can be a walk-by for all the data you wished about this and didn’t know who to ask. Glimpse here, and also you’ll positively uncover it.
I keep listening to the rumor talk about getting boundless online grant applications so I have been looking around for the top site to get one. Could you tell me please, where could i acquire some?
I’ve read a few good stuff here. Certainly worth bookmarking for revisiting. I surprise how much effort you put to make such a great informative site.
I keep listening to the rumor speak about receiving boundless online grant applications so I have been looking around for the best site to get one. Could you tell me please, where could i find some?
As I web site possessor I believe the content matter here is rattling magnificent , appreciate it for your efforts. You should keep it up forever! Good Luck.
wonderful post, very informative. I wonder why the other specialists of this sector don’t notice this. You must continue your writing. I am sure, you’ve a great readers’ base already!
Wow! Thank you! I constantly wanted to write on my blog something like that. Can I implement a fragment of your post to my site?
Nice!
Thanks for the blog post, how can I make is so that I receive an email sent to me whenever you make a new post?
Dangit, I guess my cornstarch has expired. I swear I’ve made your recipe before with no issues, but today I made it, cooked at 425 for 16 minutes (timed), I even checked it once around 13 minutes because to me it started to smell burnt and I was worried I overdid it. But it was raw. :( The tops looked just like yours, all shiny golden brown, but once I used a pairing knife around the edge, I knew it was 100% raw underneath. And flipping it proved that. The only thing I can assume is that the cornstarch expired, and was no longer an active binding ingredient. Shame, my chocolate went to waste! :( I’ll try again with flour next time. I SWEAR I’ve made this recipe before with no problems, or maybe I’m just getting too old. Haha!
I don’t know if it helps but lava cakes are not really supposed to be cooked all the way through. like its not raw, but once you cut into the chocolate is supposed to pour out. only the very outer layer of lava cake should be “done”
I am very happy to read this recipe of cake. I never seen such kind of delicious cake. Thank you so much
best mother’s day gift
OMG! Those chocolate lava cakes are so tempting. Thanks for sharing this amazing recipe will definitely try it this weekend.
Showed this recipe to my mom and she went right away to make it. The whole family loved it as it turned out great. Thanks to you for sharing this and keep it coming.
Really Delicious Love It , Amazing recipe of CHOCOLATE LAVA CAKE i have ever seen
Thanks a Lot
Loved it! They were delicious. Thank you for sharing
I am allergic to egg is there anything to replace the egg
Hi Cathe, I have not attempted an eggless version of this myself, but I did see some online and it looks like many of them use vegetable oil or milk, or a combination. You could experiment with those!
Can I use unsweetened chocolate for this? And if yes, do I need to adjust the sugar?
I would not recommend unsweetened chocolate, you wouldn’t be able to get it sweet enough, I don’t think.
Chocolates always make me drool. I tried this recipe. I couldn’t stop myself from finishing it in one go. Thanks for sharing the recipe.
Loved it! They were delicious. We made them with Dove dark chocolate. I made the mistake of leaving two in the ramekins, so we decided to eat them from there.
Hi…. I need to leave in a while longer…. yes, they were shiny on top, but messy on the bottom……any suggestions? thanks
Hi Phyllis, What do you mean by messy?
Mine were shiny as requested, but they stuck to the ramekin… I look at your picture and see that they are NOT shiny…. I will leave a few minutes more.\thanks
Everyone loved these for our Mother’s day dessert. I served them with French vanilla ice cream on the side. I like that they are gluten free since my sister-in-law has celiac disease. Thank you!
Any easy swaps for cornstarch?
Hi Sara, It helps to stabilize the cake, so flour should work as a sub.
Thank you!!
What size ramekins do you use?
When using a muffin tin instead, how full do you fill each well?
Hi Jess, Both are in the recipe instructions above – use 4-ounce ramekins and divide the batter evenly between the 6 muffin cups.
Dessert is a very important part of a meal and we all need that kind of dessert that is easy to make, This one is really easy and less time-consuming. Thank you for sharing such an easy and tasty recipe will definitely try it. Good luck! keep posting.