Dirt Dessert Recipe
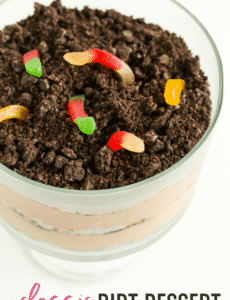
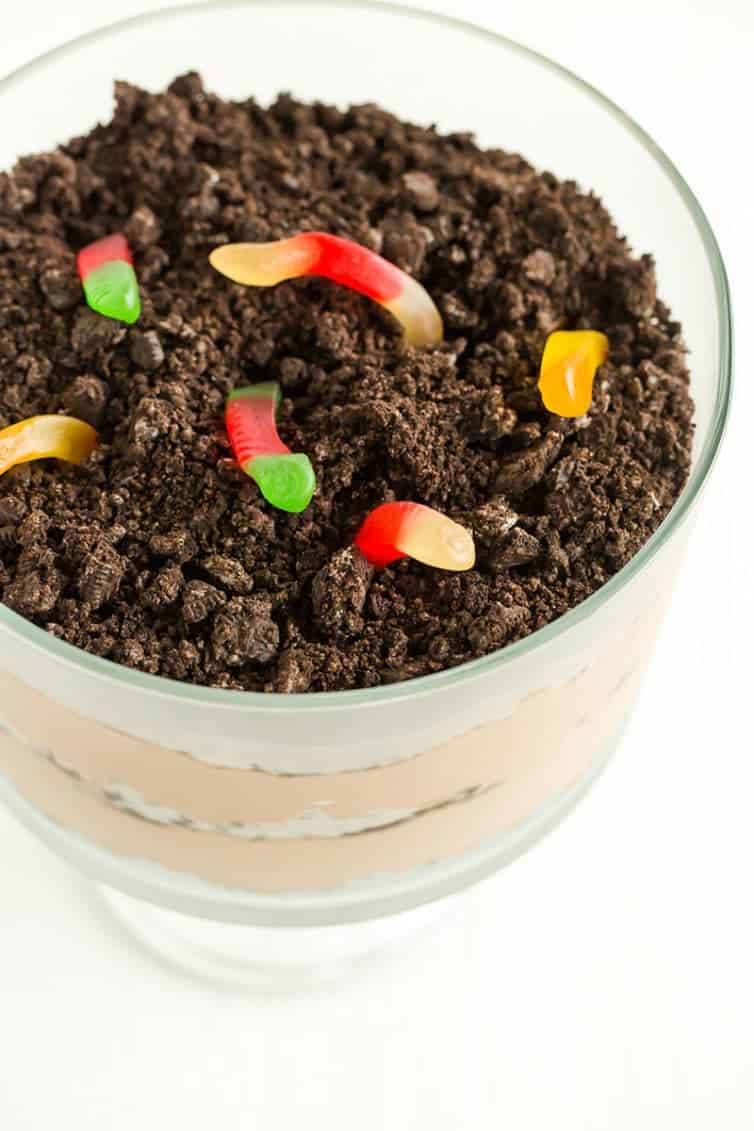
A recipe for classic dirt dessert! This easy summer dessert features alternating layers of crushed Oreos and a chocolate pudding mixture. It is made to look like dirt, complete with (gummy) worms!
I tend to think I’m a “regular Joe” when it comes to the type of desserts that I enjoy. I am more a “handful of chocolate chips” type of girl than a spun sugar, fancy cake kind of girl. Many times, I crave what I loved when I was a kid.
This dirt dessert is one that I remember fondly. I distinctly remember eating it while visiting my parents’ friends during the summer. They had two daughters roughly the same age as me and my sister, and we all got together very often when I was little. My mom’s friend Karen would serve this in individual cups or faux flower pots to all of the kids. I thought it was the coolest thing, and I still appreciate all of the wonderful flavors as an adult. (I even secretly enjoy eating the gummy worms!)
The old-fashioned dirt dessert recipe consists of alternating layers of crushed Oreo cookies and a chocolate pudding mixture that has been lightened up with cream cheese and Cool Whip. You can make this dessert as quick and easy as you’d like, or you can substitute homemade versions of the Oreo cookies, chocolate pudding and Cool Whip for a 100% from-scratch dessert. I have written the dessert as it was made by my family, but feel free to make any of those substitutions if you’d like. The combination of flavors is bound to be delicious no matter what!
What were your favorite childhood desserts?
Save This Recipe
One year ago: Chocolate Dump-It Cake
Two years ago: Top 10 List: Favorite Side Dishes
Five years ago: Sausage, Mozzarella & Basil Stuffed Peppers
Eight years ago: Pizzelles
Watch How to Make Dirt Dessert:

Dirt Dessert
Ingredients
- 14.3 ounce (405.4 g) Oreo Cookies
- 7.8 ounce (221.13 g) instant chocolate pudding
- 4 cups (976 ml) milk
- 8 ounces (226.8 g) cream cheese, at room temperature
- ¼ cup (56.75 g) butter, at room temperature
- 1 cup (120 g) powdered sugar
- 8 ounce (226.8 g) container Cool Whip
- Gummy worms, optional
Instructions
- Crush the Oreo cookies into fine crumbs using a food processor (or, place the cookies in a resealable plastic bag and crush with a rolling pin); set aside.
- In a large bowl, whisk together both boxes of the instant pudding with the milk for about 2 minutes. Let sit for 5 minutes.
- Meanwhile, beat together the cream cheese and butter on medium speed until light and fluffy, about 3 minutes. Reduce the speed to low, add the powdered sugar, then gradually increase the speed back to medium until a fluffy texture is reached.
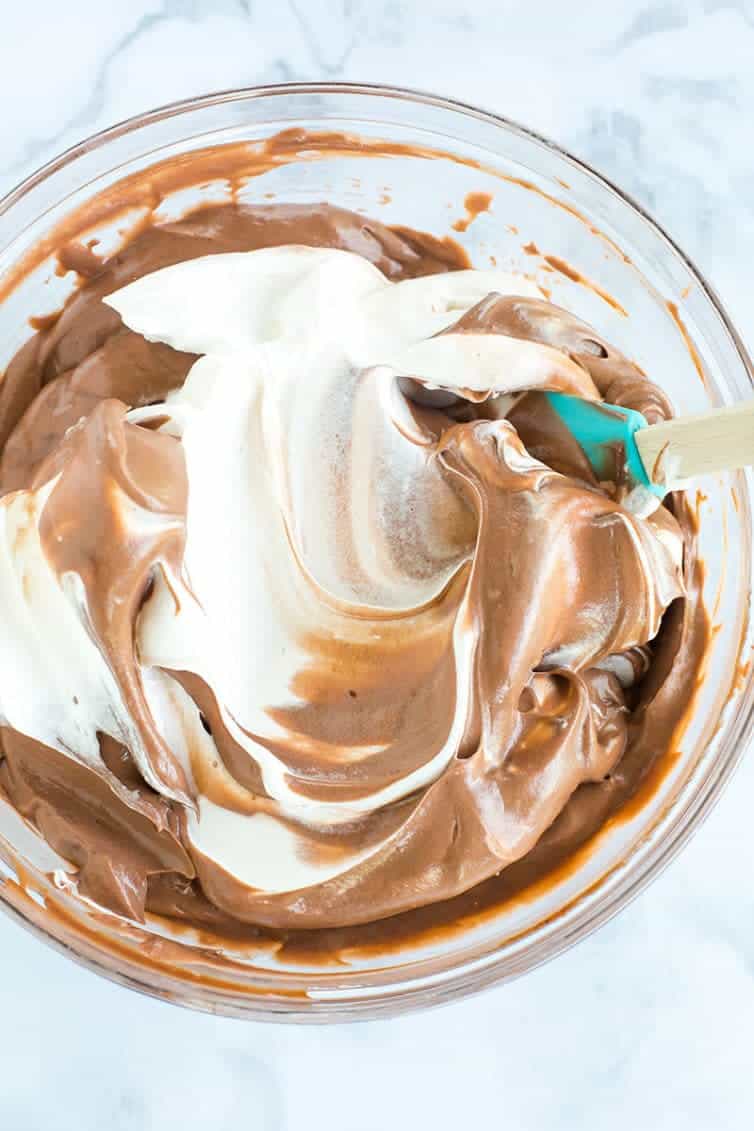
- Using a rubber spatula, fold the cream cheese mixture into the chocolate pudding, then fold in the Cool Whip until completely combined.
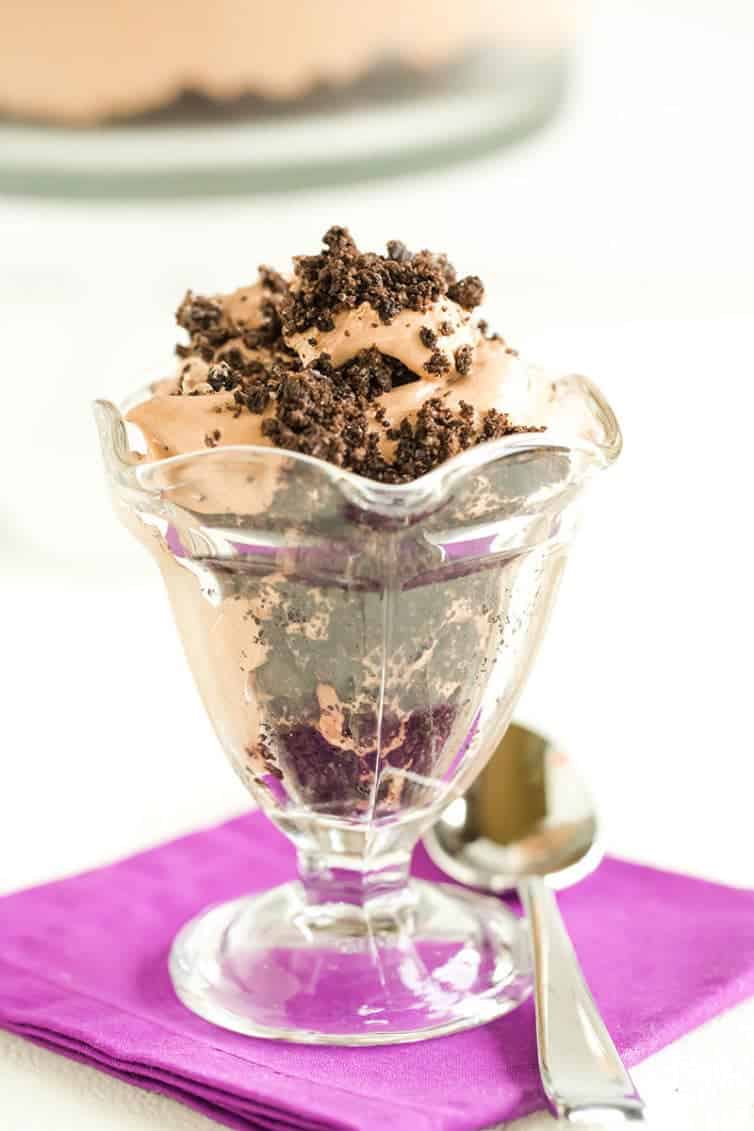
- The dessert can be assembled in a number of ways – in a rectangular or square serving dish, in a trifle dish, or in individual cups. However you plan to serve it, layer the dessert with alternating layers of the crushed Oreos and pudding mixture, beginning and ending with the crushed Oreos. Refrigerate for at least 4 hours (or overnight) before serving. Decorate the top with gummy worms before serving, if desired.
Notes
Did you make this recipe?
Leave a review below, then snap a picture and tag @thebrowneyedbaker on Instagram so I can see it!
This recipe was originally published on May 20, 2013.


delishise
Curious on the package size of instant pudding as it only comes in 3.4 oz or 5.9 oz? or am I just to add up how many grams I need and measure it out? I’m making this recipe for 150 people so just want to be sure before I make a large amount of it. Thank you!
Hi Bethany, This calls for two (3.9-ounce) packages of instant pudding (for 7.8 ounces total). I see the 3.9-ounce size box on Amazon, Target, Kroger, etc.
This is a family favorite. I am expected to bring it to all family gatherings!
This dessert is a family favorite. I have made it so many times and it is always a hit. It works great exactly as the recipe dictates and I have also made it with sugar-free Jello chocolate pudding, 1% milk, reduced-fat cream cheese and lite Cool Whip – it still tasted terrific! I make it the night before serving so it can set overnight.
very interesting subject , outstanding post.
Delicious! This is a requested dessert from friends & family!
This recipe has become a birthday treat in our house! Love it, thank you!
Why the heck aren’t people leaving their stars!! This recipe is worth EVERYONE! OMGoodness, so delicious! I’m glad I read the comments, the 1 person that rated this recipe 1 star probably did something wrong. 😬🤪 Thank you for this!
I’m so glad I found this! I used to make this dessert and then lost my recipe. It’s really easy and a kid favorite! Bringing it to Thanksgiving! ;)
Doesn’t come out good! The pudding is so runny..definitely needs less milk or more time to set. My 6 year old was very upset this didn’t come out right…she wanted to make it for the Easter bunny
I had this happen making pies before. Turns out, I bought stove top pudding by mistake instead of instant. Maybe that happened?
Also you must use whole milk, NOT skim milk. I learned that the hard way when making pudding before. My daughter and her friends love this dessert. Have made it for acting camp for the past 6 years, had college students come back for the summer and pop in for the party when they heard there would be “dirt!”
I make this with the vanilla Oreos and vanilla instant pudding, sooo so good.
Hi, first of all thank you for this amazing recipe
Since It is hard to find cool whip in my country , what can i use instead of it?
You can make homemade whipped cream and it will work just fine.
Wow, what a creation. I love the idea of it and it looks delicious too!
I made a slightly different version of this for my grandson’s Birthday…. mixed the Oreo cookie crumbs together with the pudding, whipped cream
and other ingredients mixing in gummy worms and candy rocks. Put the whole thing in a clean new clay pot, stuck a plastic flower and a spade in the top. My daughter took it into his preschool and the kids all loved it! Just adorable!!!!
SAVED! look at those pictures.. I want it, right now!
Wow, this brings back memories. My mom used to make this when I was a kid; it was one of my little brother’s top requests for birthdays! :)
This looks like fun for the little ones, perfect, thank you!
Don’t forget to bury small tootsie rolls in the dirt. Kitty droppings!
Your dirt dessert makes me laugh. I must make it for my children, they’d love it. And yes, I would also eat some of the gummy worms myself! Thanks for sharing. So much fun.
It looks yummy.I’m gonna try it right now
This came out SO good! Thank you for posting this recipe. I’m making it for tomorrow’s Halloween party. It brings back good old memories :) I needed more Oreos and I’m thinking I want to top it off with something else crunchy. Like maybe a crunchy candy, any suggestions? Thank you!