Homemade Pierogies (Potato and Cheese)

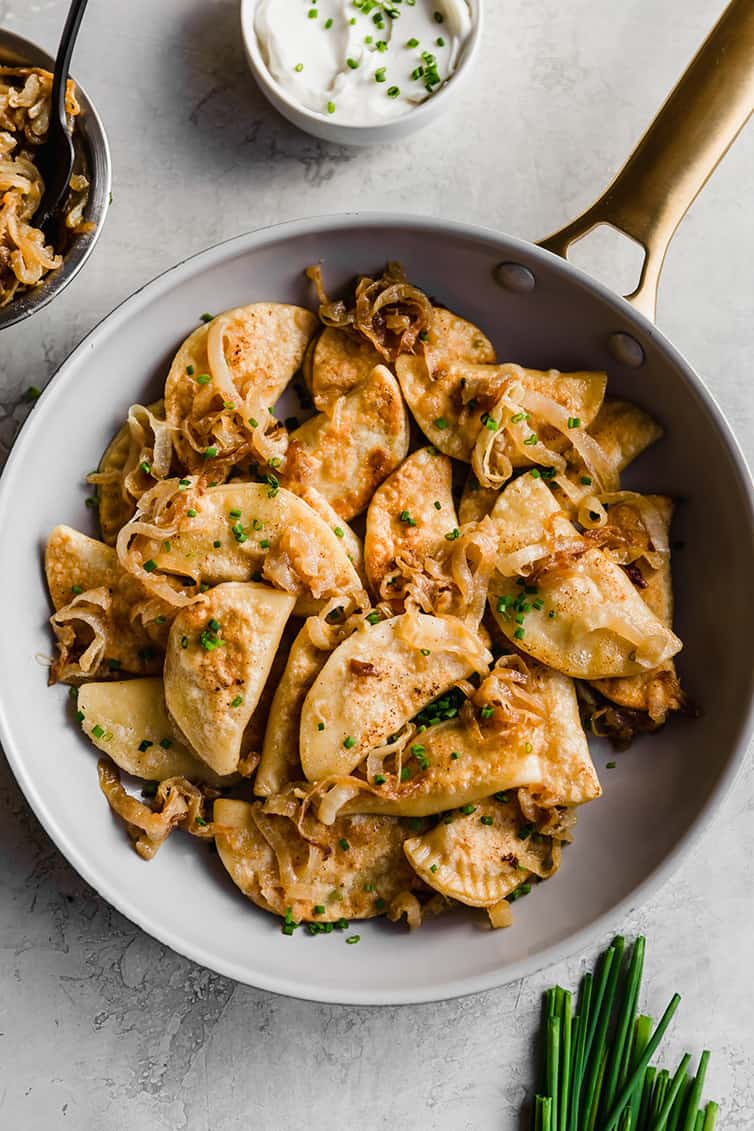
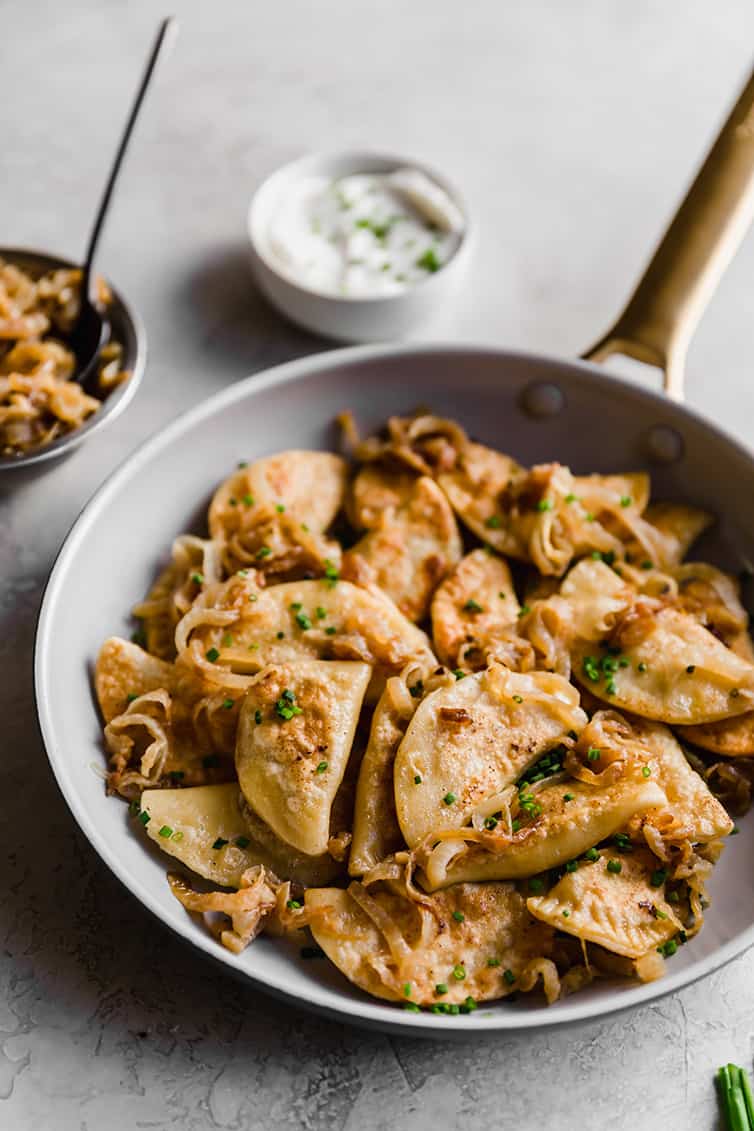
These homemade pierogies are made with a potato and cheese filling and dough that’s a dream to work with. Simply saute in butter and serve with caramelized onions for a hearty and satisfying comfort food meal. Bonus that it’s naturally vegetarian, as well, if you avoid meat or are cooking for someone who does.
Pierogies will always and forever remind me of Friday night meals during Lent. Our church had a fish fry and my parents always volunteered to help, so I spent dozens upon dozens of Friday nights during elementary school running around the school hallways with friends while our parents cooked and served food for the fish fry.
The extent of my fish love during that time was frozen-in-a-box fish sticks, so at the fish fry I always ordered pierogi; it was my go-to and still holds a firm place in the comfort food category for me.
Quite some time ago, I tackled homemade pierogi for the first time and I felt like they turned out just okay. Definitely not well enough for me to think it was worth doing again. However, about five years ago, I had a hankering to revisit the homemade pierogi and found a winner of a recipe.
What are pierogies? Where are they from?
Quite simply, pierogies are dumplings traditionally filled with potatoes and cheese (sometimes sauerkraut!) then boiled and pan-fried in butter.
There is a long-standing debate over whether pierogies are Polish or German in origin and, ultimately, we don’t know! What we DO know is that these delicious little dumplings date back to the 13th century in central and Eastern Europe. They remain a large part of the food culture in that region.
How to Make Potato and Cheese Pierogies
I know, making pierogi at home sounds intimidating and time-consuming and totally unnecessary, but believe me when I tell you that these homemade pierogi are 100000000% better than anything you will find in the frozen food aisle. No need to be intimidated! Let’s talk through the two major components: the dough and the filling.
Homemade Pierogi Dough
This dough is so wonderful to work with; it mixes together into a wonderfully soft and pliable dough that’s easy to roll out, cut, and shape. In order to give it those wonderful soft and malleable properties, an egg, egg yolk and vegetable oil are added to the traditional flour, salt, and water of most dough recipes. While this comes together very quickly and easily in a food processor, you can make it by hand, as well (see the recipe notes for details).

Potato and Cheese Pierogi Filling
The possibilities for pierogi fillings are only limited by your imagination! Potato and cheese is a very traditional choice, as is sauerkraut, but there are tonssssss of recipes for others such as mushroom, meat, salmon, and the list goes on and on. If you Google pierogi fillings, you will find dozens upon dozens of really unique ideas.
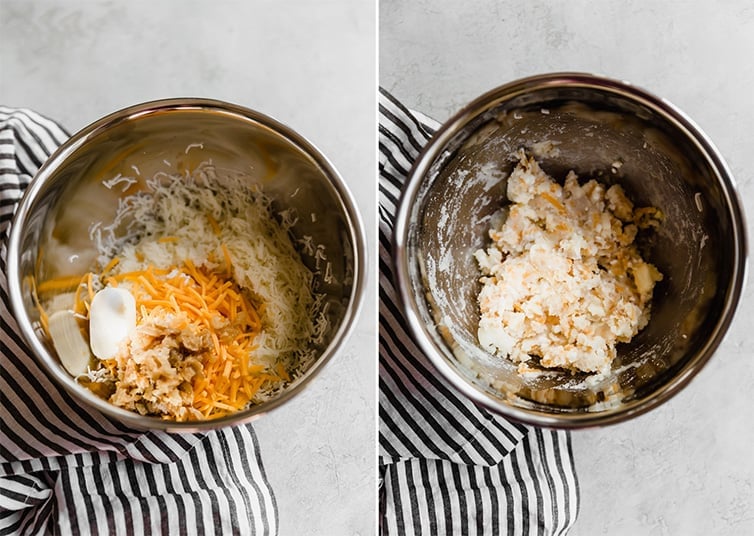
But! We’re here to talk about this potato and cheese filling, which is my all-time favorite because it’s what I grew up eating as a kid. Nostalgia at its best. Here’s what goes into the filling:
- Potatoes (that are boiled and processed through a ricer or food mill to keep them light and fluffy);
- Cheese (farmers cheese and cheddar cheese for a variety of flavor);
- Caramelized onions (for a punch of sweet flavor);
- Butter (just a tad, to pull it all together).
At this point you may be asking yourself:
What is farmer’s cheese?
It is made from cottage cheese that has had the whey drained off and is pressed into a solid form. It has a distinct flavor and is used in traditional pierogi, but you can substitute an equal amount of ricotta cheese if necessary.
Assembling the Pierogi
This is the most time-consuming part of the process, but it’s not at all difficult and if you want to really stock your freezer, you can scale up the recipe, invite over some family or friends, and make a party of it (I know people who do this for Christmas!).
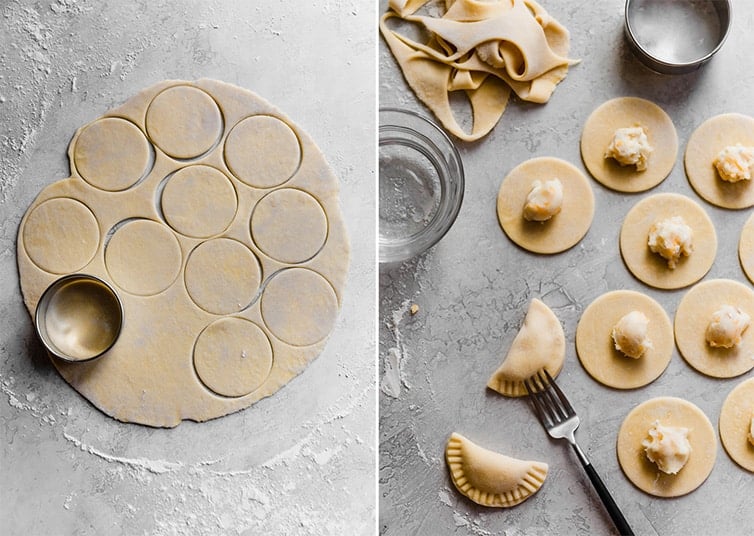
You will roll out the dough quite thin, then cut out circles, place a teaspoon of filling in the center of each, then fold over and seal the pierogi. At this point, you can freeze the pierogi or cook them within the next four hours.
Save This Recipe
You did it!
Cooking the pierogi
Pierogi are traditionally cooked using a two-step process:
- Boil
- Pan-fry
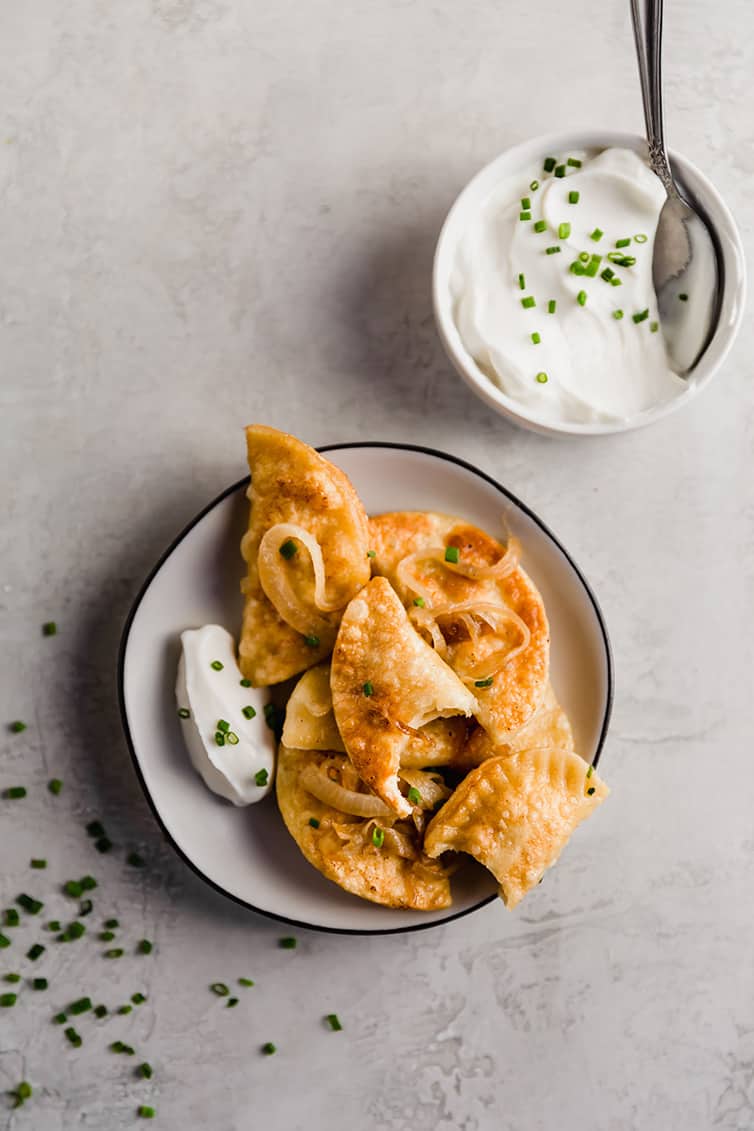
First, the pierogi are dropped into boiling water until al dente, then once drained, they are pan-fried in butter (and oftentimes, onions, as well!).
What to serve with pierogi
My mom and grandma always prepared their pierogies using a two-step process – first they would boil the pierogies to cook them through, then toss them into a frying pan with butter and onions to finish them off. SO GOOD. This is my absolute favorite way to eat them, but here are some other ideas:
- Sour cream
- Applesauce
- Fried and crumbled bacon
- Sautéed mushrooms
- Sauerkraut
Pierogies recipe notes
A few quick tips and tricks to ensure you have the best pierogi coming out of your kitchen!
- Farmer’s Cheese: You can substitute an equal amount of ricotta cheese for the farmer’s cheese in the filling.
- Make the Dough by Hand: Whisk the flour and salt, then use a rubber spatula to incorporate the egg, yolk, oil, and water until a shaggy dough forms, then knead briefly to bring it together into a soft dough.
- Many people cut up the dough scraps and boil and pan-fry with the rest of the pierogi so as not to waste – yum!
Make-ahead and freezing instructions
- Make-Ahead Dough: Once the dough is made, either wrap in plastic wrap, place in a freezer bag and freeze for up to 1 month, or use within 2 hours.
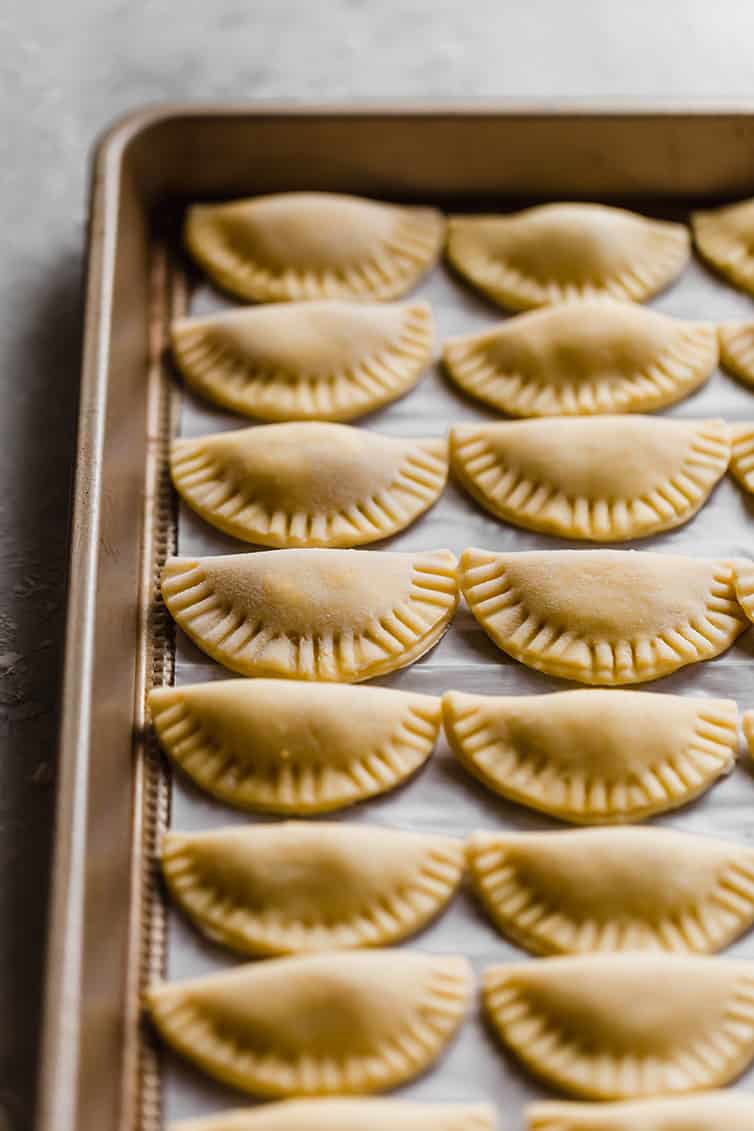
- How to Freeze Pierogi: The assembled pierogi can be frozen – place them in a single layer on a baking sheet and place them in the freezer until completely frozen, about 2 hours. Transfer the pierogi to a freezer bag and freeze for up to 1 month. No need to thaw before cooking – they can be boiled straight from the freezer.
More Lent-Worthy Dishes to Try:
- Homemade Fish Sticks with Tartar Sauce
- Beer Battered Cod
- Tuna Noodle Casserole (From Scratch!)
- Crock Pot Mac and Cheese
- Cajun Shrimp Macaroni and Cheese
Watch How to Make Homemade Pierogi:
If you make this recipe and love it, remember to stop back and give it a 5-star rating - it helps others find the recipe! ❤️️

Homemade Potato and Cheese Pierogies
Ingredients
For the Dough:
- 2 cups (250 g) unbleached all-purpose flour, plus extra for the work surface
- ½ teaspoon (0.5 teaspoon) salt
- 1 egg
- 1 egg yolk
- 1 tablespoon vegetable oil
- 4 to 6 tablespoons cold water
For the Caramelized Onions:
- 4 tablespoons unsalted butter
- 3 large onions, halved and thinly sliced
- ¼ teaspoon (0.25 teaspoon) salt
For the Potato and Cheese Filling:
- 1 medium russet potato, about 9 ounces, peeled and sliced 3/4 inch thick
- 1 tablespoon salt
- ¼ cup (59 g) reserved chopped caramelized onions
- 1½ ounces (42.52 g) cheddar cheese, shredded (about ⅓ cup)
- 1½ ounces (42.52 g) farmers cheese, cut into small pieces (about ¼ cup)
- 1 tablespoon unsalted butter
- Salt and ground black pepper, to taste
For Cooking and Serving:
- 1 tablespoon salt
- 4 tablespoons unsalted butter, for sautéing
- Sour cream, for serving
Instructions
- Make the Pierogi Dough: Pulse the flour and salt together in a food processor until combined, about 4 pulses. With the machine running, slowly add the whole egg, egg yolk, and oil through the feed tube until the mixture resembles wet sand, about 30 seconds. With the machine running, slowly add 4 tablespoons of the water until the dough forms a ball. If the dough doesn't ball up, add the remaining water, 1 tablespoon at a time, with the processor running until a dough ball forms (you may not use all the water).
- Transfer the dough to a lightly floured work surface and knead by hand until it firms slightly and becomes smooth, about 2 minutes. Cover with plastic wrap and set aside to relax for at least 15 minutes or up to 2 hours.
- Make the Caramelized Onions: Meanwhile, melt the butter in a 12-inch nonstick skillet over medium heat. Add the onions and salt and cook until very soft and well browned, 15 to 20 minutes. Measure out ¼ cup of the onions, chop them fine, and reserve them for the filling. Cover the caramelized onions to keep warm.
- Make the Potato and Cheese Filling: Cover the potatoes by 1 inch of water in a large saucepan and add 1 tablespoon salt. Bring to a boil, then reduce to a simmer and cook until the potatoes are tender and a fork can be slipped easily into the center, 10 to 12 minutes. Drain the potatoes into a colander.
- Set a food mill or ricer over a medium bowl and process the potatoes into the bowl. Add the caramelized onions. Stir in the cheeses and butter until incorporated and season with salt and pepper to taste. Cool slightly before filling the pierogi or cover with plastic wrap and refrigerate until needed, up to 2 days.
- Assemble the Pierogi: Dust a baking sheet liberally with flour; set aside. Divide the dough into 2 even pieces and cover with plastic wrap. Working with 1 piece of dough at a time, unwrap the dough and roll out on a lightly floured work surface into a 15-inch circle, about 1/16-inch thick. Using a 3-inch round biscuit cutter, cut out as many rounds as possible. Carefully gather up the dough scraps, wrap them in plastic wrap, and set aside.
- Place 1 teaspoon of the filling in the center of each dough round and moisten the edge of the dough round with water, using either your finger or a pastry brush. Fold the dough in half over the filling, making a half-moon shape. Pinch the seam along the edge to secure. Crimp the seam using the tines of a fork. Transfer to the prepared baking sheet and cover with a damp kitchen towel. Repeat with the remaining dough.
- Gently knead all of the dough scraps together into a ball and let relax for 5 to 10 minutes. Roll out, cut, and assemble additional pierogi, discarding any remaining dough scraps. [MAKE-AHEAD NOTE: The towel-covered baking sheet of pierogi can be wrapped with plastic wrap and refrigerated for up to 4 hours. The pierogi can also be frozen for up to 1 month; once completely frozen, the pierogi can be transferred to a zipper-lock bag. Do not thaw before boiling.]
- Cook the Pierogi: Bring 4 quarts of water to a boil in a large pot. Add 1 tablespoon of salt and half the pierogi. Cook, stirring often, until the edges feel al dente, 5 to 6 minutes (8 to 10 minutes if frozen). Using a wire spider or slotted spoon, transfer the pierogi to a colander and set aside. Return the water to a boil and cook the remaining pierogi.
- While the second batch of pierogi is boiling, melt 2 tablespoons of the butter in a 12-inch nonstick skillet over medium-high heat. Add the first batch of boiled and drained pierogi and sauté until golden on both sides, 1 to 2 minutes per side. Transfer the browned pierogi to a platter and cover to keep warm. Drain and sauté the remaining pierogi using the remaining 2 tablespoons butter. Sprinkle the caramelized onions over the top and serve with sour cream.
Notes
- Farmer’s Cheese: You can substitute an equal amount of ricotta cheese for the farmer’s cheese in the filling.
- Make the Dough by Hand: Whisk the flour and salt, then use a rubber spatula to incorporate the egg, yolk, oil, and water until a shaggy dough forms, then knead briefly to bring it together into a soft dough.
- Make-Ahead Dough: Once the dough is made, either wrap in plastic wrap, place in a freezer bag and freeze for up to 1 month, or use within 2 hours.
- How to Freeze Pierogi: The assembled pierogi can be frozen – place them in a single layer on a baking sheet and place them in the freezer until completely frozen, about 2 hours. Transfer the pierogi to a freezer bag and freeze for up to 1 month. No need to thaw before cooking – they can be boiled straight from the freezer.
- Recipe from Cook’s Illustrated
Did you make this recipe?
Leave a review below, then snap a picture and tag @thebrowneyedbaker on Instagram so I can see it!
Photography by Ari Laing.


Excellent recipe for dough. I tried so many other recipes and the dough was so sticky , then too dry and couldn’t be rolled out. This recipe makes a lovely dough that’s easy to roll nice and thin.
My Ukrainian Baba didn’t use an egg in her dough (she said that’s why italian’s pasta was so chewy!) but sadly I never got her recipe that was not, of course, written down. She also used just farmers cheese and likely would have been stern about not using cheddar.
But I’ve tried about a dozen recipes in the last few months and have been unhappy with the chewy or too thin/fragile dough so tried this recipe.
It was my favorite so far but not like my grandmother’s.
However, please help with the incorrect spelling of pierogi. You got in right in parts of the texts but “Pierogi” is already plural so it is incorrect to add the “es” on the end.
And it’s funny that someone said “varenki” are Ukrainian and “pierogi” are Polish because my grandmother called them “pyrohy” and her Polish friend called them “varenyky”.
I tried every other dough recipe and it was a nightmare to work with. I was about to give up on making pierogi until I tried this recipe the dough is AMAZING to work with. Try it!
These are spot on perfect. I had some left over pre-made empanada wrappers that needed something doing with them. Otherwise followed your recipe and cooking instructions to a tee and they were fantastic. Just a shortcut suggestion for the pastry-averse :)
This recipe is amazing. I would say my only critique is it makes extra filling but it’s not that much and I’d rather have leftover than run out. Otherwise, it’s a perfect recipe. The pierogies cook up perfectly and it is worth the labor. I boil first and then pan fry. My grandmother wasn’t able to pass along our family recipe to us, but this has been a staple she would be proud of and you should definitely try it.
Love this recipe. Be😋en a lover of pieoorgies all my life. After all, I am Polish…
Always thought it wasi intimidating! It wasen’t! Easy, peasy!
So delicious, seriously.
Try making it yourself. You won’t be sorry!
Happy Eats! ✌❤👣
Sorry, love your content, but as for the pierogi there is no debate – they’re 100% Polish ;) debate might be that they could be Ukrainian but those would be varenyky. Germans don’t have this style of dumpling, instead they have jewish-style potato dumplings called “knoedel”. Hope it’s not offensive to throw in my 2 cents ‘:D
have been using my Mom’s dough recipe for a very very long time. I use the flour, water and 1 egg. I am wondering what the extra yolk and oil does to the dough.
These were fabulous! I was surprised mine looked exactly like the picture. I think what makes these extra special is the caramelized onions. They are delish! I had my pierogies with sour cream and chives (plus apple sauce, pigs in a blanket and sauerkraut on the side). Yummy!
I had a decent amount of filling left over so I made another batch of dough and ended up with about 50 pierogies total. These were not hard to make but very time consuming. I am very tired but they were well worth it! I am excited to freeze them and enjoy them all month long :)
I am so excited to try your recipe, most especially for the dough. I have my Mother’s recipe but the dough can sometimes be a nightmare to roll, depending on ambient temperature & humidity. I usually have to gather a crew to make them.
One of the fillings we use is dry cottage cheese (also called farmers cheese or quark) an egg salt & pepper & chives. I order the dry cottage cheese, sometimes called diet cottage cheese, from our local Golden Dawn Market. Italian markets can also carry it.
We also use a filling of lekvar (prune butter). If you like sweet, this one is for you.
We also fill with, sauerkraut or sweet & sour cabbage. I’m interested to try your version of the potato ones. Ours was a simple mashed (or preferably) riced potato with cheddar cheese. I’m sure the caramelized onions add a fabulous flavor.
I preboil until they float, dip in melted margarine, place on a parchment papered cookie tray in freezer until set solid. Then into a ziplock bag. All I do is grab the quantity I want & pan fry , on low heat first. The margarine keeps them from sticking together & serves to oil the pan for sautéing.
Wesołych Świąt Wielkanocnych – Happy Easter
I made the filling and it is absolutely what I want to taste in a pierogi. I have to make a gluten free dough so didn’t try the dough recipe but could eat that filling with a spoon!
It looks so delicious and mouth-watering. Got to try it as soon as possible.
* I made these tonight, and the dough was really nice to work with. Loved the onions on the delicious finished product.
store-bought cousins are even improperly named. They’re called “Pierogies.”
For all Poles, this is the funniest thing. Reason being is that the word “Pierogi” is already pluralized (1 “pierog” is the singular).
Elaine, yours is the first comment I’ve come across, and I’ve read LOTS of comments on dozens of pierogi recipe pages, to mention this point of mistaken translation/grammar. THANK YOU! In honor of and gratitude for your comment, I’ll sign off with my it’s vs. its grammar-correcting ID ;)
Now then — to the recipe author — while I shouldn’t promise to follow your directions exactly, I can tell, based on aforementioned research (plus a goodly amount of experience across decades of pierogi eating and, more recently, cooking) that the recipe *is* great! Thanks very much for it.
I’m going to give this recipe a try! pierogi are common to our family but it’ll be helpful to follow a recipe with accurate measurements.
One question though-is one pierogi 67 calories or are there 67 calories in five pierogi?
Hi Sharlene, The nutrition is for 1 pierogi.
my husband grew up eating these! I usually just buy frozen but I need to try this recipe soon!
I don’t have a ricer or food mill. Does this mean I should not try to make them (with all the effort that goes into them)? I only have a 4 cup food processor so will use my stand mixer. Thank you
Hi Lynne, While the texture will be just a bit different, you can mash up your potatoes as you would for mashed potatoes.
I love these!!! I’ve had Perogies before and never cared for them,, but I’m totally on board with this recipe!!!
What type of ricer and food processor do you use? Do you love them both? Thanks 👍🏻
Oh my goodness your pierogies are so super dreamy! The caramalized Onions got me like oh I have to make these on Sunday! Can’t wait to get cooking now, Thanks for sharing the recipe.
Looks delicious… Thanks for sharing such a delicious recipe.
Do you need a rice maker or milk or can you process potatoes a different way?
Hi Sarah, Using a ricer or mill gives the potatoes a super fluffy texture.
This post hit home for me. I have been making pierogi’s for years and don’t think I can change my tried and true Gramma’s dough recipe. It’s made with sour cream, eggs, flour and a little salt, smooth as a baby’s butt and no need to chill. We do 2 fillings, one cheese (sharp cheddar) and potato the other Farmer’s cheese, it’s true, you need the real thing. Through the years we’ve learned a few short cuts, like running the dough through the pasta roller. We used a hand crank one first, then my daughter bought me an attachment for my Kitchen Aide. Sure makes life easy when you’re making hundreds. Also, adding chopped, sauted leeks to the potatoes isn’t a bad idea.
This is also a nice method to cook these potato and cheese pierogies!
Love the pasta roller idea! Thanks so much for sharing your fillings too!
I love pierogies! I will try this recipe. I usually put some sour cream in my dough. Also, I boil all of mine right away and toss them in a little bit of melted butter and sautéed onions. Then I lay them in a vacuum sealer bag, not overlapping much, and freeze in small batches. That way I can pull out a few at a time and simply brown them in a skillet for a quick dinner.
That’s a fantastic idea!! Thanks for sharing :)
The deep-fried pierogi with sour cream in one of the above photographs looks really delicious. Do they need to be boiled prior to frying?
It’s not deep fried, just sauteed in butter, per the recipe instructions :)
Up next: haluski?
Yes, I have the recipe my grandma sent me saved and I’ve been meaning to test it myself and get it posted!
Yay!
If you think this is a good recipe then I’m tempted to try it. When I lived in Pittsburgh I would
buy Tambellini ‘s frozen pierogis to fix, just as you described with the butter and onions. Pierogis were new to me and I LOVED them but I have never taken on a recipe.
You call for only 1 teaspoon of filling in each pierogy. That seems like an awfully small amount of filling. Did you mean 1 tablespoon ??
Hi Lloyd, Yes so sorry!
Oh no- can you please fix that up top, please?? I just made mine with a tsp without reading the comments first!
you only use one russet potatoe?
Hi, my family are big pierogi lovers and I was wondering how the dough would go if you froze it? Thinking of making a heap of dough and just being able to grab it as I need it!
Hi Nikki, I’ve never frozen the dough but I imagine that it would work just fine! Enjoy!
Can I make perogie dough in a bread maker on the dough cycle
Hi Donna, I don’t think so, as this is not a yeast dough that needs intense mixing.