All-Butter Pie Crust
Learn how to make a fabulous, flaky butter pie crust that is easy to work with and turns out magnificent pie dough each and every time. Included are step-by-step instructions, a video, and tons of tips and tricks to ensure you have success with all of your delicious pie recipes. This is going to become your favorite butter pie crust, guaranteed!

Today we are tackling an all-butter pie crust!
Many of you may be familiar with my heralded “foolproof pie dough“, which uses a combination of shortening and butter, as well as a secret ingredient (spoiler, it’s vodka!) to create a flaky and workable pie crust.
Today, I am introducing you to a butter pie crust, which includes is even more delicious than a traditional pie crust (hello, ALL butter!) and infinitely more flaky. While an all-butter pie crust is amazing in every possible way, it’s not quite as easy to work with as a butter/shortening pie crust, so today I’m walking you through the recipe and all of the potential pitfalls so you can enjoy pie crust nirvana all summer long.
Why use an all-butter crust?
Most old-fashioned or traditional pie crusts use a combination of butter and shortening for the fat component of the crust. The reason is that butter tastes delicious, but shortening has a higher melting point, which means it can help to keep the dough together and workable without the worry of it becoming too warm before it gets into the oven.
So why make a pie crust recipe without shortening?
Simply, an all-butter pie crust is absolutely delicious and its flakiness is seriously something to behold (especially in a classic pastry like quiche Lorraine!).
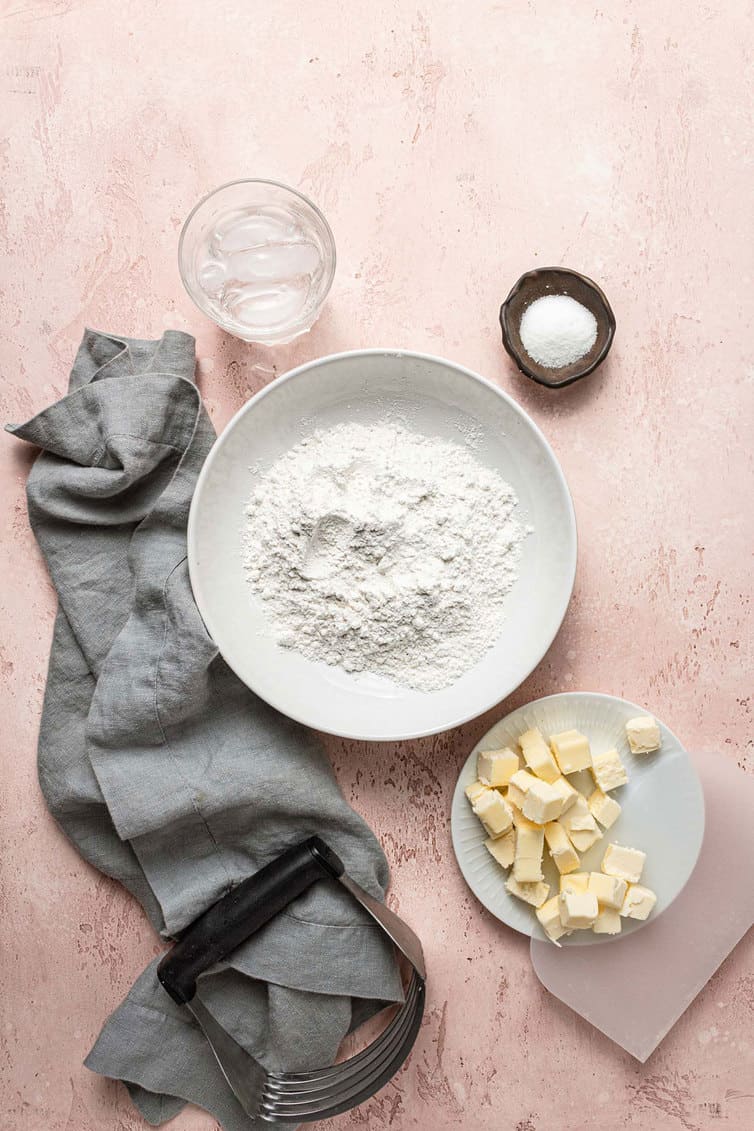
Pie crust ingredients
We only need five ingredients that you most likely have in your pantry and refrigerator to make this amazing pie crust:
- Flour – Keeps everything together!
- Sugar – Helps the pie crust achieve a little tenderness and helps it to brown nicely. You can omit this if using the pie crust for a savory pie.
- Salt – For better flavor, always.
- Unsalted butter – Use unsalted so we can control the salt content. Be sure the butter is cut into small cubes and is thoroughly chilled.
- Ice water – The tie that binds! The water should be extremely cold and we only use as much as we have to in order to get the dough to come together. If you’re unsure about whether you’ve used enough, it’s okay to use a little extra. I’ve found that “wetter” or “stickier” pie crusts are much more forgiving because you can use a little extra flour when rolling, versus having a dry pie crust that is difficult to roll and shape.
Step-by-step instructions
I prefer to make my pie crusts by hand (so quick and easy!), and this is the method that I use:
- Whisk together the flour, sugar, and salt in a large bowl.
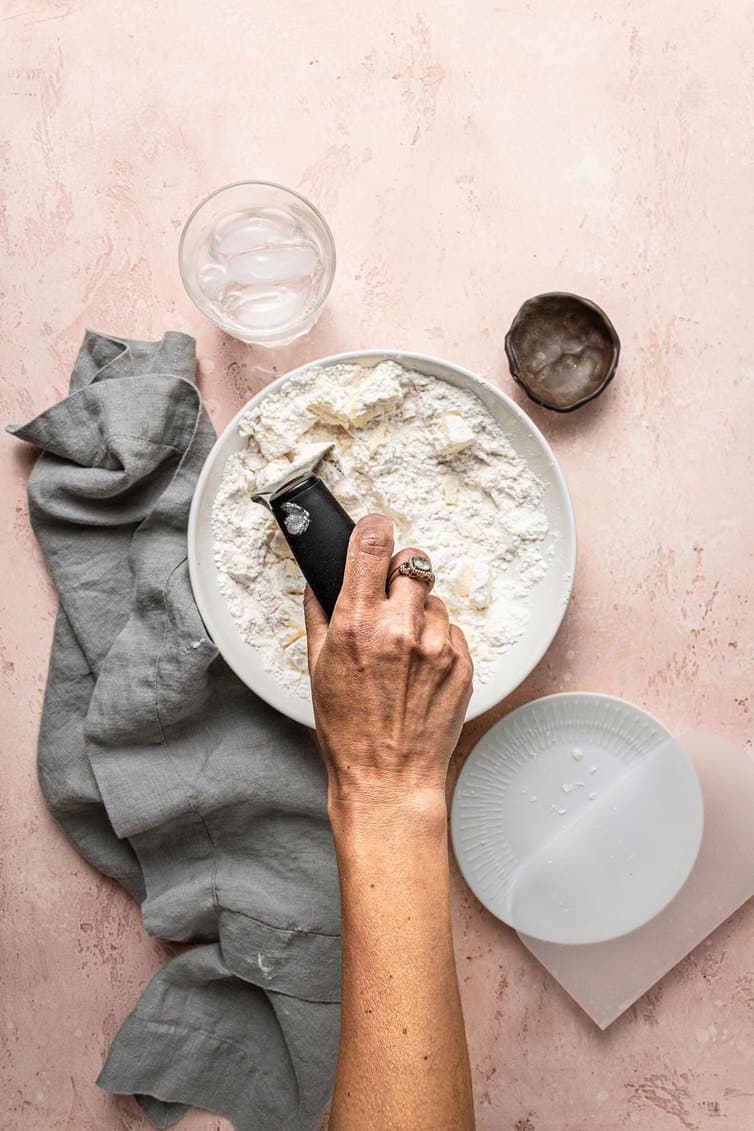
- Cut in the cold, cubed butter with a pastry blender until most of the butter is in pea-size clumps.
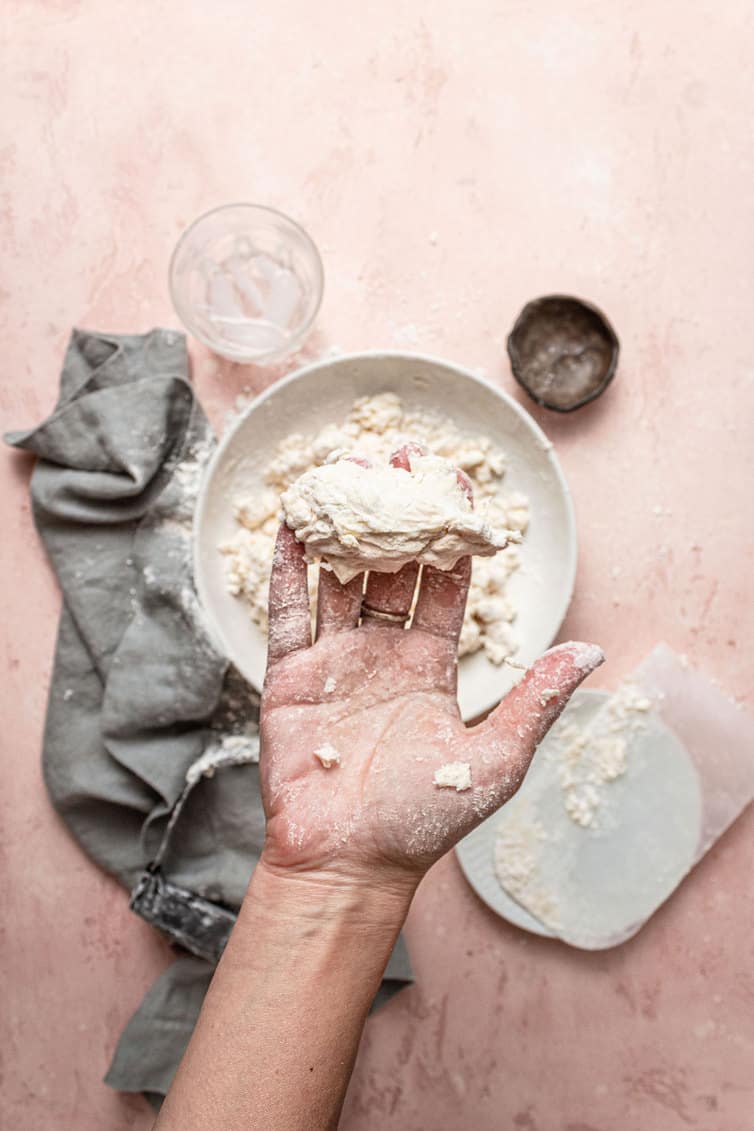
- Add the ice water a little at a time until the dough is cohesive and comes together. It should feel moist and a little sticky.
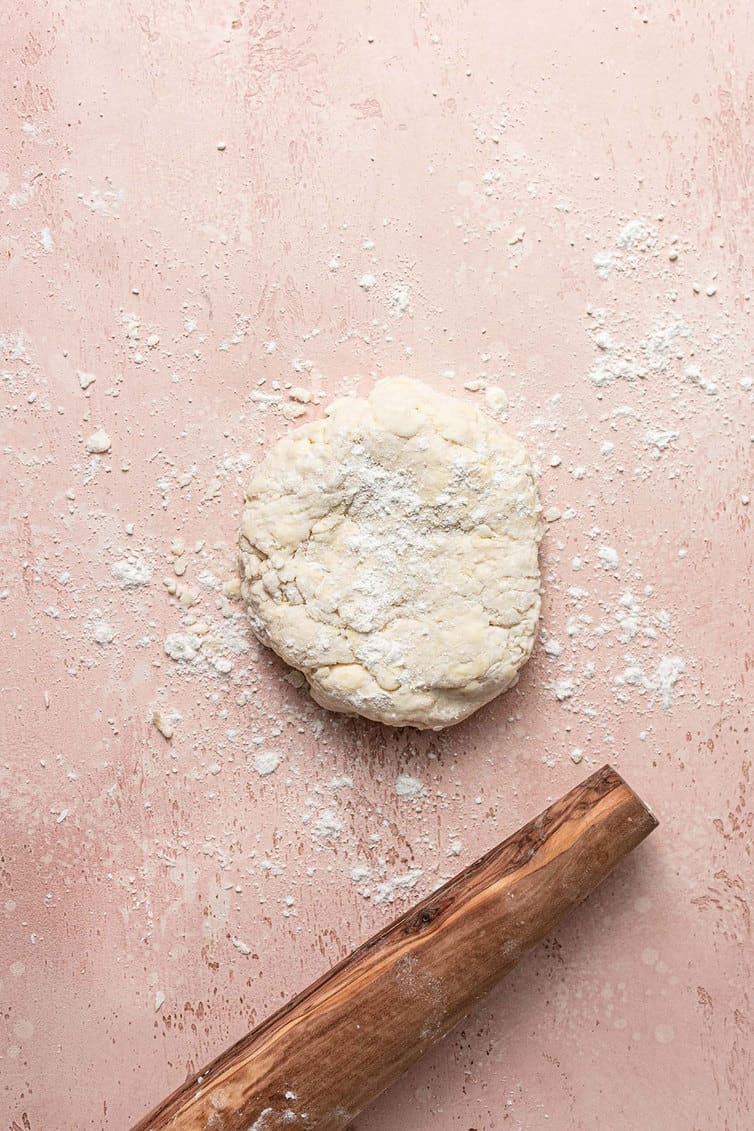
- Turn the dough out onto a lightly floured surface and bring it together using your hands, pressing it into a ball.
- Flatten it into a 6-inch round disk.
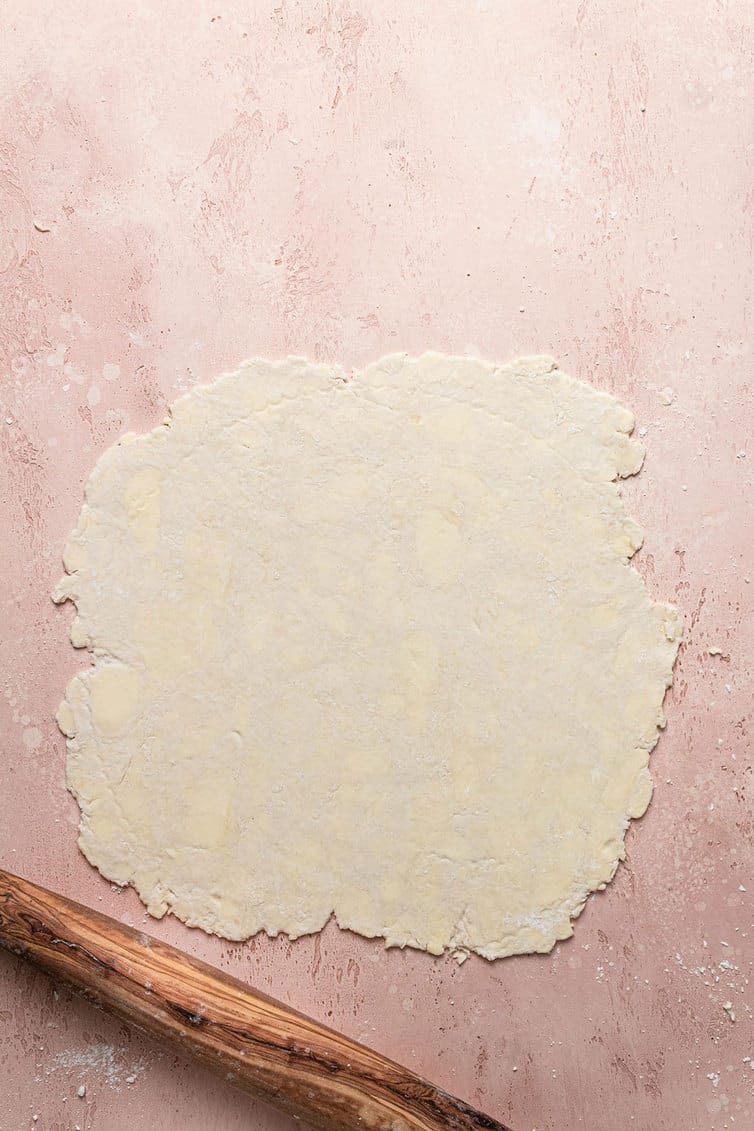
- Roll it out into a 13-inch circle.
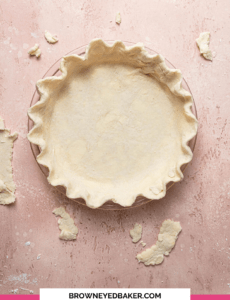
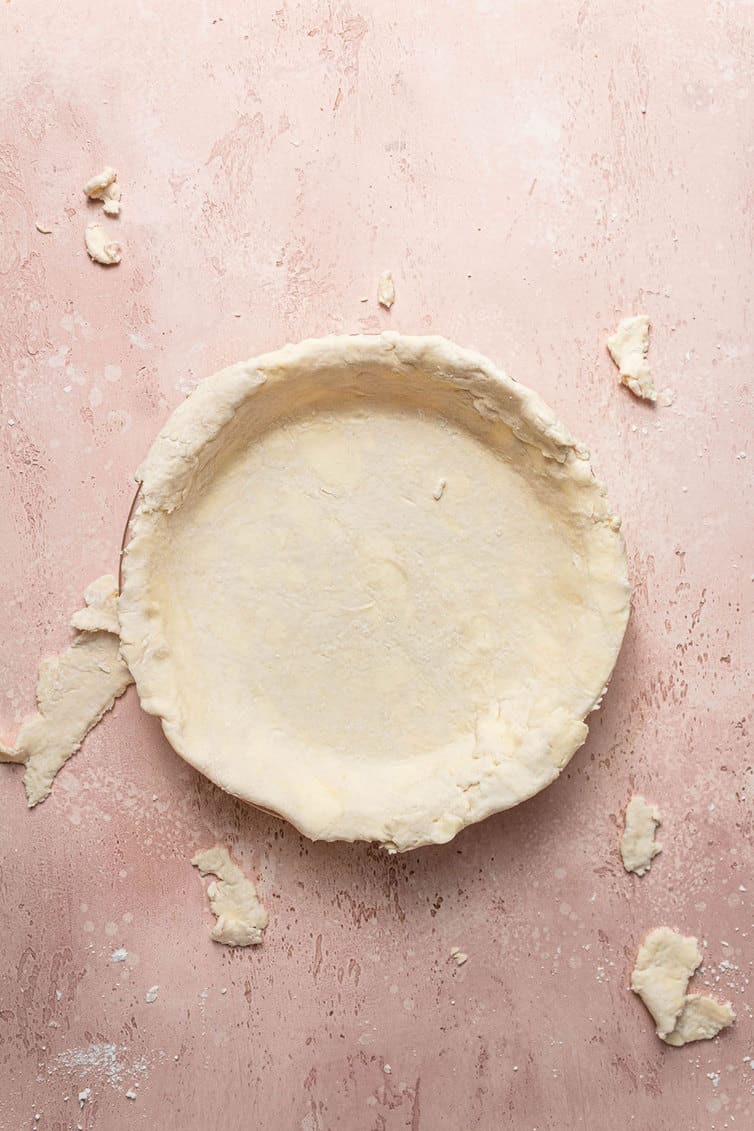
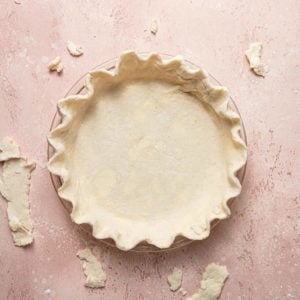
- Transfer the dough round into a 9-inch pie plate. Trim off any excess overhang.
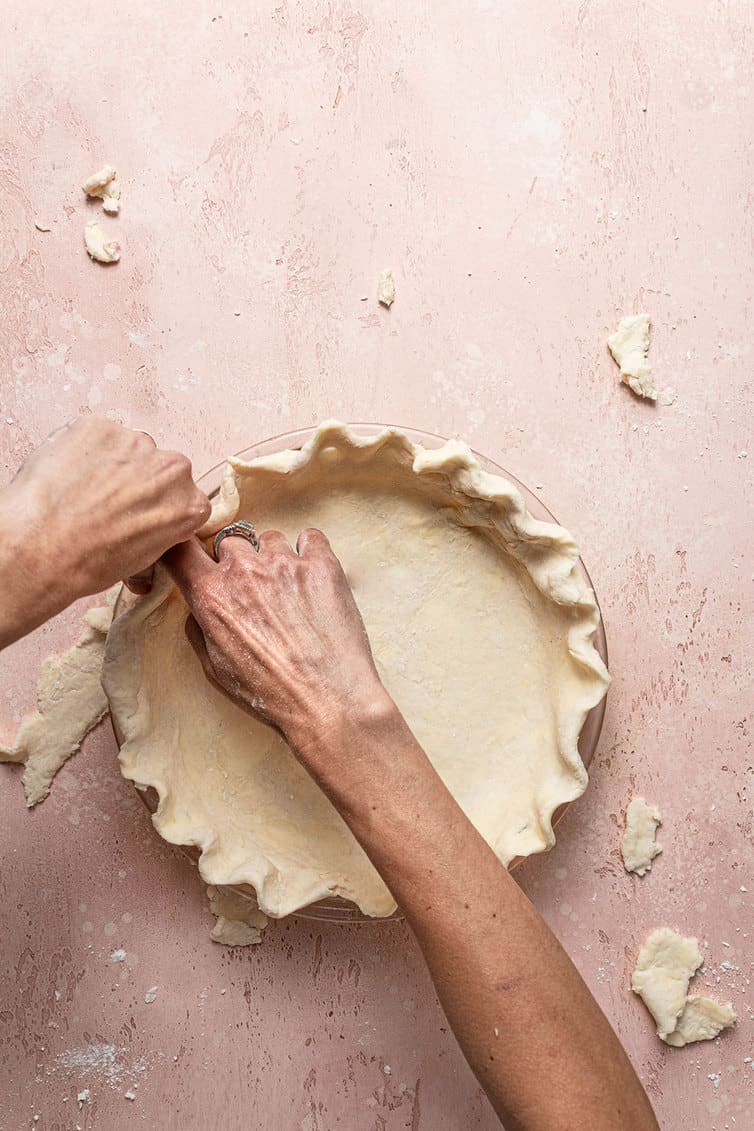
- Crimp, flute, or press the dough around the edges as desired.
- Chill in the refrigerator for at least 2 hours before proceeding with the recipe.
Food processor instructions
While I love making pie crust by hand, I know many people prefer the ease of a food processor. I’ve used it myself a number of times and if you’d like to employ it for this recipe, follow these steps:
- Add the flour, sugar, and salt to the food processor work bowl.
- Pulse a few times to combine.
- Add the unsalted butter to the work bowl.
- Pulse again until the butter is in very small clumps, as described above.
- Slowly drizzle in the ice water and pulse until the dough comes together in a cohesive clump.
- Proceed with the recipe as described above and in the recipe below.

Rolling out the pie crust
I take an unconventional approach with rolling and chilling the pie crust.
Typically, once pie dough is mixed together, it’s formed into a disk and chilled for at least a couple of hours before being rolled out.
I flip the order here and roll it out immediately after it’s mixed together, then transfer it to the pie plate and chill it in that for at least 2 hours.
I find that the dough is easier to work with when it’s just mixed together; it’s supple, easy to roll and shape. Trying to roll out chilled dough often results in a dough that cracks and breaks and can give fits when trying to get it into a nice smooth circle.
As you’re rolling, dust a little flour as needed and give the dough a quarter turn after each roll to keep it from sticking. Once it’s rolled out into a circle, gently transfer it to your pie plate and you’re on your way!
Cold is key!
The number one, most important tip for making a successful pie crust is make sure everything is as cold as possible. If the dough gets too warm, the butter will soften and begin to break down before it hits the oven, which can make for a tough pie crust.
When the cold butter inside the pie crust hits a hot oven, the water inside of the butter evaporates, leaving pockets of steam, which is what creates that glorious, flaky crust. If that water starts breaking down before it gets to the oven, you won’t get those bursts of steam and gorgeous, flaky crust.
To that end, make sure that the butter is completely cold and firm and that your ice water is as cold as possible.
Some people go so far as to chill the dry ingredients, too. I’ve never found that necessary, but if your home is particularly warm or extra humid, especially in the summer, you may want to try it!
If you have one, a marble pastry board is ideal for rolling out pie crust (as well as cut-out sugar cookies, too!). The marble naturally stays cooler, which helps to keep the dough from getting too warm and the butter from softening.
Finally, chilling the pie crust before filling it and baking is absolutely CRUCIAL to pie crust success. You need this step to ensure all of the butter has resolidified in the even it got too warm during rolling and shaping; this keeps the crust flaky and the rest also helps to ensure that it doesn’t shrink in the oven.
Butter pie crust recipe tips
- Cold ingredients are essential! Be sure to have the butter and ice water as chilled as possible before beginning. Once you start, work quickly and pop the dough back into the refrigerator for 10-15 minutes if the dough is getting too soft or the butter too warm.
- Equipment recommendations: Pie plate / pastry blender / food processor / marble board / rolling pin
- Double crust: If you have a pie recipe that calls for a double crust, simply double this recipe. I recommend lining the pie plate but leaving the overhang in place until ready to fill and bake. Roll the second piece of dough out into a circle and place on a parchment-lined baking sheet and chill for 2 hours as well.
- Blind Baking: If a recipe calls for blind baking (or pre-baking) a pie crust, I recommend lining the chilled pie crust with aluminum foil and using granulated sugar to fill the entire pie plate. This has been the most successful method I’ve used and it ensures a beautiful crust that never shrinks!
- Make-Ahead: You can refrigerate the dough-lined pie plate up to a day in advance of baking. You can also prepare the pie dough and wrap the disk in plastic wrap and refrigerate for up to 3 days. Let sit on the counter for about 20 minutes before rolling out. Once the pie plate has been lined with the dough and the edges crimped as desired, be sure to chill again for at least 2 hours before proceeding with the recipe.
- Freezing Pie Crust: To freeze the crust, place the disk(s) wrapped in plastic wrap in an airtight ziplock bag and place in the freezer for up to 3 months. Thaw in the refrigerator overnight, then follow the make-ahead instructions above.
Pies to make with this crust
Now that you’ve mastered an all-butter pie crust, you are totally prepared to whip up any pie of your choosing. Below are some of my favorites:
Watch the Recipe Video:
If you make this butter pie crust recipe and love it, I would so appreciate it if you would take a moment to leave a rating below. Thank you so much! ❤️️
All-Butter Pie Crust
Ingredients
- 1¼ cups (150 g) all-purpose flour
- 1½ teaspoons granulated sugar
- ½ teaspoon salt
- ½ cup (113 g) unsalted butter, cubed and very cold
- 2 to 4 tablespoons (2-4 tablespoons) ice water
Instructions
- In a large bowl, whisk together the flour, sugar, and salt.
- Add the butter and, using a pastry blender or two forks, quickly cut it into the flour until large pea-sizes bits remain.
- Add 2 tablespoons of the ice water and use a rubber spatula to stir it into the dough, pressing it together. If it still seems dry, add more water a little at a time until it is cohesive.
- Turn the dough out onto a lightly floured work surface and bring it together with your hands, pressing it into a 6-inch round. Lightly flour the top and gently and quickly roll it out to a 13-inch circle, picking it up and doing a quarter turn after every couple of rolls to keep it from sticking.
- Transfer the dough to a 9-inch pie plate and gently press it into the bottom and up the sides. Trim the dough to 1 inch beyond the lip of the pie plate, then tuck it under itself so it is flush with the edge of the pie plate. Flute the edges or press with the tines of a fork, then refrigerate the dough-lined plate for at least 2 hours.
- Proceed with your pie recipe as instructed.
Notes
- Cold ingredients are essential! Be sure to have the butter and ice water as chilled as possible before beginning. Once you start, work quickly and pop the dough back into the refrigerator for 10-15 minutes if the dough is getting too soft or the butter too warm.
- Equipment recommendations: Pie plate / pastry blender / food processor / marble board / rolling pin
- Double crust: If you have a pie recipe that calls for a double crust, simply double this recipe. I recommend lining the pie plate but leaving the overhang in place until ready to fill and bake. Roll the second piece of dough out into a circle and place on a parchment-lined baking sheet and chill for 2 hours as well.
- Blind Baking: If a recipe calls for blind baking (or pre-baking) a pie crust, I recommend lining the chilled pie crust with aluminum foil and using granulated sugar to fill the entire pie plate. Bake at 350 degrees F for 45 minutes if it will be baked again once filled, or 55 minutes if it is to be baked fully. This has been the most successful method I’ve used and it ensures a beautiful crust that never shrinks!
- Make-Ahead: You can refrigerate the dough-lined pie plate up to a day in advance of baking. You can also prepare the pie dough and wrap the disk in plastic wrap and refrigerate for up to 3 days. Let sit on the counter for about 20 minutes before rolling out. Once the pie plate has been lined with the dough and the edges crimped as desired, be sure to chill again for at least 2 hours before proceeding with the recipe.
- Freezing Pie Crust: To freeze the crust, place the disk(s) wrapped in plastic wrap in an airtight ziplock bag and place in the freezer for up to 3 months. Thaw in the refrigerator overnight, then follow the make-ahead instructions above.
Did you make this recipe?
Leave a review below, then snap a picture and tag @thebrowneyedbaker on Instagram so I can see it!
[Photography by Dee of One Sarcastic Baker]


Just finish the dough in the fridge. Anxious to see taste with my Mom butterscoth pie. One thing for sure it rolled easy.👍
I love the flakey texture and ease of putting everything together because of the tips and tricks you share! This recipe makes a delicious crust. However, I always find that for my 9 inch pie pans (I have shallow and deep dish pans) that there is always -almost- enough dough but it comes shy of having any overhang, which I need since I am a novice baker. I recommend three batches worth and dividing them in two. If you aren’t baking a pie with a double crust freeze the extra half in the freezer for your next bake.
Wonderful recipe, but if I may, get and use a pastry cloth. It makes rolling and handling the dough so much easier and the dough does not stick to it if seasoned with flour then wipe flour off with hand. Much easier to transfer to pie plate. I love mine. Oh and a rolling pin cover too.
Pie crust is my bugbear, but this turned out really well! I used it with Ina Garten’s Perfect Peach Pie recipe.
wonderful ususally always made with some shortening… but my secret is Mrs Anderson Pie Bag makes pie making so wonderful and easy clean up… you insert in bag the dough roll then put pie pan inside the bag and flip over not mess and they wash up so well with hot soapy water. Cannot be without these round Mrs Anderson bags Amazon and BedBath have them
I take butter out of freezer and grate
This is a great post. Kudos on the clear instructions! Vodka was something ATK recommended some time ago, and you “hinted” at in the intro to this post, but you didn’t put any mention of it in the actual recipe or instructions. Did I miss or misunderstand something?
Hi Rae, Thank you, I’m glad you’ve found the post helpful! I do have the recipe for the pie crust that uses vodka here (it’s a butter/shortening crust and uses a bit more flour since it’s a more hydrated dough): https://www.browneyedbaker.com/the-best-pie-crust-recipe/
Homemade pies almost seem like the way we will have to go. Thank you for keeping some traditions going-such as making pies. Not only have I noticed how expensive a purchased pie is these days (nearly 15.00 at many places) but they just dont taste all that great any more. I can barely find anyone who sells a boysenberry pie around here anymore either. What’s up with the ever vanishing boysenberry?
Crust is often the best part of a pie for me, if done well. 😊
Hi Macy, I am forever disappointed by store-bought pies! I’ve yet to be impressed, unfortunately! They all seem to have a weird aftertaste!
Really something good and well explained.
Hi Michelle, so nice to see someone else make a pie crust by hand, I thought I was the last in the land to do that. I don’t like the pastry blender, I just use to dinner knives and cross them to cut in the butter. I’ve never made an all butter crust, I’m an all shortening girl, so I look forward to trying yours!
Hi Ellen, I usually do as much by hand as possible! Except for potatoes for scalloped potatoes – those I put through the food processor ;-) I can’t wait to hear what you think of the pie crust!