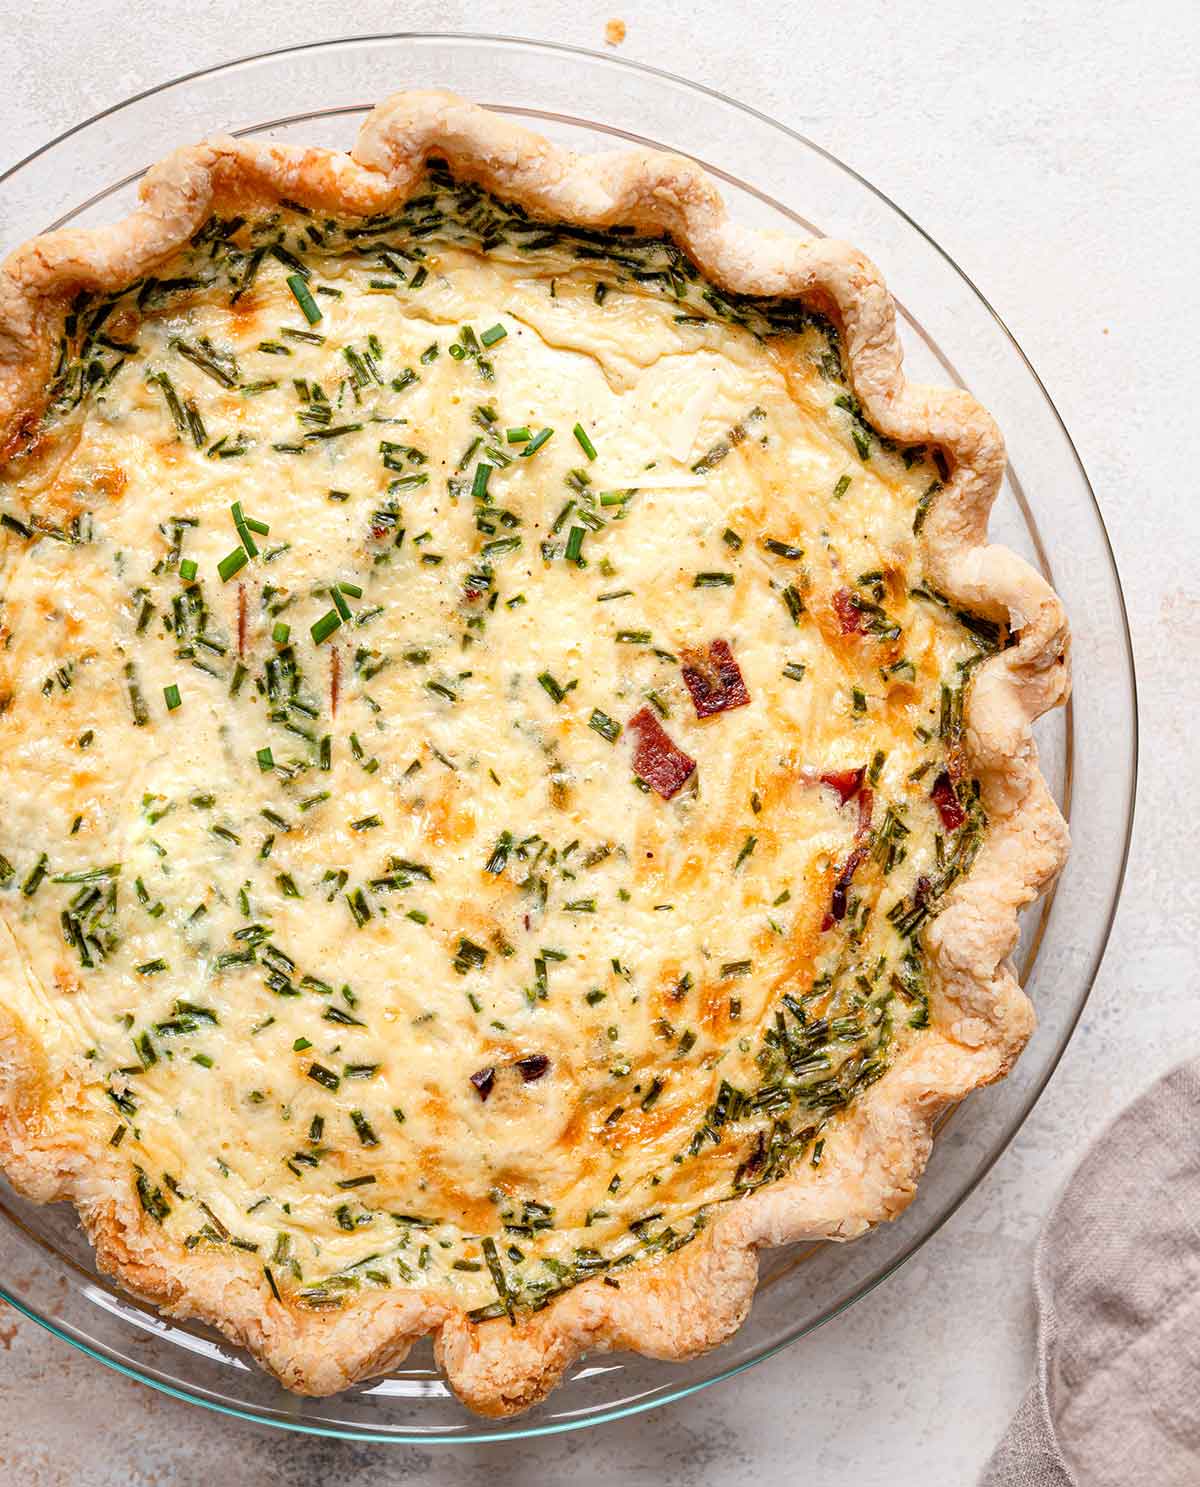
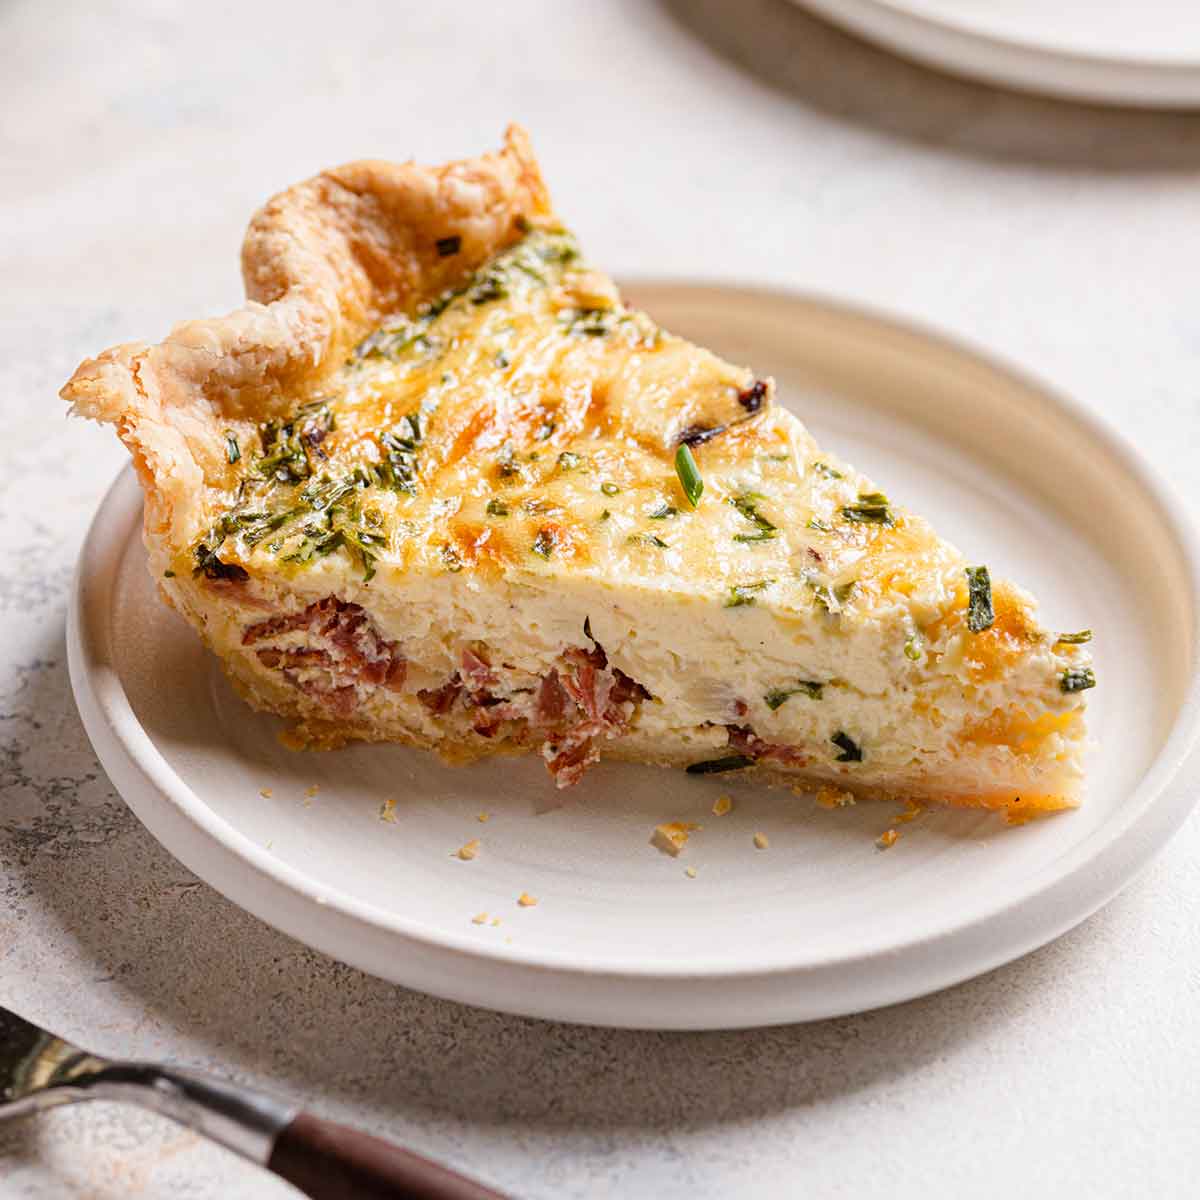
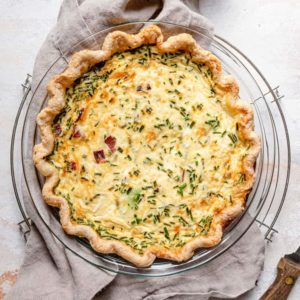
Classic Quiche Lorraine

This perfect recipe for the classic French quiche Lorraine features a buttery pie crust filled with a savory custard studded with bacon, Gruyere cheese, and chives. Perfect for breakfast, brunch, lunch, or dinner!
In the past, I’ve made quiche Lorraine scones and a bacon and cheese quiche tart, but now it’s time to visit the original: classic quiche Lorraine!
What is Quiche Lorraine?
Quiche dates back to the 13th century and appeared in cookbooks as early as the 15th century (!); it is widely known as a French recipe, but the simple eggs and cream custard baked in a pastry was also common in English and Italian cuisines around the same time.
Quiche Lorraine is arguably the most popular type of quiche recipe and is named after the Lorraine region of France; they made a classic quiche filling with eggs, cream, and lardons (cubes of fatty bacon or pork fat). Interestingly, the French quiches did not include cheese; however, in English-speaking countries, quiche Lorraine typically includes cheese, and the lardons are replaced with bacon.
What You’ll Need to Make It
If you’ve felt intimidated about how to make quiche in the past, have no fear! It’s quite simple and only requires two steps: preparing and par-baking the crust, and then filling it up and baking it in the oven.
Let’s go over each step…
The Crust
There are a few options when it comes to the quiche crust:
- All-butter pie crust - This is the version included in the recipe below because I think it's just absolutely divine. The buttery, flaky crust pairs wonderfully with the savory filling.
- Foolproof pie dough recipe - This has been my go-to pie crust ecipe for years, using a combination of butter and shortening, along with some vodka in place of water for a perfectly flaky crust that's easy to work with each and every time.
- Store-bought crust: You can absolutely buy a pre-made crust and use that. I do think homemade is exponentially better, but if you’re short on time, it will absolutely work.
- Crustless quiche option: You can make a quiche without a crust, just be sure to leave it in the pan that it’s baked in, as it won’t be able to be completely removed for serving.
How to Parbake the Crust
Also referred to as "blind-baking" the crust, we're going to bake the crust until it's almost done, but not quite since it'll go back in the oven with the filling. I've tried many different methods for this, different pie weights (including ceramic balls, dry beans, rice, you name it!), and the method I've found that is completely foolproof is the one outlined by Stella Parks.
You can see a step-by-step tutorial here: How to Blind Bake Pie Crust and read the short version below:
Line the chilled pie plate with aluminum foil then fill it all up with granulated sugar (you can reuse it!) and bake it at 350 degrees F for 40 to 45 minutes (for partially-baked crusts) or 55 to 60 minutes (for a fully baked crust).
I have never had so much success - no shrinking pie crust, no dough sticking to foil as I try to remove it halfway through baking, and a beautifully browned pie crust.
Quiche Filling
For a wonderfully rich quiche, I use a combination of heavy cream and milk and feel it creates the best taste and texture. However, you can mix up the proportions if you'd like more milk than cream (or simply use half and half instead).
Add-Ins!
Save This Recipe
While quiche Lorraine filling typically includes bacon, Gruyere cheese, and some type of onions, you can use this basic quiche recipe to mix and match ingredients for countless different quiche varieties! I recommend using no more than 1 cup of cheese and 2 cups of whatever else you want to include. Some ideas:
- Meat: Ham or Canadian bacon, sausage, crab meat
- Cheese: Swiss cheese, cheddar, goat, gouda, feta
- Veggies: Spinach (or other greens), mushrooms, onion, shallot, asparagus, peppers, tomatoes, zucchini
- Seasonings: Chives, parsley, basil, cayenne pepper, Old Bay seasoning, hot sauce
Note: If you use any fresh vegetables or greens, I recommend cooking them first so they don't release liquid in the quiche and cause it to become watery or soupy.
Many quiche Lorraine recipes also include some type of cooked onions or shallots; I am not always a fan of cooked onion in egg dishes, as I feel it can sometimes be overpowering, so I opted instead to use chives. They give the perfect amount of bite but are much milder.
The Pan
- A classic 9-inch pie plate is perfect for this quiche recipe; I've found glass pie plates perform better than metal or ceramic pie plates in terms of browning, heat conduction, and consistency.
- An alternative for your quiche is a tart pan, usually 9½ or 10 inches in diameter. Since tart pans are shallower than pie plates, you may have some leftover custard, and your baking time will be reduced if you choose to go the tart pan route. A tart pan with a removable bottoms allows you to remove the entire quiche from the pan and place it on a serving platter.
- They also sell quiche molds, which are fluted like a tart pan (and also have a removable bottom), but much deeper than a traditional tart pan and should hold all of the filling without an issue.
The great news is that whatever pan you choose, no prep work is required; you do not need to grease them or line them in any way.

Make-Ahead, Storing, Freezing and Reheating Instructions
- Make-Ahead Pie Crust: The pie dough can be prepared ahead of time and stored in the refrigerator for up to 5 days or in the freezer for up to 3 months.
- Make-Ahead Parbake Pie Crust: You can par-bake the crust ahead of time. Complete instructions through step 6, then allow the partially baked crust to cool completely. Wrap tightly in plastic wrap and refrigerate for up to 3 days. You can fill the cold crust and bake (the crust does not need to be reheated prior to filling).
- Storage: Wrap the quiche tightly in plastic wrap and refrigerate for up to 4 days.
- Freezing Instructions: Cool baked quiche completely, then cover tightly with a layer of plastic wrap and then a layer of aluminum foil, place in a large ziptop bag, and freeze for up to 3 months. Thaw in the refrigerator overnight, then reheat at 350°F (177°C) for 20-25 minutes.
What to Serve with a Classic Quiche
What you choose to serve with your quiche will probably depend on whether you're serving it for breakfast/brunch, or dinner. Here are some suggestions that could work in either instance:
- Fruit salad
- Roasted tomatoes
- Tossed salad
- Cucumber salad
- Breadsticks
- Roasted, sauteed, or grilled vegetables
- Soup
More Favorite Breakfast and Brunch Recipes
- Challah French Toast
- Homemade Croissants
- Fluffy and Crisp Buttermilk Waffles
- Danish Pastries
- Fluffy Buttermilk Pancakes
Watch the Recipe Video:
If you make this classic quiche recipe and love it, remember to stop back and give it a 5-star rating - it helps others find the recipe! ❤️️
Classic Quiche Lorraine Recipe
Ingredients
For the Crust:
- 1¼ cups (195 g) all-purpose flour
- 1½ teaspoons granulated sugar
- ½ teaspoon salt
- ½ cup (113 g) unsalted butter, cubed and very cold
- 2 to 4 tablespoons ice water
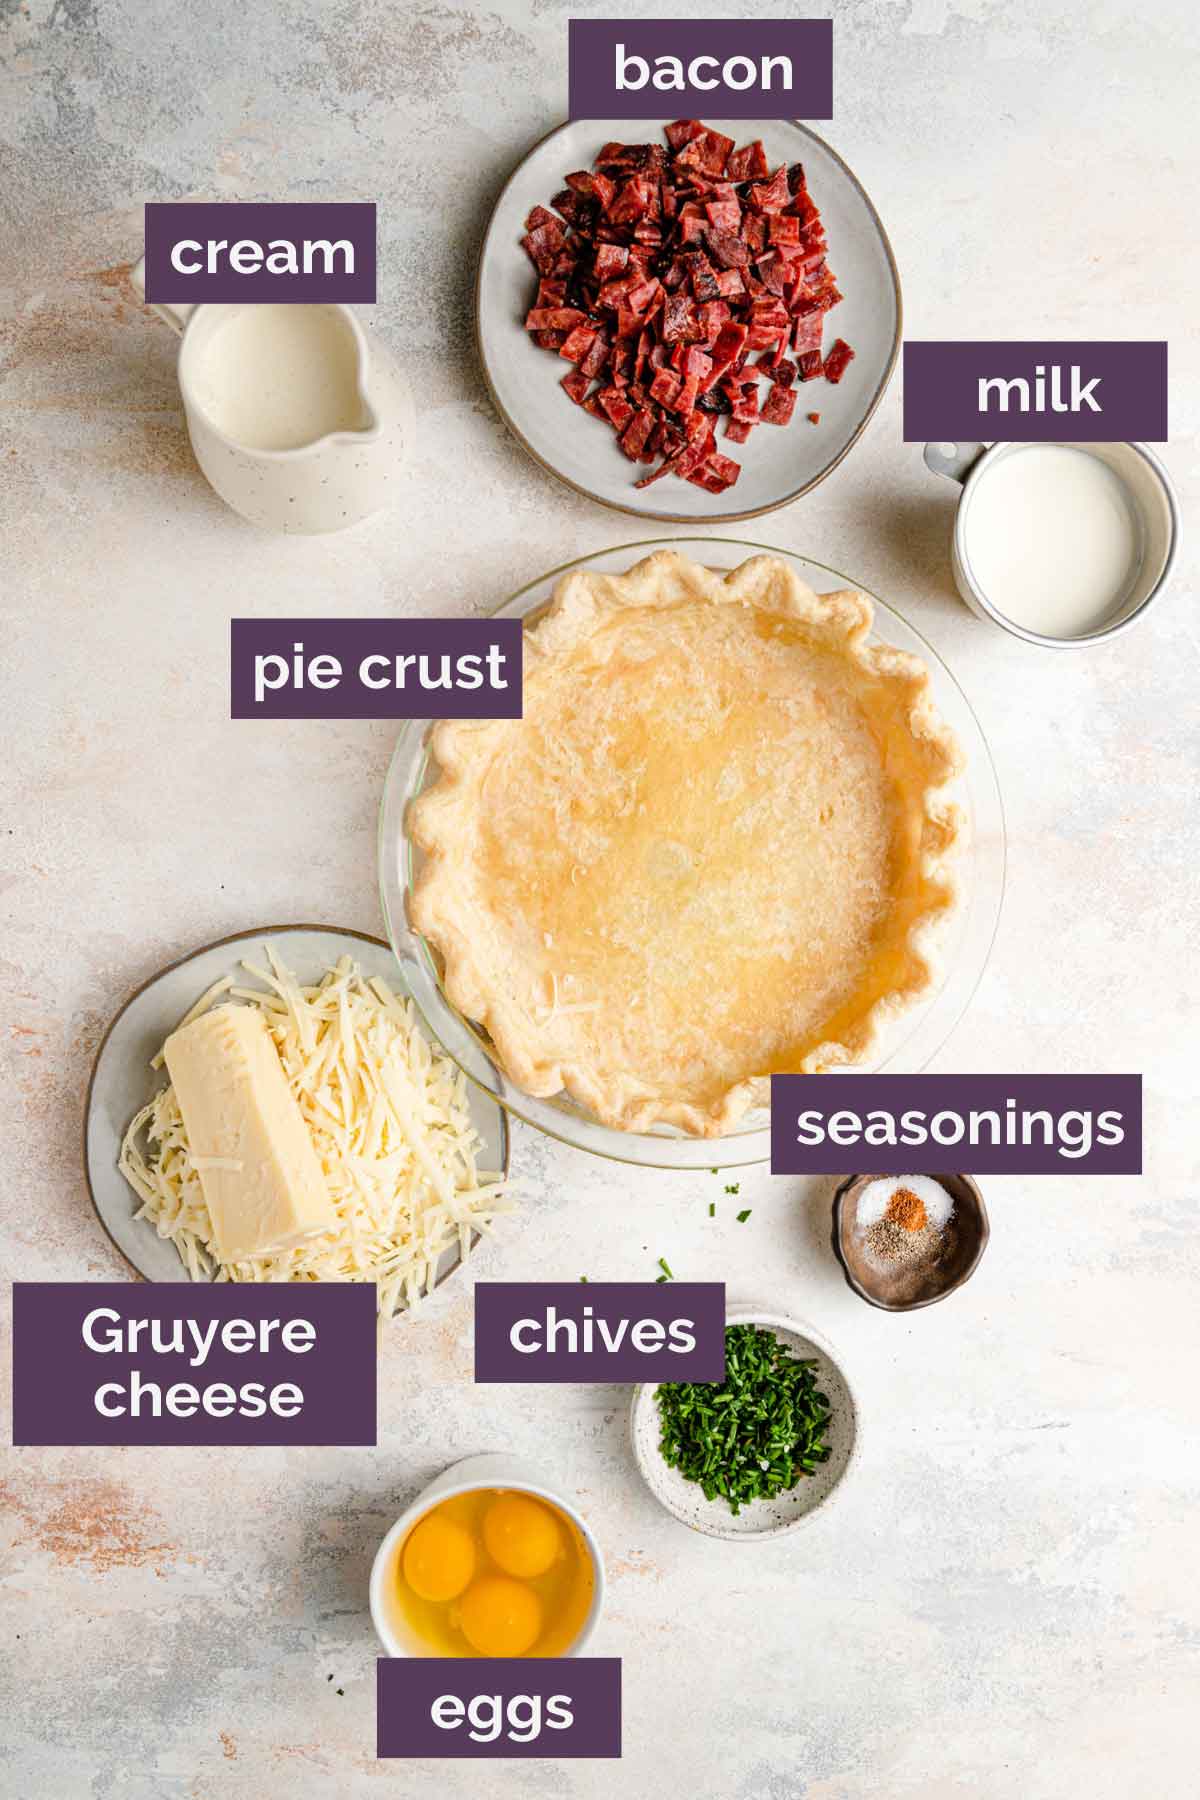
For the Filling:
- 8 ounces bacon, about 8 slices, cooked and chopped
- 4 ounces Gruyere cheese, shredded (about 1 cup)
- 3 eggs
- ¼ teaspoon salt
- ¼ teaspoon pepper
- Pinch nutmeg
- 1 tablespoon minced chives
- 1 cup (240 ml) heavy cream
- ½ cup (120 ml) milk
Instructions
- Prepare the Crust: In a large bowl, whisk together the flour, sugar, and salt.
- Add the butter and, using a pastry blender or two forks, quickly cut it into the flour until large pea-sizes bits remain.
- Add 2 tablespoons of the ice water and use a rubber spatula to stir it into the dough, pressing it together. If it still seems dry, add more water a little at a time until it is cohesive.
- Turn the dough out onto a lightly floured work surface and bring it together with your hands, pressing it into a 6-inch round. Lightly flour the top and gently and quickly roll it out to a 13-inch circle, picking it up and doing a quarter turn after every couple of rolls to keep it from sticking.
- Transfer the dough to a 9-inch pie plate and gently press it into the bottom and up the sides. Trim the dough to 1 inch beyond the lip of the pie plate, then tuck it under itself so it is flush with the edge of the pie plate. Flute the edges or press with the tines of a fork, then refrigerate the dough-lined plate for at least 2 hours.
- Blind Bake Crust: Preheat oven to 350 degrees F. Line the chilled pie dough with aluminum foil and use granulated sugar to fill the whole pie plate. Bake for 40 minutes; remove the foil and sugar and set the crust aside while you make the filling.
- Prepare the Filling: Increase oven temperature to 375 degrees F.
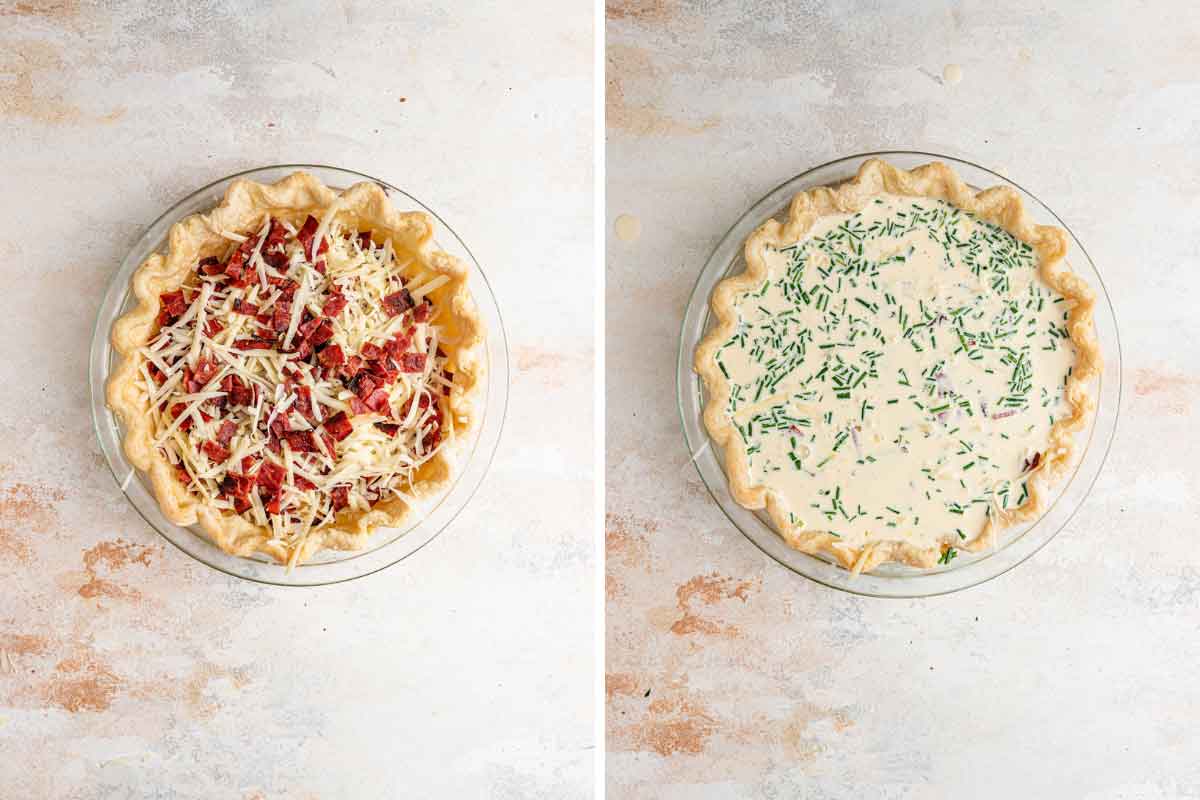
- Sprinkle the bacon and cheese over the bottom of the pie crust.
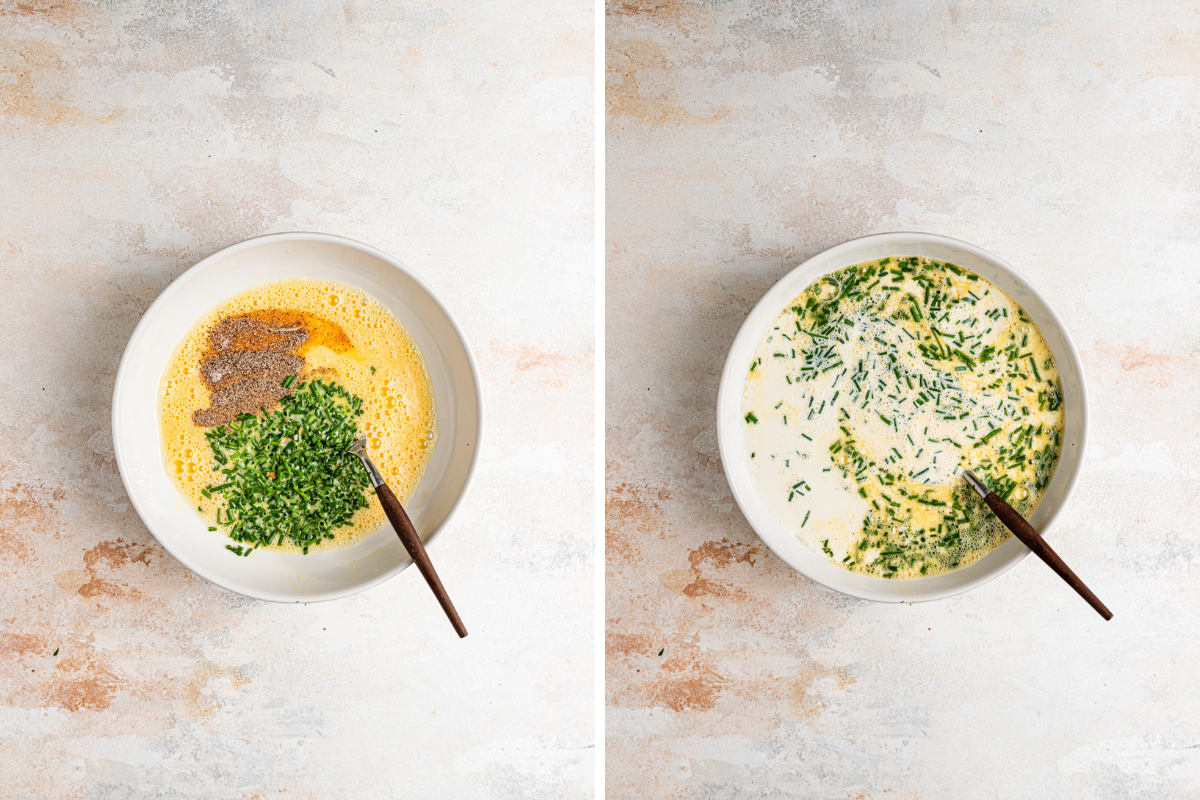
- In a large bowl, whisk the eggs until they are broken up and a little frothy. Add the salt, pepper, nutmeg, and chives, and whisk to combine. Add the cream and milk and whisk vigorously for about 15 seconds.
- Pour the filling over the bacon and cheese. Using a fork or spoon, gently stir everything around a little so that the bacon and cheese are mixed into the filling.
- Bake the Quiche: Bake for 30 to 40 minutes; check for doneness by giving the pie plate a little wiggle. The quiche mixture should jiggle ever so slightly in the middle; it will finish setting up as it cools.
- Allow the quiche to rest for 10 to 15 minutes before serving. It can be served warm or at room temperature.
Notes
- Crust: Use the included all-butter pie crust or my butter/shortening crust.
- Pan: 9-inch glass pie plate (alternatives: tart pan or quiche mold)
- Heavy Cream/Milk: You can adjust the ratios of cream and milk or use all half-and-half.
- Mix-Ins: Mix and match meats, cheese, and veggies for your own custom quiche. See suggestions above, keeping it to 1 cup cheese and 2 cups meat and/or veggies.
- Make-Ahead Pie Crust: The pie dough can be prepared and stored in the refrigerator for up to 5 days or in the freezer for up to 3 months.
- Make-Ahead Parbake Pie Crust: You can pre-bake the crust ahead of time. Complete instructions through step 6, then allow the partially baked crust to cool completely. Wrap tightly in plastic wrap and refrigerate for up to 3 days. You can fill the cold crust and bake (the crust does not need to be reheated before filling).
- Storage: Wrap the quiche tightly in plastic wrap and refrigerate for up to 4 days.
- Freezing Instructions: Cool baked quiche completely, then cover tightly with a layer of plastic wrap and then a layer of aluminum foil, place in a large ziptop bag, and freeze for up to 3 months. Thaw in the refrigerator overnight, then reheat at 350 degrees F for 20 to 25 minutes.
Did you make this recipe?
Leave a review below, then snap a picture and tag @thebrowneyedbaker on Instagram so I can see it!
[Photography by Dee of One Sarcastic Baker]


This has a lovely flavor. I made mine as directed with bacon, chives, and gruyere. I also added some cooked green beans. The only disappointment was that the quiche appeared to bee baked long enough, but when I let it cool a bit and cut it, it was a little runny in the middle. I had already cooked it 40 minutes and the crust was done, so I could not cook it any longer. Next time I might reduce the milk to 1/4 cup.
This is my go to quiche recipe! It turns out perfect every time!
I just wish I was better at making the crust! Tastes great, just wish I could make a nicer looking edge!😂
Thanks! I’m going to try this recipe. My cousin married a girl from Canada, whose mom was from France. She gave me a recipe for quiche that was so beyond my capabilities that I never made it lol. This recipe looks doable!
I’ve made this a few times now, it always comes out beautifully.
Absolutely tasty! Made multiple times. Household requests often.
This the most delicious quiche!
And so easy!!
Thank you for all your wonderful recipes and I love the family photos in your Friday emails.
Christine
This recipe is a keeper. Easy to modify depending on what you have on hand. My crust recipe left me with two egg whites so I added those to the milk mixture w about 1/4c more of milk. Sautéed the onion with some frozen mushrooms. Amazing taste and texture. Reheats well in a low temp oven or toaster.
1st time making quiche. I appreciated Lori’s comment about the shallot. I did some sliced green onion and a small shallot in the bacon grease, and think it was perfect. Also, took the advice of adding other things … did 4 slices of bacon in the oven while the crust baked … and then a breakfast ham slice, diced up (and browned again in the bacon grease). I was hesitant about my pie crust making skills (my mom can whip up pies with her eyes closed)…and this recipe, followed from top to bottom and according to directions turns out AMAZING! I did have to bake a bit longer (after cutting a small slice)…to get the inside set to my liking … but that isn’t a reflection on the recipe, more on my oven that does not maintain temp to well. Oh, and no Gruyere cheese to be found in my little town, so I used Havarti (google said this was a decent substitute). If you want to take the time and effort to present a fancy savory dish … this my friends is it. The end result looks intimidating, but it really is not. Once again, miss brown eyed baker, you have hit a homerun! I think my next attempt will be the scrumptious looking PB Pie I am seeing pictures of :) This recipe certainly broadened my cheese horizons :) … and that is dangerously good!
This was my first time making quiche lorraine and I found this a very simple and easy to follow recipe.
I also dislike shallot/onion in egg dishes (I hate the crunch), but I love the flavor, so I cook the bacon for my quiches with a couple of chopped shallots. It gives just enough flavor. Then I save the shallot/bacon grease mixture to cook chicken breast for any dish that pairs well with bacon/shallot flavor.
(this is my first time commenting, but I LOVE your blog—I’ve been following since 2008 or 2009, and you are the first place I go to when trying a new dish)
I’ve made many but this is by far my favorite!
That’s so awesome to hear!