Ciabatta Bread
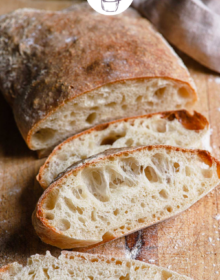
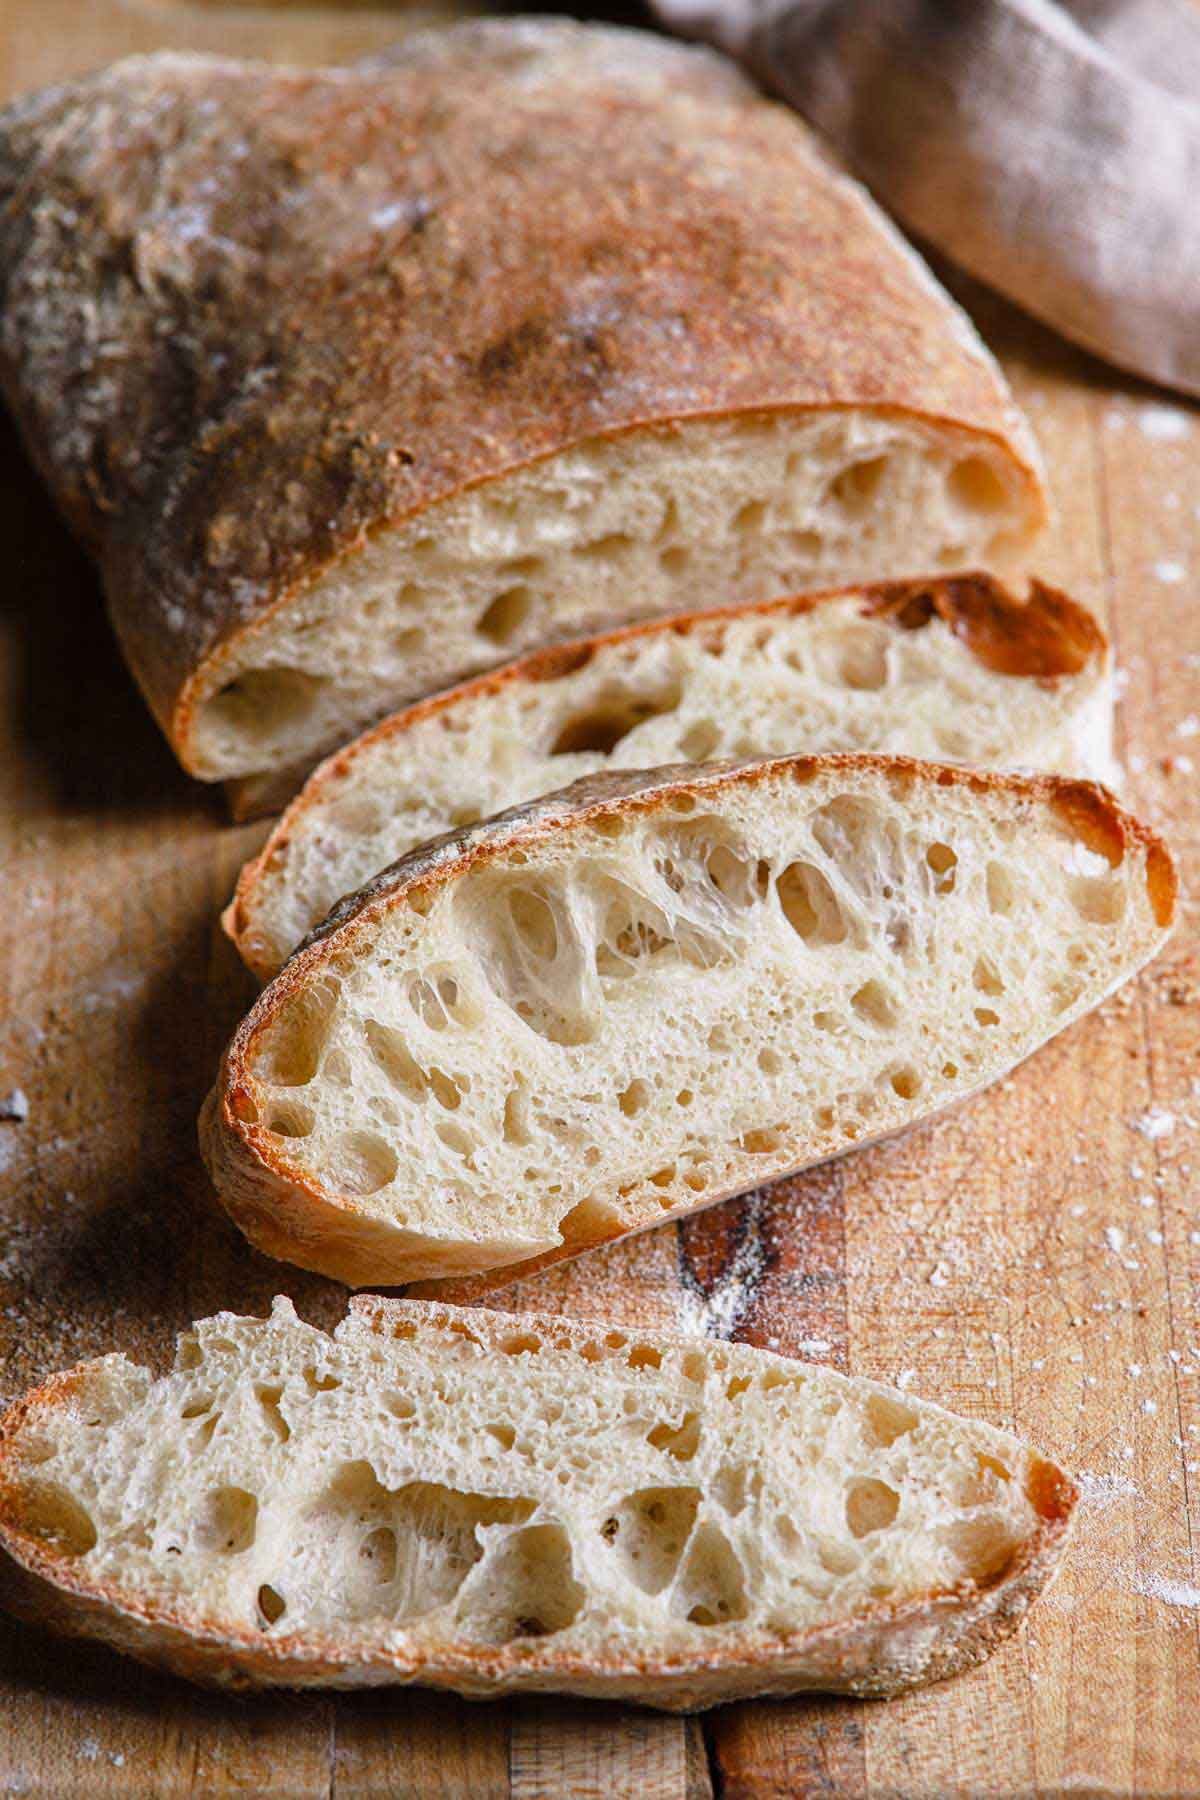
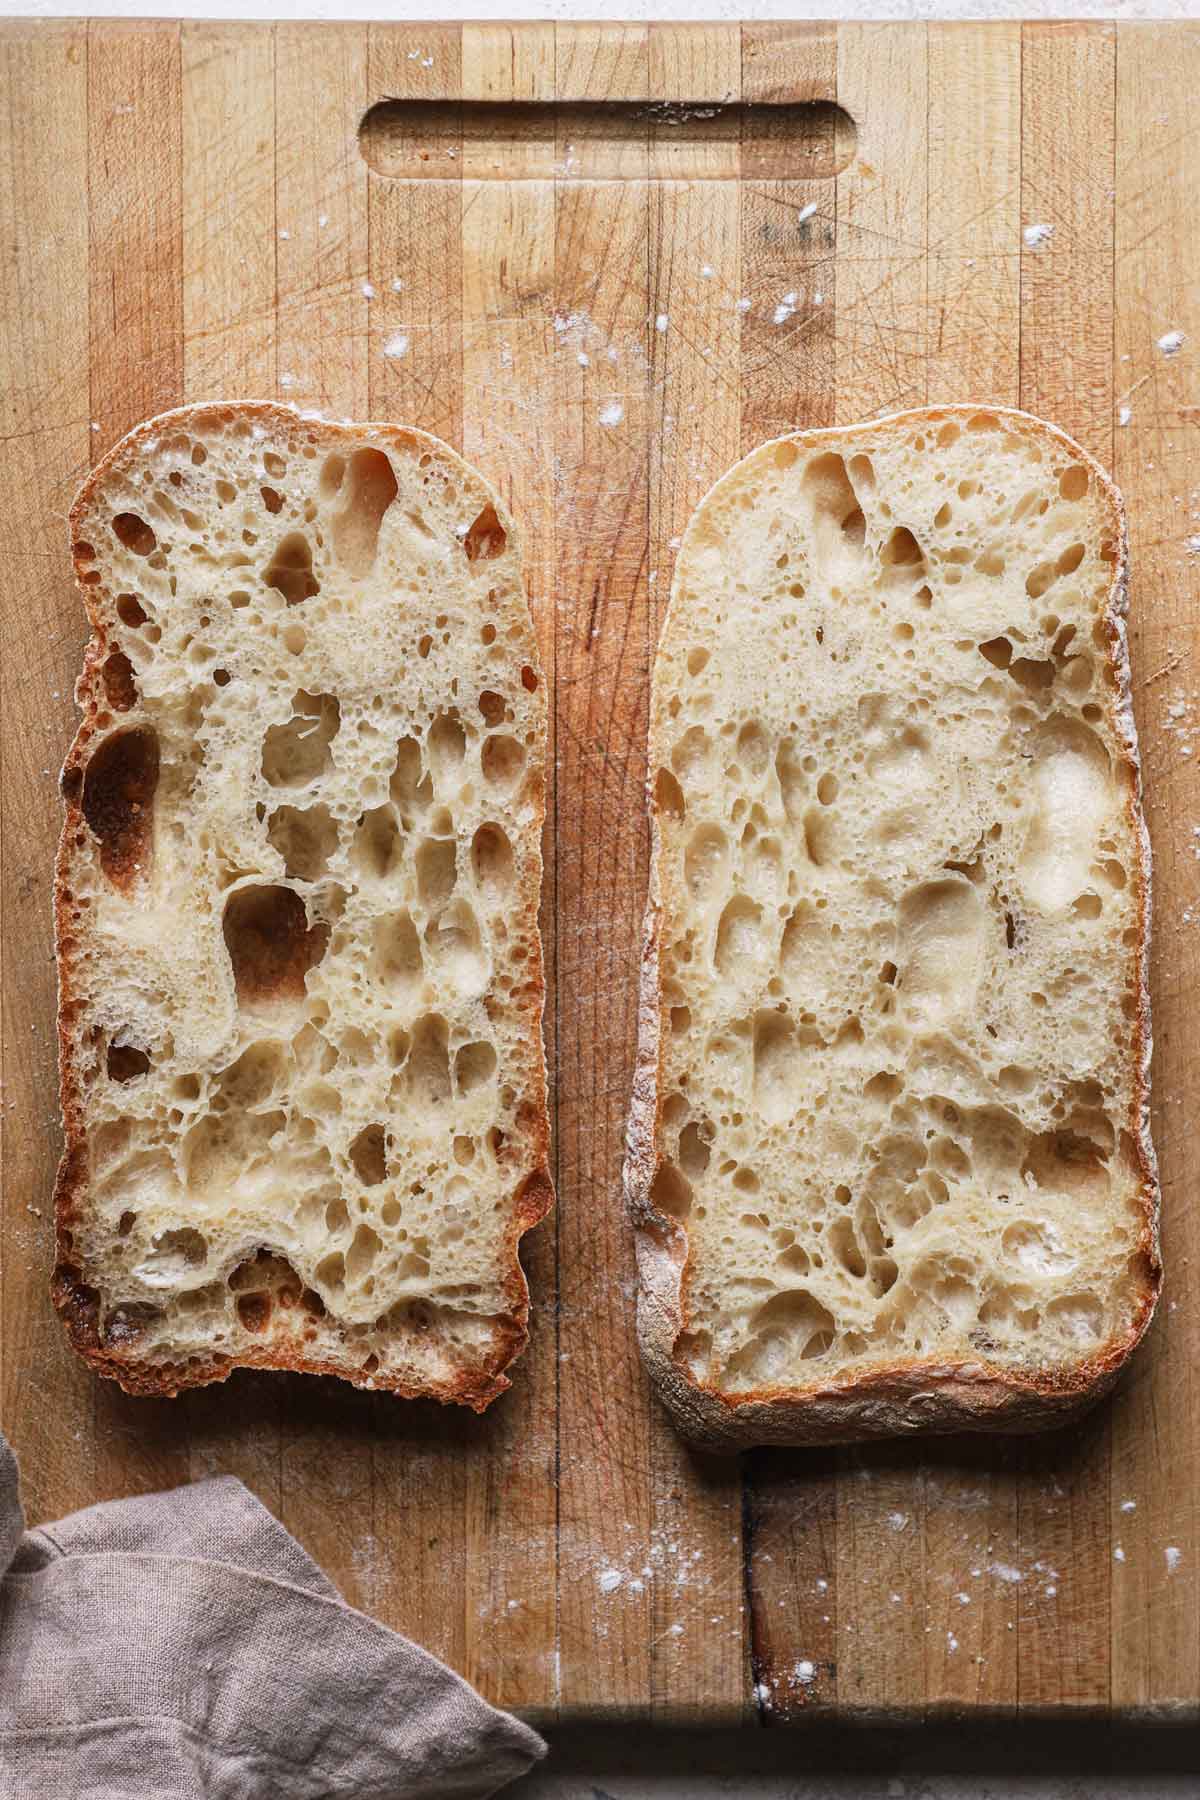
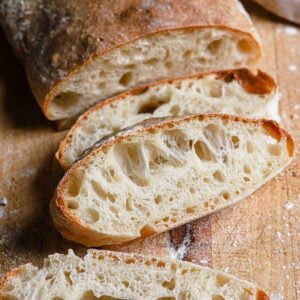
This easy ciabatta bread recipe results in beautiful rustic loaves of classic Italian bread, with its perfectly chewy interior texture studded with those wonderfully large air bubbles. It’s practically begging to be dipped into your favorite soup or stew.
I have such a love affair with baking homemade bread; the smell of yeast and fresh, rising dough has such a calming effect.
It makes me want to curl up on a covered wrap-around porch and read during a rainstorm.
Why You’re Going to Love It
I've long loved ciabatta bread for its chewy exterior and soft crumb speckled with air holes. It's the perfect bread for dunking into soup, slicing horizontally and making a sandwich, converting to garlic bread, or for simply slathering with butter and eating until your heart's content.
This recipe is not complicated, although it does take a little bit of planning ahead. Actual hands-on time is less than an hour in total, and the dough is very forgiving. Let’s dive into the details of the recipe!
Ingredients Overview
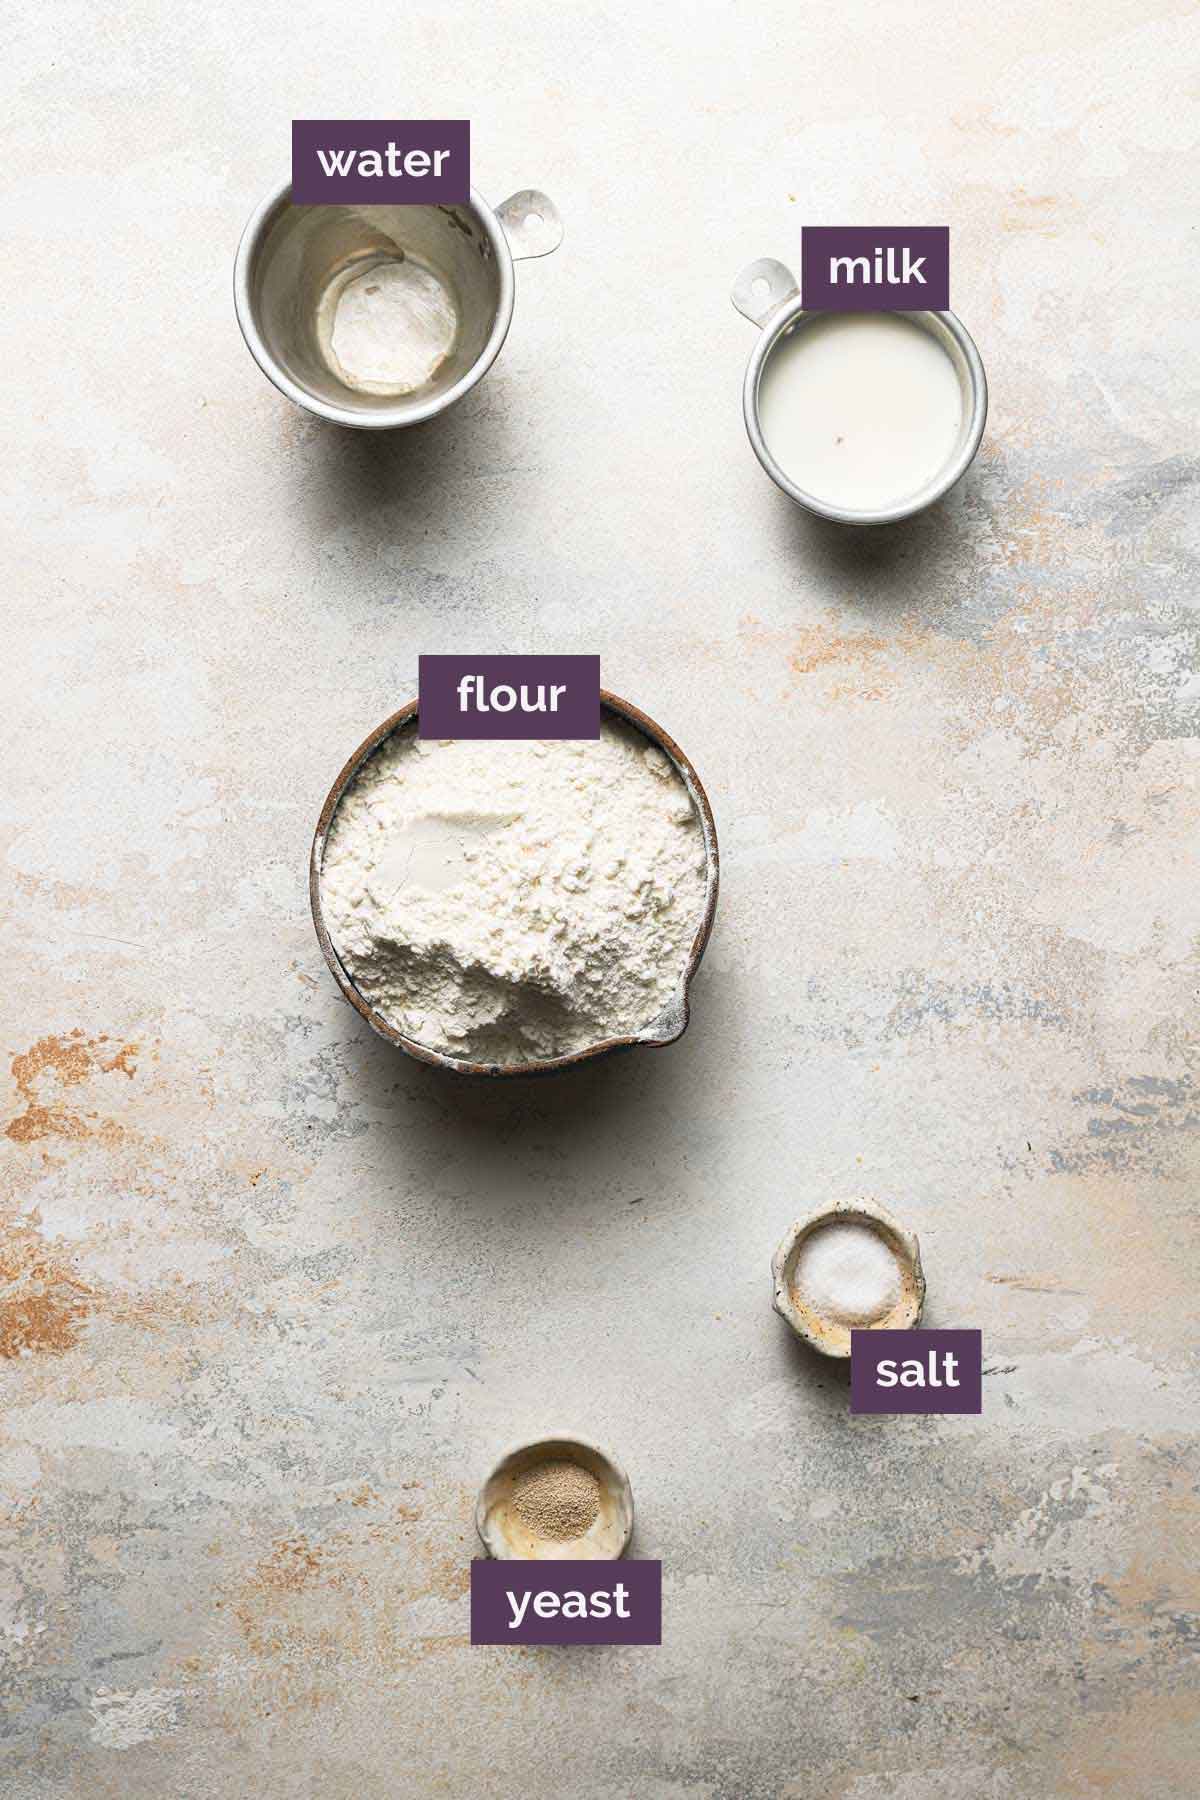
The beauty of this bread is its incredibly simplistic and rustic nature. Below is a quick overview of the ingredients we use with some notes on them and substitutions you may be wondering about:
- Flour – For this recipe, we use all-purpose flour. It has the perfect amount of protein to produce a ciabatta with a perfect rise and airy texture. Substituting bread flour will result in a denser, chewier, and less airy loaf of bread.
- Yeast – We use instant yeast, which is easily mixed into dry ingredients. If you need to substitute active dry yeast, be aware that you will need to activate it in both the sponge and the dough by first ensuring that the water is warm (100 to 110 degrees F), sprinkling the yeast over the water, giving it a quick stir, and then waiting 10 or 15 minutes, until it becomes foamy. At that point, proceed with the rest of the recipe.
- Water – A vital component! Ciabatta dough is considered a high-hydration dough because of the ratio of water to flour. For this reason, you will notice that it is rather sticky and a very wet dough. We’ll talk below about how best to handle the dough.
- Salt – Not only does this help to balance flavors in bread, but it also aids in coloring the crust, controlling the rise, and developing gluten. Don’t leave it out!
- Milk – A protein in milk helps to control the size of the air bubbles in the bread. Without it, the holes are larger, which doesn’t leave as much bread structure. The best milk is whole or 2%, but 1% can also be used in a pinch. You can also substitute 2 tablespoons of nonfat milk powder (increase the water in the dough step to 1 cup).
Ciabatta Dough: Two Parts
The dough for ciabatta bread is made in two stages:
- Sponge (or Biga) – This first mixture is prepared the day before you plan to bake the bread. It is comprised of just flour, yeast, and water. This fermented sponge is what gives the ciabatta its amazing, slightly tangy flavor.
- Dough – The next day, you will mix together the dough, which will include the sponge that has been sitting overnight.
How to Make the Dough
Let’s walk through how the dough comes together:
Step #1: Make the Sponge – You’ll mix together the flour, yeast, and water with a wooden spoon, cover the bowl with plastic wrap, and let sit overnight or for up to 24 hours.
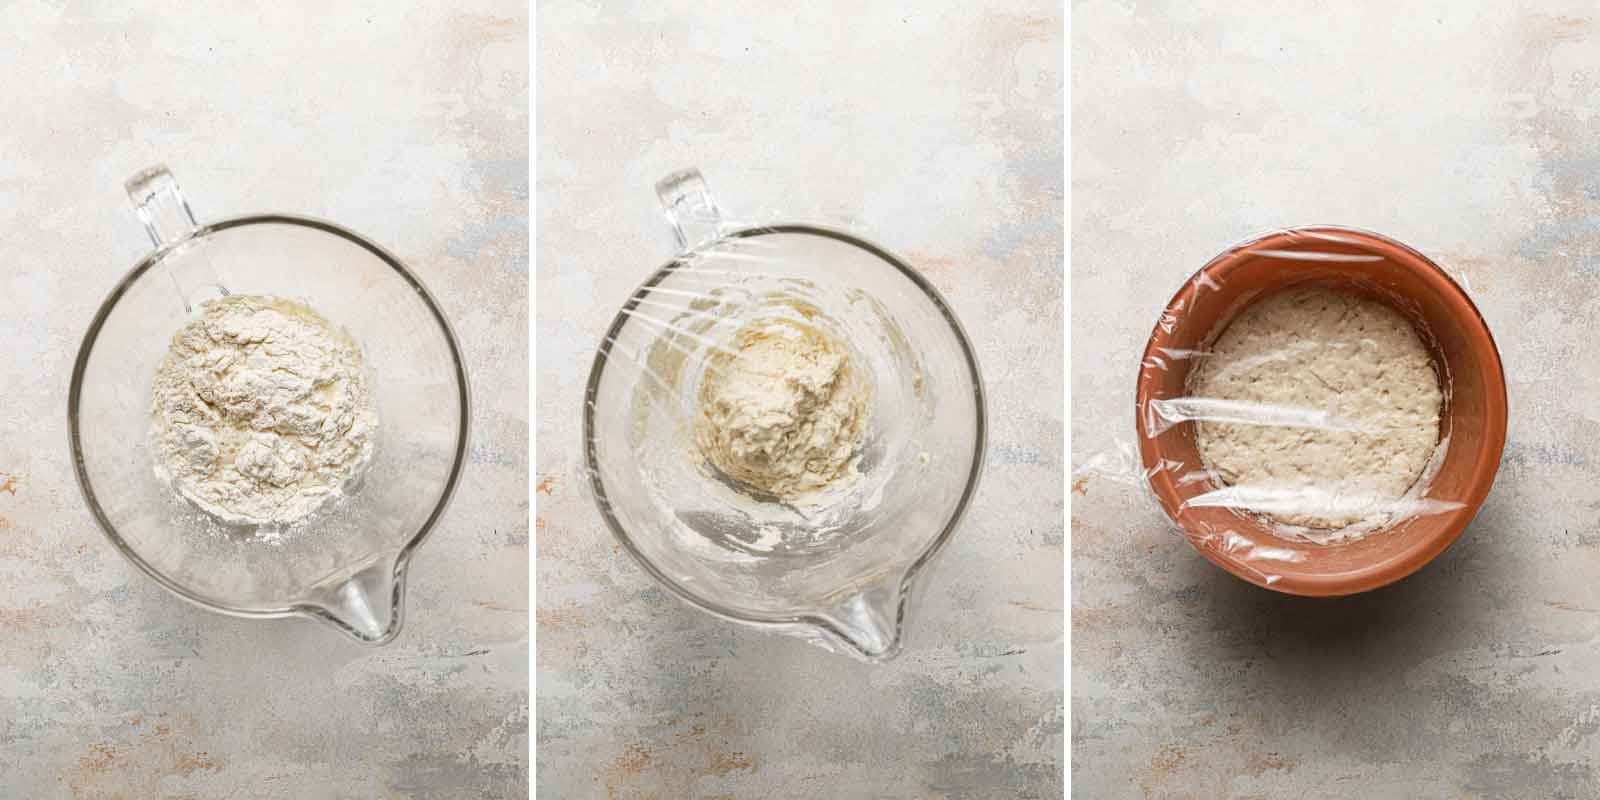
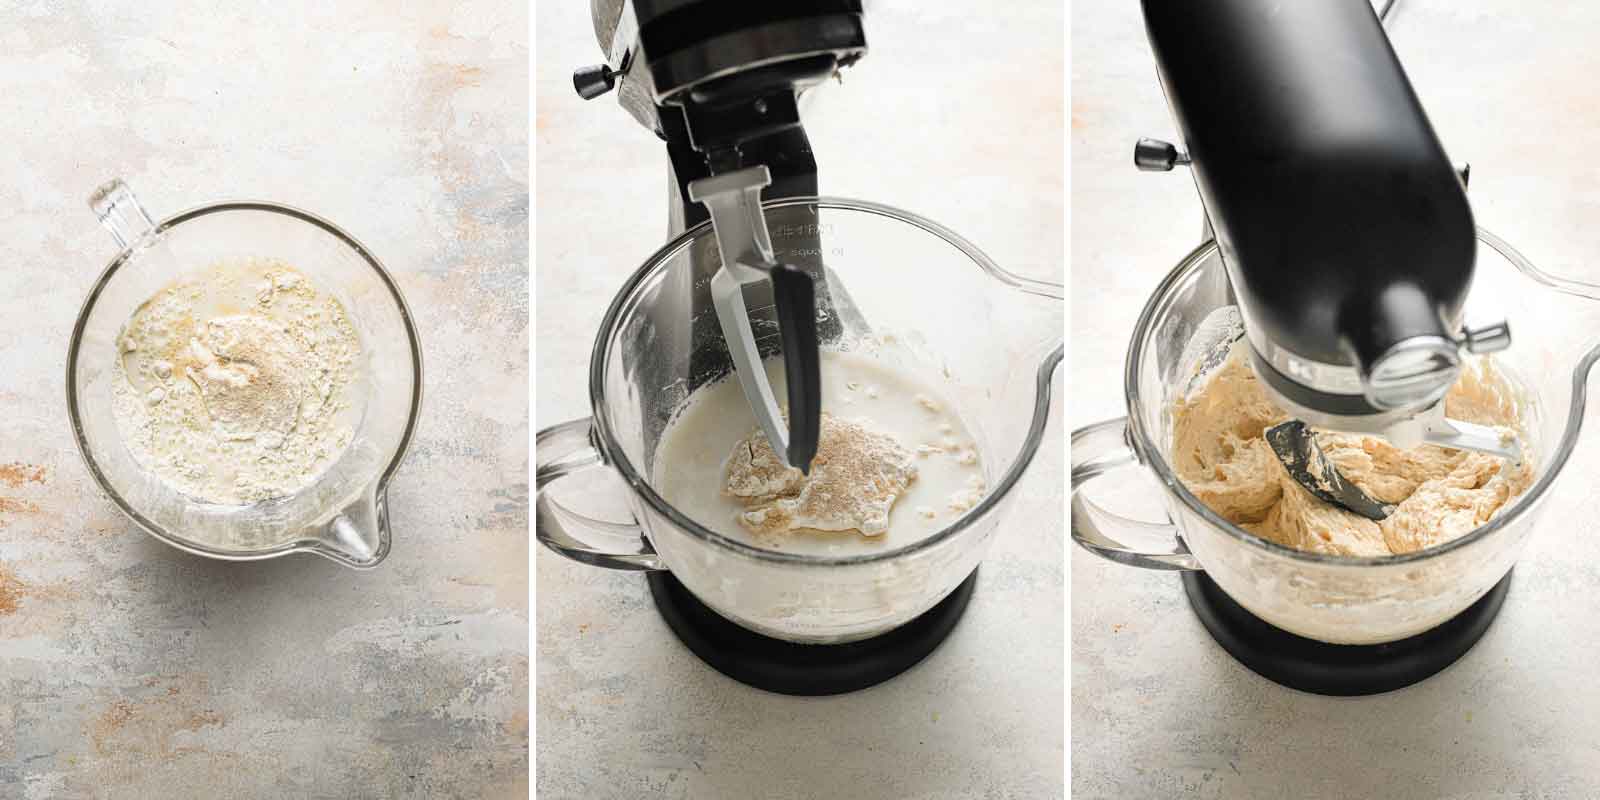
Step #2: Mix the Dough – Add the sponge and all of the dough ingredients to a stand mixer and mix with the paddle attachment until it becomes a uniform mass and pulls away from the sides of the bowl. Switch to the dough hook and knead until the dough is shiny and smooth (about 10 minutes).
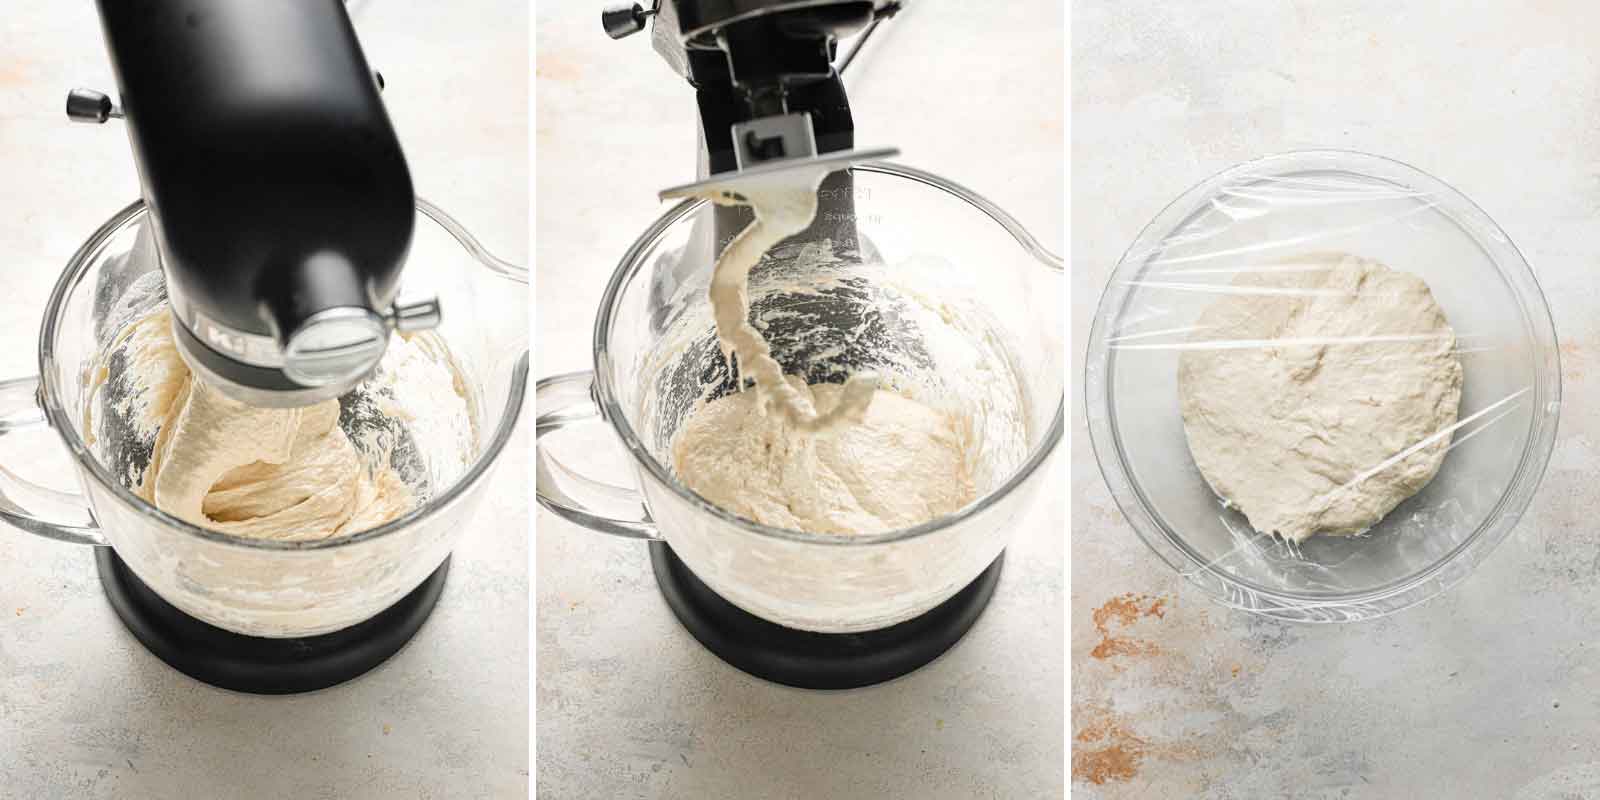
Step #3: Rise – Transfer the dough to a bowl, cover with plastic wrap, and set at room temperature until doubled in size (about 1 hour).
Folding the Dough
This folding process may seem tedious, but it is an integral part of achieving those picture-perfect air bubbles! Here is how you do it:
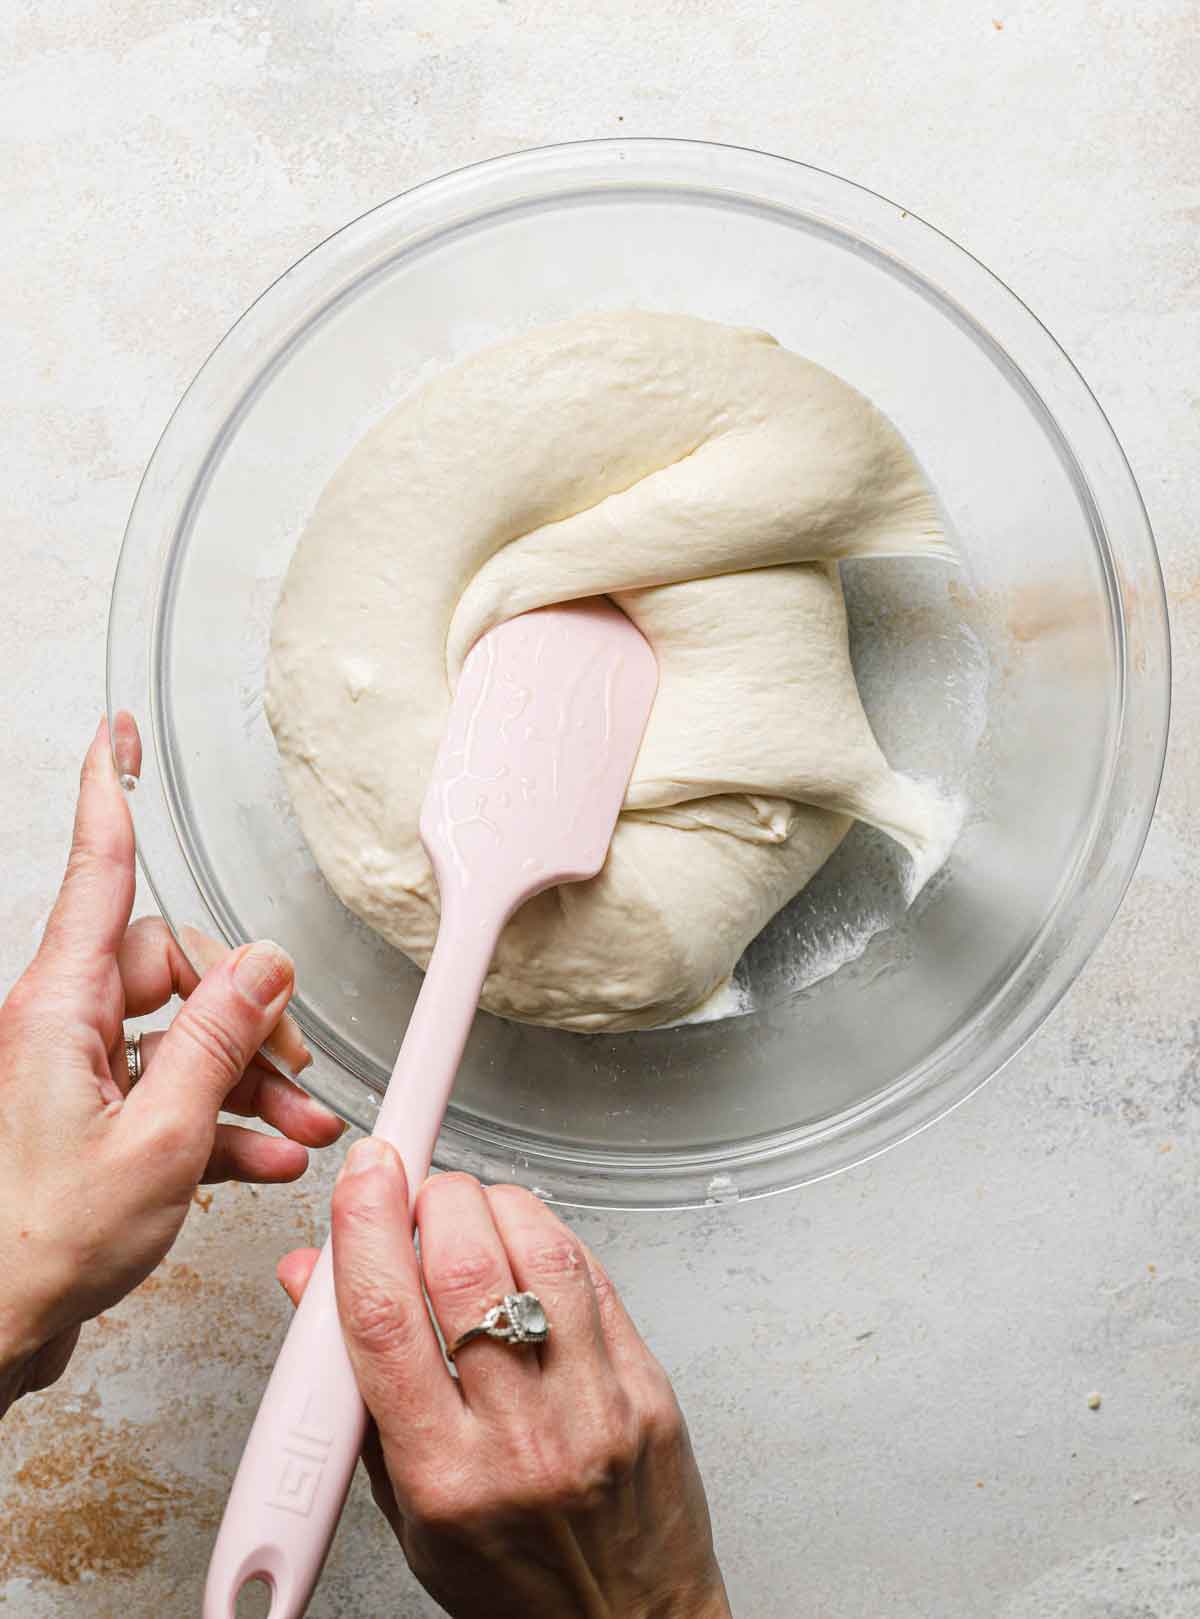
Make sure your spatula or bowl scraper is sprayed with cooking spray (or rub it with olive oil).
Then lift the end of the dough over itself toward the middle, rotate the bowl 90 degrees, repeat, and then six more times, for a total of 8 times.
Save This Recipe
Cover the bowl with plastic wrap, let rest/rise for 30 minutes, then repeat the exact same folding process again.
Once done, cover the dough once more and allow to double in size before proceeding with shaping.
Shaping the Ciabatta
The final shaping of the ciabatta before baking is what gives the bread its characteristic “slipper” shape, from which its name originates (“ciabatta” means slipper in Italian; the bread was given this name because its shape resembles a well-worn slipper).
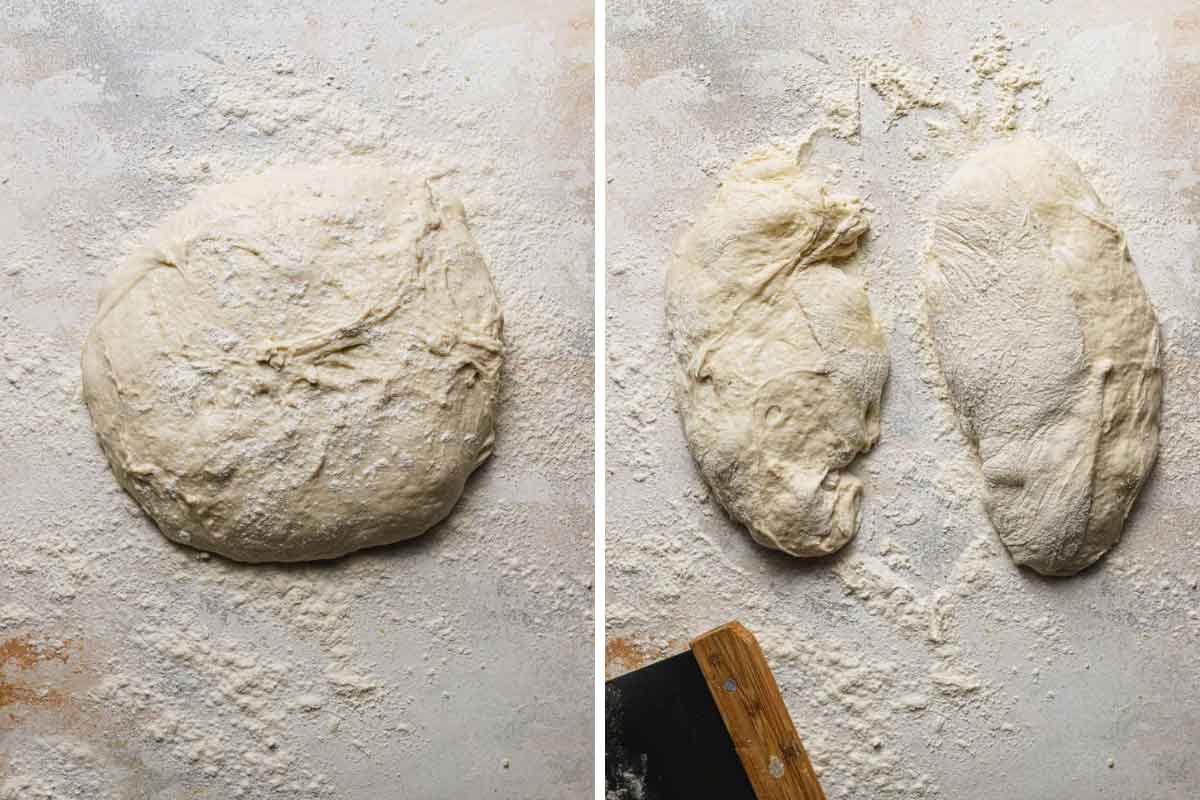
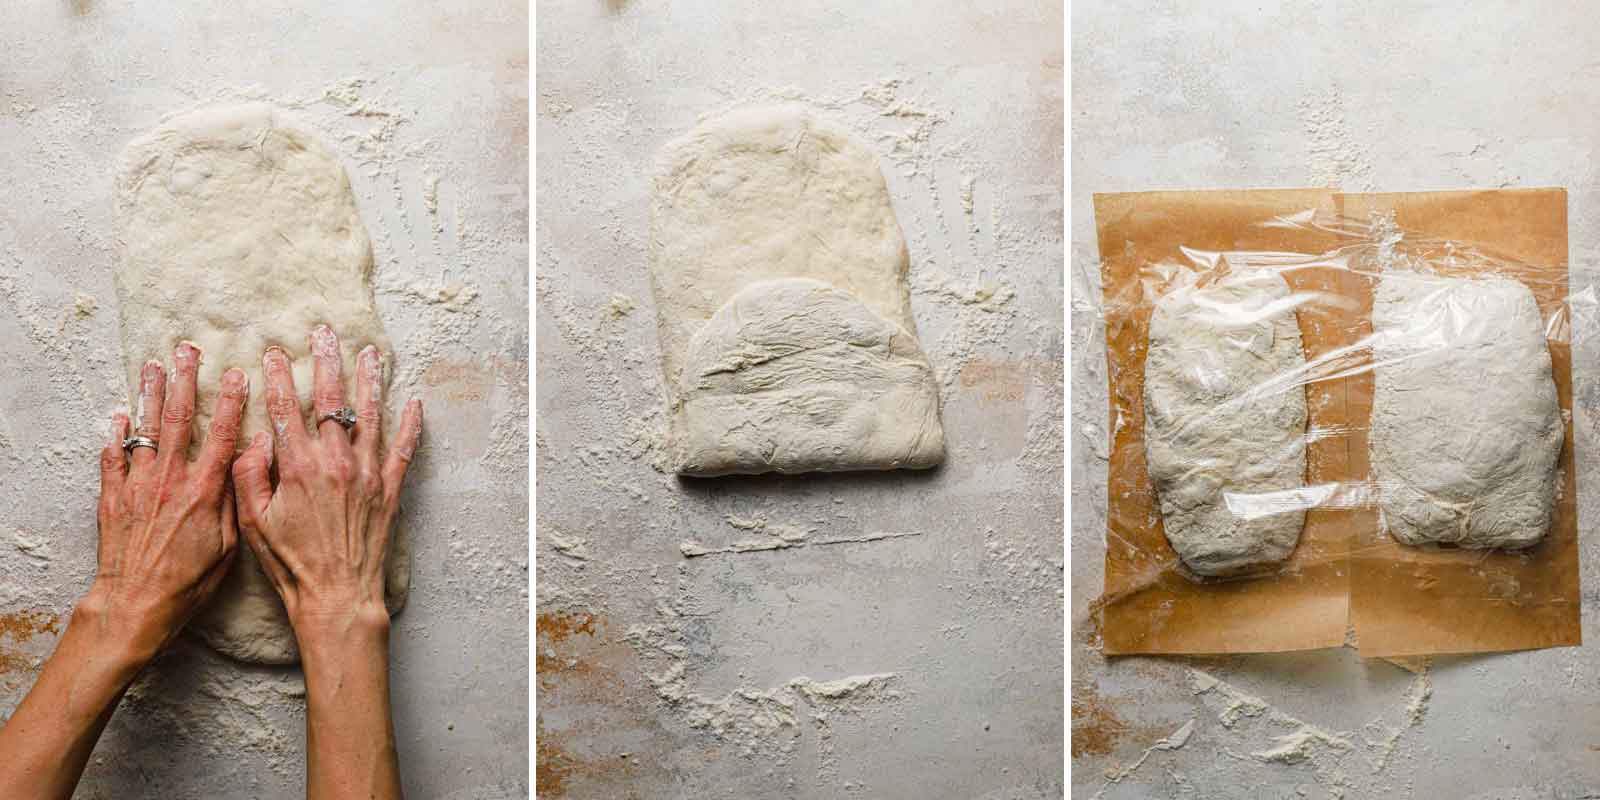
Shaping Step #1: Turn the dough out onto a floured surface gently (so it does not completely deflate), dust it with flour, and divide in half with a bench scraper.
Shaping Step #2: Place one piece of dough cut-side-up and dust with flour, then using fingertips, gently press the dough into a 12×6-inch rectangle. Fold one end of the dough towards the middle, and fold the other end over the top of the first fold (as you would fold a letter in thirds). Repeat with the second loaf of dough.
Shaping Step #3: Transfer each loaf to a rectangular piece of parchment that has been dusted with flour. Dust the tops of the loaves with flour, cover with plastic wrap, and allow to sit for 30 minutes.
Baking the Bread
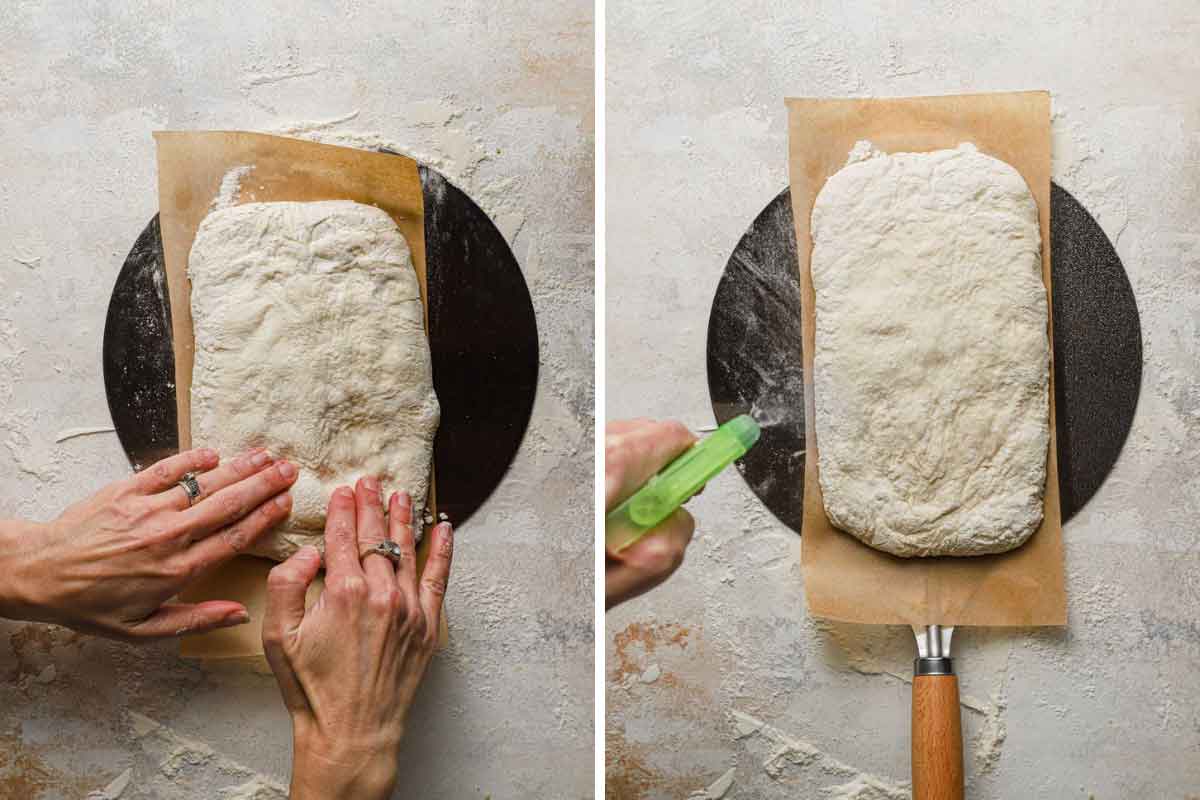
When the 30 minutes is up, you will slide the parchment pieces with the loaves onto a pizza peel. Use floured fingertips to poke the surface all over to create a 10×6-inch rectangle. Lightly spritz the loaves with water and slide the loaves onto a preheated pizza stone in the oven (you can also use an inverted baking pan, see notes below).
Spray with water twice more during the first 5 minutes of baking, then continue baking until the internal temperature registers 210 degrees F.
Recipe Notes and FAQ
A few notes and the answers the some commonly asked questions:
- Equipment – To make the most of this recipe, I recommend using the following pieces of equipment: stand mixer / bowl scraper / bench scraper / baking stone / parchment paper / pizza peel / spray bottle / digital instant-read thermometer / wire cooling rack
- Yeast – If you substitute active yeast instead of instant yeast, you will need to be sure to activate it in warm water first, instead of simply mixing it with the flour and room temperature water.
- Milk – Whole milk is preferred, but 2% or 1% can also be used. You can also substitute 2 tablespoons of nonfat milk powder (increase water in dough to 1 cup).
- Stand Mixer – Due to the high hydration of this dough and how sticky it is, a stand mixer is important for being able to manage the dough properly.
- Handling the Dough – Keep in mind that this dough is very wet and sticky; the key to working it well is to do so quickly and gently. Too much heavy-handling of the dough will result in flat, tough loaves. Use a bowl scraper when possible and if you need to use your hands, make sure they are well-floured.
- Baking Stone – If you do not have a baking stone, you can use a baking sheet that is turned upside on the lowest oven rack and preheated as directed.
- Making Ciabatta Rolls – To make rolls, use a bench scrape to divide each loaf into 6 or 8 even-sized portions. Separate them a bit on the parchment sheet so they aren’t touching.
- Storage – The bread can be kept at room temperature, wrapped in foil, for up to 2 days.
- To Reheat the Bread – Keep it wrapped in foil and place in a 450-degree oven for 6 to 8 minutes.
- Freezing the Bread – Wrap tightly in foil, then place in a ziploc freezer bag and freeze for up to 3 months. Thaw at room temperature, then warm and re-crisp the crust using the reheating method above.
More Popular Homemade Bread Recipes
- The Best White Bread Recipe
- Grandma’s Banana Nut Bread
- Copycat Pizza Hut Breadsticks
- Classic Italian Bread Recipe
- Spicy Cheese Bread
Watch How to Make Homemade Ciabatta Bread:
If you make this ciabatta bread recipe and love it, remember to stop back and give it a 5-star rating - it helps others find the recipe! ❤️️
Ciabatta Bread
Ingredients
For the Sponge:
- 1 cup (130 g) all-purpose flour
- ⅛ teaspoon instant yeast
- ½ cup (120 ml) water, at room temperature
For the Dough:
- 2 cups (260 g) all-purpose flour
- 1½ teaspoons salt
- ½ teaspoon instant yeast
- ¾ cup (180 ml) water, at room temperature
- ¼ cup (60 ml) whole or 2% milk, at room temperature
Instructions
- Make the Sponge: Combine the 1 cup flour, ⅛ teaspoon yeast, and ½ cup water in a medium bowl and stir with a wooden spoon until a uniform mass forms. Cover the bowl tightly with plastic wrap and let stand at room temperature for at least 8 hours or up to 24 hours.
- Make the Dough: Place the sponge and the dough ingredients (flour, salt, yeast, water and milk) in the bowl of a stand mixer fitted with the paddle attachment. Mix on low speed until combined and a shaggy dough forms, about 1 minute, scraping down the bowl and paddle as needed. Increase the speed to medium-low and continue mixing until the dough becomes a uniform mass that collects on the paddle and pulls away from the sides of the bowl, 4 to 6 minutes.
- Change to the dough hook and knead the bread on medium speed until smooth and shiny (the dough will be very sticky), about 10 minutes.
- Transfer the dough to a large bowl, cover tightly with plastic wrap, and let rise at room temperature until doubled in size, about 1 hour.
- Spray a rubber spatula or bowl scraper with non-stick cooking spray. Fold the dough over itself by gently lifting and folding the edge of the dough toward the middle. Turn the bowl 90 degrees, and fold again. Turn the bowl and fold the dough 6 more times (for a total of 8 times).
- Cover with plastic wrap and let rise for 30 minutes.
- Repeat the folding as in step #7, replace the plastic wrap, and let rise until doubled in size, about 30 minutes.
- One hour before baking, adjust an oven rack to the lower-middle position, place a baking stone on the rack and preheat the oven to 450 degrees F.
- Cut two 12×6-inch pieces of parchment paper and dust liberally with flour. Transfer the dough to a floured work surface, being careful not to deflate it completely. Liberally flour the top of the dough and divide it in half with a bench scraper. Turn 1 piece of dough cut-side-up and dust with flour. With well-floured hands, press the dough into a rough 12×6-inch rectangle. Fold the shorter sides of the dough toward center, overlapping them like you would fold a letter in thirds, to form a 7×4-inch rectangle. Repeat with the second piece of dough.
- Gently transfer each loaf, seam-side-down, to the parchment sheets, dust with flour, and cover with plastic wrap. Let the loaves sit at room temperature for 30 minutes (the surface of the loaves will develop small bubbles).
- Slide the parchment pieces with the loaves onto a pizza peel. Using floured fingertips, evenly poke the entire surface of each loaf to form a 10×6-inch rectangle; spray the loaves lightly with water. Slides the loaves and parchment onto the baking stone. Bake, spraying the loaves with water twice more during the first 5 minutes of baking time, until the crust is deep golden brown and the loaves register 210 degrees F, 22 to 27 minutes.
- Transfer the loaves to a wire rack, discard the parchment, and let cool to room temperature for at least 1 hour before slicing and serving. The bread can be wrapped in a double layer of plastic wrap and stored at room temperature for up to 3 days. Wrapped with an additional layer of foil, the bread can be frozen for up to 1 month. To recrisp the crust, thaw the bread at room temperature (if frozen), and place unwrapped bread in 450-degree oven for 6 to 8 minutes.
Notes
- Equipment - To make the most of this recipe, I recommend using the following pieces of equipment: stand mixer / bowl scraper / bench scraper / baking stone / parchment paper / pizza peel / spray bottle / digital instant-read thermometer / wire cooling rack
- Yeast - If you substitute active yeast instead of instant yeast, you will need to be sure to activate it in warm water first, instead of simply mixing it with the flour and room temperature water.
- Milk - Whole milk is preferred, but 2% or 1% can also be used. You can also substitute 2 tablespoons of nonfat milk powder (increase water in dough to 1 cup).
- Stand Mixer - Due to the high hydration of this dough and how sticky it is, a stand mixer is important for being able to manage the dough properly.
- Handling the Dough - Keep in mind that this dough is very wet and sticky; the key to working it well is to do so quickly and gently. Too much heavy-handling of the dough will result in flat, tough loaves. Use a bowl scraper when possible and if you need to use your hands, make sure they are well-floured.
- Baking Stone - If you do not have a baking stone, you can use a baking sheet that is turned upside on the lowest oven rack and preheated as directed.
- Making Ciabatta Rolls - To make rolls, use a bench scrape to divide each loaf into 6 or 8 even-sized portions. Separate them a bit on the parchment sheet so they aren't touching.
- Storage - The bread can be kept at room temperature, wrapped in foil, for up to 2 days.
- To Reheat the Bread - Keep it wrapped in foil and place in a 450-degree oven for 6 to 8 minutes.
- Freezing the Bread - Wrap tightly in foil, then place in a ziploc freezer bag and freeze for up to 3 months. Thaw at room temperature, then warm and re-crisp the crust using the reheating method above.
- Recipe from Baking Illustrated
Did you make this recipe?
Leave a review below, then snap a picture and tag @thebrowneyedbaker on Instagram so I can see it!
This recipe was originally published in March 2014.
Photography by Dee Frances.


Wow this is just perfect! Thanks for relinking in your last post…somehow missed this! pinned now
Just took the loaves out of the oven an hour ago. Came out perfect. This is the best ciabatta bread I have ever had. Thanks for the great recipe!
I just made two loaves of these ciabatta bread today, and I have to say, they were absolutely delicious! I only had active dry yeast on hand, so all I changed from the recipe was to proof the dough in each step longer, until the desired size is reached. Besides homemade hamburger buns, I’ve never had much success with homemade bread until now. Thank you for posting such a lovely recipe! :)
Michelle,
I love ciabatta bread. Yours looks perfect. Pinned.
Annamaria
This look PERFECT!! Good gosh, I need this. Great recipe and photos!
i only have active dry yeast is that ok??
Hi Angela, Active dry yeast typically needs to be activated by warm water or milk before being added to the rest of the ingredients. You may also find that your rise times are longer (up to twice as long). I stock both instant and active dry, as I have recipes that call for one or the other. I would keep both on hand and use whichever the recipes calls for.
I was just thinking that I was in the mood for some homemade baked bread. I love ciabatta bread so I’m definitely trying this one!
You have a love affair with homemade bread, and I have a love/hate relationship with homemade bread! I will make a batch of homemade bread and it’s a success, then I will try my hand at making a different type of homemade bread, and it’s a huge fail! I don’t know why this happens to me!
Peace & Sunshine,
Sammi at Sammi Sunshine- A Food Blog
Have you tried Alton Brown’s “Very Basic Bread” recipe? I’ve been using that for years and haven’t had an issue. Definitely one of those that you need to start overnight, but it’s so worth it!
Humidity and freshness of yeast and flour can also play a role. Science Friday (on NPR) recently had in someone from America’s Test Kitchen and he talked a lot about the science behind bread: http://www.sciencefriday.com/segment/03/21/2014/food-failures-knead-to-know-science-behind-bread.html
I absolutely love homemade bread. This looks SO perfect!!
I love ciabatta, such a gorgeous bread!
So glad this takes AP flour, I have all the ingredients on hand. Bread and butter for dinner tomorrow.
This bread is very good. It took time, but is so worth it. I let the sponge sit 24 hours. This recipe is a keeper.
Hi, can this be made with soy milk to make it vegan??
Hi Cynthia, I’m not sure how a soy milk would affect the recipe, if at all. If you give it a try, please let me know how it turns out!
Michelle, although I am not vegan, I use soy or almond milk in many of my baked goods because I prefer to avoid the saturated fats found in many animal products. I find the plant milks also have less sugar than cows milk, so you might find you’ll need to adjust your recipes a bit. Please ignore uninformed and uneducated Internet “trolls” whose only intent is to stir controversy. Plant-based proteins are far easier on our kidneys and gut than animal based products. Our teeth patterns indicate we are plant eaters, not carnivores! And yes, I have a little education…I’m an RN and clinical analyst.
Or you could be healthy and use actual milk. Being a vegan isn’t healthy at all. Quit spreading around all this vegan crap. Most animals are meant to be eaten. It’s the way humans were designed. You cannot survive without protein. Jesus Christ.
This is probably the most ignorant comment I have ever read. Educate yourself, please.
OMG!! Agreed!! It’s people like her that all we vegans must protect the animals and the planet from!!! :/
We weren’t designed, we evolved, perhaps that’s a different argument but I believe that. Hence, if we evolved to eat meat because we had to, could we not further evolve to not eat meat now we don’t have to? (Eating steak tonight, won’t give up my meat because someone disagrees with me.)
But I will defend someone who wants to make that choice.
Go vegan if you want to. Just eat right.
Well said.
Good gosh watch the documentary Forks Over Knives or What The Health and then you’ll see how ridiculous your comment sounds…..
Love ciabatta rolls and can’t always find them at the super market bakery. I can’t wait to try this recipe.
What a beautiful loaf!! I wish I could make such a wonderful bread. This looks amazing. I bet smells so good too :)
Nothing is better than freshly baked bread! I absolutely love baking bread and am always looking for a new recipe. This ciabatta looks amazing !! Pinning this and can’t wait to try it out!
I love homemade bread so much, and my goal is to master it this year. There’s just nothing like the smell as it bakes, and how comforting a nice, warm slice is. :) Ciabatta is one of my favorite breads, and yours looks fantastic!
Oh yes – dangerously delicious! This is a beautiful load and it would not last long at my house either. Bravo!
You made this look so easy!!
I am travelling at the moment so I hope to get into bread making when i’m home :)
Thanks for sharing!
Anisa – The Macadame. xx
http://www.creamstop.com
I need to make my own ciabatta more often! Yours looks amazing!
Oh man as soon as I saw this I just HAD to get it started tonight! Got the sponge on whilst making dinner, can’t wait for morning to get started!
I think ciabatta is my all time favorite bread. Paninis! I’m so happy that I’ve finally conquered it in my own kitchen too. Bread making is definitely one of my passions. :)
Have a wonderful Monday!
Ciabatta has to be my favortite crusty bread. I used to work near a Portuguese bakery that made it twice a week…Tuesday and Friday. In addition , there was a store nearby that carried a fresh, soft white cheese on Fridays. My assistant would often stop on her way to work and pick up both for our lunch. She loved spreading a spicy condiment on her serving but I loved the combination of warm bread and plain, delicious cheese…so delicious. Your recipe brought back all of thos yummy memories. I will have to give this recioe a try but I don’t have a stand mixer so I have to figure out how to mix this…by hand I guess.
I looooove the look of this bread! Ciabatta is one of my all time fav breads!
I love ciabatta bread! This looks amazing
I can’t wait to try this! Ciabatta is one of my very favorite breads – it can transform any standard sandwich into extraordinary, can’t it? Looks so lovely. There’s nothing like the chew of ciabatta!
I wish your blog was around when I first attempted this! I simply love this with herby olive oil and a slice of fresh mozzarella. You bread is divine!
I love making bread, homemade bread is just so much better than store bought. I’ve considered making ciabatta before, but I heard somewhere it was quite difficult, so I’d been put off, but reading this recipe it seems a lot easier than I thought, I just need to be prepared. Thanks for the recipe, I’ll definitely be giving this a try some day soon :)
Ohh my godddd….
I fell in love with this sticky sponge bread…
I am dreaming to eat that with some italian soup:)
Thanks a lot for sharing dear michelle.
I am sure that i will give it a try as soon as possible:-X
Michelle this looks delicious. I will have to give this a try. Looks delish
Homemade bread is absolutely my #1 weakness. This looks so yummy, I love all the air pockets. = )