Dill Pickles Recipe
Homemade dill pickles are easier to make than you’d think and allow you to keep a stash of delicious canned pickles in the pantry. These pickles taste incredibly fresh and have the perfect balance of dill and garlic flavor. Learn everything you need to know about how to make them in the post below – there are loads of tips and resources!
Many years ago, I began my pickling journey with refrigerator bread and butter pickles, which were absolutely delicious and have become the most popular recipe here each and every summer. A few years later, I wanted to give dill a try, and make a version that would be suitable for canning and long-term storage. I turned to my trusty resource, the Ball Complete Book of Home Preserving; it had a great recipe for dill slices perfect for sandwiches.
I’m always amazed at how low-maintenance canning actually is; all it takes is a couple of hours on a Saturday to have a pantry stocked with jars of your favorite items.
These dill pickles will go a long way on your favorite sandwiches over the winter! The dill flavor is fantastic and like most things, they taste better the longer they sit and the flavors develop. Once you are ready for a new jar, I would recommend letting it sit in the refrigerator for a couple of days to chill before cracking it open.
How to make dill pickles
Canning can be an intimidating process, but we’re going to break it down so that you have tons of confidence going into it. Believe me when I tell you that if I can do it, you can do it!
- Prepare the jars and lids – The first step is to ensure the jars and lids are all completely sanitized. You do this by first washing them with hot soapy water, and then placing the jars on a rack in a large pot, filling it with water, and bring the water to a simmer until it reaches 180 degrees F. The lids can be simmered in a small saucepan. Keep all of the equipment hot until ready to use.
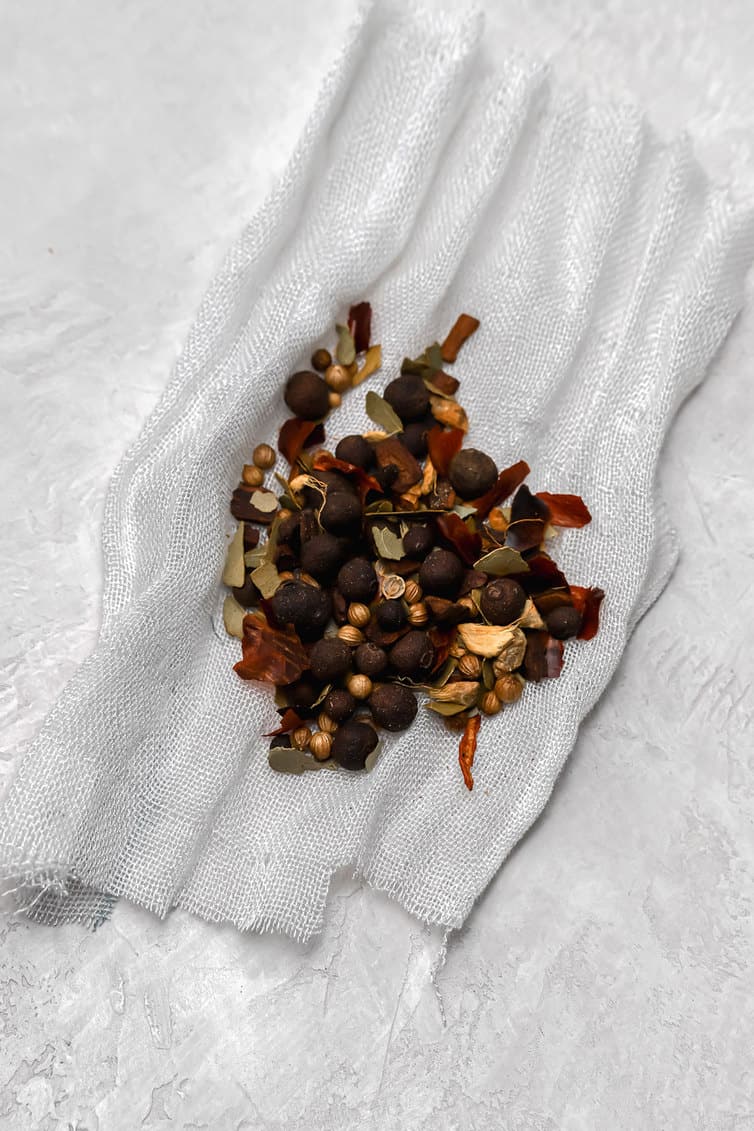
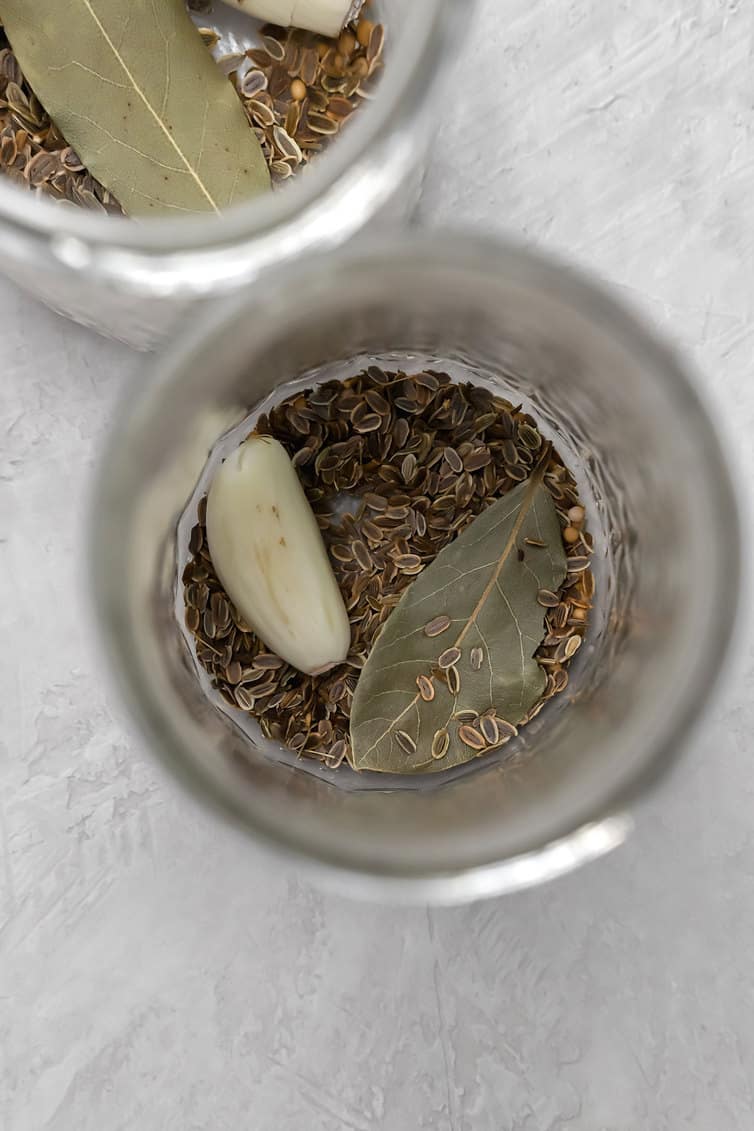
- Create a spice bag – Tie the pickling spices together in a square of cheesecloth.
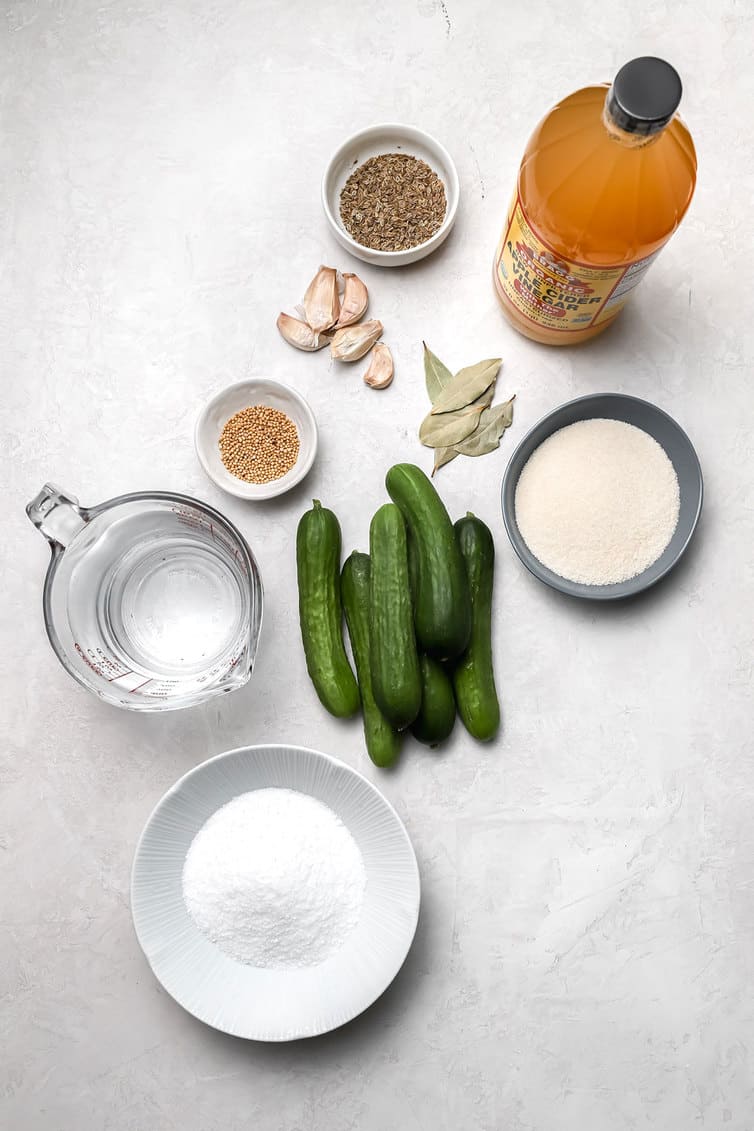
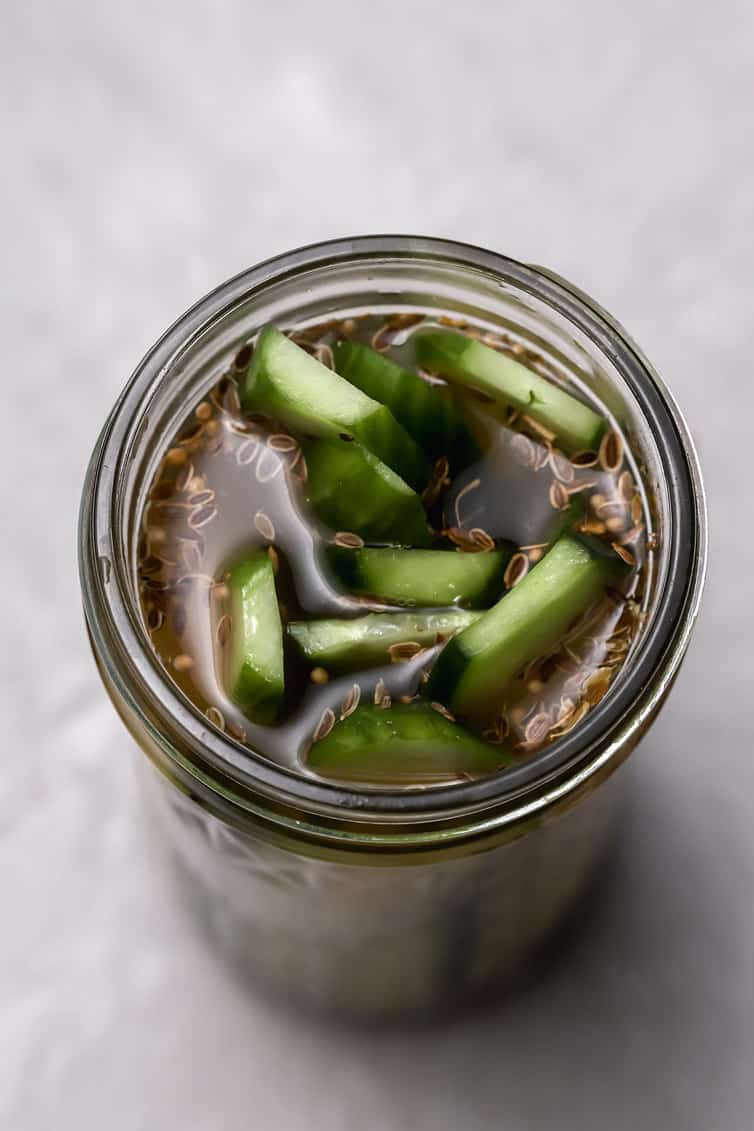
- Make the pickling liquid – Combine the vinegar, water, sugar, pickling salt, and spice bag in a saucepan. Boil gently for 15 minutes.
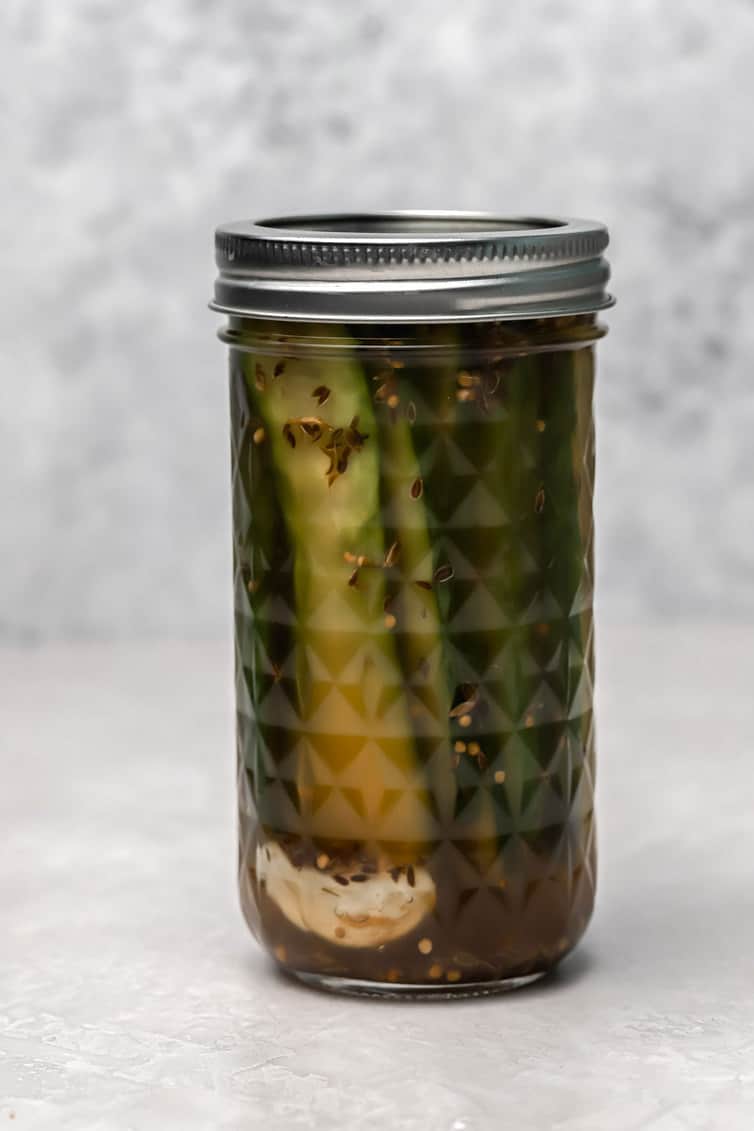
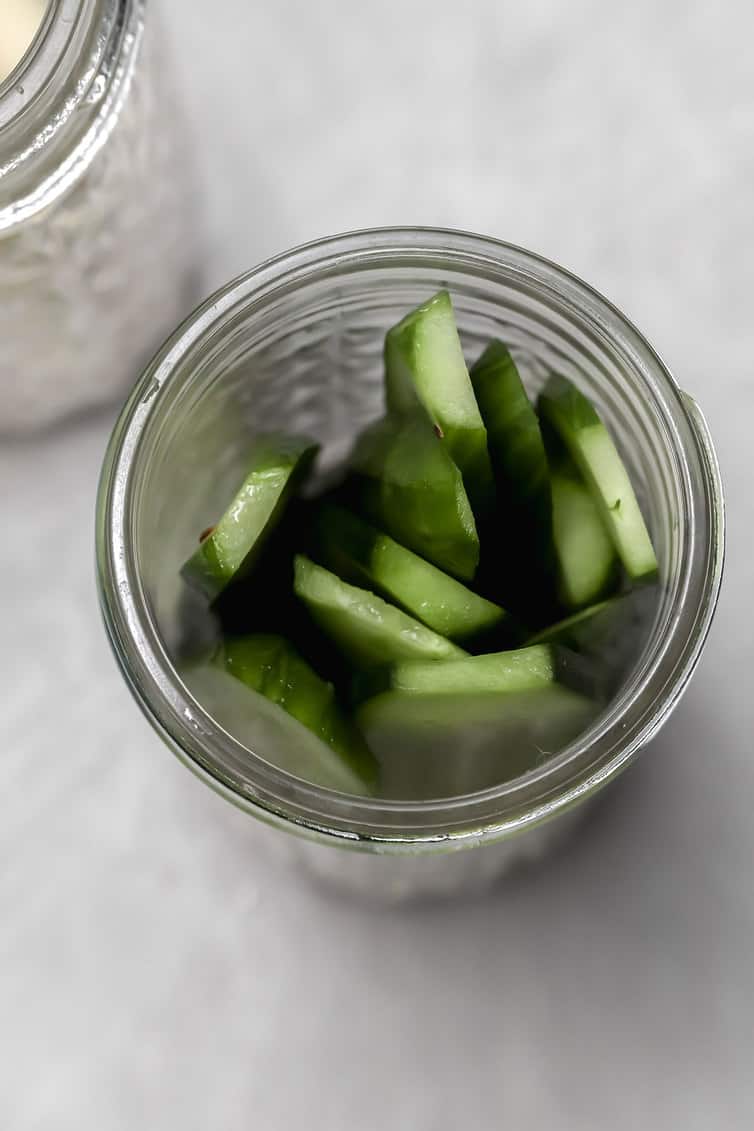
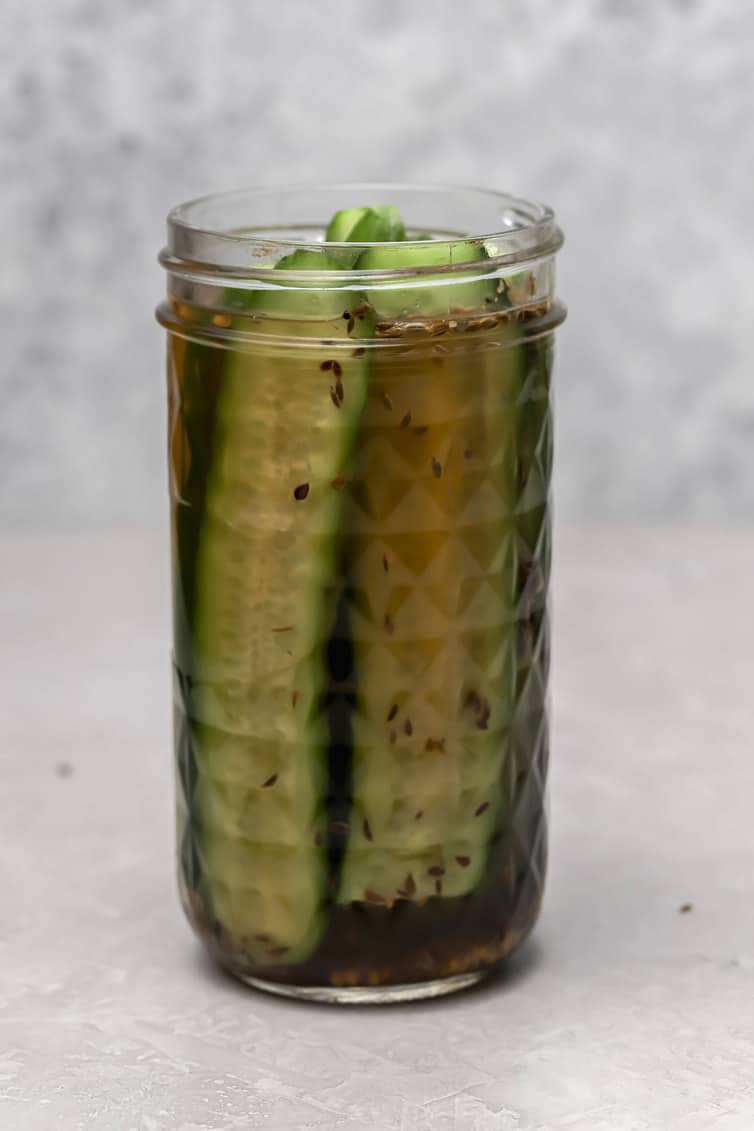
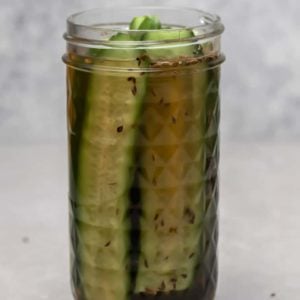
- Pack the jars – Add garlic, bay leaves, mustard seeds, and dill seeds to each jar, then back with the sliced cucumbers.
- Add the pickling liquid – Ladle the hot pickling liquid into each jar to cover the cucumbers and leave ½-inch of space at the top.
- Process the jars – Place a lid on each jar and tighten a screwband around each. Place back on the rack in the large pot and adjust the water so it covers the jars by at least 1 inch. Bring to a boil and allow to boil for 15 minutes. Turn off the heat and allow the jars to sit for 5 minutes.
- Let the jars rest – Carefully remove the jars from the water and place them on a clean towel on the counter. Do not disturb for at least 24 hours.
- Check the seals – Once the 24 hours is up, unscrew the bands and run your finger over the center of the lids. The seals (the circular center part) should be concave (curving downward); put the bands back on and store in a dark, cool place for up to 1 year. If any of the seals appear to be “popped up” in the center, transfer those to the refrigerator and use within 1 month.
The best cucumbers to use
Pickling cucumbers are usually the cucumber of choice for pickles (the name is a total giveaway!) – they are shorter and wider than regular cucumbers and have a thinner skin, which usually makes for better pickles.
However, regular cucumbers can absolutely be used, as well. If you can’t find pickling cucumbers, don’t let that stop you from making homemade pickles!
How to cut your cucumbers
This is all a matter of personal preference and the types of pickles that you like to enjoy. Some ideas:
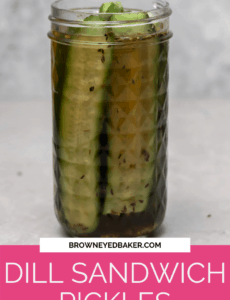
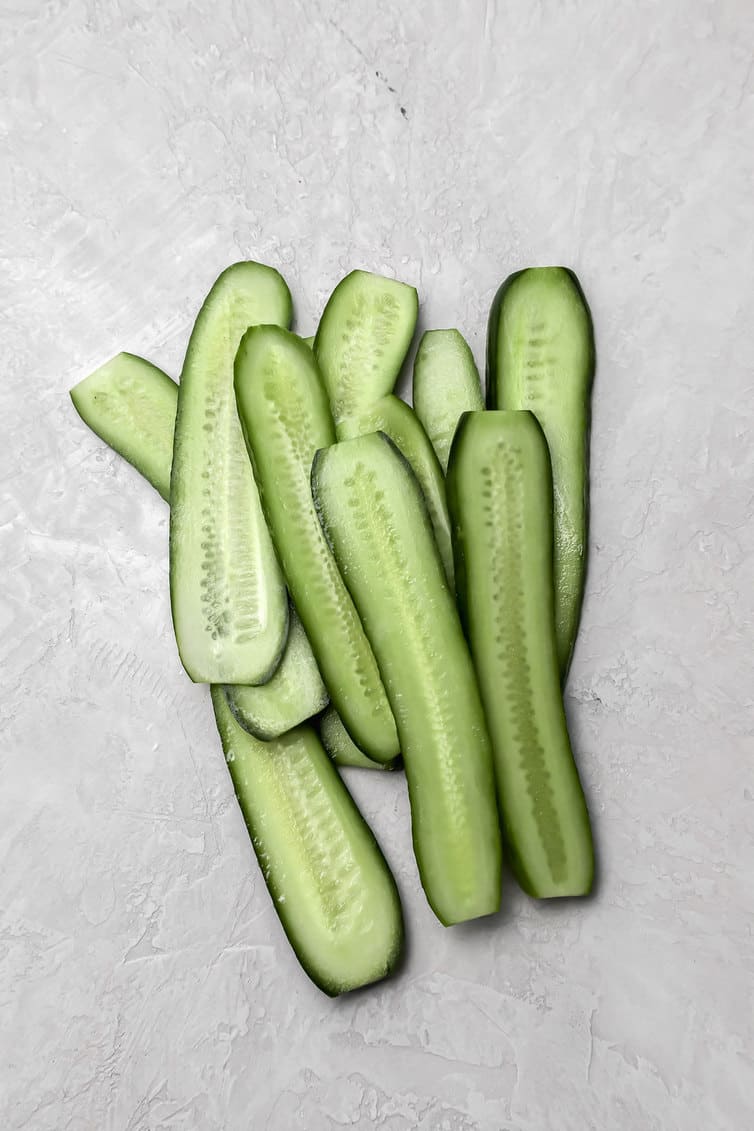
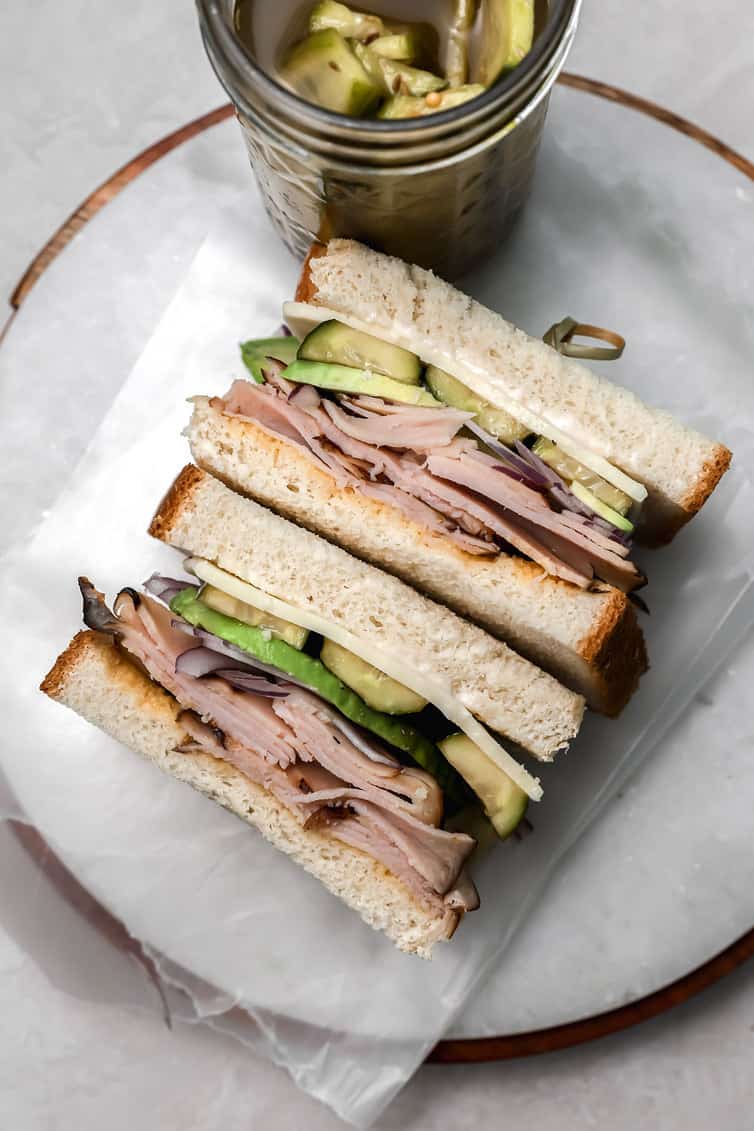
- “Sandwich”-style pickles, which are shown here. They are sliced lengthwise so they can easily layer on a sandwich. While you can use a knife to carefully slice these, a mandoline is my tool of choice for a quick process and uniform pickles.
- Spears – Simply slice the pickles lengthwise into spears.
- Chips – The kind that come on your favorite hamburger! When I make pickle chips, I love to use this wavy slicer to make them prettier ;-)

Canning 101
What are the advantages of canning?
If you’re wondering why you would want to go through the process of canning pickles, the answer is simple – you can stockpile tons of different foods (on top of pickles, you can make jams, jellies, pie fillings, pasta sauces, salsa, vegetables, and the list goes on.
If you have a garden or have easy access to local, in-season produce, canning it is much more economical for keeping a stock of canned food in your pantry for whenever you need it.
How do you can?
In the steps above under “how to make dill pickles” I outlined the basic steps, which are very similar no matter what type of food you’re canning.
You will sterilize jars and lids, fill the jars with the food you are preserving, affix the lids, then process the jars in boiling water to “seal” them.
Canning Safely
It is extremely important to follow all recommended guidelines when canning foods. I have only used recipes in established and respected publications, such as the Ball handbook that I’ve linked to above (and also below the recipe).
There must be a certain level of acidity to ensure that the foods will be safe to eat after canned. If you want to can your own foods using your own recipes, I highly recommend consulting a source such as the USDA Complete Guide to Home Canning for guidance and safety.
Save This Recipe
Different Types of Pickling
There are two different types of pickling:
- Pickles preserved in vinegar – This is how standard pickles are made, such as the ones you buy at the grocery store. The vinegar acts as a strong acid where most bacteria cannot survive.
- Pickles soaked in a salt brine – This encourages fermentation, which is the growth of “good” bacteria that makes food less susceptible to “bad” bacteria.
Canned pickles vs refrigerator pickles
Refrigerator pickles have become super trendy recently, and you might be wondering what the difference is between “refrigerator pickles” and canned pickles.
Quite simply, refrigerator pickles are made by pouring the pickling liquid into jars and then placing them straight into the refrigerator and using within a month or so, completely skipping the canning process.
On the flip side, canned pickles (such as these) are processed in a water bath, which makes them safe for long-term storage at room temperature. You can keep them in your pantry for up to a year and they’ll be as fresh as the day you made them.
Dill 101
Dill is a green herb and is the iconic flavor associated with pickles (and often times potato salads and deviled eggs!). There are a few different ways you can use dill in these pickles:
- Dill seed – This is the option I used in the recipe; it is found in the spice aisle (or Amazon) and it gives the pickles a bit more of a spicy punch.
- Fresh dill head – This is the leafy herb that you’ll find in the produce section of the grocery store. Use 5 heads of fresh dill for this recipe.
- Dried dill weed – You can typically find this in the spice aisle of your grocery store; use 2 teaspoons of dried dill weed for each jar.
Flavor options
The spices used in these pickles will give you the most traditional dill pickle flavor, but as always, there are more options! Some ideas for you:
- Up the garlic – Each jar uses 1 clove of garlic, but you like a garlic-ier pickle, drop in another clove or two!
- Spice it up – Add in a pinch of red pepper flakes or black peppercorns for a spicier flavor.
- More flavors – Mix and match any of these to play around with the flavors: allspice, caraway, celery seed, cloves, coriander, and the list goes on!
How to use the pickles
Naturally, you’ll want to layer these pickles onto your favorite sandwich, but you can also eat them straight from the jar, chop them up and substitute for relish, or even use them to make dill pickle dip (it’s SO addicting!).
If you love pickles, make these:
- Refrigerator Bread and Butter Pickles
- Zesty Refrigerator Zucchini Pickles
- Quick & Easy Refrigerator Dill Pickles
Watch the Recipe Video Below:
If you make these dill pickles and love them, I would so appreciate it if you would take a moment to leave a rating below. Thank you so much! ❤️️
Dill Pickles Recipe
Ingredients
- 3 tablespoons pickling spice
- 4 cups (960 ml) cider vinegar
- 4 cups (960 ml) water
- ¾ cup (149 g) granulated sugar
- ½ cup (144 g) pickling or canning salt
- 5 (5 bay leaves) bay leaves
- 5 (5 garlic cloves) garlic cloves
- 2½ tablespoons (2.5 tablespoons) dill seeds
- 2½ teaspoons (2.5 teaspoons) mustard seeds
- 7 pounds pickling cucumbers, ends trimmed and cut into ¼-inch slices lengthwise
Instructions
- Prepare canner, jars and lids. Wash the jars, lids and screw bands in hot, soapy water. Rinse well and drain (you don’t need to dry them). Place a rack in the bottom of a boiling-water canner, then place the required number of jars on the rack. Add water to the jars and the canner until it reaches the top of the jars. Cover the canner and bring the water to a simmer (180 degrees F) over medium heat. Do not boil the jars. Keep jars hot until you’re ready to use them. Place the lids in a small saucepan, cover with water and bring to a simmer (180 degrees F) over medium heat. Again, do not boil the lids. Keep lids hot until you’re ready to use them. Set the screw bands aside, they do not require heating.
- Tie pickling spice in a square of cheesecloth, creating a spice bag
- In a large stainless steel saucepan, combine vinegar, water, sugar, pickling salt and spice bag. Bring to a boil over medium-high heat, stirring to dissolve the sugar and salt. Reduce the heat and boil gently for 15 minutes.
- Working with one jar at a time, remove a jar from the canner, pouring hot water back into the canner. Place the jar on a heat-protected work surface, such as a wooden cutting board or towel. Place 1 bay leaf, 1 garlic clove, ½ teaspoon mustard seeds and 1½ teaspoons dill seeds into each jar. Pack cucumber slices into hot jars to within a generous ½-inch of the top of the jar. Ladle hot pickling liquid into the jar to cover the cucumbers, leaving ½-inch headspace. Slide a nonmetallic utensil, such as a rubber spatula, down between the food and the inside of the jar two or three times to release air bubbles. Adjust headspace, if necessary, by adding more hot pickling liquid. With a clean damp cloth or paper towel, wipe jar rim and threads. Using a magnetic or nonmetallic utensil, lift a hot lid from the water and place it on the jar, centering the sealing compound on the rim of the jar. Place a screw band on the jar. With your fingers, screw band down until resistance is met, then increase to fingertip-tight. (Do not use excessive force to tighten.) Return the jar to the rack in the hot water-filled canner. Repeat filling steps until all jars are filled.
- When all of the jars are in the canner, adjust the water level in the canner so that it covers the jars by at least 1 inch. Cover the canner with a lid and bring the water to a full rolling boil over high heat. Once the water is boiling hard and continuously, process (continue boiling) for 15 minutes. Turn off the heat, remove the lid and let sit for 5 minutes. After 5 minutes, remove the jars, lifting them out of the hot water without tilting them. Don’t dry the lids or jars at this point. You don’t want to disturb the lids while the seal is being formed. Place the jars upright on a towel in a draft-free place and let cool, undisturbed, for 24 hours.
- When the processed jars have cooled for 24 hours, check the lids for seal. Remove the screw bands and with your fingers, press down on the center of each lid. Sealed lids will be concave (they’ll curve downward) and will show no movement when pressed. Jars that have not sealed properly must be refrigerated immediately. Use unsealed refrigerated product within a few days. For the jars that have good seals, with a damp cloth, thoroughly wipe lids and jar surfaces to remove any water residue or food particles. Store the sealed jars of jam in a cool, dark place for up to 1 year.
Notes
- Equipment: Water bath canner / Canning essentials set / Jars / Pickling spice / Pickling salt
- Cucumbers: Pickling cucumbers are preferred, but regular cucumbers can be used also.
- Dill: In place of the dill seeds, you can substitute 5 heads of fresh dill (the yellow flower portion) or 2 teaspoons dried dillweed for each jar (10 teaspoons total).
- Seals: Do not disturb the jars for 24 hours after processing. Once you check them, be sure to refrigerate any jars that do not have a concave seal.
- Storage: Properly sealed jars can be stored in a cool, dark place for up to 1 year. Refrigerate the jar for a day or two before using for best flavor.
Did you make this recipe?
Leave a review below, then snap a picture and tag @thebrowneyedbaker on Instagram so I can see it!
(Recipe from Ball Complete Book of Home Preserving)
[Photography by Ari of Well Seasoned]


These are good- but not dill pickles. These are bread and butter pickles. Heads up to those who are looking for a real dill.
I add slices of jalapeños to my pickles. Also, add a whole grape leaf. Sounds crazy but it helps to make your pickles crunchy.
Is it just me or do these taste a bit too salty? My palette might be different, is it possible to safely can these pickles with less salt.
Grow you own dill, it’s easy to grow. My prob is that my dill is done before my cucumbers are ready. I only have seed left. I’m going to try your recipe, I only have a pressure canner and was wondering if I use it will it make my pickles to soft? I’m also doing the fermented pickles this year to try it.
Hi Renee, I’ve never used a pressure canner, so I couldn’t speak to how it would impact the texture. Enjoy!