The Best Dutch Apple Pie Recipe
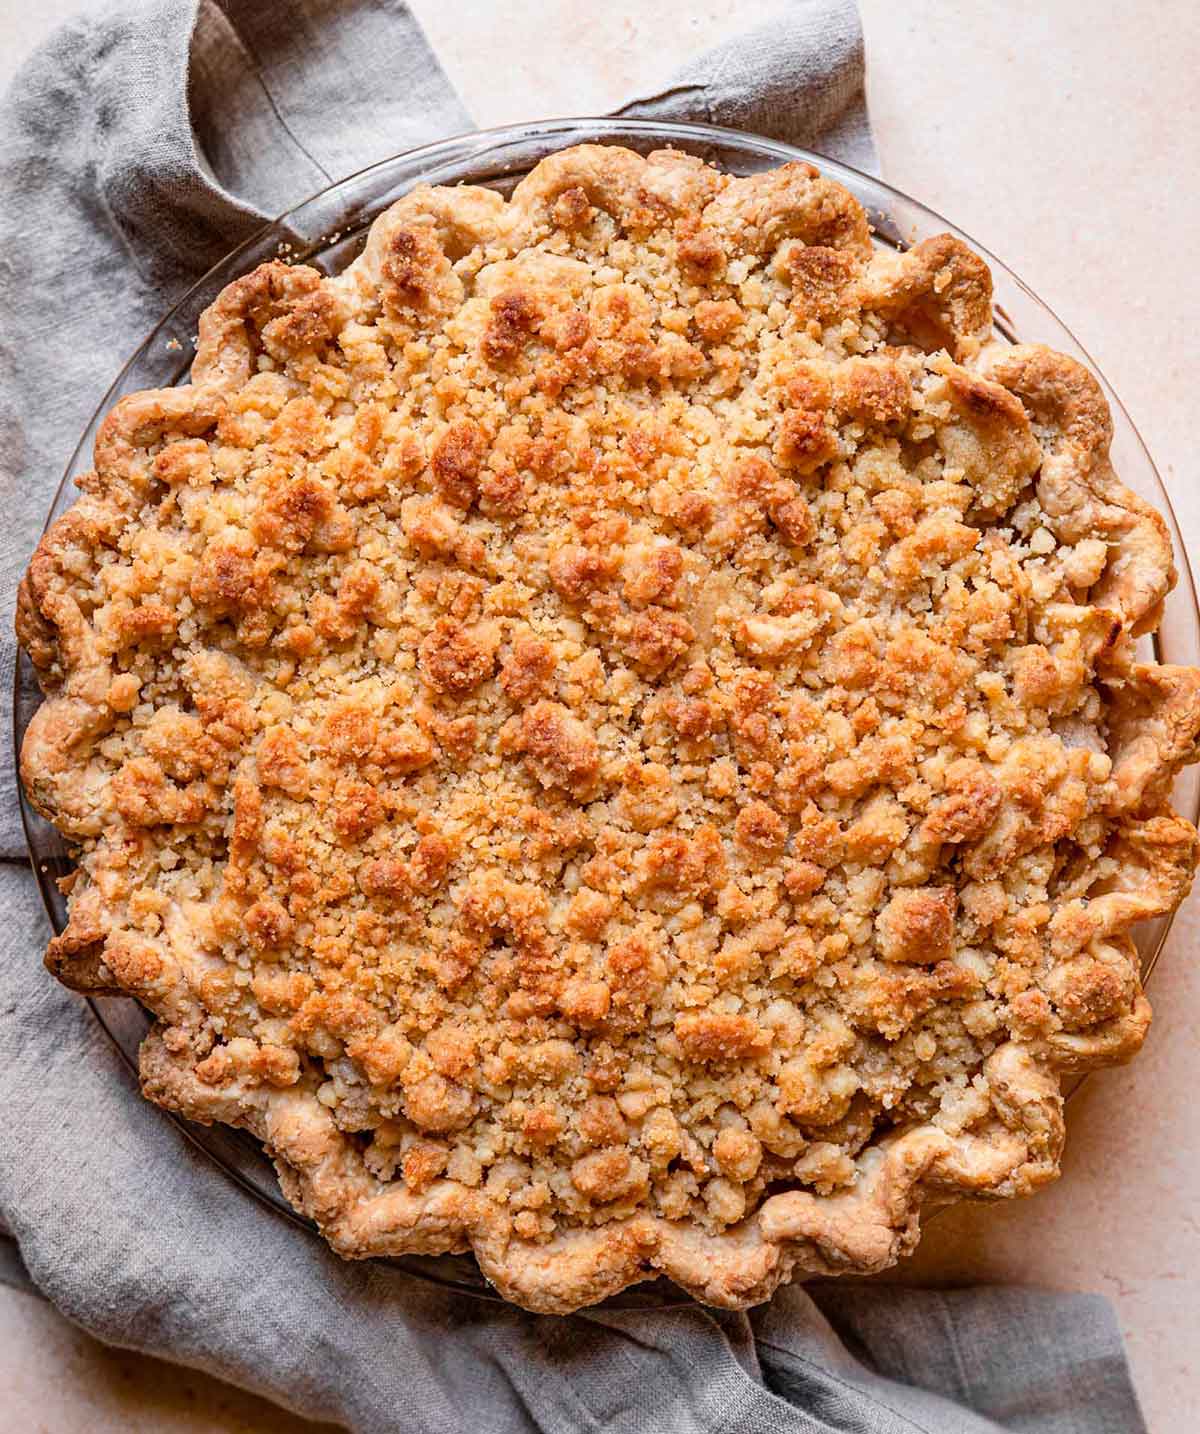
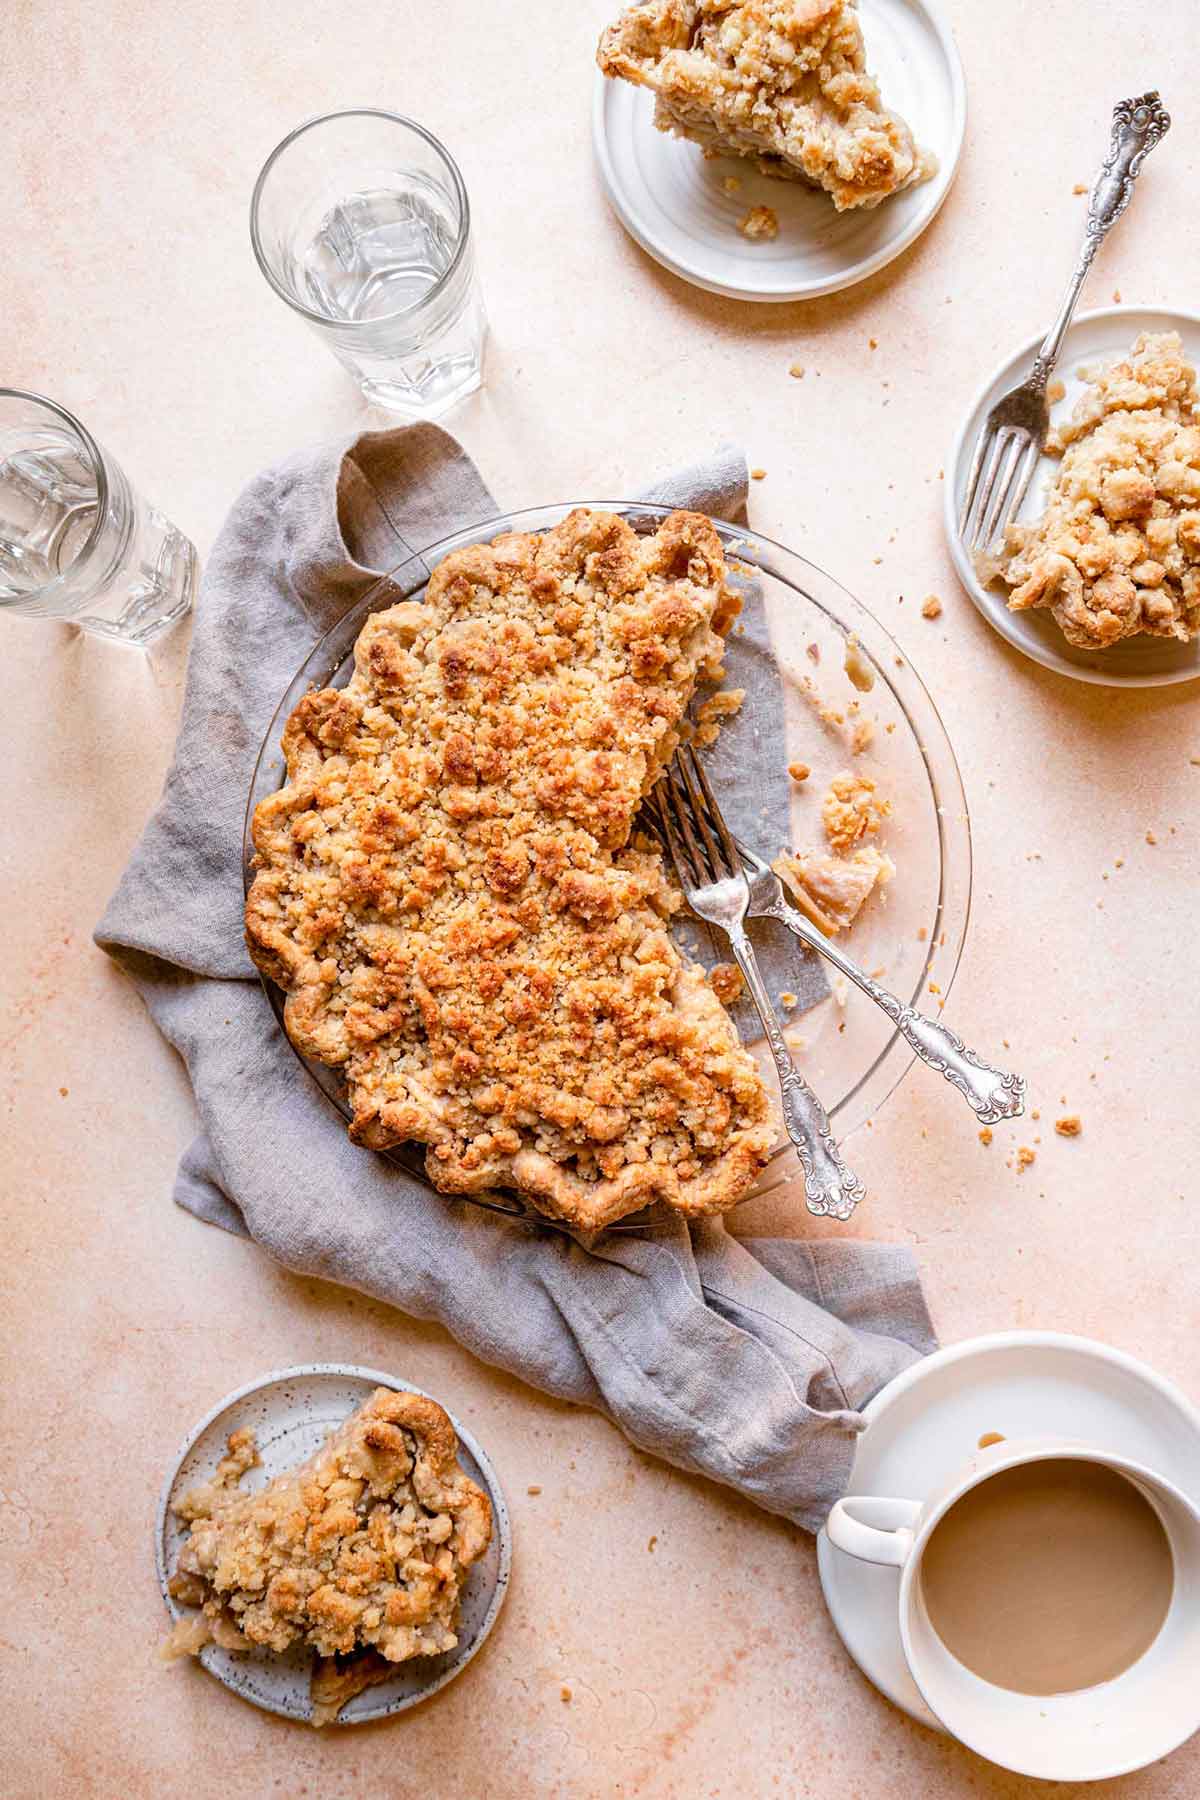
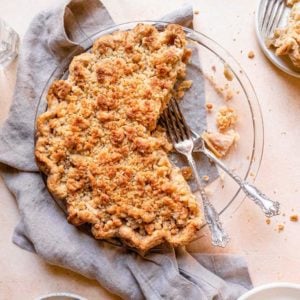
A Dutch apple pie with a perfectly cooked apple filling, flaky crust, and tons of crumble topping. Apple pie meets apple crisp for the best of both worlds. The quintessential fall dessert and the epitome of pie perfection!
Apple picking has begun, and my pie-loving heart is so happy! It is no secret that I love sky-high pies with all kinds of buttery crusts, crumbles, and streusel toppings. This recipe's topping is so incredible it now outranks one from a favorite local bakery.
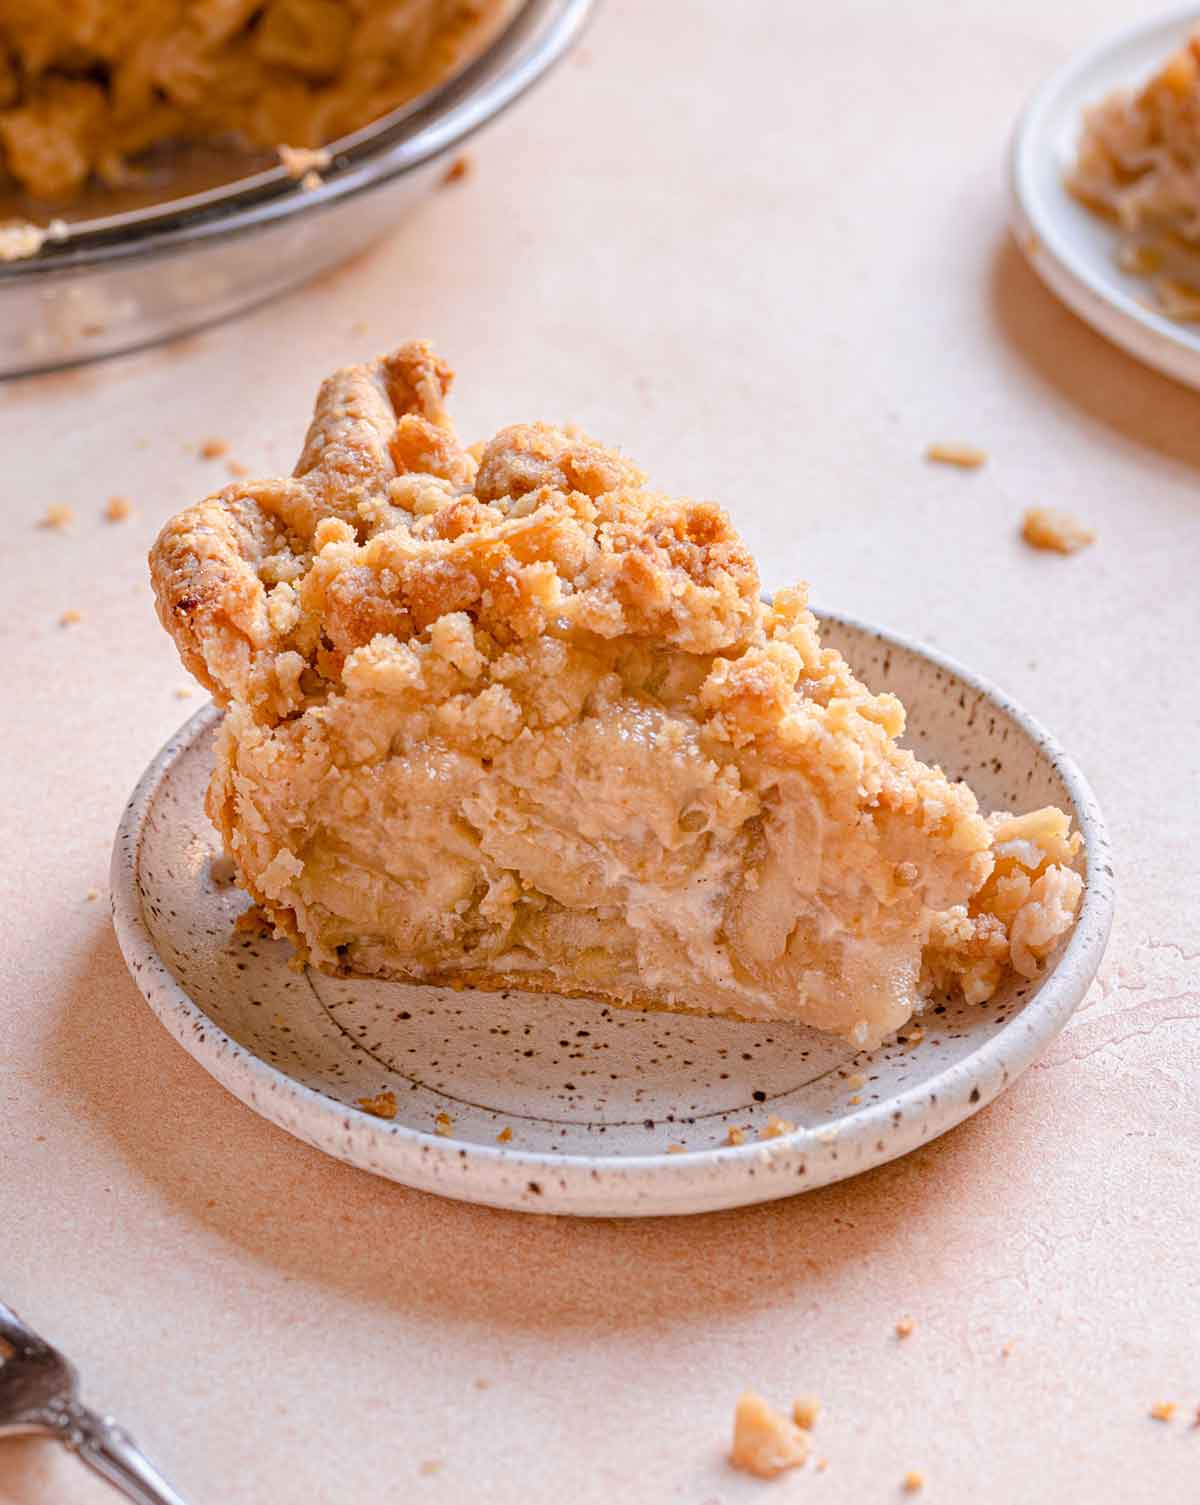
Of course this boasts a flaky, buttery base, soft and sweetened apples, a creamy filling, and those crumbs! Oh, those crumbs! It's truly a pie lover's dream and I am so excited to share it with you!
What Makes it "Dutch"?
The unique crumb topping of butter, sugar, and flour is what sets this dessert apart.
While traditional apple pie boasts a regular double crust (a crust on the bottom and a crust on top), a Dutch apple pie has a regular bottom crust, but a crumble topping.
Dutch apple pie has been recorded in recipe books as far back as the early 1500s, but eventually, it made its way to the northeastern U.S., where it is sometimes called Pennsylvania Dutch Apple Pie.
Why This is the BEST Dutch Apple Pie Recipe
- The best crust plus a foolproof method for blind baking gifts you a fantastic base on which to build the actual pie filling and topping.
- A combination of apples creates an amazing complexity in terms of both flavor and texture.
- Cooking the apple pie filling ensures that the apples won’t be too raw when the pie is finished, and also that all of the moisture is cooked out, eliminating a runny filling when the pie is sliced.
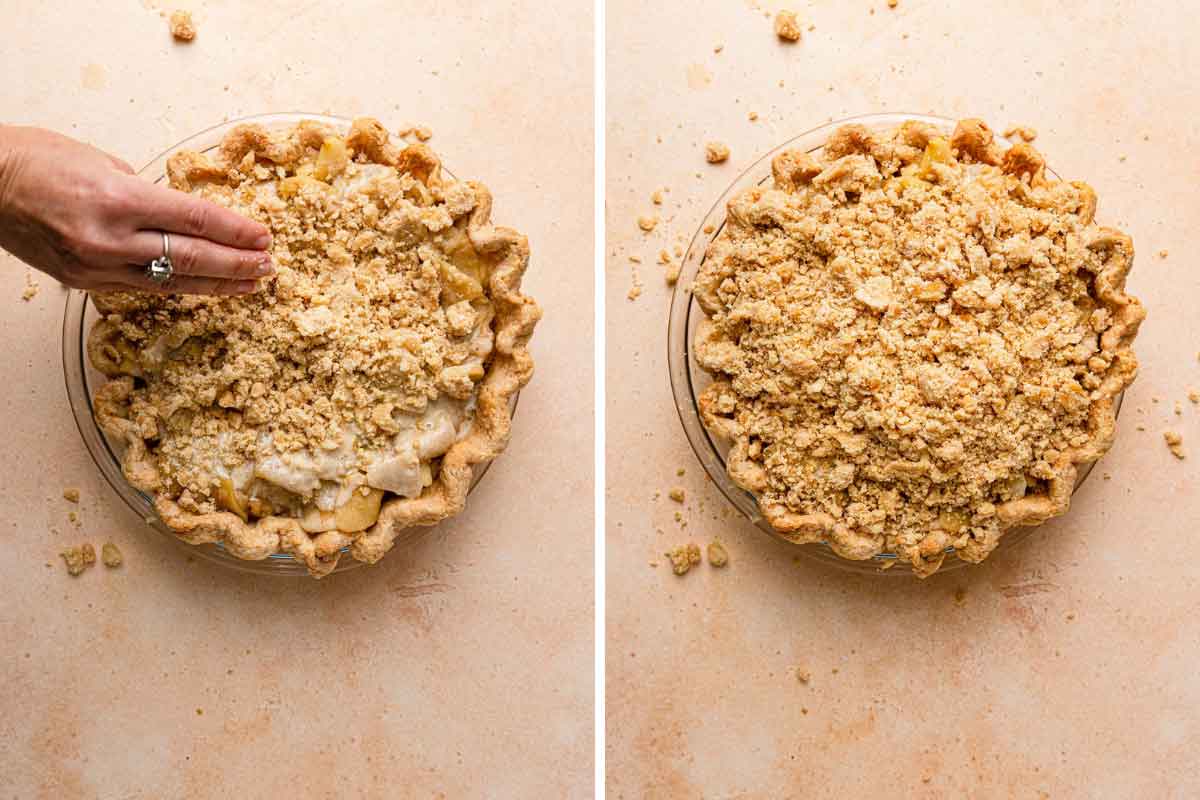
- The crumble topping is NOT skimpy! I love a hearty crumb topping and this pie is completely covered.
- Many components, plus the entire pie, can be made ahead!
The Pie Crust
For this pie, I use none other than my all-time favorite, hands-down best ever foolproof pie crust recipe. It uses an ingredient that surprises most people (vodka!), which creates less gluten development that using all water, and the alcohol vaporizes in the oven, which makes for a wonderfully flaky crust.
You’ll also see that I use my favorite method for blind baking the pie crust. This involves rolling out the crust and lining the pie plate immediately, then letting it chill for a couple of hours. Then, you’ll cover the pie dough with foil and fill it up the whole way with sugar, then do a partial bake in the oven, keeping it covered and weighted the entire time.
I was blown away the first time I tried this method and have used it exclusively since; it creates the most perfectly blind-baked crust!
The Apple Pie Filling
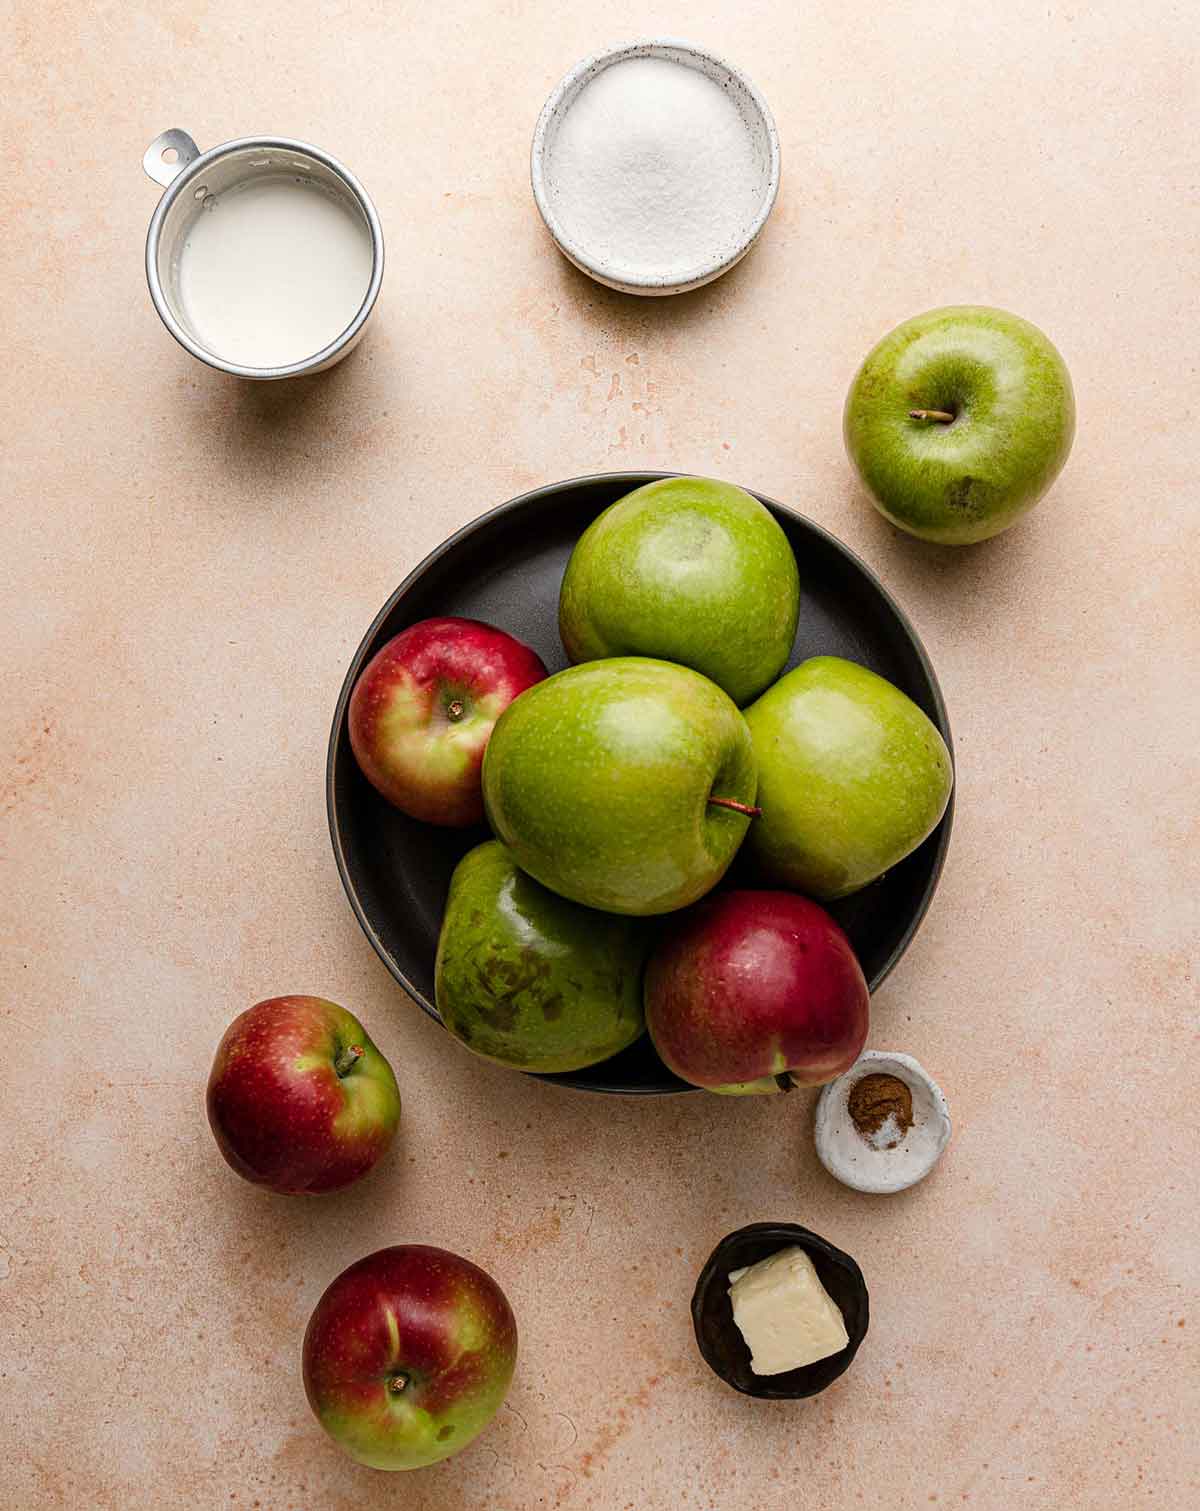
The Best Apples to Use
I prefer a mix of sweet and tart apples and recommend McIntosh and Granny Smith for this pie.
If you cannot find McIntosh apples, the following are good substitutes:
- Honeycrisp
- Cortland
- Empire
- Pink Lady
If you are working with mostly tart apples, you may want to add additional sugar.
This Dutch Apple pie recipe calls for you to peel, core, and quarter a total of nine apples - which may look like a lot! However, we are going to be cooking these down before baking, which helps us keep the bottom of the crust flaky and strong enough to hold the delicious filling and crumb!
To prepare the apples, you will peel them, quarter them, core them, and then slice them crosswise into ¼-inch slices (shorter slices make for cleaner slices of pie!)
I like to use this swivel peeler, but if you do a ton of apple baking, you may want to invest in a tabletop apple peeler.
We Cook the Filling!
Unlike a regular apple pie, where you toss fresh apples with sugar and spices then pile into the crust, the apple filling for a Dutch apple pie is first cooked on the stovetop with butter, sugar, and seasonings.
Save This Recipe
This accomplishes two important things:
- Cooking the apples first ensures that the moisture is cooked out prior to baking, which ensures a less runny filling (the worst when you bake a pie!).
- Doing this means that the pie doesn’t need a long baking time, just long enough to brown the crumble topping and not have it burn or overcook.
The Crumble Topping
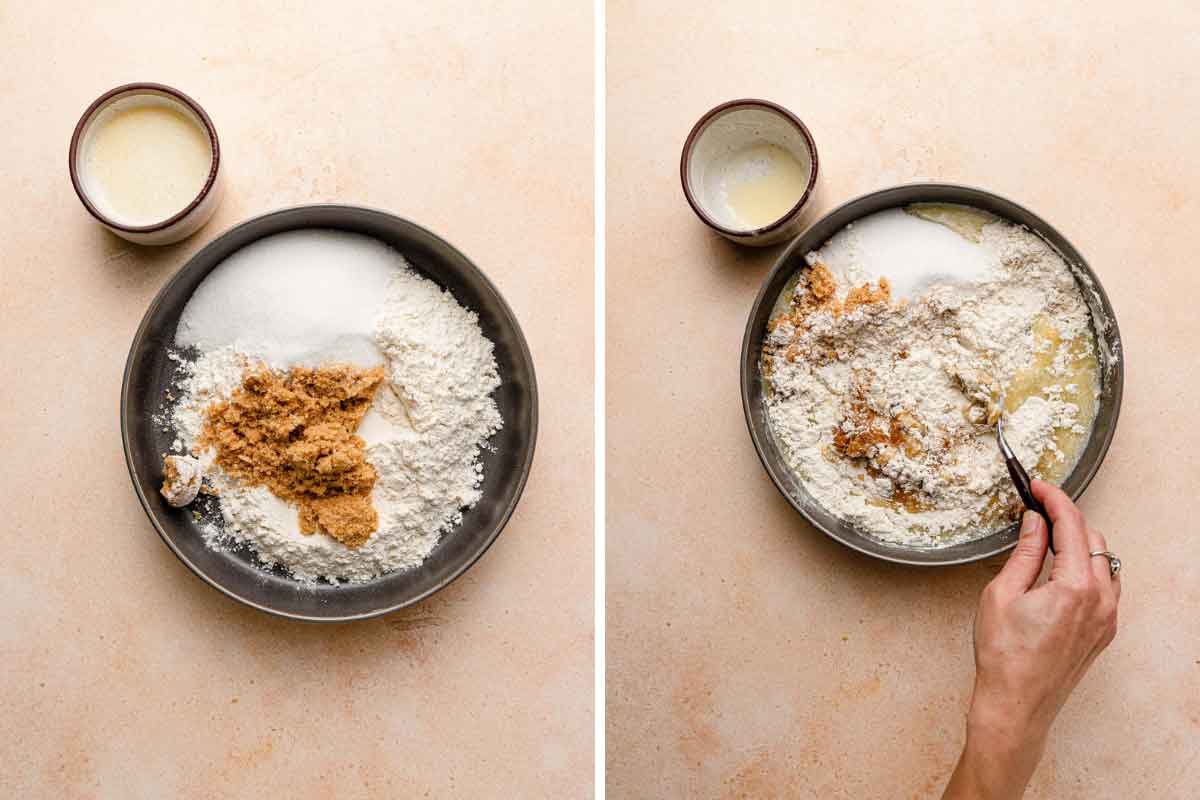
I LOVE this crumb topping! It does not skimp on coverage and is just absolutely delicious. You simply whisk together flour, brown sugar, and white sugar, then stir in melted butter. It makes the BEST crumbs!
If you like extra crunch in your crumb topping, you could add about ¾ cup of chopped walnuts or pecans.
What Pie Pan to Use
First and foremost, you want to be sure you have a quality pie plate. Glass is great for fruit pies, as you can see exactly what your crust is up to!
I use and recommend a classic glass 9-inch Pyrex pie dish.
How to Make the Pie, Step-by-Step
A quick overview of how you will make and assemble this delicious pie!
- Make the Crust: I have a lot of detail you can read about the crust on the page for the foolproof pie crust and very detailed instructions for blind baking the pie crust on that dedicated page, as well, though you will still find full instructions for both below.
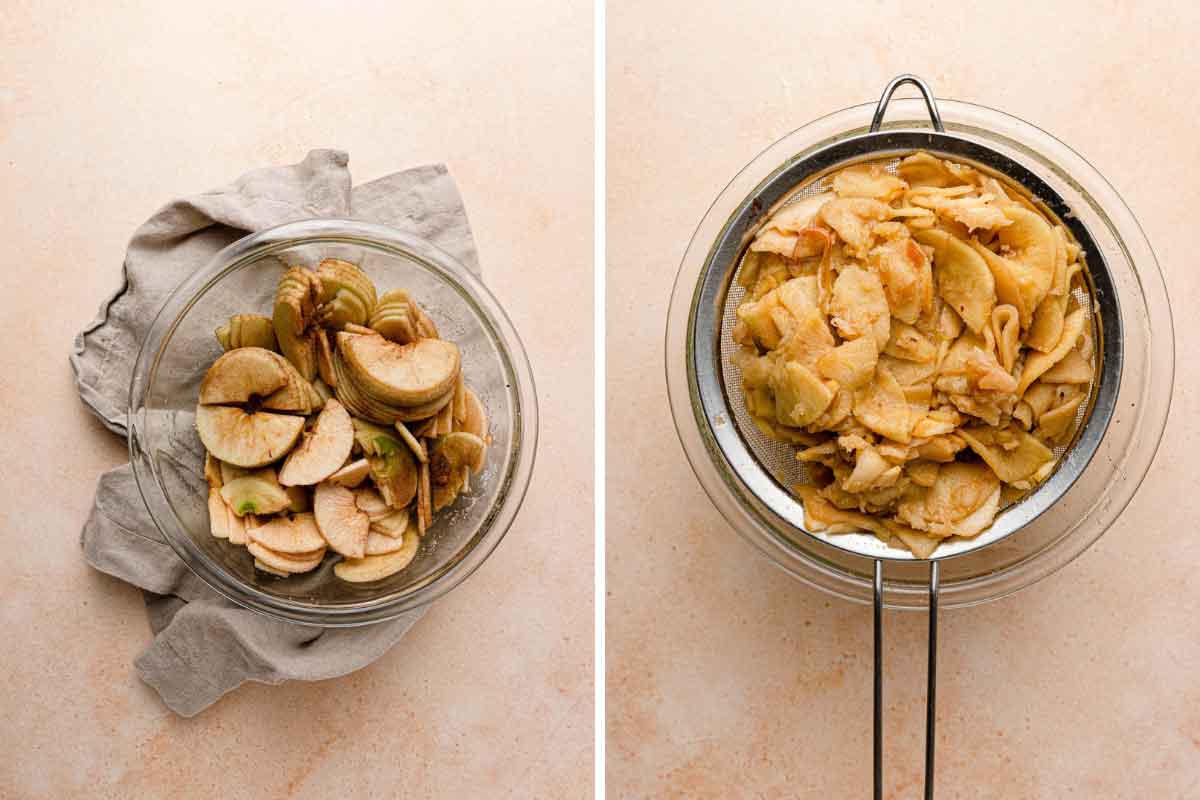
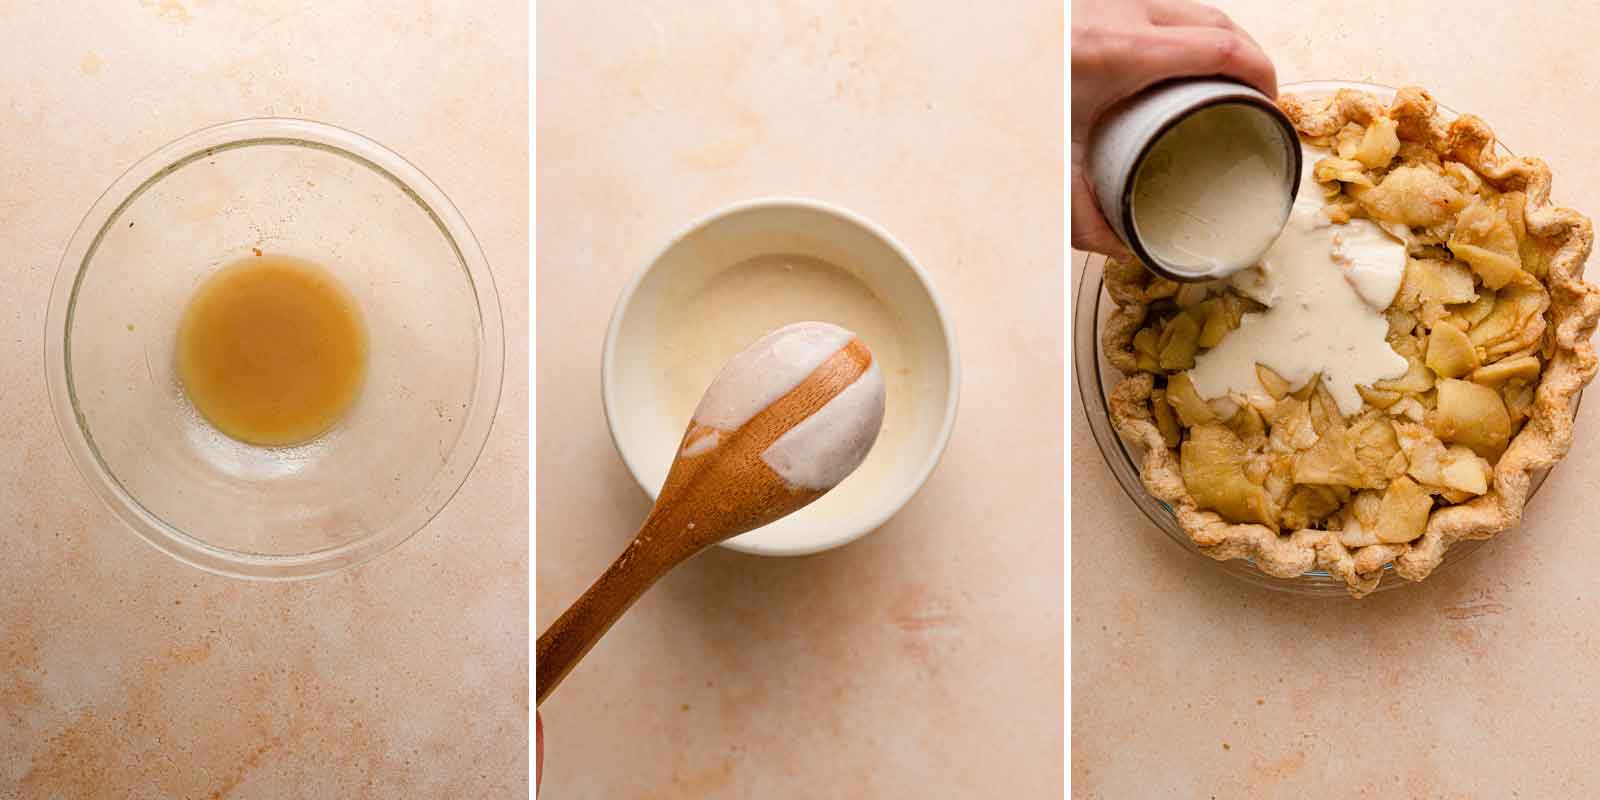
- Make the Filling: The sliced apples get tossed with sugar, cinnamon, and salt, and are sauteed in butter until the begin to soften. The cooked apples are transferred to a colander set over a bowl to drain. Once drained, the apples are added to the partially-baked pie crust.
- Cook the Juices: The reserved juice from the drained apples is combined with heavy cream in the pot and boiled until thickened. The mixture is then drizzled over the apples in the pie dish.
- Make the Crumble Topping: You mix together the flour and sugars, then stir in melted butter until everything is melted and holds together clumps. Sprinkle the crumb mixture evenly over the top of the pie.
- BAKE! The pie only needs about 10 to 20 minutes in the oven since the filling is already cooked. We’re just looking to brown the topping and get that filling nice and bubbly.
- Cool and Serve: The pie will set up best if you hold off slicing it until it has cooled to room temperature, usually at least 2 hours.
Dutch Apple Pie Prep Tips + Make-Ahead Notes
This is an amazing recipe, but quick it is not. Buckle up for some kitchen time when you decide to make this. There is quite a bit of inactive and baking time, but if you plan to make it start-to-finish all at once then plan on at least 4 hours of time for this apple pie.
I promise those four hours go by quickly when your kitchen smells this good! However, I know that time can be hard to find, so here are some tips for getting ahead:
- The crust here can be made ahead of time, wrapped tightly in plastic wrap, and refrigerated for up to 2 days. It can also be wrapped tightly and put inside of a freezer bag, and stored in the freezer for up to 3 months. Transfer to the refrigerator to thaw overnight before proceeding with the recipe.
- The crumble topping can be made up to 2 days in advance, covered, and refrigerated until ready to use.
- The pie can be baked, cooled, then stored at room temperature (tented loosely with foil) up to 1 day in advance. You can reheat briefly (10 minutes) at 375 degrees for a fresh-tasting pie.
Suggestions for Serving
If you ask me, pie is great every which way… warm, room temperature, chilled - any time!
This Dutch Apple pie is phenomenal fresh, right after it's cooled, and you just HAVE to have it with a big scoop of vanilla ice cream. Or whip up a quick batch of homemade whipped cream to dollop on top, OR drizzle with salted caramel sauce!
Though it likely won't last long enough, leftovers will keep well for up to 2 days at room temperature lightly covered with foil.
Looking for more apple pies? I’ve got you covered!
- Dutch Apple Pie Bars
- Apple Hand Pies
- Salted Caramel Apple Pie
- Caramel Apple Cheesecake Pie
- Classic Apple Pie
- Maple-Apple Crumble Pie
If you make this Dutch apple pie recipe and love it, remember to stop back and give it a 5-star rating - it helps others find the recipe! ❤️️
Dutch Apple Pie Recipe
Ingredients
Pie Crust
- 1¼ cups (162 g) all-purpose flour, divided
- 1 tablespoon granulated sugar
- ½ teaspoon salt
- 6 tablespoons (85 g) cold unsalted butter, cut into ¼-inch slices
- ¼ cup (46 g) vegetable shortening, chilled, cut into 2 pieces
- 2 tablespoons ice water
- 2 tablespoons vodka, chilled
Apple Filling
- 5 large Granny Smith apples, about 2½ pounds
- 4 large McIntosh apples, about 2 pounds
- ¼ cup (50 g) granulated sugar
- ½ teaspoon ground cinnamon
- Pinch of salt
- 2 tablespoons (28 g) unsalted butter
- ½ cup (120 ml) heavy cream
Streusel Topping
- 1¼ cups (162 g) all-purpose flour
- ⅓ cup (71 g) light brown sugar
- ⅓ cup (66 g) granulated sugar
- 7 tablespoons (99 g) unsalted butter, melted
Instructions
- Make the Pie Crust: Process ¾ cups of the flour, the sugar, and salt together in a food processor until combined, about 2 one-second pulses. Add the butter and shortening and process until a homogenous dough just starts to collect in uneven clumps, about 7 to 10 seconds (the dough will resemble cottage cheese curds with some very small pieces of butter remaining, but there should be no uncoated flour). Scrape down the sides and bottom of the bowl with a rubber spatula and redistribute the dough evenly around the bowl. Add the remaining ½ cup flour and pulse until the mixture is evenly distributed around the bowl and the mass of dough has been broken up, 4 to 6 quick pulses. Empty the mixture into a medium bowl.
- Sprinkle the vodka and water over the mixture. With a rubber spatula, use a folding motion to mix, pressing down on the dough until it is slightly tacky and sticks together. Turn the dough out onto a lightly floured work surface and bring it together with your hands, pressing it into a 6-inch round. Lightly flour the top and gently and quickly roll it out to a 13-inch circle, picking it up and doing a quarter turn after every couple of rolls to keep it from sticking.
- Transfer the dough to a 9-inch pie plate and gently press it into the bottom and up the sides. Trim the dough to 1 inch beyond the lip of the pie plate, then tuck it under itself so it is flush with the edge of the pie plate. Flute the edges or press with the tines of a fork, then refrigerate the dough-lined plate for at least 2 hours.
- Blind Bake the Pie Crust: Preheat oven to 350 degrees F. Line the chilled pie dough with aluminum foil and use granulated sugar to fill the whole pie plate. Bake for 40 minutes; remove the foil and sugar and place the crust on a wire rack while you make the filling.
- Increase the oven temperature to 425 degrees F.
- Make the Apple Filling: Peel, quarter, and core the apples; slice each quarter crosswise into pieces ¼ inch thick. Toss the apples, sugar, cinnamon, and salt in a large bowl to combine. Heat the butter in a large Dutch oven (or pot) over high heat until foaming subsides; add the apples and toss to coat. Reduce the hat to medium-high and cook, covered, stirring occasionally, until the Granny Smith apple slices are tender and the McIntosh apple slices are softened and beginning to break down, about 10 minutes.
- Set a large colander over a large bowl; transfer the cooked apples to the colander. Shake the colander and toss the apples to drain off as much juice as possible. Bring the drained juice and the cream to a boil in the now-empty Dutch oven over high heat; cook, stirring occasionally, until thickened and a wooden spoon leaves a trail in the mixture, about 5 minutes. Transfer the apples to the prebaked pie shell; pour the reduced juice mixture over and smooth with a rubber spatula.
- Make the Streusel Topping: Combine the flour and sugars in a medium bowl; drizzle with the melted butter and toss with a fork until evenly moistened and the mixture forms many large chunks with pea-sized pieces mixed throughout. Sprinkle the streusel evenly over the pie filling.
- Bake the Pie: Set the pie plate on a baking sheet and bake until the streusel topping is deep golden brown, 10 to 20 minutes. Cool on a wire rack to room temperature and serve.
Notes
- Crust: Use the included crust or my all-butter pie crust.
- Make Crust by Hand: If you do not have a food processor, use this method to make the pie dough: In a large bowl, whisk together the flour, sugar and salt. Scatter the shortening and butter over the dry ingredients and, using a pastry blender or your fingers, work the fat into the flour mixture until it looks like coarse sand. Then sprinkle the water over the mixture and use a fork to incorporate until it is evenly moistened and the dough will hold together when pinched between your fingers.
- Equipment: Pie plate / Food processor / Peeler / Colander
- Apples: A mix of sweet and tart apples is recommended, but any combination of apples will work!
- Serving Suggestions: Top the pie with Cinnamon Ice Cream, homemade whipped cream, or a drizzle of salted caramel sauce!
- Make-Ahead: The pie crust dough can be refrigerated for up to 4 days or frozen for up to 3 months. The par-baked pie crust can be cooled, wrapped in plastic, and refrigerated for 1 day or frozen for up to 3 months. The baked pie can be cooled completely, then refrigerated for 1 day prior to serving.
- Storage: You can store leftovers, covered, in the refrigerator for up to 3 days.
- Freezing Instructions: You can freeze the unbaked pie by wrapping it in plastic wrap, then in foil, and placing it in a freezer bag.
- Recipe adapted from Cook’s Illustrated.
Did you make this recipe?
Leave a review below, then snap a picture and tag @thebrowneyedbaker on Instagram so I can see it!
[Photography by Dee of One Sarcastic Baker]


Even though this recipe is 5 years old, I’m making it for the 4th time this weekend for a pot luck, and I figured you’d like to hear that it is my go-to show stopper apple pie recipe. It’s the best apple pie I’ve ever had, and there are never any leftovers.
I have bumped up the cinnamon and used brown sugar before, but it is also wonderful as written.
Thanks for the first and only apple pie recipe I’ve used!
I just made this pie. There are more steps than I’m used to for an Apple pie. I followed it exactly and I will never make any other! It was worth the extra time. The best I ever ate. I was too good to put ice cream on the first slice but I did put dulce de leche on my next one later! Thanks for all your wonderful apple recipes. I can’t go wrong when I make one of yours!
This pie has become a Thanksgiving family tradition. So delicious and perfect! What is the name of the Italian grocery outside of Pittsburgh with the 2nd best Dutch apple Pie?
Hi Cheryl, Labriola’s – they have a few different locations – Aspinwall, Wexford, Penn Hills and Monroeville.
Wanting to make mini pies, tiny tins. How do I need to alter the cooking times? Thanks
Hi Sarah, Unfortunately, I have no idea, I’ve never tried to make mini pies out of this recipe. You will of course need to reduce the baking time, but I couldn’t say by how much.
Mini Pies Tips- Instead of rolling the dough; press with fingers into small pie foil tins. Bake Pies with empty pie tin pressed into the top to hold its form for 10 minutes. I did notice that to fill all the mini pies ( recipe makes about 12-14) you need extra filling sauce and less apples. I took extra cooked apples and added an extra half cup of cream and used an immersion blender to puree it as I cooked it down. Once the extra tins are removed and apples, sauce and topping are on bake for 15 minutes, rotate and bake for 15 more minutes.
Hi Michelle,
Thank you so much for this recipe. I’m planning on making it next week. Quick question: can I use the recipe for your Perfect Pie Crust which contains only butter and no shortening? If so, will any of the time requirements change?
Happy holidays!
Hi Nicole, Yes, you can substitute any pie crust you would like. No changes are necessary for the rest of the pie. Enjoy!
Hello Michelle,
could you tell me when I have to add the heavy cream? I have read the directions and I don´t find any mention to the heavy cream.
Thank you very much
Hi Monica, It is in step #5.
Sorry. I´ve missed it.
hi
i love this recipe. we are hosting christmas and i would like to plan ahead and make the desserts a week ahead. have you tried freezing a week before? any suggestions?
thanks
Hi Marina, I have not tried freezing this. I think you could set the assembled pie on a baking sheet in the freezer until completely frozen (maybe 1-2 hours). Remove and wrap well in plastic wrap and foil, then when ready to bake, remove them. You may need to add some extra minutes to the bake time.
I made this for Thanksgiving and it was a hit! I will definetely make this again, delicious!
Hi. Just wanted to say that I made this pie yesterday for thanksgiving and everyone loved it. I made it exactly like you said. Your site will always be my go to recipe site. Thanks for all you do.
A perfect pie. Very easy with little time commitment… Definitely a recipe to keep – bookmark on iPad.
This is the best apple pie I have ever eaten! It was definitely time consuming and my crust shrank a bit (anyone know why that might have been?) – but totally worth it. I can’t recommend it enough. Another winning recipe Michelle!
Hello, I have another issue with your ingredients, all are in cups and tbsp, and in europe we are use to grams at least where I live. What is the ratio? because in google some says: 1 cup : 130 grams, other 128, 200, I get so confused. Thanks so much.
It depends on what you’re measuring, as volume measurements can vary depending on the ingredient. Please see the conversions page for additional resources: https://www.browneyedbaker.com/conversions/
Hello, if I dont have what you called vegetable shortening, what could I use?
You can substitute butter.
I made this tonight and it was FANTASTIC!! I used Pillsbury Ready-Made Pie Crust to cut down on time and I used 10 medium sized Honeycrisp apples (got a ton of them from a friend and needed to use them up). Very simple recipe (using a ready-made crust), and very delicious! Will definitely be keeping this one!
I made 3 of these at once. Toooooo much work but well worth it. Next time I would only make one at a time.
Fabulous!! Thanks for the recipe!!
Hi Michelle! I am planning on making this recipe for christmas…the problem is that we have to travel 5 hours away a few days before chrisy for the festivities! I know that I can premake the dough and store for up to 2 days, but is it possible to fully bake the base and transport that ready to fill? Also, how long will the pie last for once its fully preapred? Not that i anticipate any leftovers! Sorry if these questions have already been answered by yourself during previous comments…
Hi Pru, I don’t see why you couldn’t pre-bake the crust, but you might want to warm it up first before you fill it. Once the pie is assembled, it needs to be baked immediately, but leftovers should last a good 2 to 3 days.
Oh wow! Just made this for Thanksgiving. It was worth the extra time. Amazing recipe!
Making this and your pumpkin cheesecake recipe for tomorrow! Can’t wait! so far they both smell delicious! So excited to try them both :)
i’m making this pie for thanksgiving… can i premake it and refridgerate it until thursday then reheat?
Hi Aubrey, I’m not sure how far ahead you plan to make it, but you could definitely make it on Wednesday and then just leave it at room temperature until you serve it Thursday; no need to refrigerate and re-heat.
Awesome recipe! I made it last month but could find mcintosh apples. I don’t remember what I had substituted it for but worked. I am going apple picking this weekend and am planning on making it again. Thank you!
After the pumpkin granola bar disaster this recipe restored all my faith in you, and more :) It’s probably the most time-consuming apple pie recipe I ever used, but it was worth every minute. It was everything I ever wanted from an apple pie: a thin, crunchy crust (but a firm one that doesn’t fall apart during cutting!), a plethora of apples and the crumbs… oh boy, the crumbs. My family, who have already eaten quite a number of my pies couldn’t stop praising it. At first I was a bit afraid that a 23 cm tin wouldn’t hold 2 kilograms of apples, but cooking them in butter compressed them nicely. I increased the amount of cinnamon to a heaping teaspoon (come on – two kilograms of fruit! Them apples need their spices), and it still wasn’t nowhere near too much. I liked that the recipe calls for two different types of apples – it makes for a more interesting texture. All in all, it was an absolutely wonderful recipe, one that’ll definitely bear repeating.
Looking for a killer Dutch Apple Pie recipe for Labor Day. Bookmarking! :)
What does chilling and freezing the pie crust do? I just made this, but, as you said, it took forever. So, I was wondering what would happen if I skipped those steps next time.
Hi Laura, Chilling and freezing the crust allows the butter to become ice cold, which is what creates the flaky and tender texture when it’s baked. If the butter is warm or room temperature when it goes into the oven, there is no steam created and you could end up with a tough dough in the end.
Can i make this without the pie crust? Would the cream moxture set enough to be able to cut or scoop it out? Im just not a fan of pies but love everything else about this dish :)
Hi Lisa, Hmm, I suppose you could try it, but I don’t know how it would turn out! It sounds like you might want to look for a Dutch apple crumble or crisp recipe, if you you are opposed to using a bottom pie crust.
I don’t have a 9 inch deep dish pie plate and I think those are too much apples for the pie plate I have here. Do you think it’s okay if I half the recipe? for a 9 inch pie plate that isn’t deep dish?
Hi Kath, I would not cut it in half, I think you would be left with a pretty slight pie. I would make the whole recipe, but just pile on as much of the apple filling as you can fit. It should be a bit of a higher pie.
I thought so too kath! I just took the pie out the oven and it is a high pie! The good thing is you can always be creative and make it fit to your liking! Next time I’ll use hemp butter!
I made this pie for an in- law gathering and everyone couldn’t stop saying how good it was! Thanks for the recipe! …and some “points” with the in-laws for a fantastic dessert!
I’d love to know the name of that Italian bakery. Do they use fresh cram? ;)
Hi Mira, the name of the bakery is Labriola’s.
Made this for Thanksgiving this year, and it was a huge hit. Thank you so much for this fabulous recipe!
Thanksgiving is such a crazy time and I’d love to prepare some items ahead of time. One of the items I am making is apple pie and I was wondering if the apples would spoil if I made the pie 2 nights ahead of time. If I make my pie ahead of time, should I go ahead and bake the pie 2 days ahead and then just warm it up the day we are serving? Or, should I make the pie and then freeze it, and bake it the day we are serving. Or really should I just nix the idea of making the apple pie in advance and just make the pie the day of Thanksgiving? :) Thanks in advance for the advice!
I haven’t tried assembling this ahead of time, but I feel like the topping could get soggy. If you google freezing pies you might find some suggestions, but I’ve never done it so I couldn’t say for sure what the results would be.
Ehow recommends freezing without the topping then adding it before you bake it.
Bake the crust and fill with the apples, then freeze. When you’re ready to bake, let thaw for a couple hours, then top with the streusel, then bake. Depending on how cold the pie is, you might have to bake it a little longer. Or make the pie a couple of days ahead and refrigerate, then top and bake on Thanksgiving. It will keep fine in the fridge for a few days.
Made this on a chilly day. It came out amazing!!! It was my first go at a homemade pie crust but not to shabby if you ask me. Only going to get better. Looking at more of your recipes that have homemade pie crust – can’t wait to try the pumpkin pie. Also you are 100% correct – it may take extra prep time (the crust) but it’s all worth it!!!