Chili Con Carne
This version of chili con carne is made with chunks of beef, a homemade chili paste, and a couple secret ingredients. A great change of pace from my traditional beef chili recipe made with ground beef!
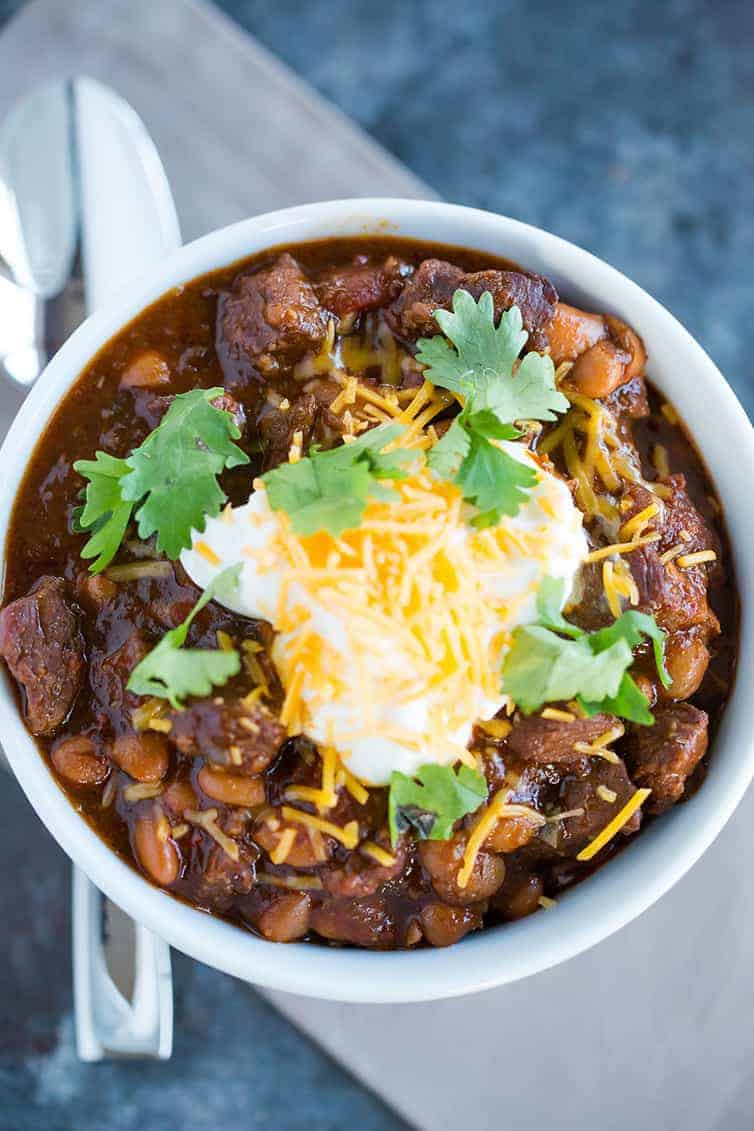
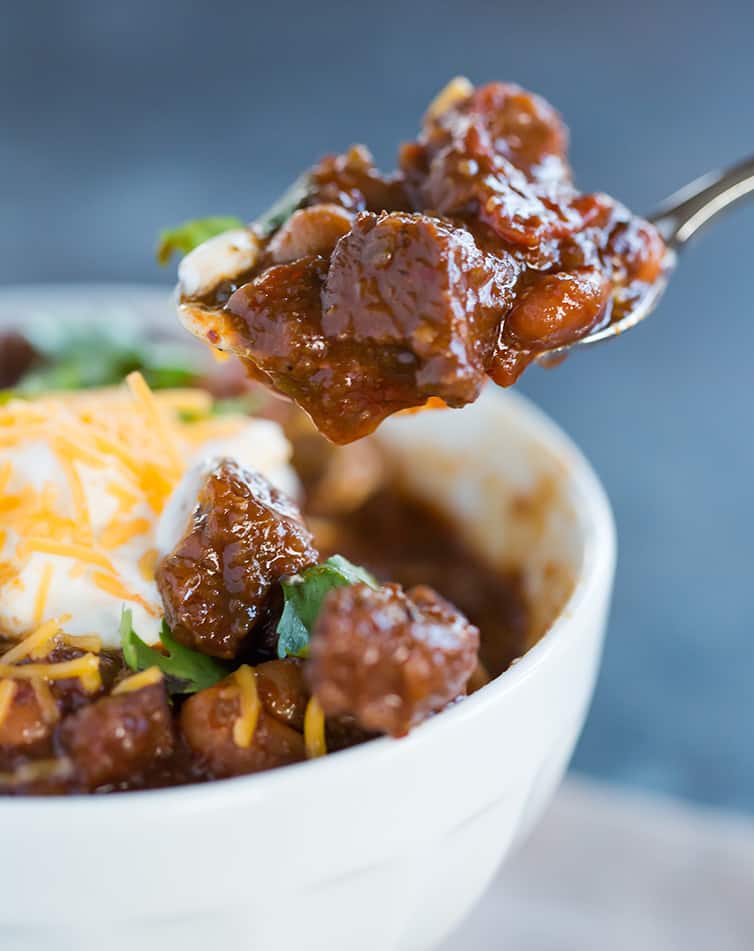
Behold the absolute, without question, best bowl of chili I have ever had.
I first came across this recipe seven or eight years ago in Cook’s Illustrated and although it seemed like a lot of work (it IS labor-intensive), it produced one of the most amazing chilis I had ever eaten. In fact, I think I ended up making it at least three times over the course of a month because my husband and I loved it so much.
This is certainly not your average chili… it includes a few “secret” ingredients like cocoa powder, molasses and beer. It uses dried chiles ground down to make a chili powder and paste instead of the typical chili powder. And it used chunks of beef instead of ground meat. At the time, this was all very unfamiliar ground to my chili palate, but it all sounded so irresistible.
I’m so glad I tried it all those years ago because it really is the most flavorful chili I’ve ever eaten. It’s bursting with flavor, and the meat becomes so tender that it melts in your mouth.
What Is the Definition of Chili Con Carne?
You will likely find as many definitions for chili con carne as there are people living in Texas. If you look at the Wikipedia page for chili con carne, it sums it up as a spicy stew containing chili peppers and meat, and sometimes tomatoes and beans. If you do a little more digging, you’ll find that people have very strong feelings about their chili con carne, with some proclaiming that it must always include tomatoes and/or beans, and some proclaiming that it cannot include either to be authentic.
Then there’s the question of ground beef versus a cut of beef… since the technical definition is a “stew” I always err on the side of using a cut of beef cut into chunks, and I LOVE it this way!
So, How Do You Make Chili Con Carne?
It probably won’t come as a surprise that there are literally thousands, maybe millions, of variations and recipes that you can find out there… ground beef, chuck roast, tomatoes, no tomatoes, beans, no beans, etc.
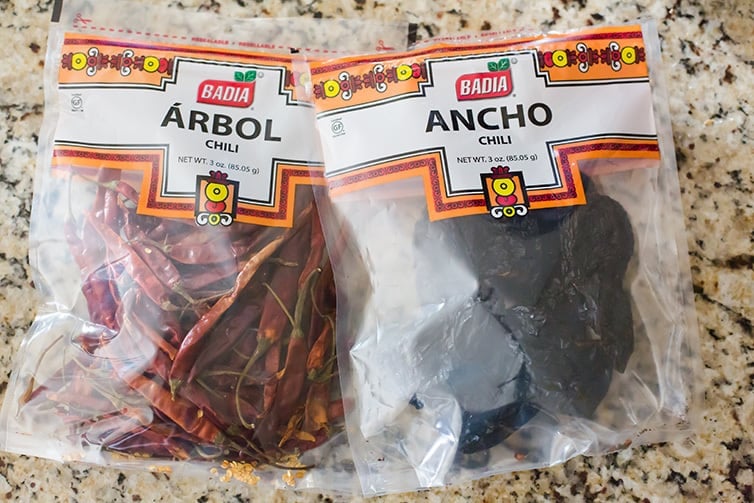
THIS recipe starts by soaking dried pinto beans, and although I think they certainly hold up better than canned, in a pinch you could certainly substitute canned beans. Next is a homemade chili paste using the dried chiles and additional seasonings (including cocoa powder!), pureed together with some chicken broth.
The first time that I made this recipe was my first time ever working with dried chiles, and I wasn’t sure if I would even be able to find them, but was pleasantly surprised when I found them at my regular supermarket. They were located in the international aisle, under the Hispanic foods.
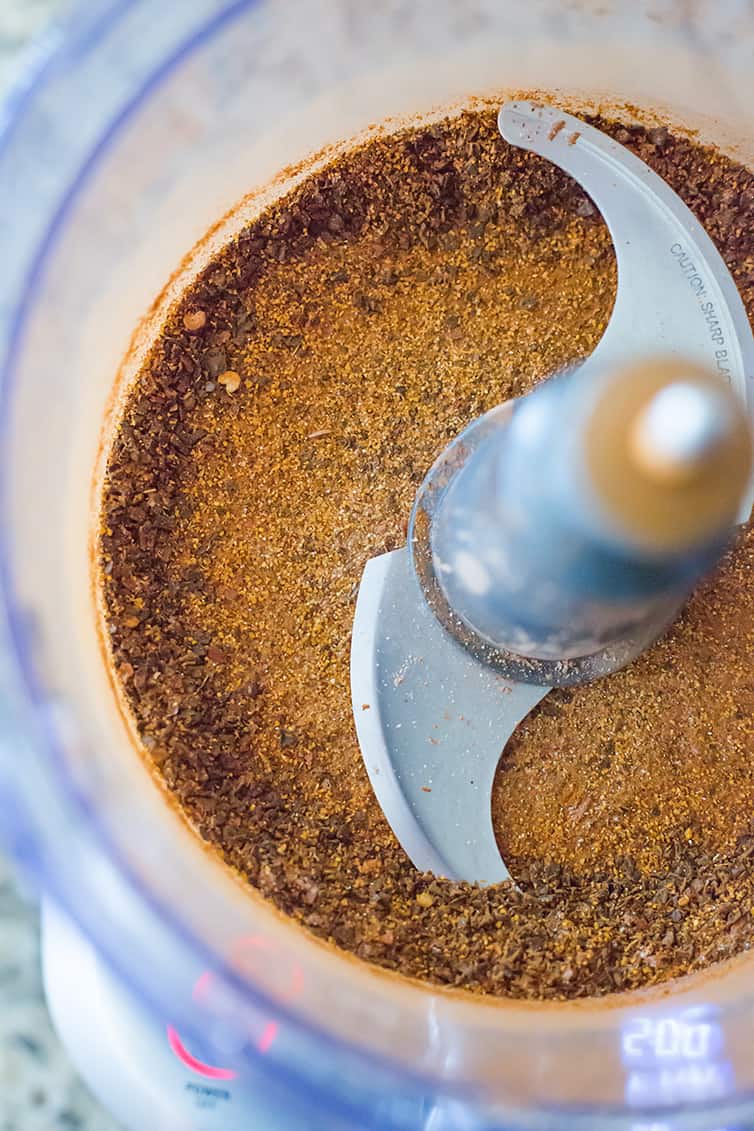
Using the dried chiles to make a homemade chili powder and paste is one of the things that really sets this recipe apart from many of the other chili recipes I have ever tried.
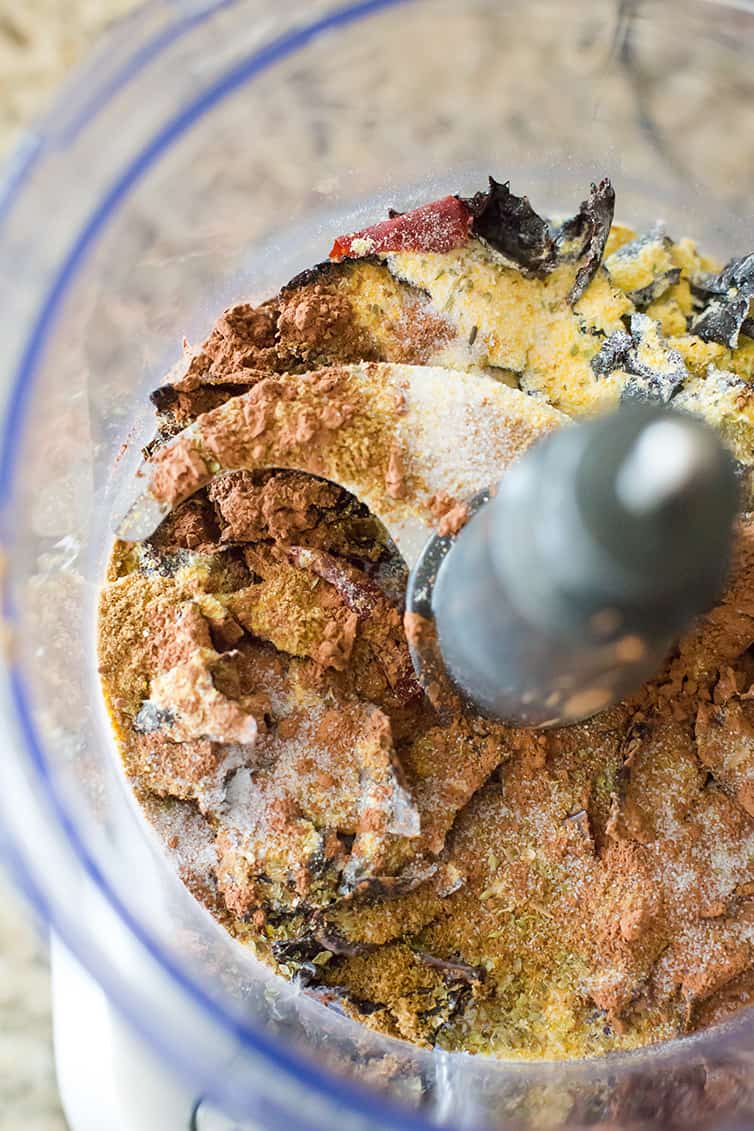
After toasting the ancho chiles, you toss them into a food processor with the arbol chiles, salt, cornmeal, oregano, cocoa powder, and cumin… voila! Chili powder!
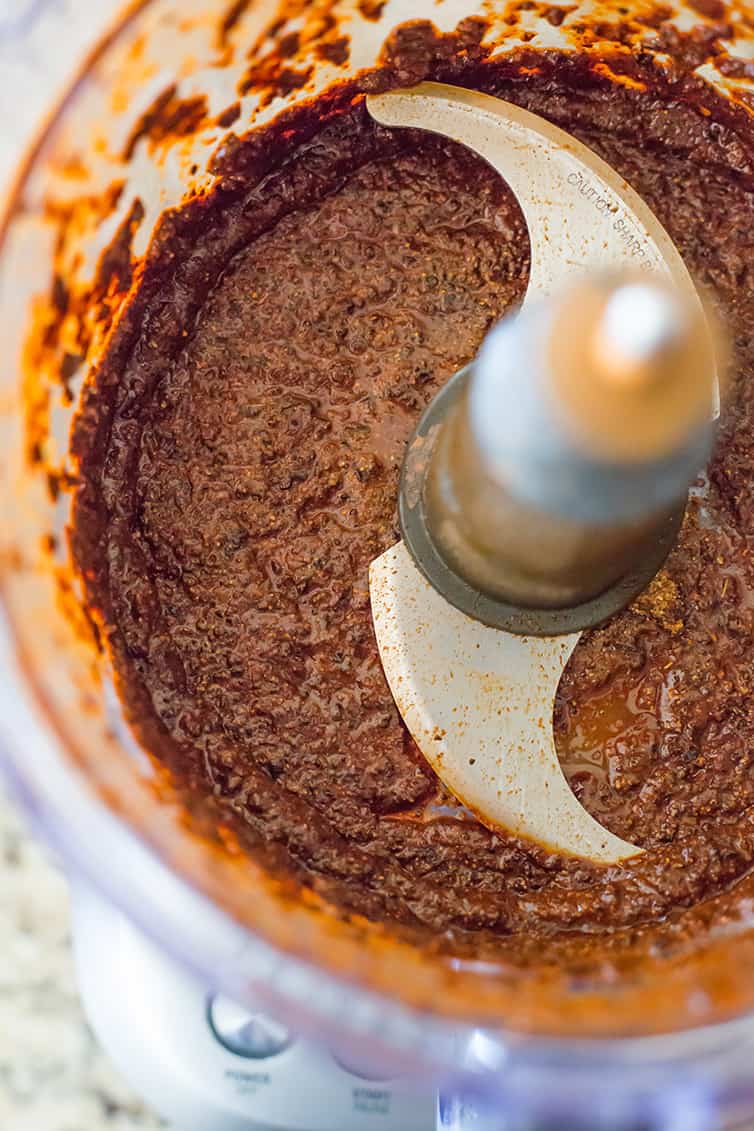
Then you slowly drizzle in a little chicken broth, and… voila! Chili paste!
Save This Recipe
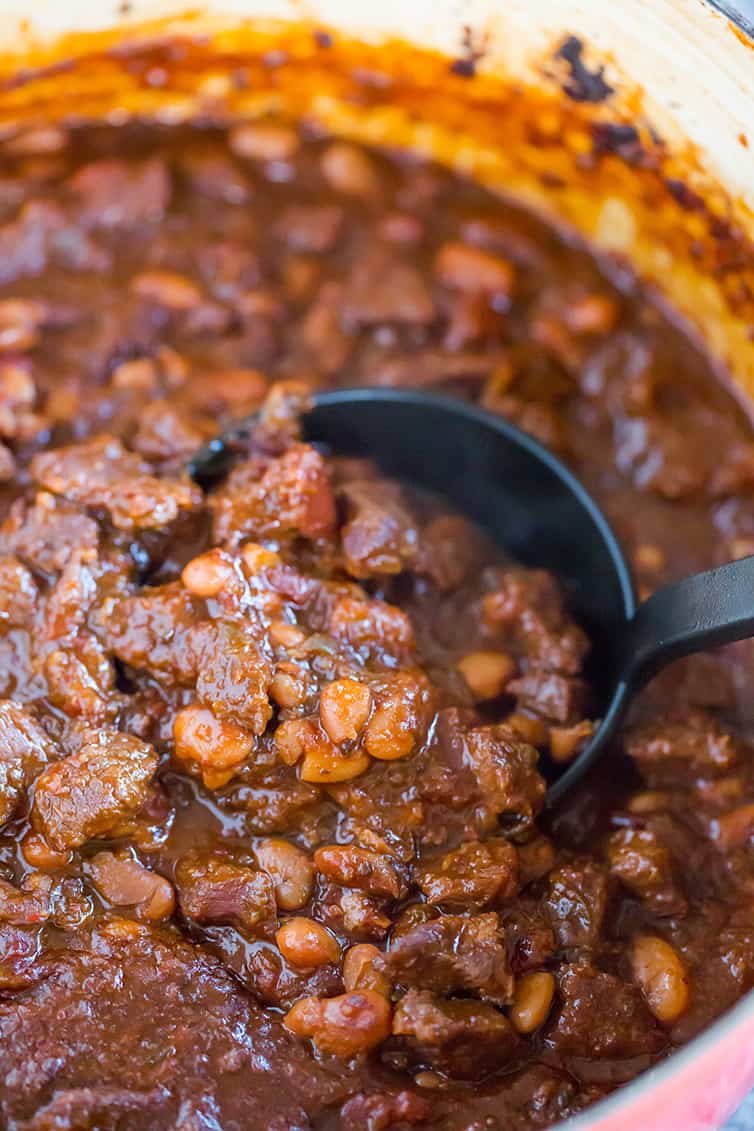
The rest of the recipe is pretty straightforward – the chunks of meat are seared and added to the chili paste, beans, onions and jalapeños, along with additional chicken broth, beer and diced tomatoes. It is cooked in the oven for a couple of hours, and then you’re ready to dig in!
I realize that this recipe is a far cry from the supremely easy classic beef chili that is my personal chili go-to because it’s so simple, so I have a bunch of notes that may help you out…
Tips for Making Chili Con Carne
- If you are in a pinch for time, you can substitute two cans of pinto beans, drained and rinsed.
- The recipe calls for blade steak, but I always use chuck roast when I make this; for me, it’s always the winner when making stew-like dishes because it holds up so well to long cooking times.
- You can also substitute regular chili powder and ground cayenne pepper in place of the dried chilies (quantities in the recipe notes below), but the consistency and texture of the chili will be slightly different.
- While the recipe calls for cooking this in the oven, you can do a low simmer on the stove until the beef is totally tender, at least 2 hours.
- I have not attempted to adapt this to a slow cooker, but if you want to go that route, assemble it as you would according to the recipe and instead of placing it in the oven, stir everything together in the slow cooker. Low for 6 to 8 hours should work, although you may want to crank it up to high and take the lid off to let it thicken a bit at the end.
- You can make this chili up to 3 days in advance of serving it (many chili con carne connoisseurs swear by cooking the chili and then letting it sit in the refrigerator overnight so that the flavors can intensify). Re-warm on the stovetop over low heat before serving. If the chili appears to thick, you can thin it out to the desired consistency with some additional chicken broth.
- The recipe calls for using 2 to 4 arbol chiles; I used two and I think it gave the chili a medium level of heat. If you’re sensitive to spicy foods, you may opt with one, and if you like things really, REALLY spicy, then you can up the amount!
What To Serve with Chili Con Carne
Garnishments and side dish possibilities are truly limitless, but when I make this, these are the toppings I put out for people to choose from:
- Shredded cheddar cheese
- Sour cream
- Diced red onion
- Diced avocado
- Cilantro
- Lime wedges
- And of course, cornbread on the side!

This certainly is not a fast, whip-it-up-when-I-get-home-from-work type of chili. This is a hunker down on a rainy or snowy Saturday and make this for a cozy night in. It’s time-consuming, but if you can make the time for it, it’s absolutely worth every minute. Plus, you could make a big pot over the weekend and then freeze it in portions for a rainy day, so to speak.
Although I don’t make this chili recipe as I do others, it’s by far one of my two favorites and has an unbelievable amount of texture and flavor in every bite. These cold winter days are a perfect opportunity to give it a try!
Crazy For Chili? More Favorite Chili Recipes:

Chili Con Carne
Ingredients
- Table salt
- ½ pound (226.8 g) dried pinto beans, about 1 cup, rinsed and picked over
- 6 dried ancho chiles, about 1¾ ounces, stems and seeds removed, and flesh torn into 1-inch pieces
- 2-4 (2) dried árbol chiles, stems removed, pods split, seeds removed
- 3 tablespoons cornmeal
- 2 teaspoons dried oregano
- 2 teaspoons ground cumin
- 2 teaspoons cocoa powder
- 2½ cups (587.5 ml) chicken broth, divided
- 2 medium onions, cut into ¾-inch pieces (about 2 cups)
- 3 jalapeño peppers, stems and seeds removed, cut into ½-inch pieces
- 3 tablespoons vegetable oil, divided
- 4 garlic cloves, minced
- 14.5 ounce (411.07 g) can diced tomatoes
- 2 teaspoons light molasses
- 3½ pounds (1.59 kg) blade steak, trimmed of gristle and cut into ½-inch pieces
- 12 ounce (340.2 ml) bottle mild lager, such as Budweiser
Instructions
- Combine 3 tablespoons salt, 4 quarts (16 cups) water, and beans in a large Dutch oven and bring to a boil over high heat. Remove the pot from heat, cover, and let stand 1 hour. Drain and rinse beans well. Rinse out Dutch oven.
- Adjust oven rack to lower-middle position and heat oven to 300 degrees. Place ancho chiles in a 12-inch skillet set over medium-high heat; toast, stirring frequently, until flesh is fragrant, 4 to 6 minutes, reducing heat if chiles begin to smoke. Transfer to bowl of a food processor and cool. Do not wash out skillet.
- Add árbol chiles, cornmeal, oregano, cumin, cocoa, and ½ teaspoon salt to food processor with toasted ancho chiles; process until finely ground, about 2 minutes. With the processor running, very slowly add ½ cup broth until a smooth paste forms, about 45 seconds, scraping down the sides of the bowl as necessary. Transfer the paste to a small bowl. Place the onions in the now-empty processor bowl and pulse until roughly chopped, about four 1-second pulses. Add the jalapeños and pulse until the consistency of chunky salsa, about four 1-second pulses, scraping down the bowl as necessary.
- Heat 1 tablespoon of vegetable oil in the large Dutch oven over medium-high heat. Add the onion mixture and cook, stirring occasionally, until the moisture has evaporated and the vegetables are softened, 7 to 9 minutes. Add the garlic and cook until fragrant, about 1 minute. Add the chili paste, tomatoes, and molasses; stir until chili paste is thoroughly combined. Add the remaining 2 cups chicken broth and the drained beans; bring to a boil, then reduce heat to a simmer.
- Meanwhile, heat 1 tablespoon of the vegetable oil in the 12-inch skillet over medium-high heat until shimmering. Pat the beef dry with paper towels and sprinkle with 1 teaspoon salt. Add half of the beef to the skillet and cook until browned on all sides, about 10 minutes. Using a slotted spoon, transfer the meat to the Dutch oven. Pour off any liquid in the skillet into the sink and return to the heat. Add ½ of the bottle of lager to the skillet, scraping the bottom of the pan to loosen any browned bits, and bring to a simmer. Transfer the lager to the Dutch oven. Repeat with the remaining tablespoon of oil, steak, and lager. Once the last addition of lager has been added to the Dutch oven, stir to combine and return the mixture to a simmer.
- Cover the pot and transfer to the oven. Cook until the meat and beans are fully tender, 1½ to 2 hours. Let the chili stand, uncovered, 10 minutes. Stir well and season to taste with salt.
Notes
- You can substitute a 4-pound chuck-eye roast, well trimmed of fat, for the steak.
- I recommend wearing gloves when working with the dried chiles; if you don’t be sure to wash your hands well immediately after.
- If you don’t want to use dried chiles, the anchos and árbols can be replaced with ½ cup chili powder and ¼ to ½ teaspoon cayenne pepper, although the texture of the chili will be slightly compromised.
- Condiment ideas: diced avocado, chopped red onion, chopped cilantro, lime wedges, sour cream, and shredded cheese.
- You can make this up to 3 days in advance; refrigerate covered and re-warm over low heat, adding chicken broth to loosen the mixture if necessary.
Did you make this recipe?
Leave a review below, then snap a picture and tag @thebrowneyedbaker on Instagram so I can see it!
This recipe was originally published on October 27, 2011.


Hi Michelle – do you have any thoughts about the change in flavor profile if I use Guiness Draught instead of Bud? I love the Guiness Beef Stew recipe, have Guiness on hand and was thinking about subbing it.
Hi Marla, I think it would be just fine. I used Labatt this last time because that’s what we had in the fridge.
10 years ago I had a birthday party for my one year old puppy. We invited all of the dog cousins in our family (NINE dogs total) and I decided to have a chili bar for the humans. I made a Texas red chili (and a white chicken chili and veggie chili) that was very similar to this, except it did not have beans. It was a huge hit with everyone. But I had purchased the premade sauce from Williams-Sonoma. I’m so excited to try this because we haven’t had it since that day. I don’t think I’ll make the family eat out of dog bowls again though. Haha
That sounds like so much fun!! I’ll be anxious to hear how you think this one compares! I’ve never tried any of those Williams Sonoma starters or sauces; I should grab a couple for an easy meal!
Hey Michelle…! this is one of favorite recipe till now, these dish its really amazing & incredible, i love your recipe and beautifully photography. I will make this chili con carne. Thanks for sharing and keep shared new ideas….!
Looks so good and perfect on cold winter days!
I won second place at my society’s annual chili cook-off with this recipe! It really is great chili.
That’s awesome Melody! Congratulations, and so glad you love the chili!
Instead of placing in the oven, can you leave on the stove top? I’d like to cook this outside while tailgating.
I think that SHOULD work, although I’ve never done it myself.
This sounds so delicious!! I plan to make this recipe for a chili cook-off on Saturday. Will the chili keep if I make it on a Thursday night? Or is it better to serve immediately?
Hi Gabrielle, It will still be good to serve two days later. As many things, its optimal texture is achieved when it’s freshly made.
Hi Michelle, thanks for the tip! I made the chili the morning of the cook off and I won! Your recipes are always showstoppers, so I should’ve known! I had to make two slight adjustments to the recipe, though, but it was absolutely delicious! I couldn’t find Arbol chilis so I used ancho chili powder in addition to the paste mixture and a used liiiittle bit of Portuguese hot sauce for some heat. I also added too much broth (yikes!) so I mixed in some puréed black beans to make it a bit more thick — worked like a charm and didn’t affect the flavor.
So,I made this for a party yesterday – 30+ people.
I did a test run last week, and made the chili exactly as written and wasn’t thrilled with it. I mean, it was good, but it wasn’t me. I worried. And worried. And said “screw it, husband likes it, I’ll run with it”.
So I cooked. And cooked. And cooked. And served. And forgot the tomatoes. And freaked out. And said “screw it, what’s the worst that can happen?”
And it was glorious. :o)
Thanks, Michelle.
Okay, I just have to ask. What is milk lager? I do not drink beer and don’t know much about it. I have heard of Budweiser of course, but never milk lager as noted in your recipe. Just wondering. Is it supposed to be mild lager?
That should be mild lager ;-) I edited!
I am making this for a chili cookoff this weekend and I need to make 15 gallons… any clue how many gallons one batch of this makes so I can approximate how many batches I need to make?
Hi Robin, Unfortunately, I have no idea how many gallons this makes.
For the chile powder/paste, try adding 3 to 4 cascabel peppers. Also the addition of some smoked paprika.
This is my favorite chili recipe when I have time to make it. The boyfriend LOVES it. At least once a month I hear him say, “We should make the chili.” THE chili. There is no other.
A note: be really careful not to burn your peppers when toasting them on the stove. The resulting chili is still good, but it had a bitter aftertaste that I didn’t care for.
I don’t think I ever commented on this when I made it the first time, but for those wondering: this is basically the best chili in the universe. The end.
I made this last night and it was very good! I found it to be rather costly as far as chili goes. That and the time I put into all the prep , might deter me from doing this often. My husband said it was worth it, so that speaks volumes! I am glad we have leftovers for tonight!
Can I brown meat first, then remove, and add meat back to pot later? Less
pots to clean!
If you want to do it that way, you can. Just be sure to clean the pot before proceeding with the recipe so you don’t get burned bits in your chili. I’m not sure that that saves you washing or not.
Made this last year and just rediscovered it today, planning to make it next weekend. I am SO excited, this is by far the best chili I’ve had, and probably in my top 3 favorite recipes. SO tasty! :)
Can I soak the beans 24 hours prior to making the dish? I want to make this for the SF vs. Atlanta game on Sunday and am looking for some shortcuts. Thank you!
Hi Natalie, Yes, I don’t see why not!
Looks so yummy! Definately gonna try it some day, never had real American chili :)
One question though – can I use something else than a Dutch oven? Would a cast iron pot do as well? I never heard about a Dutch oven before :)
Thank you in advance!
Hi Kristine, Yes you could use another large, heavy-duty pot in place of the Dutch oven.
I made this for a friendly chili cook-off and it tied for first place! I made it exactly as the recipe reads, except I didn’t have any Bud-type lager on hand and used Goose Island’s Mild Winter, which is pretty dark. It was still great! A bit labor-intensive, sure, but worth it! I too used 2 arbol chilis and it had a pleasant amount of heat. I might try 3 next time just to see how it goes. And yes, wear gloves! I didn’t and had some feels-like-burning-under-the-fingernails fun afterwards!
Wow, this was hardcore! I totally tried to follow it, but got lazy (par for the course with me!) with the slow cooker and couldn’t find the right chiles so I improvised. Of course, I shared my improvisation with my 2 faithful readers and linked back to you because I couldn’t forget my muse for this chili!! Thanks for the awesome recipe!
When I look at this recipe I see ALL the chili peppers – ancho, jalpeno, àrbol and it seems like it would be REALLY spicey. You said you only used two àrbol but what about the others? I have a wide range of people eating chili and it needs to be pretty mild.
Hi Lea, I would say that it’s moderately spicy. It definitely has kick, but doesn’t make your nose run and eyes water ;-) If you mild chili then I would probably eliminate the arbol chiles all together.
I don’t know how I missed that note! Thanks.
I’ve been making a version of the smoky chili from Sugarlaws blog for a while now and this looks like it will fit the bill for a great non-smoky chili. As far as I’m concerned, chili NEEDS chocolate, beer and cumin, and of course quality chili.
The thing is, I have a HUGE bag of ancho chili powder from Pendery’s and while I definitely plan on making this with actual chili peppers someday, I’m wondering if the Pendery’s would work for now in place of the ancho chili peppers or if I’d be losing a lot in the flavor.
Thanks–and your recipes are fabulous! You’ve made a lot of people around me happy, I can tell you.
Hi Kathleen, You can definitely make that substitution. Check out note #3 in the recipe for how to substitute chili powder for the dried chiles. Enjoy!
Hey Michelle, I just wanted to stop by and let you know I had to add this chili to my list of faves I do every week. I think most of my readers read you anyway but I just had to share. This is just so amazing.
I don’t have a dutch oven–could this be modified to simmer on the stove? trying this recipe this week!! :)
Hi Lea – You could use any oven-safe pot, it doesn’t have to be a Dutch oven. I haven’t done it on the stove, so I can’t really say how well it would turn out, or how differently, but you could certainly try. I would keep it on very low heat. Alternatively, you could put it in a (large) crock-pot for 4 hours on low.
This chili looks like it beats all other chili recipes! Wow. And perfect for upcoming winter. Thanks for sharing.
This chili does sound like a great bowl of deliciousness. I love a hearty chili (you really can’t go wrong) and have a small personal chili cook off coming up this week. I normally stick to the same recipe but this one tackles a few upgrades I can certainly see incorporating.
I have been keeping this recipe bookmarked too, but haven’t made it because of the time commitment involved. Good to know it’s worth it!
I made this for dinner tonight and it was delicious! My husband just couldn’t get enough :)
I am all over this! Like white on rice!