Pizza Crust Recipe
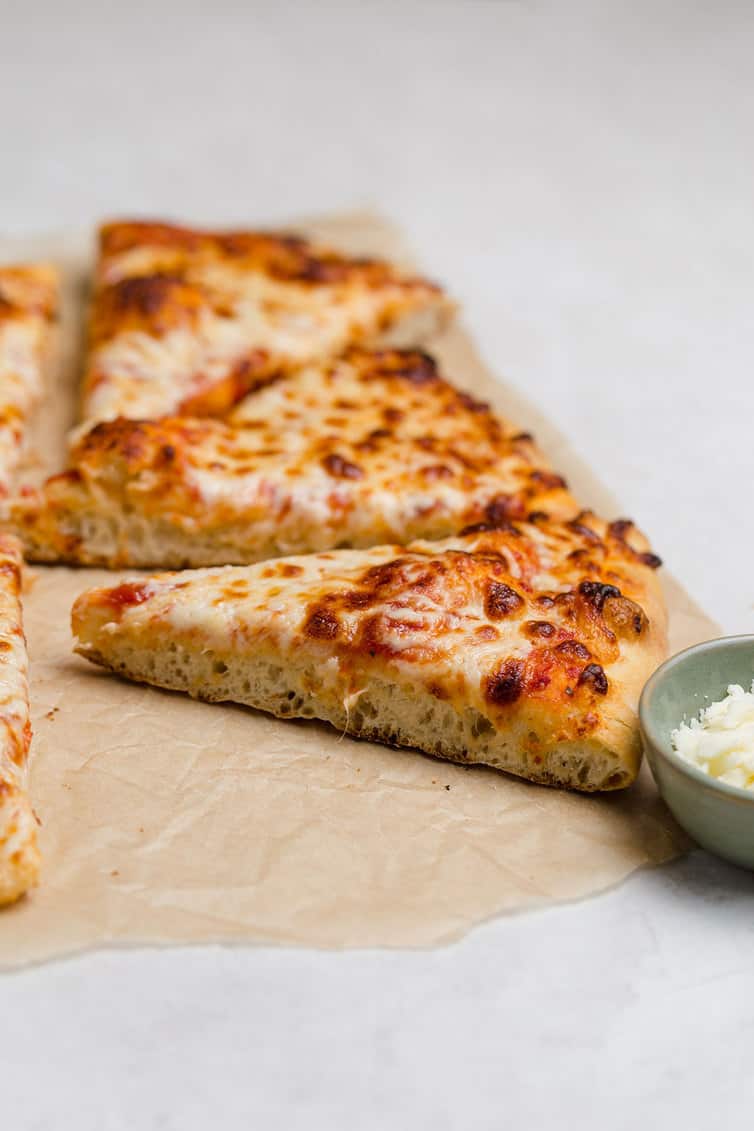
This pizza crust recipe creates delicious crust – crisp outside and chewy inside. Make this for pizza night instead of using store-bought!
I’ve made dozens upon dozens of pizza dough recipes and this is the one I come back to time and again. It’s our old standby for Friday pizza nights and never, ever disappoints.
It’s the perfect mix of a chewy, airy interior with a crisp crust.
I first made it nearly 15 years ago and I’ve simplified the process over the years, going from mixing it up in a food processor to using a good old bowl and spoon. If you’ve been on the hunt for an easy and absolutely perfect pizza dough recipe that isn’t too thick or too thin, you’ve found it!
How to make the pizza crust recipe
This easy pizza dough recipe makes enough for 3 medium or 2 large pizzas. The dough will need around 90 minutes to rise, so give yourself plenty of time!
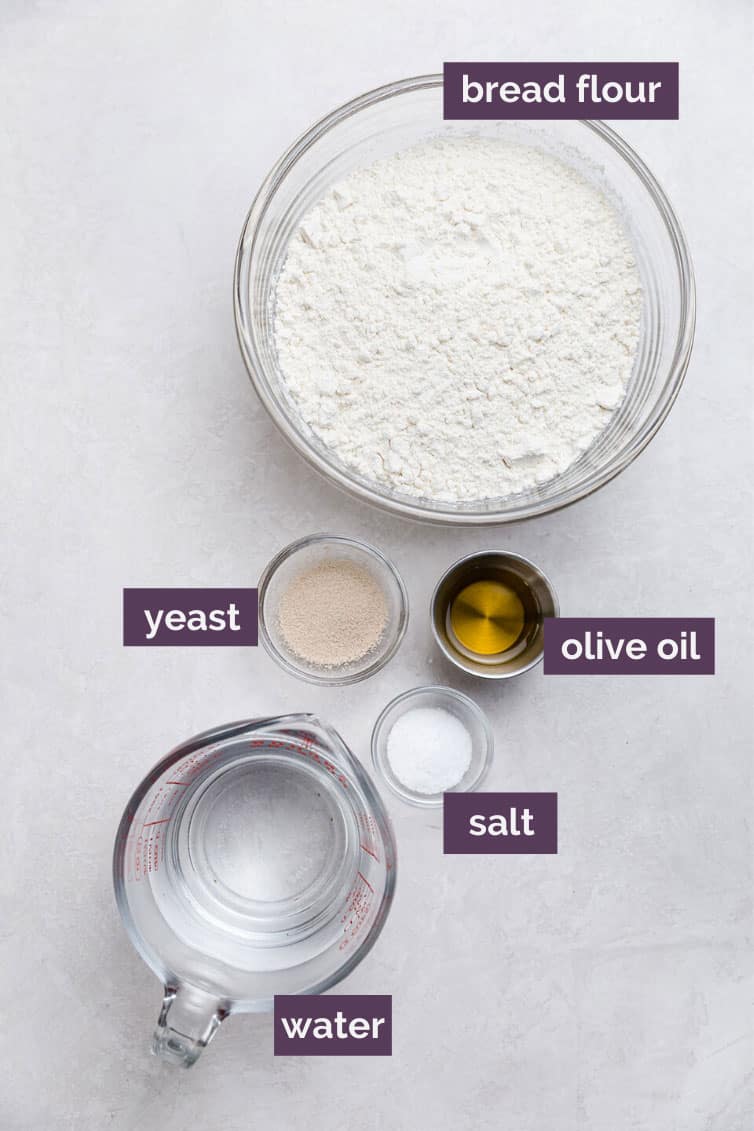
Ingredients
- Warm water – You'll need some for the yeast and some for the dough. It's important that the temperature is around 110 degrees F or the yeast won't fully activate. Using warm water, and so much of it, to make the dough creates a soft texture that's easier to form.
- Instant yeast – This recipe works best with instant yeast, but instructions on using dry active yeast can be found in the recipe notes below.
- Extra-virgin olive oil – Always use quality olive oil to get a good flavor in your dough.
- Bread flour – This is the secret ingredient! Using this instead of all-purpose flour is what creates that crispy exterior crust and chewy interior.
- Salt – Use salt with a fine texture so it dissolves easily into the dough.
- Semolina – This is used under the dough when baking to prevent it from sticking to the pizza peel. If you can’t find it, cornmeal works well, too!
Step by step instructions
Mix the Dough
Combine the instant yeast with some of the warm water to proof. Then stir in the oil and the remaining water.
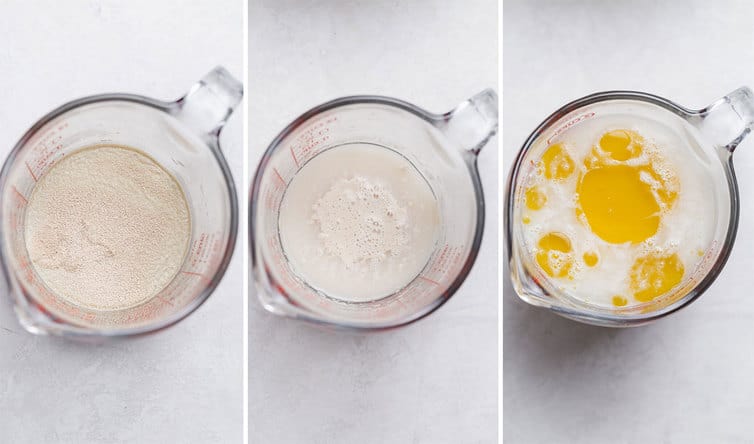
NOTE: Normally instant yeast is adding directly to the dry ingredients and proofs when everything is mixed together. Activating it separately like this allows you to only do one rise on the dough, instead of two.
Whisk together the dry ingredients, then slowly add the yeast mixture a little at a time.

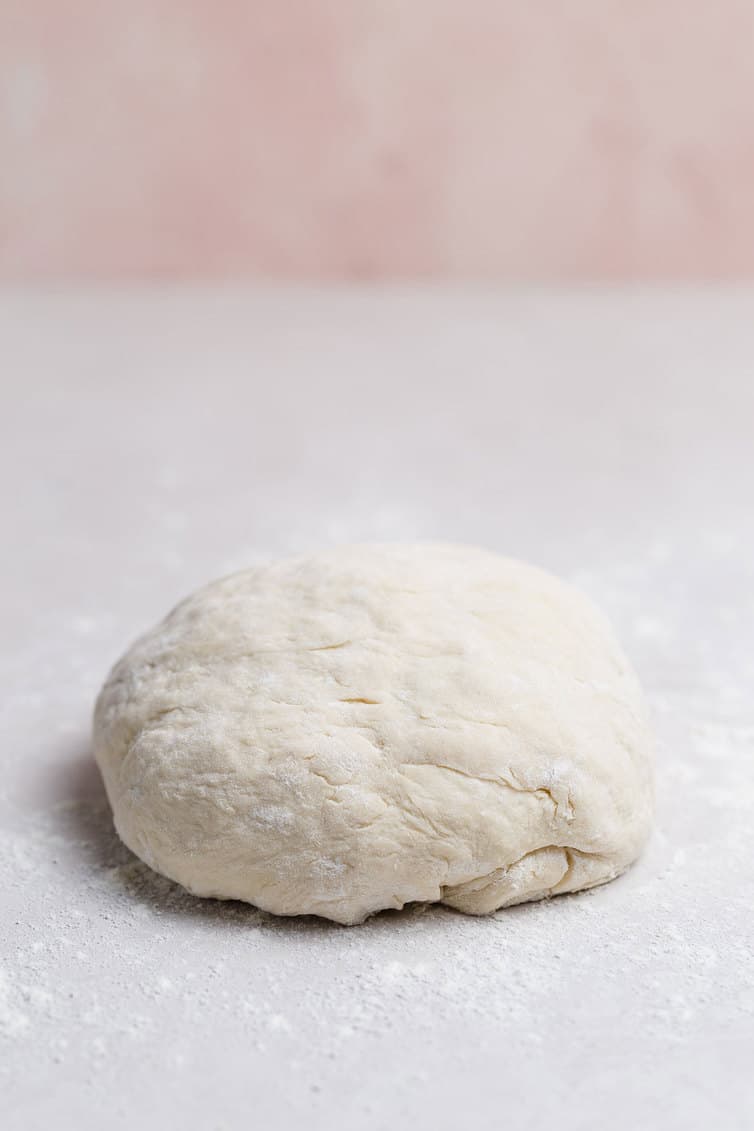
Knead the dough for a few minutes on a lightly floured surface, then transfer to a bowl and coat with oil.
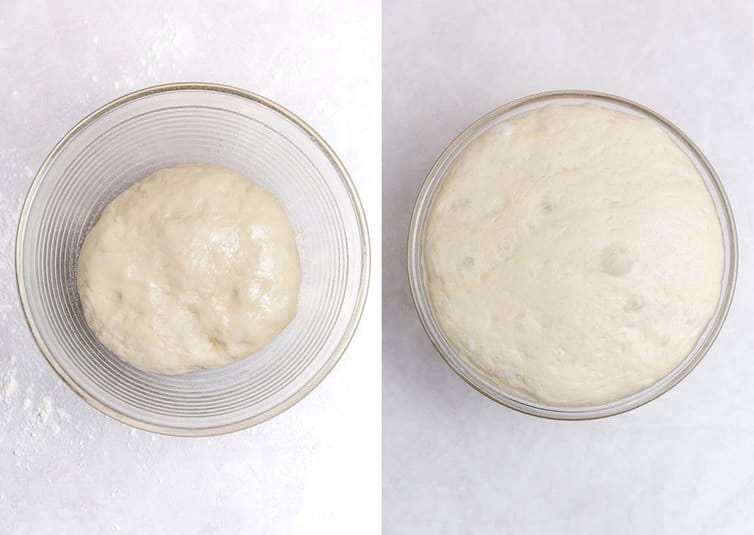
Let it Rise
Save This Recipe
Cover in plastic wrap until doubled in size. This should take about 1½ hours.
Form the Dough
Remove the plastic wrap and press on the dough to deflate it.
Turn it out onto a floured surface and divide it into smaller pieces, depending on how many pizzas you want to make.
Form each piece into a ball, then cover with a damp cloth and let it relax for at least 10 minutes. NOTE: Don't let it sit for longer than 30 minutes or you will end up with a flat, dense crust after it has baked.
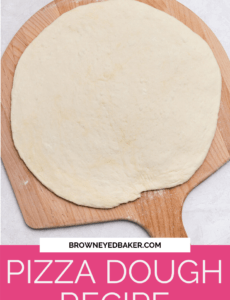
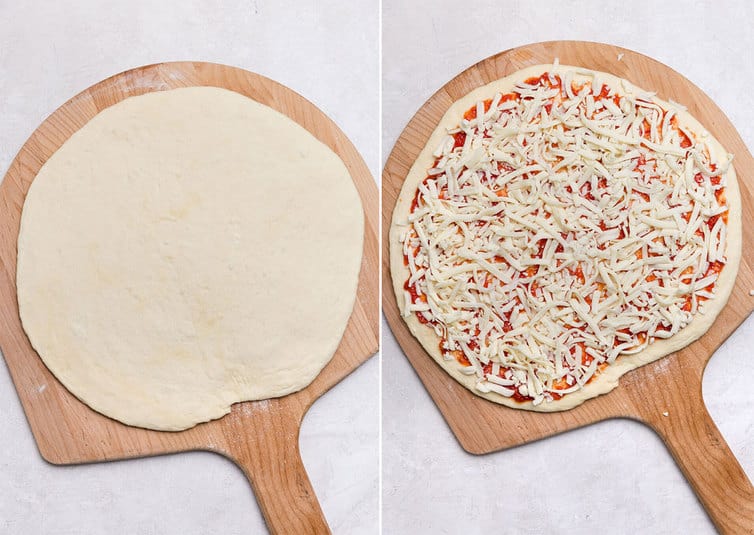
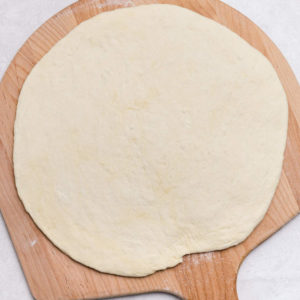
Shape each dough ball, one at a time, into a circle. The size will depend on whether you are making medium or large pizzas.
Make your Pizza
Lightly dust a pizza peel with semolina, then transfer the raw crust onto it.
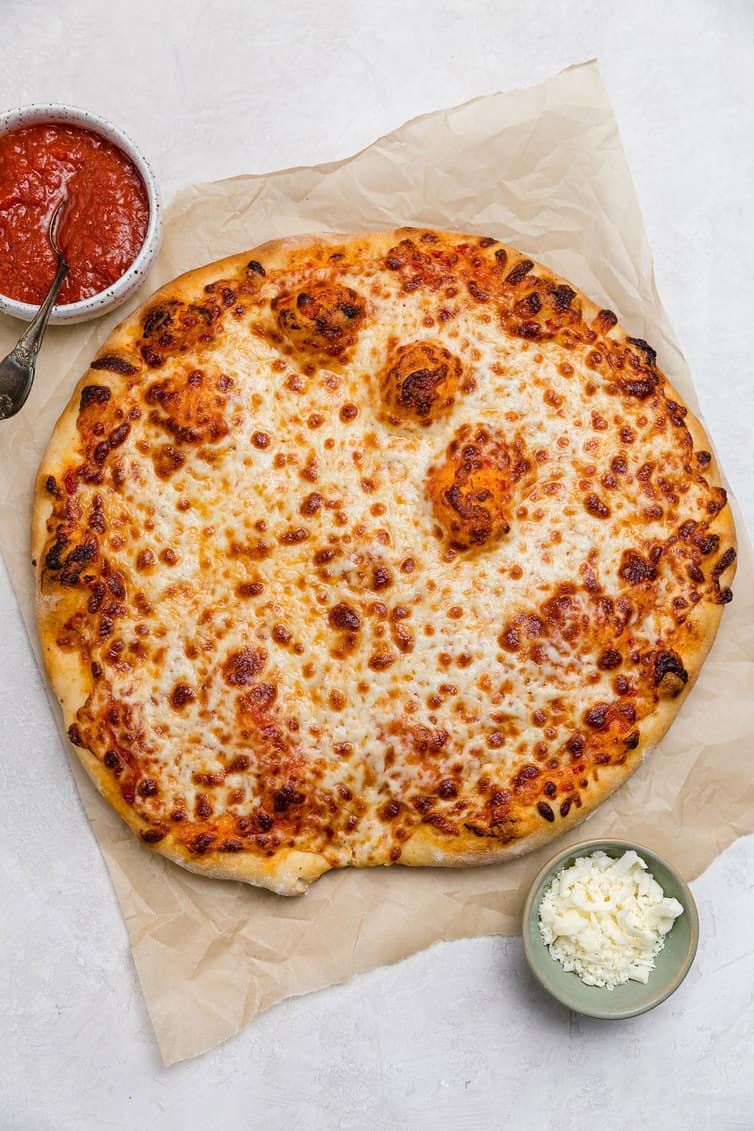
Add all the toppings to your homemade pizza dough, then bake at 500 degrees F until the edges of the crust start to brown.
NOTE: If you're looking for a homemade pizza sauce, my favorite can be found here.
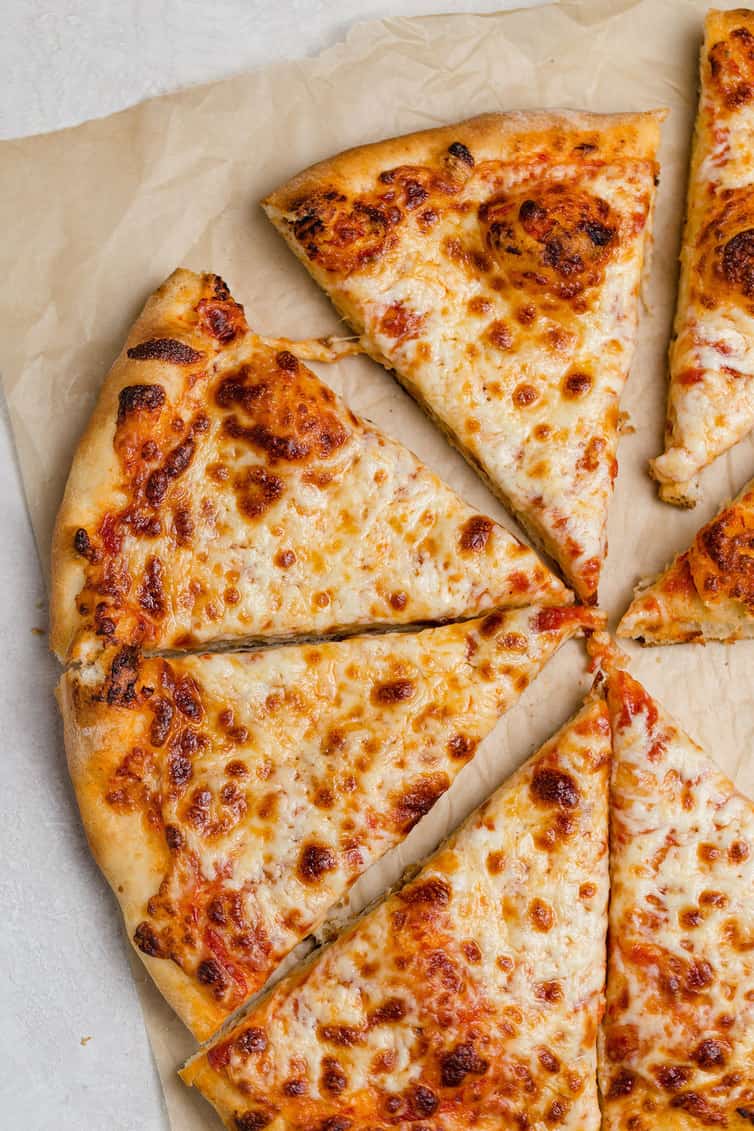
Remove from the oven, slice, and enjoy!
Recipe Tips!
- Flour: You can substitute all-purpose flour for the bread flour in this pizza crust recipe, but the crust will have a slightly softer texture.
- Yeast: If you don’t have instant yeast, you can substitute active dry yeast. Follow the recipe as directed, but be aware that the rise time will likely be longer. Just watch for it to double in size and then you’re ready to go.
- Alternate Mixing Methods: You can also make this easy pizza dough in a food processor or stand mixer instead.
- Semolina Alternative: If you don’t have semolina to dust the pizza peel, you can also use cornmeal.
- Special Equipment: To make amazing pizza, invest in a pizza stone and a pizza peel, which allows you to easily transfer your pizza to and from the stone. If you don’t have these, you can use parchment paper on top of an upside-down baking sheet.
- Freezing Instructions: This pizza crust recipe freezes extremely well! Follow the recipe through the step where you divide the dough. Wrap any dough balls you won't be using in plastic wrap and transfer to a zippered freezer bag. Store in the freezer up for up to 3 months. When you're ready to use the dough, put it in the refrigerator the morning you will use it (or the night before) so it can thaw.
More Pizza Night Inspiration
- Neapolitan Pizza
- Sicilian Pizza
- Thin Crust Pizza
- Chicago-Style Deep-Dish Pizza
- Portobello Pesto Pizza
If you make this recipe and love it, I would so appreciate it if you would take a moment to leave a rating below. Thank you so much!
Pizza Crust Recipe
Ingredients
- 1¾ cups (125 ml) warm water, about 110 degrees, divided
- 2¼ teaspoons (1) instant yeast
- 2 tablespoons extra-virgin olive oil
- 4 cups (500 g) bread flour, (22 ounces)
- 1½ teaspoons (1.5 teaspoons) salt
Instructions
- Measure ½ cup of the warm water into a 2-cup liquid measuring cup. Sprinkle in the yeast and let stand until the yeast dissolves and swells, about 5 minutes. Add the remaining 1¼ cups water and oil and stir to combine.
- In a large bowl, whisk together the flour and salt. Stir with a wooden spoon or rubber spatula while you gradually pour in the liquid mixture. The dough should come together into a shaggy mass and be mostly moistened; you may not need all of the liquid, so hold back a few tablespoons and then add if necessary.
- Turn the dough out onto a lightly floured work surface. Knead by hand for a few minutes to form a smooth, round ball (it will a very soft dough). Put the dough into an oiled bowl, turn to coat the dough, and cover the bowl with plastic wrap. Place in a draft-free area and let rise until doubled in size, about 1½ hours.
- Place a pizza stone on a rack in the lower third of the oven. Heat the oven to 500° for at least 30 minutes.
- Press the dough to deflate it, then turn the dough out onto a lightly floured work surface. Use a chef's knife or dough scraper to divide the dough into two pieces. Form each piece of dough into a smooth, round ball and cover it with a damp cloth. Let the dough relax for at least 10 minutes but no more than 30 minutes.
- Meanwhile, get your sauce and toppings ready.
- Working with one piece of dough at a time and keeping the other covered, shape the dough into a 14-inch circle, then transfer it to a pizza peel that has been lightly dusted with semolina.
- Top your pizza as desired and slide the dough onto the heated stone. Bake until the crust edges brown and the cheese is golden brown in spots, 8 to 12 minutes. Remove the pizza from the oven, cut into wedges, and serve immediately. Repeat with the remaining piece of dough.
Notes
- Flour: You can substitute all-purpose flour for the bread flour in this pizza crust recipe, but the crust will have a slightly softer texture.
- Yeast: If you don't have instant yeast, you can substitute active dry yeast. Follow the recipe as directed, but be aware that the rise time will likely be longer. Just watch for it to double in size and then you're ready to go.
- Alternate Mixing Methods: You can also make this easy pizza dough in a food processor or stand mixer instead.
- Semolina Alternative: If you don't have semolina to dust the pizza peel, you can also use cornmeal.
- Special Equipment: To make amazing pizza, invest in a pizza stone and a pizza peel, which allows you to easily transfer your pizza to and from the stone. If you don't have these, you can use parchment paper on top of an upside-down baking sheet.
- Freezing Instructions: This pizza crust recipe freezes extremely well! Follow the recipe through the step where you divide the dough. Wrap any dough balls you won’t be using in plastic wrap and transfer to a zippered freezer bag. Store in the freezer up for up to 3 months. When you’re ready to use the dough, put it in the refrigerator the morning you will use it (or the night before) so it can thaw.
Did you make this recipe?
Leave a review below, then snap a picture and tag @thebrowneyedbaker on Instagram so I can see it!
(Recipe adapted from Baking Illustrated)
[photos by Ari of Well Seasoned]


My go to pizza dough recipe. Definite favorite. Appreciate the tips.
Hi, Michelle, Thank you for sharing family news with us, and particularly information about Dominic’s status. Blessing on you and your family. I look forward to Friday Things each week. I have a question about the water measurement in this recipe. Shouldn’t 1 3/4 cups of water be 415 ml? –Chris
Used the exact amount of ingredients and made sure the water was the right temperature. You may get great results by using a baking sheet instead of a krunker pizza stone, and you will still get some.
Thanks Michelle! Have a blessed day! ❤️🙏🦋
Great pizza dough recipe, fast and easy to make. Will be using as my go to recipe.
Honda Pioneer 1000 5 Reviews
Great
Absolutely love this pizza dough recipe. I use it almost every week! I especially love the fact that I do not have to get my mixer out to make it.
This is my go to pizza crust! We always make our pizzas on the grill with a pizza stone using this recipe for the crust! Our go to favorites are BBQ chicken pizza and classic meat lovers supreme. This crust makes for a crispy outside and soft airy inside. I haven’t had much success making a crispy crust in the oven (even with pizza stone), I highly suggest using a grill for making this.