Classic Pumpkin Roll with Cream Cheese Filling
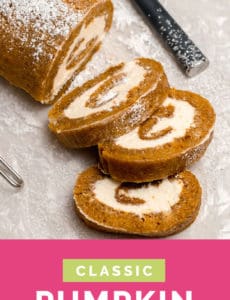
Say hello to this full-of-tradition, it-wouldn’t-be-Thanksgiving-without-it pumpkin roll. Raise your hand if your family requires at least one (usually more) pumpkin roll on the Thanksgiving dessert table. They are way too easy NOT to make, they satisfy all of those anti-pumpkin pie relatives (I’m one), and who can resist all of that cream cheese filling? (Not me.) Let’s do this!
Welcome to the November BEB Bake-Along! I loved seeing you tackle sticky buns throughout October, and can’t wait for you to dive in on this month’s recipe, which, incidentally, would be a fantastic addition to your Thanksgiving dessert menu.
I love, love, love pumpkin rolls, but I most certainly do not love the heart-pounding anxiety that flipping a hot cake onto a tea towel dusted with powdered sugar incites in me. Then, if the cake flips out and doesn’t break (praise the Lord!), then it gets rolled up and I’m left crossing my fingers for however long it takes to cool that when I go to unroll it there aren’t eleventy bajillion cracks in it. Who’s with me?
I am thrilled to announce that I’ve found a new, BETTER way to tackle these beautiful roll cakes that cuts wayyyyyy down on the anxiety (as in, there was none!) and guarantees an absolutely gorgeous, crack-free pumpkin roll every single time.
Let’s discuss!
I originally shared a pumpkin roll recipe seven (!!) years ago, but have tweaked it a bit into a new and improved recipe here. The ingredients are mostly the same, but I’ve upped the warm spices significantly (if you don’t have pumpkin pie spice, be sure to check the notes for a link on how to make your own!), and added a bit of vanilla because nearly everything is better with vanilla.
The most significant change, however, is the technique used to roll the cake.
Rolling Up a Pumpkin Roll
Traditional roll cakes are made by turning the hot cake onto a powdered sugar-covered tea towel or parchment paper and then rolled up immediately. Rolling up a hot cake will theoretically keep it from cracking and ensures that it’s pliable and can be unrolled, slathered with filling, then rolled back up.
The problem? Flipping out a hot cake is a tiny bit anxiety-producing (understatement there!) and I’ve always found that rolling it up in a tea towel, no matter how well sugared, causes the cake to stick a little bit and gives it a funky texture on top once it’s unrolled.
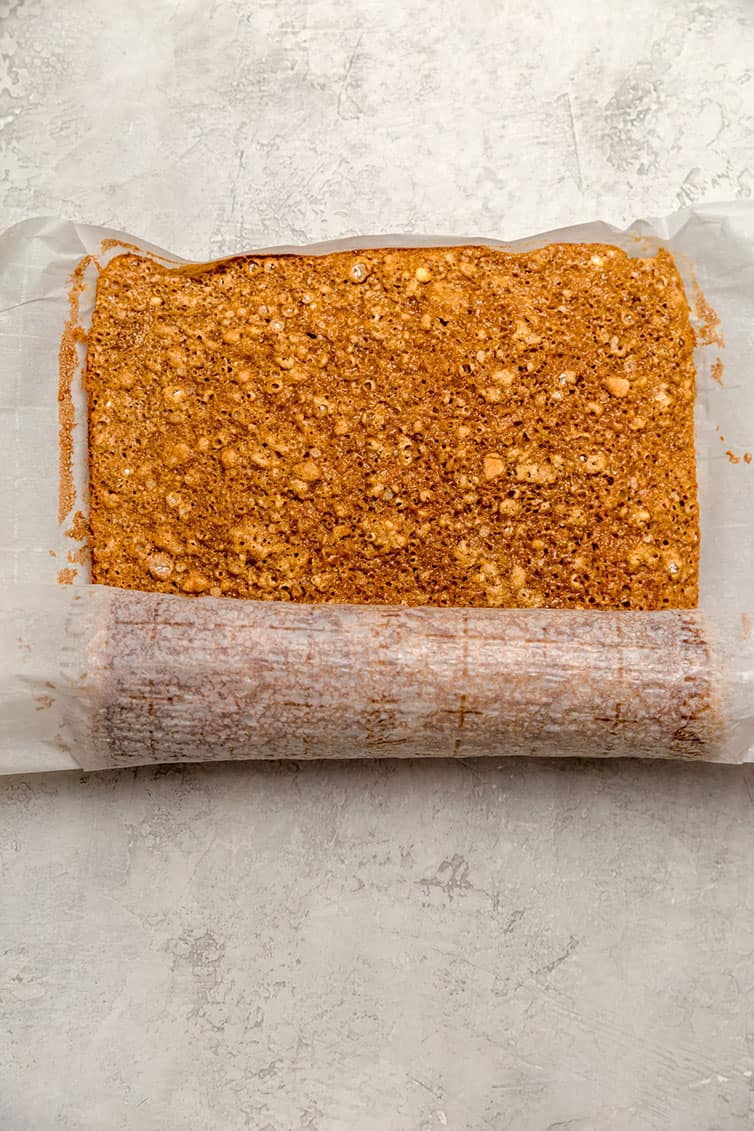
The solution? Line your jelly roll pan with parchment paper, then once the cake comes out of the oven, simply use the parchment paper to lift the cake out of the pan, and roll it right up in the parchment paper. Simpler, less mess, I find it creates a superior texture to the cake (a tighter, smoother crumb), and the exterior of the cake is smoother and more aesthetically pleasing.
Save This Recipe

More Pumpkin Roll Tips
Let’s make these the best pumpkin rolls your Thanksgiving has ever seen!
- If you do not have pumpkin pie spice on hand, you can make homemade pumpkin pie spice using cinnamon, ginger, nutmeg, cloves, and allspice.
- This recipe only calls for ⅔ cup pumpkin puree; one 15-ounce can of pumpkin puree will yield three pumpkin rolls, so you may as well bake them up and freeze a couple for holiday festivities.
- If you do not have a jelly roll pan and don't want to buy one, you can use a half sheet pan; just trace a 10×15-inch rectangle on parchment paper and spread the cake batter in that area only.
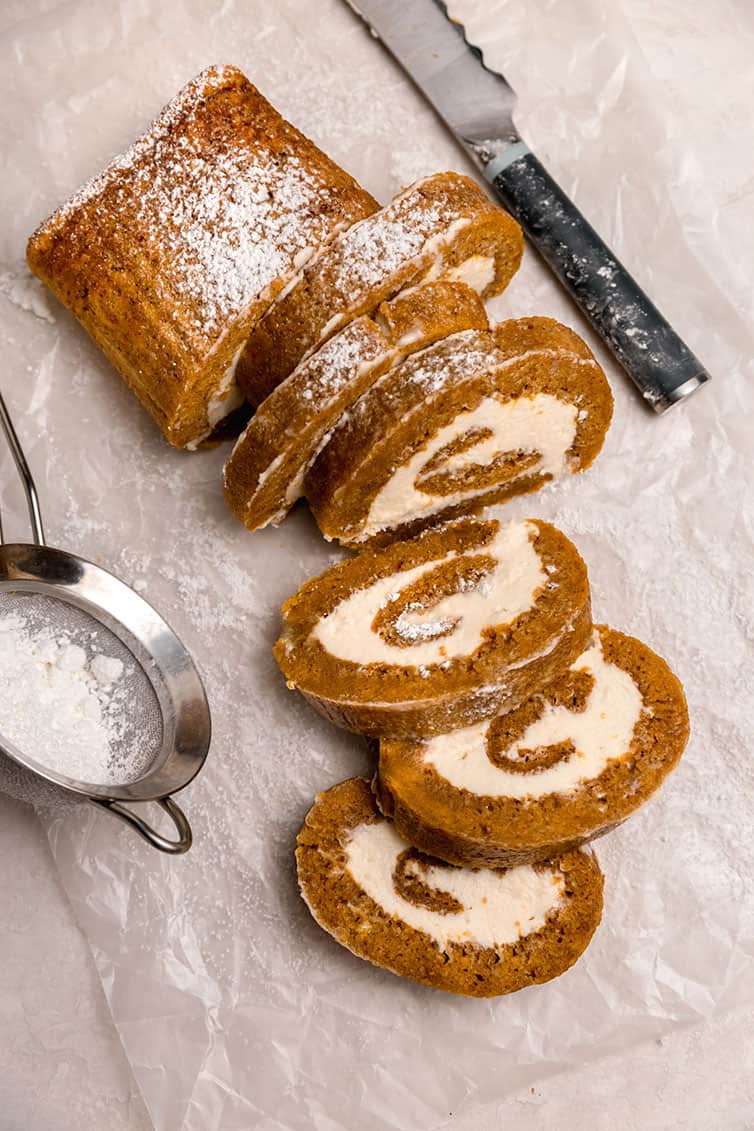
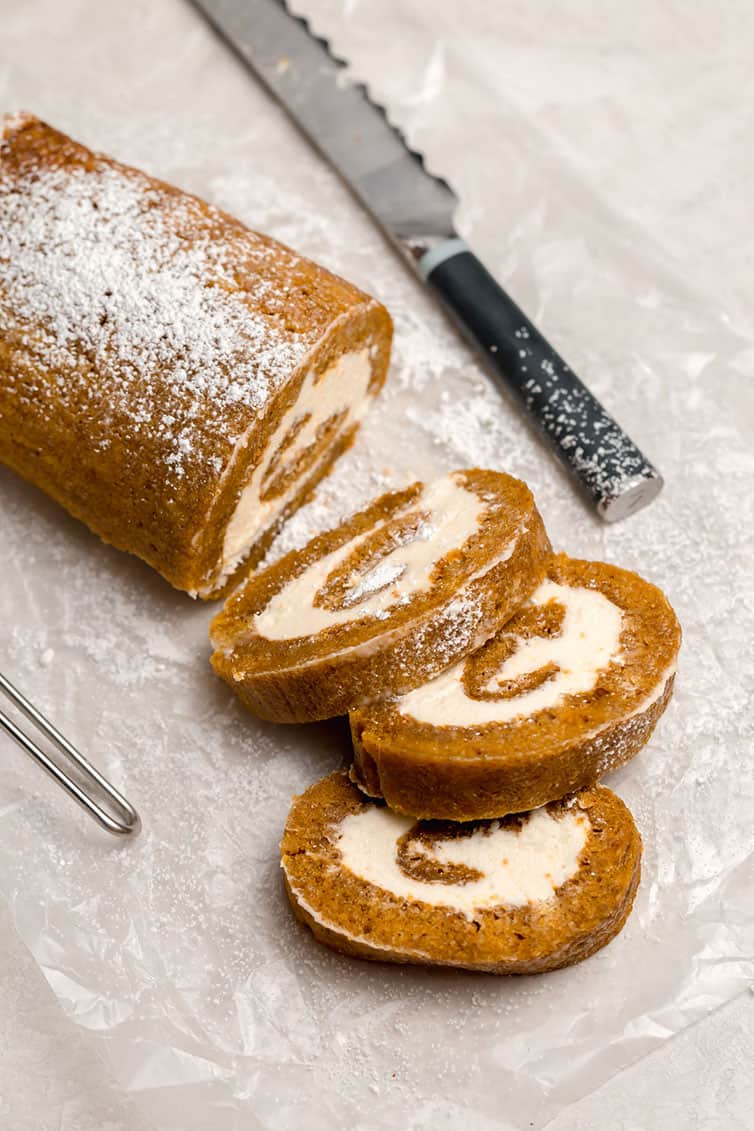
- For a super pretty presentation, slice off the ends of the pumpkin roll before serving to showcase the swirl!
- A large serrated knife makes for a nice, clean cut and keeps the pumpkin roll from getting smooshed when sliced.
- Make-Ahead: Once the pumpkin roll is assembled, wrapped in plastic wrap and refrigerated, it can be stored for up to 2 days before serving.
- To Freeze: Wrap the pumpkin roll tightly in plastic wrap, then in aluminum foil and place in a freezer-safe zip-top resealable bag. Freeze for up to 3 months; thaw overnight in the refrigerator.
More Pumpkin Desserts You’ll Love
- Pumpkin Cupcakes with Cream Cheese Frosting
- Pumpkin Scones with Spiced Glaze
- Pumpkin Bread with Chocolate Chips & Pecans
- Pumpkin Spice Latte Cupcakes
- Pumpkin-Gingerbread Trifle
Watch How to Make an Old-Fashioned Pumpkin Roll:
Pumpkin Roll
Ingredients
For the Cake:
- ¾ cup (93.75 g) all-purpose flour
- 1 tablespoon (0.5 teaspoon) pumpkin pie spice
- ½ teaspoon (0.5 teaspoon) baking powder
- ½ teaspoon (0.5 teaspoon) baking soda
- ¼ teaspoon (0.25 teaspoon) salt
- 1 cup (200 g) granulated sugar
- 3 eggs, at room temperature
- 1 teaspoon vanilla extract
- ⅔ cup (163.33 g) canned pure pumpkin
For the Filling:
- 8 ounces (226.8 g) cream cheese, at room temperature
- 6 tablespoons unsalted butter, at room temperature
- 1 cup (120 g) powdered sugar, sifted
- 1 teaspoon vanilla extract
For Garnishing
- Powdered sugar
Instructions
- Make the Cake: Preheat oven to 375 degrees F. Grease a 10×15-inch jelly roll pan with butter or non-stick cooking spray. Line with parchment paper, allowing a 1-inch overhang on the long sides of the pan. Spray the parchment paper with non-stick cooking spray; set aside.
- In a medium bowl, whisk together the flour, pumpkin pie spice, baking powder, baking soda, and salt; set aside.
- In a large bowl, whisk the sugar, eggs, and vanilla vigorously until thick and pale, about 2 minutes. Gently whisk in the pumpkin puree to combine.
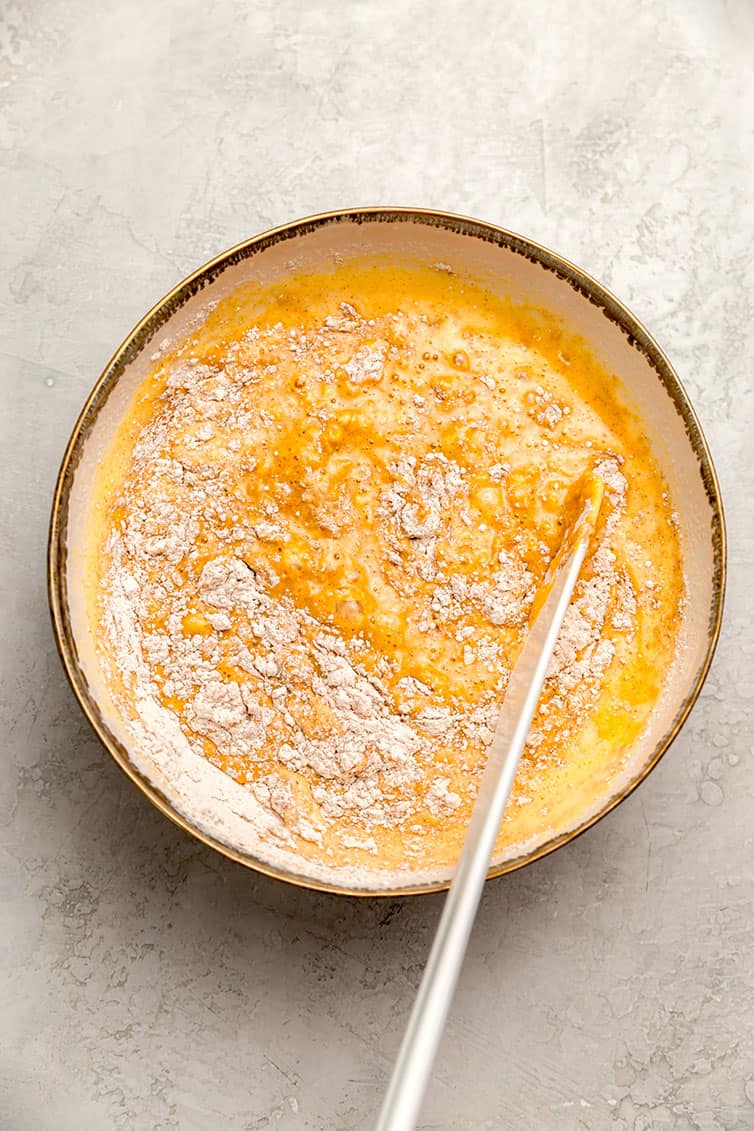
- Using a rubber spatula, fold the dry ingredients into the pumpkin mixture until no streaks of flour remain. Pour the batter into the prepared pan and spread into an even layer.
- Bake until the top of the cake springs back when lightly pressed, 13 to 15 minutes.
- Very carefully lift the edges of the parchment paper to lift the cake out of the pan and place on a flat, heatproof surface. Starting on a short end, roll the cake up with the parchment paper until completely rolled, then place on a wire rack to cool completely.
- Make the Cream Cheese Filling: In a large bowl, beat the cream cheese and butter at medium speed until light and fluffy, about 2 minutes. Add the powdered sugar and vanilla and beat on medium-low speed until combined, then scrape down the bowl, increase the speed to medium, and beat for 1 more minute.
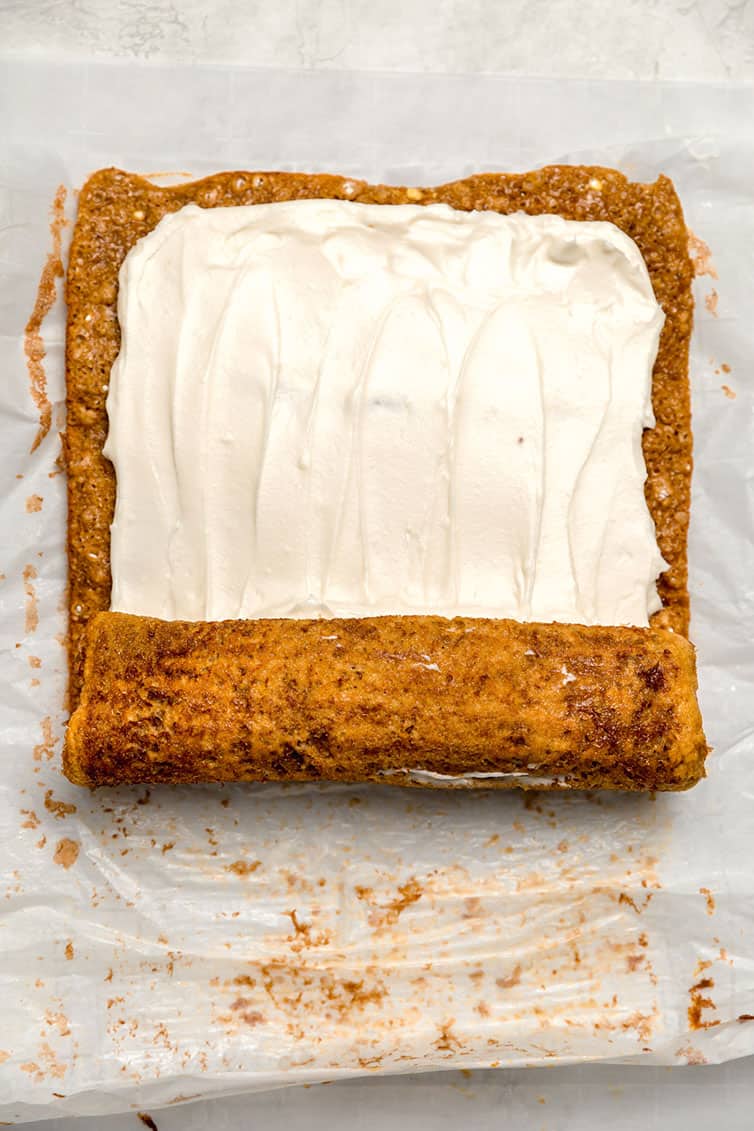
- Assemble Pumpkin Roll: Once the cake is completely cool, very slowly unroll it. Spread the cream cheese filling in an even layer, leaving a ½-inch border around all of the edges.
- Gently roll the cake back up without the parchment paper (it can now be discarded), then wrap the pumpkin roll tightly in plastic wrap and refrigerate for at least 1 hour.
- When ready to serve, remove the plastic wrap, place the pumpkin roll on a serving platter and dust with powdered sugar. Slice and serve. Leftover pumpkin roll can be wrapped in plastic wrap and refrigerated for up to 5 days.
Notes
- If you do not have pumpkin pie spice on hand, you can make homemade pumpkin pie spice using cinnamon, ginger, nutmeg, cloves, and allspice.
- This recipe only calls for ⅔ cup pumpkin puree; one 15-ounce can of pumpkin puree will yield three pumpkin rolls, so you may as well bake them up and freeze a couple for holiday festivities.
- If you do not have a jelly roll pan and don't want to buy one, you can use a half sheet pan; just trace a 10×15-inch rectangle on parchment paper and spread the cake batter in that area only.
- For a super pretty presentation, slice off the ends of the pumpkin roll before serving to showcase the swirl!
- A large serrated knife makes for a nice, clean cut and keeps the pumpkin roll from getting smooshed when sliced.
- Make-Ahead: Once the pumpkin roll is assembled, wrapped in plastic wrap and refrigerated, it can be stored for up to 2 days before serving.
- To Freeze: Wrap the pumpkin roll tightly in plastic wrap, then in aluminum foil and place in a freezer-safe zip-top resealable bag. Freeze for up to 3 months; thaw overnight in the refrigerator.
Did you make this recipe?
Leave a review below, then snap a picture and tag @thebrowneyedbaker on Instagram so I can see it!
Update Notes: This recipe was originally published in November 2012. Updated in November 2019 with an improved recipe, new photos, and a video.
[photos by Ari of Well Seasoned]


I have made pumpkin rolls for 20 years now. There is no way to 3 rolls out of one can of pumpkin. As you stated, it calls for 2/3 cup of pumpkin and is 6.66 ounces.
6.66 X 3=19.98 ounces. The cans are 15 ounces. Do the math. I do love the suggestion of adding vanilla to the mix, though.
Just wondering where you’re getting 6.66 ounces from? The recipe says 2/3 cups or 163.33g of puree. If you convert grams to ounces, it works out to 5.76 ounces which is pretty close to 1/3 of a 15 ounce can.
Hi I HAVEN’T MADE A PUMPKIN ROLL IN YEARS SO I HAVE A QUESTION.
WHEN ROLLING WITH THE PARCHMENT PAPER IT’S STILL HOT THE FIRST ROLL IS THAT RIGHT? AND DO YOU LEAVE THE PARCHMENT PAPER ON WHILE IT COOLS AND UNTIL YOU UNROLL AND ADD THE FILLING AND REROLL THEN REMOVE THE PAPER? I HOPE SOMEONE REPLIES TO ME SOON SO I KNOW WHAT I SHOULD DO.
THANK YOU FOR ANY HELP OR SUGGESTIONS .
I’ve been making this recipe for years – it’s perfect every time.
I made four rolls yesterday and my grandson went and got me stuff to make three more. Our kids and grandkids already got the first four. This recipe is so wonderful and easy.
“Looks delicious! Can’t wait to make this!”
“Yum! Love a good pumpkin roll with cream cheese filling! 😋 Can’t wait to try this recipe!”
Thanks for sharing this amazing recipe.
thanks for sharing !!
I never comment on recipes but this one was so disappointing :( I’ve made Swiss roll cakes before without cracking so this isn’t a first-timer issue. I greased the parchment thoroughly, but it still stuck to the cake after rolling. That led to huge cracks and holes. The cake tastes delicious, but I could unfortunately never serve this to a party. Basically a short, thick-layered opera cake. I will go back to the tea towel method again.
I love making roll cakes, but like most, really dislike flipping the cake onto a towel. Do you think this parchment paper method would work for various kinds of cakes…I.e. chocolate or sponge?
Nice Recipe, Love this article . Niranjan
Oh my goodness! Can I give you a giant virtual hug? I am 72 yo and you have made my pumpkin roll life better! Soooo easy! No freaking out when trying to flip that hot cake!!! Thank you so much. I’ve been following you since the beginning and always learning something new…. yes you CAN teach an old dog new tricks!!
I absolutely agree! She is my go to for all recipes!
I’ve made pumpkin roll since I was 5 at my moms side. Your recipe is really close to mine, yours adds baking soda where mine didn’t and mine has a tsp of lemon juice. I liked the parchment paper roll up verses the flip onto a powdered sugar towel. I did add walnuts to one because my family likes them that way. They’re delicious! I will be making your fudge as soon as December hits. We love your recipes.
Thanks For Sharing
Will Definitely Try
It Just Look like wow.. Keep sharing these amazing recipes.. Love It
I can’t stop making it at home after reading this blog as I just want to relish this one right now. superb blog and i was imagining the same while reading.
After seeing this recipe for years, I finally got around to making it (the classic Libby recipe) for the first time for Christmas 2019. It was so good, I wished I had made it years earlier. I especially loved how clean the spices came through in the cake, I think because there is not fat in the cake, just eggs. And that the cream cheese filling isn’t over sweet.
I saved this recipe a few years ago and have been making it every year but this recipe is not the same as the one I did last year and the year before I never had to use pumpkin spice!!
Hello dear,
This classic pumpkin roll recipe with cream cheese filling is the all-time favorite recipe.
It suits every occasion. Trying to make this by my own without any cracking in rolls with your suggestions.
Can you use fresh pumpkin?
Hi Janice, You can as long as you’re sure to strain it and squeeze out every last drop of moisture.
Pumpkin rolls with cheese filling sounds so fantastic! Thank you for the recipe!
Hi everyone, I’ve been making pumpkin roll for years.
LOVE parchment roll up !! GREAT idea.
Thank you as always for your wonderful ideas and sharing your family with us.
GOD BLESS you all.
That looks delicious!
Delicious Recipe!! I will definitely prepare it this weekend. Thanks for sharing this post.