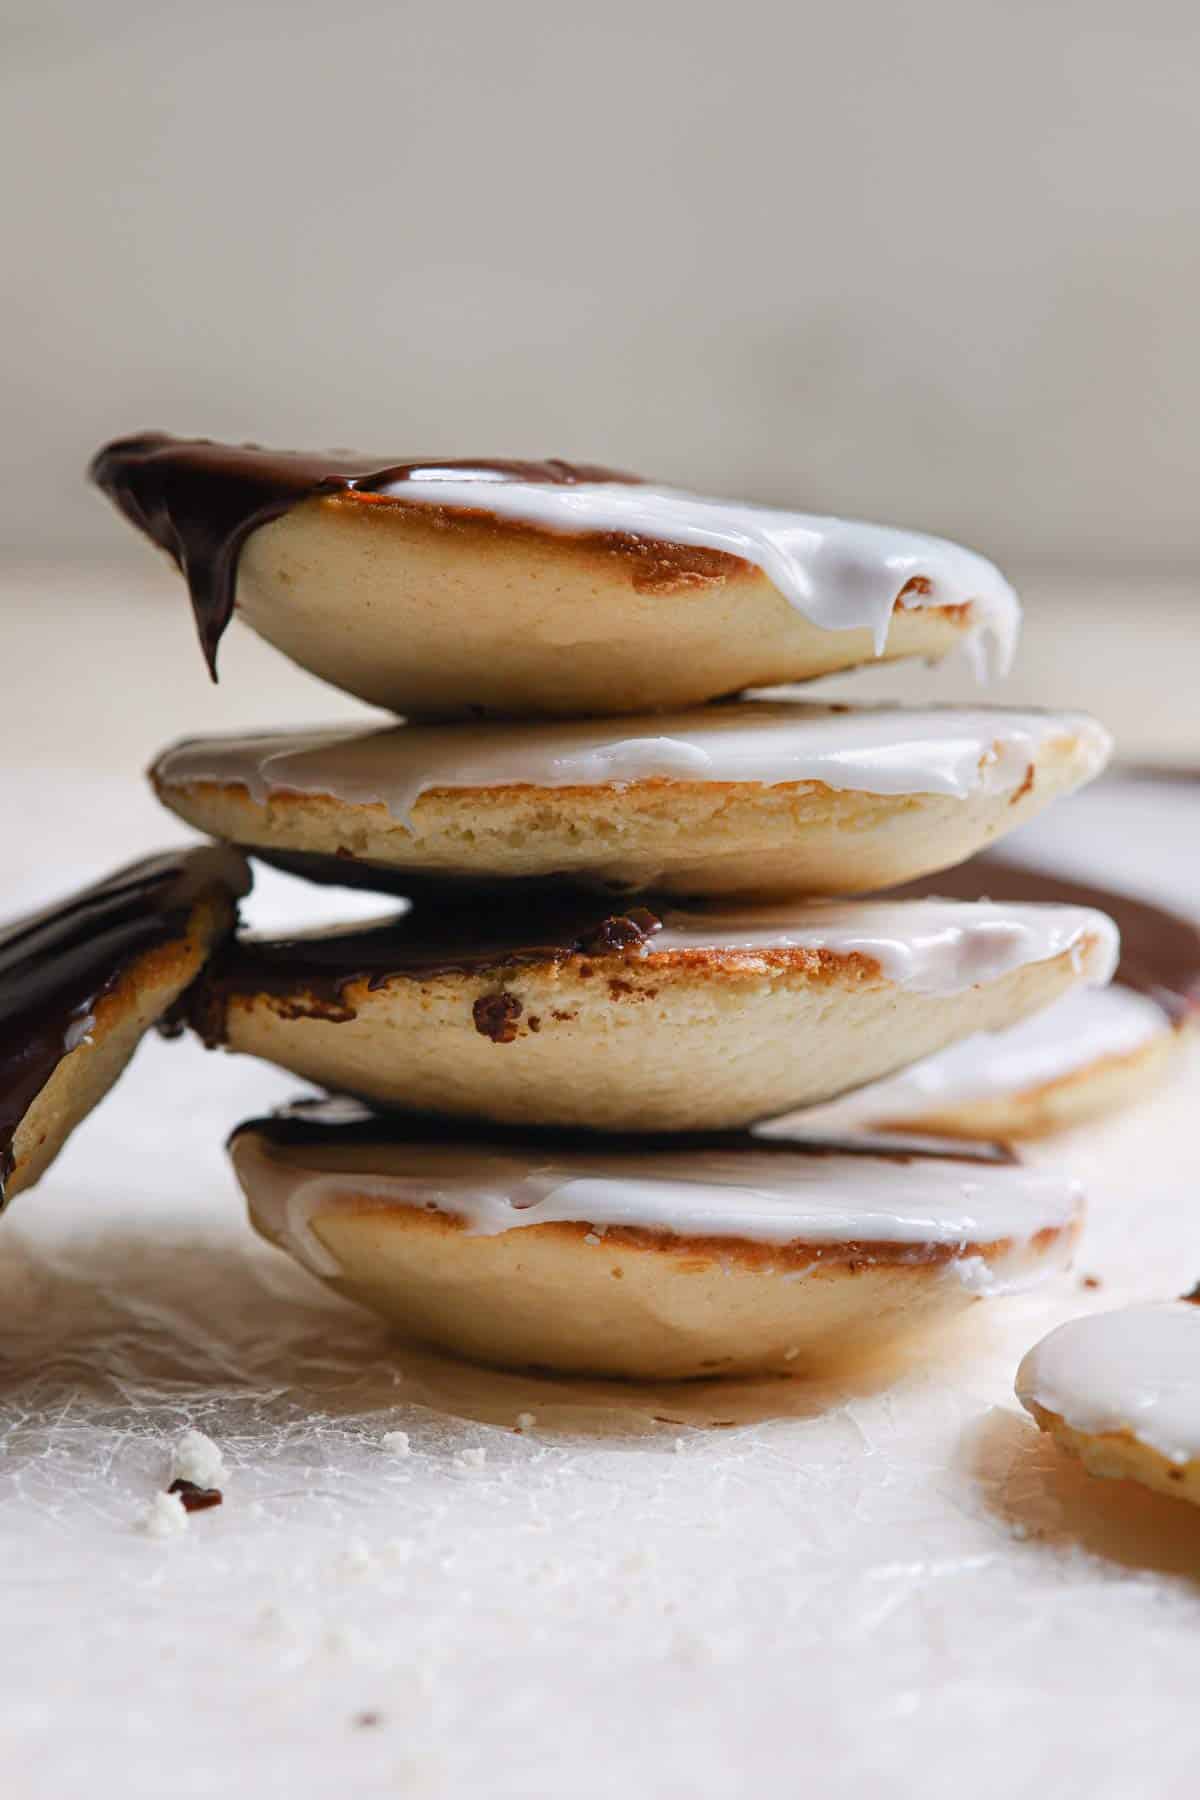
Black and White Cookies
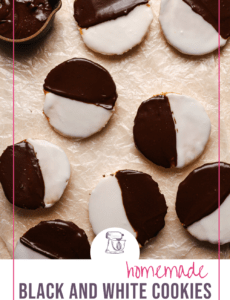
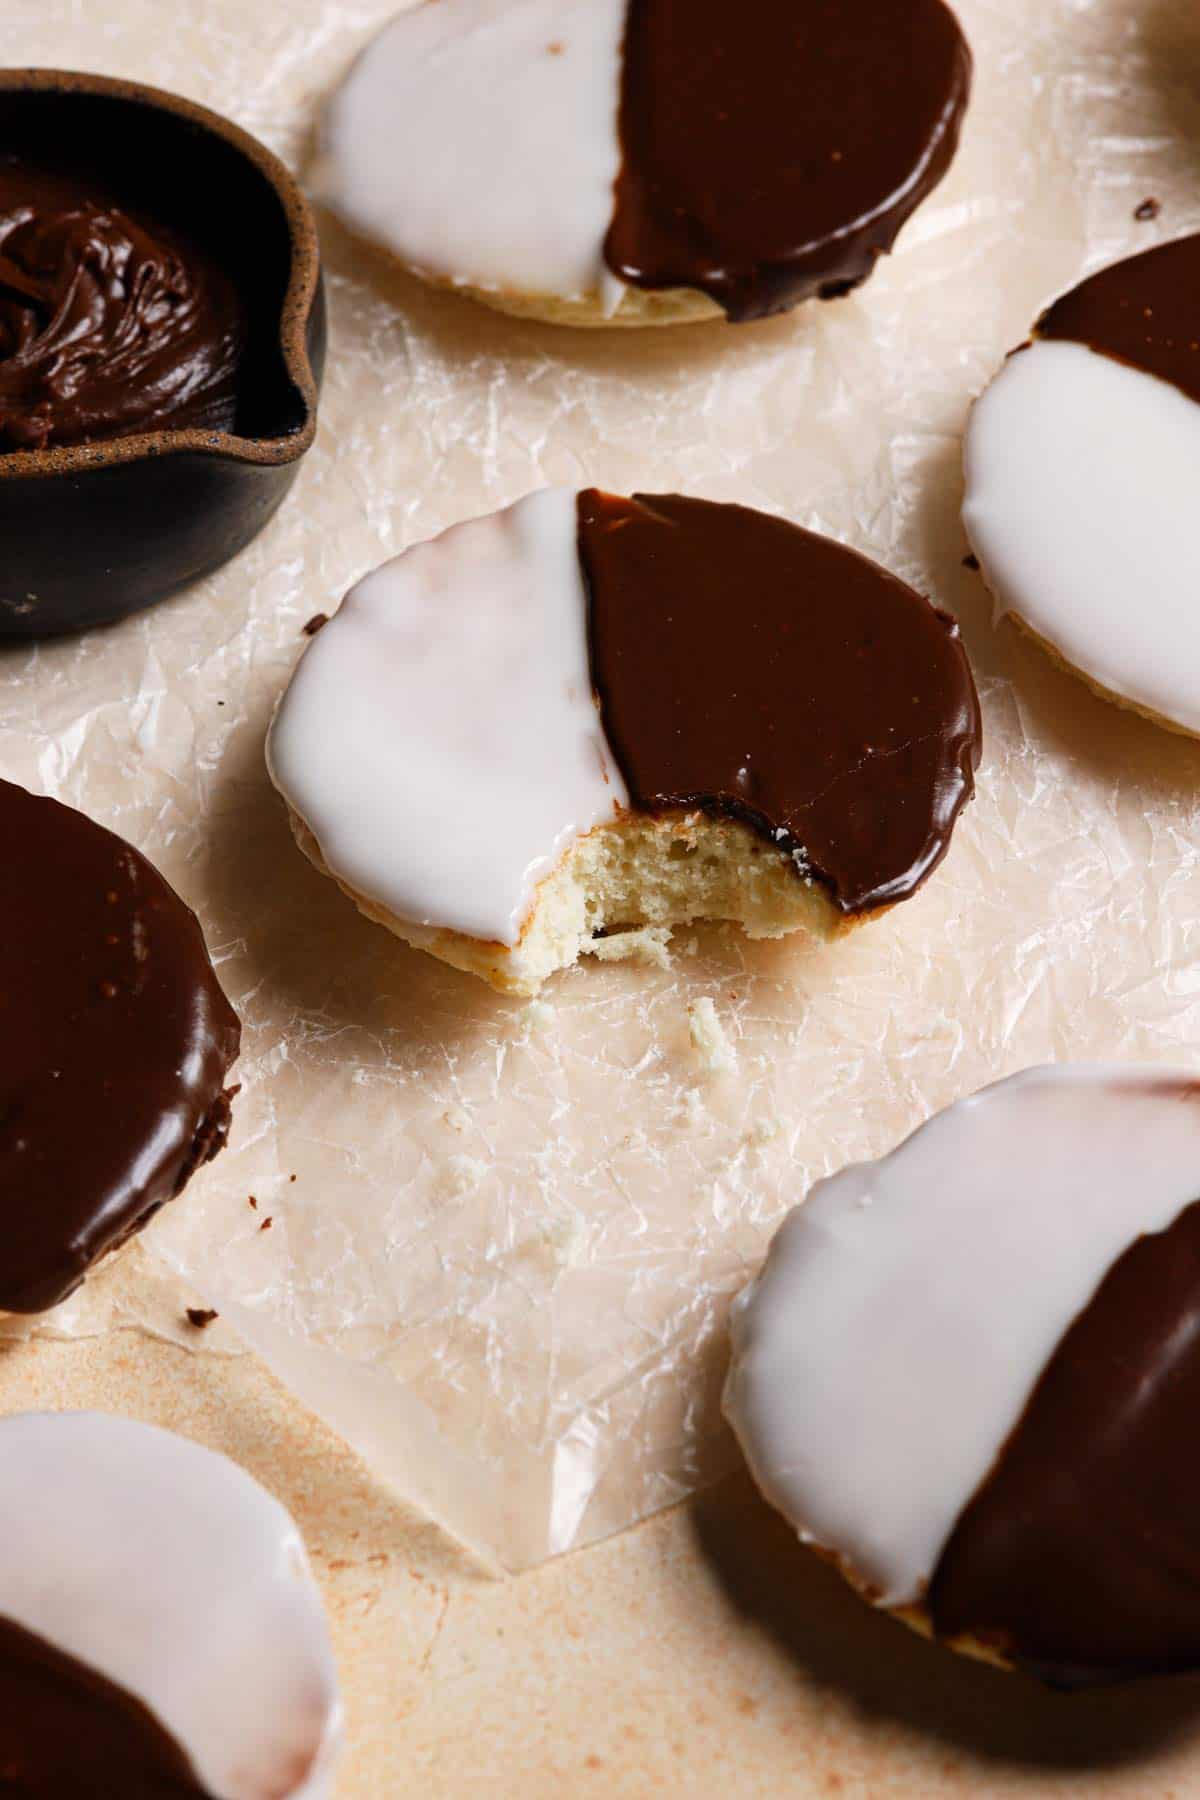
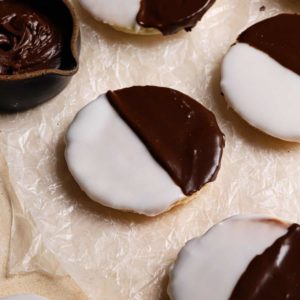
Bring a little flavor of the big city home with these homemade Black and White Cookies. Tender, fluffy cookies are topped with vanilla and chocolate icing; these cookies give you the best of both cake and cookie, vanilla and chocolate.
What are Black and White Cookies?
If you aren’t familiar with them, black and white cookies are almost as synonymous with New York City bakeries as cheesecake. I always think of the Seinfeld “Look to the cookie!” episode when I see one.
These cake-like cookies are also known as half and half cookies, half-moon cookies, and Amerikaner in Germany. Originating in the early 1900s, two different New York bakeries claim to be the creator of these iconic cookies, Glaser’s Bake Shop in New York City and Hemstrought's Bakery in Utica, NY. Regardless of who created the original cookie, they have become a staple in New York delis for decades!
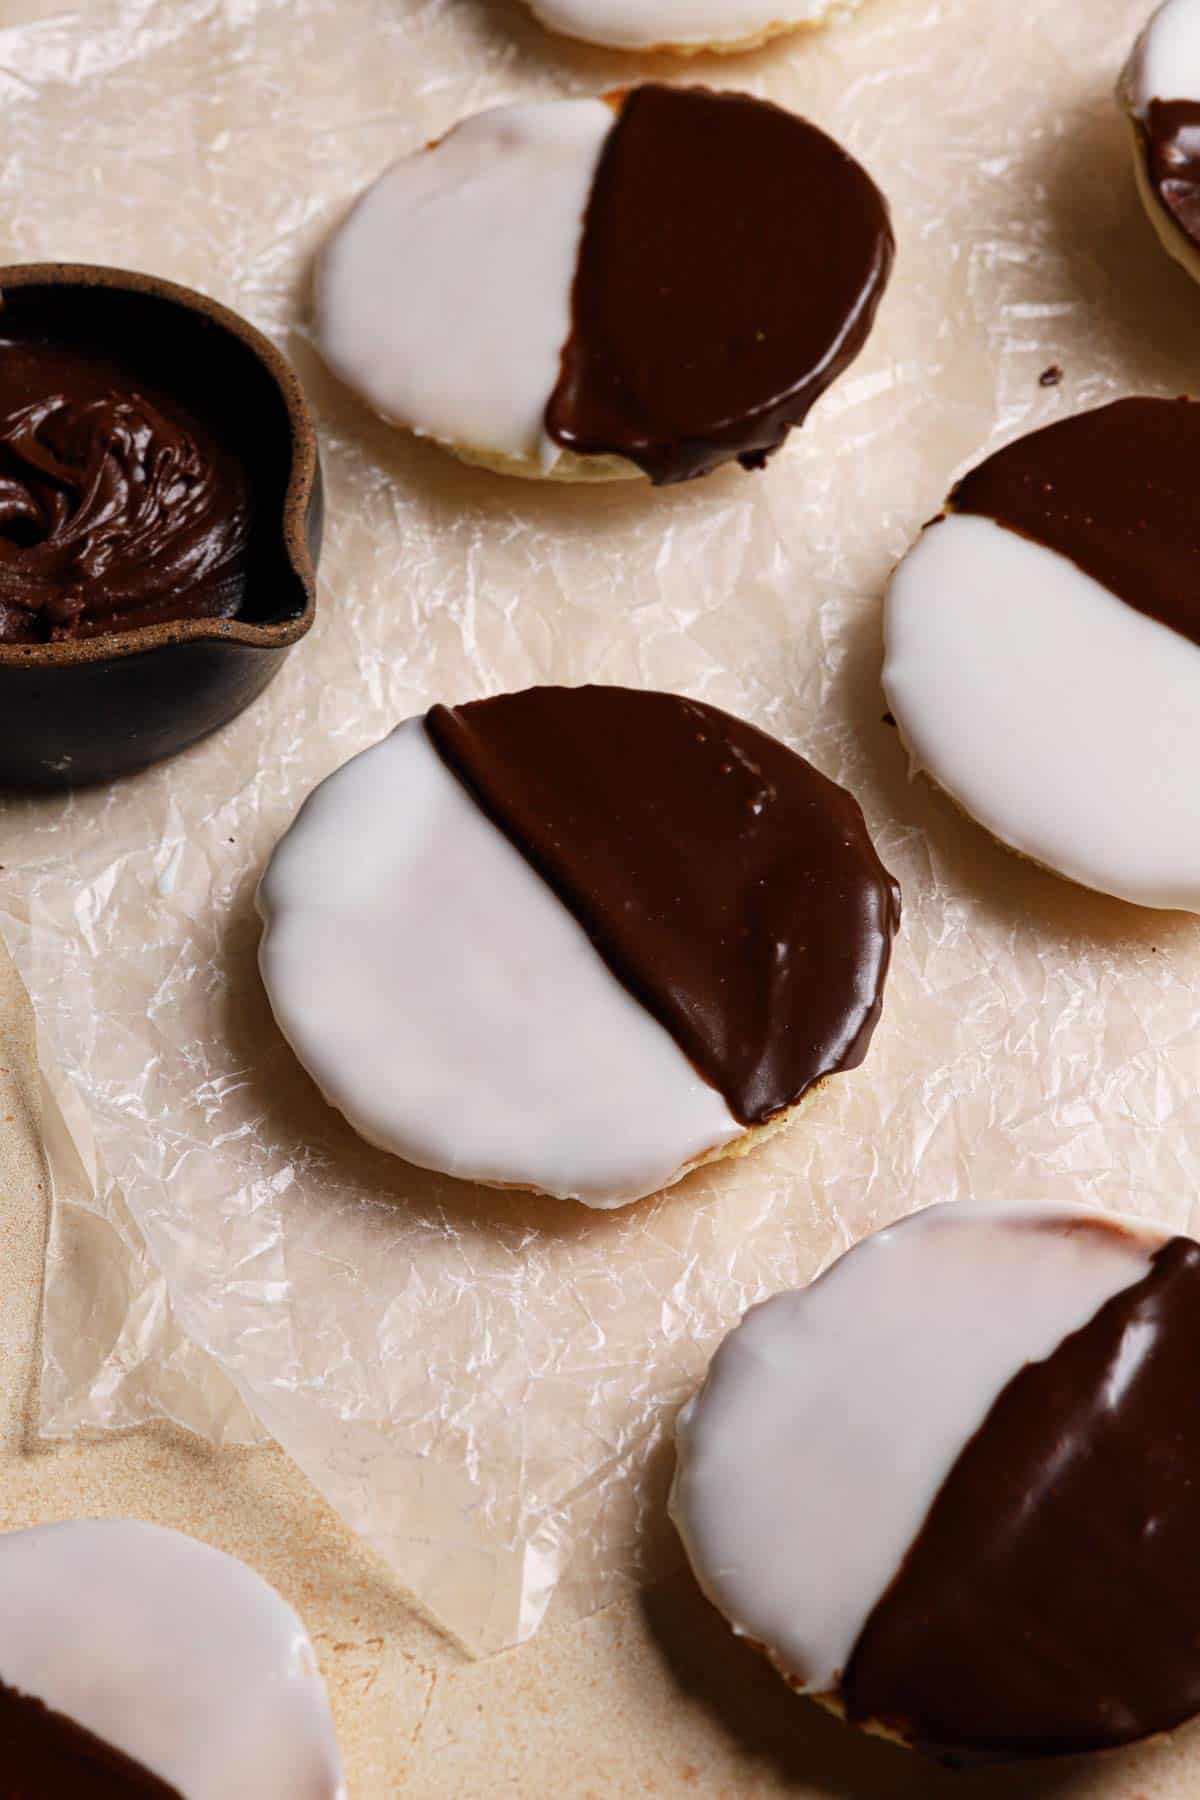
The texture is sponge-like, the cookies have a hint of lemon flavor, and are covered in vanilla and chocolate icings. They’re a fabulous change of pace from the typical chocolate chip and oatmeal cookies that are found in most bakeries.
Ingredients You’ll Need
First, you’ll bake and cool the cookies, then ice them. Here are the key ingredients you’ll need for both steps:
For the Cookies
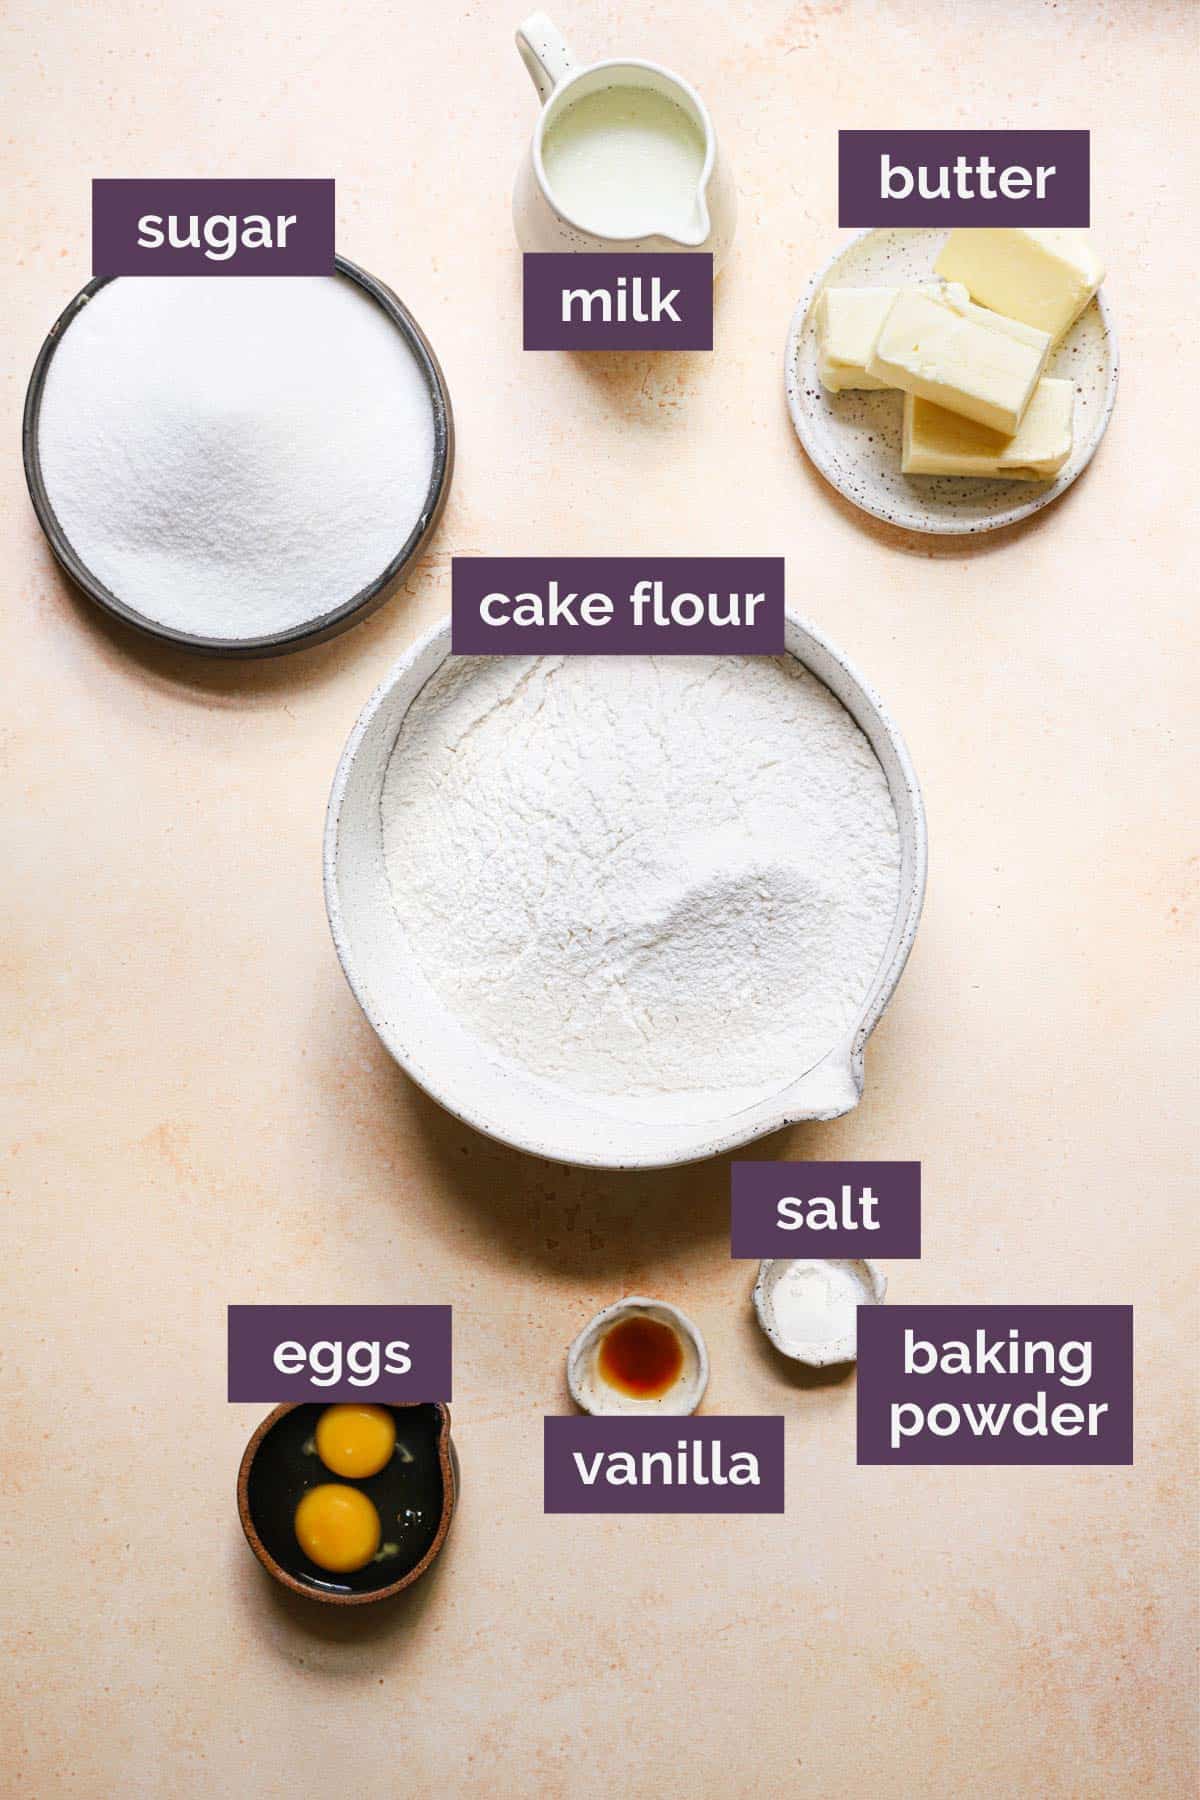
- Cake Flour: Has a lower gluten content than all-purpose flour leaving these cookies light and spongy.
- Butter: Use unsalted butter at a cool room temperature.
- Lemon Extract: This is optional and not overpowering, but gives the cookies that familiar flavor.
- Milk: Use whatever you have on hand; 1%, 2%, or whole milk.
For the Icing
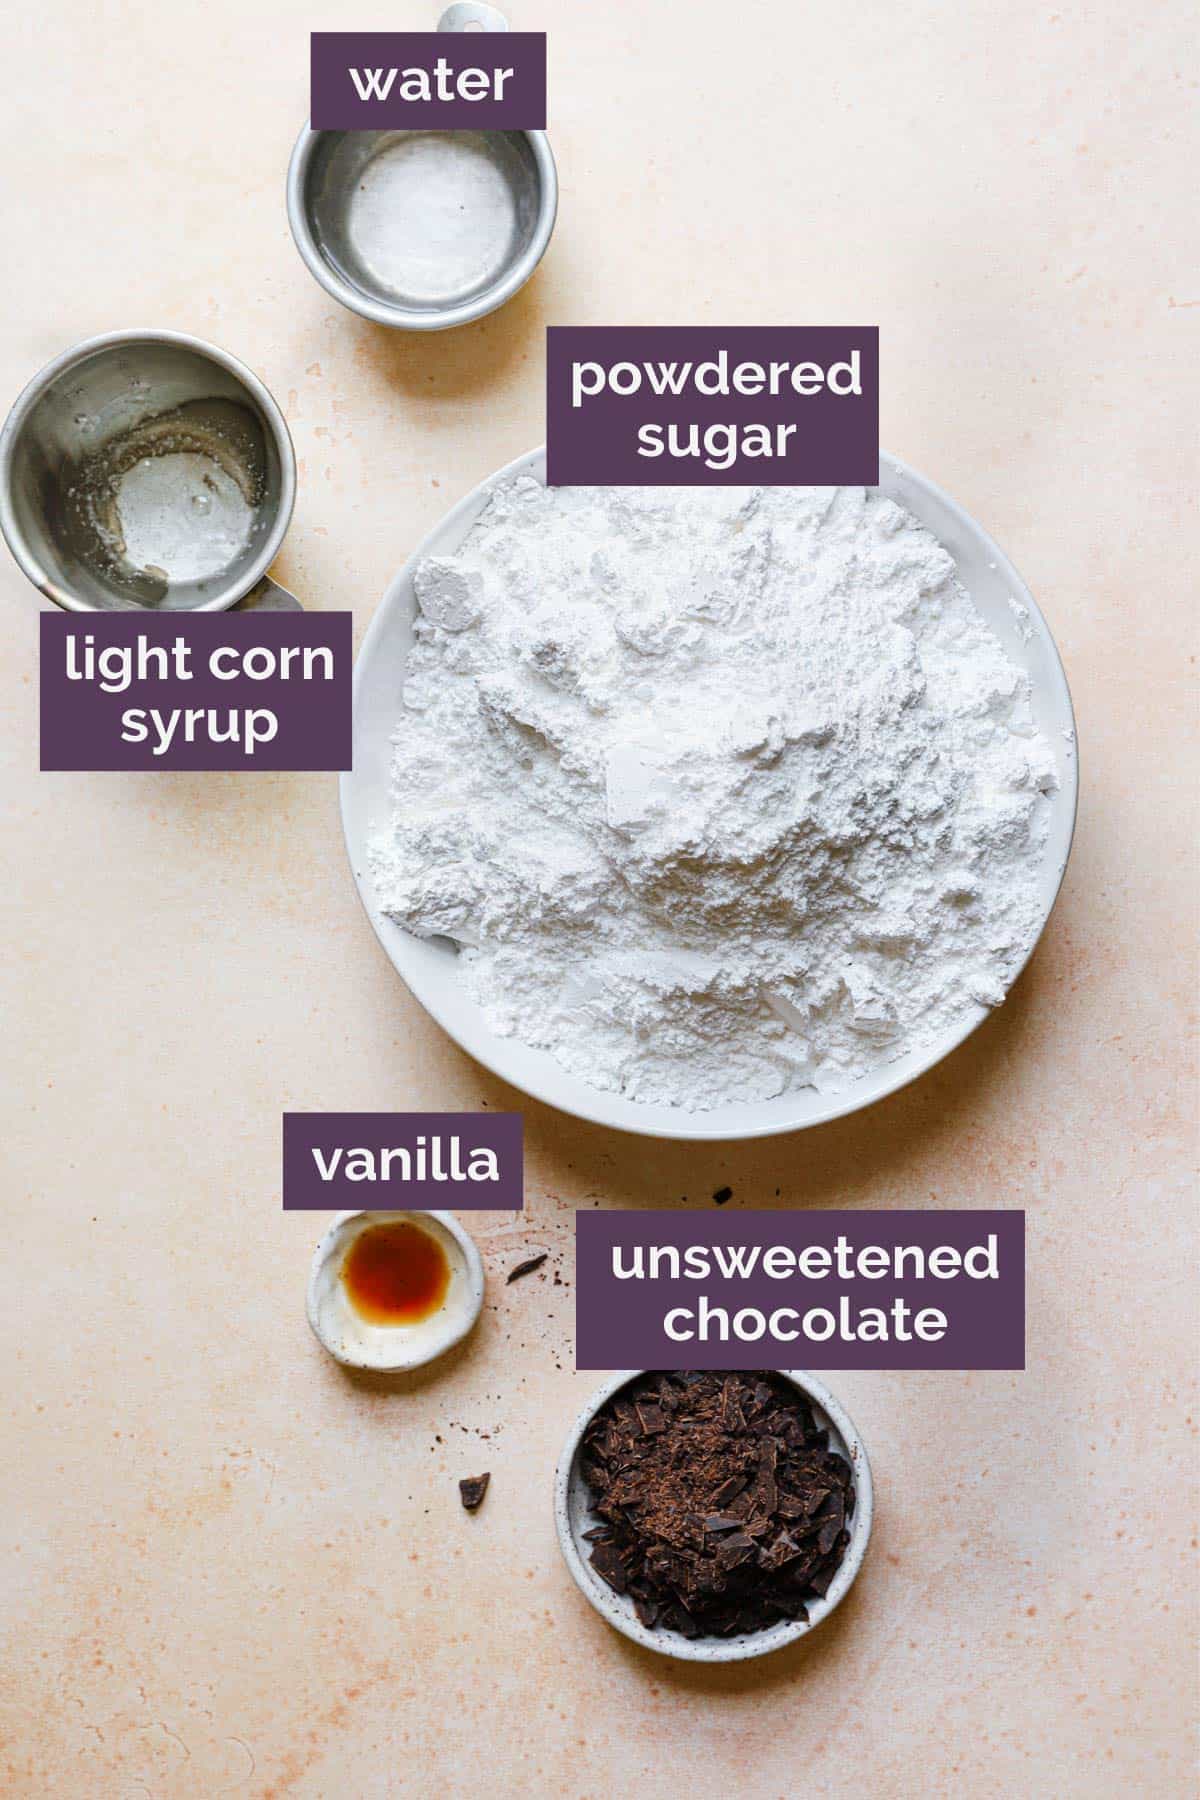
- Chocolate: Chopped unsweetened chocolate mixed with the icing base will give half of each cookie chocolate icing.
- Water: Thins out the icing for easy pouring and spreading.
- Corn Syrup: Gives the icing a bit of a sheen.
- Powdered Sugar: To sweeten and thicken the icing.
- Vanilla: Flavor!
Step-By-Step Directions
While it may appear to be a difficult recipe it really breaks down to four main steps: making the dough, baking the cookies, preparing the icing, and frosting the cookies.
Step 1: Make The Cookie Dough
- Adjust the oven racks to the lower-middle and upper-middle positions in the oven.
- Preheat the oven to 375°F and line two baking sheets with parchment paper or a silicone baking mat.
- Mix dry ingredients: In a large bowl, whisk together the flour, baking powder, and salt; set aside.
- Beat butter then add sugar: Beat the butter at medium speed for 30 seconds to loosen it up. Keeping the mixer running, gradually add in the sugar and then gradually increase the speed to medium-high and beat until light and fluffy, about 3 minutes.
- Add eggs and extracts: Scrape down the sides of the bowl and add the eggs, vanilla, lemon extract. Beat at medium speed until combined, about 30 seconds. Scrape down the sides and bottom of the bowl again.
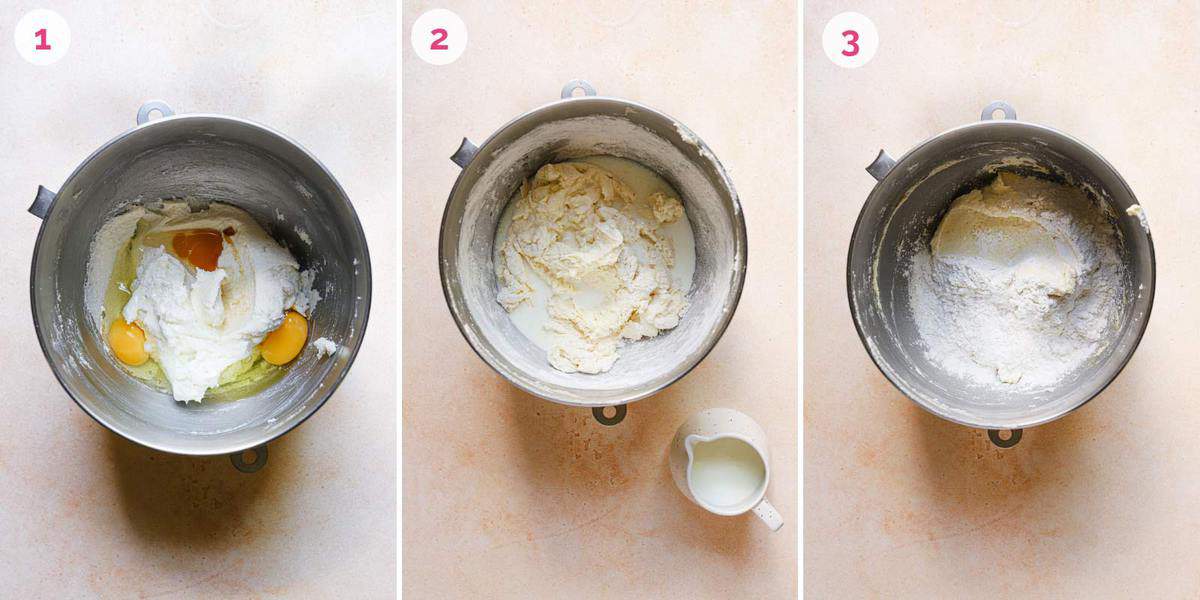
- Stir in flour and milk: With the mixer on low speed, alternately add the flour in four additions and the milk in three additions (beginning and ending with the flour), and mix until just combined.
- Final stir: Give the mixture a few final stirs with a rubber spatula to ensure all of the flour has been incorporated.
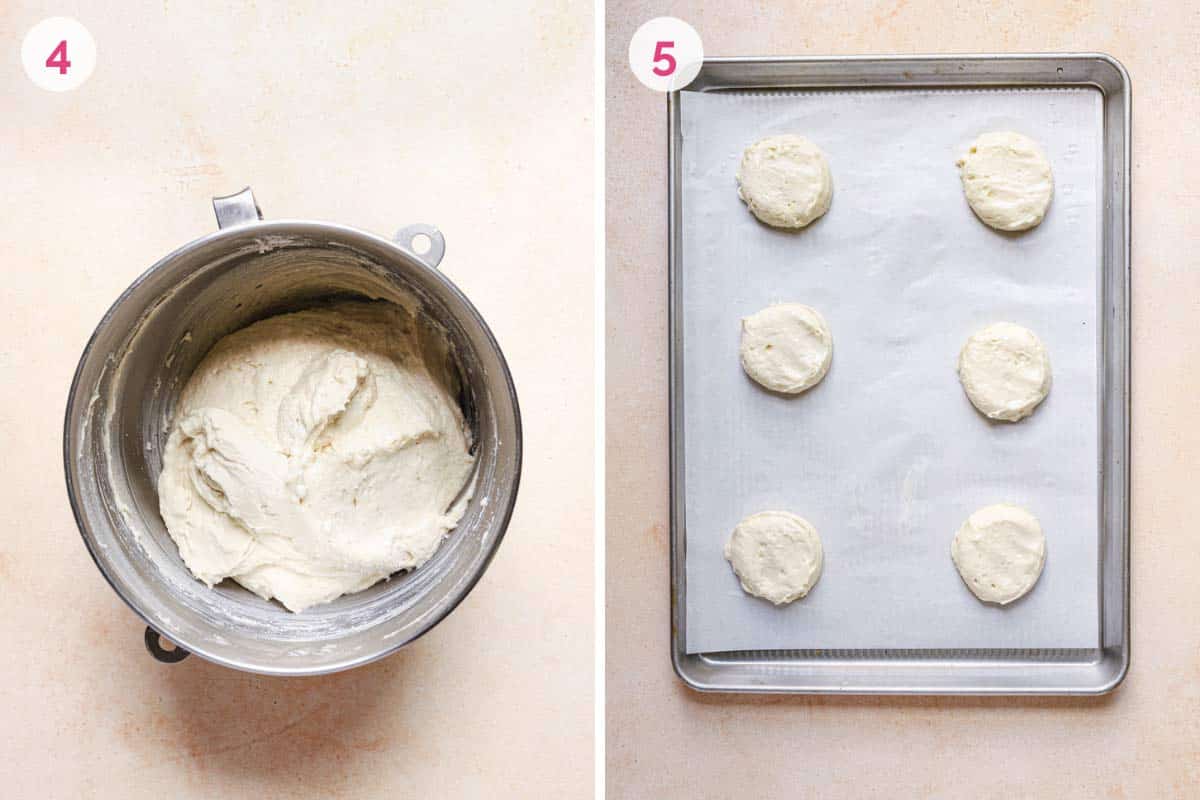
Step 2: Bake the Cookies
- Scoop the dough: Using a ¼-cup measuring cup, scoop mounds of dough onto the prepared baking sheets about 2 inches apart.
- Press into circles: Using moistened fingers, gently press each mound of dough into a 2½-inch circle.
- Bake until the edges of the cookies are set and light golden brown, about 20 minutes.
- Cool the cookies: Allow the cookies to cool for 2 minutes on the baking sheets, then remove to a wire rack to cool completely.
Save This Recipe
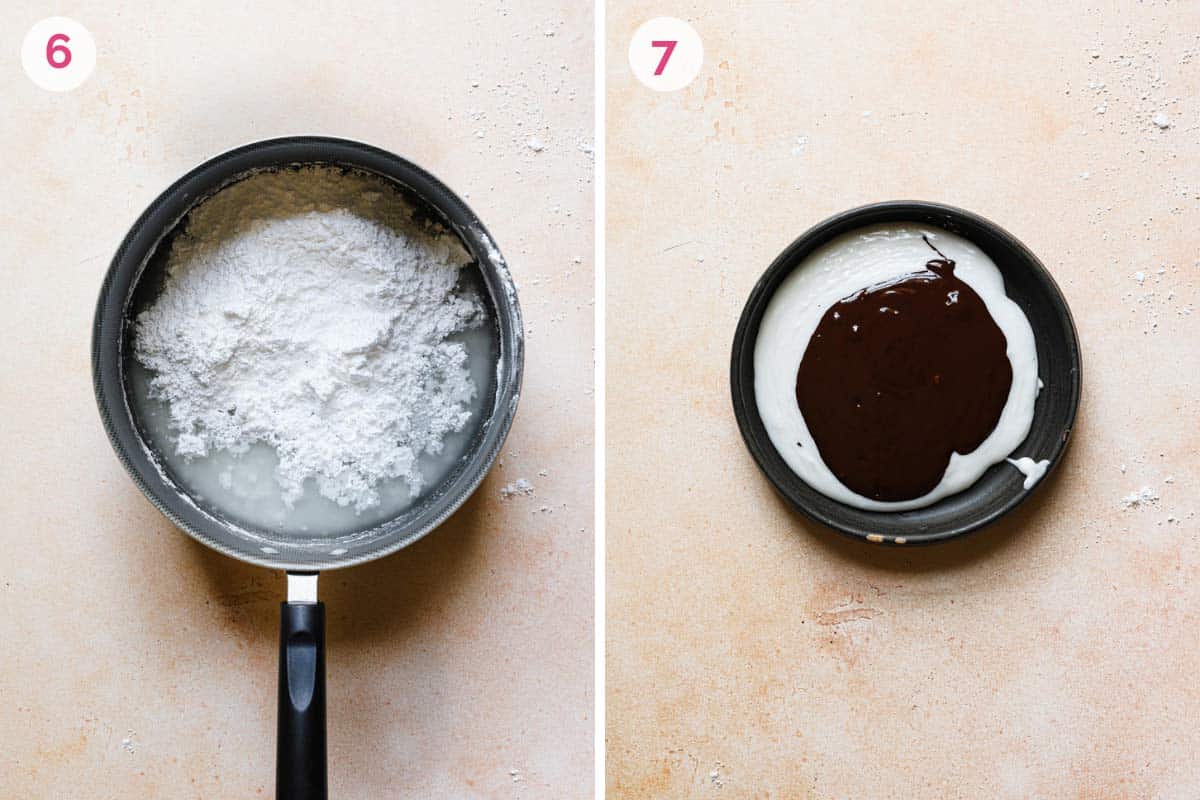
Step 3: Make the Vanilla and Chocolate Icing
- Melt the chocolate: Melt chocolate in a medium bowl set over a saucepan over barely-simmering water, or use the microwave on 50% power in 30-second increments; set aside.
- Boil liquids: In a medium saucepan over medium heat, bring the water and corn syrup to a boil.
- Add sugar and vanilla: Remove from heat and whisk in the powdered sugar and vanilla extract.
- Mix in chocolate: Transfer 3/4-cup of the icing to the bowl with the melted chocolate and whisk to combine.
Step 4: Ice the Black and White Cookies
- Prepare the icing station: Place wire racks over wax paper to catch any drips.
- Spread vanilla icing: Use a small offset spatula to spread about 2 tablespoons of the vanilla icing onto half of the flat underside of each cookie. The icing should move on its own when the cookie is tilted; use the spatula to scrape any excess from around the edges.
- Allow to set: Place the finished cookies on the wire racks and allow them to set for at least 15 minutes.
- Spread chocolate icing: Again, using a small offset spatula, spread the chocolate icing on the other half of each cookie, scraping excess icing from around the edge of the cookies.
- Fully set: Place the finished cookies on the wire racks and allow them to set for at least 1 hour.

Success Tips
- Cookie Temperature: Be sure the cookies are fully cooled before beginning to frost. If the cookie is too warm the icing will melt and not set on the cookie properly.
- Vanilla Icing: If the vanilla icing begins to thicken too much, stir in a teaspoon of warm water at a time until the icing goes back to a smoother, looser consistency.
- Chocolate Icing: If the chocolate icing thickens too much, place the bowl on a small saucepan of barely simmering water so that it can re-melt. If it is still too thick, you can add warm water, a teaspoon at a time, until it returns to the correct consistency.
Storing, Freezing, Making Ahead
Whether you have leftovers, want to keep some for later, or are planning to make these delicious cookies in advance, here are a few simple steps to help you along the way.
- Storing: Keep frosted black and white cookies in an airtight container for up to 3 days. Separate the layers of cookies with wax paper to prevent the frosting from sticking.
- Freezing: Wrap black and white cookies (frosted or un-frosted) in plastic wrap and store in a freezer-safe container for up to 3 months.
- Thawing: To thaw, refrigerate overnight and then bring to room temperature before serving or frosting.
- Making Ahead: Planning to make these in advance? For just a few days in advance, I suggest making and storing them in an airtight container. For longer than 3 days, follow freezing instructions and frost before serving.
Black and White Cookie FAQs
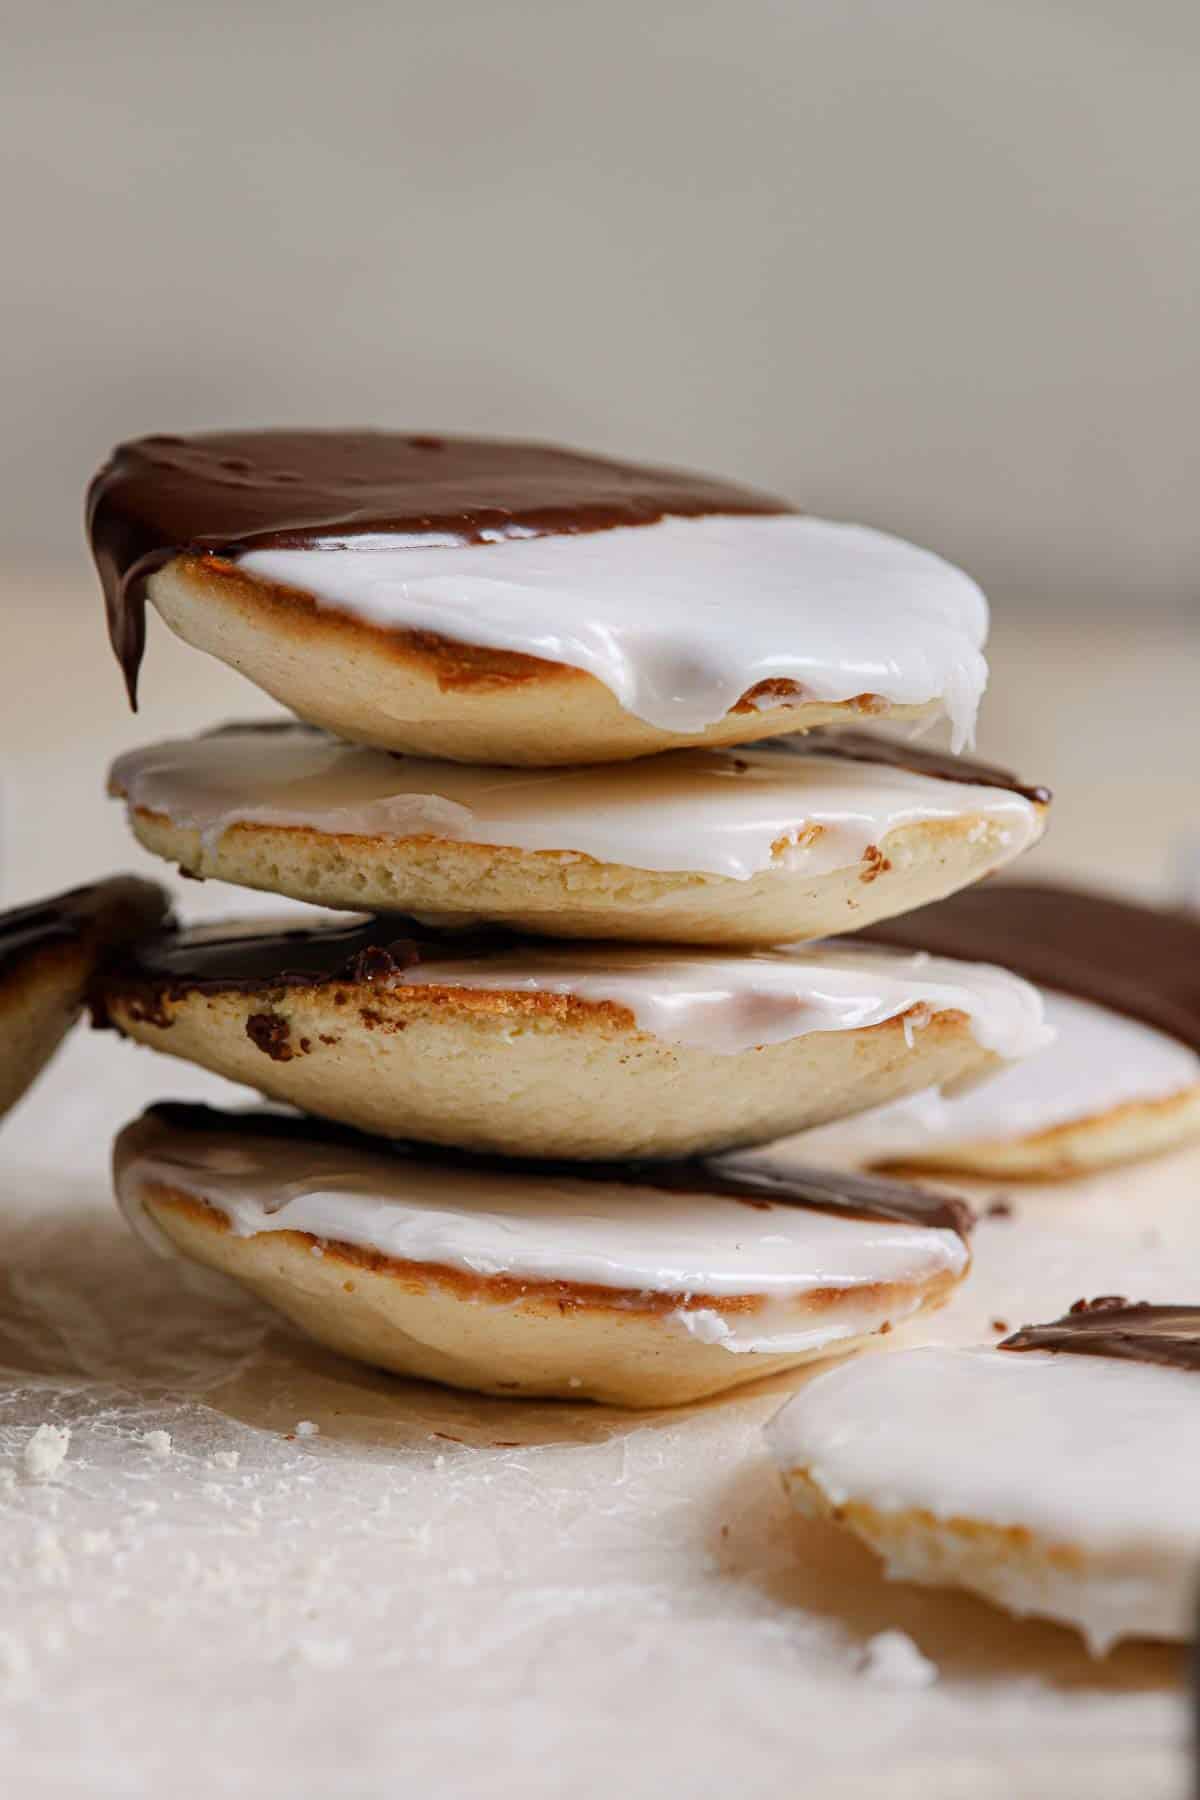
Black and white cookies have a vanilla cookie base with just a hint of lemon. Topped with vanilla and chocolate frosting, you will never have to choose between the two when eating one of these cookies!
The cake-like texture of these iconic cookies leads some to say they are actually more akin to mini cakes than cookies. They tend to fall in the category of a drop cookie, since they do not spread as much as a traditional cookie.
Creative Cookies to Bake Next
- Orange Cookies
- Thick and Chewy Chocolate Chip Cookies
- Lofthouse Cookies with Thick Buttercream Frosting
- Cowboy Cookies
- Soft Chewy Sugar Cookies
Bring the flavor of New York City home with these homemade Black and White Cookies. A tender cake-like cookie coated with vanilla and chocolate icing make these a one-of-a-kind treat!
Watch the Recipe Video Below:
If you make this recipe and love it, remember to stop back and give it a 5-star rating - it helps others find the recipe! ❤️️
Black and White Cookies
Ingredients
For the Cookies:
- 4 cups (500 g) cake flour
- ½ teaspoon (0.5 teaspoon) baking powder
- ½ teaspoon (0.5 teaspoon) salt
- 1 cup (227 g) unsalted butter, at cool room temperature
- 1¾ cups (350 g) granulated sugar
- 2 eggs, at room temperature
- ½ teaspoon (0.5 teaspoon) vanilla extract
- ¼ teaspoon (0.25 teaspoon) lemon extract
- 1 cup (244 ml) milk
For the Icing:
- 2 ounces (56.7 g) unsweetened chocolate, finely chopped
- ⅓ cup (83.33 ml) water
- ¼ cup (85.25 g) light corn syrup
- 5 cups (600 g) powdered sugar
- ½ teaspoon (0.5 teaspoon) vanilla extract
Instructions
- Make the Cookies: Adjust the oven racks to lower-middle and upper-middle positions and preheat the oven to 375 degrees F. Line two baking sheets with parchment paper or a silicone baking mat.
- In a large bowl, whisk together the flour, baking powder and salt; set aside.
- Beat the butter at medium speed for 30 seconds to loosen it up. Keeping the mixer running, gradually add in the sugar and then gradually increase the speed to medium-high and beat until the mixture is light and fluffy, about 3 minutes. Scrape down the sides of the bowl and add the eggs, vanilla and lemon extract. Beat at medium speed until combined, about 30 seconds. Scrape down the sides and bottom of the bowl again. With mixer on low speed, alternately add the flour in four additions and the milk in three additions (beginning and ending with flour), and mix until just combined. Give the mixture a few final stirs with a rubber spatula to ensure all of the flour has been incorporated.
- Use a ¼-cup measuring cup to scoop mounds of dough onto the prepared baking sheets about two inches apart. Using moistened fingers, gently press each mound of dough into a 2½-inch circle. Bake until the edges of the cookies are set and light golden brown, about 20 minutes. Allow the cookies to cool for 2 minutes on the baking sheets, then remove to a wire rack to cool completely.
- Making the Icings: Melt the chocolate either in a medium bowl set over a small saucepan over barely-simmering water, or using the microwave on 50% power in 30-second increments; set aside.
- In a medium saucepan over medium heat, bring the water and corn syrup to a boil. Remove from the heat and whisk in the powdered sugar and vanilla extract. Transfer ¾ cup of the icing to the bowl with the melted chocolate and whisk to combine.
- Ice the Cookies: Place wire racks over wax paper to catch any drips. Use a small offset spatula to spread about 2 tablespoons of the vanilla icing onto half of the flat underside of each cookie. The icing should move on its own when the cookie is tilted; use the spatula to scrape any excess from around the edges. If the vanilla begins to thicken too much, stir in a teaspoon of warm water at a time until the icing goes back to a smoother, looser consistency. Place the finished cookies on the wire racks and allow to set for at least 15 minutes.
- Again using a small offset spatula, spread the chocolate icing on the half of each cookie, scraping any excess icing from around the edge of the cookies. If the chocolate icing thickens too much, place the bowl on a small saucepan of barely simmering water so that it can re-melt. If it’s still too thick, you can add warm water, a teaspoon at a time, until it returns to the correct consistency. Place the finished cookies on the wire racks and allow to set for at least 1 hour.
- The cookies can be stored in an airtight container at room temperature for up to 3 days. If you stack the cookies, be sure to place a piece of wax paper between layers.
Notes
- Cake Flour: Has a lower gluten content than all-purpose flour leaving these cookies light and spongy. I do not recommend substituting all-purpose flour. You can find cake flour in any grocery store, online, or use this substitution.
- Lemon Extract: This is optional and not overpowering, but gives the cookies that familiar flavor.
- Milk: Use whatever you have on hand; 1%, 2%, or whole milk.
- Cookie Temperature: Be sure the cookies are fully cooled before beginning to frost. If the cookie is too warm the icing will melt and not set on the cookie properly.
- Vanilla Icing: If the vanilla icing begins to thicken too much, stir in a teaspoon of warm water at a time until the icing goes back to a smoother, looser consistency.
- Chocolate Icing: If the chocolate icing thickens too much, place the bowl on a small saucepan of barely simmering water so that it can re-melt. If it is still too thick, you can add warm water, a teaspoon at a time, until it returns to the correct consistency.
- Storing: Keep frosted black and white cookies in an airtight container for up to 3 days. Separate the layers of cookies with wax paper to prevent the frosting from sticking.
- Freezing: Wrap black and white cookies (frosted or un-frosted) in plastic wrap and store in a freezer-safe container for up to 3 months.
- Thawing: To thaw, refrigerate overnight and then bring to room temperature before serving or frosting.
- Recipe from Baking Illustrated
Did you make this recipe?
Leave a review below, then snap a picture and tag @thebrowneyedbaker on Instagram so I can see it!
Photography by Dee Frances.


this is test
A Jewish New Yorker here chiming in to say these are bang on! These are exactly what I grew up on.
The main/cover photo with the cookies iced on the wrong side is killing me softly.
Hi! I made black and white cookies from your recipe a few years ago and they were amazing! Have you modified this recipe at all? I’m reading it, and I think it might be different than what was here before, but not certain. If you’ve modified, is there a link to the original recipe? Thanks!
Definitely originated / invented by Hemstrought’s in Utica, NY ! !
The best version actually uses a chocolate cake/cookie under the frosting.
Thanks for sharing this with everyone…
Yum, sounds amazing w chocolate.
I’ve never had one of these cookies before.
These were very fun and fairly easy to make – I followed it exactly, except I added 2 tsp of bloomed Dutch cocoa to my chocolate icing because I just wanted a deeper chocolate flavor. The icing was very forgiving (the tips helped!) and dried with such a nice sheen.
I don’t think they taste exactly like the deli cookies I grew up eating, but this a VERY good quality version of it. The lemon extract is a wonderful addition and it’s only a hint of the flavor. I love the texture of the cookie and I think it tastes even better the next day. I shared them with 4 neighbors and they all absolutely loved them. I highly recommend trying this out!
Don’t wast your time with this! I was excited about making these cookies since it didn’t call for sour cream or buttermilk like the other black and white recipes. These really bummed me out, all the time it took to bake then frost them. The frosting was TOO SWEET, couldn’t taste the chocolate. Just a lemon cookie with Extra extra sugar on top. They are edible, but not enjoyable. Homemade cookies from scratch are to be othe ones you grab and can’t get enough of.
These are fantastic. The cookies of my childhood at the Jewish bakery. I seem to need to bake them for only 10 minutes or so to achieve the moist cake like cookies they should be. I have made them many times and that is the only thing that strays from your excellent recipe.