Black and White Cookies
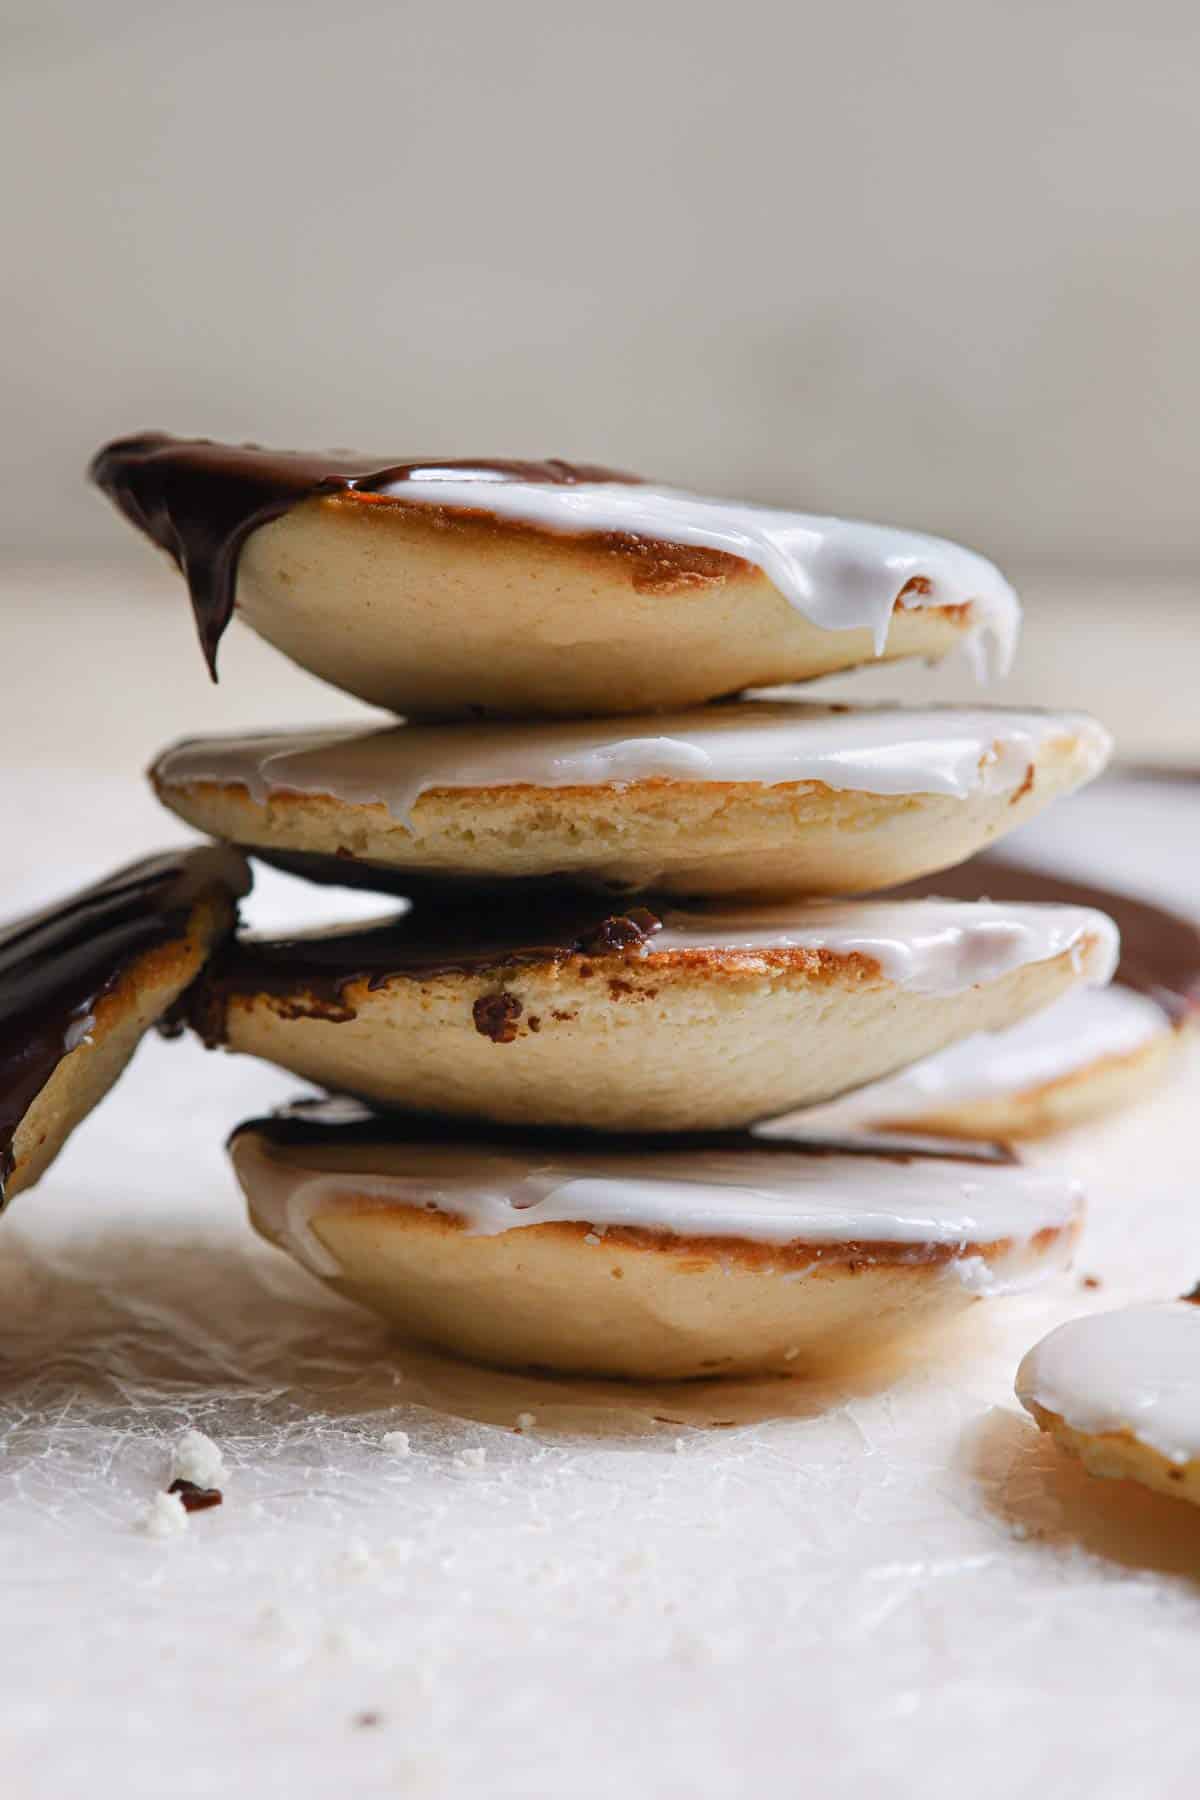
Bring a little flavor of the big city home with these homemade Black and White Cookies. Tender, fluffy cookies are topped with vanilla and chocolate icing; these cookies give you the best of both cake and cookie, vanilla and chocolate.
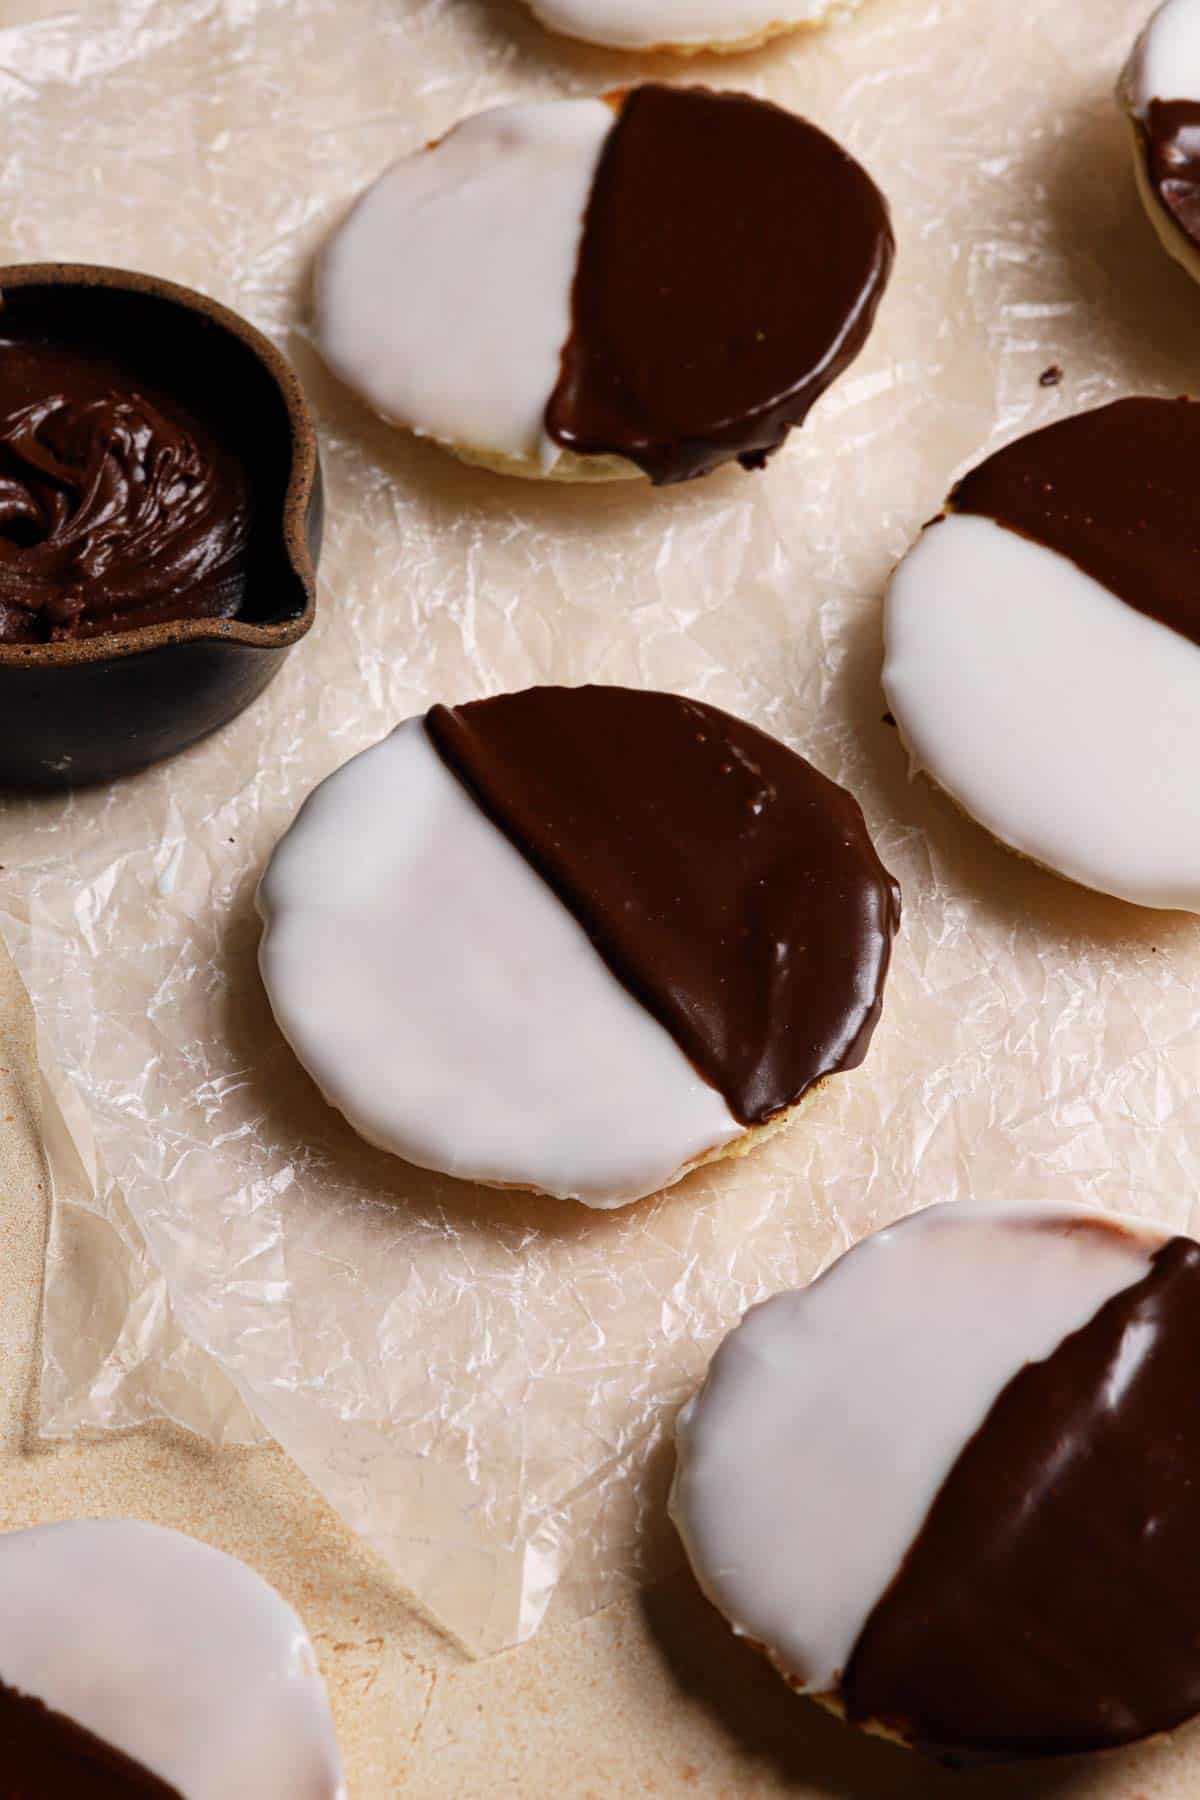
What are Black and White Cookies?
If you aren’t familiar with them, black and white cookies are almost as synonymous with New York City bakeries as cheesecake. I always think of the Seinfeld “Look to the cookie!” episode when I see one.
These cake-like cookies are also known as half and half cookies, half-moon cookies, and Amerikaner in Germany. Originating in the early 1900s, two different New York bakeries claim to be the creator of these iconic cookies, Glaser’s Bake Shop in New York City and Hemstrought's Bakery in Utica, NY. Regardless of who created the original cookie, they have become a staple in New York delis for decades!
The texture is sponge-like, the cookies have a hint of lemon flavor, and are covered in vanilla and chocolate icings. They’re a fabulous change of pace from the typical chocolate chip and oatmeal cookies that are found in most bakeries.
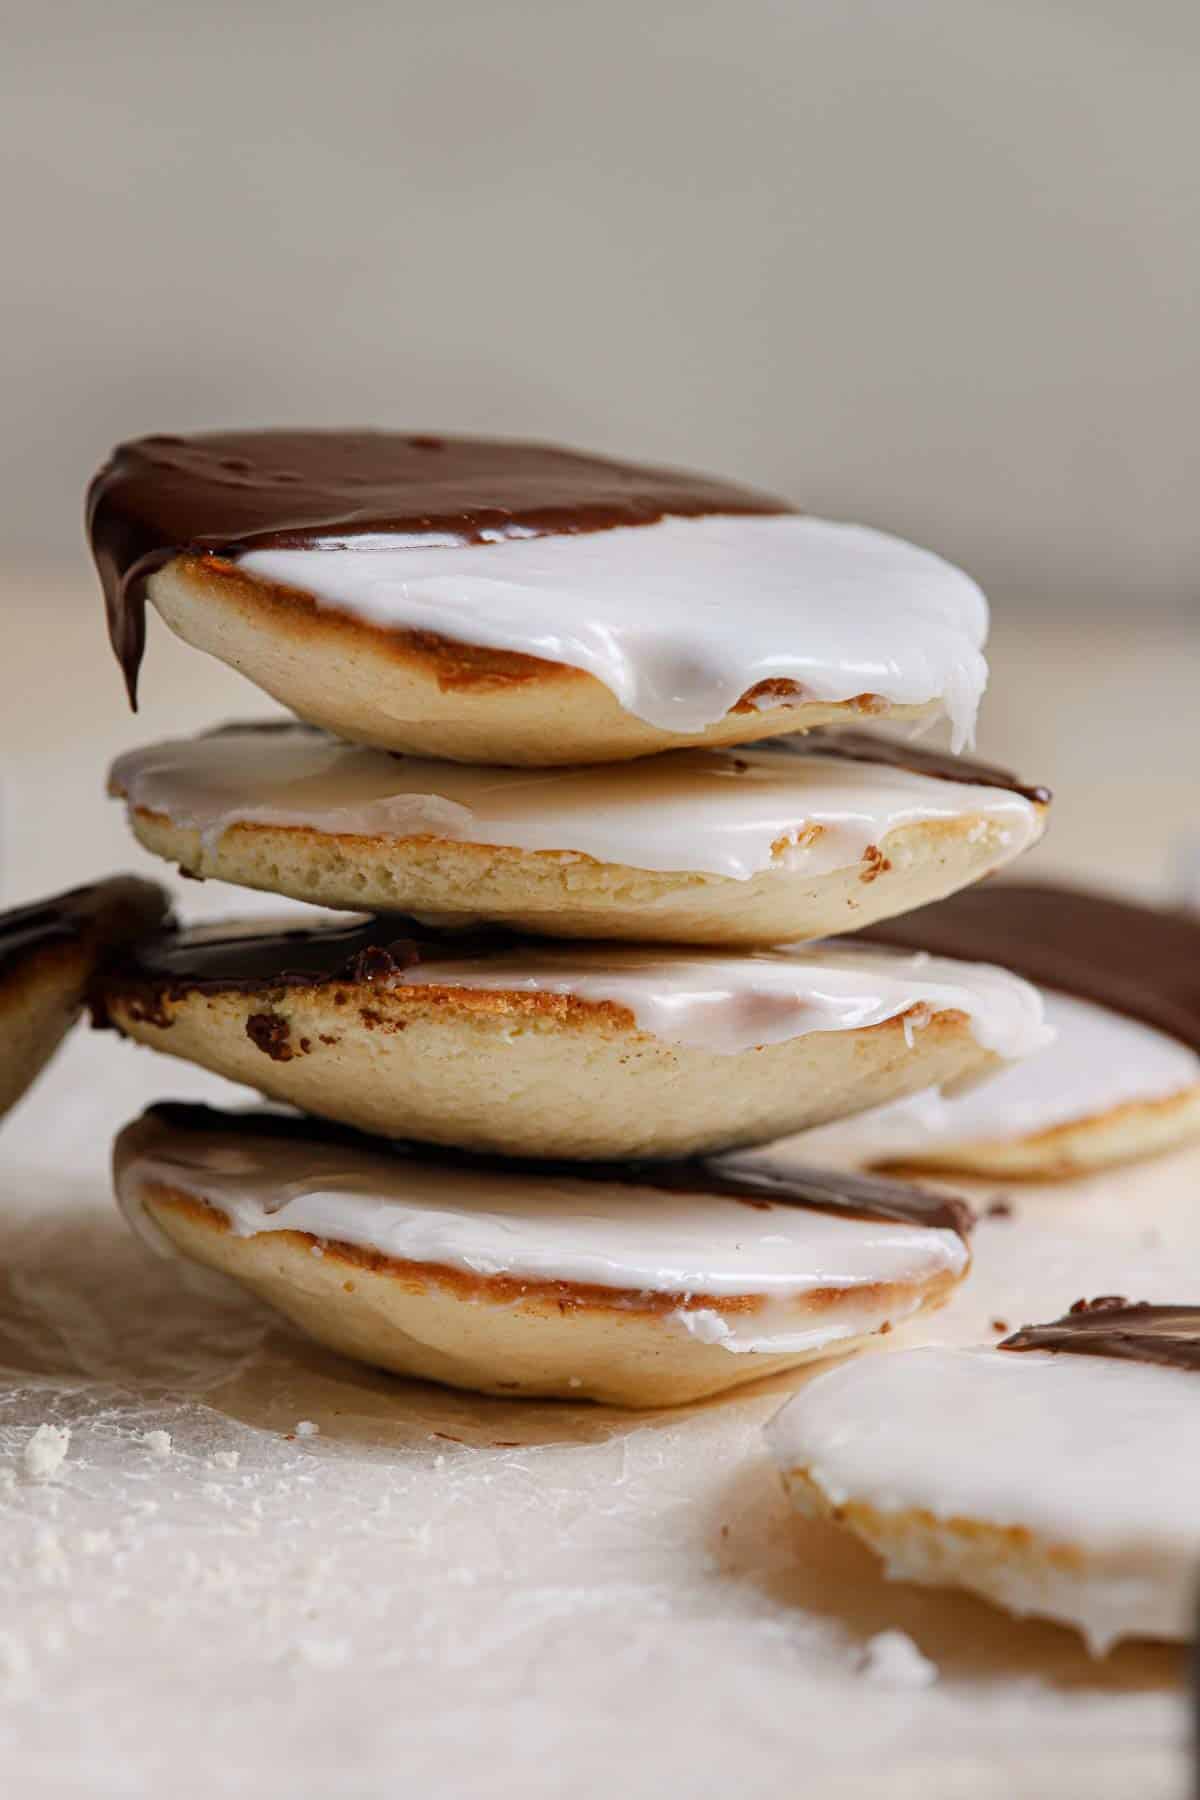
Ingredients You’ll Need
First, you’ll bake and cool the cookies, then ice them. Here are the key ingredients you’ll need for both steps:
For the Cookies
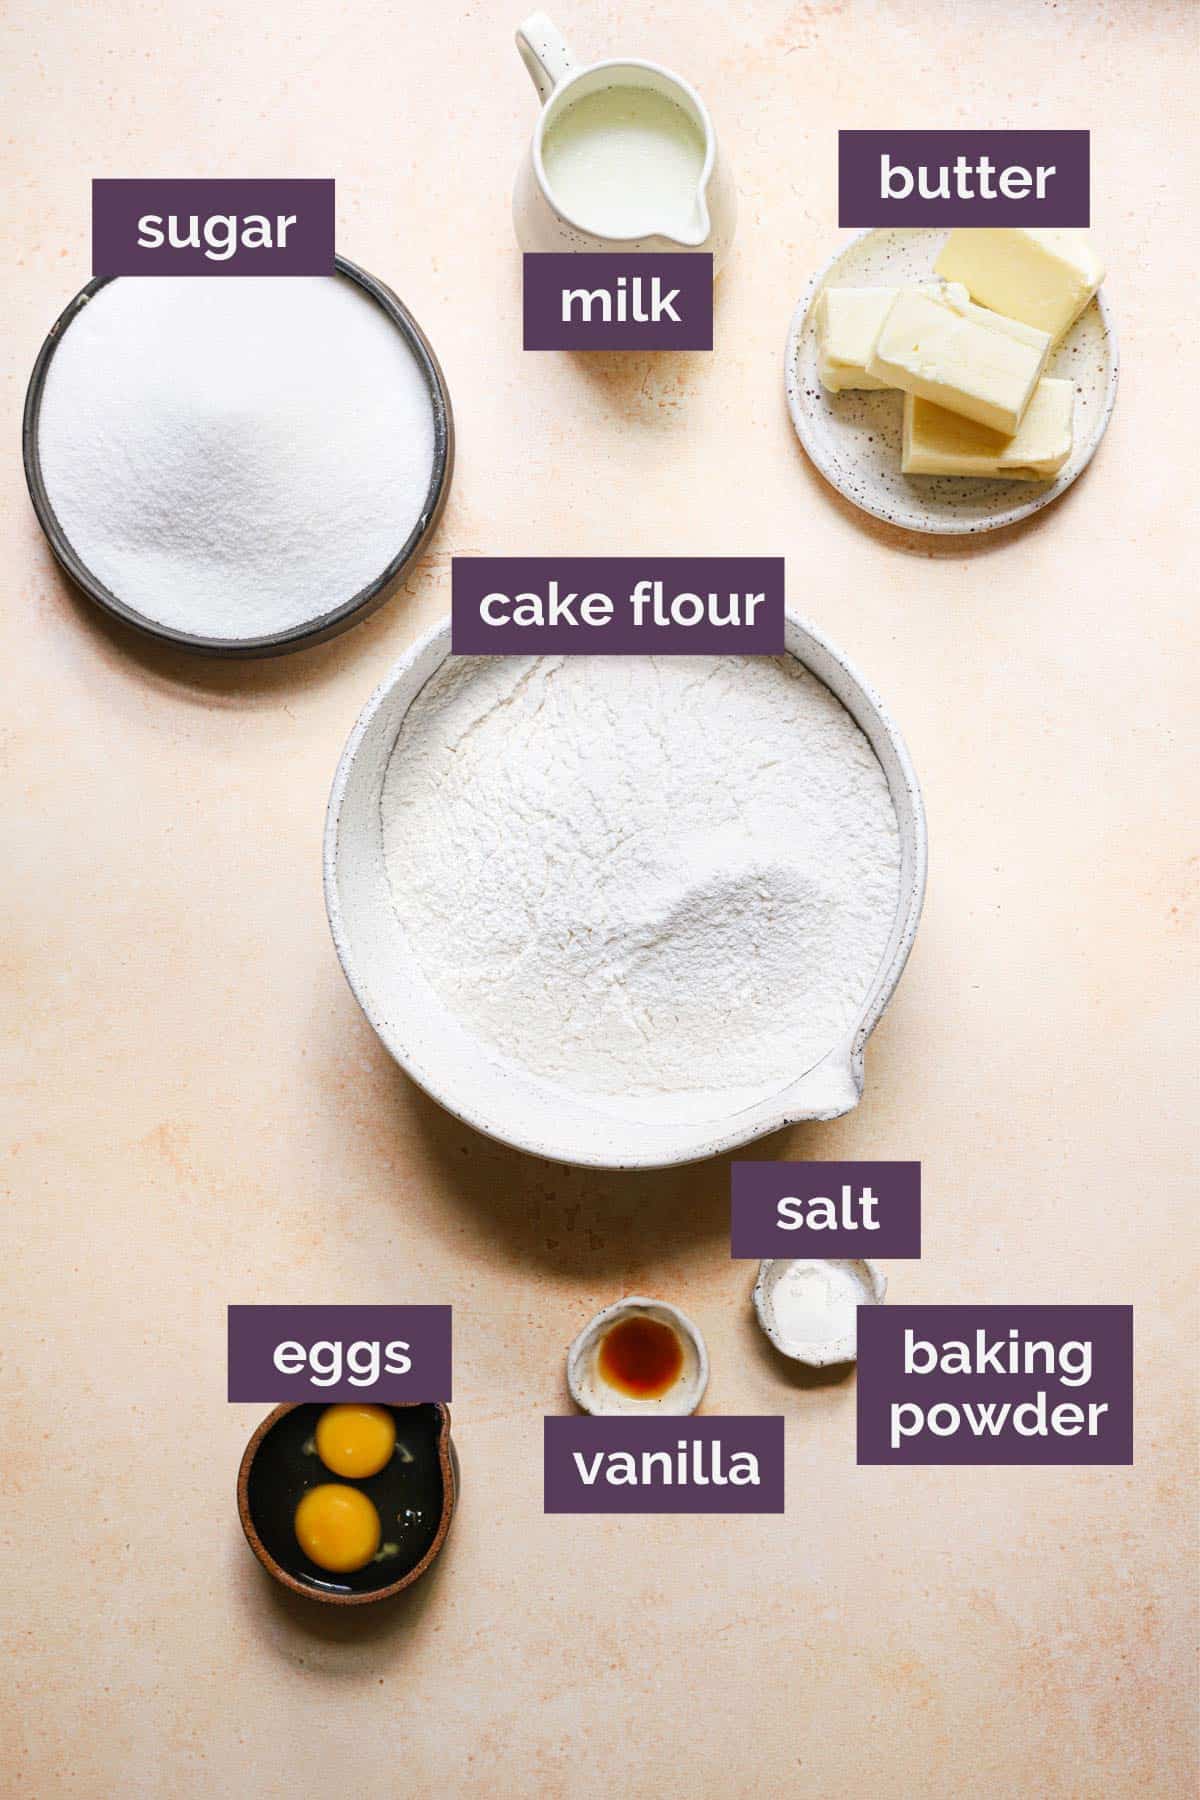
- Cake Flour: Has a lower gluten content than all-purpose flour leaving these cookies light and spongy.
- Butter: Use unsalted butter at a cool room temperature.
- Lemon Extract: This is optional and not overpowering, but gives the cookies that familiar flavor.
- Milk: Use whatever you have on hand; 1%, 2%, or whole milk.
For the Icing
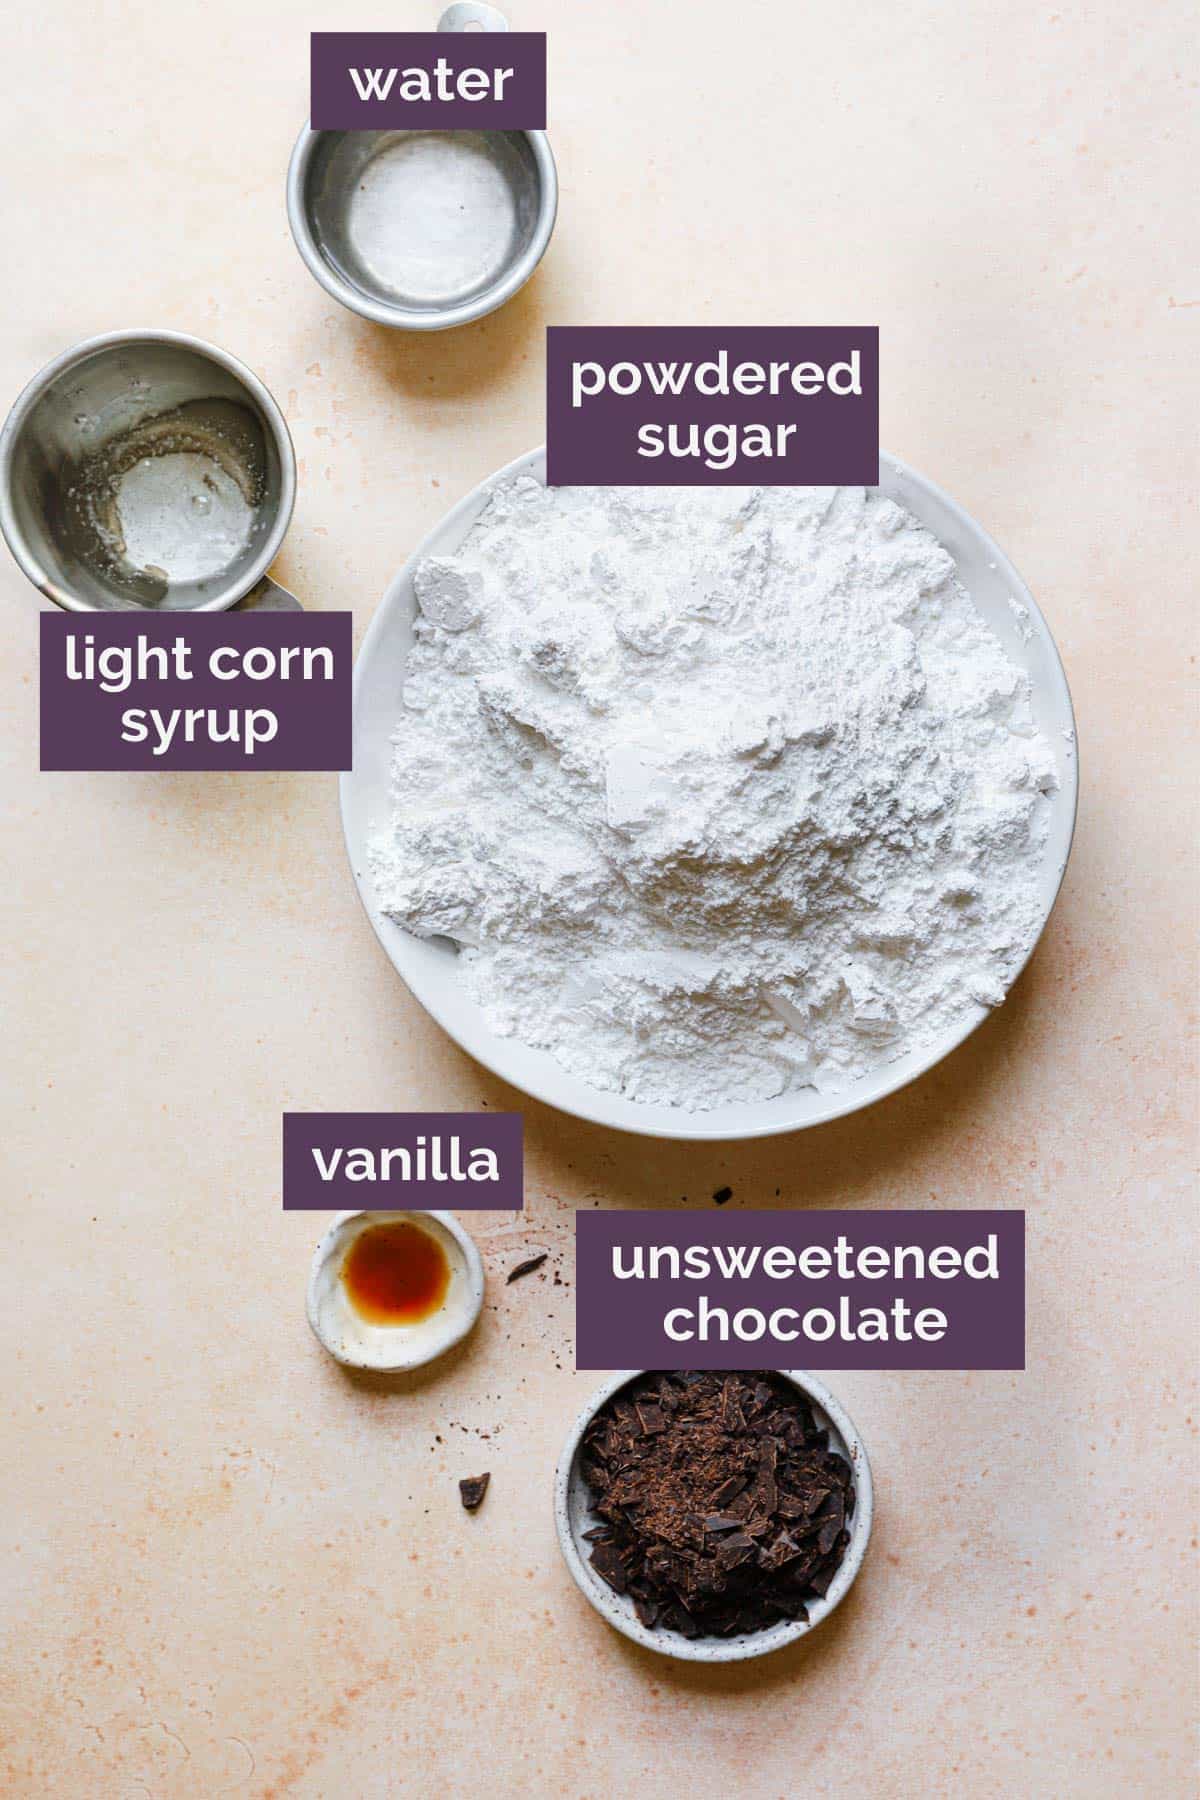
- Chocolate: Chopped unsweetened chocolate mixed with the icing base will give half of each cookie chocolate icing.
- Water: Thins out the icing for easy pouring and spreading.
- Corn Syrup: Gives the icing a bit of a sheen.
- Powdered Sugar: To sweeten and thicken the icing.
- Vanilla: Flavor!
Step-By-Step Directions
While it may appear to be a difficult recipe it really breaks down to four main steps: making the dough, baking the cookies, preparing the icing, and frosting the cookies.
Step 1: Make The Cookie Dough
- Adjust the oven racks to the lower-middle and upper-middle positions in the oven.
- Preheat the oven to 375°F and line two baking sheets with parchment paper or a silicone baking mat.
- Mix dry ingredients: In a large bowl, whisk together the flour, baking powder, and salt; set aside.
- Beat butter then add sugar: Beat the butter at medium speed for 30 seconds to loosen it up. Keeping the mixer running, gradually add in the sugar and then gradually increase the speed to medium-high and beat until light and fluffy, about 3 minutes.
- Add eggs and extracts: Scrape down the sides of the bowl and add the eggs, vanilla, lemon extract. Beat at medium speed until combined, about 30 seconds. Scrape down the sides and bottom of the bowl again.
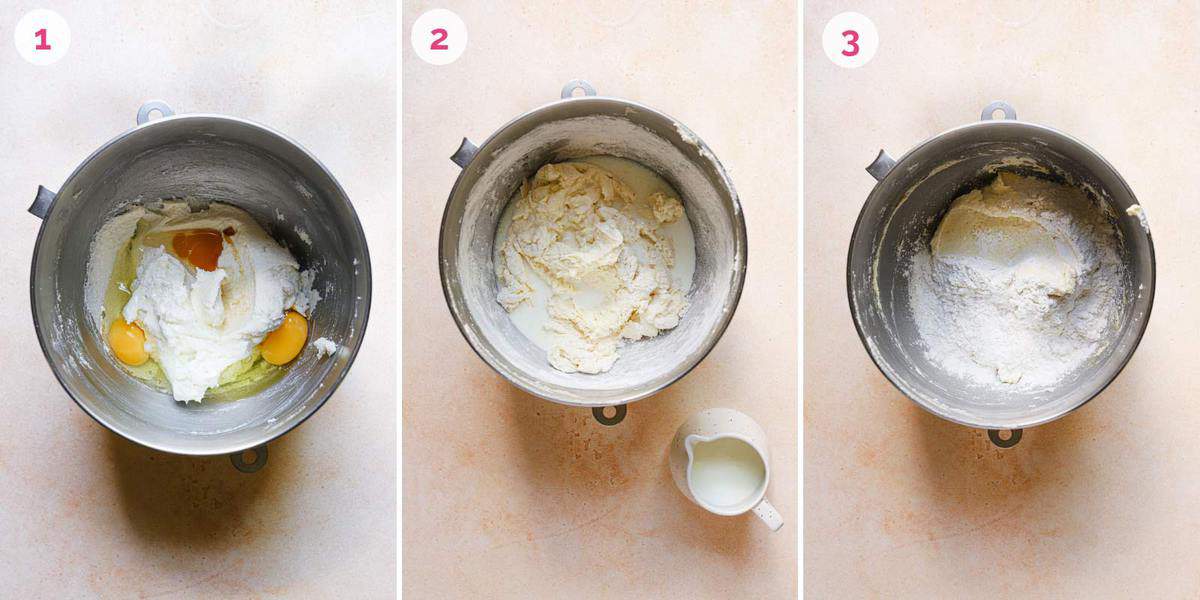
- Stir in flour and milk: With the mixer on low speed, alternately add the flour in four additions and the milk in three additions (beginning and ending with the flour), and mix until just combined.
- Final stir: Give the mixture a few final stirs with a rubber spatula to ensure all of the flour has been incorporated.
Step 2: Bake the Cookies
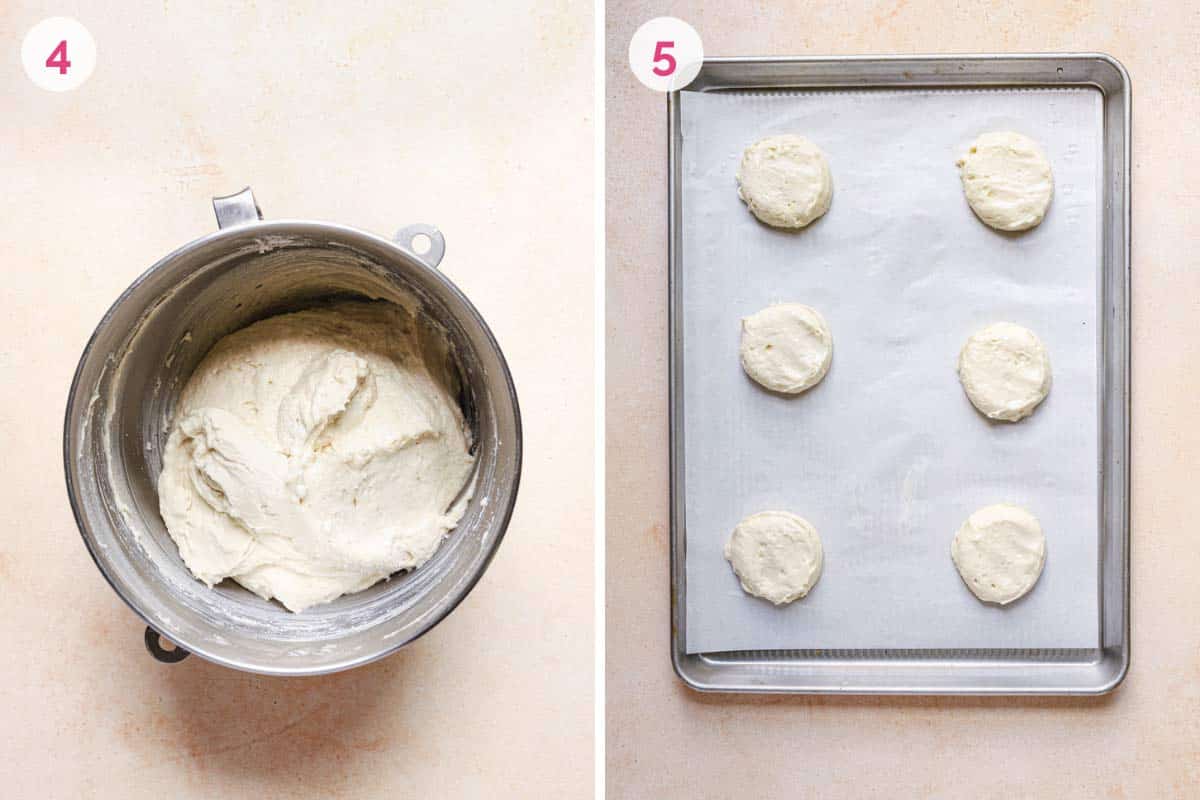
- Scoop the dough: Using a ¼-cup measuring cup, scoop mounds of dough onto the prepared baking sheets about 2 inches apart.
- Press into circles: Using moistened fingers, gently press each mound of dough into a 2½-inch circle.
- Bake until the edges of the cookies are set and light golden brown, about 20 minutes.
- Cool the cookies: Allow the cookies to cool for 2 minutes on the baking sheets, then remove to a wire rack to cool completely.
Save This Recipe
Step 3: Make the Vanilla and Chocolate Icing
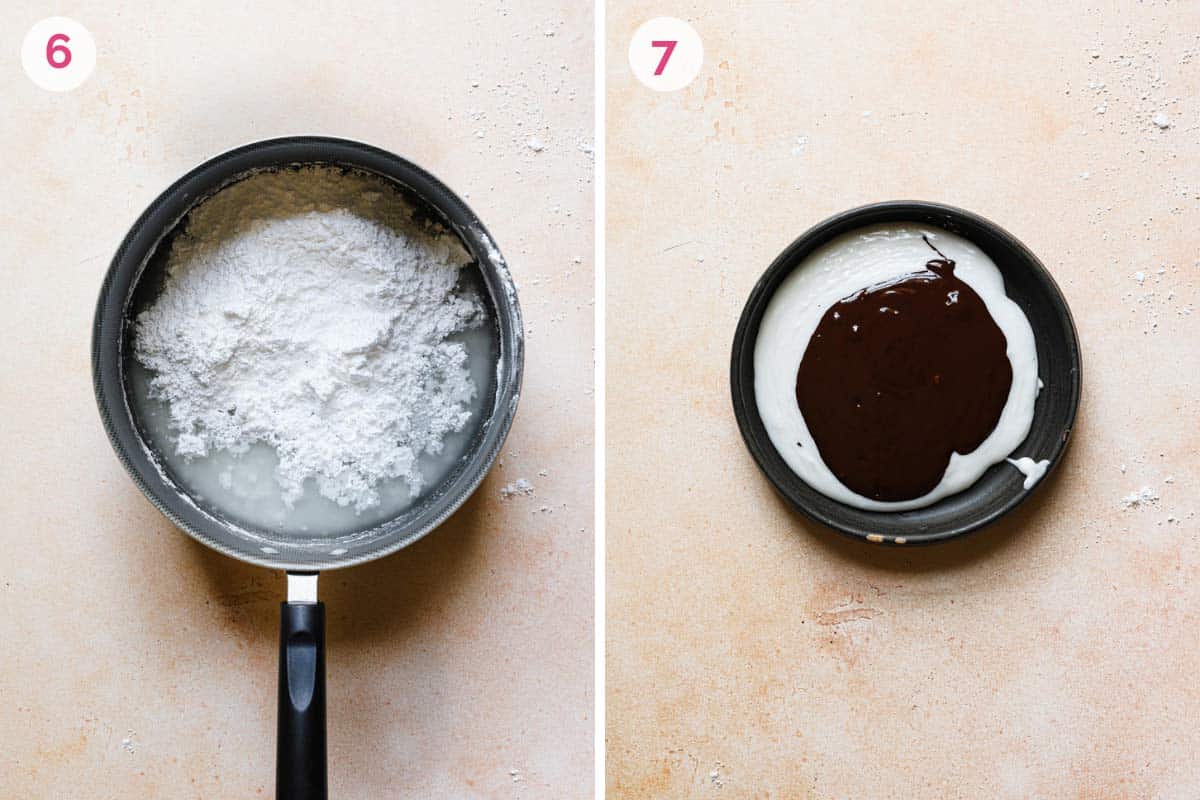
- Melt the chocolate: Melt chocolate in a medium bowl set over a saucepan over barely-simmering water, or use the microwave on 50% power in 30-second increments; set aside.
- Boil liquids: In a medium saucepan over medium heat, bring the water and corn syrup to a boil.
- Add sugar and vanilla: Remove from heat and whisk in the powdered sugar and vanilla extract.
- Mix in chocolate: Transfer 3/4-cup of the icing to the bowl with the melted chocolate and whisk to combine.
Step 4: Ice the Black and White Cookies
- Prepare the icing station: Place wire racks over wax paper to catch any drips.
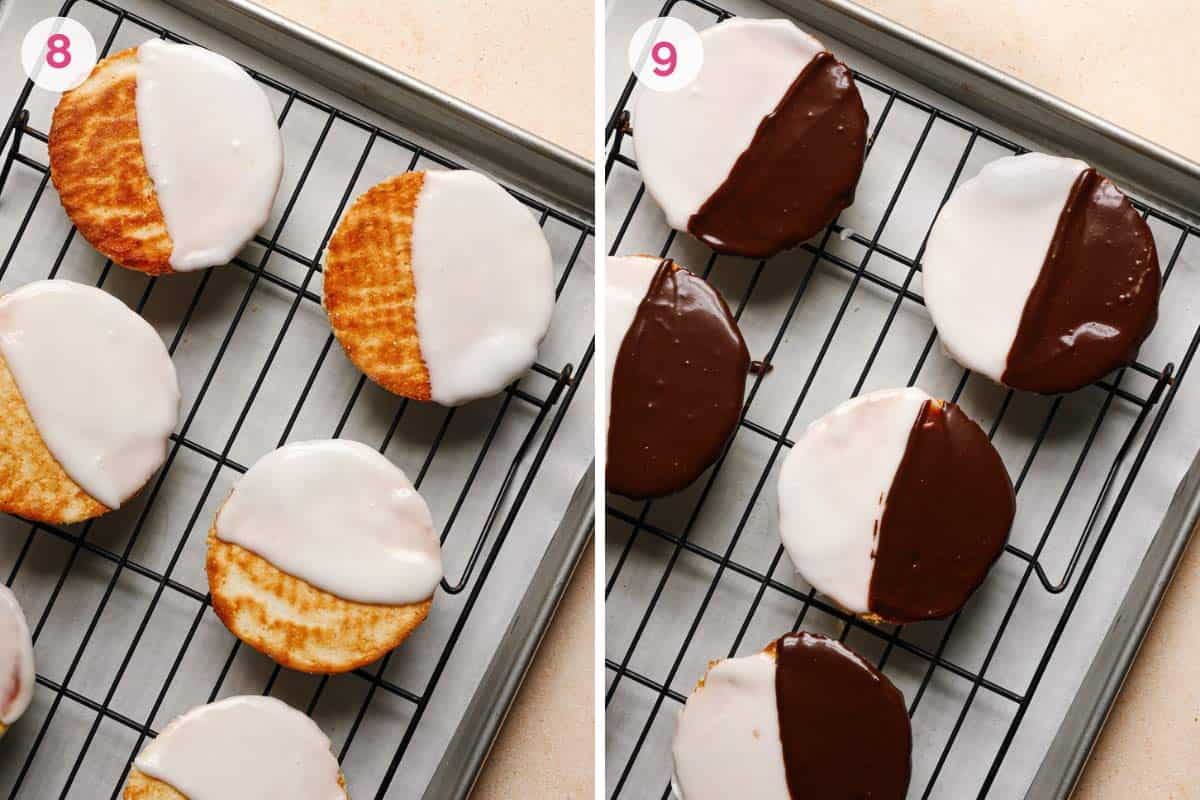
- Spread vanilla icing: Use a small offset spatula to spread about 2 tablespoons of the vanilla icing onto half of the flat underside of each cookie. The icing should move on its own when the cookie is tilted; use the spatula to scrape any excess from around the edges.
- Allow to set: Place the finished cookies on the wire racks and allow them to set for at least 15 minutes.
- Spread chocolate icing: Again, using a small offset spatula, spread the chocolate icing on the other half of each cookie, scraping excess icing from around the edge of the cookies.
- Fully set: Place the finished cookies on the wire racks and allow them to set for at least 1 hour.
Success Tips
- Cookie Temperature: Be sure the cookies are fully cooled before beginning to frost. If the cookie is too warm the icing will melt and not set on the cookie properly.
- Vanilla Icing: If the vanilla icing begins to thicken too much, stir in a teaspoon of warm water at a time until the icing goes back to a smoother, looser consistency.
- Chocolate Icing: If the chocolate icing thickens too much, place the bowl on a small saucepan of barely simmering water so that it can re-melt. If it is still too thick, you can add warm water, a teaspoon at a time, until it returns to the correct consistency.
Storing, Freezing, Making Ahead
Whether you have leftovers, want to keep some for later, or are planning to make these delicious cookies in advance, here are a few simple steps to help you along the way.
- Storing: Keep frosted black and white cookies in an airtight container for up to 3 days. Separate the layers of cookies with wax paper to prevent the frosting from sticking.
- Freezing: Wrap black and white cookies (frosted or un-frosted) in plastic wrap and store in a freezer-safe container for up to 3 months.
- Thawing: To thaw, refrigerate overnight and then bring to room temperature before serving or frosting.
- Making Ahead: Planning to make these in advance? For just a few days in advance, I suggest making and storing them in an airtight container. For longer than 3 days, follow freezing instructions and frost before serving.
Black and White Cookie FAQs
Black and white cookies have a vanilla cookie base with just a hint of lemon. Topped with vanilla and chocolate frosting, you will never have to choose between the two when eating one of these cookies!
The cake-like texture of these iconic cookies leads some to say they are actually more akin to mini cakes than cookies. They tend to fall in the category of a drop cookie, since they do not spread as much as a traditional cookie.
Creative Cookies to Bake Next
- Orange Cookies
- Thick and Chewy Chocolate Chip Cookies
- Lofthouse Cookies with Thick Buttercream Frosting
- Cowboy Cookies
- Soft Chewy Sugar Cookies
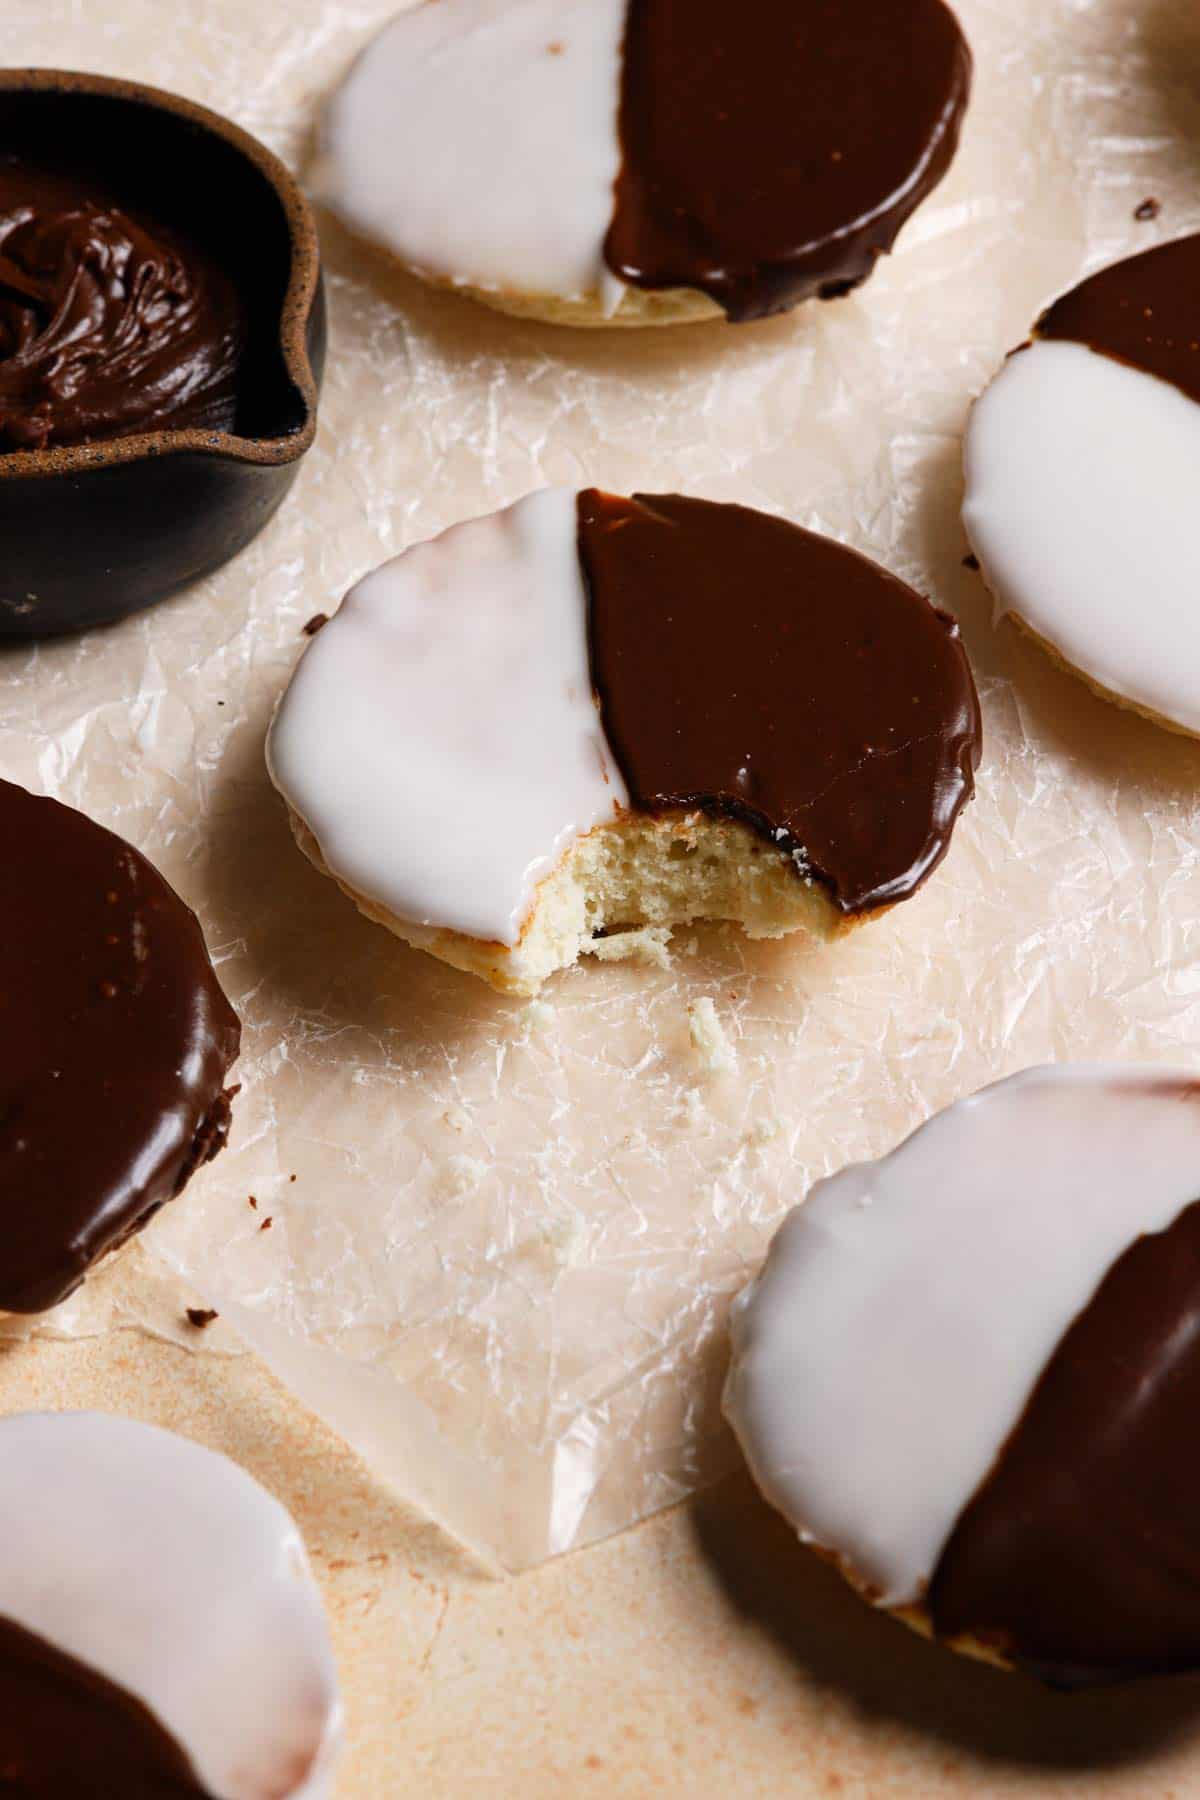
Bring the flavor of New York City home with these homemade Black and White Cookies. A tender cake-like cookie coated with vanilla and chocolate icing make these a one-of-a-kind treat!
Watch the Recipe Video Below:
If you make this recipe and love it, remember to stop back and give it a 5-star rating - it helps others find the recipe! ❤️️
Black and White Cookies
Ingredients
For the Cookies:
- 4 cups (500 g) cake flour
- ½ teaspoon (0.5 teaspoon) baking powder
- ½ teaspoon (0.5 teaspoon) salt
- 1 cup (227 g) unsalted butter, at cool room temperature
- 1¾ cups (350 g) granulated sugar
- 2 eggs, at room temperature
- ½ teaspoon (0.5 teaspoon) vanilla extract
- ¼ teaspoon (0.25 teaspoon) lemon extract
- 1 cup (244 ml) milk
For the Icing:
- 2 ounces (56.7 g) unsweetened chocolate, finely chopped
- ⅓ cup (83.33 ml) water
- ¼ cup (85.25 g) light corn syrup
- 5 cups (600 g) powdered sugar
- ½ teaspoon (0.5 teaspoon) vanilla extract
Instructions
- Make the Cookies: Adjust the oven racks to lower-middle and upper-middle positions and preheat the oven to 375 degrees F. Line two baking sheets with parchment paper or a silicone baking mat.
- In a large bowl, whisk together the flour, baking powder and salt; set aside.
- Beat the butter at medium speed for 30 seconds to loosen it up. Keeping the mixer running, gradually add in the sugar and then gradually increase the speed to medium-high and beat until the mixture is light and fluffy, about 3 minutes. Scrape down the sides of the bowl and add the eggs, vanilla and lemon extract. Beat at medium speed until combined, about 30 seconds. Scrape down the sides and bottom of the bowl again. With mixer on low speed, alternately add the flour in four additions and the milk in three additions (beginning and ending with flour), and mix until just combined. Give the mixture a few final stirs with a rubber spatula to ensure all of the flour has been incorporated.
- Use a ¼-cup measuring cup to scoop mounds of dough onto the prepared baking sheets about two inches apart. Using moistened fingers, gently press each mound of dough into a 2½-inch circle. Bake until the edges of the cookies are set and light golden brown, about 20 minutes. Allow the cookies to cool for 2 minutes on the baking sheets, then remove to a wire rack to cool completely.
- Making the Icings: Melt the chocolate either in a medium bowl set over a small saucepan over barely-simmering water, or using the microwave on 50% power in 30-second increments; set aside.
- In a medium saucepan over medium heat, bring the water and corn syrup to a boil. Remove from the heat and whisk in the powdered sugar and vanilla extract. Transfer ¾ cup of the icing to the bowl with the melted chocolate and whisk to combine.
- Ice the Cookies: Place wire racks over wax paper to catch any drips. Use a small offset spatula to spread about 2 tablespoons of the vanilla icing onto half of the flat underside of each cookie. The icing should move on its own when the cookie is tilted; use the spatula to scrape any excess from around the edges. If the vanilla begins to thicken too much, stir in a teaspoon of warm water at a time until the icing goes back to a smoother, looser consistency. Place the finished cookies on the wire racks and allow to set for at least 15 minutes.
- Again using a small offset spatula, spread the chocolate icing on the half of each cookie, scraping any excess icing from around the edge of the cookies. If the chocolate icing thickens too much, place the bowl on a small saucepan of barely simmering water so that it can re-melt. If it’s still too thick, you can add warm water, a teaspoon at a time, until it returns to the correct consistency. Place the finished cookies on the wire racks and allow to set for at least 1 hour.
- The cookies can be stored in an airtight container at room temperature for up to 3 days. If you stack the cookies, be sure to place a piece of wax paper between layers.
Notes
- Cake Flour: Has a lower gluten content than all-purpose flour leaving these cookies light and spongy. I do not recommend substituting all-purpose flour. You can find cake flour in any grocery store, online, or use this substitution.
- Lemon Extract: This is optional and not overpowering, but gives the cookies that familiar flavor.
- Milk: Use whatever you have on hand; 1%, 2%, or whole milk.
- Cookie Temperature: Be sure the cookies are fully cooled before beginning to frost. If the cookie is too warm the icing will melt and not set on the cookie properly.
- Vanilla Icing: If the vanilla icing begins to thicken too much, stir in a teaspoon of warm water at a time until the icing goes back to a smoother, looser consistency.
- Chocolate Icing: If the chocolate icing thickens too much, place the bowl on a small saucepan of barely simmering water so that it can re-melt. If it is still too thick, you can add warm water, a teaspoon at a time, until it returns to the correct consistency.
- Storing: Keep frosted black and white cookies in an airtight container for up to 3 days. Separate the layers of cookies with wax paper to prevent the frosting from sticking.
- Freezing: Wrap black and white cookies (frosted or un-frosted) in plastic wrap and store in a freezer-safe container for up to 3 months.
- Thawing: To thaw, refrigerate overnight and then bring to room temperature before serving or frosting.
- Recipe from Baking Illustrated
Did you make this recipe?
Leave a review below, then snap a picture and tag @thebrowneyedbaker on Instagram so I can see it!
Photography by Dee Frances.




Can you make the cookies half the size , so you will have more cookies with one batch?
Hi Katie, Yes, you can do that, just be sure to reduce the baking time so your cookies don’t burn!
I, too, would like to make these for my wedding (favors!), but I would like to miniaturize them–any idea on an adjusted baking time or any other adjustments I should make?
Hi Emily, You will need to reduce the baking time, how much so will depend on how large you make them. It may take a little trial and error!
I really want to make these for my wedding but I’m wondering about how big these turn out to be. Thank You.
Hi Stacey, They’re pretty large, about 4 inches in diameter.
Made these, delish!!! I need to make a ton of them for Sunday can I bake them all up tomorrow, Friday, and frost Subday? How can I store the infrosted ones so they stay fresh? Thanks!!!
Hi Rosanne, Yes, you could do that. I would just keep them in an airtight container at room temperature.
This was a wonderful recipe, easy to follow with spectacular results, not to mention that you absolutely nailed the taste. We have ordered these cookies from New York for years, making them fresh was truly a treat, thank you!
My goodness…. My husband is from New Jersey and loves these cookies… I have tried on and off for years and these cookies are the best.. Your recipe is perfect but I do have one question …. what type of chocolate do you use for the chocolate side of the frosting… We used semi sweet chocolate the other night but it looks like milk chocolate and my husband says it’s almost there but not fully……. your chocolate is dark in the photo and that’s what I’m looking for….. Hope you can help thank you again for the recipe… A California girl cooking for a Jersey Boy…
Hi Maria, I’m glad you and your husband have enjoyed the cookies! Per the recipe, I use unsweetened chocolate for the chocolate icing. I hope that helps!
Check your website . Upon clicking on your link I recieved a popup that down loaded a virus to my computer… Love your website but it happened twice now!
I grew up with Black and White Cookies, but hadn’t had them in decades. I made them today and they are perfect! Thank you!!!!
Hi! I made these cookies and they came out perfect! However the second time I made them I had a lot of trouble. The dough seemed great and kept it’s form nice on the baking sheet, but after a minute or so in the oven it would have sides that would seep out of shape to create really ugly non-uniform cookies. It was as if once in the oven, some butter or sugar within the dough would release and ooze and flatten a part of the circle. I re-did the batch a third time and the same thing happened. Any ideas why? I had to resort to making them in cupcake tins because they still tasted delicious but wouldn’t keep form. Help!
Hi Bonnie, It’s odd that they worked perfectly the first time, but did not after that. Were there any changes at all to your kitchen temperature, process, ingredients, etc.? Also, be sure to use an oven thermometer to make sure there isn’t some fluctuation in your oven temperature, which could also be causing the issue.
Hi there!
I loved the cookie recipe! I was trying this for a dinner party I was having for my family… unfortunately I messed up the frosting! I’m not sure what I did wrong.. but the chocolate was way too hard to use… Hmm…
I live in NY and get these cookies all the time. This recipe taste just like a bakery’s cookie. EXCELLENT!
I have already made these cookies and I must say they are absolutely delicious!
I’m having serious issues with the icing. The vanilla icing gets stiff almost immediately. And twice the chocolate has seized immediately on contact with the portion of the vanilla icing I mix it into.
Is there some missing fat ingredient to keep the chocolate from seizing?
Hi Kyle, I’m not sure what would cause the chocolate to seize; you’re not putting the water in with the chocolate, are you? That’s the only thing that I can think of that would cause it.
Nope, no water. I’ve melted the chocolate both in the microwave and in a double-boiler to the same effect.
Perhaps it’s due to a temperature difference between the vanilla icing and the melted chocolate? Should they be at the same temperature, or should the chocolate be warmer?
Hi Kyle, If you melt the chocolate first (which is what I did), the vanilla icing will be slightly warmer, but both should be at least slightly warm, or else they will each start to set.
Originally from the great Steel City, but have been in NYC for more than a decade now–getting married here in the fall and wanted to have black and whites as my favors. Did a trial run last night–this recipe really is perfect. The cookies I made were on the huge side–they look exactly like what you get at a deli here (that’s a good thing:)). Only thing that tripped me up a bit was chocolate measurement in oz not cups…don’t have a kitchen scale and was using a bag of bittersweet choc chips. Initially it was too thick but i added a little water and it was fine. I am test-freezing a few to see how they hold up (uniced), as i need to make 100+ of these guys eventually…will let you know how it turns out!
tried them today and loooove it so much! thanks for the great recipe!
I am totally in love with your blog (just discovered it today looking for a B&W cookie recipe, and have now found many recipes that I want to try out)!
I love black and white cookies. My first memories of them come from Saul’s – a ‘Jewish style’ restaurant and deli in Berkeley, CA (where I grew up). I got hooked on B&W cookies, though, while living in Poughkeepsie, NY. The diner at the entrance to my work site makes HUGE ones – about the size of my face – and they’re so delicious. They’re my special treat to myself. But now I live 1.5 – 2hrs away, in NYC. Strangely enough, it wasn’t until I moved to NYC that I encountered B&W cookies with a significant lemon flavoring to the cookie, which made me fall in love with them all over again (not surprising; I tend to make my Madelines very lemon-y). All of this is what sent my on quest to make my own B&W cookies! I’m so excited to try making these!
Do you know of an appropriate substitute for lemon extract? My local grocery apparently doesn’t carry it! Not really a huge deal – as I also forgot to get cake flour (if they carry that) and cornstarch – and I’ll be near a Trader Joe’s tomorrow or Sunday.
Hi Leah, You could use lemon juice, although the flavor would be much more mild. If you have time, you could order lemon extract from somewhere like Amazon or King Arthur Flour.
At this very moment, I am tasting the cookies that I have just made from your recipe! I haven’t even made the frosting yet, since I wanted to make sure the cookies were completely cooled…. Just the cookie texture, and taste alone were enough for me to get online and write a review about them. To sum them up in one word…..HEAVEN! By my third batch I figured how to position and flatten the cookie before they went into the oven, to ensure a nice flat, round shape. The cookies are delicately sweet and crumb to perfection! I CAN’T wait untill I start my frosting and finish these heaven sent cookies completely! Hands down a fabulous recipe! LOOK NO FURTHER IF SEARCHING FOR A BLACK AND WHITE COOKIE RECIPE! My cookie exchange party is in two weeks, and I WILL for a fact be baking these show stoppers! Thank you! Thank you! Thank you!
I’m making them for the first time this weekend since we no longer live in the Big Apple. Looking forward to trying out your recipe! So far, everything that I have made from your site has come out spectacular!
Ops, *found. :)
I founded. Thank you!
I’ve always wanted to bake these cookies because my family loves them (who doesn’t). So glad you tried making them again and shared your success! Can’t wait to try them. :)
Hi, Michelle!
I’ll try to bake some B&W for my husband and in-laws. They are all from NY and I do want to make them happy and bring good memories with these cookies :)
The thing is… I’m a real beginner in the baking/cooking world, so, I’d like to bake half of the cookies to begging with, while I’m trying to make it right. Would you please let me know how could I reduce the recipe to make 10 to 12 cookies instead of the 24?
P.s.: I know that to make half I’d need only to put half of the ingredients, but I think I skipped enough Mat classes as to divide 1 3/4 cups of granulated sugar and other ingredients and come with a precise quantity in order to have the right recipe.
Thank you very much for you patience!
And as soon as I bake them I’ll let you know the results!
Hoping that you read this abet a bit late since I already made these :)
Cannot tell you how pleased I am that you posted this recipe! I made these today and was so in heaven over them! My 92 year young mother is from Nedrow, NY and I am bringing some over to her tomorrow. I have been on a quest for the perfect B&W or 1/2 moon cookie as some call them and although I haven’t tried another recipe, why bother? These are the best, bar none!
That said, I lowered the temp on my oven since it’s a new oven and wasn’t sure about baking them at 375. 350 for 15 minutes was perfect. I used a organic concentrate of lemon flavoring and they are utterly amazing. Had a bit of an issue with the frosting but adding some additional corn syrup took care of it. Could be our weather but initially, it wouldn’t spread.
My question is, can the leftover cookie batter be refrigerated and if so, for how long? I ask as I refrigerated half of the batter as I have a friend from the Bronx visiting on Halloween and pressed for time, was hoping that the batter would be OK if well wrapped and refrigerated. Did freeze it as I was a bit afraid of doing that. Would appreciate any advise.
For anyone contemplating recipes for this type of cookie, look no further! I scored the internet looking at every recipe available until my eyes were crossed. Of course these have to pass my mothers taste test (her mother used to make them but sadly, no recipe was ever handed down). I know this is a blue ribbon winner!
Hi Eliza, I’m so happy to hear how much you loved these! I think you can refrigerate the dough for a few days, but I haven’t tried it, so I’m not sure how it would affect the spread/rise of the cookies. You might want to bring it to room temperature before baking.
Hello Michelle,
Thank you for replying. I wanted to follow-up on the results.
The leftover cookie dough was wrapped in a zip lock baggie (the good kind that actually does lock :), removing as much air as possible. For added measure, I placed that baggie inside another zip lock, removed air and sealed. A uncut pastry bag would work as well but one would have to seal the end of the bag with something heavy duty, like shipping tape.
The dough sat in my refrigerator for 8 days. No separation of ingredients occurred. Let dough come to room temperature before forming/baking cookies. The results were 100% perfect! No weird taste and they rose the same as the first batch that I had made.
On a side note. My mother said these were every bit as good (if not better) than the ones she used to get out of her mothers kitchen in NY. The time it took to make these was worth it more than I can say. Today I will present my friend with a box of these. He hasn’t had them since childhood Bronx days and I know he will be thrilled!
Hi Eliza, Thanks so much for stopping back to share your results, I appreciate it! I’m so glad that you and your mother have enjoyed the cookies!
Hi, Eliza!
I’m reading your story and I’m so happy that your mother enjoyed the cookies!
My husband and my in-laws are all from NY and I want to bake some of B&W for them.
I’ve tried other recipes, but not being successfully so far. I’ll try this one soon and hope I can make them happy as you made your mother!
HI Vanessa,
Sorry I didn’t see your comment earlier. I hope your husband and in-laws enjoyed the B&W’s. Sadly, my mother passed on right before her 93rd birthday (in March this year) but I know how much she loved these cookies. I still make them for my friend from the Bronx (just made him a batch last week). The recipe is fool proof, always fantastic results. I cannot have them due to diet restrictions but they sure are fun to make for others!
I made these for football Sunday yesterday and they were great. I did quite a bit of research and recipes by Duff Goldman, Paula Deen and Food Network kitchen had bad reviews. I must say though, that I’m glad I read through the comments because I tend to be a skim reader and did not see CAKE flour until I saw it in a commet. WHEW! Glad I did! These cookies are delicious and will definitely make them again. Got a lot of compliments on them! Next time, I might add just a little more lemon extract and I did have a runny vanilla side. I was afraid to add too much more powdered sugar because I don’t like to taste powdered sugar, but the vanilla took care of that so next time I will be a little more heavy handed if I need to thicken it up. THIS IS THE RECIPE TO USE! LOOK NO FURTHER! :D
Hi!!!!
I love this recipe but I’m out of cake flour, it is ok if i use all puporse flour? Is it going to ruined the recipe or? Thanks :)
Hi Lauren, You should use cake flour. If you don’t have any, you can make your own using a combination of all purpose and cornstarch flour. You can find the directions here: https://www.browneyedbaker.com/substitutions/
Thank you so much! I grew up on Long Island and have lived in Seattle for years. Nobody makes black-and-whites out here, so I baked a batch with this recipe. My icing technique needs a lot of improvement, but I’m very happy to have one of these again.
Thanks so much Michelle! The measurement in the recipe doesn’t show up for me online or when printed out. All I see is a box before “cup water”. I read through the comments to see if anyone else has the same problem but didn’t see any mention. It must be my computer.
I appreciate your quick response! Thank you!
You’re welcome, enjoy the cookies!
Michelle, these look great and I’d love to try them, however it’s unclear how much water goes in the icing.
Thanks!
The measurement is for 1/3 cup, listed in the ingredients, and it is used in step #6. Per the instructions, if you find that the icing becomes too thick while you are decorating, you can use 1 teaspoon of water at a time to thin it.
I tried these and they spread out on the pan like a flat cake (I didn’t ice them after that). Do you know if there was anything that would cause that?
Sorry, I now know realize I mixed up and ingredient. It still taste’s scrumptious though.
Scratch that…I see them. I totally looked at the recipe THREE times. My apologies!