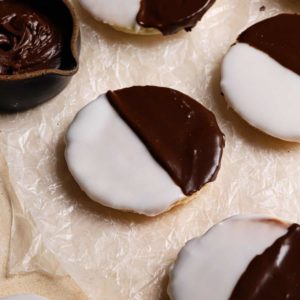
Black and White Cookies
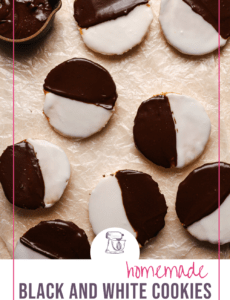
Bring a little flavor of the big city home with these homemade Black and White Cookies. Tender, fluffy cookies are topped with vanilla and chocolate icing; these cookies give you the best of both cake and cookie, vanilla and chocolate.
What are Black and White Cookies?
If you aren’t familiar with them, black and white cookies are almost as synonymous with New York City bakeries as cheesecake. I always think of the Seinfeld “Look to the cookie!” episode when I see one.
These cake-like cookies are also known as half and half cookies, half-moon cookies, and Amerikaner in Germany. Originating in the early 1900s, two different New York bakeries claim to be the creator of these iconic cookies, Glaser’s Bake Shop in New York City and Hemstrought's Bakery in Utica, NY. Regardless of who created the original cookie, they have become a staple in New York delis for decades!
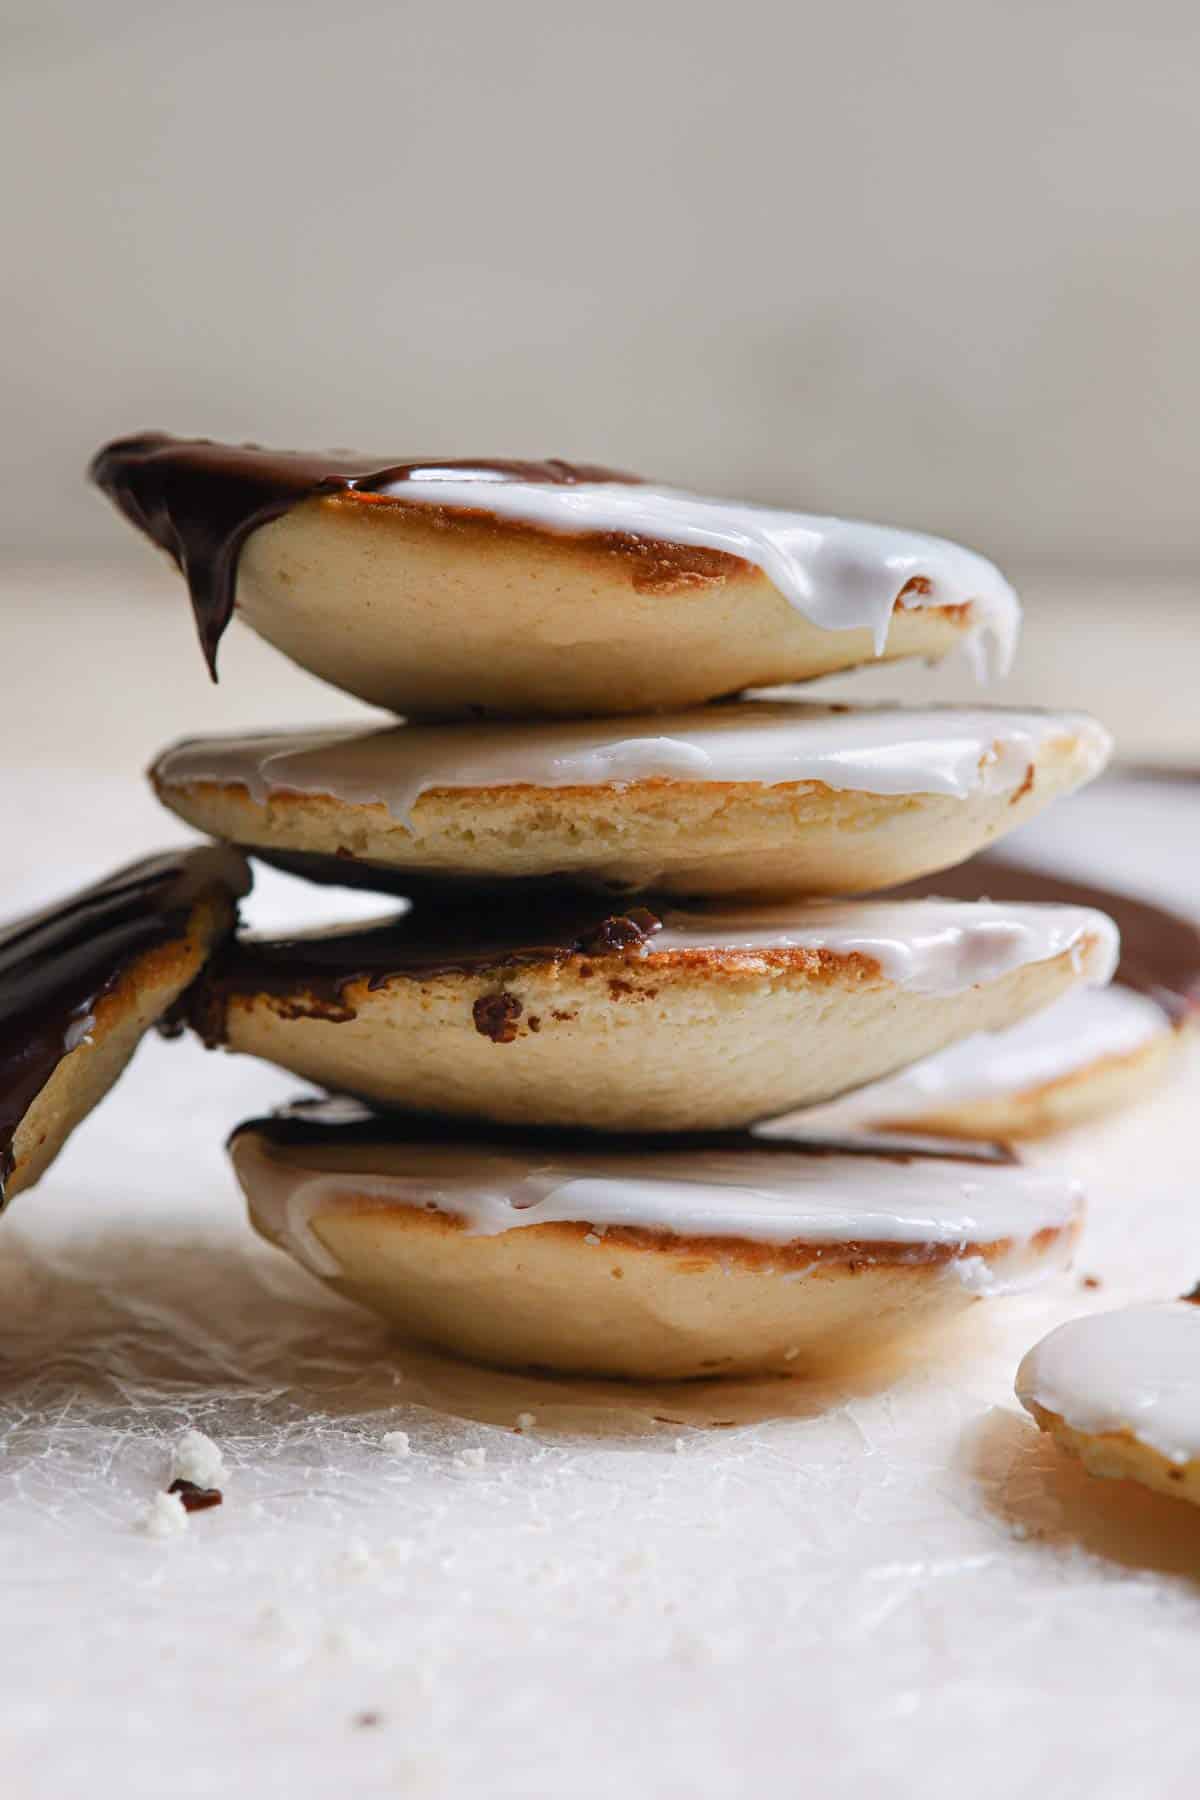
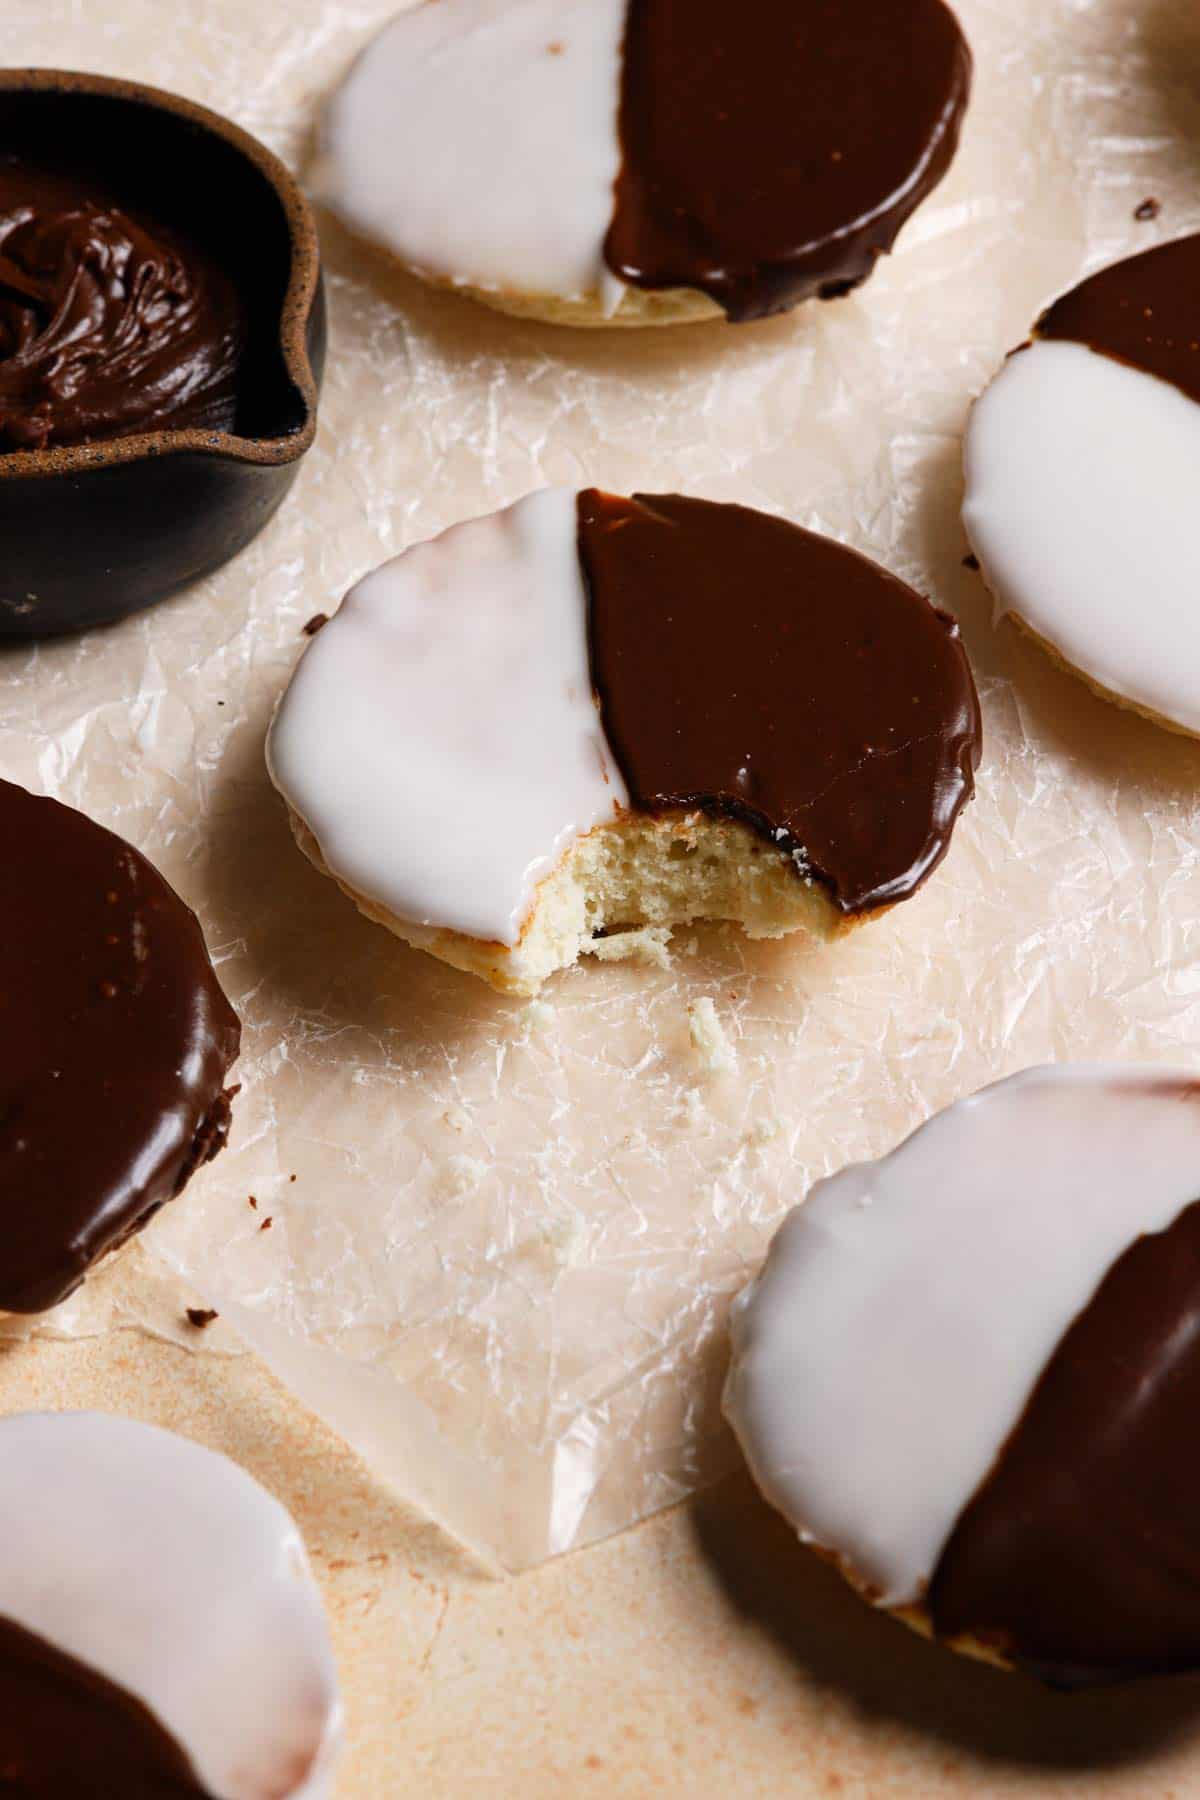
The texture is sponge-like, the cookies have a hint of lemon flavor, and are covered in vanilla and chocolate icings. They’re a fabulous change of pace from the typical chocolate chip and oatmeal cookies that are found in most bakeries.
Ingredients You’ll Need
First, you’ll bake and cool the cookies, then ice them. Here are the key ingredients you’ll need for both steps:
For the Cookies
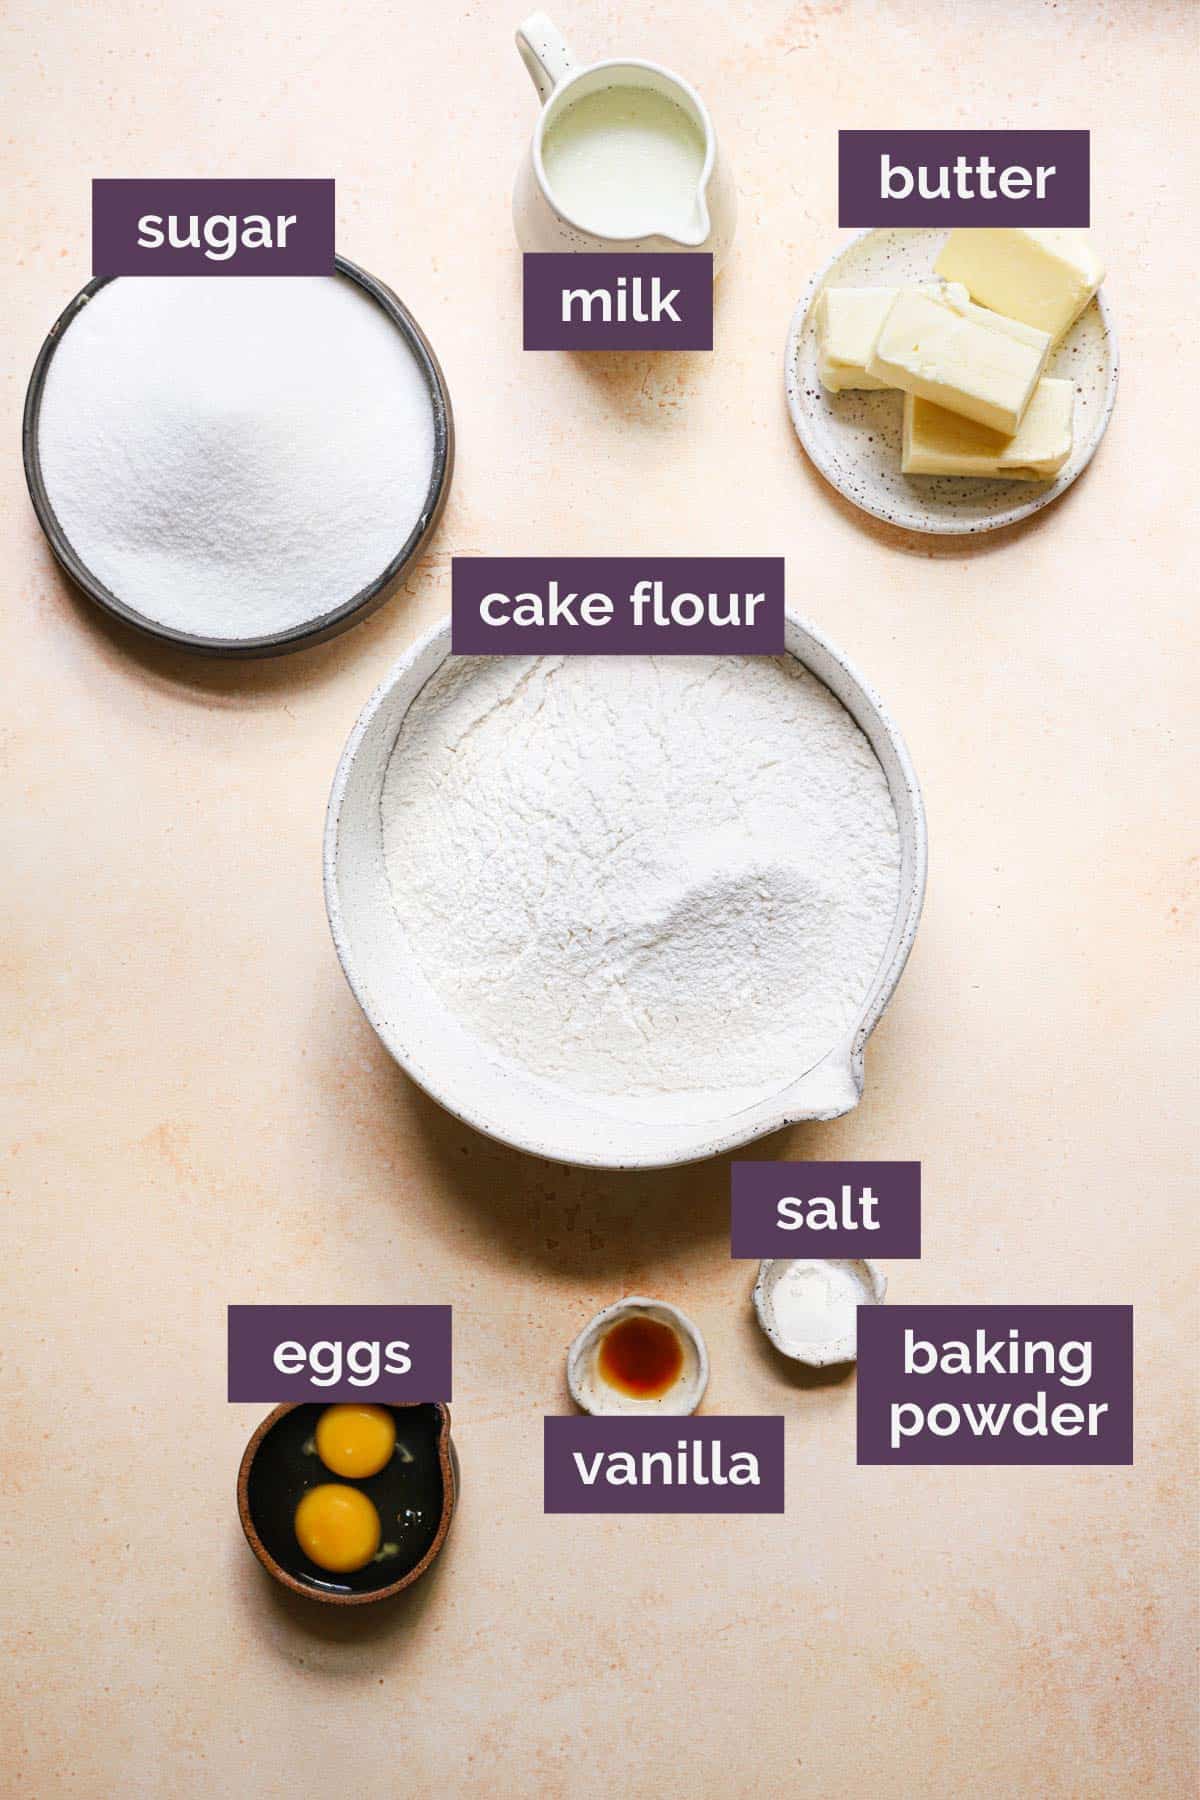
- Cake Flour: Has a lower gluten content than all-purpose flour leaving these cookies light and spongy.
- Butter: Use unsalted butter at a cool room temperature.
- Lemon Extract: This is optional and not overpowering, but gives the cookies that familiar flavor.
- Milk: Use whatever you have on hand; 1%, 2%, or whole milk.
For the Icing
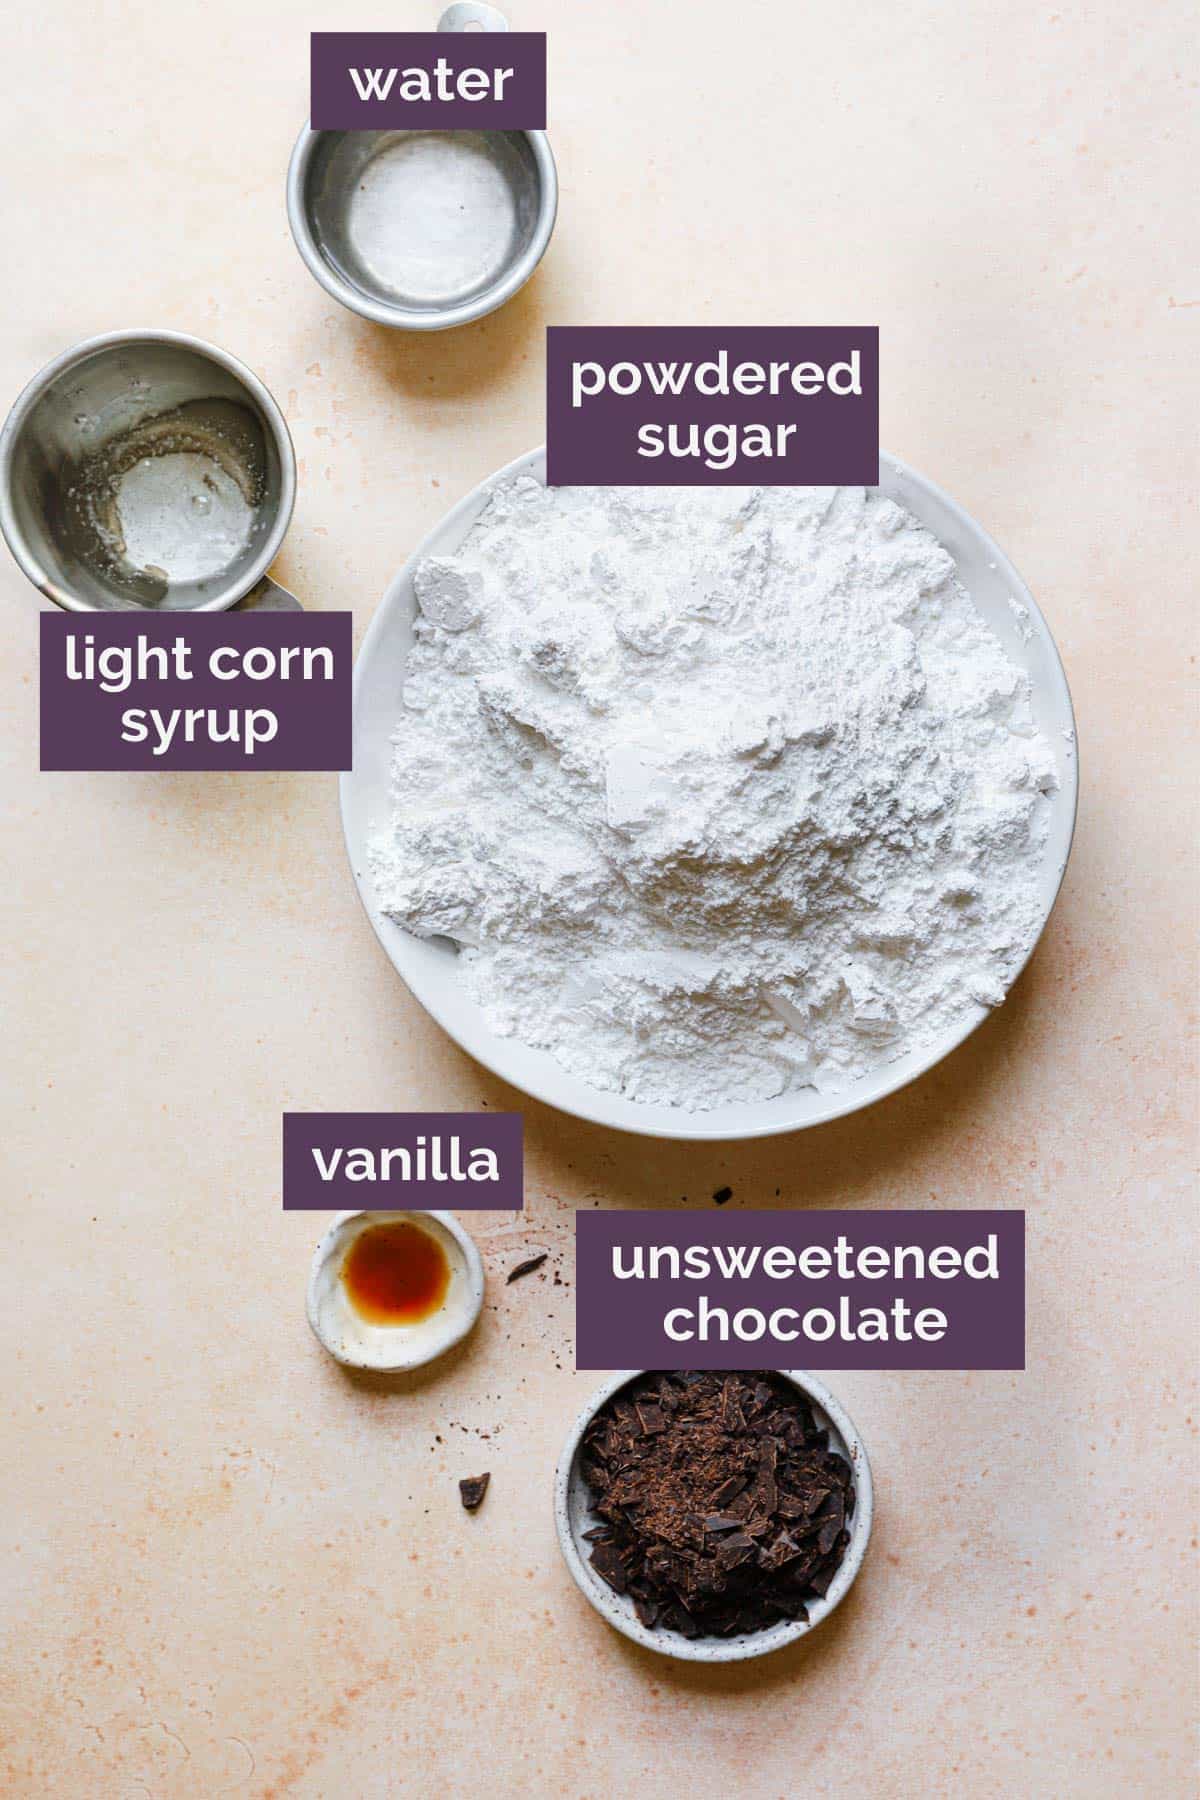
- Chocolate: Chopped unsweetened chocolate mixed with the icing base will give half of each cookie chocolate icing.
- Water: Thins out the icing for easy pouring and spreading.
- Corn Syrup: Gives the icing a bit of a sheen.
- Powdered Sugar: To sweeten and thicken the icing.
- Vanilla: Flavor!
Step-By-Step Directions
While it may appear to be a difficult recipe it really breaks down to four main steps: making the dough, baking the cookies, preparing the icing, and frosting the cookies.
Step 1: Make The Cookie Dough
- Adjust the oven racks to the lower-middle and upper-middle positions in the oven.
- Preheat the oven to 375°F and line two baking sheets with parchment paper or a silicone baking mat.
- Mix dry ingredients: In a large bowl, whisk together the flour, baking powder, and salt; set aside.
- Beat butter then add sugar: Beat the butter at medium speed for 30 seconds to loosen it up. Keeping the mixer running, gradually add in the sugar and then gradually increase the speed to medium-high and beat until light and fluffy, about 3 minutes.
- Add eggs and extracts: Scrape down the sides of the bowl and add the eggs, vanilla, lemon extract. Beat at medium speed until combined, about 30 seconds. Scrape down the sides and bottom of the bowl again.
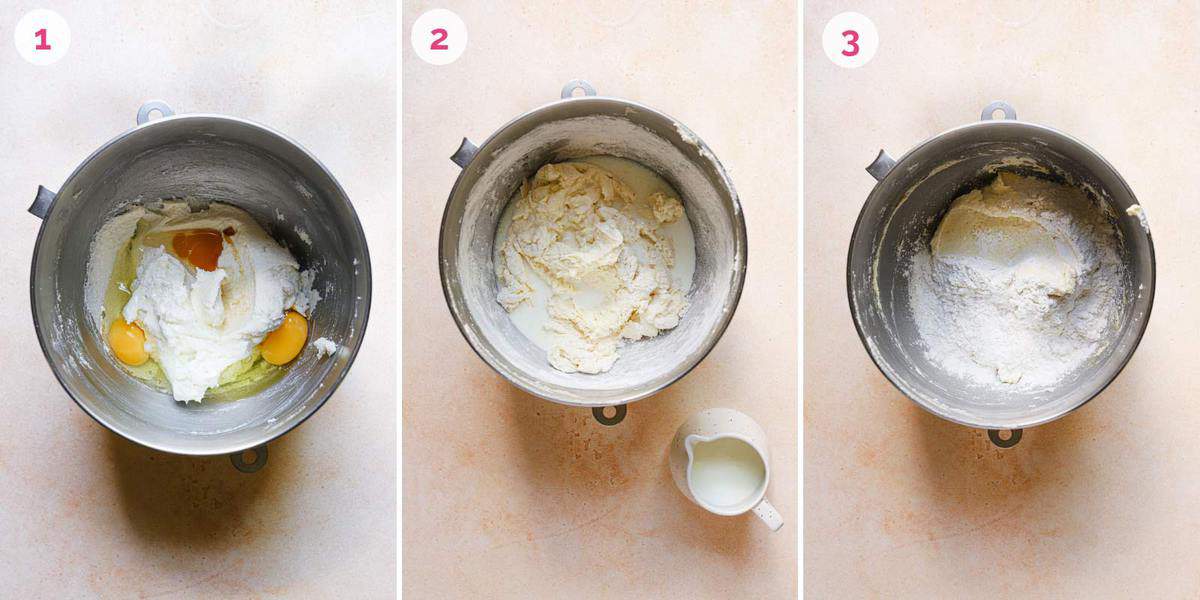
- Stir in flour and milk: With the mixer on low speed, alternately add the flour in four additions and the milk in three additions (beginning and ending with the flour), and mix until just combined.
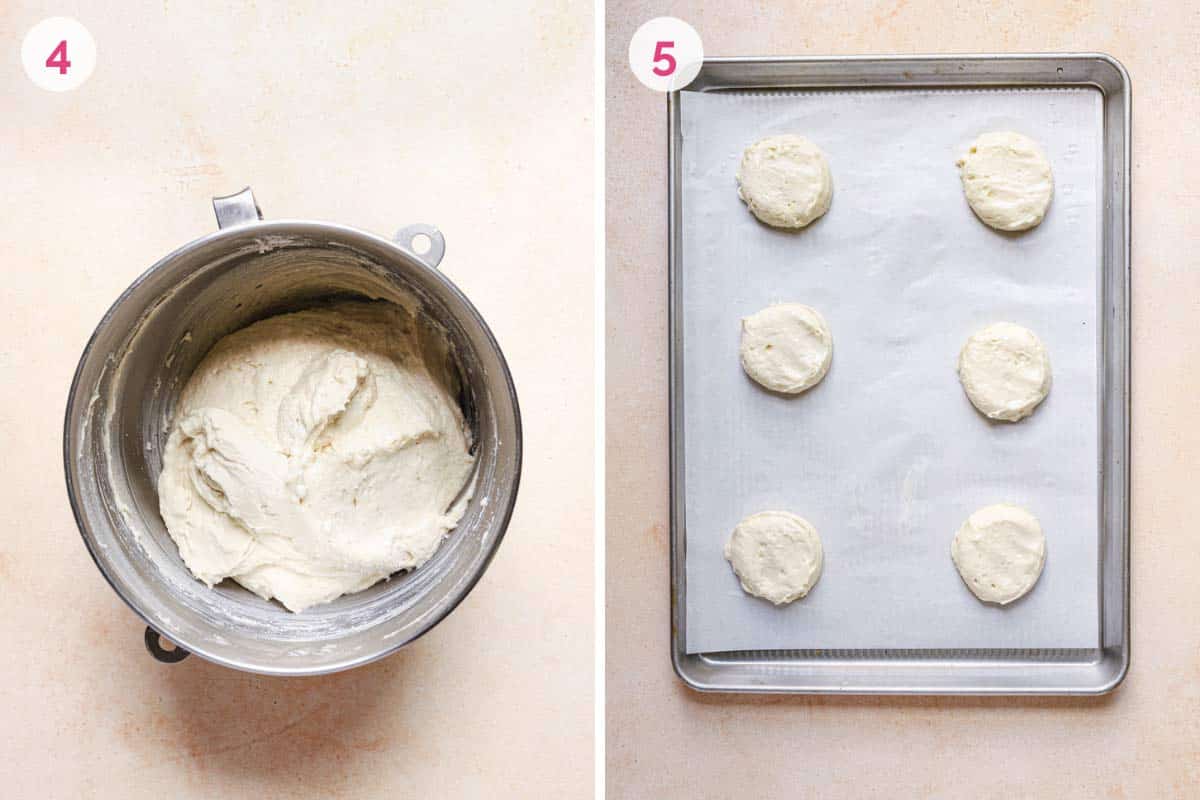
- Final stir: Give the mixture a few final stirs with a rubber spatula to ensure all of the flour has been incorporated.
Step 2: Bake the Cookies
- Scoop the dough: Using a ¼-cup measuring cup, scoop mounds of dough onto the prepared baking sheets about 2 inches apart.
- Press into circles: Using moistened fingers, gently press each mound of dough into a 2½-inch circle.
- Bake until the edges of the cookies are set and light golden brown, about 20 minutes.
- Cool the cookies: Allow the cookies to cool for 2 minutes on the baking sheets, then remove to a wire rack to cool completely.
Save This Recipe
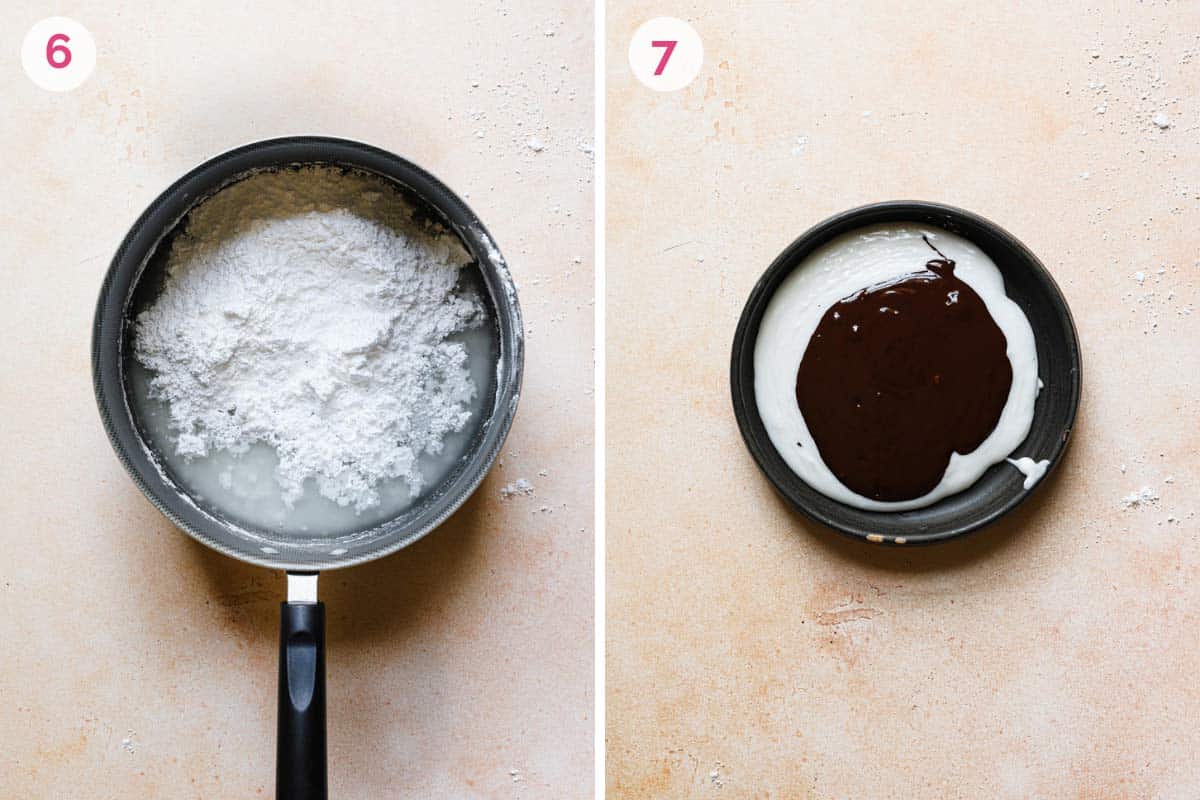
Step 3: Make the Vanilla and Chocolate Icing
- Melt the chocolate: Melt chocolate in a medium bowl set over a saucepan over barely-simmering water, or use the microwave on 50% power in 30-second increments; set aside.
- Boil liquids: In a medium saucepan over medium heat, bring the water and corn syrup to a boil.
- Add sugar and vanilla: Remove from heat and whisk in the powdered sugar and vanilla extract.
- Mix in chocolate: Transfer 3/4-cup of the icing to the bowl with the melted chocolate and whisk to combine.
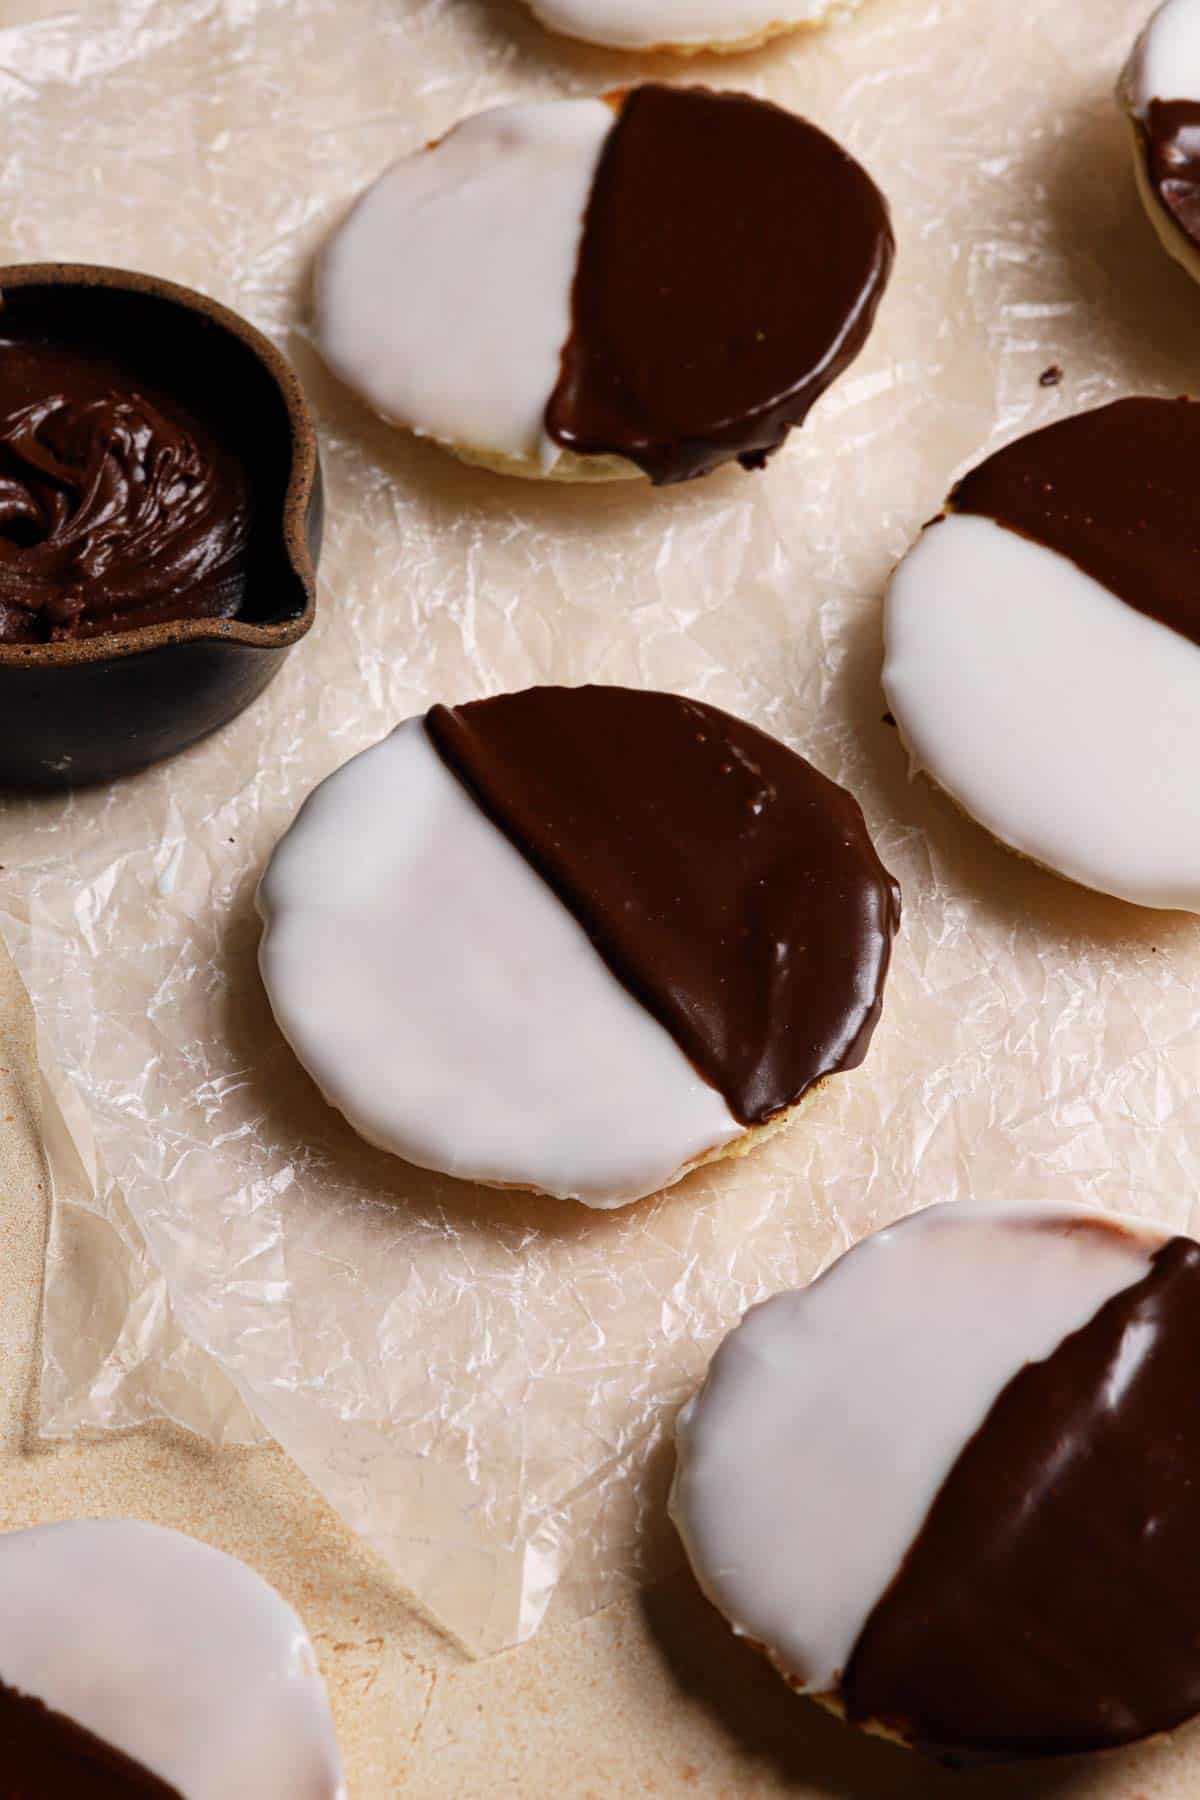
Step 4: Ice the Black and White Cookies
- Prepare the icing station: Place wire racks over wax paper to catch any drips.
- Spread vanilla icing: Use a small offset spatula to spread about 2 tablespoons of the vanilla icing onto half of the flat underside of each cookie. The icing should move on its own when the cookie is tilted; use the spatula to scrape any excess from around the edges.
- Allow to set: Place the finished cookies on the wire racks and allow them to set for at least 15 minutes.
- Spread chocolate icing: Again, using a small offset spatula, spread the chocolate icing on the other half of each cookie, scraping excess icing from around the edge of the cookies.
- Fully set: Place the finished cookies on the wire racks and allow them to set for at least 1 hour.

Success Tips
- Cookie Temperature: Be sure the cookies are fully cooled before beginning to frost. If the cookie is too warm the icing will melt and not set on the cookie properly.
- Vanilla Icing: If the vanilla icing begins to thicken too much, stir in a teaspoon of warm water at a time until the icing goes back to a smoother, looser consistency.
- Chocolate Icing: If the chocolate icing thickens too much, place the bowl on a small saucepan of barely simmering water so that it can re-melt. If it is still too thick, you can add warm water, a teaspoon at a time, until it returns to the correct consistency.
Storing, Freezing, Making Ahead
Whether you have leftovers, want to keep some for later, or are planning to make these delicious cookies in advance, here are a few simple steps to help you along the way.
- Storing: Keep frosted black and white cookies in an airtight container for up to 3 days. Separate the layers of cookies with wax paper to prevent the frosting from sticking.
- Freezing: Wrap black and white cookies (frosted or un-frosted) in plastic wrap and store in a freezer-safe container for up to 3 months.
- Thawing: To thaw, refrigerate overnight and then bring to room temperature before serving or frosting.
- Making Ahead: Planning to make these in advance? For just a few days in advance, I suggest making and storing them in an airtight container. For longer than 3 days, follow freezing instructions and frost before serving.
Black and White Cookie FAQs
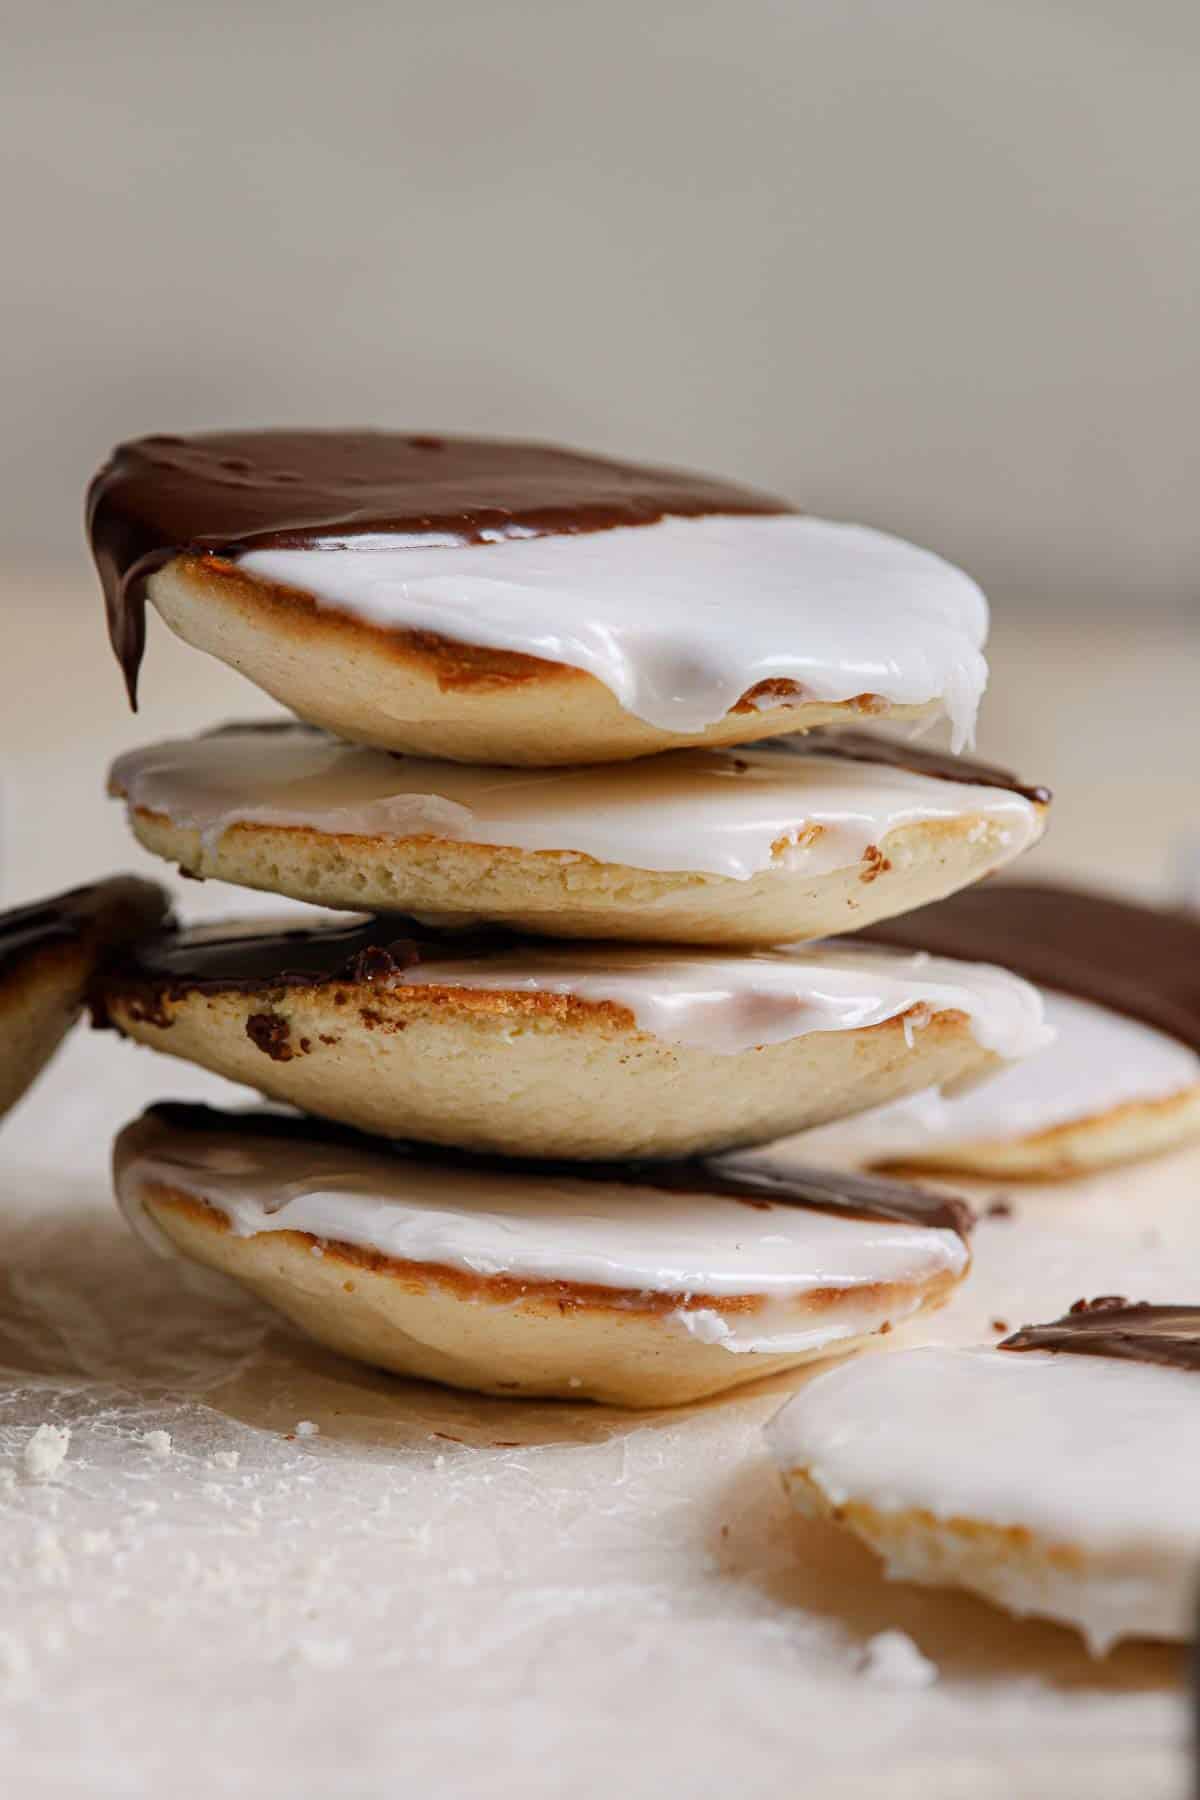
Black and white cookies have a vanilla cookie base with just a hint of lemon. Topped with vanilla and chocolate frosting, you will never have to choose between the two when eating one of these cookies!
The cake-like texture of these iconic cookies leads some to say they are actually more akin to mini cakes than cookies. They tend to fall in the category of a drop cookie, since they do not spread as much as a traditional cookie.
Creative Cookies to Bake Next
- Orange Cookies
- Thick and Chewy Chocolate Chip Cookies
- Lofthouse Cookies with Thick Buttercream Frosting
- Cowboy Cookies
- Soft Chewy Sugar Cookies
Bring the flavor of New York City home with these homemade Black and White Cookies. A tender cake-like cookie coated with vanilla and chocolate icing make these a one-of-a-kind treat!
Watch the Recipe Video Below:
If you make this recipe and love it, remember to stop back and give it a 5-star rating - it helps others find the recipe! ❤️️
Black and White Cookies
Ingredients
For the Cookies:
- 4 cups (500 g) cake flour
- ½ teaspoon (0.5 teaspoon) baking powder
- ½ teaspoon (0.5 teaspoon) salt
- 1 cup (227 g) unsalted butter, at cool room temperature
- 1¾ cups (350 g) granulated sugar
- 2 eggs, at room temperature
- ½ teaspoon (0.5 teaspoon) vanilla extract
- ¼ teaspoon (0.25 teaspoon) lemon extract
- 1 cup (244 ml) milk
For the Icing:
- 2 ounces (56.7 g) unsweetened chocolate, finely chopped
- ⅓ cup (83.33 ml) water
- ¼ cup (85.25 g) light corn syrup
- 5 cups (600 g) powdered sugar
- ½ teaspoon (0.5 teaspoon) vanilla extract
Instructions
- Make the Cookies: Adjust the oven racks to lower-middle and upper-middle positions and preheat the oven to 375 degrees F. Line two baking sheets with parchment paper or a silicone baking mat.
- In a large bowl, whisk together the flour, baking powder and salt; set aside.
- Beat the butter at medium speed for 30 seconds to loosen it up. Keeping the mixer running, gradually add in the sugar and then gradually increase the speed to medium-high and beat until the mixture is light and fluffy, about 3 minutes. Scrape down the sides of the bowl and add the eggs, vanilla and lemon extract. Beat at medium speed until combined, about 30 seconds. Scrape down the sides and bottom of the bowl again. With mixer on low speed, alternately add the flour in four additions and the milk in three additions (beginning and ending with flour), and mix until just combined. Give the mixture a few final stirs with a rubber spatula to ensure all of the flour has been incorporated.
- Use a ¼-cup measuring cup to scoop mounds of dough onto the prepared baking sheets about two inches apart. Using moistened fingers, gently press each mound of dough into a 2½-inch circle. Bake until the edges of the cookies are set and light golden brown, about 20 minutes. Allow the cookies to cool for 2 minutes on the baking sheets, then remove to a wire rack to cool completely.
- Making the Icings: Melt the chocolate either in a medium bowl set over a small saucepan over barely-simmering water, or using the microwave on 50% power in 30-second increments; set aside.
- In a medium saucepan over medium heat, bring the water and corn syrup to a boil. Remove from the heat and whisk in the powdered sugar and vanilla extract. Transfer ¾ cup of the icing to the bowl with the melted chocolate and whisk to combine.
- Ice the Cookies: Place wire racks over wax paper to catch any drips. Use a small offset spatula to spread about 2 tablespoons of the vanilla icing onto half of the flat underside of each cookie. The icing should move on its own when the cookie is tilted; use the spatula to scrape any excess from around the edges. If the vanilla begins to thicken too much, stir in a teaspoon of warm water at a time until the icing goes back to a smoother, looser consistency. Place the finished cookies on the wire racks and allow to set for at least 15 minutes.
- Again using a small offset spatula, spread the chocolate icing on the half of each cookie, scraping any excess icing from around the edge of the cookies. If the chocolate icing thickens too much, place the bowl on a small saucepan of barely simmering water so that it can re-melt. If it’s still too thick, you can add warm water, a teaspoon at a time, until it returns to the correct consistency. Place the finished cookies on the wire racks and allow to set for at least 1 hour.
- The cookies can be stored in an airtight container at room temperature for up to 3 days. If you stack the cookies, be sure to place a piece of wax paper between layers.
Notes
- Cake Flour: Has a lower gluten content than all-purpose flour leaving these cookies light and spongy. I do not recommend substituting all-purpose flour. You can find cake flour in any grocery store, online, or use this substitution.
- Lemon Extract: This is optional and not overpowering, but gives the cookies that familiar flavor.
- Milk: Use whatever you have on hand; 1%, 2%, or whole milk.
- Cookie Temperature: Be sure the cookies are fully cooled before beginning to frost. If the cookie is too warm the icing will melt and not set on the cookie properly.
- Vanilla Icing: If the vanilla icing begins to thicken too much, stir in a teaspoon of warm water at a time until the icing goes back to a smoother, looser consistency.
- Chocolate Icing: If the chocolate icing thickens too much, place the bowl on a small saucepan of barely simmering water so that it can re-melt. If it is still too thick, you can add warm water, a teaspoon at a time, until it returns to the correct consistency.
- Storing: Keep frosted black and white cookies in an airtight container for up to 3 days. Separate the layers of cookies with wax paper to prevent the frosting from sticking.
- Freezing: Wrap black and white cookies (frosted or un-frosted) in plastic wrap and store in a freezer-safe container for up to 3 months.
- Thawing: To thaw, refrigerate overnight and then bring to room temperature before serving or frosting.
- Recipe from Baking Illustrated
Did you make this recipe?
Leave a review below, then snap a picture and tag @thebrowneyedbaker on Instagram so I can see it!
Photography by Dee Frances.


Does using buttermilk improve anything vs whole milk?
Buttermilk will change the flavor slightly and could alter the texture a bit.
I’ve made this recipe before, I found that using sour cream helped me keep get a better consistency for the batter. With Milk, my batter was too runny and when they were in the oven, it spread out so the cookie was more flat. They were still delicious, had great flavor and a great icing but I wanted a bit more rise out of my cookie.
I’ve used AP flour but that made the texture of the cookie too stiff and it lost of lovely soft cake-like mouth feeling.
Can I substitute cake flour with AP flour?
Hi Leeann, The texture of the cookies will be different if you make that substitution.
I have a dear friend who is originally from Long Island. She has been very ill for quite some time and I wanted to bring her some black and white cookies to cheer her up. I hunted around town, but could not find any. I even live next door to a bakery and I asked them to make me a batch. What they made was not even close to a real black and white cookie and were very expensive! So I determined I would have to make them myself. I Googled a recipe and found yours. I made these last night. My family says they are awesome! So, I am taking a few over to her today. I’m hoping her reaction is just as good. Thank you so much for this recipe.
Hi Melissa, I hope your friend enjoyed them, xo
When you spread these cookies out to 2 1/2 inch circles, do the cookies spread or stay about 2 1:2 inches? Can’t wait to try the recipe. I am adding the black and whites to my Christmas cookie baking this year at my husbands request. Thank you!!
Hi Alice, They stay about that same size, not much spreading! Enjoy!
What a fantastic recipe. I’m a lifelong NYer, living in NYC, and we had friends visiting from Paris who missed NY food items., so rather than do some some cake or tart, which is what we’d usually do, I found this was recipe and was impressed, and I decided to give it a go. The cookies turned out perfect: spot on! Actually we had so much going on that I had to ice the cookies with folks there, and that turned out to be a bit of a fun show. But, the texture and flavor were absolutely perfect, and everyone was extremely impressed with the final product. I couldn’t believe how straightforward the steps all were. The only wrinkle I had was that, for the chocolate icing, I folded in cocoa powder versus melting chocolate, as we have a package of nice, high-end cocoa powder, but that turned out to be a bad replacement as the chocolate frosting got lumpy and lost its luster. The flavor was fine, but next time I’ll do the bain marie and will melt. Proper cake flour was initially hard to find, but I went to a Coop/natural foods store, and they had a very large package of it, and I’m glad I held out. No doubt AP flour wouldn’t have had the same texture. Anyway, fantastic recipe, and spot-on taste and texture! I promise to use it again!
Anxious to try this recipe, but do not understand the part “ using moistened fingers gently pressed each mound of dough into a 2½inch circle. Sorry I do not understand the part 2½inc. Look forward to your response, thank you!
Hi Kate, That should be 2.5 inch circle. The code seems to have gotten mixed up and I’ll get that fixed, so sorry for the inconvenience!
Black & White Cookies bring back great childhood memories. My Mom, originally from Queens, would run to a neighborhood deli (in Toledo, OH) after church on many Sundays. She’d get 2 lbs of pastrami, a loaf of Challah bread, and 1/2 doz Black & White Cookies. If my brother & I were with her, we’d get to wolf down 1 B&W cookie each on the way home – and trust me, that cookie was long gone before we got back to the house!
I’v lived in many places since; LA, Boston, Oakland, Phoenix, but NOTHING compares to those B&W Cookies from “back in the day.” After seeing this recipe, I’m gonna pull all the ingredients together and knock myself out with the real deal.
Will Lee you posted as to how they turn out. Thanks soooooo much for the recipe and the memories!
Pam
Have you ever froze these? I want to make about 75-100 cookies for my daughters wedding which is in September but would like to get a head start as I am baking 300 cupcakes, 75 mini peach pies and 400 chocolate chip cookies
Thanks for your advise
Robyn
Hi Robyn, I’ve never frozen these, but I think they would freeze well!
I made these cookies because I was missing my favorite NYC cookies and they didn’t taste very good but they looked pretty. I would recommend not using the lemon extract because it was too over powering. They definitely didn’t taste like black and white cookies from New York but they were really fun to make.
How would you bake these at at a higher altitude? I am visiting family and wanting to make these black and whites for everyone.
Hi Heather, I have not baked at a high altitude, but here is a page full of tips that might be able to help!
https://www.browneyedbaker.com/high-altitude-baking-tips/
Perfect recipe! We miss these cookies from where we used to live. I have messed with different recipes trying to make it perfect. Got it pretty close then saw yours and tried it and here it is… the perfect recipe! Thank you!
Black & whites are my favorite cookie ever – growing up in NY, they were a special treat for Sundays after church! Now I eat them like 3 times a week and living in VA it’s an expensive habit. I’m really excited to have come across your recipe and can’t wait to try making them this weekend!
I used your recipe to make eclipse cookies for our path of totality party today.
I’m wondering if there is a typo in the water measurement for the icing? I had playdough before even half the powdered sugar had been added and ended up spooning in a good bit of hot water to make a usable icing. It was quite a workout with a wooden spoon but I did eventually succeed.
I also found they were done in 15 minutes even though I’d measured exactly 1/4C for each.
The cookies got rave reviews for both appearance and flavor.
I had the same experience with my icing as well, however, it was just for the chocolate. It seized up almost immediately and I had dough rather than glaze. I’m glad to know you were able to salvage it, and I’ll have to use your tip if I have the same experience in the future. Since these were just for home, I just made the chocolate work for a half ugly cookie. ; ) No one seemed to mind though, because they were delicious!
After I originally left a comment I appear to have clicked the -Notify me when new
comments are added- checkbox and now each time a comment is added I
recieve four emails with the exact same comment. There has to be an easy method you can remove me
from that service? Many thanks!
That hasn’t been an option on the site in years, I’m so sorry! It’s not longer installed, so there’s nothing I can even check to unsubscribe you from the comments, I can’t believe you would still be getting notifications!
How do you stack your black and white cookies without it sticking together or frosting sticking to the top of the other?
Hi Lori, Once the frosting is completely dry (it will dry hard), I use either wax or parchment paper between layers.
I just finished decorating these and letting them set, and they’re already fast disappearing! I noticed a lot of people in the comments expressed bad past experiences with black and white cookies. I encourage those people to try this recipe immediately, because this is the most perfect form of these cookies I’ve found. Other recipes led me to to hard, crumbly cookies or cracked, oversweetened frosting. Not these. These taste as good or better than bakery ones. I especially love the trick with wetting your fingers to form the discs of dough–worked like a charm!–and using unsweetened chocolate in the frosting so the cookies aren’t cloying. The corn syrup is a must for that classic black and white shine. Even though I used 1/4 cup scoops and flattened them to 2 1/2″ discs as directed, they didn’t need 20 minutes in my oven. I recommend keeping an eye on them after 15 minutes or so and when they spring back after being pressed by a fingertip, they’re done. In any case, I now have a permanent addition to my recipe cards!
Just made these and had to make a few adjustments. Had to turn my oven to 350 and bake for 11 minutes (clearly could be my oven). They then had the appropriate sponge texture. Overall very good and close to my childhood bakery’s b&w cookies!
These are excellent. I have missed b&w’s being away from NYC, and these are much much better since the cookie is made with butter , better flavor by far. I did have to thin the icing, esp. the chocolate with some hot water, but otherwise exceeded expectations!
Love the story behind the recipe. I’m from the mid-west, never had one of these cookies until my family and I visited NewYork over Christmas time. When I saw the black and white cookie in the glass case at the pastry shop, I remembered Seinfelds’ “Look to the cookie” episode, so I tried one. It was SO good, went back for more the next day. Thanx for sharing this recipe- it looks delicious!
Hi, I was wondering if I could make the dough the night before, chill it, and bake as instructed the next day?
I’m going to a friend’s house for a cookie baking day and this would save time-space-etc…
Thanks!
Hi Charlene, Yes, I think that would work! If you have the refrigerator space, I think I would actually scoop out the dough onto the cookie sheets, cover with plastic wrap and refrigerate, then bake from there.
I did it, I wondered how these would come out gluten free. Excellent, perfect.
Thank you for the blueprint recipe.
I’ve become slightly obsessed with this cookie. Thank you for the recipe!! They’re a major hit every time I bring them in to work.
Making these cookies right now and cant wait to see the result. Never tried them before so cannot compare to anything else, but will post some photos on our blog. Tomorrow were having a bake off with sugar cookies so the Black and Whites will be our warm up for me and my finace. Thanks for the recipe.
For how long could I keep them if I freeze them instead? I wanna make some for my sisters wedding and its 30 days away. The only time i will be able to do it is 20 days before the wedding. So how can i store them for up to 20 days?
Thank you!
Hi Hebba, They would be fine frozen for a month, but I would not recommend icing them until they are thawed.
can i use vegetable oil instead of butter?????
also can i use cocoa powder and milk chocolate? i dont have dark chocolate and i was wondering if i did __parts cocoa powder with __parts milk chocolate if itd make dark chocolate
I would not recommend substituting oil for butter, nor would I use cocoa powder and milk chocolate in place of the dark chocolate.
For how long will they stay good if frozen?
I actually do not recommend freezing the cookies once they are iced. You could freeze them un-iced for up to 2 months, then thaw and ice them.
You add the water and syrup mix to the chocolate? Won’t it sieze?
You do, and no, it does not seize.
the icing is way too sweet. the chocolate flavored icing… not bad but the vanilla one… gave me a toothache.
JUST finished making these. Followed the recipe exactly. They are awesome! I made them for tomorrow, Mother’s Day, since my New York mama cannot find her favorite cookie down here in Alabama. The icings are fabulous. The texture of the cookie is awesome and spot-on. I do find the cookie taste to be lacking a lil sweetness. Could be the cake flour I used– our Publix only had King Arthur’s unbleached cake flour. Thanks so much for this recipe :)) Took forever but worth it!