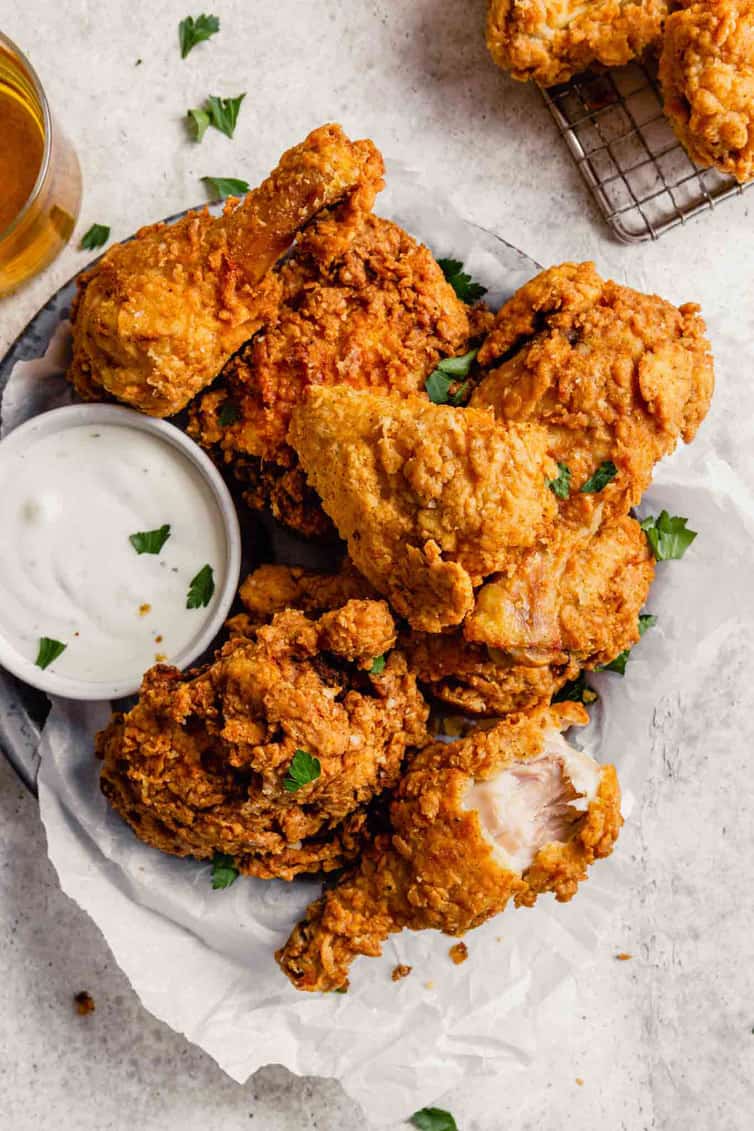
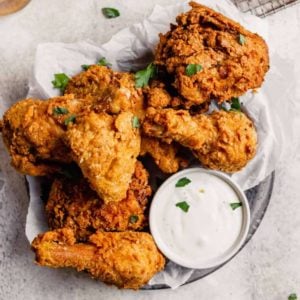
Buttermilk Fried Chicken
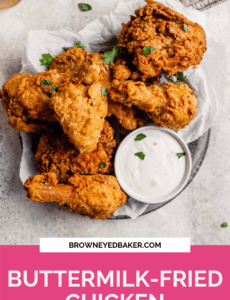
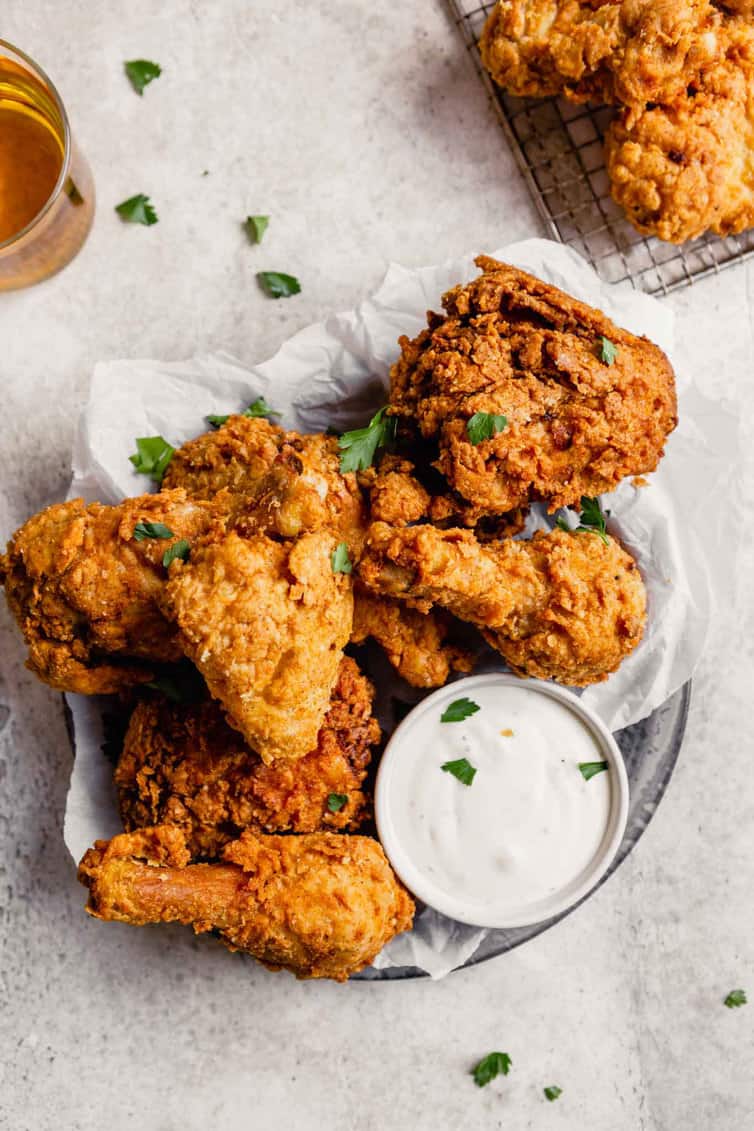
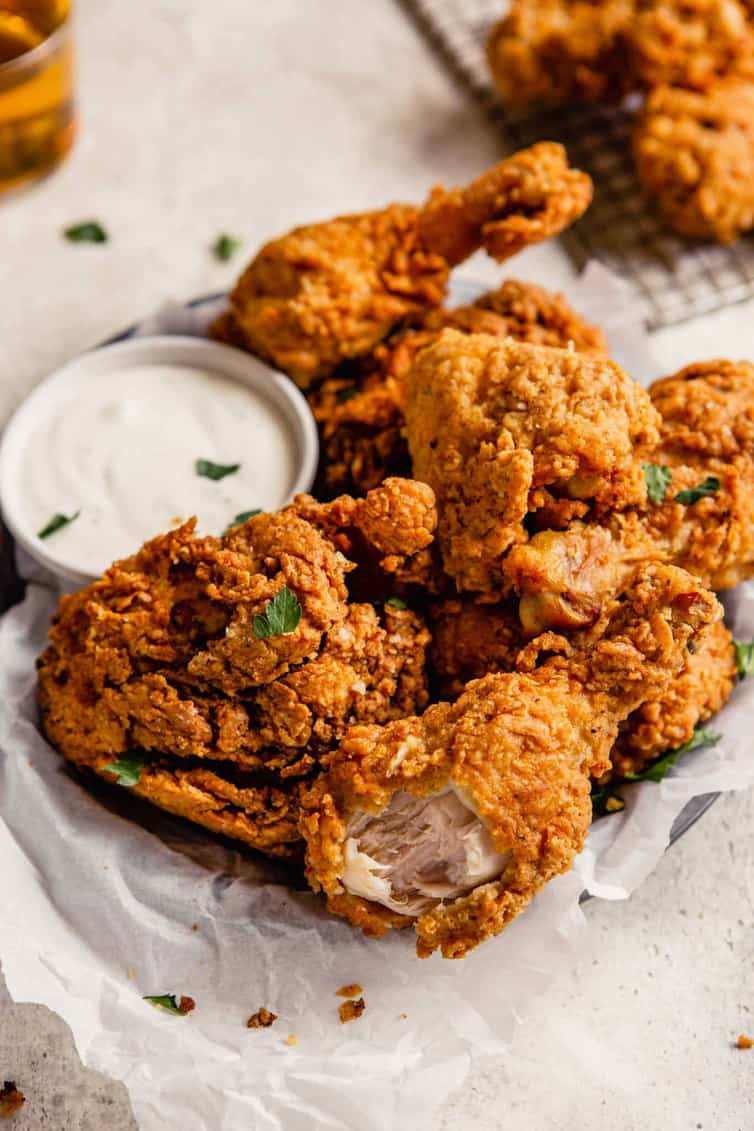
This crispy buttermilk fried chicken recipe is THE BEST thanks to an overnight marinade, a dip in buttermilk, and a special dredging technique. Extra crunchy on the outside, tender and juicy on the inside, you won’t want to put this chicken down!
Make a delicious fried chicken sandwich, or use this recipe for fried chicken fingers (kids and adults will both love them!) or a big batch of fried chicken wings, tossed with the sauce of your choice.
My freshman year of college a girl that lived on my floor worked at a local Kentucky Fried Chicken. On the nights that she worked, she would get back to the dorm around midnight with the leftover food from the end of her shift. Six of us girls would sit in the hallway, with all of the food in the middle, gossip, and snack on fried chicken, potato wedges, biscuits and chocolate chip cake.
It’s been over two decades (!) since those days but a crispy piece of fried chicken takes me back in an instant.
What makes great fried chicken?
I think we can all agree a great piece of fried chicken has two important qualities- crispy on the outside but juicy and tender on the inside. While I have had my fair share of amazing pieces of fried chicken, I've also experienced a greater number of disappointing chicken with dry meat and soggy breading. When I set out to make my homemade fried chicken, I wanted to make sure I created the former, not the latter. So how do you achieve the perfect fried chicken from the comfort of your home?
Brining + Shaggy Dredging!
Brining involves soaking your chicken pieces for 8-12 hours in a salt water mixture with other aromatics. My first experience with this process comes from Thomas Keller’s recipe from At Hoc at Home. This method of marinating your chicken overnight tenderizes the meat. It also allows the chicken to absorb additional flavor and water before being coated and fried to golden perfection.
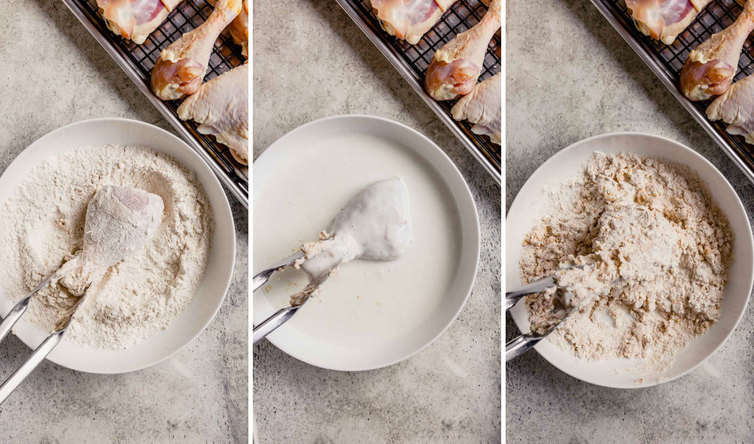
The second tip for making great fried chicken is to create a shaggy dredging. The breading on this chicken is thick and extra-crunchy, just how I like it! Similar to the bread coating on my General Tso’s chicken and sesame chicken this method of adding some buttermilk to the final dry breading makes all the difference in the world.
The essential ingredients
Getting the right ingredients makes all the difference in the world. For this crispy fried chicken you will need:
- Chicken – I use a whole chicken, bone-in that has already been chopped into its pieces. You can chop it yourself or save yourself some time and buy it pre-cut.
- Brine – A mixture of salt and water with additional flavors added in to soak the chicken overnight for the most tender and juicy fried chicken!
- Buttermilk – In this recipe buttermilk is used as a binding agent to stick the coating to the chicken.
- Coating – All-purpose flour seasoned with garlic powder, onion powder, paprika, cayenne, salt, and pepper give this juicy chicken an extra-crispy exterior.
- Oil – Use peanut or canola oil for making the fried chicken. These oils both have high smoke points which will keep your kitchen free of excessive smoke while you fry the chicken.
How to make buttermilk fried chicken
There are a few steps to ensuring the chicken comes out crispy, tender, juicy, and all-around perfect.
Prepare + Brine the Chicken
- Combine water, salt, lemon, bay leaf, parsley, thyme, honey, garlic, and peppercorns in a large stock pot. Cover and bring to a boil.
- Boil 1 minute, stirring to dissolve the salt.
- Remove from heat and cool completely. Then chill thoroughly before using.
- Pour brine into a large container, add the chicken pieces and refrigerate for 8-12 hours. Don’t refrigerate for much longer, or the chicken will be too salty.
- Remove the chicken from the brine and rinse under cold water, washing off any particles from the brine stuck to the chicken.
- Pat dry with paper towels and let sit at room temperature for 1½ hours, or until it reaches room temperature.
Get the cooking area ready
- Fill a large pot with at least 2 inches of frying oil, place it over medium heat, and heat to 320° F.
- Place a wire cooling rack on top of a baking sheet and place it to the side of the pot of oil to drain the cooked chicken.
Prepare the Dredging Station
- Whisk together the flour, garlic powder, onion powder, paprika, cayenne, salt, and pepper in a large bowl.
- Divide the mixture between two shallow bowls.
- Pour 1 quart of the buttermilk into a third shallow bowl.
- Make the shaggy dredging. Add the 6 tablespoons of buttermilk to one of the bowls with the flour mixture and use a fork or your fingers to toss the mixture together – all of the moisture from the buttermilk should be absorbed and the mixture should look a little shaggy.
- Set up the dredging station in this order: chicken pieces, dry flour mixture, buttermilk, and shaggy flour mixture, then a parchment-lined baking sheet.

Fry the Chicken
I recommend frying the chicken in batches based on the part of the chicken to ensure they are each properly cooked through.
Save This Recipe
Chicken Thighs
- Dip the thighs into the first bowl of coating, turning to coat and patting off the excess; dip them into the buttermilk, allowing the excess to run back into the bowl; then dip them into the second bowl of shaggy coating. Transfer to the parchment-lined pan.
- Carefully lower the thighs into the hot oil. Adjust the heat as necessary to return the oil to the proper temperature.
- Fry for 2 minutes, then carefully move the chicken pieces around in the oil and continue to fry, monitoring the oil temperature and turning the pieces as necessary for even cooking, for 11 to 12 minutes, until the chicken is a deep golden brown, cooked through (should register 170°F on an instant-read thermometer), and very crisp.
- Transfer cooked thighs to the cooling rack skin-side-up and let rest while you fry the remaining chicken.
Drumsticks
- Coat the drumsticks following the same method you used for the thighs and transfer to the parchment-lined baking sheet.
- Once the oil returns to 320°F carefully lower drumsticks into the hot oil.
- Cook the chicken drumsticks for about 8 minutes, checking for doneness as you did with the thighs.
- Transfer to a cooling rack skin-side-up when they are done.
Finish with the Chicken Breasts and Wings
- Increase the heat slightly and bring the oil up to 340° F.
- Coat the chicken breasts and wings following the same method you used for the thighs and drumsticks.
- When the oil reached 340°F, lower the chicken breasts into the hot oil and fry for 7 minutes, or until golden brown, cooked through (should register 165° F on an instant-read thermometer), and crisp.
- Transfer chicken breasts to the rack, skin-side-up.
- Cook the wings for 6 minutes, or until golden brown and cooked through.
- Transfer the wings to the rack and turn off the heat.
- Allow the chicken to rest for about 10 minutes before serving.
Recipe Notes and Variations
Can I use heavy cream instead of buttermilk?
Yes. Just like my buttermilk scones, you can easily swap heavy cream for buttermilk. You will want to add some vinegar to the heavy cream to "curdle" the milk and give it the acidic quality of buttermilk. For 1 cup of heavy cream add 1 tablespoon vinegar.
How long can you leave the raw chicken in a brine?
I would recommend brining the chicken between 8 and 12 hours. Any longer and you risk having excessively salty pieces of chicken, or worse- mushy chicken.
How can you prep ahead for fried chicken?
Since this recipe involves a 12-hour marinade, there are a few things you can do in advance to help make the process of making fried chicken a little easier.
- Buy pre-cut chicken pieces. This might be a little more expensive but it will definitely save you time and will be less messy than cutting a chicken into pieces.
- Make the brine in advance. You can make the brine up to 3 days before you plan to make the fried chicken and keep it refrigerated.
- Reheat already fried chicken. If you have left-overs or make this fried chicken in advance, place the chicken in a 400°F oven for about 15 minutes to warm up.
- Skip the brine. You can swap the brine out and soak the chicken pieces in buttermilk instead. Here’s what you’ll do: Place 1-quart buttermilk and the chicken in a resealable plastic bag, and refrigerate overnight, then proceed with the rest of the recipe as written. You won’t get as much flavor this way, but it saves quite a bit of time.
Frying Safety
Whether you are making fried chicken or fish and chips, when cooking with hot oil there are a few things you will want to keep in mind to safely fry.
- Keep an eye on the temperature and adjust as needed. Maintaining the proper temperature prevents the oil from getting too hot and ensures a crisp fry on your chicken. While a candy thermometer will do the job, I highly recommend a digital thermometer for the most accurate temperature readings.
- Carefully lower the chicken. This helps prevent the oil from splattering out of the pan. You can also use a splatter screen to prevent oil from getting all over your kitchen.
- Properly dispose of your oil. Before getting rid of the frying oil, allow it to cool completely. Then, you can pour the cooled oil into a non-recyclable container with a lid and toss the oil away.
Serve this fried chicken with some of my favorites sides:
Extra buttermilk? Make my Buttermilk Waffles and serve them with any left-over fried chicken for a delicious brunch of chicken and waffles!
If you make this recipe and love it, remember to stop back and give it a 5-star rating - it helps others find the recipe! ❤️️
Buttermilk Fried Chicken
Ingredients
- 2 2½ to 3 pound chickens, cut into breasts, thighs, drumsticks and wings
For the Brine:
- 5 lemons, halved
- 24 bay leaves
- 1 bunch, 4 ounces fresh parsley
- 1 bunch, 1 ounce fresh thyme
- ½ cup (169.5 ml) honey
- 1 head garlic, halved horizontally
- ¾ cup (0.08 g) black peppercorns
- 2 cups (584 g) kosher salt
- 2 gallons (7.57 l) water
For the Coating and Dredging:
- 6 cups (750 g) all-purpose flour
- ¼ cup (0.03 g) garlic powder
- ¼ cup (27.5 g) onion powder
- 4 teaspoons paprika
- 4 teaspoons cayenne
- 4 teaspoons kosher salt
- 1 teaspoon freshly ground black pepper
- 1 quart (0.95 l) + 6 tablespoons buttermilk, divided
For Frying:
- 2 to 3 quarts (1.9 to 2.85 l) peanut or canola oil
Instructions
- Prepare the Brine: Combine all of the brine ingredients in a large stockpot, cover, and bring to a boil. Boil for 1 minute, stirring to dissolve the salt. Remove from the heat and cool completely, then chill thoroughly in the refrigerator before using. The brine can be refrigerated for up to 3 days. Pour the brine into a large container, add the chicken pieces and refrigerate for 8 to 12 hours (don't refrigerate for much longer, or the chicken will be too salty).
- Prepare the Chicken: Remove the chicken from the brine and rinse under cold water, washing off any particles from the brine stuck to the chicken. Pat dry with paper towels and let sit at room temperature for 1½ hours, or until it reaches room temperature.
- Prepare the Coating and Dredging Station: Fill a large pot with at least 2 inches of frying oil, place it over medium heat and heat to 320 degrees F. Place a wire cooling rack on top of a baking sheet and place it to the side of the pot of oil to drain the cooked chicken.
- Meanwhile, whisk together the flour, garlic powder, onion powder, paprika, cayenne, salt and pepper. Divide the mixture between two shallow bowls. Pour 1 quart of the buttermilk into a third shallow bowl. Add the 6 tablespoons of buttermilk to one of bowls with the flour mixture and use a fork or your fingers to toss the mixture together – all of the moisture from the buttermilk should be absorbed and the mixture should look a little shaggy. Set up the station in this order: chicken pieces, dry flour mixture, buttermilk and shaggy flour mixture, then a parchment-lined baking sheet.
- Just before frying, dip the chicken thighs into the first bowl of coating, turning to coat and patting off the excess; dip them into the buttermilk, allowing the excess to run back into the bowl; then dip them into the second bowl of shaggy coating. Transfer to the parchment-lined pan.
- Fry the Chicken: Carefully lower the thighs into the hot oil. Adjust the heat as necessary to return the oil to the proper temperature. Fry for 2 minutes, then carefully move the chicken pieces around in the oil and continue to fry, monitoring the oil temperature and turning the pieces as necessary for even cooking, for 11 to 12 minutes, until the chicken is a deep golden brown, cooked through (should register 170 degrees F on an instant-read thermometer), and very crisp. Meanwhile, coat the chicken drumsticks and transfer to the parchment-lined baking sheet.
- Transfer the cooked thighs to the cooling rack skin-side-up and let rest while you fry the remaining chicken. Ensure that the oil has returned to 320 degrees F, and cook the chicken drumsticks for about 8 minutes, checking for doneness as you did with the thighs. When the drumsticks are done, transfer them to the cooling rack skin-side-up.
- Increase the heat slightly and bring the oil up to 340 degees F. Meanwhile, coat the chicken breasts and wings. Carefully lower the chicken breasts into the hot oil and fry for 7 minutes, or until golden brown, cooked through (should register 165 degrees F on an instant-read thermometer), and crisp. Transfer to the rack, skin-side-up. Cook the wings for 6 minutes, or until golden brown and cooked through. Transfer the wings to the rack and turn off the heat. Allow the chicken to rest for about 10 minutes before serving. If made ahead, the chicken can be placed in a 400 degree F oven for a few minutes to warm up.
Notes
- Brine: If you don’t have time for the brine (it needs to boil, then cool to room temperature, then be completely chilled before using), you can do the following: Place 1-quart buttermilk and the chicken in a resealable plastic bag, and refrigerate overnight, then proceed with the rest of the recipe as written. You won’t get as much flavor this way, but it saves quite a bit of time.
- Brine in Advance: You can make the brine up to 3 days before you plan to make the fried chicken.
- Chicken: Buying pre-cut chicken pieces might be a little more expensive, but will save time and be less messy than cutting a chicken into pieces.
- Reheating Instructions: If you have left-overs or make this fried chicken in advance, place the chicken in a 400°F oven for about 15 minutes to warm up.
- Recipe adapted Ad Hoc at Home
Did you make this recipe?
Leave a review below, then snap a picture and tag @thebrowneyedbaker on Instagram so I can see it!


Michelle,
Delicious recipe .. thank you. Have you tried this in an air fryer or would you have any suggestions /recipes to do wings etc in the air fryer?
Thanks much
Kathy Noel
Hi Kathy, So glad you enjoyed this! I haven’t experimented with an air fryer yet, but it’s on my list!
Whenever we try to use Buttermilk in our fried chicken recipe the breading turns black when fried. Removing the Buttermilk from the breading mix and cooking in the exact same temperature oil (deep fryer with digital temp control) results in golden brown breading but not very thick or flaky. We stopped using Buttermilk for this reason. Have you ever experienced this? Can it be related to a particular type or brand of Buttermilk?
Hi Jim, I’ve never experienced that! I know that they sell whole milk buttermilk and low fat buttermilk; I wonder if one or the other causes it?
Oh my! Such a classic and it looks so good! reading the process makes me hungry! thanks for sharing your recipe. I’ll do it tomorrow for our lunch.
Absolutely delicious! The chicken looks so crisp and juicy from inside. Really excited to try this recipe as soon as possible. Thank you so much for such a lovely recipe with all the details and easy to understand procedure.
Two of my family members won’t eat chicken with bones – can this recipe be made with boneless pieces?
Hi Amy, Yes, for sure! But they shouldn’t be brined for more than 2 hours or they will get mushy and too salty without bones. You could do a quick brine using ¼ cup each salt and sugar with 1 quart of water for 1 to 2 hours. Enjoy!!
Crazy question: can you use a non dairy milk alternative with lemon juice to make non dairy buttermilk; or does that not really work ? Please say yes and change my life!!!!
I have never done it, but I did a ton of research and it seems the overwhelming answer is, yes! Follow the same instructions for buttermilk substitutions – put 1 tablespoon of lemon juice in a liquid measuring cup, then fill it up to 1 cup with your milk alternative. Stir and let it sit for 5 minutes before using.
If I wanted to make sandwiches, how do you think a BL/SL breast would do since it’s brined?
That’s also my question: can boneless/skinless breasts be used and skip the brining step?
Hi Michelle, I would still brine since boneless/skinless breasts can especially be dry, but they shouldn’t be brined for more than 2 hours or they will get mushy and too salty without skin or bones. You could do a quick brine using ¼ cup each salt and sugar with 1 quart of water for 1 to 2 hours. Enjoy!!
Hi Miriam, I would still brine since boneless/skinless breasts can especially be dry, but they shouldn’t be brined for more than 2 hours or they will get mushy and too salty without skin or bones. You could do a quick brine using ¼ cup each salt and sugar with 1 quart of water. Enjoy!!
Thanks Michelle! I’m soo excited to try this!
Sorry, one more ….same brine and timeframe as breasts if I decided on boneless skin on thighs? Do you think that option would’ve give a better outcome?
Hi Miriam, If they are boneless/skinless I would follow the same recommendation for the boneless/skinless breasts.
Yummm!! Thanks for sharing the recipe. I will definitely try this.
You’re welcome! Enjoy!
Looks delicious! But is there a recipe for this with less fats and carbs from the oils and marinate? I’m planning on going on a keto diet with this.
I feel so hungry right now after reading the post :) Thank you for sharing the recipe! Fried chicken is always one of my favorite.
Hi there!! :)
Have question regarding your statement below:
Speaking of the breading, I changed up the original recipe a bit to create more of a shaggy, extra-crispy exterior very similar to the General Tso’s Chicken and Sesame Chicken I’ve made. Adding some liquid to the final dry breading makes all the difference in the world. The breading on the chicken is thick and extra-crunchy, just how I like it!
what did you change in the actual recipe? :) what do you mean by adding some liquid to the final breading? :) how’d you do it? :) thank you so much!! :)
Hi there, The directions for adding liquid to the breading are included in step #4. The original recipe only called for a dry final breading, I added some buttermilk. The recipe is written the way I made it, there was nothing changed from the way it is currently written.
oh!! sorry didn’t read the instructions anymore, thank you so much for answering my question ^_^
Do you strain the brine prior to adding the chicken?
Hi Lisa, No, don’t strain the brine.
Thank you! Trying tonight :)
this chicken is so good that the first moooooch slapped Barry when he picked up a gizzard! It’s beeezed goods!
Did you use two whole cut up chickens or one? Want to know if I need to halve the brine. Thanks!
Hi Shari, The brine recipe should not be altered if you use the amount of chicken called for in the recipe (5 to 6 total pounds).
This looks sssoooooo good. Being from the south, I have eaten PLENTY of fried chicken, and the best I have ever had has always had the buttermilk coating. It really helps to hold things together and adds just the right amount of twang.
Wonderful recipe as always! One question: what would you recommend as side please? Thanks and keep up the yumminess!
You could do anything that you like! Some of my favorites sides for fried chicken are mashed potatoes, macaroni and cheese, biscuits, etc.
i just made this, but in chicken strips version, woowwww… it’s the best fried chicken i’ve ever cooked. so crunchy on the outside n moist on the inside.. thx 4 recipe. i’m sure i will make this more often
Your fried chicken looks so incredible, so crunchy on the outside and so moist on the inside!