Cheesy Pull-Apart Bread
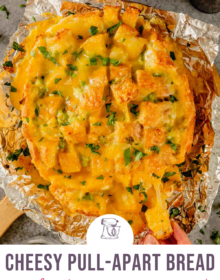
This cheesy pull-apart bread with garlic butter recipe is an easy crowd-pleaser for any occasion, especially football season. It’s simple to throw together, only calls for 7 ingredients, and is ready in just 30 minutes!

Why You’ll Love This Cheesy Garlic Pull-Apart Bread Appetizer
If the prospect of filling your belly with nothing more than carbs and cheese excites you as much as it excites me, then you need to run - not walk - to your kitchen and make this pull-apart bread!
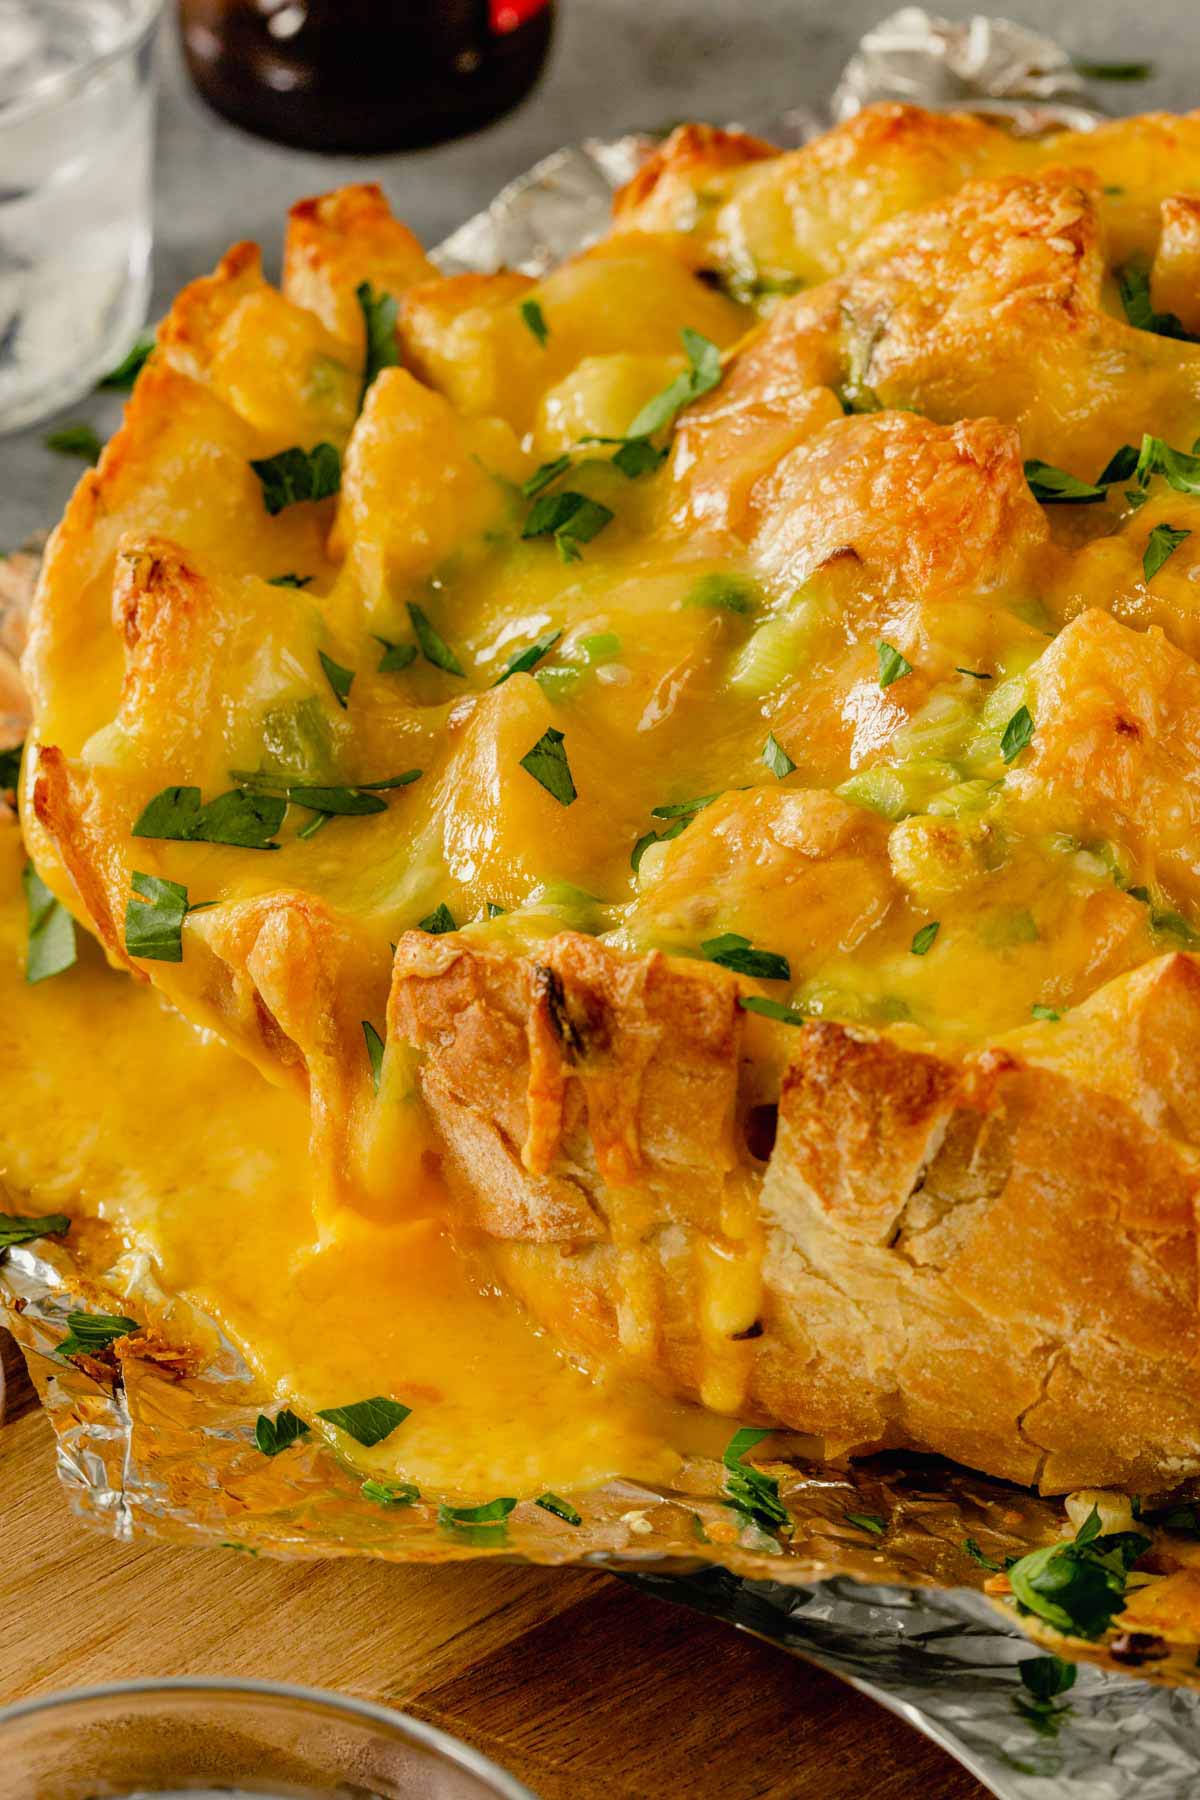
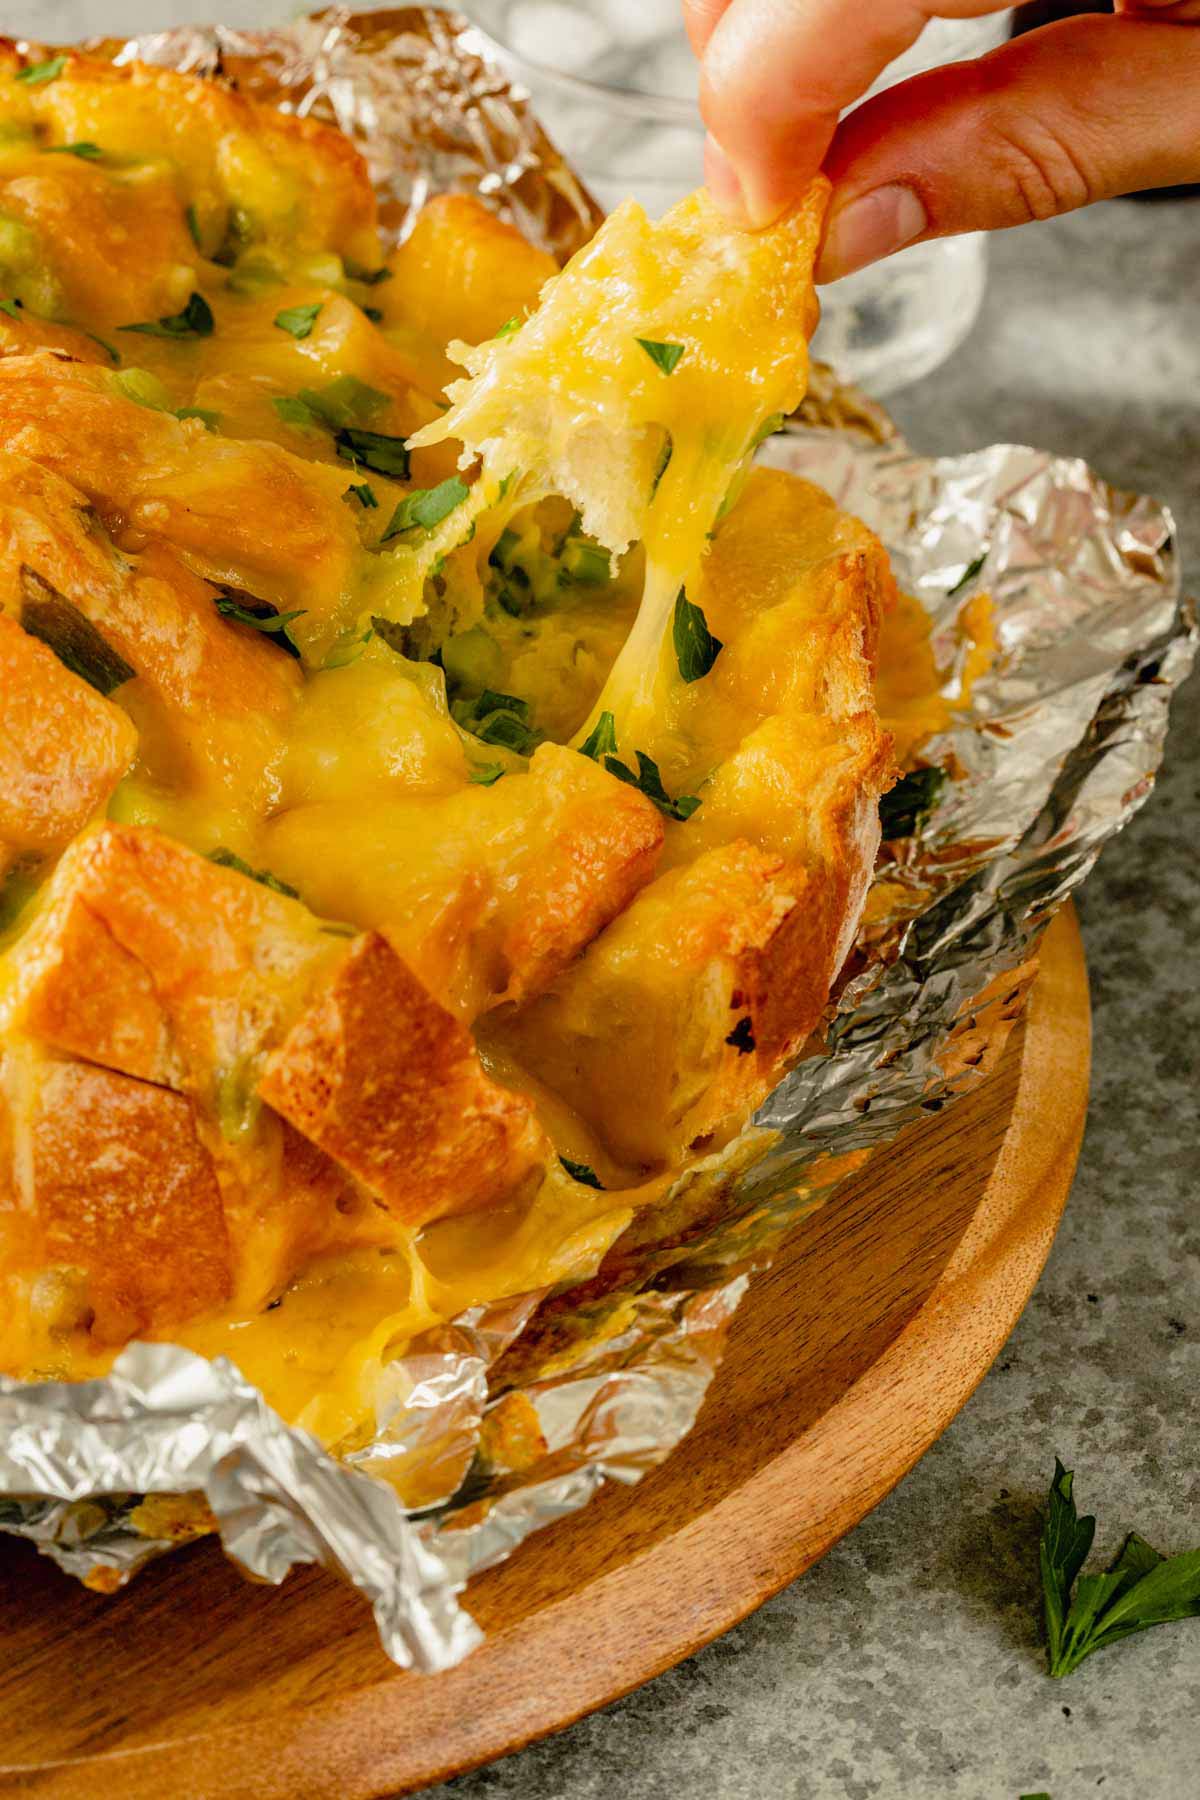
Imagine cheesy garlic bread on steroids that you can pull apart with your fingers. Crispy on the bottom and outside, with melty cheese and fluffy bread on the inside, this addictive appetizer is also called Cheddar Tailgating Bread, Bloomin’ Onion Bread, and “Crack Bread.” Yes, it’s every bit as amazing as you’re imagining it to be!
Key Ingredients
Remember when I said you only needed seven ingredients to make this super simple pull-apart bread? I wasn’t lying! And I bet you have most of these on-hand.
- A large loaf of boule-style Italian bread (Sourdough or French could also work; just try to find one that’s large and oval-shaped so that there’s a good bread-to-crust ratio for the garlic-cheese filling)
- Melted butter (unsalted or salted will work, depending on your preference)
- Garlic (I only used one clove, but you could amp that up if you’re a hardcore garlic lover.)
- One bunch of scallions (trimmed and thinly sliced)
- Shredded sharp cheddar and Monterey Jack cheeses (about 2 cups of each)
- Chopped fresh parsley (as an optional garnish)
How To Make the Best Cheesy Bread
The best part about this little gem? It’s seriously the easiest thing to prepare.
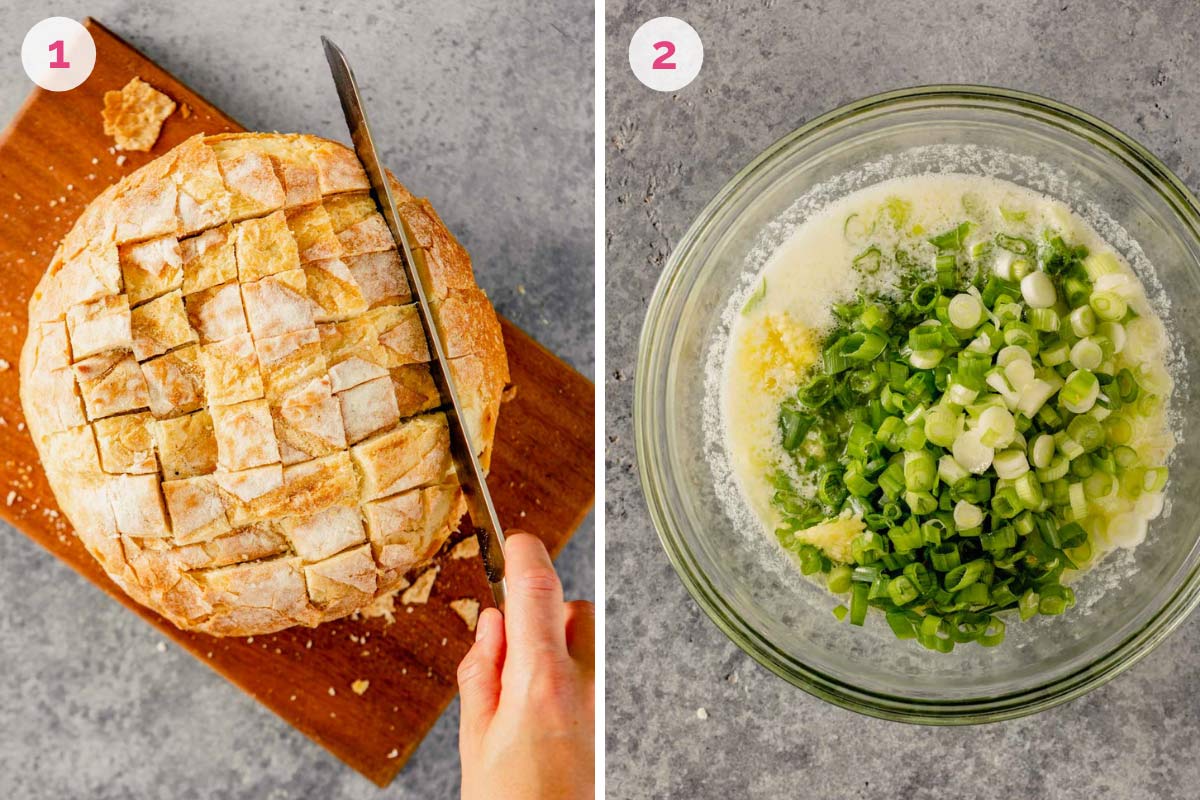
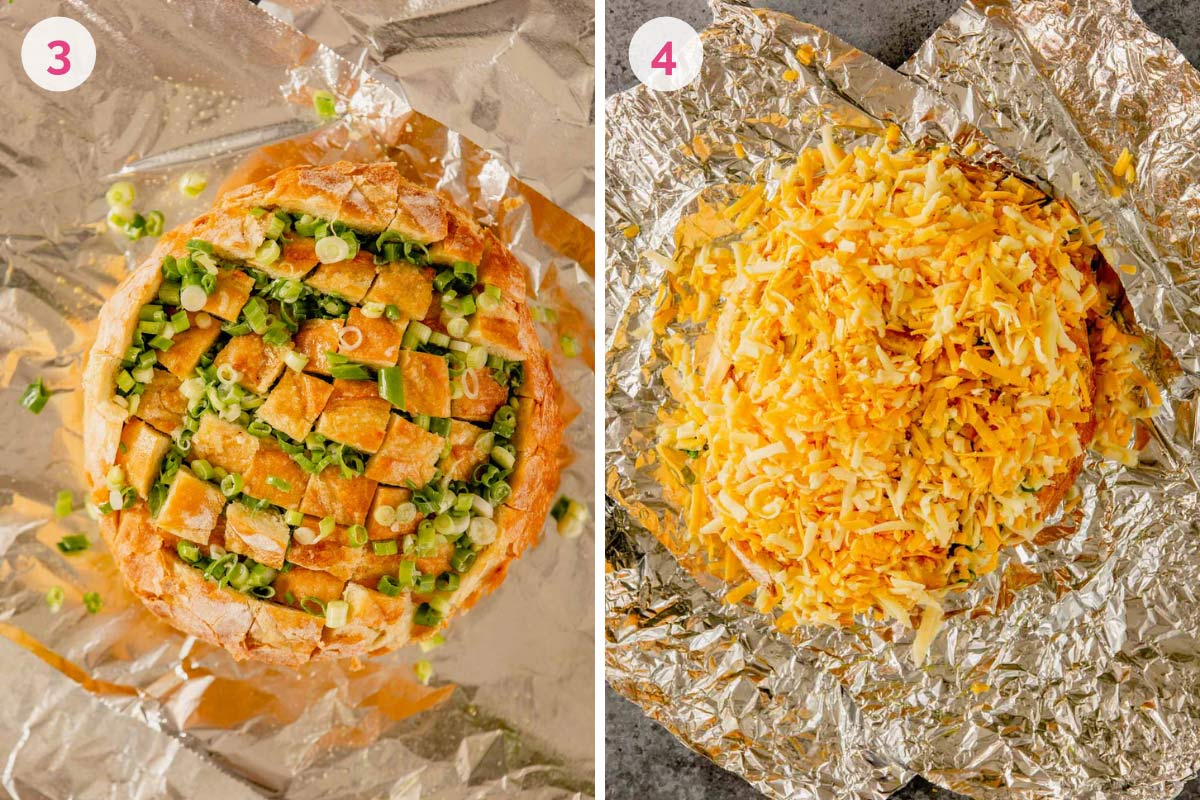
Take one loaf of bread (I like using Italian, but sourdough or French bread would also work), and cut it up into a grid pattern. Pour a mixture of melted butter, garlic, and scallions into all of the crevices, and then cover with foil and bake.
After it has baked in the foil - which allows the garlic butter to permeate every nook and cranny of the bread - take it out of the oven, stuff it with cheese, and cover it in shredded cheese.
Then, pop it back into the oven, uncovered, to melt the cheese and develop a crispy cheese crust on the top and around the edges. Voila! Crusty, cheesy awesomeness ready to be consumed in under 30 minutes.
Save This Recipe
This Dish Is a Guaranteed Crowd-Pleaser!
You don’t need me to tell you that you won’t be able to stop eating this. I dare you to try! My family demolished this entire loaf and, truth be told, it would have been very easy for only two of us to do it.
If you’re feeding a crowd, you can easily double this recipe and serve with toothpicks to make grabbing a couple of squares of the garlicky, cheesy, carby goodness easier without losing that glorious cheese pull.
I’m looking forward to consuming many, many more loaves of this cheesy bread. You owe it to yourself and those you feed to make at least one!
Tips and Variations
- I recommend shredding cheese off a block with a cheese grater over store-bought shredded cheese. Pre-packaged shredded cheese is typically mixed with cellulose powder to prevent the cheese from melting or clumping together in transit from the plant to the grocery store, so naturally this makes it less melty than freshly shredded cheese. It requires a little bit of elbow grease, but trust me. It’s worth the effort!
- If you want to turn this appetizer and side dish into a more filling meal, add some meat! Shredded chicken, grilled chicken, pepperoni slices, or crumbled bacon would be delicious additions.
- Turn this into cheesy jalapeño pull-apart bread by adding some diced jalapeño peppers or pickled jalapeño peppers!
- Or make this more like a pizza pull-apart bread by serving it with marinara sauce for dipping. (Similar to my favorite pepperoni pizza pull-apart bread!)
Storage, Freezing, and Reheating Recommendations
- Store any leftover pull apart cheesy bread in an airtight container or plastic bag in the fridge for up to 5 days.
- Freeze cooled pull-apart bread wrapped in plastic wrap or aluminum foil (to prevent freezer burn) inside an airtight, freezer-safe plastic bag or container for up to a month.
- Reheat from chilled or frozen in the oven at 350 degrees for 15 minutes covered in foil, then 15-20 minutes uncovered, or until warmed through and bubbling.
More Easy Appetizer Recipes To Try

Cheesy Pull-Apart Bread
Ingredients
- 1 large loaf or boule-style Italian bread, Sourdough or French could also work
- ½ cup (113.5 g) butter, unsalted or salted is fine, melted
- 1 clove garlic, minced
- 1 bunch scallions, trimmed and thinly sliced
- 8 ounces (226.8 g) sharp Cheddar cheese, shredded (about 2 cups)
- 8 ounces (226.8 g) Monterey Jack cheese, shredded (about 2 cups)
- Chopped fresh parsley, to garnish (optional)
Instructions
- Preheat oven to 350 degrees F. Spray a sheet of heavy-duty foil with non-stick cooking spray and set aside.
- Cut a cross-hatch pattern into the top of the bread by slicing ½-inch grid lines into the bread, stopping about ¼-inch from the bottom of the bread so that it stays together. Place the bread on the piece of foil that has been sprayed.
- Stir together the melted butter, garlic and scallions.
- Gently separate the bread with your fingers, then spoon the butter mixture in all of the seams, making sure it is evenly distributed among the whole loaf. Wrap the loaf up in the foil and place on a baking stone or directly on the oven rack and bake for 10 minutes.
- Remove from the oven and increase the oven temperature to 425 degrees F.
- Open the foil and sprinkle the shredded cheese on top of the bread. There will be a lot of cheese, so try to push down as much as you can in between all of the crevices in the bread. Leave the foil open and return it to the oven. Bake until the cheese is completely melted, bubbling and starting to brown on top, about 15 minutes. Let stand for 5 minutes before serving, then sprinkle with parsley (if desired) and dig in!
Notes
- Bread: Use a large loaf of boule-style Italian bread; sourdough or French would make good substitutes, too!
- Cheese: I recommend shredding cheese off a block with a cheese grater. Pre-packaged shredded cheese is typically mixed with cellulose powder to prevent the cheese from melting or clumping together, which makes it less melty than freshly shredded cheese.
- Meat Additions: If you want to turn this appetizer and side dish into a more filling meal, add some meat! Shredded chicken, grilled chicken, pepperoni slices, or crumbled bacon would be delicious additions.
- Turn this into cheesy jalapeño pull-apart bread by adding some diced jalapeño peppers or pickled jalapeño peppers!
- Or make this more like a pizza pull-apart bread by serving with some marinara sauce for dipping. (Similar to my favorite pepperoni pizza monkey bread!)
- Store any leftover pull-apart cheesy bread in an airtight container or plastic bag in the fridge for up to 5 days.
- Freeze cooled pull-apart bread wrapped in plastic wrap or aluminum foil (to prevent freezer burn) inside an airtight, freezer-safe plastic bag or container for up to a month.
- Reheat from chilled or frozen in the oven at 350 degrees for 15 minutes covered in foil, then 15-20 minutes uncovered, or until warmed through and bubbling.
Did you make this recipe?
Leave a review below, then snap a picture and tag @thebrowneyedbaker on Instagram so I can see it!
Photography by Lauren Grant.


Tried it- our favorite!!!
I wanted to make this for a snack because I love cheese and bread, but do I need the scallions, really? I can’t eat scallions. Is there a better alternative? Or is it required?
Hi Nina, You can omit the scallions if you’d like.
Must try. With bacon. Yummmmmmmmmmm…!!!
Woo hoo! I’m very excited to try this.
love chezyyy.
I made this yesterday for our non super bowl party (don’t watch it), and it was “meh”. I don’t know if my loaf of bread was too big (bakery Italian loaf), but I couldn’t get the ingredients in all the crevices. Same with the cheese, so I didn’t have any extra to put on top, so all the cheese was in the crevices and didn’t get brown. Don’t get me wrong, it was good – but basically anything with a stick of butter, garlic, and 4 cups of cheese is going to taste good, right? I think I’d just make a regular garlic bread with some cheese in it and slice it up vs. go through the fuss of cubing it.
I made this for a house party and WOW. At first people were really sceptical about it but once they tried it everyone really loved it and thought it was delicious! I’m so glad I made it – but next time I think I’ll make some just for me! :) I didn’t put any scallions/spring onions in, I literally just put some melted butter, tiny bit of parsley, and a combi of monterey jack, edam, mature cheddar and mozzerella and everyone loved it. Next time I think I’ll put in the scallions and maybe some prosciutto? They were surprised how easy it was to make as well, they were so shocked when I told them I literally bought a loaf and stuffed it with butter and cheese! :D Thanks for sharing this recipe!
I just now made this for my sister and her husband and it was a hit from the first cheesy bite! I look forward to tweaking and experimenting with this delicious recipe!
Ok….you are darling! Loved reading your comments on cheese and bread….it’all I need to survive. Can’t
Totally fat free, right?
These pictures are amazing!!!!! Love them!
I made this o yesterday for superbowl and not a crumb was left. Love this, so easy.
I made this yesterday and my boyfriend loved it!!!! I didn’t have butter so I used olive oil instead and it was delicious!!
Looking forward to your next recipe.
We just made this for super bowl tonight! But we skipped the cheddar and added poppy seeds! It was delicious!
I made this for our Super bowl party…..it was incredibly cheesy deliciousness!! I can’t wait for another event to make this for!!
I made this tonight and I knew it would be cheesy, but wow! It was beyond cheesy….. but so good. Thank you!
I am prepping this right now for the big Superbowl Party! I know everyone will love it so much that I am making a 3rd one to hide away just for myself!!! Cheers!
Wow, this looks incredible. It doesn’t get much better than cheese, butter, garlic, and bread ;) Once our recipe search engine is up and running, we’d love to feature a recipe like this one. Check us out :)
This bread is amazing!! I made it for a get together with friends and it was a big hit!!! Thanks for the recipe!
Wow, I’m kinda speechless. What I’d do for a chunk of this bread :) Delicious..
Oh my god, there is so much awesomeness in this post. This will definitely be happening in my kitchen.
These pictures SCREAM 1000 words. wow! Good enough to make me want to make this right now!!!!!
that looks so good! I bet I could eat the entire thing in one day.
Wow! Naughty!
I think….I…..love……you. sigh
thank you! :-)
I always see these pull-apart breads, but have never made one. I think this weekend’s Superbowl Party needs pull-apart bread.
Now I know what to do to make my family fall in love (even more than already! ;) hehe) with me this Sunday…
This is going to be addicting! LOVE it! PS: I totally want that crispy cheese on the bottom :)
That crispy cheese on the bottom is money :)
I can’t possibly explain how badly I want this right now. Yuuuuum!