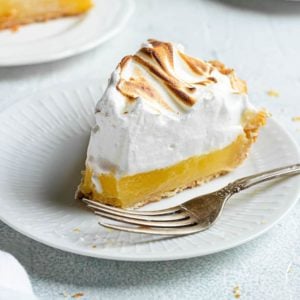
Classic Lemon Meringue Pie
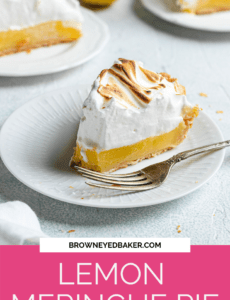
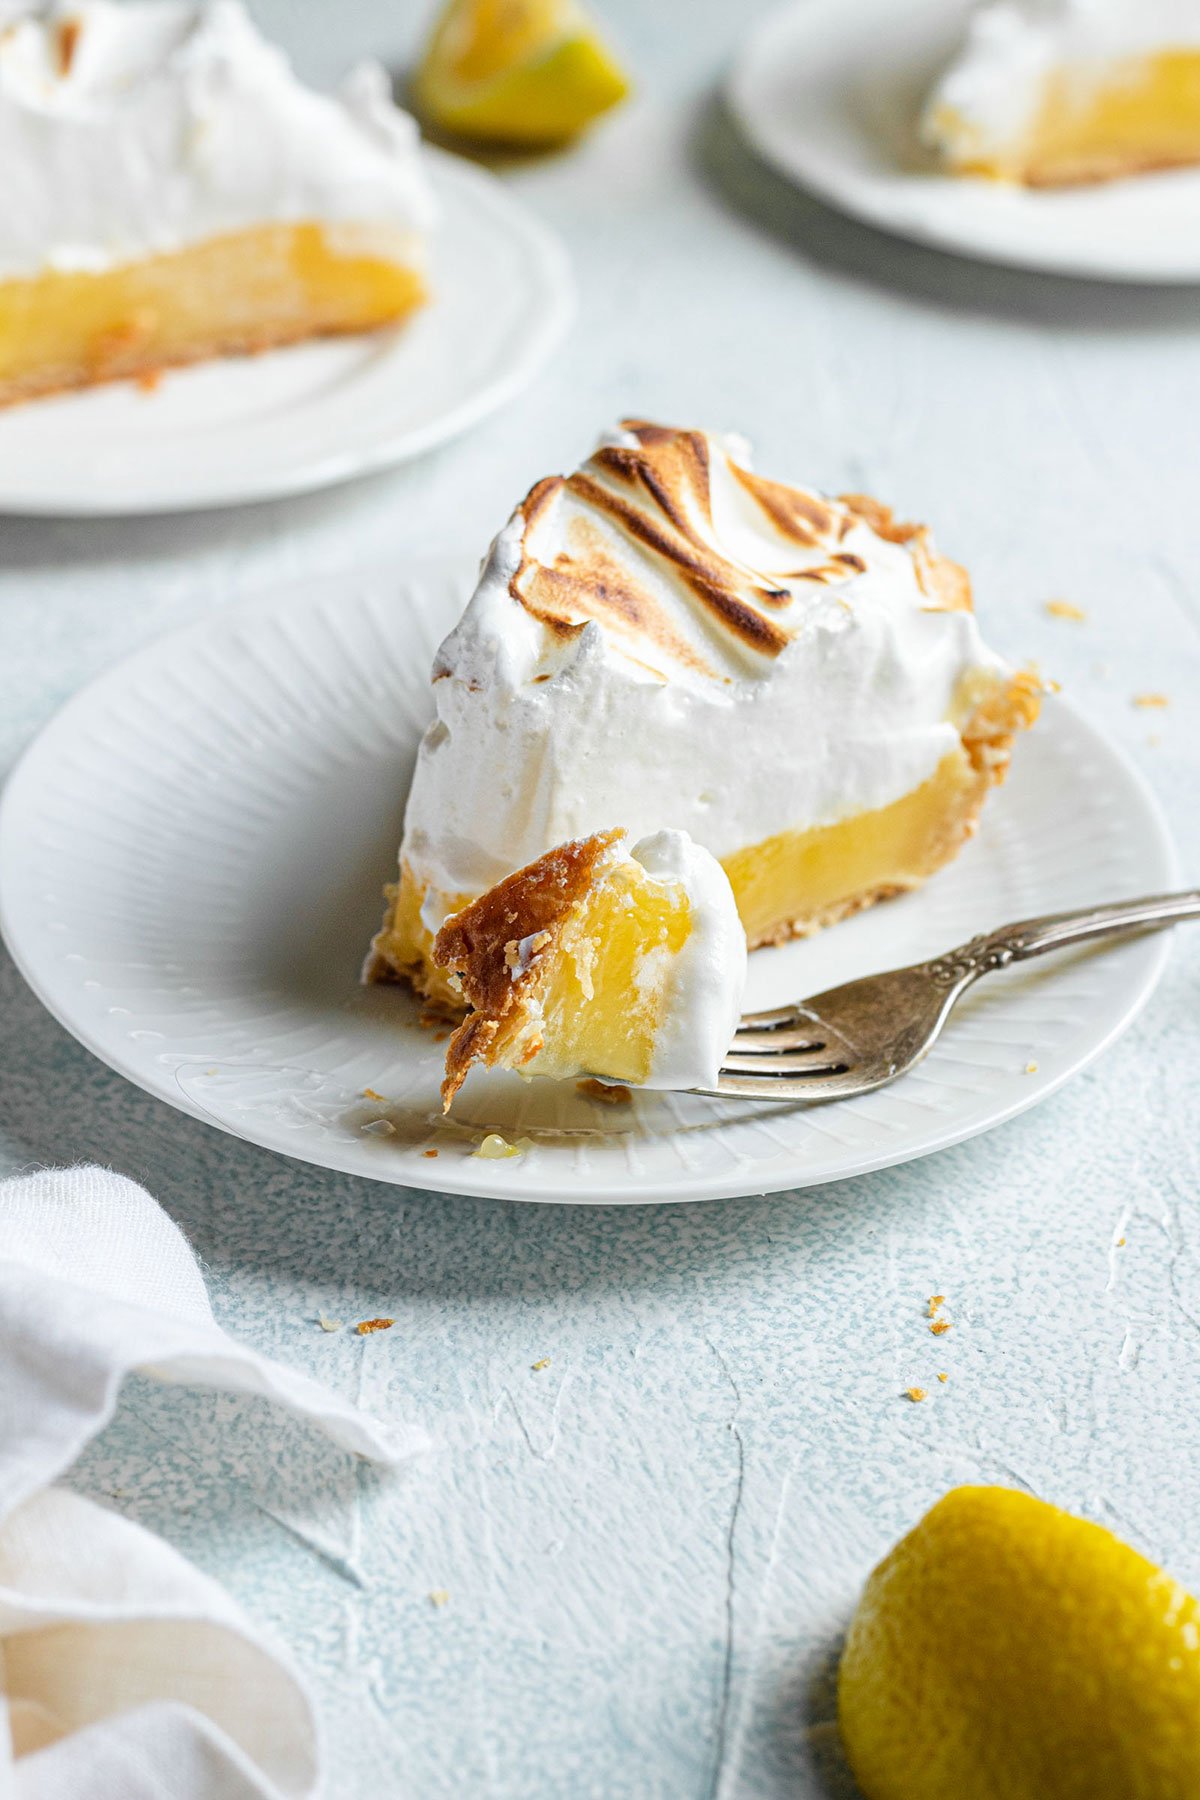
There’s nothing quite like perfect, from-scratch lemon meringue pie. Made with a flaky butter pie crust, a creamy, slightly tart homemade lemon filling, and piled high with sweet, fluffy meringue, this is a pie lover’s dream come true.
If you’re unfamiliar with traditional lemon meringue pie, let me introduce you…
What Is Lemon Meringue Pie?
Classic lemon meringue pie features 3 parts:
- Homemade pie crust
- Lemon custard filling
- Fluffy meringue topping
The combination of flavors and textures – buttery, flaky pie crust + creamy, tart lemon filling + fluffy, sweet meringue – makes this traditional dessert a favorite of many!
The Ingredients
This impressive lemon meringue pie comes together with basic kitchen ingredients. Here’s an overview of what you’ll need to get started (full ingredient list and recipe instructions included at the bottom of this page):
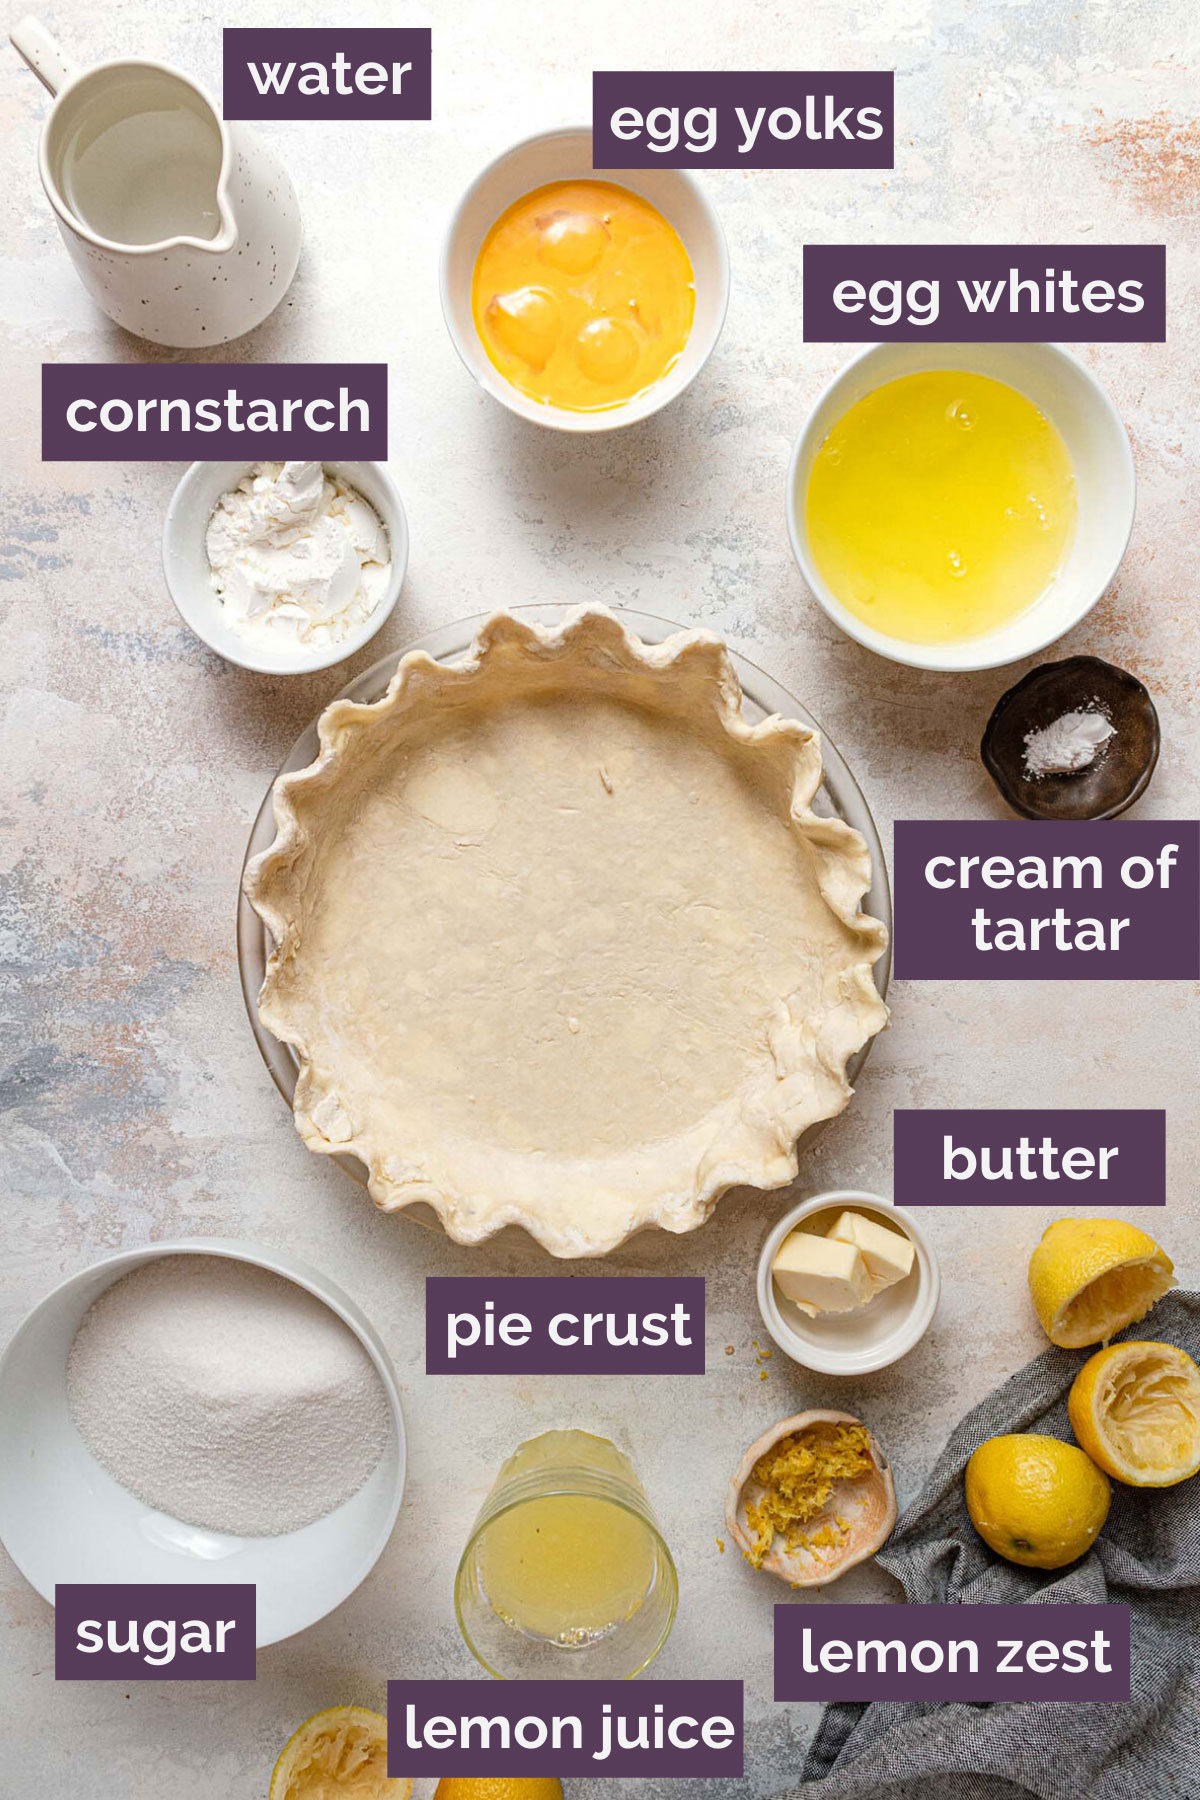
Pie Crust Base
Choose your own adventure! Here are 3 of my tried-and-true classic crust recipes that work wonderfully with this traditional pie:
- All-Butter Pie Crust: I include this pie crust recipe in the full pie recipe below because it’s absolutely divine. The buttery, flaky crust pairs wonderfully with the cold, creamy, and tart lemon filling. If you’re making a classic lemon meringue pie, this is the crust I would use.
- “The Best Pie Crust“: This has been my go-to pie crust recipe for years. This recipe uses a combination of butter and shortening, along with some vodka in place of water for a perfectly flaky crust each and every time.
- Graham Cracker Crust: For a quick shortcut, a graham cracker crust is a delicious and easy lemon meringue pie crust option.
Lemon Pie Filling
This lemon meringue pie filling is ultra-creamy, a little sweet, and tart. A couple of power ingredients for the best lemon pie filling include:
- Egg Yolks: Egg yolks create the creamy, custard-y pie filling texture we expect in a traditional lemon meringue pie.
- Sugar: Use all granulated sugar for sweetness.
- Cornstarch: Cornstarch thickens the pie filling. This ensures perfect slices when you’re ready to serve!
- Lemon Juice + Zest: This pie tastes best with fresh lemon juice and zest. If fresh lemons aren’t an option, use the equivalent amount of bottled lemon juice (omit the zest).
Meringue Topping
Top the entire pie with a fluffy, sweet meringue! You need standard meringue ingredients for the pie topping:
- Egg Whites: Whipped egg whites are the foundation of meringue topping.
- Cream of Tartar: Stabilizes the egg whites.
- Sugar: Granulated sugar adds sweetness.
- Vanilla Extract + Salt: For flavor.
How to Make Lemon Meringue Pie
While all of the steps may look intimidating, this lemon meringue pie comes together quite easily! Let’s walk through the highlights of the process. You’ll master this classic dessert in no time!
Make the Crust: Mix together the pie dough, roll it out and line the pie plate, then refrigerate it for at least 2 hours.
Blind Bake the Crust: Also referred to as “par-baking,” bake the crust until it’s almost done, but not quite baked all the way. It will go back in the oven for a couple of minutes once the filling and meringue are ready.
Note: After years of trying various blind baking methods and pie weights, the method I’ve found to be completely foolproof is the one outlined by Stella Parks. Line the chilled pie plate with aluminum foil (on top of the pie dough) then fill it all up with granulated sugar (you can reuse it!) and bake it at 350 degrees F for 45 minutes (for partially-baked crusts) or 55 to 60 minutes (for a fully baked crust). I have never had so much success – no shrinking pie crust, no dough sticking to foil as I try to remove it halfway through baking, and a beautifully browned pie crust.

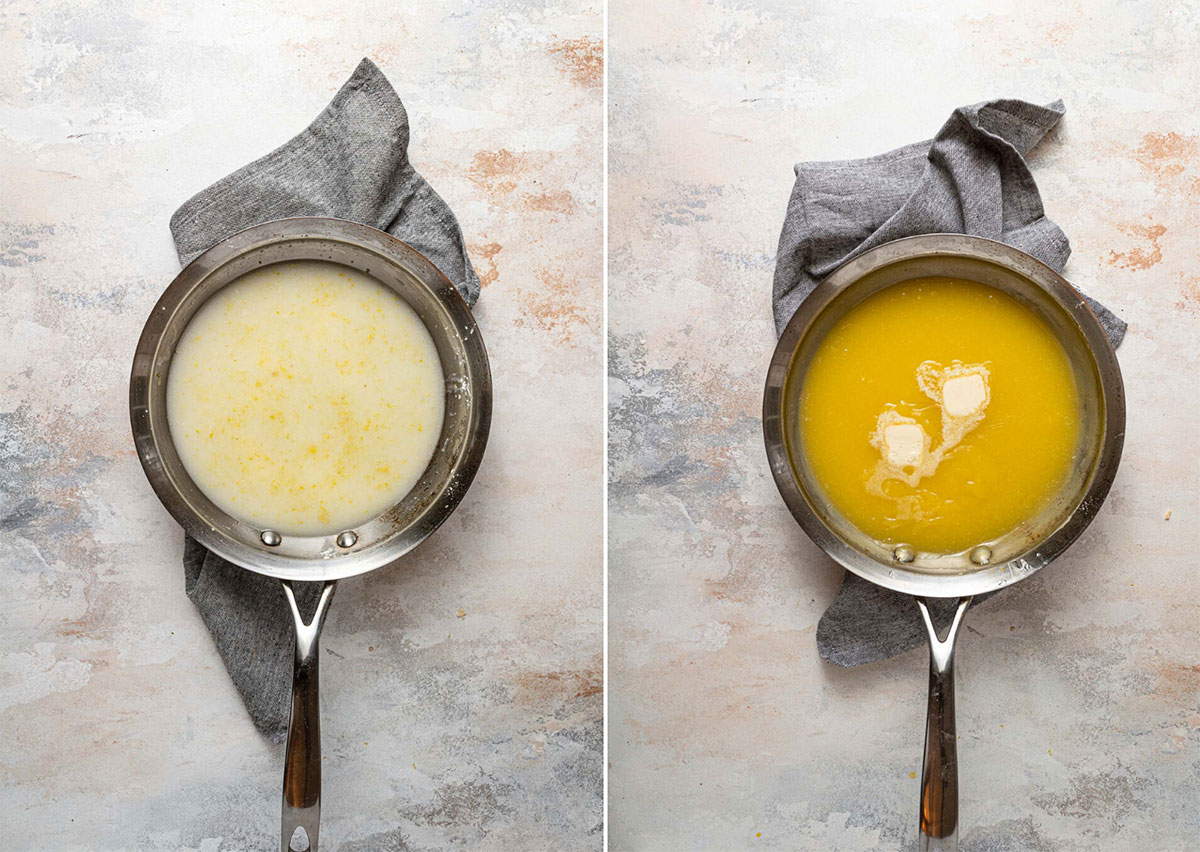
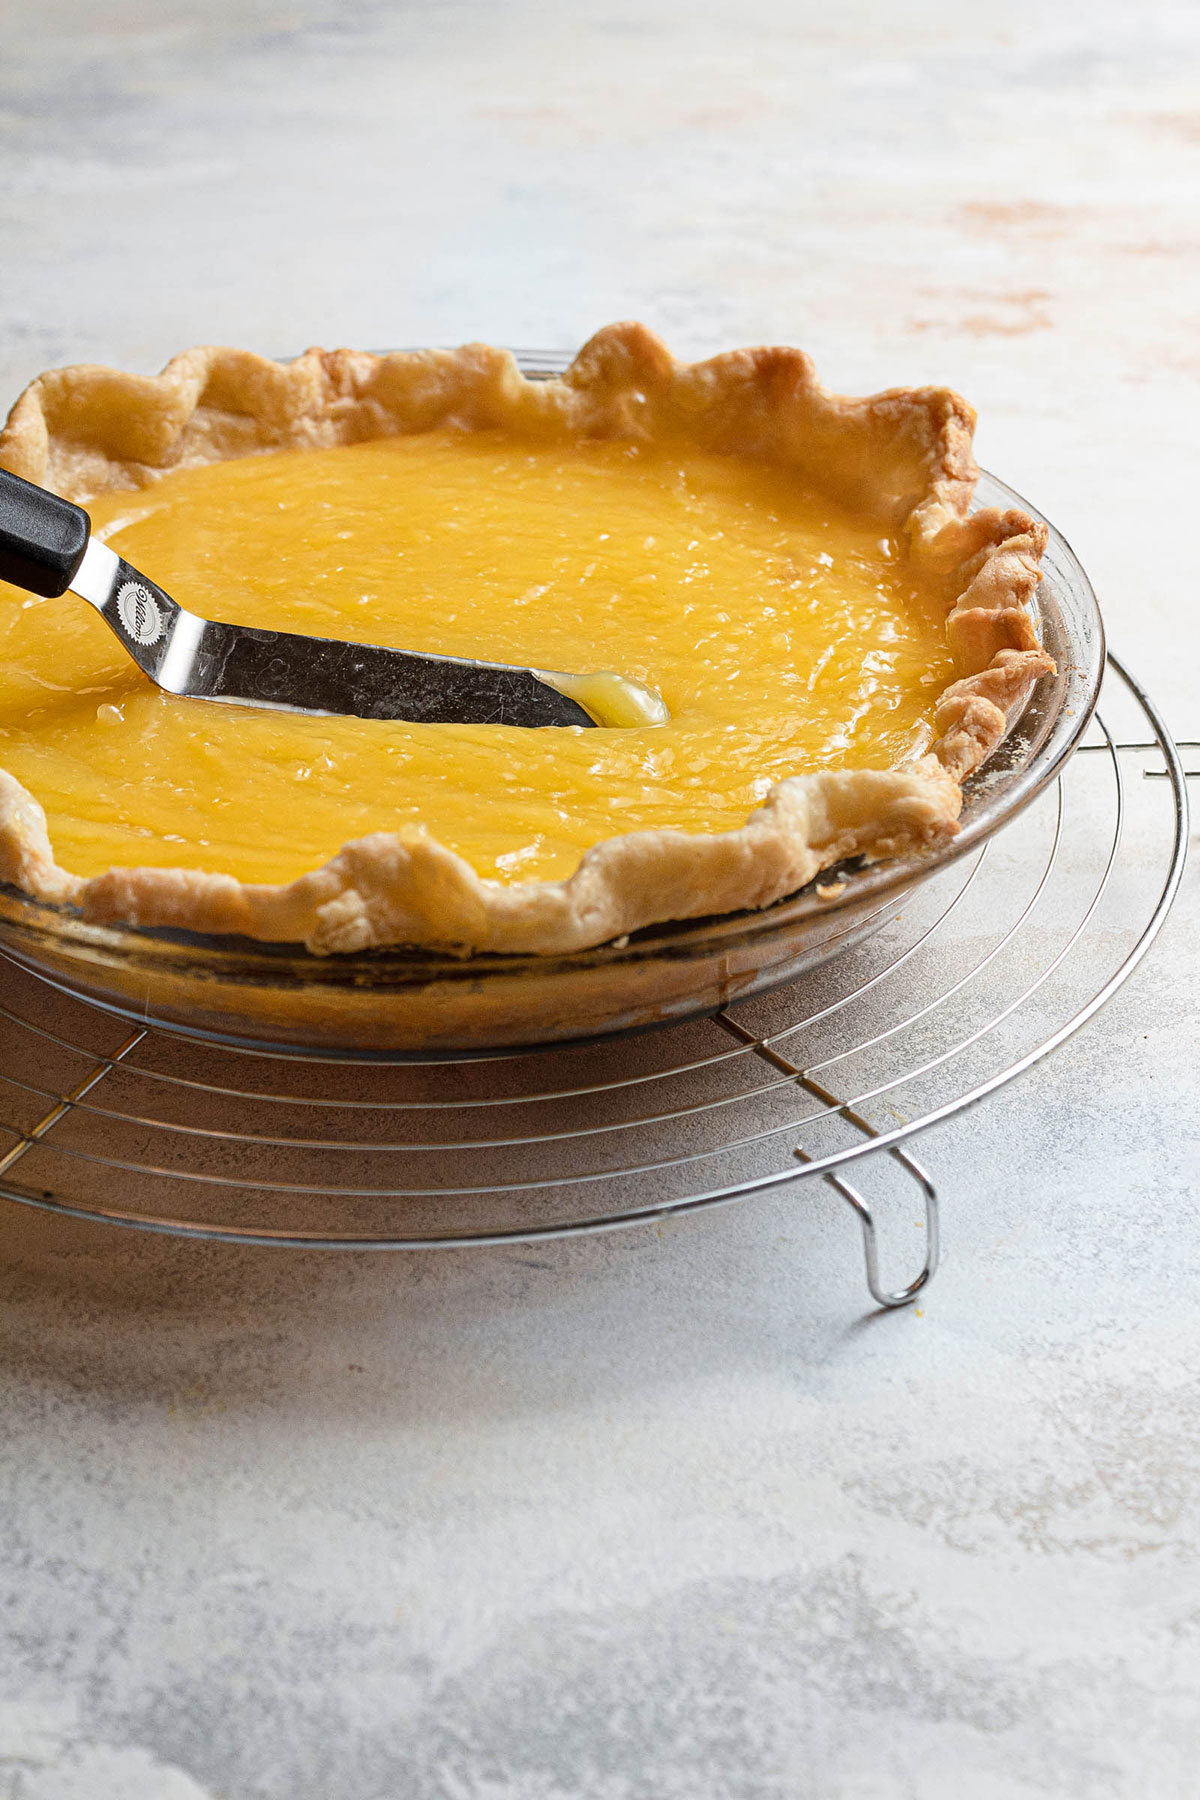
Make the Lemon Filling: Mix and heat the water, sugar, salt, cornstarch, lemon juice, and lemon zest until it is bubbly and thick. Gradually mix with the beaten egg yolks and temper this mixture until heated through and large bubbles burst on the surface. Whisk in the butter, transfer to the pie crust, and press a piece of plastic wrap against the surface.
Save This Recipe
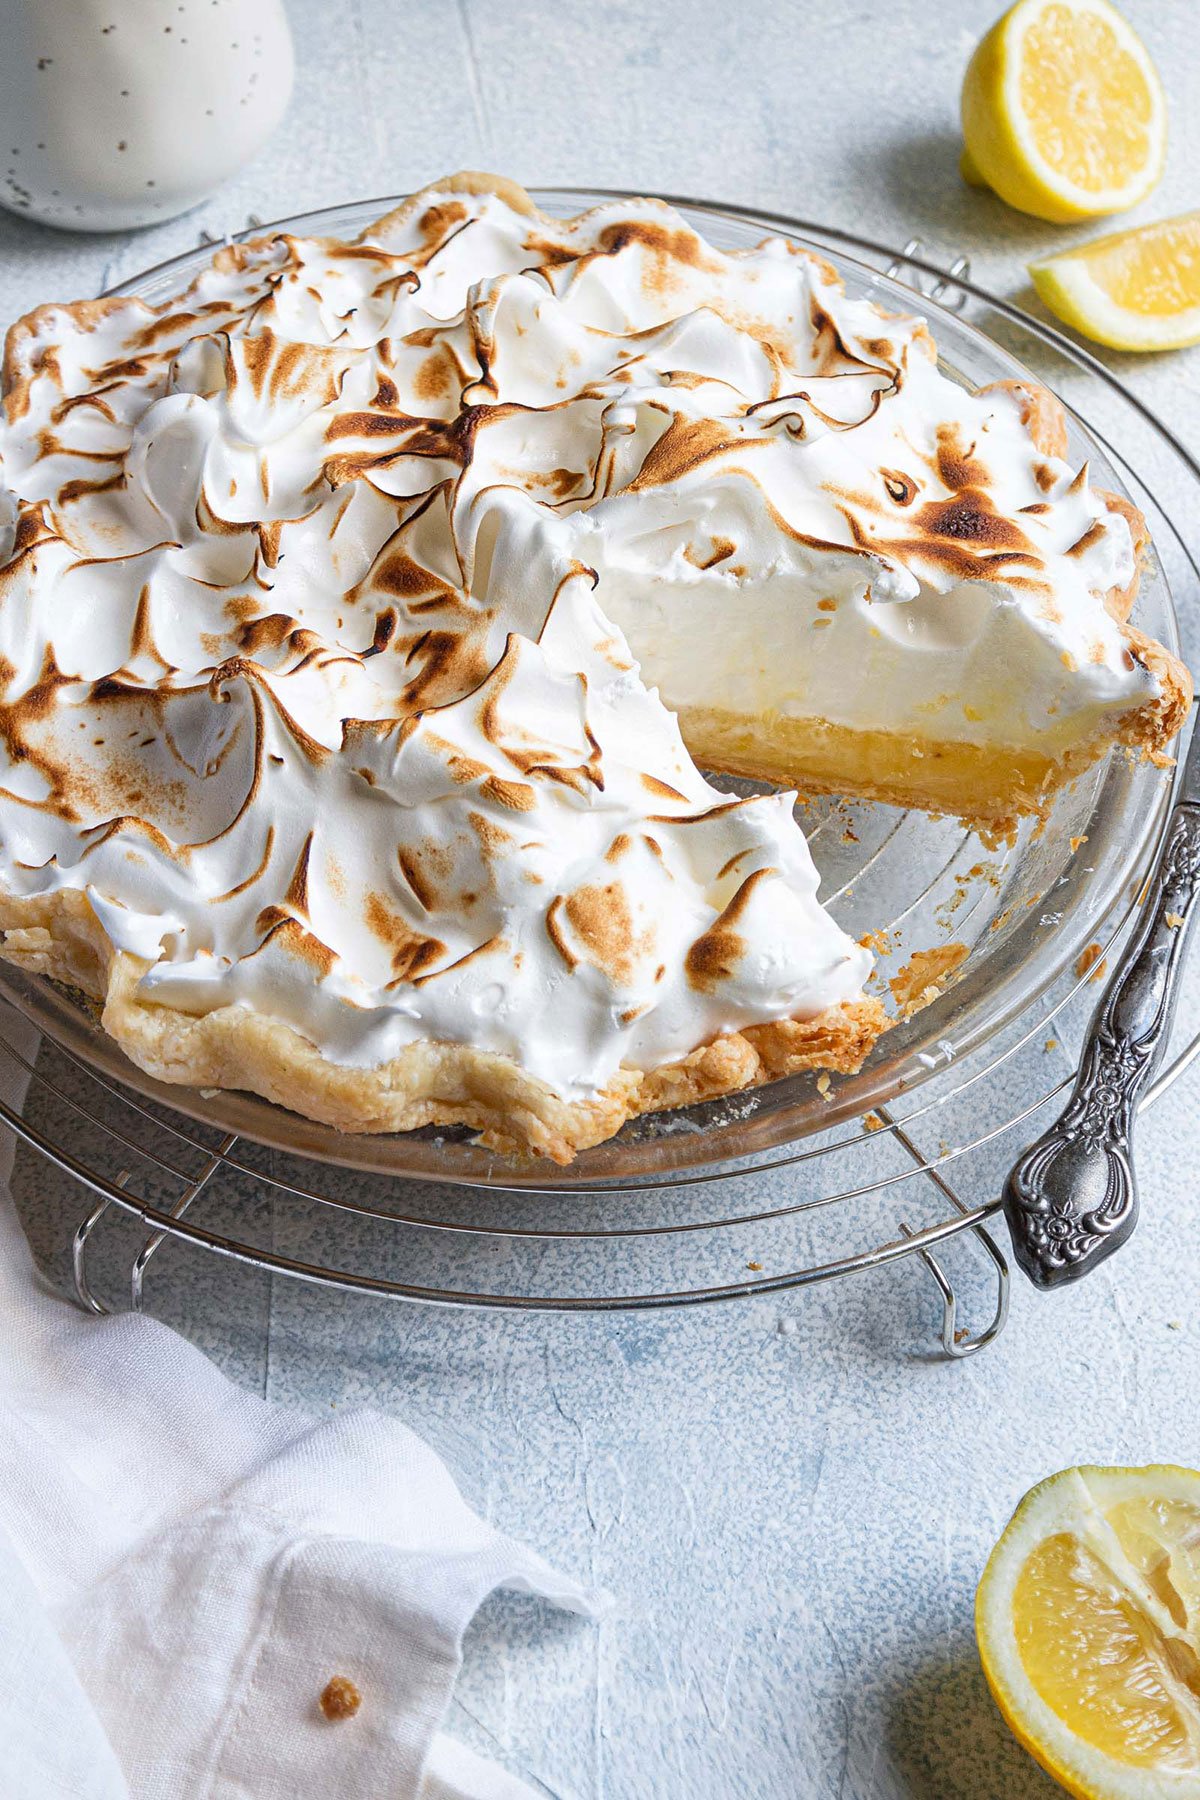
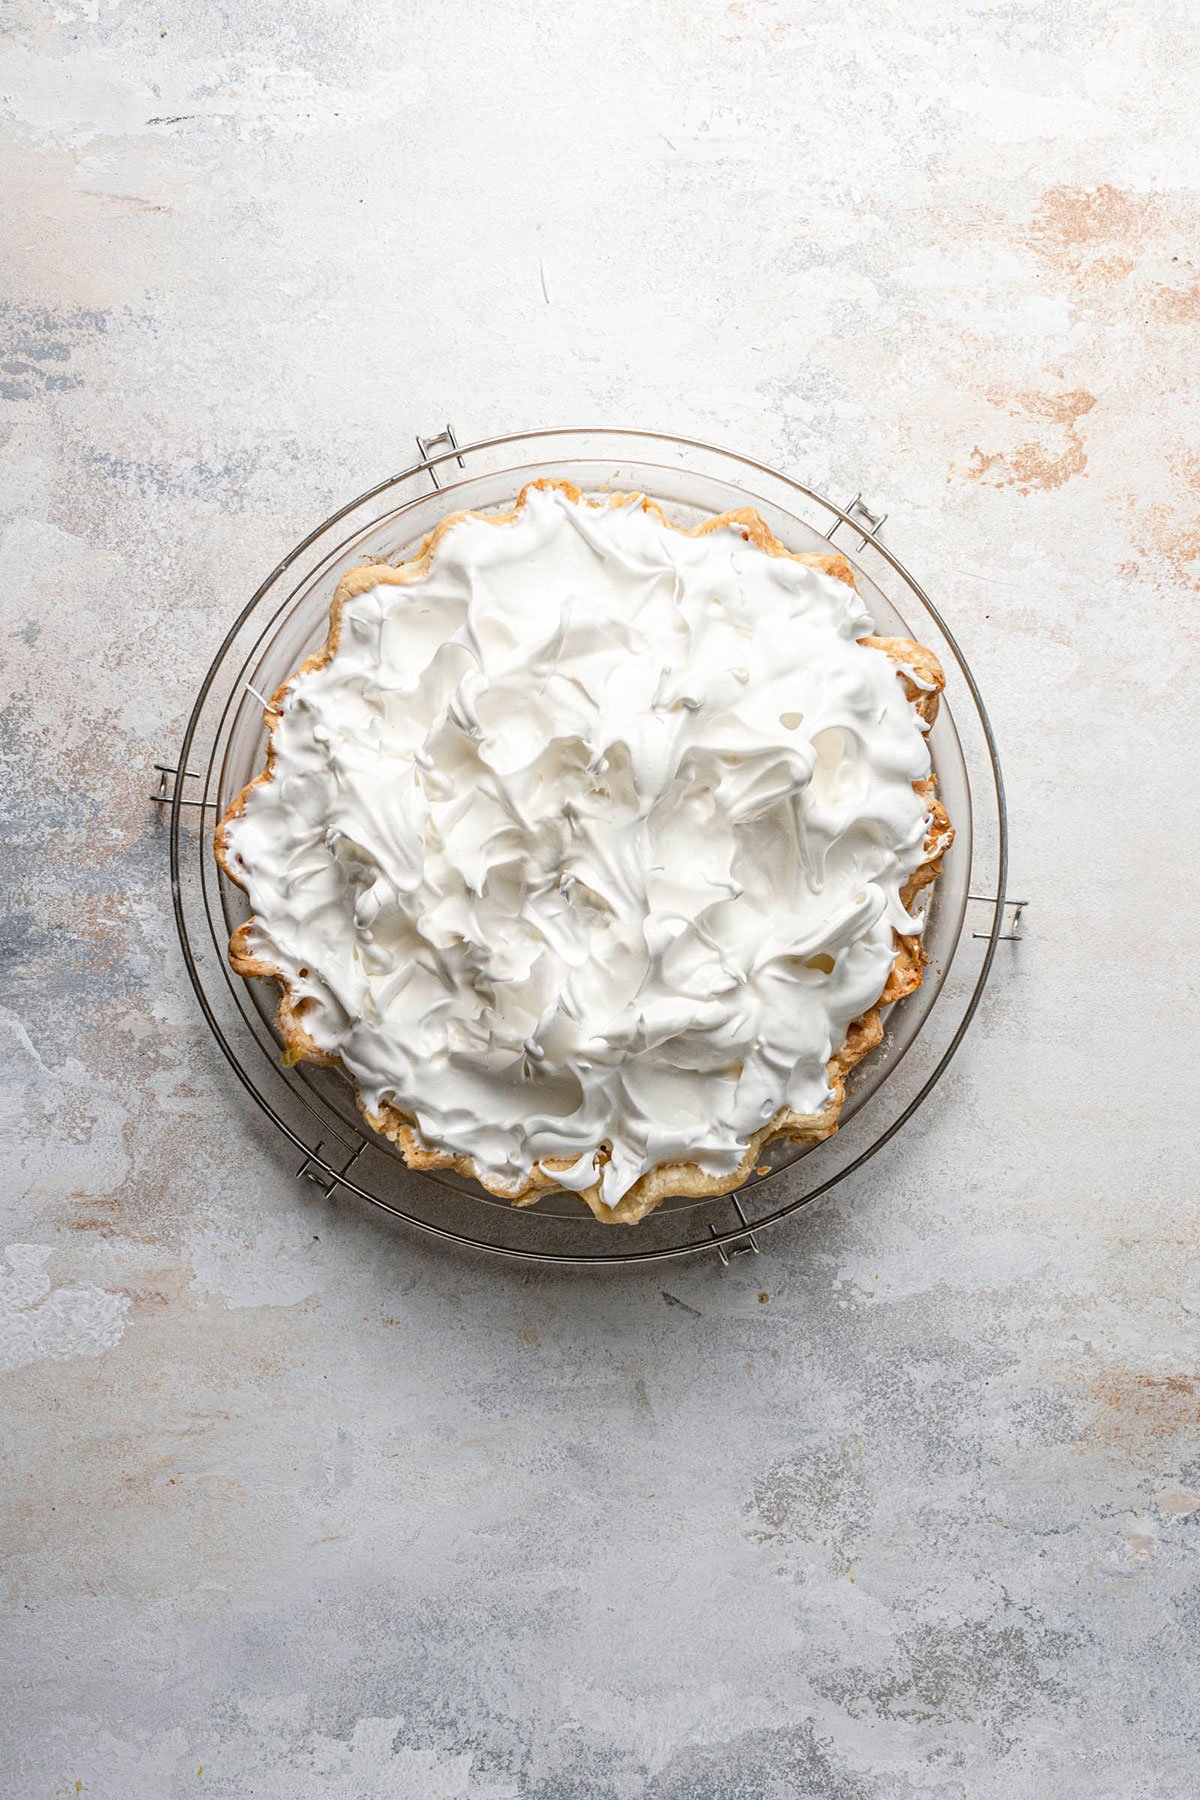
Make the Meringue: Top this traditional pie with a classic meringue! Whip the egg whites until frothy, add cream of tartar to stabilize the egg whites, and vanilla extract, and continue beating until soft peaks form. At this point, add the sugar and beat until stiff, glossy peaks form. Pile the meringue on top of the lemon filling (remove the plastic wrap first!), ensuring the meringue touches and connects with the outer crust. This “seals” the pie and keeps it from weeping.
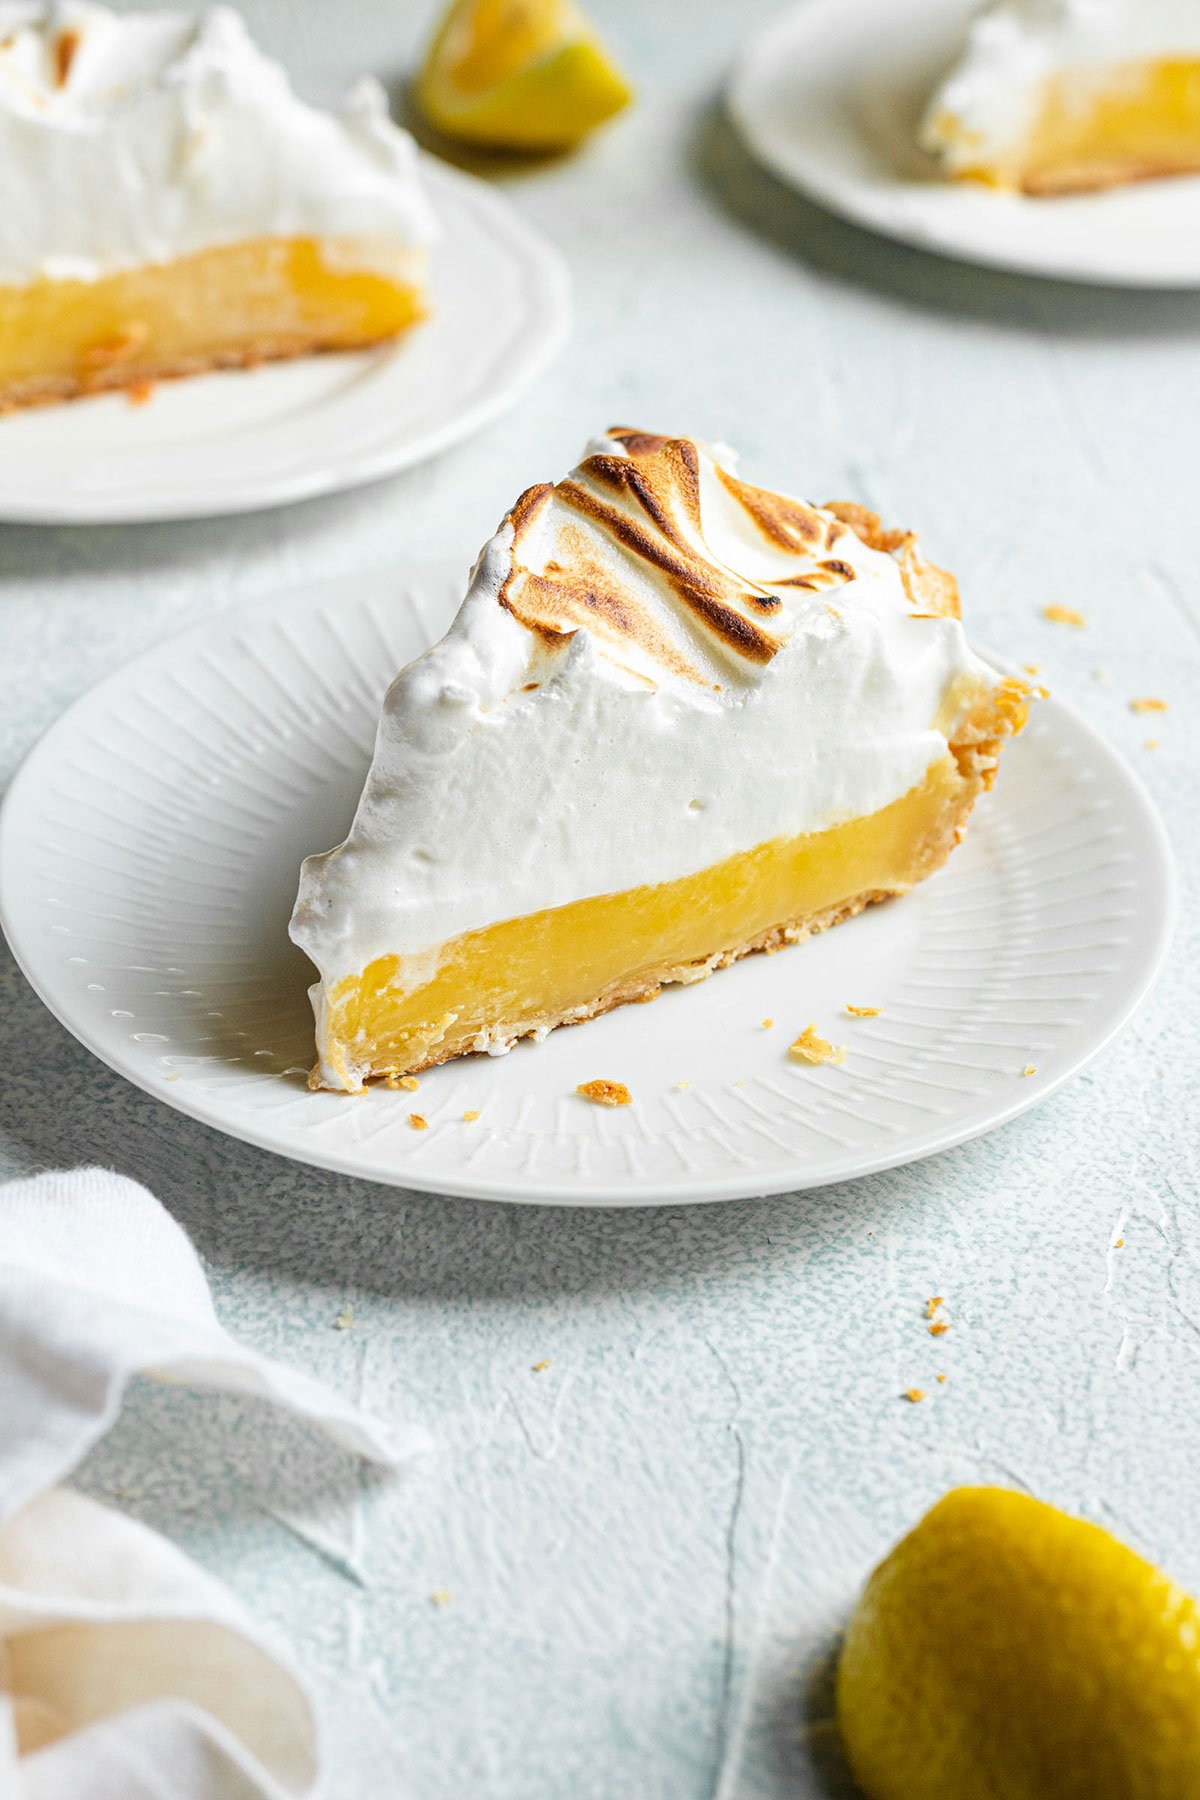
Bake the Pie: Lemon meringue pie only needs a short time in the oven to set the filling and cook/brown the meringue.
Cool and Chill: After baking, cool the pie at room temperature for 1 hour, then chill in the refrigerator for at least 4 hours prior to serving.

Tips for Perfect Lemon Filling
Fresh Lemons vs. Bottled Juice
For the best lemon pie filling, fresh lemon juice and lemon zest are best! However, if fresh citrus isn’t readily available, you can use bottled lemon juice instead. While fresh juice will give you the biggest pop of flavor, you can absolutely use the equivalent amount of bottled lemon juice for the filling (you’ll need to omit the zest, though).
Zesting Tip
Whenever a recipe calls for citrus juice and zest, always zest the outside of the fruit first. I absolutely swear by this Microplane citrus zester whenever I need to zest oranges, lemons, or limes. It takes off just the outer zest and leaves the white pith (which is bitter!) behind.
To really amp up the lemon flavor in the filling, use your fingers to combine the lemon zest and granulated sugar until the sugar is completely moistened and has the consistency of wet sand. Then, combine it with the rest of the ingredients in step #11 of the recipe and proceed as usual.
Juicing Tip
Press and roll the lemon on the counter before juicing – this helps loosen up the lemon’s membranes and makes it easier to squeeze, which means more juice! For this recipe, we need ½ cup of lemon juice; depending on the size and “juiciness” of the lemons, you will likely need anywhere from 2 to 4 lemons.
Troubleshooting Lemon Meringue Pie
Why is my lemon meringue pie filling runny or watery?
Lemon meringue pie filling should be firmer than pudding so that it’s easy to slice, but not quite as firm as Jello. The biggest culprit when it comes to a runny filling is not letting the cornstarch cook long enough when cooking the filling. The filling mixture should become thick and bubbly before tempering the egg yolks – if it doesn’t get to this point, the filling won’t set and firm up correctly.
Why won’t my meringue form stiff peaks?
I LOVE making meringue, but it can be a little finicky. Ensure that absolutely no fat comes in contact with the egg whites; the smallest bit of egg yolk can keep the egg whites from forming stiff peaks. Check your bowl and beaters to make sure there isn’t any grease on them, either.
When you add the sugar to the egg whites, add it gradually (a few tablespoons at a time). Meringue can break and never form stiff peaks if all of the sugar is added at once. I share many more tips and tricks to perfecting meringue in my ultimate meringue guide.
Why is my meringue weeping?
Weeping happens when liquid or condensation forms between the meringue and pie filling. To avoid a weeping lemon meringue pie: (1) Spread the meringue on a warm filling to create a good “seal.” We keep the filling warm by pressing plastic wrap against the filling while making the meringue; and (2) When you spread the meringue on top of the filling, ensure that the meringue touches the pie crust the entire way around; no gaps! This seals the filling underneath and prevents the meringue from separating or pulling away from the crust.
Make Ahead, Shelf Life, and Storage Tips
Make-Ahead: Fully prepare the crust, line the pie plate, and crimp the edges. Keep this in the refrigerator overnight before completing the rest of the pie.
Shelf Life: Keep lemon meringue pie in the refrigerator and serve within 1 day of baking. The meringue will eventually separate and get a bit watery the longer it sits, so leftovers don’t keep very well for very long.
Storage: Lemon meringue pie does not freeze well and is not recommended.
More Meringue Desserts
If meringue makes you swoon, try these desserts next:
- Classic Pavlova Recipe
- Pavlova Layer Cake with Whipped Cream & Berries
- Chocolate Pavlova with Mascarpone & Raspberries
- Chocolate Chip Meringue Cookies
- Sky-High Lemon Meringue Pie Bars
Watch the Recipe Video:
If you make this lemon meringue pie and love it, I would so appreciate it if you would take a moment to leave a rating below. Thank you so much! ❤️️
Classic Lemon Meringue Pie Recipe
Ingredients
For the Crust:
- 1¼ cups (150 g) all-purpose flour
- 1½ teaspoons (1½ teaspoons) granulated sugar
- ½ teaspoon (½ teaspoon) salt
- ½ cup (113 g) unsalted butter, cubed and very cold
- 2 to 4 tablespoons ice water
For the Filling:
- 5 egg (5 egg yolks) yolks
- 1½ cups (360 ml) water
- 1¼ cups (248 g) granulated sugar
- 5 tablespoons cornstarch, beaten
- ¼ teaspoon salt
- ½ cup (120 ml) fresh lemon juice
- 1 tablespoon lemon zest
- 2 tablespoons unsalted butter
For the Meringue:
- 5 (5 egg whites) egg whites, room temperature
- ½ teaspoon cream of tartar
- ½ teaspoon vanilla extract
- Pinch salt
- ½ cup (99 g) granulated sugar
Instructions
- Make the Pie Crust: In a large bowl, whisk together the flour, sugar, and salt.
- Add the butter and, using a pastry blender or two forks, quickly cut it into the flour until large pea-sizes bits remain.
- Add 2 tablespoons of the ice water and use a rubber spatula to stir it into the dough, pressing it together. If it still seems dry, add more water a little at a time until it is cohesive.
- Turn the dough out onto a lightly floured work surface and bring it together with your hands, pressing it into a 6-inch round. Lightly flour the top and gently and quickly roll it out to a 13-inch circle, picking it up and doing a quarter turn after every couple of rolls to keep it from sticking.
- Transfer the dough to a 9-inch pie plate and gently press it into the bottom and up the sides. Trim the dough to 1 inch beyond the lip of the pie plate, then tuck it under itself so it is flush with the edge of the pie plate. Flute the edges or press with the tines of a fork, then refrigerate the dough-lined plate for at least 2 hours.
- Partially Bake the Crust: Preheat oven to 350 degrees F.
- Remove the chilled dough-lined pie plate from the refrigerator. Line with a large piece of aluminum foil, pressing it firmly into the edges of the pie dough and over the edges of the crust. Fill the now foil-lined pie plate with granulated sugar (you could also use beans or pie weights, but sugar is the best!). Bake for 45 minutes.
- Remove from the oven and let sit for 5 minutes, then carefully remove the foil and sugar (you can pour the sugar into a container to use again).
- Reduce oven temperature to 325 degrees F.
- Make the Filling: In a medium bowl, whisk the egg yolks together; set aside.
- In a medium saucepan, whisk together the water, sugar, cornstarch, salt, lemon juice, and lemon zest. Set over medium heat and cook, whisking occasionally, until it is bubbly and thickened, 4 to 6 minutes. Reduce the temperature to low.
- Very gradually, whisk about half of the hot lemon mixture into the beaten egg yolks, then scrape the mixture back into the saucepan. Increase the heat back to medium and cook until the mixture is thick and large bubbles are breaking on the surface, 1 or 2 minutes. Remove the pan from the heat and whisk in the butter until melted.
- Pour the filling into the pie crust and smooth into an even layer. Place a piece of plastic wrap against the surface of the filling to keep it warm and prevent a film from forming while you prepare the meringue.
- Make the Meringue: Using an electric mixer with the whisk attachment (or a hand mixer), beat the egg whites on medium speed until frothy, then add the cream of tartar, salt, and vanilla extract. Increase the mixer speed to medium-high and beat to soft peaks. While continuing to beat the egg whites, gradually add the granulated sugar and beat until glossy and stiff peaks form.
- Remove the plastic wrap from the top of the filling and spread the meringue on top. Be sure that the meringue is touching the crust the entire way around to prevent the meringue from weeping. You can make decorative swirls with the back of a spoon, if you'd like.
- Bake until the meringue is golden brown on top, 18 to 22 minutes. Remove from the oven and place on a wire rack. Cool for 1 hour, then place in the refrigerator and chill for at least 4 hours before serving.
Notes
- Alternate crust options: Butter/shortening crust or graham cracker crust.
- Equipment recommendations: Pie plate / pastry blender / food processor / marble board / rolling pin / citrus zester
- Lemons: You will need 2 to 4 lemons for the juice called for in the recipe.
- Make-Ahead Crust: You can prepare the pie crust and keep it refrigerated up to a day in advance before blind baking.
- Storage: The pie is best eaten within a day of baking. Store leftovers in the refrigerator covered with plastic wrap. This pie does not freeze well.
Did you make this recipe?
Leave a review below, then snap a picture and tag @thebrowneyedbaker on Instagram so I can see it!
Photography by Dee Frances.


Turned out amazing! Thanks for the recipe.
I used Arrowroot instead of cornstarch. Could have used less than the conversion chart suggested but still a pretty good consistency just a little gooey. Flavor is good but had to use a whole extra lemon and more zest for tartness. Still a great recipe!
I want to have more filling. Can I double the lemon filling for a deeper pie?
so…. PERFECT!!! every dessert looks like it came from heaven,the icing is so smooth and its like i can taste it through my screen!!
If you want to experience such heavenly deserts or cakes.
Visit https://papilloncake.com I bet you won’t be disappointed !! ;)
If you wish to experience such heavenly deserts.
Visit https://papilloncake.com I bet you won’t be disappointed !! ;)
Everytime I make Lemon Meringue Pie I have a lemon syrup in the bottom. Help What am I doning Wrong?
I just wanted to mention that this works with the sugar replacement Pure cane (erythritol). I knew the filling would be fine but I worried about the meringue. It was perfect! I used slightly less than the full amount of pure cane. They say it can replace sugar on a 1:1 basis but that is a little sweet for me. Thank you for a great recipe with great instructions!
Great recipe. Family loved it. I have a question it seems that the meringue and the lemon layer separate after the pie is cut what causes that and how can I correct it in for the future.
Baking this soon for sure! My mother-in-law makes a famous lemon meringue pie and now this BEB recipe will help me make my own!
For those of us without central air, this meringue is impossible in the humidity Pgh is experiencing now. I think I’ll wait for fall to make this! LOL!
Truly an amazing , easy to follow and most delicous recipe I have made in a while. Had one slice only beacuse my husband got to it first!
I can’t wait to make this it looks lip smacking good!
This is the best lemon meringue pie recipe I have ever made! This has become a staple in my home! I live in California and use Meyer lemons from my tree! It’s absolutely Devine!
The filling is very nice! Creamy without being stiff.
I’ve been making Lemon Meringue for literally 60 years. Your recipe is as close to the one I developed over all those years! Originally from Grandmother’s recipe it calls for both corn starch and flour which I continue to use.
I cook the filling in a double boiler which prevents burning and having to constantly stir. This allows me to multi task and make the meringue. Keeping my eye on both.
This way my filling is hot when I pour it into the pie crust and spread on the meringue. No chance of weeping!
I know your recipe will be really good!
Love you! You do inspire me a lot! Though I haven’t tried any of your recipe but it just gives me so much joy of seeing your recipe💞