How to Decorate Cookies with Royal Icing
Welcome to the first in what I plan to be a recurring “How-To” series here on Brown Eyed Baker. While recipes are all well and good, there are some techniques that are best explained in a step-by-step method, with pictures included (at least this is how I learn best). As I was decorating my Stanley Cup Playoffs cookies last week I thought that doing a tutorial on how to decorate cookies with royal icing would be a great first How-To post.

I was always very good at baking snowmen, Christmas trees, angels and the like in December, slapping on some buttercream, a few sprinkles and calling it a day. Not that it isn’t good. It is definitely good. But then royal icing came onto my radar. The possibilities seemed endless – a completely smooth finish to the cookies and intricate designs? Now THAT looked fun! I’m here to guide you on a step-by-step tutorial on how to achieve any design you want on any shape cookie. Ready? Let’s begin!
Step 1: Find a Good Sugar Cookie Recipe
This might seem obvious, but not all sugar cookie recipes stand up well to heavy-duty decorating. If you don’t already have a favorite, let me point you to mine: Dorie Greenspan’s All-Occasion Sugar Cookies. They’re incredible.
Step 2: Cool Cookies Completely
Again, maybe elementary, but we’re going step-by-step here. You can’t decorate cookies that have just come out of the oven. Or even cookies that are slightly warm. They need to be completely cool before you can move on to decorating.
Step 3: The Equipment
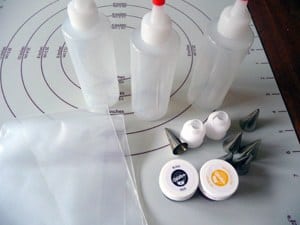
Now, you don’t necessarily need fancy equipment for decorating with royal icing, but investing in just a few decorating tips and couplers, some disposable pastry bags and squeeze bottles will make your cookie decorating experience exponentially more pleasant. Here is a run-down of what I typically use:
♦ 12″ disposable pastry bags. So easy to just throw away when you’re done instead of washing them!
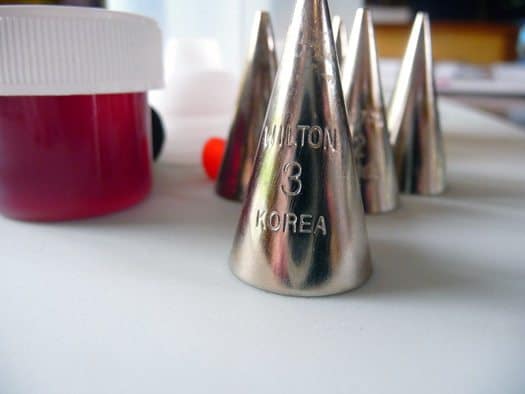
♦ Decorating tips. For outlining the cookie I use a #3 tip and anything from a #1 to #3 for intricate designs on the cookie. It’s not a bad idea to have a few of each number, as I find myself using them a lot.
♦ Couplers. These make it easy to switch the size tip you are using in the same color.
♦ Squeeze Bottles. I use these for flooding my cookies. Since the royal icing is very thin at this point, it’s a much neater alternative to a cut-open pastry bag. Plus you can put the cap on and save any extra icing for next time.
♦ Small bowls or Tupperware (to color your icing)
♦ Toothpicks.
Step 4: Prep, Prep, Prep!
This got me the first time I decorated with royal icing, and is especially important if you are going to be using multiple colors and different tips. I flew by the seat of my pants and ended up making a huge mess, it took twice as long as it should have, and I was trying to fish used tips out of pastry bags to re-use them somewhere else. Your plan of action:
♦ Write down how many different colors you will be using and take out that many pastry bags and couplers and prepare them. Also figure out what size decorating tips you will be using and fit them to the pastry bags.
♦ If you don’t have squeeze bottles for flooding, add additional pastry bags for however many colors you will use for flooding, in additional to the bags of that color you will use for detail work (if any).
♦ Have your icing colors ready and as many small mixing bowls (Tupperware works great for this) as you have colors planned.
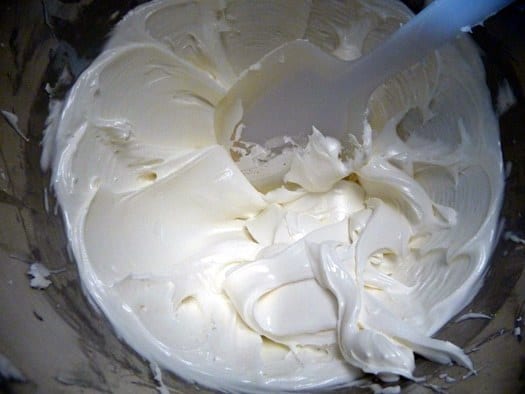
Step 5: Make the Royal Icing
The recipe for royal icing is very simple:
Save This Recipe
4 cups powdered sugar
2 tablespoons meringue powder
6 tablespoons water
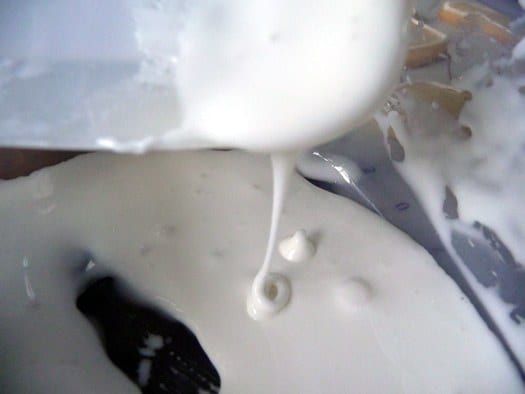
Mix all ingredients on low speed for 7-10 minutes or until the icing loses its shine. Add more water by the teaspoon if it appears too stiff. At this stage you want to be able to pipe it easily:
Step 6: Color the Icing
Divide the icing into your containers based on how much you will need of each one. Proceed to color the icing and then cover each container with a damp paper towel. It is key when working with royal icing not to allow it to dry out.
Step 7: Outline the Cookies
You will want to outline the cookies with whatever color you will be using to fill them in with. Place some of the icing into a disposable pastry bag fitted with a #3 tip and outline the outside of the cookie. I find that keeping the tip about ½-inch above the cookie while moving it allows the icing to lay on the cookie more easily.
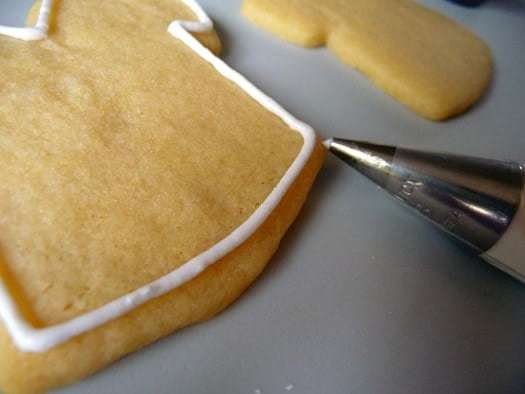
You’ll want to make sure that the outline is pretty well set before moving on to flooding the cookies, but I generally find that by the time I am done outlining the first ones are already dry.
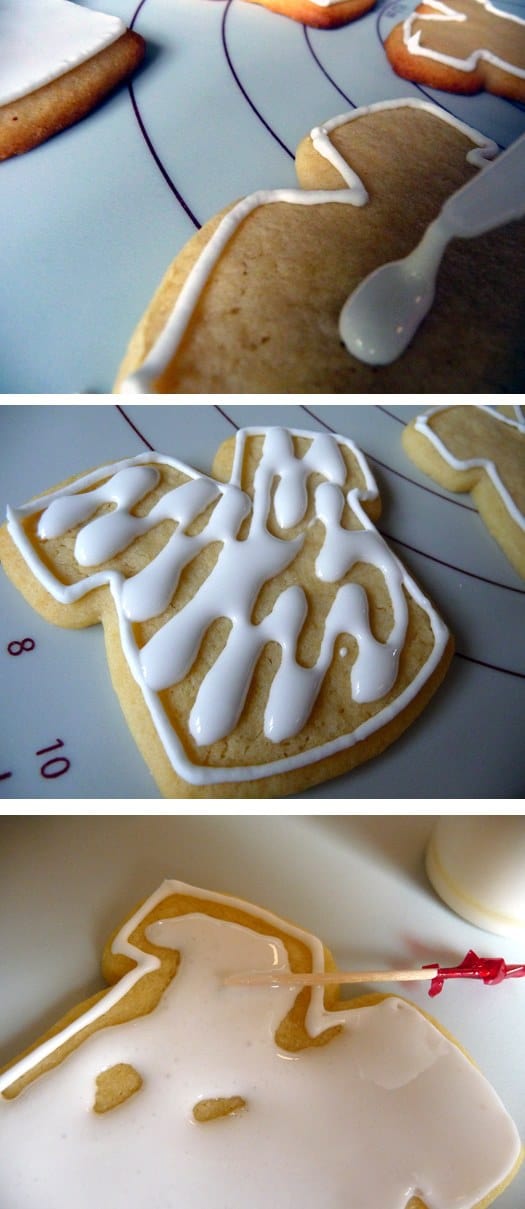
Step 8: Flood the Cookies
Take whatever color you are using to fill in the cookies and slowly start adding a few drops of water at a time, until the icing reaches an almost liquid consistency. The test here is to pick some icing up with a spoon and let it drizzle back into the bowl – the drizzle should disappear into the bowl within 10 seconds. Once you have achieved this, you are ready.
Either fill a squeeze bottle with the thinned icing or transfer it to a disposable pastry bag with a ¼-inch hole cut off the end.
Now squeeze in the icing to almost completely fill the inside the cookie.
Then take a toothpick and gently use it to distribute the icing to any empty spots.
Once you are done the cookies need to dry completely before moving on to any intricate piped designs. Some bakers will let them sit overnight but I generally find that a 2-3 hour rest will do the trick.
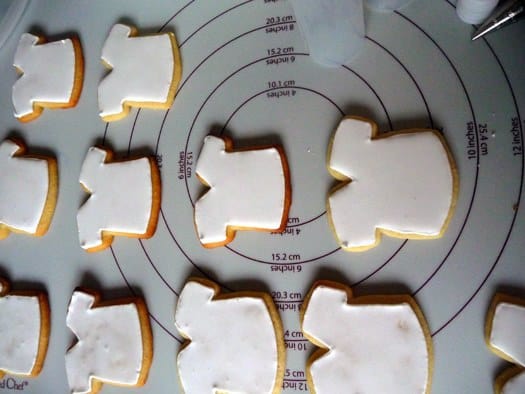
Now use whatever colors and tips you’d like to achieve the design you want!

♦ ♦ ♦
Was this helpful? I’d love your feedback on this post since it’s the first of its kind on Brown Eyed Baker! Any questions or additional tips to share?
What do you want to learn? I’d love to hear what you would like to see featured in the How-To series. A reader has already mentioned that she’d like to see a tutorial on baking bread with yeast. What’s on your list?
![]() Don’t forget to subscribe to the Brown Eyed Baker RSS feed to ensure you don’t miss any upcoming posts!
Don’t forget to subscribe to the Brown Eyed Baker RSS feed to ensure you don’t miss any upcoming posts!


Thank you so much for your excellent step-by-step instructions! I made iced (Easter) cookies for the 1st time this weekend and they went down really well! My flooding didn’t ‘set’ too well, but they looked gorgeous!
This blog was SO helpful! My Aunt started designing these beautiful cookies and I asked her, “how did you do that?!” She wasn’t able to get back to me yet, and I decided to look up some things on my own. This was one of the 1st blogs I have seen. Although it looks like I’m a little late to the post, better late than never! Thanks so much for these step by step instructions! They are very clear! I can’t wait to get decorating…
Thanks for the great instructions, especially the flooding.
Excellent demonstration and instructions! Do you ever work with store bought icing? Something you only add water to? Just curious. Thanks for the great tips.
Hi Michele, I haven’t used store-bought icing as a base.
I would like to know how you get the black frosting. I have tried and tried and I always need to add a lot of black coloring to the white frosting. Is there something I need to know or should be doing to get it the color I want without having to use so much coloring? Loved your picture tutorial. It was a lot of help. I always wondered how these cookies turned out so perfect.
Hi Glenda, I just end up using a ton of the black gel color to get the shade of black that I need. I agree that it can be a pain a lot of times, but so far haven’t found an alternative. Happy Baking!
You could try making chocolate royal icing and then using black gel coloring to turn it black. Add 1/3 cup of cocoa for each cup of powdered/icing sugar. You probably will need to add a touch more of water to get the right consistency.
Hello,
Sorry I’m a beginner at this, so this may be a stupid question… but after you’re done flooding the cookie and you let it dry, what type of icing do you use to finish the decorating? The thick Royal icing? If this is the case, can I re-thicken the flodding icing to get back to the piping consistancy?
Just to be clear… you make one batch of icing total? First it’s made thick… then you add color… then you thin the color version… then you make the thin color version think again? Is this correct?
Hi Bianca, No such thing as a stupid question! What I typically do is make one batch of icing. If you’re planning to color it, you can do that (dividing it up if you want multiple colors). Then you’ll need to thin it a little bit to get it to a nice piping consistency for the outline and any writing. Once you have finished your outlines, I then take some of that icing (not all) and thin it way down so that it is thin enough to flood. Once the flooded cookies are cooled, you can use the rest of the icing that you didn’t thin for flooding to do any writing or additional decorating. I hope that makes sense!
Great tutorial! I’m making about 75 sugar cookies for a bridal shower with royal icing. I need to have the icing harden and then write on top of it, but also have the writing harden. Any suggestions?
Hi Krysten, That’s exactly what I did in this tutorial. Once the flooding dries, you can go ahead and write on top of it. Writing usually dries and hardens completely within a few hours. Have fun decorating!
This is a great instructional post. I needed a really nice background for some fancy edible pictures to go on shortbread cookies and this is perfect. I really appreciate you for taking the time to do this.
Thank you for the step by step. It really helped me see what I was doing incorrectly. Just wish mine looked as good as yours. :)
I’ve wanted to do this for decades and never had anyone show me how. Thank you so much for taking the time to do this. It’s obvious by all of the comments that you have touched many lives. Just think of all of the recipients of these cookies who will be happy also. Thank you again for spreading knowledge and sunshine!
Is there any substitute you can use besides royal icing?
I’m not too comfortable using it because of the egg white. You don’t get meringue substitute here. So, suggestions please?
Hi Tanvi, You can use Google to see what you can find with ingredients that are readily available to you. I know I have seen a recipe floating around that uses corn syrup, you might try that!
How early can I prepare and decorate my sugar cookies? I will be decorating 80 cookies for my daughter’s 1st birthday and don’t want to be doing it the night before (or morning of the party!) Thanks!
Hi Natalie, You could finish them a full day or day and a half ahead. For instance, if the party is on a Saturday, I would say the latest I would decorate them would be Thursday evening. Ideally, I would flood the cookies on Thursday night, let them dry overnight, and then add the details on Friday morning, let them dry, and then if you are packaging them as favors or anything like that you can do that Friday night or Saturday morning, or else just keep them until you’re ready to serve them.
This is my first time decorating cookies with royal icing, outlining and flooding. I’ve never even heard of “flooding” before so it was all new to me. Thank you for the step-by-step. It was really easy to do and my daughter even helped out! Thank you!!!! :)
Hi
Love your blog!!!
I hope you can help me- In my area we don’t have meringue powder, but we do have egg whites powder and I understand it’s like meringue powder if I’ll add some powdered suger.
Can you tell me if that is so, and what are the amounts to make the replacement?
Thanks
Hi Shanny, You do add powdered sugar to the meringue powder to form the royal icing. I think the egg whites powder is probably very similar (minus the sugar) to the meringue powder and since you’re adding so much sugar anyway, I think you’ll be okay.
Thanks for the tutorial! I’ve only used royal icing once because it was such a disaster. The first time I tried it it either ran completely off the cookie, or ended up a terrible lumpy mess. I just figured it wasn’t for me. Very excited to try it again using your instructions!
Your tutuorial is just AMAZING!!! I am in charge of making cookies for my daughter’s Valentine’s Party and I cannot wait to use this recipe for the icing. Thank you so much for all the information and the wonderful tips! BTW, I just love you site!
I have always hated to bake sugar cookies because I can’t find a good recipe and decorating them, forget it! I have looked up so many recipes and instructions on how-to do cutout cookies and icing like in this tutorial but I have never found such a good one like you have here. Its idiot proof! I haven’t tried to make these yet, but I am going to give it a test try and if all is well, then I want to make the heart Vday cookies for my daughters pre-school class. I am terrible at piping lettering,.,any tips?
Hi Anna, Honestly, like a lot of things, the more you practice it the easier it will become. You want a consistency that is thin enough to easily flow out of the decorating tip, yet still thick enough to not bleed. I use a #1 tip for writing. Sometimes I use my left hand to help steady my right hand while I write.
This was INCREDIBLY helpful. I see you’re a Steelers fan, but hopefully you’ll still be happy to hear I used this to make Giants cookies for the big game this weekend. They didn’t come out as pretty as yours, but I think it was a good start. Thanks so much for sharing this great post!
These cookies are great! I live in Fiji and no one here probably does these kinda cookies because we don’t have meringue powder but i found a great substitute by using egg whites and they turned out to be fantastic! They look great and taste great too. I made a batch for my boyfriend who plays rugby, wrote his name on the cookie and his jersey number and he thought it was the cutest cookie he had ever seen. Will be making this alot!
this is EXACTLY what i was looking for! i’ve seen this technique all over cute cookies and i’ve just been needing to know HOW it was done! thank you!!
Great tutorial! Just tried to decorate some cookies for Valentine’s Day and the iciing wasn’t too thick so I couldnt flood my cookies. Gonna bake some more and try again.
At Nicki Sweetapolita has a tutorial on using the royal icicng on wax paper then transfering to a cake.
Thank you thank you so much for this easy to follow step-by-step guide. You just saved me over $200. I am planning and baby shower and wanted the baby themed cookies. You know the onesie or baby carriage with the pastel icing and they wanted $4 per cookie. I have 60 guests. I thought it would be impossible to get the smooth topping that looks like a machine made it. I will be testing this out today to see how they come out. Thanks again!! I love this blog!
Thank you so much for this!!! This helped me a ton and I really appreciate it.
Awesome! =) Can anyone tell me if the icing tastes good?
How does this royal icing taste in comparison to normal sugar cookie butter cream frosting? Also, I would love “How-to’s” about rolled fondant and decorating cupcakes- all of your cupcakes are so gorgeous!
I pulled up your recipe and instructions again this year to make Christmas cookies with our grandson. Still could not find meringue powder locally so this time I used egg whites and it worked beautifully! I love this website!!
Betty – have u gone to walmart & michaels? In their baking sections you will definitely find them =)
This was very helpful. I am making Christmas cookies with my 5 year old and have never used royal icing in my life. I am glad I googled it before starting to decorate. Gotta go to Wally world…..then we may be able to make cookies like the ones on the cover of all the magazines. ;)
I suggest, if you are going to decorate cookies with sprinkles that you may want on just one part of the icing, for example just the lettering and not the background on the pictures above, let the cookies dry several hours more than the 2 or 3 that you’d wait for piping designs.
I suggest, if you are going to decorate cookies with sprinkles that you may want on just one part of the icing, for example just the lettering and not the background on the pictures above, let dry several hours more than the 2 or 3 that you’d wait for piping designs.
This is a great tutorial. Iced sugar cookies scare me, its something I am always happy to buy from someone else. But your tutorial makes it seem possible. I just came here to get your recipe for royal icing for gingerbread men, but I’m book marking this to give fully iced cookies a try soon.