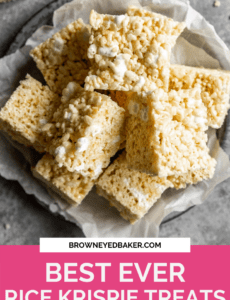
The BEST Rice Krispie Treats
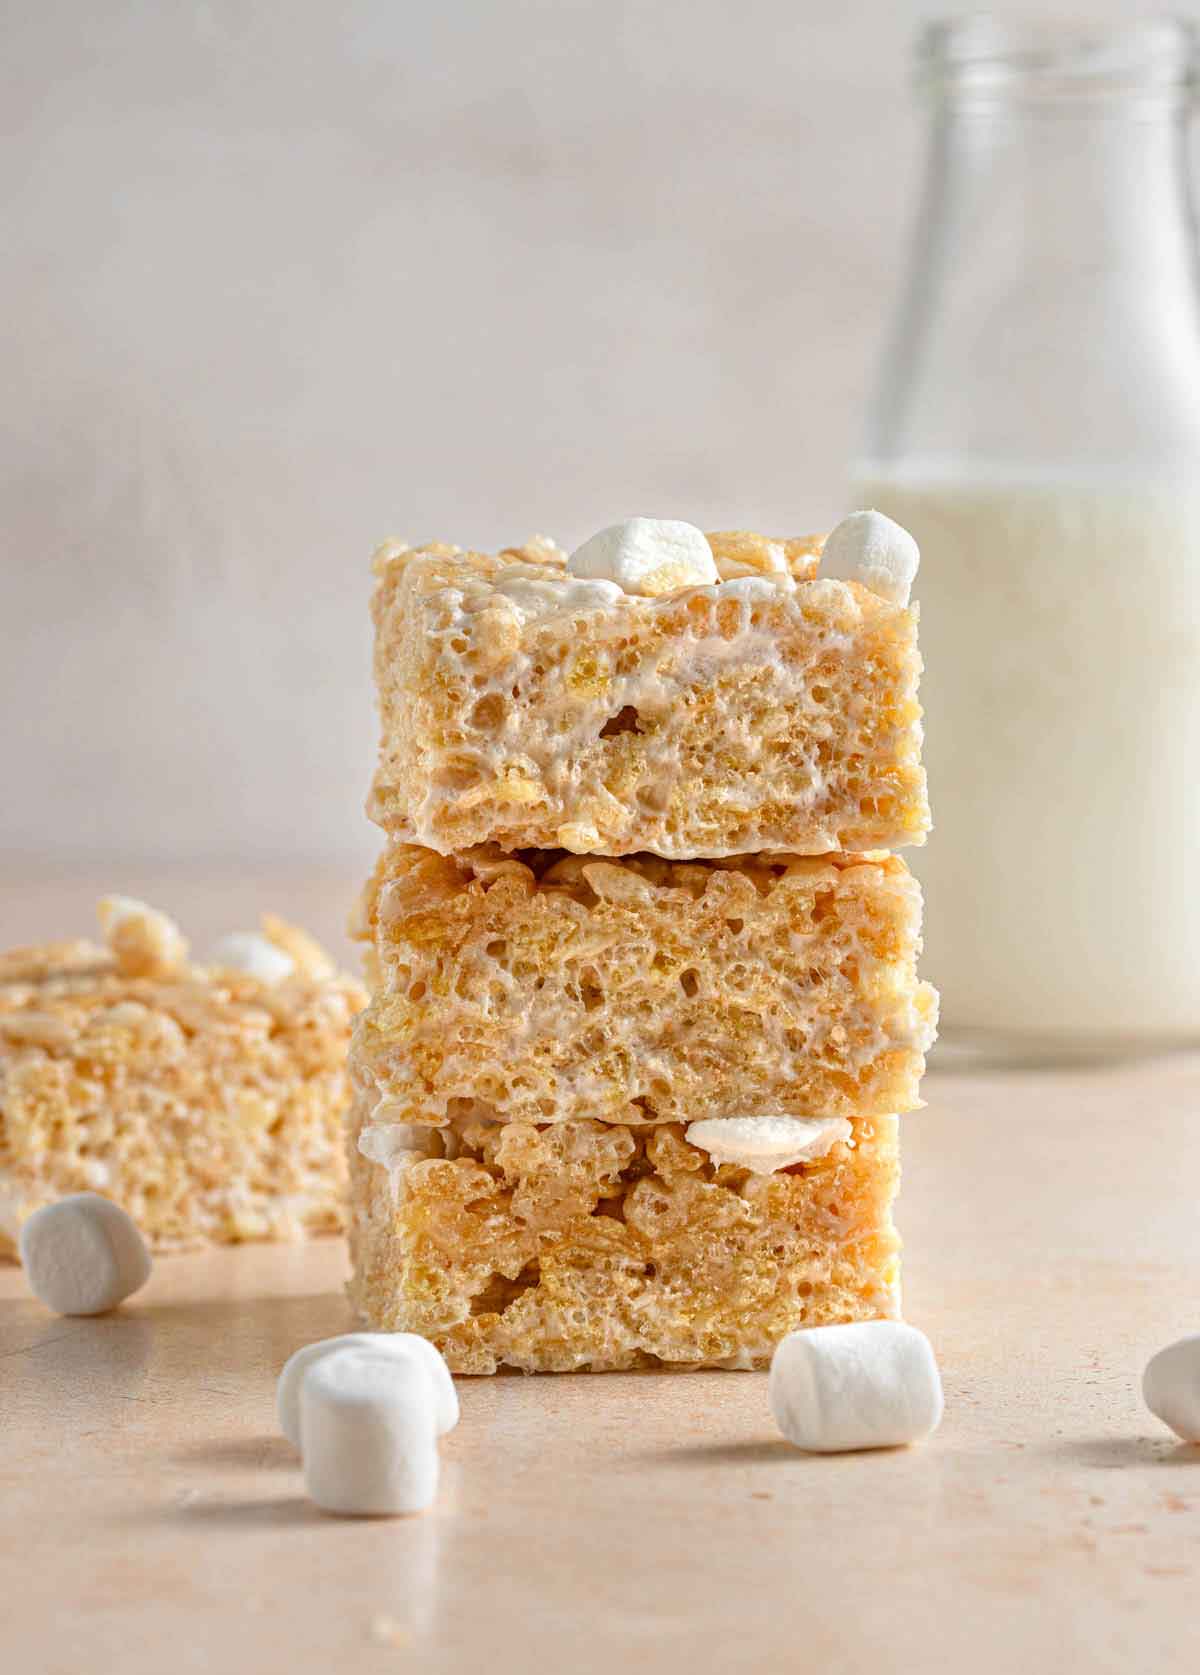
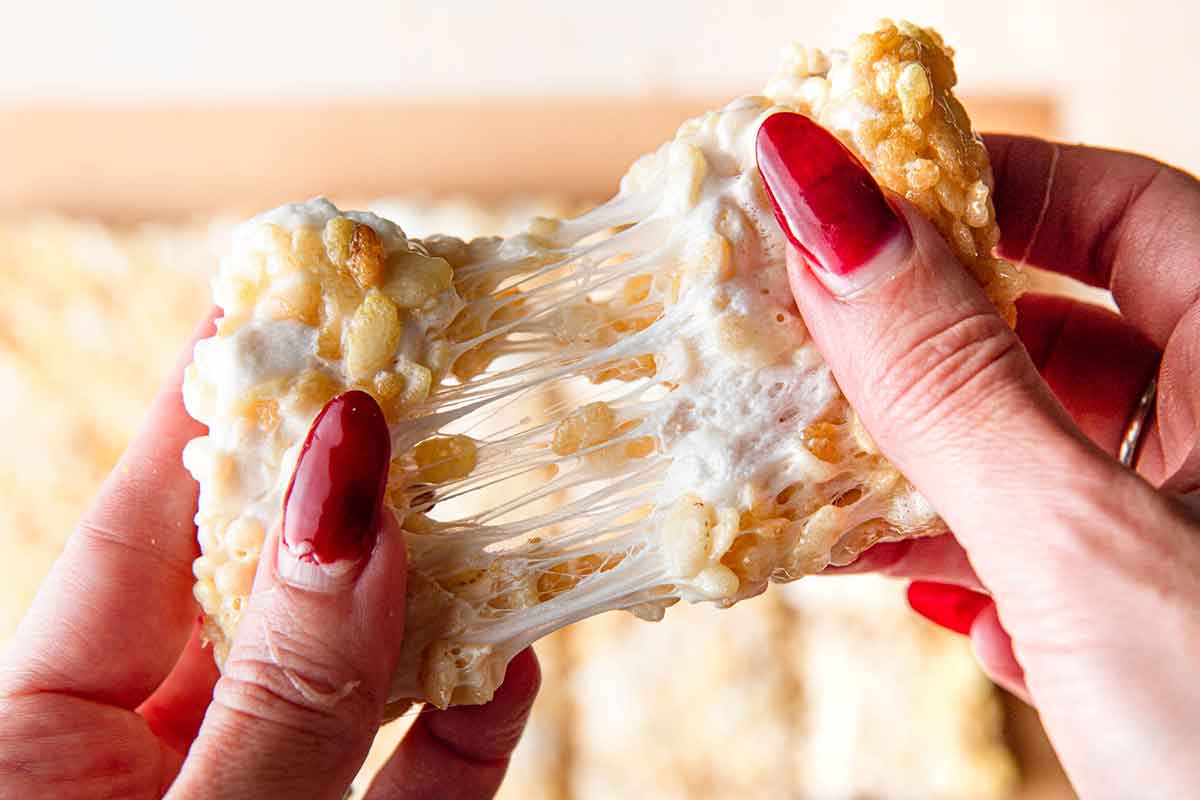
This is the absolute best rice krispie treats recipe! It is LOADED with gooey marshmallow sauce, crunchy Rice Krispie cereal, and extra pockets of marshmallows; these treats have it all. Whether you are making them for a holiday, birthday, or just because, this version of the classic and nostalgic treat is beyond perfect every time.

I have loved rice krispie treats my entire life. We didn't have them all the time, but I LOVED when my mom would make them or I'd go to a birthday party where they were served.
I've made countless rice krispie treat recipes over the years, but still hadn't found THE ONE when it came to plain and simple Rice Krispies treats. I yearned for those huge, pillowy soft and gooey treats you find at bakeries. Well, this is absolutely it. Hands down, 100%, best ever.
Why These are the Best Rice Krispie Treats
There isn't a huge secret ingredient or earth-shattering method to making these the most amazing rice krispie treats you'll ever have; it's all in the butter/marshmallow/cereal ratio!
The original recipe for rice krispie treats (printed on the box) calls for:
- 3 tablespoons butter :: 4 cups mini marshmallows :: 6 cups cereal
THIS recipe, meanwhile, uses the following:
- 10 tablespoons butter :: 16 cups miniature marshmallows :: 12 cups cereal
So while we double the amount of cereal (because we want to make huge, bakery-style treats), we QUADRUPLE the amount of marshmallows (and throw in ANOTHER 4 cups of non-melted marshmallows for extra pillowy gooeyness) and increase the butter by 3.33. The secret is all in that gooey butter and marshmallow sauce!
Just a Few Ingredients
You only need a handful of ingredients to make these amazing treats:
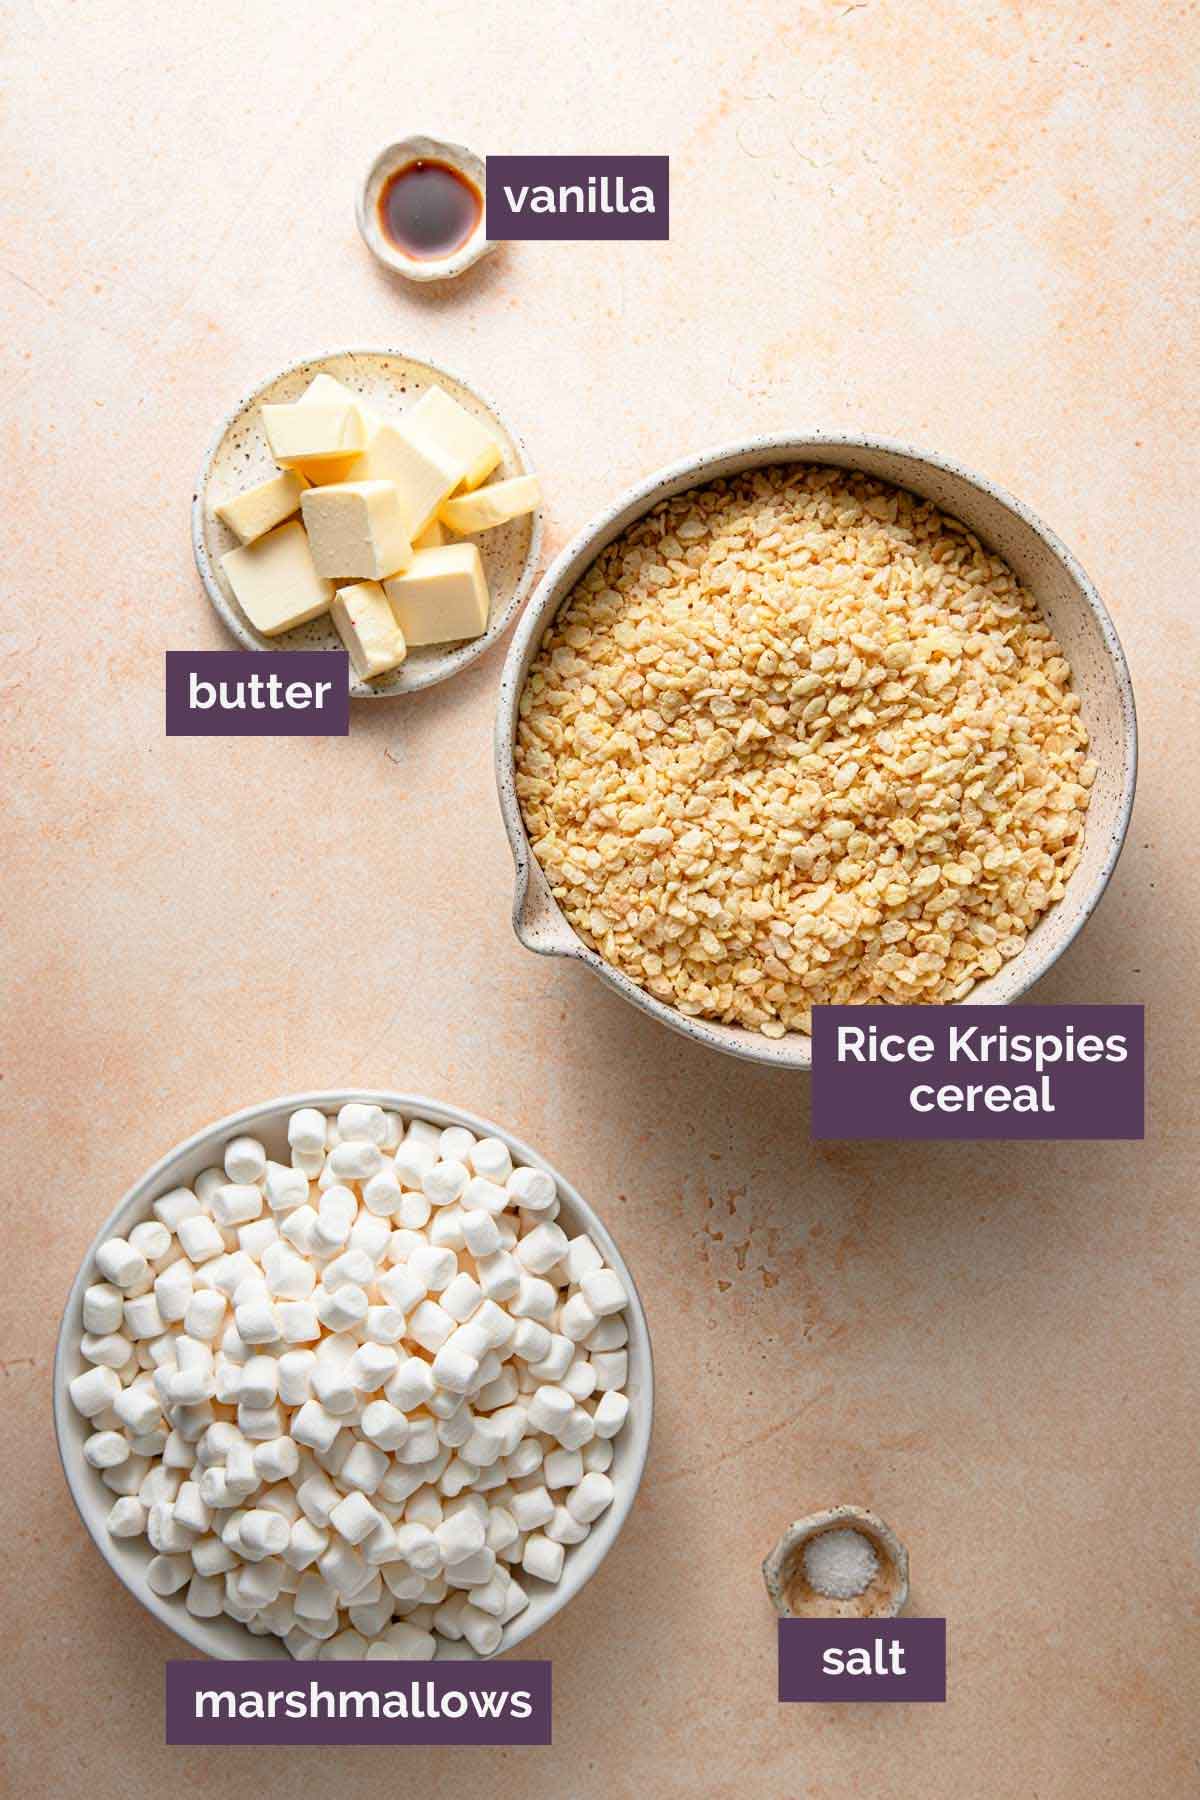
- Butter - I use unsalted butter and then add in kosher salt, but if all you have is salted butter, you can absolutely use that.
- Marshmallows - I find that miniature marshmallows are the best for making the sauce and of course for adding in at the end!
- Kosher Salt + Pure Vanilla Extract - To amp up and balance out all of the flavors.
- Rice Krispie Cereal - You will need almost exactly one 12-ounce box of cereal to make this recipe.
Mix-ins and Flavors
It really doesn't get more fun than rice krispie treats but here are a few ways to mix them up or flavor them:
- Sprinkles! -Stir in multi-color sprinkles for a funfetti look to your treats.
- Mini Chocolate Chips- For the chocoholics in your life add in mini chocolate chips.
- Butterscotch Chips - Give your rice krispies a scotcheroo-like flavor by adding in butterscotch chips.
- Almond Extract - In place of vanilla try using almond extract for a wedding cake flavor!
- Nuts – Add in your favorite chopped nuts (peanuts, almonds, pecans, pistachios, cashews, etc.)
- Favorite Candy – Chop up peanut butter cups, Oreo cookies, use M&Ms, etc.
How to Make Them
They are so quick and easy!
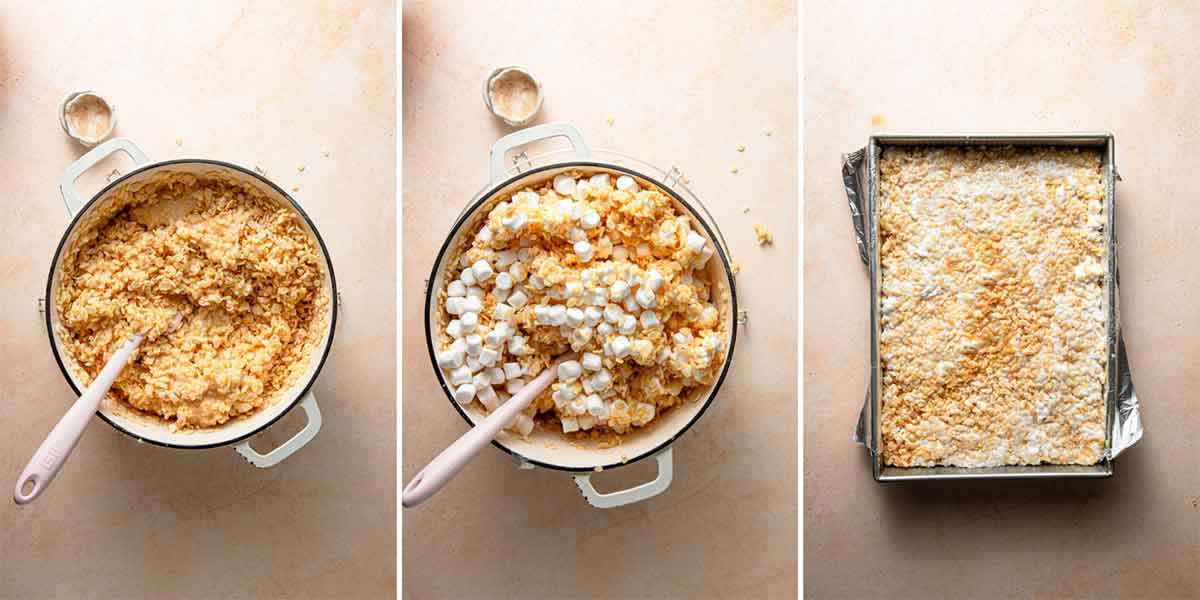
Step #1: Prep the Pan – Grease a 9×13-inch baking dish (I prefer to do this with butter); I like using a glass pan best since I usually cut the treats in the pan. You can also line a baking dish with foil (leave an overhang for easy removal), and spray the foil with non-stick cooking spray.
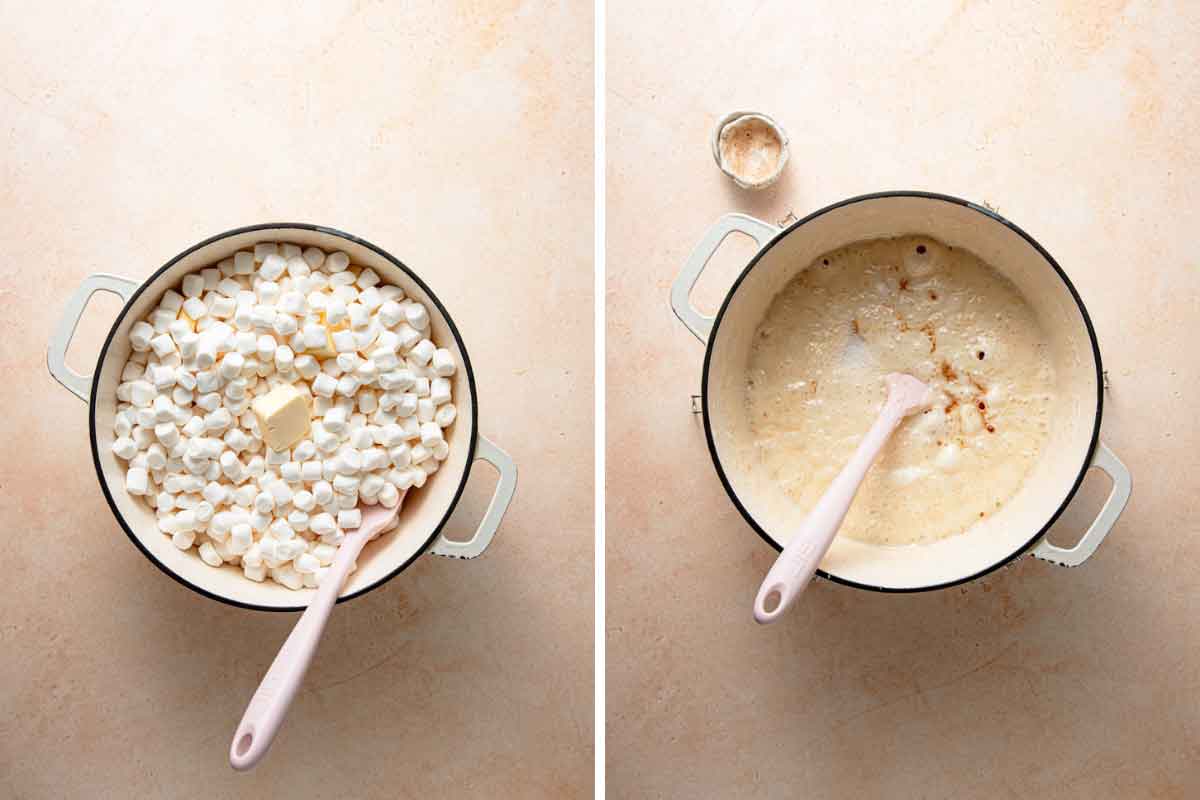
Step #2: Make the Marshmallow Sauce – Melt the butter and 16 cups of the marshmallows in a large pot or Dutch oven over low heat until the marshmallows are melted. Stir in the salt and vanilla, then remove from heat.
Step #3: Stir in the Cereal + More Marshmallows – Stir in the Rice Krispies until they are evenly coated with the marshmallow mixture, then stir in the additional 4 cups of mini marshmallows.
Step #4: Press into Baking Dish – Turn the mixture into the prepared pan using either parchment paper, wax paper, or a utensil (or your fingers) that has been greased, press the mixture firmly into a packed, even layer. Allow to set at room temperature for at least 30 minutes, then cut and enjoy!
Different Ways to Cut Rice Krispie Treats
One of the best things about these treats is their ability to take just about any shape! Here are a few other ways you can slice and serve your treats:
- Triangles: Cut the treats into squares and then slice diagonally through the center to make triangles.
- Circles: Using a biscuit cutter, press and cut the rice krispies into circles. Press the scraps back into a prepared baking dish and cut remaining circles.
- Cookie Cutters: If you want to press other shapes with cookie cutters using this recipe, I would recommend dividing the recipe into two 9×13-inch pans. This will result in thinner rice krispies that can then be easily cut with cookie cutters into every shape under the sun.
Save This Recipe
Storing, Freezing, and Making Ahead
- Storing + Shelf Life- They are best stored at room temperature in an airtight container for up to 3 days. I do not recommend refrigerating these, as it will dry out the treats.
- Ultra-fresh: You can go one step further and wrap them individually in plastic wrap to keep them REALLY fresh.
- Freezing- If you want to freeze them, wrap them individually in plastic wrap and place in a freezer ziploc bag and freeze for up to 2 months. Allow to thaw at room temperature before serving.
- Make-ahead- I truly believe the best rice krispies are the ones fresh from the pan but if you want to make them in advance remember to make them no more than 3 days before you plan to serve them or freeze them right away.
Recipe Tips and Notes
- To help with your grocery list, you will use three (10-ounce) bags of miniature marshmallows for this recipe. And one (12-ounce) box of crispy rice cereal.
- You can omit the extra marshmallows that get stirred in at the end if you wish without making any adjustments to the recipe.
- You can make rice krispie treats with marshmallow fluff for the sauce if you'd like. Substitute four (7.5-ounce) jars of marshmallow fluff for the 16 cups of miniature marshmallows that are called for in the recipe. Heat the marshmallow fluff with the melted butter over low heat and proceed with the recipe as directed.
- How to keep the crispy rice treats mixture from sticking when pressing it into the pan – Spray the wooden spoon or rubber spatula you are using (or your hands) with non-stick cooking spray, use the butter wrapper, or a square of parchment paper to press the mixture into the pan.
Rice Krispie Treats Variations
I’ve made tons of versions of the homemade rice krispie treat, and these are some of my favorites:
- Peanut Butter Rice Krispie Treats with White Chocolate
- Snickers Rice Krispie Treats
- Rocky Road Rice Krispie Treats
- Oreo Rice Krispie Treats
Watch the Recipe Video:
If you make this rice krispie treats recipe and love it, remember to stop back and give it a 5-star rating - it helps others find the recipe! ❤️️

Best-Ever Rice Krispie Treats
Ingredients
- 10 tablespoons unsalted butter
- 20 cups (1134 g) miniature marshmallows, divided
- 1 teaspoon kosher salt
- ½ teaspoon (0.5 teaspoon) vanilla extract
- 12 cups (336 g) Rice Krispies cereal
Instructions
- Line a 9×13-inch baking dish with foil, then coat with non-stick cooking spray; set aside.
- In a large saucepan or stockpot, melt the butter and 16 cups (680 grams) of the miniature marshmallows over low heat until the marshmallows are just melted. Stir in the salt and vanilla to combine. Remove the pan from the heat, add the Rice Krispies and mix until it is completely and evenly coated with the marshmallow mixture. Stir in the additional 4 cups of miniature marshmallows.
- Turn the mixture out into the prepared pan and, using a wooden spoon or spatula that has been coated in non-stick cooking spray, press the mixture firmly into a packed, even layer. Allow to set at room temperature for at least 30 minutes. Using the foil, remove the treats from the pan and slice into squares. Leftover rice krispie treats should be stored in an airtight container at room temperature for up to 3 days.
Notes
- Marshmallows: You will use three (10-ounce) bags of miniature marshmallows for this recipe.
- Omitting Extra Marshmallows: You can omit the extra marshmallows that get stirred in at the end if you wish. You do not need to make any adjustments to the recipe.
- Using Marshmallow Fluff: You can substitute four (7.5-ounce) jars of marshmallow fluff for the 16 cups of miniature marshmallows that are called for in the recipe. Heat the marshmallow fluff with the melted butter over low heat and proceed with the recipe as directed.
- Mix-Ins & Flavors: See the post above for suggestions on mix-ins and additional flavors.
- Storing + Shelf Life: These are best within 1 day of making them, but you can store them in an airtight container at room temperature for up to 3 days. To keep them ultra-fresh, wrap them individually in plastic wrap and place in an airtight container.
- Freezing: If you want to freeze them, wrap them individually in plastic wrap and place in a freezer ziploc bag, and freeze for up to 2 months. Allow to thaw at room temperature.
Did you make this recipe?
Leave a review below, then snap a picture and tag @thebrowneyedbaker on Instagram so I can see it!
This recipe was originally published in May 2016.
Photography by Dee Frances.


Kellogg’s box is 255 grams- how many fewer cups of marshmallows? Thanks so much!
Second time this month I have made this. Today I added a package of Chocolate chips.
Hi,
You’re recipe sounds great! Just one question, the recipe calls for only 20 ounces of marshmallows so why in the note at the bottom of the page it says the recipe calls for 3 10 ounce bags? What is the extra 10 ounces of marshmallow for?
Thanks!
Hi Maggie, It actually calls for 20 CUPS of marshmallows, which is about 30 ounces.
I just made these and they are amazing. Hands down best rice crispy squares I’ve ever had. Thanks a bunch ! Ill definitely be making more of these.
Made these by request of my 8y/o boy…all three of my kiddos 11, 8, and 6 LOVE them. I liked em too lol. I made the recipe as is, but instead of twelve ginormous treats we got thirty pretty regular size ones…thick chewy and gooey just like the video. My only complaint is that holy cow was it a task trying to get all that mix into the pot and then the pan. Perhaps it won’t be such a chore next time as I’ll know what to expect, but the taste was definitely worth it. These are definitely bakery worthy. Thanks for sharing :)
I just made this recipe and it is SUPER!! I took another person ‘s suggestion and browned the butter. I also used Cocoa Krispies because my husband loves chocolate. He could not eat them fast enough!!! Thanks for this recipe, it is great!!
Made these for my kiddo’s Valentine’s Day Party, and they were FANTASTIC!!!! Soft and chewy and tasted awesome! Thanks for the recipe!
Hi Wendy, You’re welcome! So glad you enjoyed them, and thanks for the review!
Can these treats be used to sculp in making decor for cakes?
Hi Tarika, I’ve never tried to do that, so I couldn’t say for sure! If you give it a try, let me know how it goes!
Absolutely amazing!!
These were the most delicious Rice Krispie treats we have ever had! My husband is still talking about them and he’s not even a huge sweets guy. Freezing individual squares kept them fresh! Thanks for the amazing recipe!
All I have to say is *drool.* I could not imagine a recipe that is any better. These are to die for. Like I said, *drool.*
I’m overdue in commenting on the deliciousness of these rice krispy treats. For the past few years I’ve made road treats for friends who set out on an annual summer road trip. I always make your no-bake cookies and rice krispy treats. This year I decided to make this recipe instead of the recipe on the cereal box. Oh. My. Word. These are amazing. My friend texted me from the road asking what I did differently to the treats to make them so delicious, and her sister wanted to know too. I sent her the link, of course. The ratio of marshmallow to cereal is just perfect.
Wow! So easy to make and addicting! Thank you so much for sharing this recipe, I always make terribly hard Rice Krispie Squares. These turned out fantastic, and I ate so many. I’m all out, have to make more soon, I’m having withdrawals.
Forgot my 5 star rating!!!! Thanks again!
Just made these again …for about the upteenth time – so very, very good! This time, I remembered a little jar of salted caramel in my cupboard from Trader Joe’s. I heated it just a bit for easier pouring and drizzled it sparingly over top before cutting. Sparingly, because I didn’t want to overdo the sweetness…..but just add that little sweet-salty tease that brings everyone back for more. And it did. Thanks again for this recipe. …A great variation on an old one that is tried & true.
Is super yummy love it
Would these work using a dairy free alternative for the butter? Eg margarine? Any tips :)
Hi Nina, Yes I think that would work just fine (although the flavor will be a bit different than butter, obviously).
Love these and so do everyone who eats them. The salt and vanilla give the treats a new twist that everyone loves compared with recipes I have used in the past.
Best Crispy Treats ever! To make them even more fun, I like to add a drizzle of melted white chocolate and top with some sprinkles!
I made this recipe, but added several tablespoons of cocoa while melting butter. Delicious.
How much cocoa did you add and no bitterness? I guess the sugar from all the marshmallows make up for adding any. I have been wanting some chocolate krispies and can make some soon! :)
I made these!! They are so delicious and pretty, with the marshmallows speckled throughout. Thank you for such a perfected recipe for a favorite treat!
I made this recipe for the first time today, and they really are the best! I’ve always followed the recipe on the back of the box……had no idea what I was missing. Thank you for sharing this recipe!
I only have one box of cereal and one bag of large Marshmallows. Does anyone know what my measurements for the ingredients would be? I don’t want to make a 9×13
What if I do not have vanilla extract. Will it taste ok without it??
It should be fine; vanilla helps to amp up the flavor is sweets and baked goods, but omitting it would not ruin these.
These looks sooo good, and with all the tips from others – brown the butter, add a little liquor (for the adults), and warming the pan before spreading the treats – this could be the best treat yet!!
Just made this and I am having the hardest time NOT eating them all. I made these ;for the family, which they LOVE and I dont think they will last much longer. This is the hands down best recipe for rice krispy treats that I have ever tried. Best rice krispy treats I have ever had!! Thank you!!
So awesome to hear this, they’re my favorite too! Thanks for the review! :)
Oooh. I’m going to have to try these. I’ve always just used the recipe on the box.
My one secret ingredient (that I discovered by accident) is, when melting the butter I let it go a little longer and brown it. It gives the squares a slight caramel flavor.
This recipe is AMAZINGLY GOOD!! everyone loved it!!
First of all these look really good! Unfortunately, at this point in my life, I have no more children to enjoy these goodies, but I’ve adapted. Now I make adult krispy treats for my adult “kids.” As I melt the marshmallows with the butter, I add Grand Marnier (or other liquer) to taste. It doesn’t take much to make very tasty treats. Everyone loves them and at first bite, no one can figure out why they taste sooo good! Next time I make these, I’ll reserve a portion of the mini’s to add at the end and I’ll look like a Pro! Thanks for a great recipe!
Now, I have a little tip. I warm the 9″ x 13″ dish in the oven while making the treats. Spreading the mixture in a warm dish is so much easier than trying to spread it in a cold one.
I have made this recipe time and time again with different variations and they always get rave reviews. The most recent I tried was I made a big pan, melted two cups of PB and poured it over the top before cutting. The PB sets up fine after it cools, and adds a lovely saltiness to the treats! I have also frosted with home made butter cream, cookie butter, mixed in oreos, chocolate chips, you name it lol.
Would you recommend this ratio of marshmallows to Lucky Charms cereal as well? I’m getting my Irish on tomorrow for St Patty’s day!
Hi Mel, I think it should work, although I’ve never tried it. YUM! Enjoy!