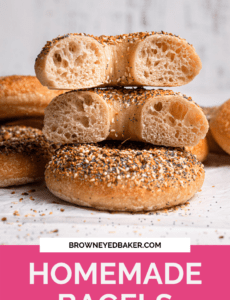
Homemade Bagels Recipe
If you’ve ever wanted to learn how to make bagels, you are in the right place! This traditional bagel recipe includes all of the tips for making homemade bagels that taste authentic, including refrigerating overnight, boiling, and baking. If you like regular ol’ plain bagels, then you can just stop right here, but this recipe is a fantastic jumping-off point for all sorts of add-in and toppings ideas. Whether you like cinnamon-raisin bagels, blueberry bagels, or anything else in between, I have all the info you need below. All you need is a slather of cream cheese on these beauties!
It’s been nearly 15 years since I first tackled homemade bagels and I’m just as in love with them now as I was then. If you are a die-hard bagel fanatic, you are going to absolutely love the ones that will come out of your oven using this recipe.
The Bread Baker’s Apprentice by Peter Reinhart was one of the very first cookbooks that I purchased, and in it was this recipe. After trying my hand at a number of other bread recipes, I finally dug in and tackled these. I never looked back when it came to homemade bagel-making. There are some special ingredients and techniques, but we’re talking through everything below so you can create the most amazing, authentic-tasting bagels in your own kitchen.
What makes a good bagel?
When you think about the most amazing bagels you’ve ever eaten, what do they all have in common? They likely have some of the following characteristics:
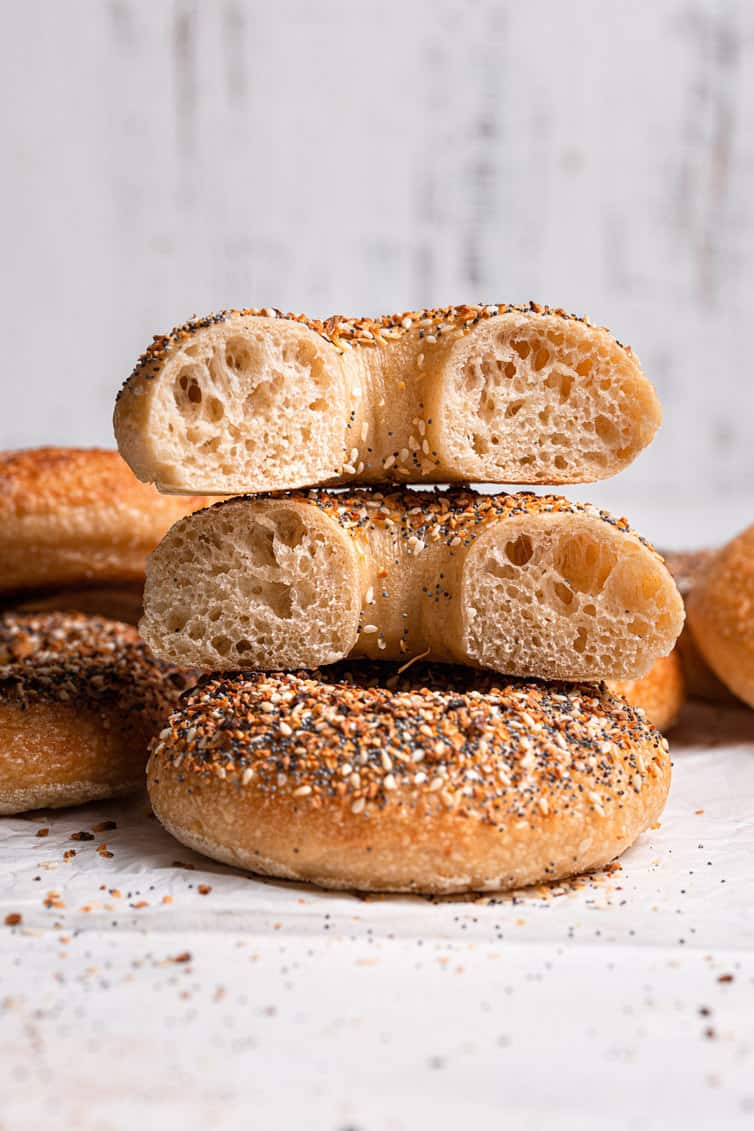
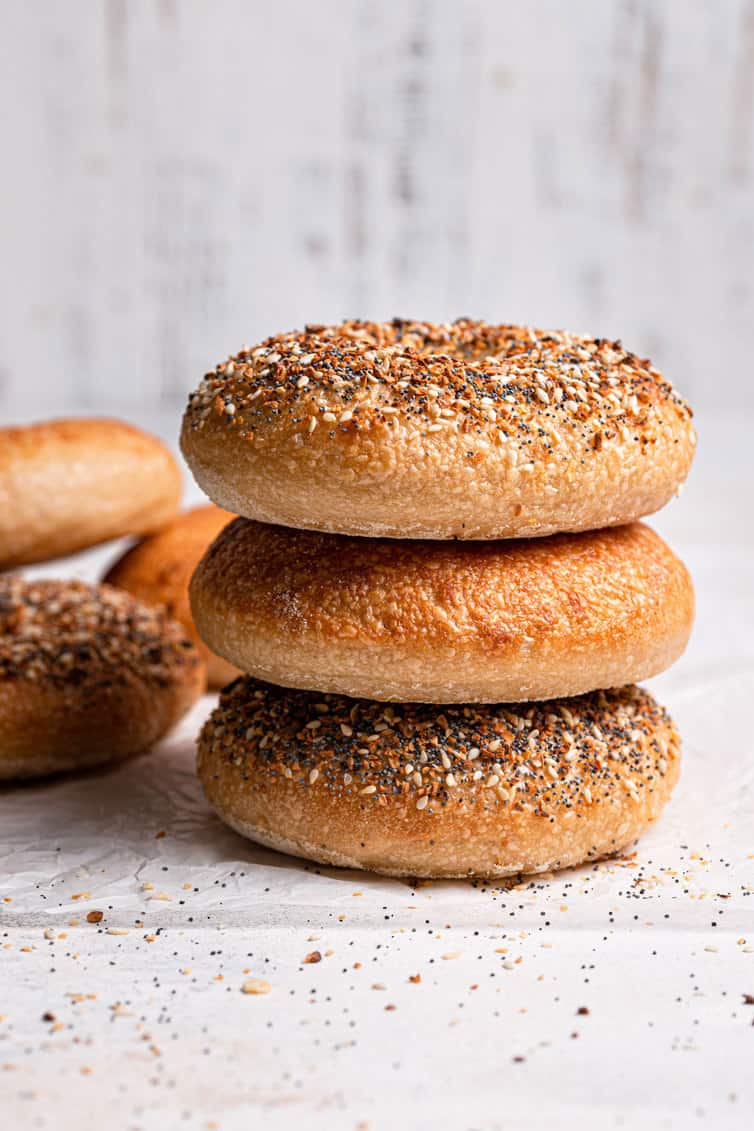
- A thin, shiny, crust that is dark golden brown and blistered.
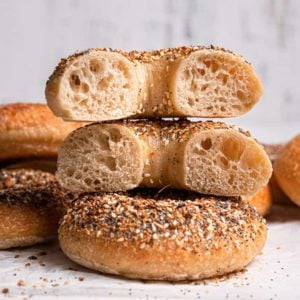
- The interior should be dense and chewy.
- Not too bready.
- The hole in the middle should be small.
- The bagels should be plump, not flat.
How do we make those amazing homemade bagels?
The process to make honest-to-goodness, traditional bagels that give us the best shot at achieving the results listed above requires multiple stages and a couple of specialty ingredients but is worth every single ounce of effort if you love true old-school bagels, not the bagel-shaped bread you can buy in a sleeve at the supermarket.
Let’s discuss!
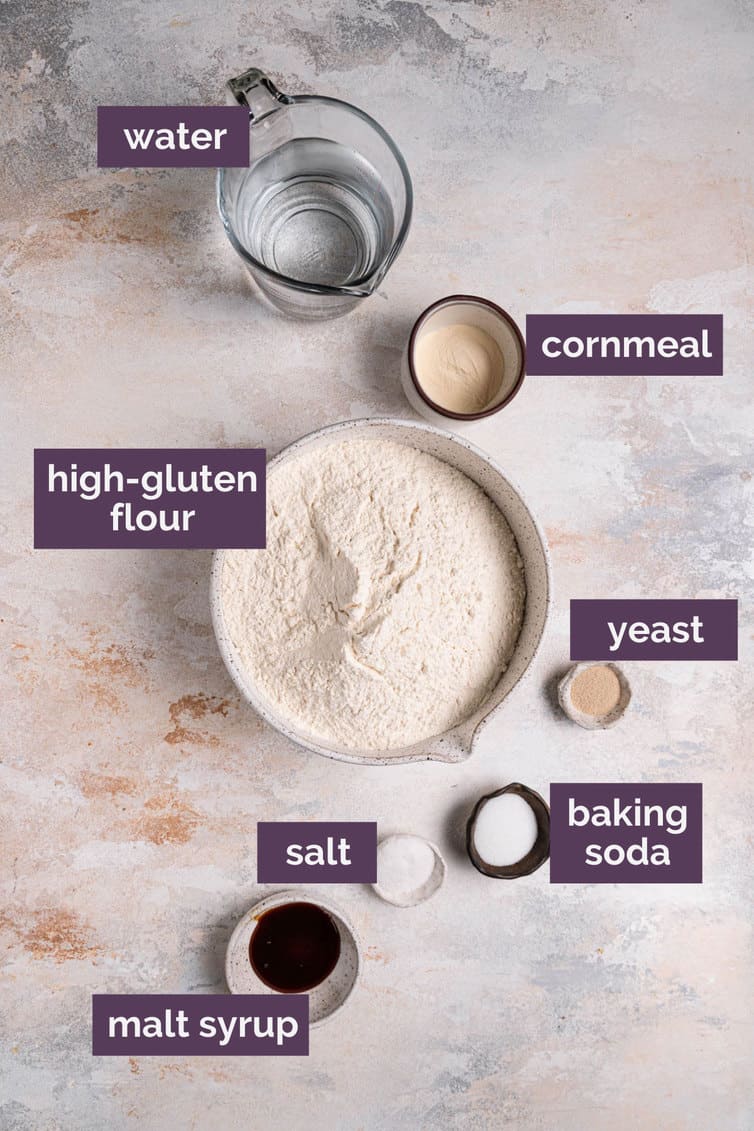
The important ingredients
You may have noticed a few ingredients in the recipe that are unfamiliar or, at least, not things you would typically keep in your pantry. Let’s discuss them, the role they play, and potential substitutes…
- High-Gluten Flour – This specialty flour (which you can purchase from King Arthur Flour) has a higher protein level (14%) than even bread flour (12%). For comparison sake, all-purpose flour usually has around 10%. That increased gluten protein is what provides elasticity and tough chew associated with classic bagels. You can substitute bread flour, but it is not recommended that you use all-purpose flour.
- Barley Malt Syrup – This is strictly for flavor, as it helps release the natural sugars trapped in the flour starches. It will give you the familiar old-school bagel shop flavor, and you can purchase it from Amazon or King Arthur Flour, but you can also substitute honey or light brown sugar.
- Non-Diastatic Malt Powder – I add this to the water bath, which creates a shiny exterior and helps the bagels brown in the oven. Again, you can purchase this from King Arthur Flour. You can omit this if you’d like; if you do, also omit the sugar and simply use 1 tablespoon of baking soda.
How to make the bagel dough
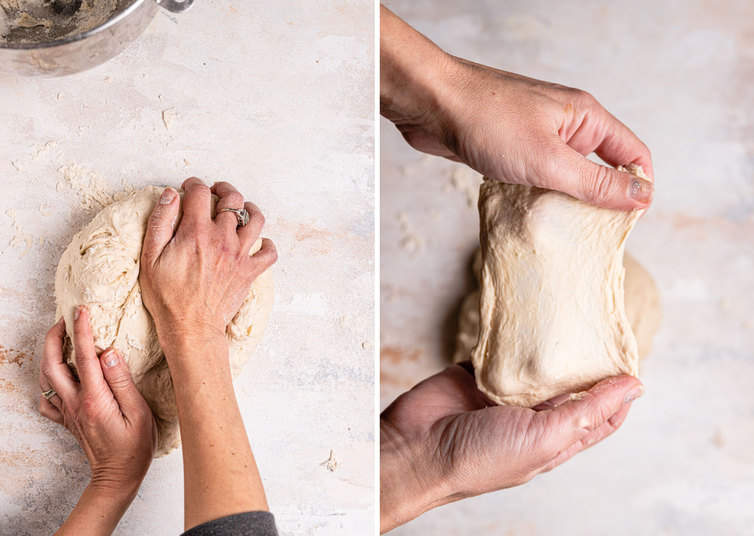
This dough is extremely stiff, with a much lower liquid to flour ratio that you will typically find in bread recipes. This stiffness is necessary to allow the dough to withstand the boiling water without deflating or losing its shape. In order to ensure the dough has the correct consistency, use the windowpane test (described in the recipe and pictured below) to see if the dough has the appropriate hydration.
Authentic bagels require some steps that you don’t find in regular bread-baking, so let’s run through them…
- The Sponge – Utilizing the sponge technique gives the bagels a better flavor and texture and also allows them to freeze and thaw more successfully due to the increase of natural acid. Longer, slower fermentation improves the flavor and shelf life.
- Overnight Refrigeration – This piggybacks on the sponge method above, giving the bagels yet another opportunity to get a long, slow fermentation going. Peter Reinhart goes so far as to say that he finds it impossible to make a decent bagel without the overnight method. The long, slow, cold fermentation allows the naturally occurring enzymes, as well as those provided by the malt, to release flavors.
Here’s how it looks, step-by-step:
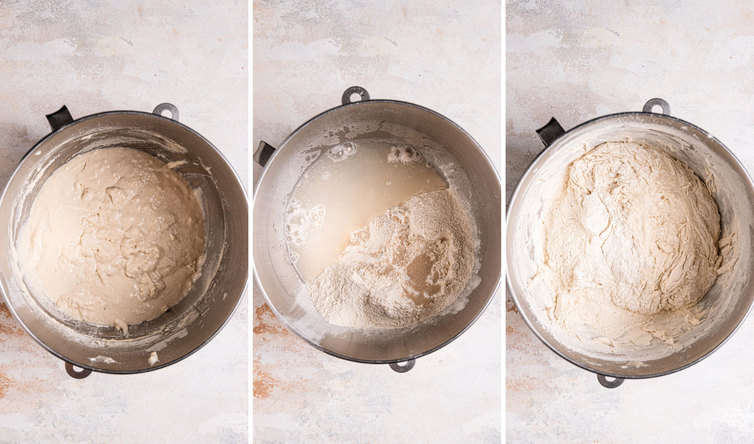
- The first step in the process is making a sponge from flour, yeast, and water. That sits at room temperature for a couple of hours until it’s bubbling and foamy and nearly doubled in size.
- Then, to that sponge, the remaining dough ingredients are added – more yeast, more flour, salt, and barley malt syrup. A stiff dough is made, then portioned out into rolls and left to rest briefly.
- The bagels are then shaped, covered, and left to sit in the refrigerator overnight.
Save This Recipe
How to shape the bagels
There are a couple of different methods you can use to shape the bagels:
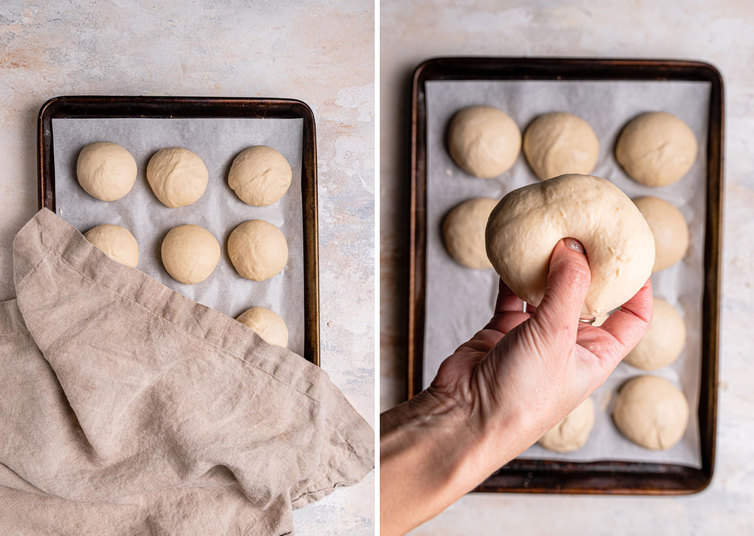
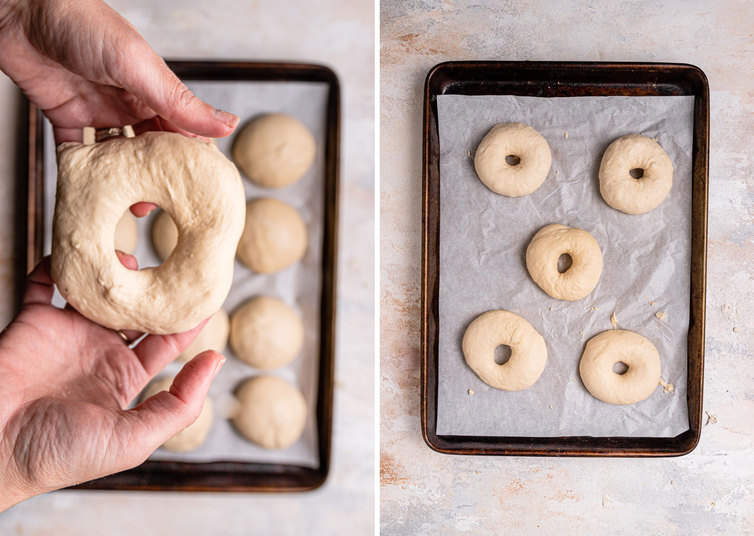
The first (and my preferred method), is to use your thumb to poke a hold in a ball of bagel dough and gently stretch evenly until the hole is 1 to 2 inches in diameter.
Alternatively, you can roll the dough into an 8-inch rope and wrap the dough around the palm and back of your hand, overlapping the ends by several inches. Press the overlapping ends together and gently roll back and forth to seal.
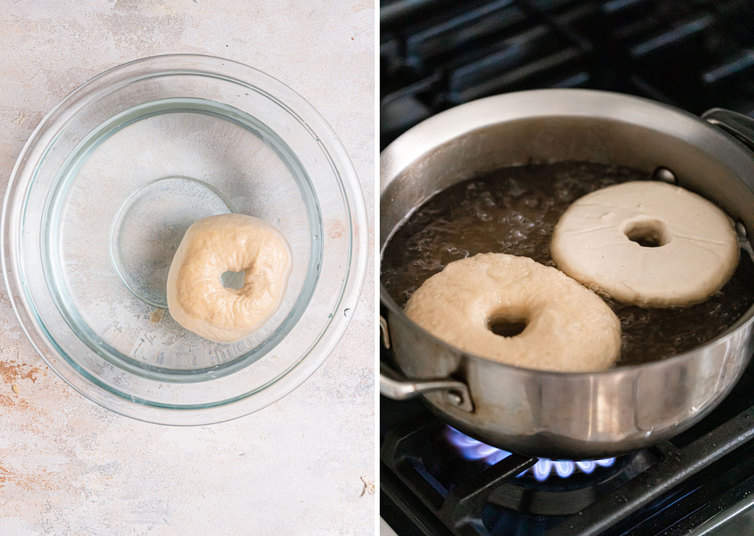
How to boil the bagels
A water bath is the traditional way to make bagels, creating the distinctive thick, chewy crust. Adding some sugar and non-diastatic malt powder to the water bath helps to “set” the outer crust of the dough and aids in its caramelization and color.
The day after the bagels are shaped and placed in the refrigerator, the bagels are boiled in water that has sugar and non-diastatic malt powder added to it, then baked in a fiery hot oven.
Storage, freezing, and reheating
Like most bread products, homemade bagels taste the best when they are freshly baked, so eating them the day they are made (or the next) is highly encouraged!
- Shelf life and storage: Leftover bagels can be stored in an airtight container at room temperature for up to 2 days, or in the refrigerator for up to 5 days.
- Freezing instructions: Bagels freeze wonderfully (we always have some in our freezer!). Wrap individually in aluminum foil then store in a resealable ziptop bag and freeze for up to 1 month. Thaw at room temperature, keeping the bagel wrapped until completely thawed.
- Make-Ahead Instructions: Once the bagels have been shaped and pass the float test (see recipe below), they can be refrigerated for up to 2 days before boiling and baking.
- Reheating: To reheat bagels, you can simply slice them in half and toast. Or to replicate its original texture, you can place the whole bagel in an oven or toaster oven at 375 degrees for about 5 minutes.
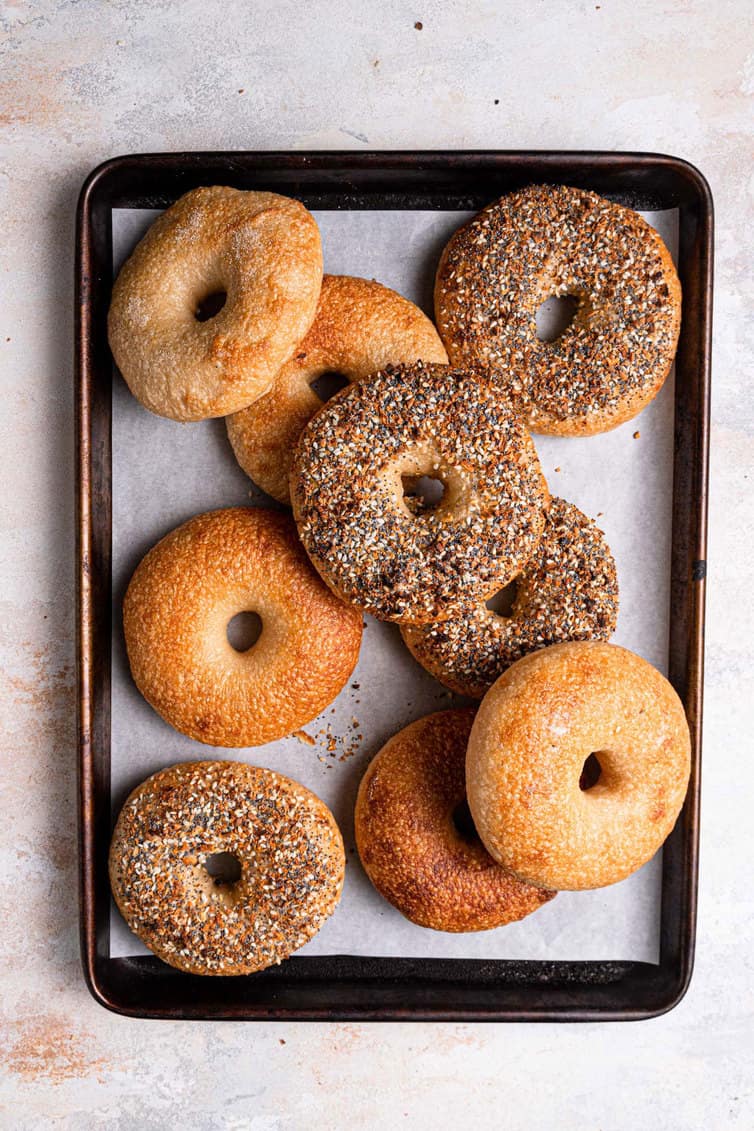
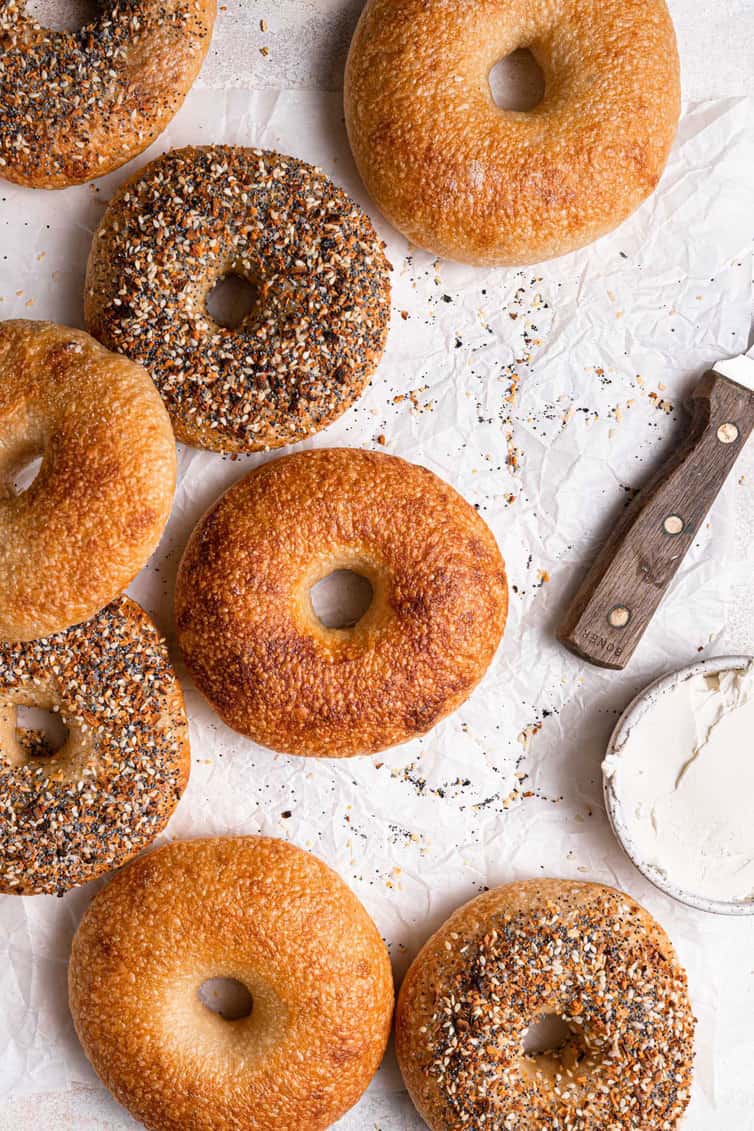
If you are a bagel purist and enjoy that chewy exterior paired with that beautiful crumb, you are going to fall in love with these. I am a total bagel minimalist and enjoy them with a slather of cream cheese and that’s it.
However, you can top them with sesame seeds, poppy seeds, dried onion, whatever you’d like!
More homemade bagel varieties and topping ideas:
- Asiago Bagels: Follow my Asiago bagels recipe.
- Blueberry Bagels: Follow my blueberry bagels recipe.
- Cinnamon Raisin Bagels: Follow my cinnamon raisin bagels recipe.
- Egg Bagels: Follow my egg bagels recipe.
- Everything Bagels: Follow my everything bagels recipe.
- Jalapeno-Cheddar Bagels: Follow my jalapeno-cheddar bagels recipe.
- Poppy Seed or Sesame Seed Bagels: As soon as the bagels come out of the water bath, sprinkle with poppy seeds or sesame seeds, as much as desired.
- Sourdough Bagels: Replace the sponge with 5 cups (35 ounces) of barm starter and increase the instant yeast in the dough to 1½ teaspoons.
Watch the Recipe Video:
Want something hearty to serve with the bagels? Try my slow cooker hashbrown, sausage, and cheddar breakfast casserole!
If you make these bagels, I would so appreciate it if you would take a moment to leave a rating below. Thank you so much! ❤️️
Homemade Bagels Recipe
Ingredients
For the Sponge
- 1 teaspoon instant yeast
- 4 cups (500 g) unbleached high-gluten flour
- 2½ cups (625 ml) water, at room temperature
For the Dough
- ½ teaspoon (0.5 teaspoon) instant yeast
- 3¾ cups (468.75 g) unbleached high-gluten flour
- 2¾ teaspoons (2.75 teaspoons) salt
- 1 tablespoon barley malt syrup
For Boiling
- 1 tablespoon granulated sugar
- 2 tablespoons non-diastatic malt powder
- Cornmeal or semolina flour, for dusting baking sheets
Instructions
- Make the Sponge: Stir the yeast into the flour in a 4-quart (or larger) mixing bowl. Add the water, whisking or stirring only until it forms a smooth, sticky batter (like pancake batter). Cover the bowl with plastic wrap and leave at room temperature for approximately 2 hours, or until the mixture becomes very foamy and bubbly. It should swell to nearly double in size and collapse when the bowl is tapped on the countertop.
- Make the Dough: In the same mixing bowl (or in the bowl of an electric mixer), add the additional yeast to the sponge and stir. Then add 3 cups of the flour and all of the salt and the barley malt syrup. Stir (or mix on low speed with the dough hook) until the ingredients form a ball, slowly working in the remaining ¾ cup flour to stiffen the dough.
- Transfer the dough to the counter and knead for at least 10 minutes (or for 6 minutes by machine). The dough should be firm, but still pliable and smooth. There should be no raw flour – all the ingredients should be hydrated. Break off a small piece of dough and gently stretch and pull it to see if it will hold a paper-thin, translucent membrane (called the “windowpane test”). If the dough seems dry and rips, add a few drops of water and continue kneading. If the dough seems tacky or sticky, add more flour to achieve the stiffness required. The kneaded dough should feels satiny and pliable but not be tacky.
- Shape the Bagels: Immediately divide the dough into 4½ ounce pieces for standard large bagels, or smaller if desired. Form the pieces into rolls. Cover the rolls with a damp kitchen towel and allow them to rest for 20 minutes.
- Line two baking sheets with silicone baking mats, or parchment paper sprayed lightly with non-stick cooking spray.
- To shape the bagels, use your thumb to poke a hold in a ball of bagel dough and gently stretch evenly until the hole is 1 to 2 inches in diameter. Alternatively, you can roll the dough into an 8-inch rope and wrap the dough around the palm and back of your hand, overlapping the ends by several inches. Press the overlapping ends together and gently roll back and forth to seal.
- Place each of the shaped bagels 2 inches apart on the pans. Mist the bagels very lightly with non-stick cooking spray and cover loosely with plastic wrap. Let the pans sit at room temperature for 20 minutes.
- Check to see if the bagels are ready to be retarded in the refrigerator by using the “float test”. Fill a small bowl with cool or room-temperature water. The bagels are ready to be retarded when they float within 10 seconds of being dropped into the water. Take one bagel and test it. If it floats, immediately return the tester bagel to the pan, pat it dry, cover the pan with plastic wrap, and place it in the refrigerator overnight (it can stay in the refrigerator for up to 2 days). If the bagel does not float, return it to the pan and continue to proof the dough at room temperature, checking back every 10 to 20 minutes or so until a tester floats. The time needed to accomplish the float will vary, depending on the ambient temperature and the stiffness of the dough.
- Boil and Bake the Bagels: The following day (or when you are ready to bake the bagels), preheat the oven to 500 degrees F with the two racks set in the middle of the oven. Bring a large pot of water to a boil (the wider the pot the better – a Dutch oven is perfect!), and add the sugar and non-diastatic malt powder. Have a slotted spoon or skimmer nearby.
- Remove the bagels from the refrigerator and gently drop them into the water, boiling only as many comfortably fit (they should float within 10 seconds). After 1 minute flip them over and boil another minute. If you like very chewy bagels, you can extend the boiling to 2 minutes per side. While the bagels are boiling, sprinkle the same silicone baking mats or parchment-lined sheet pans with cornmeal or semolina flour. If you want to top the bagels with anything, do so as soon as they come out of the water.
- When all the bagels have been boiled, place the pans on the 2 middle shelves in the oven. Bake for approximately 5 minutes, then rotate the pans, switching shelves and giving the pans a 180-degree rotation. (If you are baking only 1 pan, keep it on the center shelf but still rotate 180 degrees.) After the rotation, lower the oven setting to 450 degrees F and continue baking for about 5 minutes, or until the bagels turn light golden brown. You may bake them darker if you prefer.
- Remove the pans from the oven, transfer the bagels to a wire cooling rack, and let cool for at least 15 minutes before serving. Fresh bagels are best, but these keep well in an airtight container or bag for up to 2 days. If you won’t eat them within that time frame, I recommend wrapping them individually in plastic wrap and placing in a ziploc freezer bag, and storing them in the freezer for up to 1 month.
Notes
- High-Gluten Flour: You can substitute bread flour for the high-gluten flour, but I do not recommend all-purpose flour without compromising the texture of the bagels.
- Barley Malt Syrup: You can substitute honey or light brown sugar for the barley malt syrup in the dough.
- Shelf life and storage: Leftover bagels can be stored in an airtight container at room temperature for up to 2 days, or in the refrigerator for up to 5 days.
- Freezing instructions: Bagels freeze wonderfully (we always have some in our freezer!). Wrap individually in aluminum foil then store in a resealable ziptop bag and freeze for up to 1 month. Thaw at room temperature, keeping the bagel wrapped until completely thawed.
- Make-Ahead Instructions: Once the bagels have been shaped and pass the float test (see recipe below), they can be refrigerated for up to 2 days before boiling and baking.
- Reheating: To reheat bagels, you can simply slice them in half and toast. Or to replicate its original texture, you can place the whole bagel in an oven or toaster oven at 375 degrees for about 5 minutes.
Did you make this recipe?
Leave a review below, then snap a picture and tag @thebrowneyedbaker on Instagram so I can see it!
[Photography by Dee Frances]


I was frustrated with the typical Bagel recipes that used bread flour and had tried to add high gluten flour into those. But I just couldn’t get that nice “crunch!” Well this recipe hits on all cylinders! Couldn’t believe how good it is and I know I screwed up a bit in the process! Hilarious. Thanks for the insight and recipe. (BTW I could find your video of this process)
After sharing them with our small group Bible study, there were only 3 left. So I just had to mix up another batch that are sitting in my fridge to be boiled and baked. My husband and I developed a recipe 40 years ago that we sold in a bagel cart by the lake. He agrees that these are superb!
They came out absolutely perfect!!! I didn’t have the non diastolic malt powder so I added baking soda and a Tbsp of honey instead but otherwise followed your recipe to a T! Thanks Michelle!!!
Why the overnight refrigeration? Never seen that before. Normally it would be an overnight for the preferment, but once risen to the float test passage, they would be boiled and baked. I found it interesting that the preferment had more water than flour. Not even a poolish would be more than 1:1. And most preferments sit overnight which is why I assume so much yeast is added to it.
i loved it
i do not like bagels
I object to the following:
“While the bagels are boiling, sprinkle the same silicone baking mats or parchment-lined sheet pans with cornmeal or semolina flour.”
DO NOT USE SEMOLINA OR CORNMEAL on the baking sheets. I have been eating bagels for 60 years that have been traditionally made. When I purchase them at a local supermarket with in-house made bagels, I bring home a bag with about 2 tablespoons of semolina in the back. It gets all over the place and it’s totally unnecessary. Cornmeal and semolina are greedy and affect the taste and texture experience of a bagel. Not cool, not kosher probably
First time making egg bagels and found this recipe and dough easy to use. It also made a great tasting bagel. Love that they are shaped and put in the refrigerator overnight with minimal effort. A quick boil and into the hot oven in the morning for fresh bagels for breakfast. I used a baking stone and was pleased with the results. Wondered if I could slow the sponge down to develop even more flavor?
I first started following you in 2010 when I was searching for a bagel recipe, and your blog directed me to Peter Reinhart’s book the Bread Baker’s Apprentice. I see now that you have substituted the baking soda (which alkalises the water) in the original recipe to granulated sugar and non-diastatic malt powder. Why the change? Does it really give a better crispy shell?
Oh, PS, you are still my all-time favourite and most reliable cooking hero.
Hi Samuel! Thank you so much for the kind words! After doing some research and testing, I personally preferred with combination of sugar and malt powder for the boil, but it’s totally up to you! Both produce amazingly delicious bagels :)
My fridge is not big enough to hold trays of shaped bagels, especially when pandemic life has me shopping less often so bigger buys…any suggestions?
I have the same issue. I only have a small fridge.
Although the post is older, I
thought maybe half or quarter
the recipe may help someone who may be new to baking.
We can usually figure things
out if we really want to try a
recipe—no one can do
anything about the smaller
fridge or less space. You can do this and good luck.
The recipe is great! Hope you can share more recipes for making other cakes!
I have made bagels several times, but wanted to try this recipe, which is somewhat similiar to the one I usually use. When I checked on the bagels in the fridge they looked ok in the morning, but when I went to take them off the pan for boiling, they were loose and stuck tho the parchment. I didn’t want to wast the dough so I took all the bagel dough and turned them into balls, and reworked them. I boiled and baked- for much longer than your recipe calls for, and they turned out to be very good. What do you thing went wrong?? I did find the dough very sticky, so maybe I needed more flour. I will make them again, but I am going to roll them into balls, and put them in the fridge over nite, and then make the hole and bake. Do you think it was too long in the fridge?? It was only over nite . Again, they were delicious, but I don’t know what caused the problem .
Hi Sara, If the dough was sticky I would try adding more flour. It wouldn’t have been in the fridge too long, overnight is fine. I’m glad you enjoyed the bagels nonetheless!
I really loved how these bagels tasted! But I did have issues with the rise. All my ingredients were fresh and I followed all the directions. Do you have any thoughts on what I could be doing differently to make them less flat? I was mainly worried after the boiling phase-my pot only fits about 2-3 bagels at a time so I left them at room temp until I boiled enough bagels to fit a baking sheet. Should they go straight from the boiling water to the oven? Any advice you have would be super helpful!
This is the second time I made this bagel recipe, and I love it! They have turned out so good! I have never tried another bagel recipe but I don’t think I need to. Time commitment is worth it!
Wonderful recipe. I wish I could say I followed it exactly, the yeast I had open was active not instant so the sponge took a bit longer which I knew would happen. After the sponge was ready everything fell into place as recipe states. Directions are clearly written and easy to understand and follow. Thank you for a wonderful recipe.
This is my second attempt at this recipe. While the first batch was edible. It seemed like they should have risen more. In the first step it never did double in size. Made them again today. Same issue. I even let it sit longer. I reduced the four by 3/4 cup also. Still not sure these are going to be much better
Great recipe! I substituted, bread flour, honey & baking soda and they still came out amazing!!!!!
I’ve made these several times now and they turn out amazing. making different variations with the toppings. The toppings stay on a lot better after brushing on an egg wash mixture. I now have to have these as a staple food all the time in the freezer! It’s only me eating them but so easy and handy. After baking leaving a few out of course; I cut them in half and freeze individually. takes no time to thaw out if I don’t want to toast; if toasting put in toaster frozen and they come out so delirious! thank you for the recipe. Hard to believe so few ingredients turn out so good! It’s hard not to have all the ingredients on hand.