Apple Hand Pies

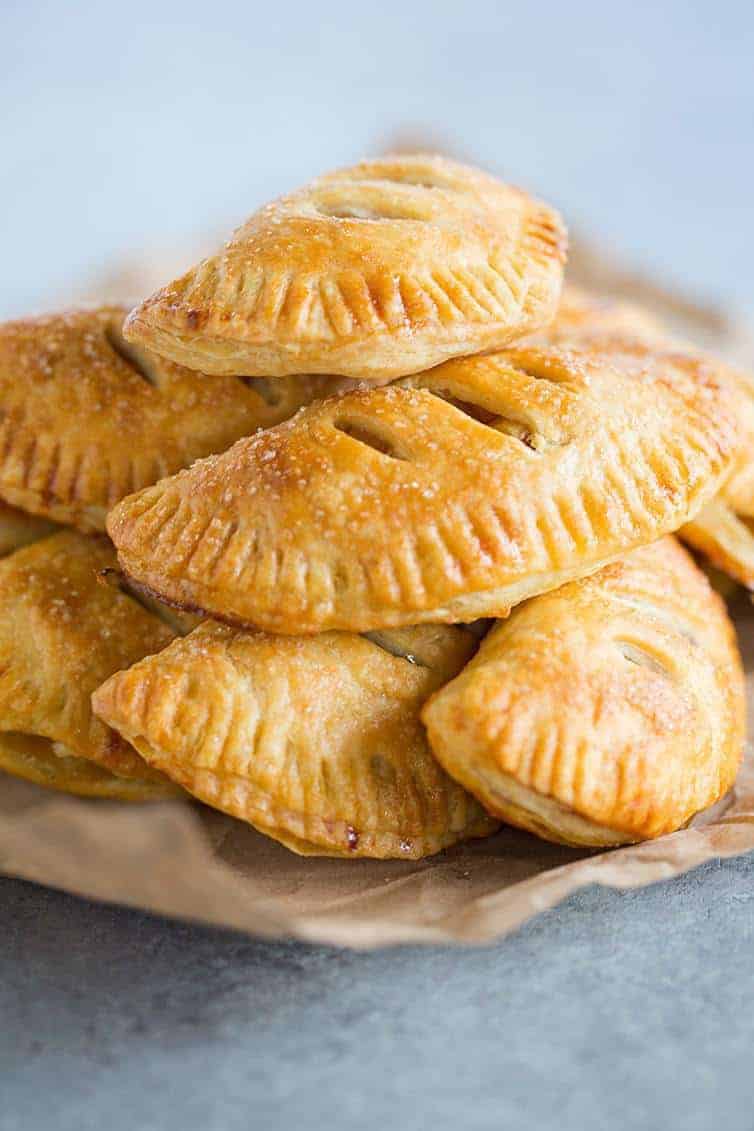
These Apple Hand Pies are portable and delicious, and bring back memories of those little pies in the grocery store checkout line. You could use this base pastry recipe and mix and match all sorts of pie fillings to suit your tastes and use up seasonal fruit.
Apple Pie: rustic, flaky, tart, and spicy. The most iconic of American traditions.
These marvelous little pies package up the best parts of apple pie, eliminate a lot of the work, and deliver scrumptious, addictive fruit-wrapped-in-crust that can be stowed away in your pocket for safe keeping.
I originally shared these apple hand pies with you way, way, wayyyyyyy back in the dark ages of 2008. It’s been quite a long time since I’ve made them myself, but when Joseph saw an episode of his favorite show, Hey Duggee, and it featured an apple pie, he proceeded to walk around the house saying “apple pieeeeeeeee” for days and days. He’d never had apple pie; how could I deprive my child of something so delicious?? I immediately thought of these hand pies, since they would be much easier for him to eat than a slice of apple pie, and I got baking!
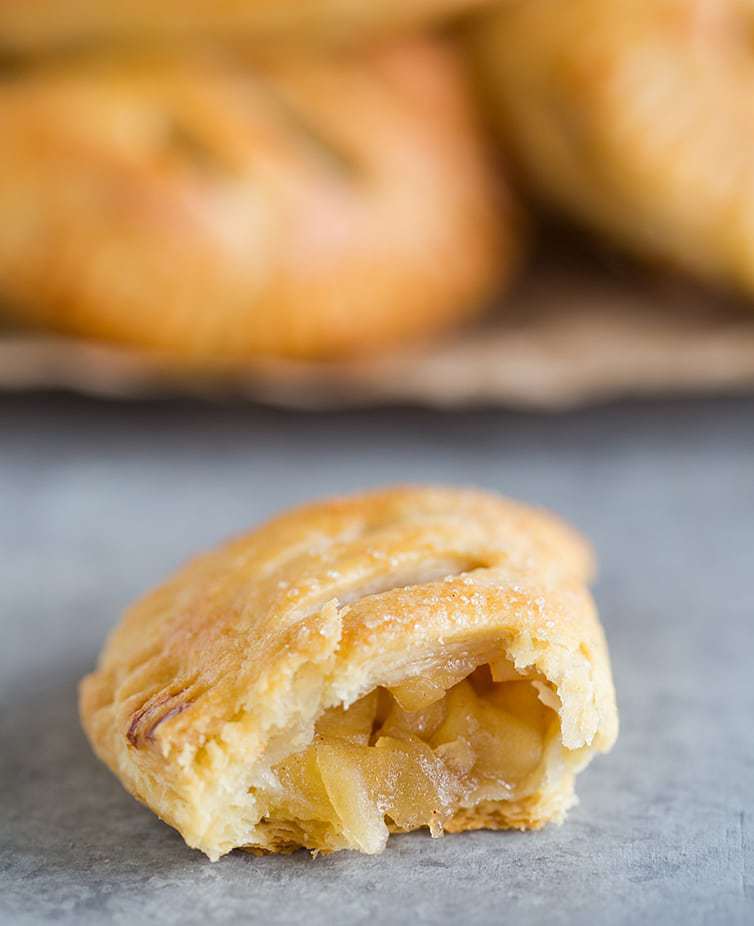
The dough for this recipe is really just incredible. I admit that I was somewhat skeptical at first, as it contained sour cream. I had never heard or seen sour cream used in a pie or pastry dough before, so it certainly caused me to raise an eyebrow. But like the good trooper that I am, I forged ahead. This dough has such an incredibly buttery, flaky texture, much like that of a laminated dough you would create for croissants. When you bite into one of these pies, the crust just flakes and shatters, which is basically a crust-lover’s dream come true.
I made two modifications to this recipe (and those changes are reflected in the recipe as it’s written below):
- The original recipe required A LOT of time chilling ingredients and the dough at different steps, which I have now condensed a bit. I didn’t find there to be any reduction in the quality of the final crust by doing so. I also made the dough mixing step a little easier to execute, as well.
- I added a little cinnamon to the filling – I can’t believe I left it out originally!
Save This Recipe
I couldn’t wait to get these baked and cooled enough for Joseph to try one. When I told him I had made him little apple hand pies, he said, “APPLE PIE?!?!”
I gave him half of one and he went over and sat on the fireplace, took a bite, and said, “Mmmmmmmm!” He polished it off quickly and then requested the other half. I’m so happy that I could make his apple pie dreams come true, ha!

These hand pies are a fantastic option for changing up the traditional slice of apple pie and ice cream and would be especially welcome as a dessert at an outdoor gathering or one that includes small children.
And really, for the kid in all of us – what’s much better than a slice of apple pie that you can pick up and carry around with you?
More Delicious Apple Recipes:
- Jewish Apple Cake
- Homemade Apple Butter
- Dutch Apple Pie
- Classic French Apple Cake
- Easy Apple Crisp
- Old-Fashioned Apple Dumplings
Watch How to Make Apple Hand Pies:
If you make these apple hand pies and love them, remember to stop back and give it a 5-star rating - it helps others find the recipe! ❤️️

Apple Hand Pies
Ingredients
For the Pastry
- 2½ cups (312.5 g) all-purpose flour
- ½ teaspoon (0.5 teaspoon) salt
- 1 cup (227 g) unsalted butter, chilled, cut into small pieces
- ½ cup (115 ml) sour cream
- 4 teaspoons fresh lemon juice
- ½ cup (125 ml) ice water
For the Filling
- 2 large apples, peeled, cored and diced small
- ⅓ cup (66.67 g) granulated sugar
- ½ teaspoon (0.5 teaspoon) ground cinnamon
- Pinch of salt
To Finish
- 1 egg yolk
- 2 tablespoons water
- Coarse sugar
Instructions
- Make the Pastry: In a large bowl, whisk together the flour and salt. Add the butter to the well and, using a pastry blender, cut it into the flour mixture until it resembles coarse meal. In a small bowl, whisk together the sour cream, lemon juice and water. Add to the flour mixture and, using a fork, gently toss and stir together until large lumps form and all of the flour has been moistened. Using your hands, pat the dough into a ball and wrap with plastic wrap. Refrigerate for 1 hour (if preparing ahead of time, the dough can be stored in the refrigerator for up to 2 days or in the freezer for up to 1 month).
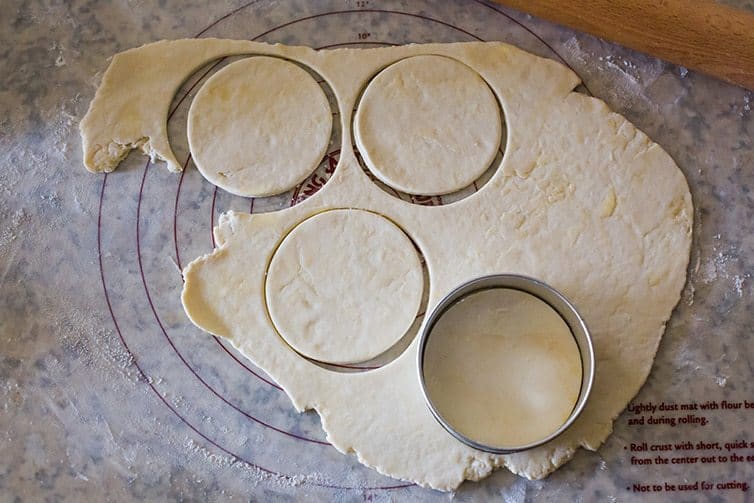
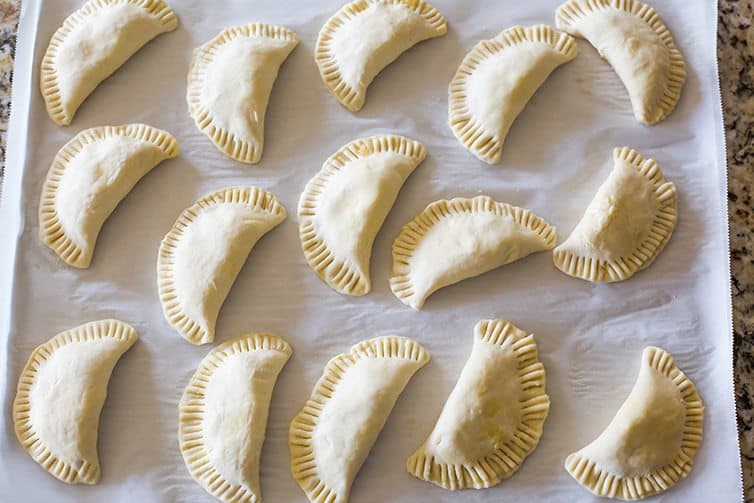
- Assemble the Pies: Line a baking sheet with parchment paper. Divide the refrigerated dough in half. On a lightly floured work surface, roll out one half of the dough to ⅛-inch thickness. Using a 4½-inch round biscuit cutter, cut seven circles out of the rolled dough. Transfer the circles to a parchment-lined baking sheet. Repeat the rolling and cutting process with the remaining half of dough. Refrigerate the dough circles for 30 minutes.
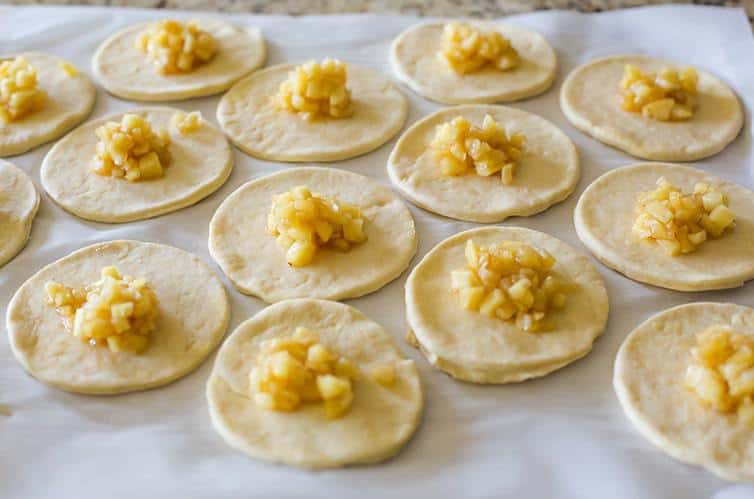
- Meanwhile, in a small pan, combine the apples, sugar, cinnamon and salt, and cook over low heat for 8-10 minutes, stirring frequently, until the apples are tender. Set aside. Prior to preparing the pies, drain any accumulated liquid from the apples.
- Remove the chilled dough from the refrigerator. Spoon about 1 to 2 tablespoons filling onto one half of each circle of dough. Brush a little water around the circumference of the dough, and fold it in half so the other side comes down over the filling, creating a semicircle. Seal the hand pie, and make a decorative edge by pressing the edges of the dough together with the tines of a fork. Refrigerate the assembled hand pies for 30 minutes.
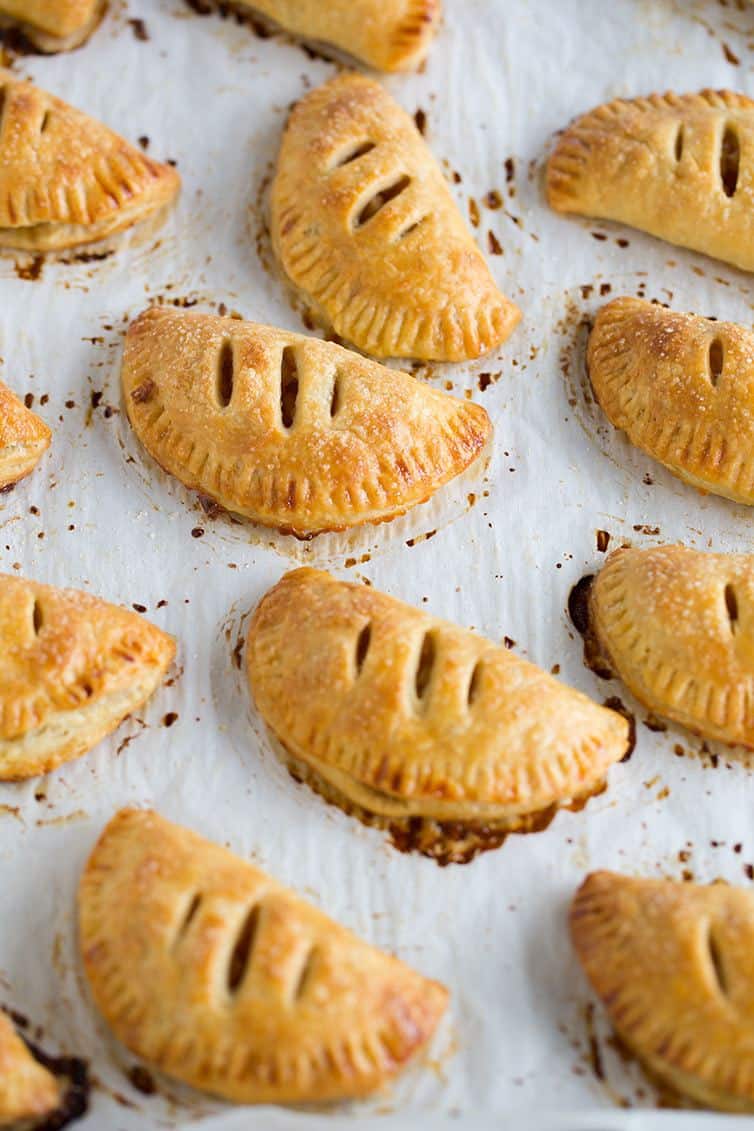
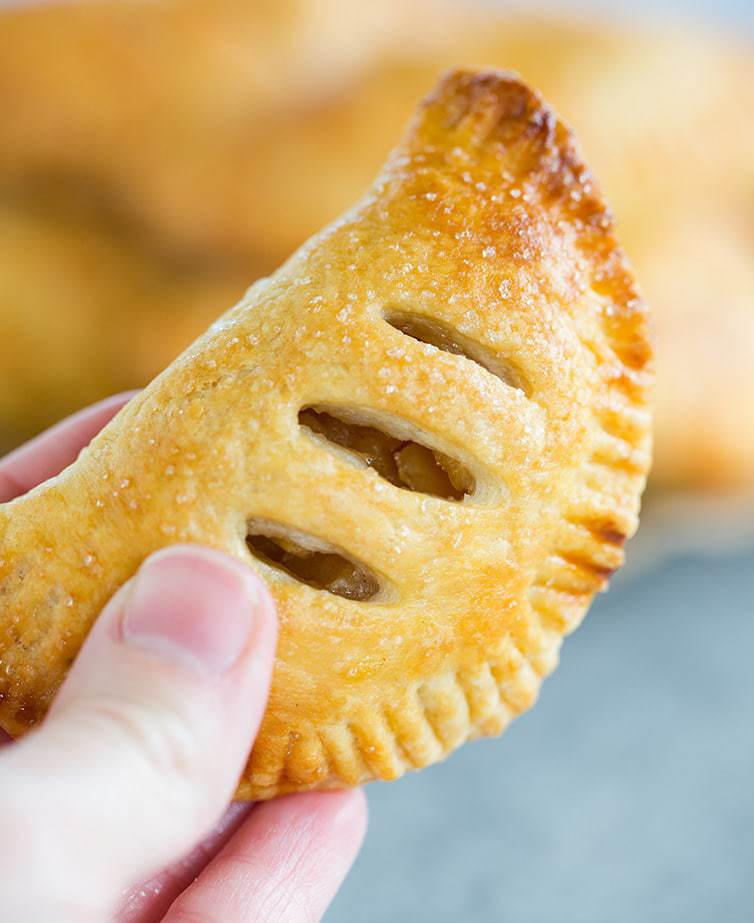
- Bake the Pies: Preheat oven to 375 degrees F. In a small bowl, whisk together the egg yolk and water for the egg wash. Remove the chilled hand pies from the refrigerator, and lightly brush with the egg yolk wash. Using a paring knife, cut a few small slits on the top of each hand pie, then sprinkle generously with coarse sugar. Bake until the hand pies are golden brown, anywhere from 20 to 40 minutes, depending on how thick you rolled the dough. Remove the pies from the oven, and let stand to cool slightly before serving. The pies are best eaten within a day of baking them, but they can be stored in airtight container at room temperature for up to 3 days. They can also be wrapped with plastic wrap and placed in a freezer storage bag and frozen for up to 2 months.
Notes
- Feel free to use any type of apple you’d like in this recipe, as it’s quite forgiving. I’ve used Granny Smith, Gala, and Honeycrisps!
Did you make this recipe?
Leave a review below, then snap a picture and tag @thebrowneyedbaker on Instagram so I can see it!
This recipe was originally published on October 15, 2008.


Do you think these would these freeze well after baking?
Yes, definitely!
The dough you made looks beautiful! Would you have any idea if it could be used for a full-sized pie (providing I made enough dough)?
i love em! Just finished a batch for the 4th of July, the crust is so worth the time!!!! Thank you for sharing!!!!
Ok..so I’m a guy..and a single Faza..and I like to keep the food I serve fresh and relevant for my boys, who are also athletes. These delicious treats are the perfect before a game snack because they are light and contain all of the requisite nutrition. I made them and they were everything promised in the recipe and more. This is the ideal method to make puff pastry as is it much less work and far less time consuming. I follow sk and have never been disappointed with any recipe.
My mind is replete with the many, many filling possibilities for these pocket rockets.
This recipe is outstanding.
Thank you .
SR
P.S. – I used Progressives Dough press set to make these. And I ran some home made caramel over the top after they cooled. Just met-in-your mouth delicious.
These look scrumptoius! I have an event in 2 days & want to make these. I also want to make the peach filling. Any suggestions where to find a really good peach filling recipe? (peaches aren’t in season yet, so.. no fresh ones.)
Hi Jana, Hmm I’m not sure, could you use frozen peaches? Sometimes they have them in the freezer section with the frozen fruit. Otherwise, I wouldn’t be sure about a peach filling unless you bought it canned or jarred?
You can make peach pie filling from canned sliced peaches, look on the internet. The one I made was delicious and everyone loved it.
These look great, and I really want to try them, but I have a question, when you say “remove the large lumps” after adding 1/2 of the liquid, do you literally mean remove them to a separate bowl?? I was slightly confused on that part and found your directions not very clear.
Also, could the dough be made in a food processor?
Hi Roberta, Yes, remove them to a separate bowl, then proceed with the next half. Then combine everything (including original lumps) into a ball.
Although I haven’t, I don’t see why you couldn’t use a food processor for the crust. Just pulse in short bursts so you don’t overwork the dough.
Absolutely adorable! These liitle pies a fabulous! AND the pastry cutter that you use in this post is amazing!!!! Where did you find such a great pastry cutter with a long handle on it? My pastry cutter is one of my most favorite tools in the kitchen so I am immediately attracted to yours….:-)
Hi Avril, That pastry cutter is from Pampered Chef. It’s great!
Check out the pamperedchef website and you can order the pastry cutter
http://www.pamperedchef.biz/nicolehelmer
WOW! These are definitely a lot of work with the preparation of the dough, but they’re so delicious that they’re worth the effort. Thanks for sharing a great recipe!
You’re welcome Felicity! Glad you found them to be worth the effort :)
I made a batch of these last night for dinner guests. They were everything you said they would be. The recipe is simple, produces the flakiest pie crust and has maximum flavor.
FYI, I did not chill the dough as directed; no time & in a hurry (guests arriving). The dough was just stickier to work with but for the effort, I still got great results. I would suggest using an empanada press to make the mini pies. They come in various sizes up to 7.5″. I’ve never had much luck with pies but feel encouraged to make them after my foray with these mini pies. The crust is the secret ingredient to this recipe. Adding cinnamon to the apples as they cook was also a winner. I’m new to your site but am very grateful for the time you take to share with us. Thank you.
I just made these today, I was telling myself I would never do them again (because they DO take a lot of time) until I tasted one of them right out of the oven… Oh my god, flakiest crust I’ve ever tasted in my life. Thank you so much for the recipe! I did add a little bit of cinnamon because I love it. And used a couple more of apples.
Hi Alisha,
Actually a pastry blender is just a handheld gadget that cuts butter into a flour mixture. You can see one here:
http://www.assoc-amazon.com/e/ir?t=broeyebak-20&l=as2&o=1&a=B000QJE48O
If you don’t have one you could simply use two knives or even your fingers to combine the flour mixture and butter.
Let me know if you have any additional questions!
I was wondering if you could use a regular blender instead of a pastry blender?
Hi Amy,
I did make a steam hole in the top of the hand pies – just a slit using a paring knife. I will go back and edit the directions. I hope you enjoy these!
It looks like you made holes in the top of the pies before baking. I didn’t see that in the instructions. Did you make a steam hole?
mmmm i love hand pies!
Agh you’ve been baking so many delicious tempting things! I totally have to try this too. Your hand pies look just perfect. I love the flakey dough mmm.
I tried making these and while the recipe was fantastic and easy, I found that 2 apples were not enough (maybe mine were smaller than the ones you used). I do plan on trying this again with more filling (and more variations on the filling)!
Kay- I was worried about the quantity as well. I found that dicing the apples REALLY small helped spread it out more- also I used the 4″ cutter so that may have helped.
Wow. I’m drooling! These look amazing.
+Jessie
a.k.a. The Hungry Mouse
Wow! This is amazing! I can’t wait to try this. I’m Hispanic and am wondering if you have ever done any Mexican pastries like empanadas, pumpkin being my favorite, since it’s very similar to these apple hand pies.
what a gorgeous pastry! I love the pic!
These look like a perfect way to use up the rest of my apples!
How adorable, they look fantastic!
All I have to say is…YUM!!!! I love baked apples
I love mini desserts and these pies are so adorable. I love the flaky crust and the apples look fantastic!
I love the idea of handpies – little mini pies!
Hand pies just make everyone happy :) I;m glad to see the pastry is without shortening as a lot of pie doughs require them. I remember eating the mini ones from my cafeteria as a kid, but I bet these are ten times better.
These look so good and flaky! I’ve been wanting to make these ever since Deb posted them. I’m thinking about making them next weekend for an event I’m baking for, so hopefully I’ll get to try them soon :)
They look great! I wish I had been able to take a pic of the inside to better show the pretty, flaky crust but I didn’t want to interrupt things with our guests :) Great process pics too!
Oh, these look delicious. I could eat way, way too many.
That’s some gorgeous pastry – LOVE the sugar sprinkle! I bet they’d make a really awesome just got home from work snack too – I’m on my way over.