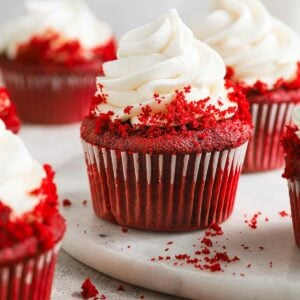
Red Velvet Cupcakes with Cream Cheese Frosting
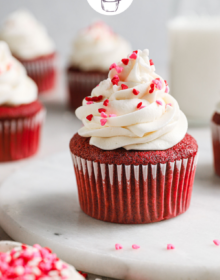
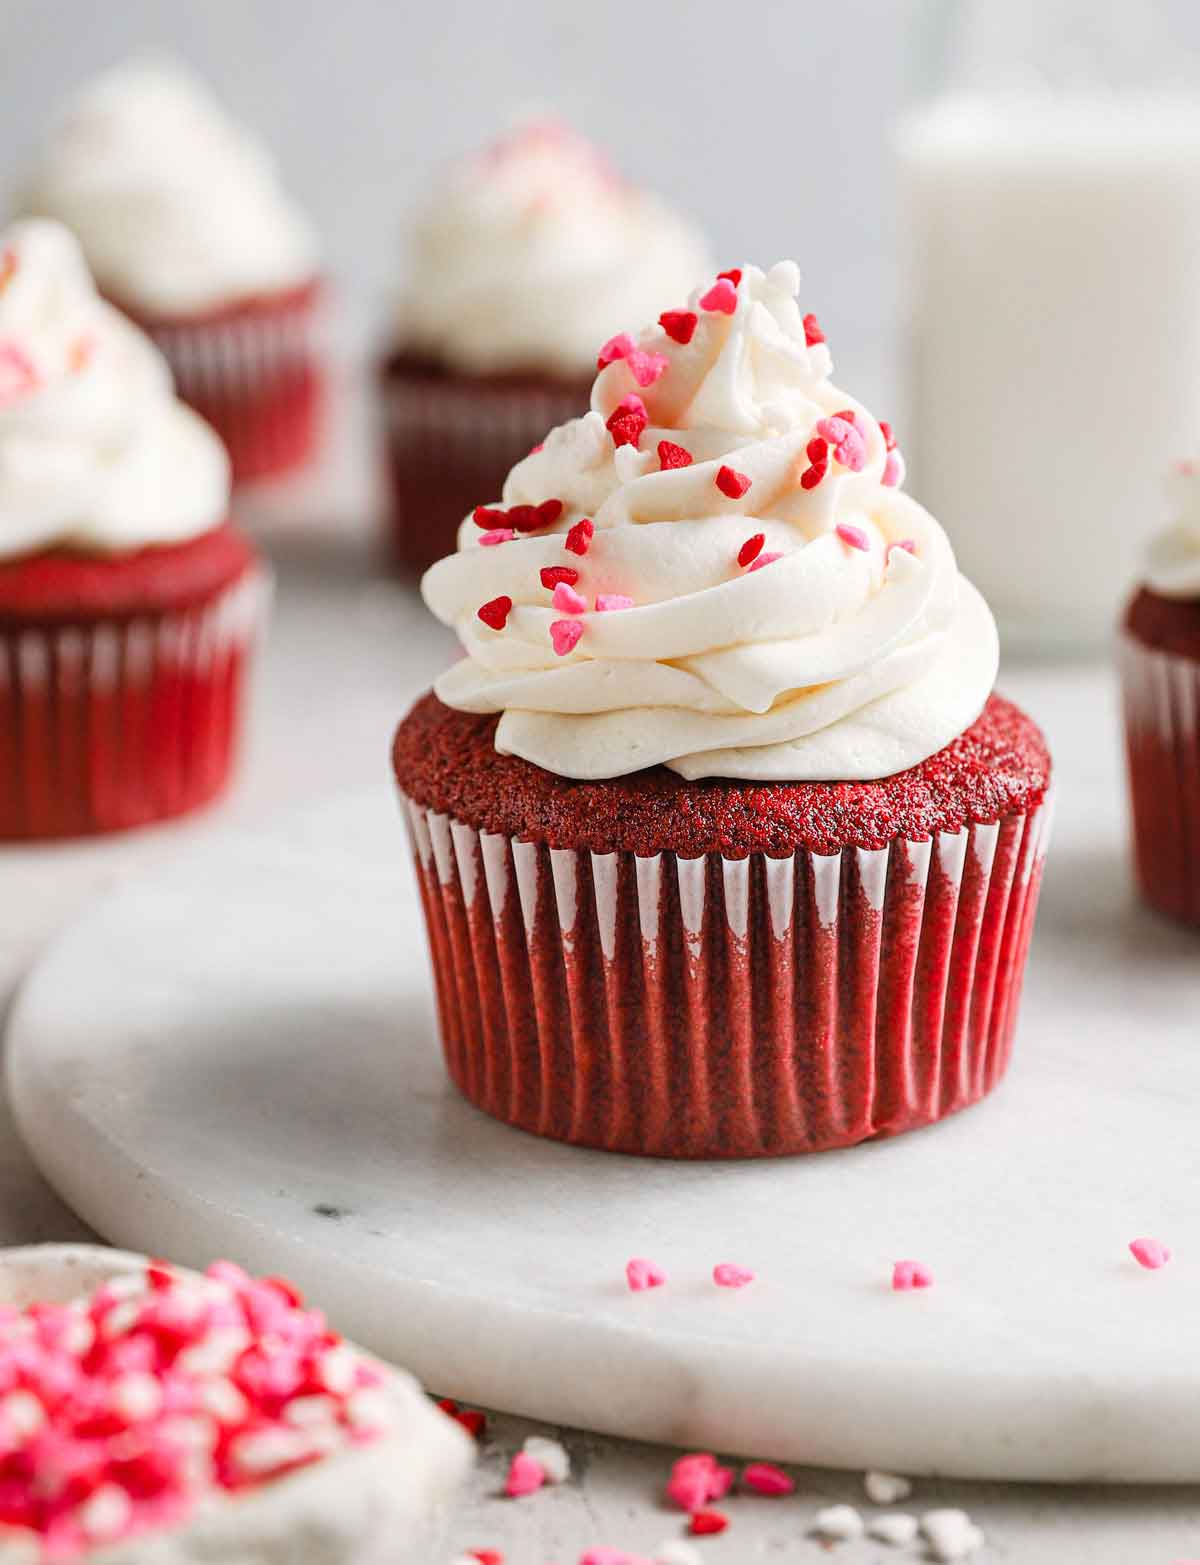
These red velvet cupcakes are a gorgeous red color, moist and fluffy, have the most amazing flavor, and are topped with a luscious cream cheese frosting. An easy recipe that is great year-round!
I found long ago that getting a really, really good red velvet cupcake could be totally elusive. Some are dry, some are TOO red. It propelled me to make a great version at home.
I did some reading, I looked at a lot of recipes, and in the end I decided to try this one, which originated at the Hummingbird Bakery. And I'm so glad I did, because I don't think a better one could exist.
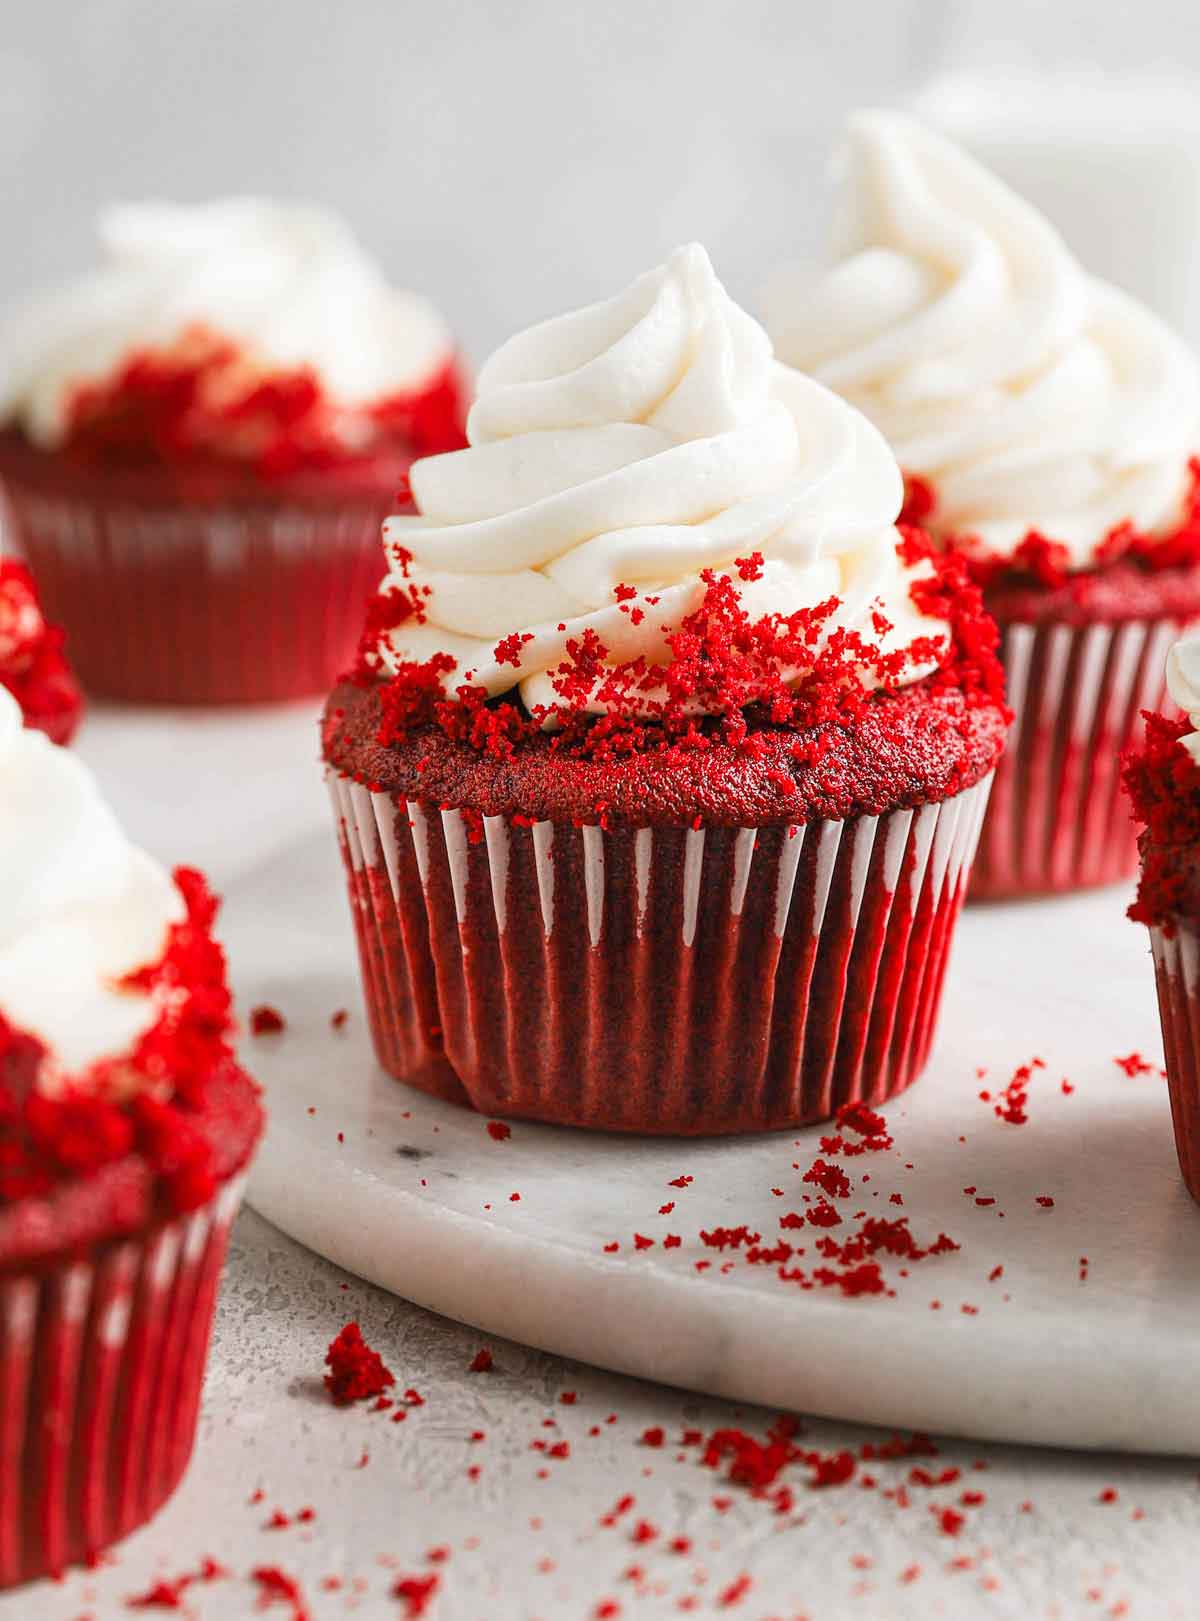
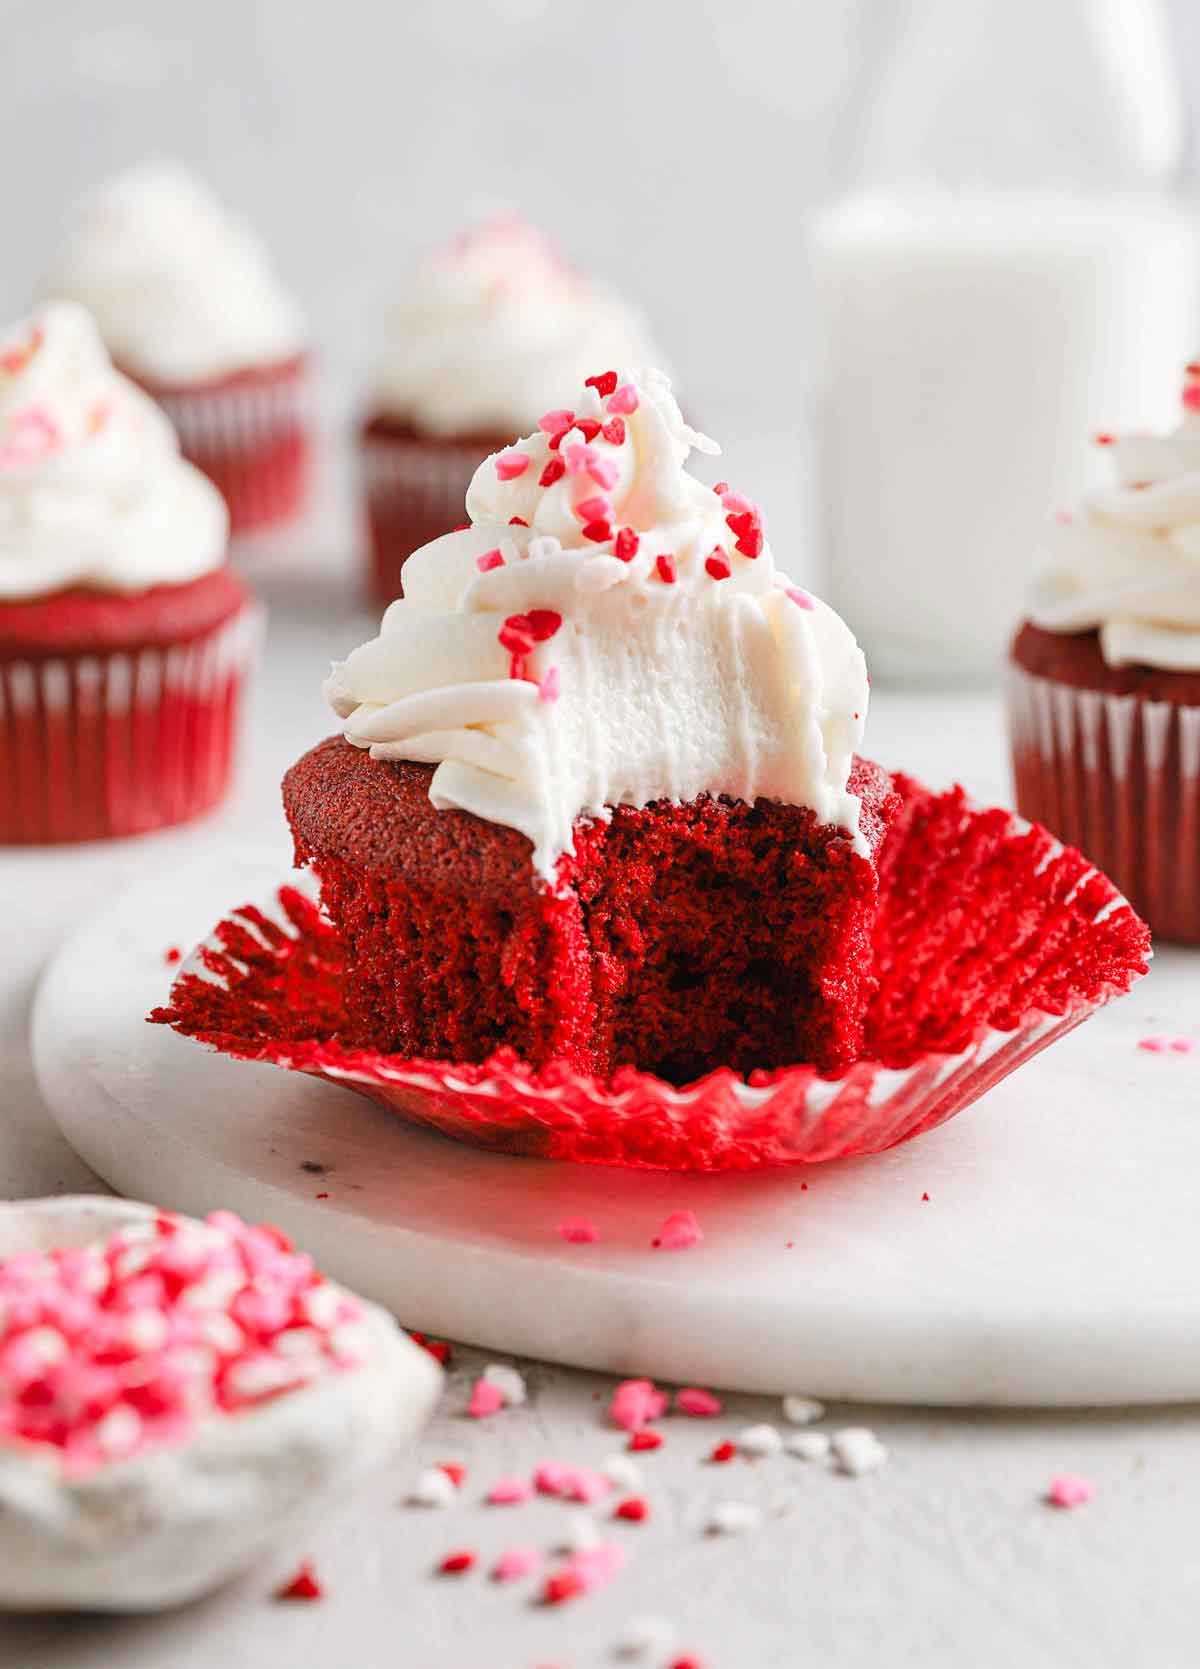
If you are looking for a super moist red velvet cupcake recipe, this is IT! They are everything you could hope for - moist, fluffy, a tiny bit chocolatey, and a perfect vehicle for a heaping pile of cream cheese frosting!
Don’t save these just for Valentine’s Day; they are great at Christmas, birthdays, or as an everyday treat!
Key Ingredient Notes
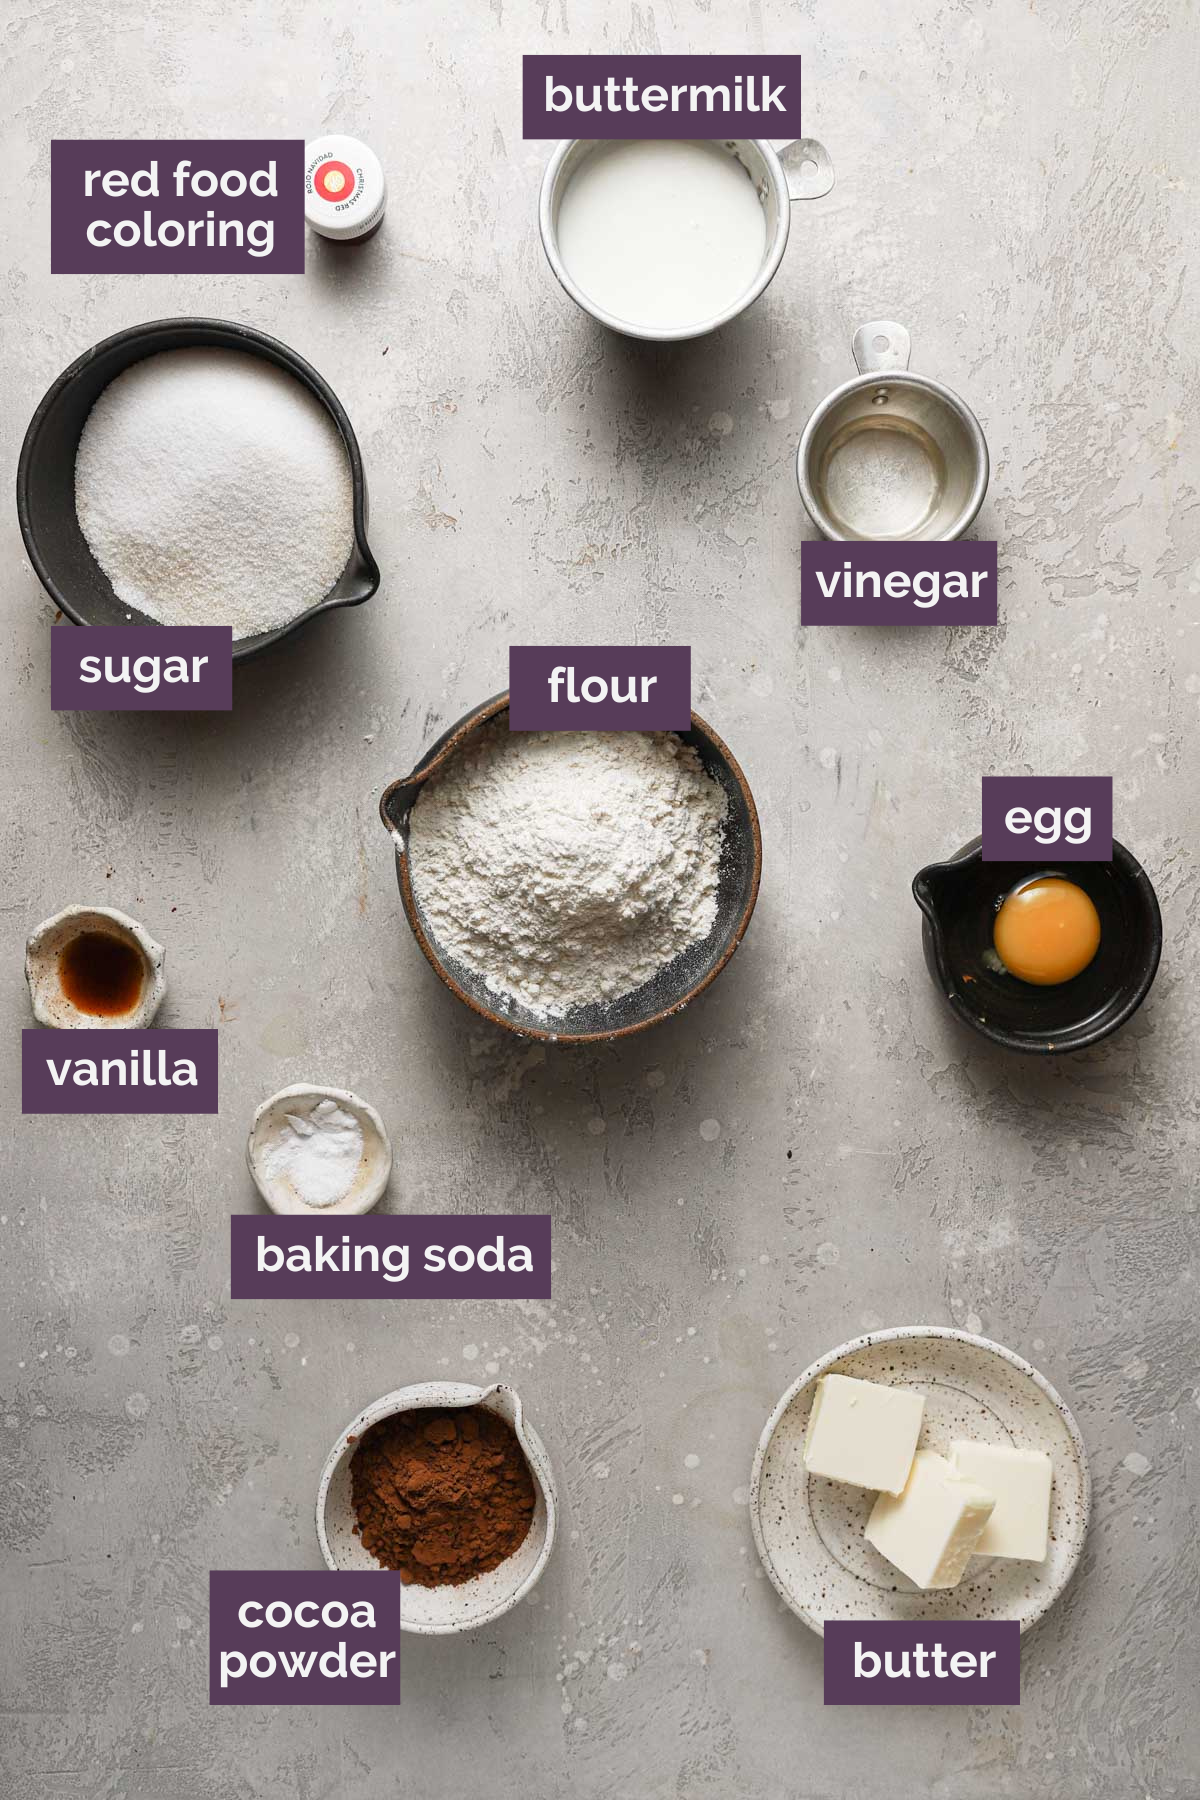
While we use some pantry staples like flour, sugar, and vanilla extract, below are notes on the essential ingredients for our red velvet cake recipe:
- Cocoa Powder – Use unsweetened, natural cocoa powder here. We want to avoid Dutched since it has already been alkalized.
- Vinegar – The reaction of the vinegar with the buttermilk helps to pull out the red hue in the cocoa powder. For this recipe, we use white vinegar, but you could also substitute apple cider vinegar.
- Buttermilk – Using soured milk is a key component to red velvet cakebatter, as the acidic liquid is needed to combine with the baking soda and cocoa powder to get the rise and texture right.
- Baking Soda – This works magic with the cocoa powder and buttermilk to get a beautiful rise and tender crumb.
- Red Food Coloring – We want to boost that beautiful red color! You can use either 2 tablespoons of liquid food coloring or 5 to 6 drops of gel food coloring.
How to Make Red Velvet Cupcakes
Step #1: Preheat oven to 350 degrees and line a standard muffin tin with paper liners.
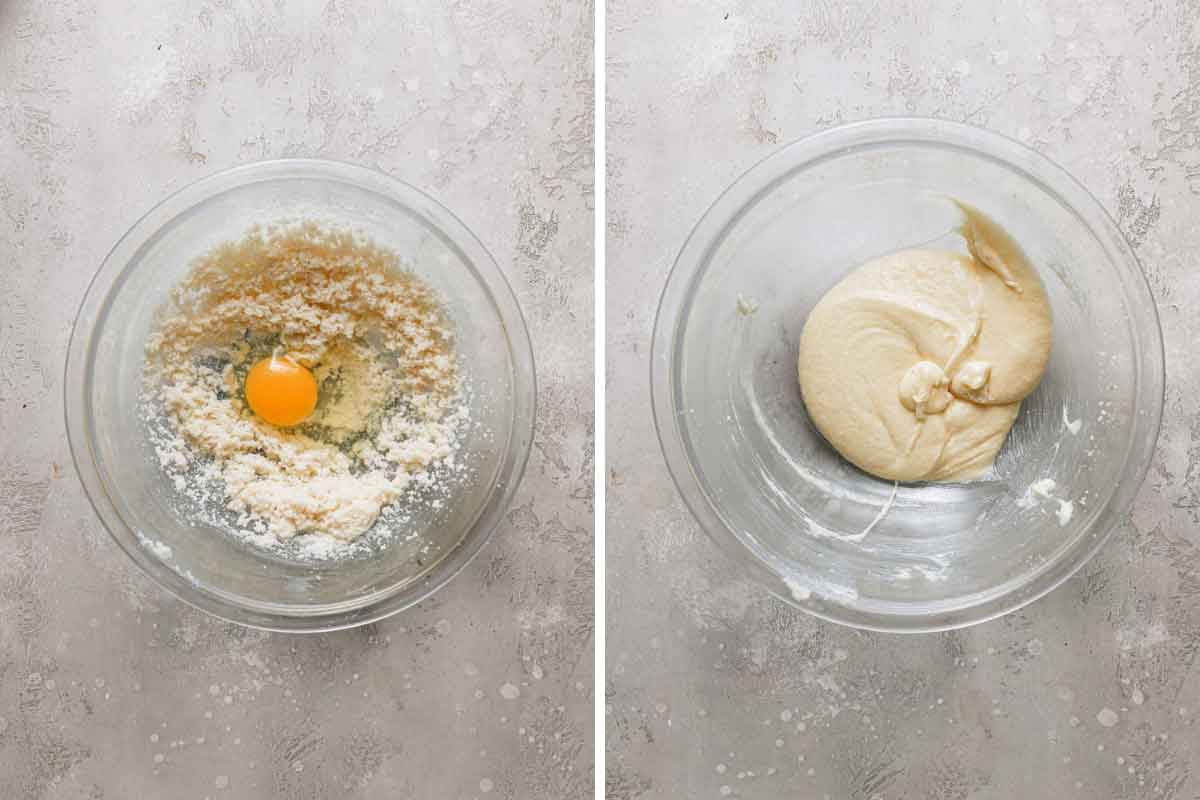
Step #2: Cream the butter and sugar together, then add the egg and beat until well incorporated.
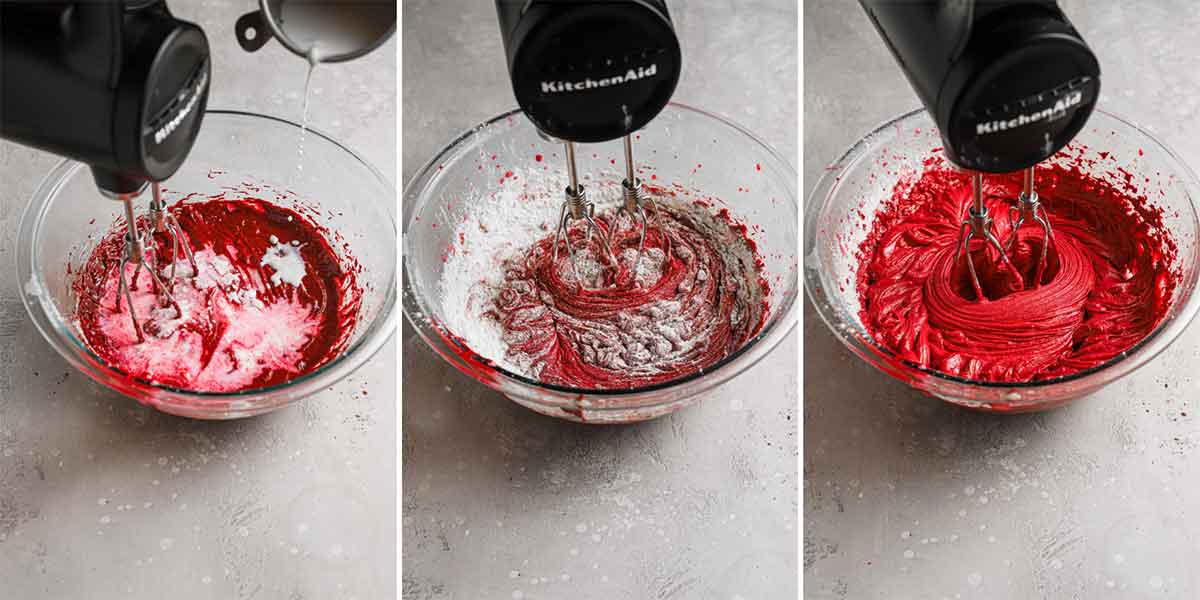
Step #3: In a separate bowl, combine the cocoa powder, vanilla extract, and red food coloring, which will make a thick paste. Add it to the batter and mix until combined.

Step #4: On low speed, alternate adding the buttermilk and flour, then beat on high until smooth.
Step #5: On low speed again, add the salt, baking soda, and vinegar. Beat on high until the mixture is completely combined and smooth.
Save This Recipe
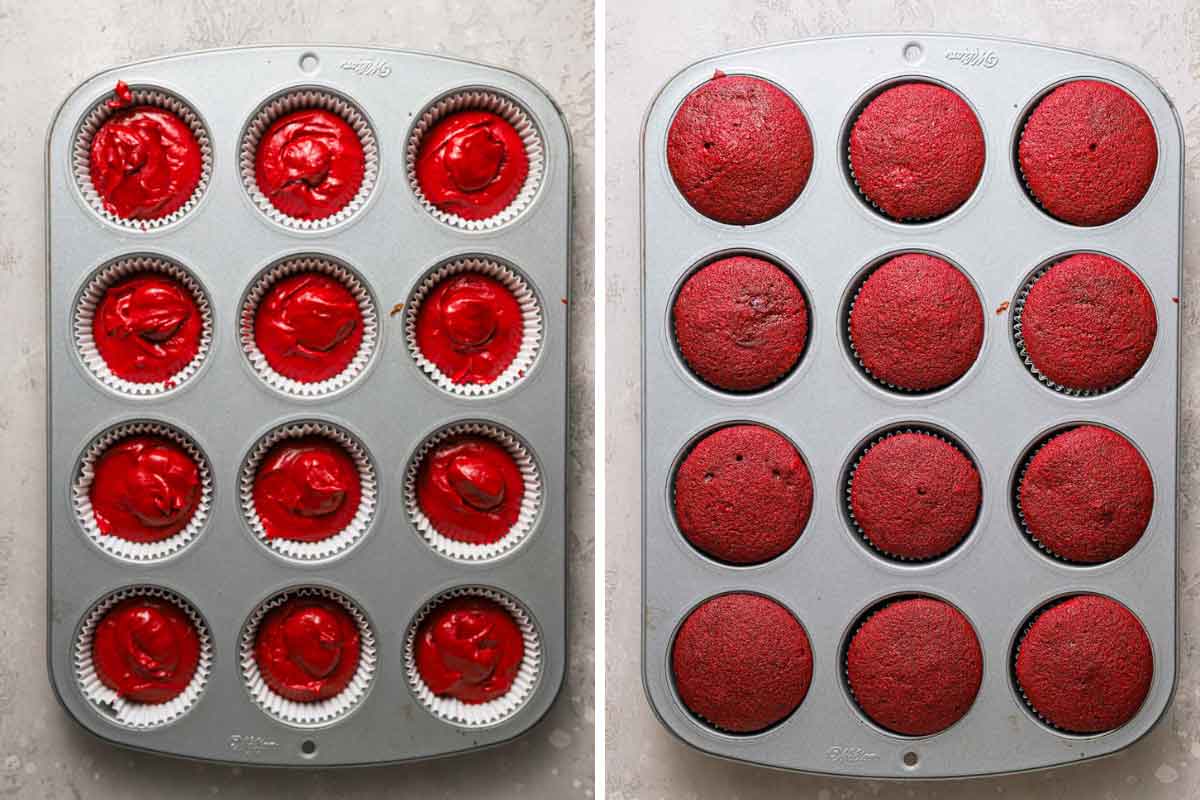
Step #6: Divide the cupcake batter evenly between the liners and bake for about 20 minutes. Cool in the pan for 10 minutes then transfer them to a wire rack to cool completely before adding the frosting.
Decorating the Cupcakes
I love to pair red velvet with my favorite cream cheese frosting; it’s so thick and luscious, plus the slight tang is a great contrast to the sweetness of the cupcake. However, you could also use a seven-minute frosting, vanilla frosting, or even a chocolate frosting!
Some decorating options:
- Use an offset spatula to spread the frosting on the cupcakes.
- Place frosting in a piping bag and use piping tips to pile the frosting high! My favorite tip for those pretty swirls on the top of cupcakes is a Wilton 1M or Ateco #826 open star tip.
- The most traditional garnishment for red velvet cupcakes is to crumble one cupcake and use the cupcake crumbs to decorate the other cupcakes.
- Or use your favorite sprinkles, popular options are heart sprinkles or red, white, and pink jimmies!
Recipe Notes & Tips
- Buttermilk Substitute: If you don’t have buttermilk on hand, use this at-home substitution – Pour 1 teaspoon of lemon juice or white vinegar into a measuring cup. Add enough milk (I recommend 2% or whole) to measure 1 cup total. Stir together and let it sit for 5 minutes, then use it as directed in the recipe below.
- Adjusting to Make a Whole Cake: This recipe can be doubled to yield two 9-inch cake layers (bake time 25 to 30 minutes), or a 9×13-inch cake (bake time about 30 minutes).
- Mixer: This recipe can be successfully made using either a stand mixer or a hand mixer; either one will work!
Storage & Freezing Instructions
- Unfrosted Cupcakes – Unfrosted cupcakes can be kept in an airtight container at room temperature for up to 2 days. They can also be frozen for up to 3 months in a freezer-safe container or bag; thaw at room temperature (should take 30 minutes to 1 hour).
- Cream Cheese Frosting – The frosting itself can be made and stored in the fridge in an airtight container for up to 1 week. It can also be frozen in a freezer-safe container or bag for up to 3 months; thaw in the refrigerator overnight.
- Frosted Cupcakes – Frosted red velvet cupcakes can be kept in an airtight container and refrigerated for up to 1 week. I do not recommend freezing the frosted cupcakes.
More Red Velvet Recipes to Try:
- Red Velvet Cheesecake
- Red Velvet Poke Cake
- Red Velvet Roll Cake with White Chocolate-Cream Cheese Filling
- Red Velvet Whoopie Pies
- Red Velvet Ice Cream
Watch the Recipe Video:
If you make these red velvet cupcakes and love them, remember to stop back and give them a 5-star rating - it helps others find the recipe! ❤️️
Red Velvet Cupcakes
Ingredients
For the Cupcakes:
- 4 tablespoons (57 g) unsalted butter, at room temperature
- ¾ cup (149 g) granulated sugar
- 1 egg
- 2½ tablespoons (13 g) unsweetened cocoa powder
- 2 tablespoons red food coloring
- ½ teaspoon vanilla extract
- ½ cup (120 ml) buttermilk
- 1 cup (125 g) + 2 tablespoons all-purpose flour
- ½ teaspoon salt
- ½ teaspoon baking soda
- 1½ teaspoons distilled white vinegar
For the Cream Cheese Frosting:
- ½ cup (113 g) unsalted butter, at room temperature
- 2 cups (227 g) powdered sugar
- 1 teaspoon vanilla extract
- ¼ teaspoon salt
- 8 ounces (227 g) cream cheese, chilled and cut into 8 pieces
Instructions
- Preheat oven to 350 degrees F. Line a standard muffin/cupcake pan with liners.
- On medium-high speed, cream the butter and sugar until light and fluffy, about 3 minutes. Turn the mixer to high and add the egg. Scrape down the bowl and beat until well incorporated.
- In a separate small bowl, mix together the cocoa powder, vanilla extract and red food coloring to make a thick paste. Add to the batter and mix on medium speed until completely combined. You may need to stop the mixer to scrape the bottom of the bowl, making sure that all the batter gets color.
- Reduce the mixer speed to low and slowly add half of the buttermilk. Add half of the flour and mix until combined. Scrape the bowl and repeat the process with the remaining milk and flour. Beat on high until smooth.
- Again, reduce the mixer speed to low and add the salt, baking soda and vinegar. Turn to high and beat for another couple of minutes until completely combined and smooth.
- Divide the batter evenly between the cupcake liners and bake for about 20 minutes, or until a thin knife or skewer inserted into the center of the largest cupcake comes out clean.
- Cool for 10 minutes and then remove cupcakes from the pan and place them on a cooling rack to cool completely before frosting.
- Make the Frosting: Using an electric mixer, beat the butter, powdered sugar, vanilla, and salt on low speed until smooth, then mix for an additional 2 minutes, scraping down the bowl as needed.
- Increase the speed to medium-low and add the cream cheese one piece at a time and mix until smooth, then mix for an additional 2 minutes.
Notes
- This recipe can be doubled to make an 8 or 9-inch layer cake.
Did you make this recipe?
Leave a review below, then snap a picture and tag @thebrowneyedbaker on Instagram so I can see it!
This recipe was originally published on November 8, 2010.
Photography by Dee Frances.


Found this recipe for my daughter’s 16th birthday, she requests them every year. Making them for her 25th next week. Excellent!!!
Very soft and fluffy
Amazing
Baker beware – if you’ve made this recipe in the past, and look forward to the incredible perfection that was this cream cheese frosting – be warned that it has been changed sometime in the last year (even though the link is the same). It used to be equal parts butter/cream cheese, started by creaming both together, then adding the powdered sugar. Now it’s double the amount of cream cheese and adding that last, after the powdered sugar. Unfortunately I didn’t realize until mere hours before my son’s birthday party, I was frantically making the frosting, thinking I KNOW I LOVE this frosting, but it sure seems weird this time! Only to have it turn out very different and unsurprisingly more … cream cheesy than frosting. I guess it’s not bad overall – but definitely doesn’t hold a candle to the original. I’ve had this problem with some other baking websites and am sad to see BEB doing the same revisionist tweaking.
These are great! Best cream cheese frosting I’ve ever made. Not too sweet, and no problem with being too soft like most cream cheese frostings!
The amount of butter required seems pretty low for that much sugar?
My go to red velvet cupcake recipe! Always a hit, and my family requests these often!
I thought the taste was good. However, I used gel food coloring and the measurement given for it doesn’t really work. It says to use a certain amount of drops, but the gel coloring I have is thick and doesn’t drop. It needs to be in a measurable amount like the regular food coloring is given. Because of this I ended up not using enough and my cake was not red.
I tested 4 red velvet cupcakes last night and these were the most authentic. There were a few recipes that tasted like good basic cupcakes, but they didn’t have the signature velvety texture I expect from red velvet. This manages to combine the flavor and texture of classic red velvet without being dense or dry. Thank you for sharing! I knew I could count on Brown Eyed Baker. 🙏🏼 Ps. This definitely makes 12 tiny cupcakes. I filled them a little more and got a solid 9 regular size.
it looks really sweet, I want to make it every morning to perfect my creations by continuing to learn, thank you for the perfect writing
So good! Made them this week after your post. Nice and easy recipe and love that the frosting isn’t too sweet. The grandkids loved them! Definite keeper.
Delicious recipe and so easy to make. The cream cheese frosting was just sweet enough and light and fluffy.
Can you recommend a natural food coloring instead of products using artificial colors?
Great recipe Very moist and it makes exactly 12. Thank you for sharing the recipe.
I haven’t made these yet, it’s my son’s favorite cake, so I’m going to try and make the cupcakes. Thank you so much for the recipe. 🤗
I made it for a girl I work with. It was her birthday and she loves red velvet. I had never made red velvet anything and I was so impressed by this recipe. Everyone LOVED it. I mean they raved about it for days. Total success. Thanks for a great recipe that I’ll continue to use.
BEB is my first stop when I’m searching for a recipe. She always seems to have what I need and the results is delicious. I made these cupcakes for my grandson’t birthday. They were perfect! So tender and moist. Will definitely make again. Thanks BEB for another fabulous recipe.
It’s is amazing The only Problem I have with this recipe is it never states when to get your flour ready I hope this won’t be a problem in the future other than that my Cupcakes came out amazing Thankyou!!!!
Exactly what red food coloring you used for this recipe?
Hi Michelle, I love your page so much. I have been making this recipe for a while now but I was wondering can you do half butter and oil or all oil instead of butter etc? Just wondering about substitutions that you might recommend? Thanks!!!!!
Hi Denise, I haven’t tested it, but you can definitely give it a try!
Can I use salted butter and omit the salt?……..emergency cake on hand and dont have unsalted butter please help
Yes, you can!
You switch from tablespoons or sticks to ounces of butter from the batter to the frosting.. I almost used 4 tablespoons of butter in the frosting until I started making it and realized that just seemed all wrong. I guess this is why cookbooks have editors.
Wat can I substitute with buttermilk?
Hi Tamisha, You can find substitute instructions for buttermilk here: https://www.browneyedbaker.com/common-baking-substitutions/
Cupcakes did not rise. I am a seasoned Baker, not sure what happened.
Made a carrot cake right after, no problems.
Yes we made it it was so delicious!!!!!
The red velvet cupcake recipe only made 8 small cupcakes. We made sure we put in all the right amounts of everything, but it still made less than what it said it would make.
This recipe is so good! I use 6 ounces cream cheese in the frosting though.
I just made these and I haven’t even tried them yet, but let me tell you, they look amazing! Just a tip to anyone who doesn’t have any regular food coloring like me: I used 1 tsp gel food coloring with about 3 tsp of water. Hope that helps!
Made them for the first time. I will post on Instagram. They turned out great but wow… Lots of work!
Hi there!! I might get this recipe today thinking that it was one that I had seen online many many years ago probably 10 years ago to be exact. And I could have sworn this was the place that I got the recipe from because I remember the name Brown eyed Baker. But I could have sworn the person that I got the recipe from had different pictures on the recipe post. Did you by any chance happen to change the pictures on this recipe? I remember the red wasn’t as vibrant it was a more of a burgundy the first time it was posted if this wasn’t factor recipe that I’m thinking about. And the frosting was more spread on there than it was piped. I made them today and they didn’t taste exactly the way that they used to when I used to make this recipe back in high school. they used to be more moist today’s cupcakes came out a little dry and they came out crunchy on the top and I made them exactly the same as in the video and directions home kind of wondering where it went wrong and if this was or was not the recipe that I was looking for. so I guess my question is did you change the pictures and was it a darker red when you originally posted this maybe 10 years ago?
I did take new photos but I did not change the recipe at all.