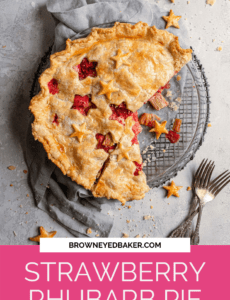
Strawberry Rhubarb Pie Recipe
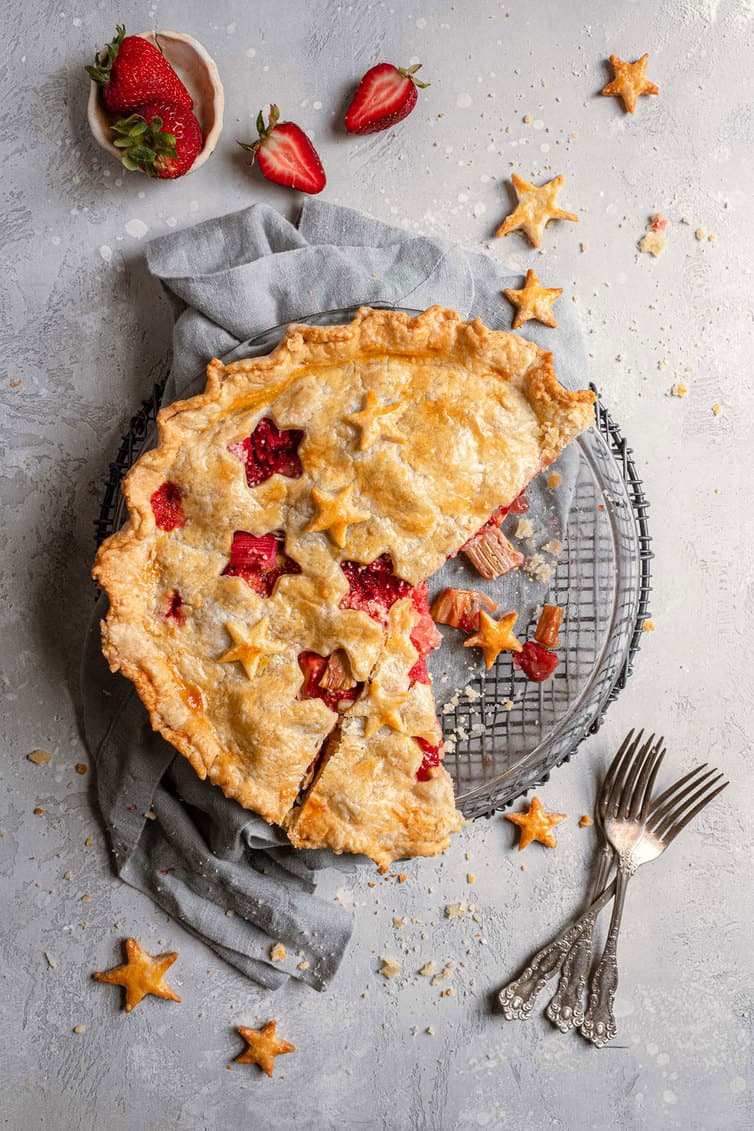
This old-fashioned strawberry rhubarb pie recipe features a tender, flaky crust and a filling that highlights the delicious combination of sweet strawberries and tart rhubarb with a touch of citrus. Included are tons of tips to ensure the filling thickens beautifully, how to use frozen fruit, as well as make-ahead and freezing instructions for preparing different components ahead of time.
Did you grow up on strawberry rhubarb pie? No one in my family ever made it and it wasn’t until I was baking on my own as an adult that I began experimenting with rhubarb. What a delicious discovery!
The combination of rhubarb and strawberry is a fruity match made in heaven. The sweetness of the strawberries balances out the bitterness of the rhubarb, and they both break down quite a bit in the pie so it almost becomes one beautiful, sweet, slightly tart, pink pie. Basically, it’s everything wonderful about summer in a pie.
A quick lesson on rhubarb
If you’ve never had it before (I was in my late 20’s before I was introduced to it!), you might be wondering what exactly is rhubarb?
It basically looks like pink celery; it comes in stalk form with leaves on the end and is in season during the spring and early summer. It has a fairly bitter flavor, so it is usually not eaten raw, but rather cooked down and sweetened in some form. It pairs incredibly well with strawberries and strawberry-rhubarb pie is its claim to fame!
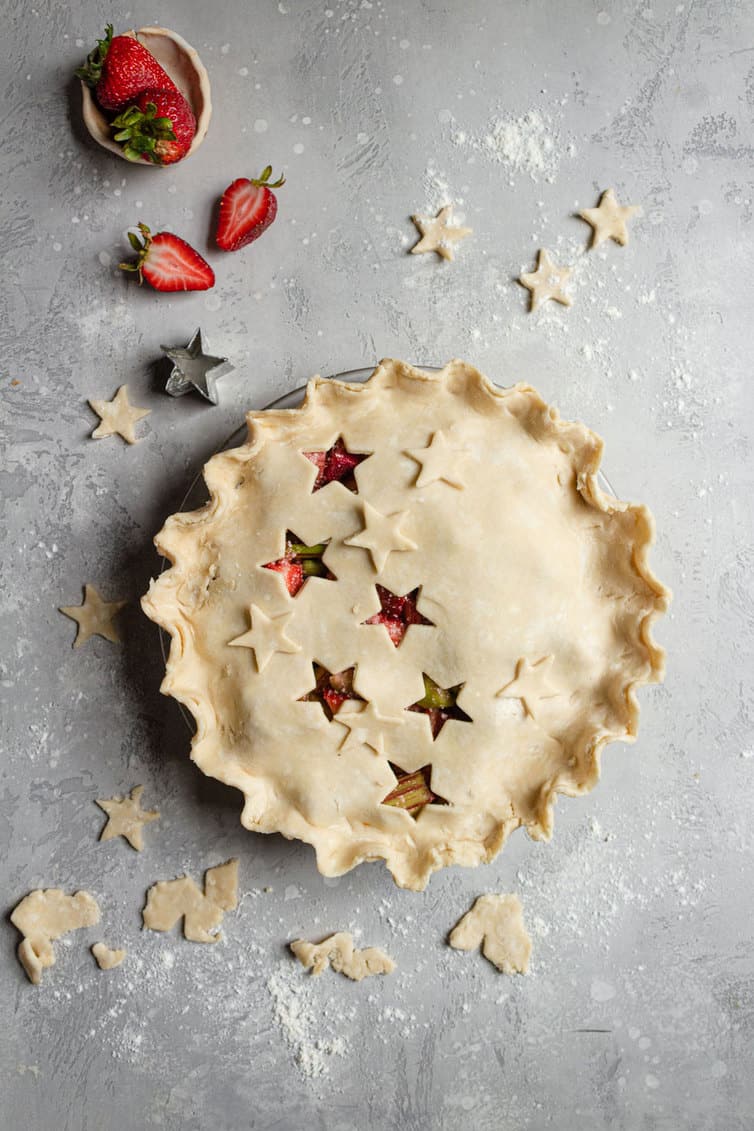
To prepare rhubarb for pie baking, simply remove the leaves if they are still attached (the leaves are poisonous and should not be eaten; most rhubarb sold in grocery stores already have the leaves removed), rinse and dry it, trim off the ends and then cut it as described in the recipe. For this pie, we’ll be cutting it into 1-inch pieces.
Save This Recipe
Key strawberry-rhubarb pie ingredients
A few notes on the main ingredients in this strawberry rhubarb pie:
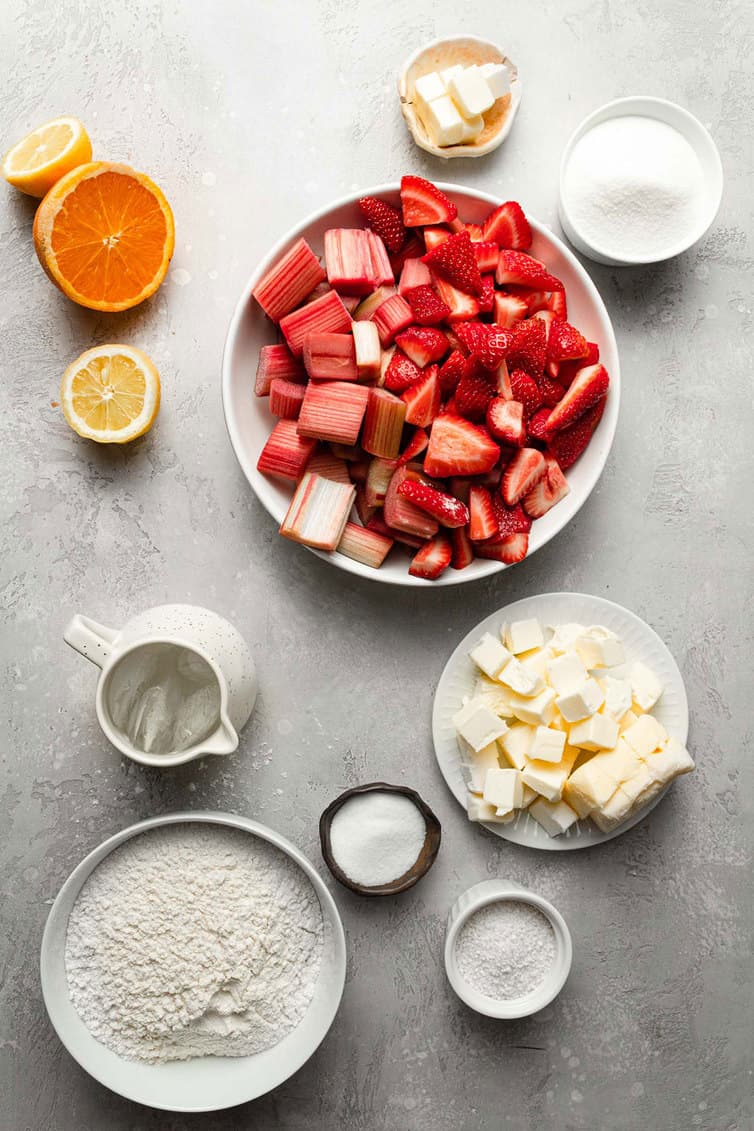
- The crust – This pie uses a traditional pie crust with a mix of butter and shortening for the fat. You can also use my most favorite pie crust recipe which uses vodka to make it incredibly flaky and tender.
- Strawberries – You can use fresh or frozen strawberries for this pie; if using frozen, use pre-sliced frozen strawberries and thaw completely before using.
- Rhubarb – You can use fresh or frozen rhubarb; if using frozen, measure the rhubarb frozen, then thaw completely and drain in a colander, but do not press liquid out.
- Instant Tapioca – This is sometimes labeled as “quick-cooking tapioca” or “minute tapioca” and has the texture of fine granules. It works wonderfully as a thickening agent in pie recipes.
Troubleshooting strawberry-rhubarb pie filling
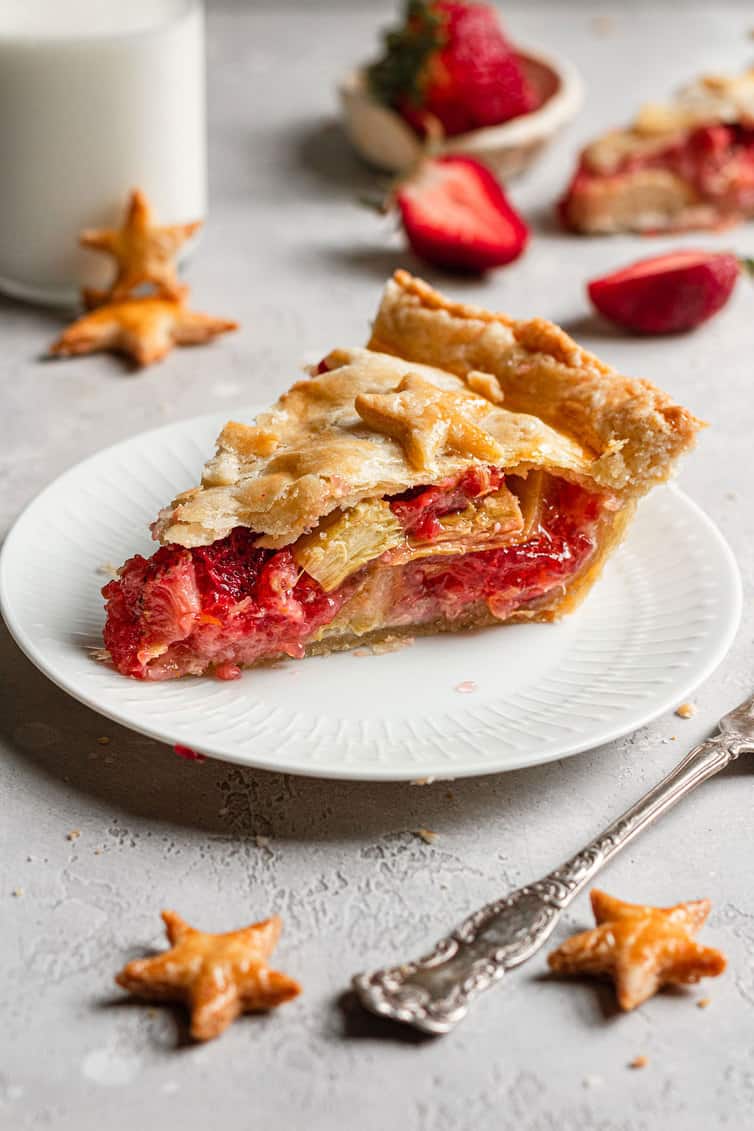
One of the biggest issues that people have when making a strawberry-rhubarb pie is runny or watery filling. That’s pretty much the worst when you make any type of pie, is it not?
There are two keys to ensuring that your pie filling sets up beautifully thick:
- Use the instant tapioca – Flour and cornstarch are two other popular pie filling thickeners, but they just flat-out do not do as good of a job as instant tapioca in terms of creating a thick, cohesive filling that isn’t cloudy or has an aftertaste.
- Allow the pie to cool COMPLETELY – Never, ever cut into a warm pie! I know, the worst right? The filling of the pie needs all of that cool-down time to thicken and set up properly. If you cut into before it is completely cool, you risk a runny, watery pie.
Make-ahead and freezing tips
You can prepare multiple components of this pie in advance:
- Entire Baked Pie – Since the pie enjoys massive benefits from allowing to cool completely before serving, it is a perfect pie to make a day in advance of serving. Store at room temperature until ready to serve.
- Pie Crust – The pie crust can be prepared and refrigerated for up to 5 days or frozen for up to 3 months. Thaw in the refrigerator overnight.
- Pie Filling – The pie filling can be mixed together and then frozen for up to 3 months. Thaw overnight in the refrigerator before using it.
- Freezing Whole Pie – Once the pie has been baked and cooled completely, wrap in plastic wrap, then in foil and place in a freezer-safe ziptop bag and freeze for up to 3 months. Thaw in the refrigerator overnight and then allow to come to room temperature before serving.
More Delicious Rhubarb Recipes
- Strawberry Rhubarb Coffee Cake
- Vanilla Bean Rhubarb-Ginger Scones
- Rhubarb-Ginger Crumble
- Rhubarb Crumb Cake
If you make this recipe and love it, I would so appreciate it if you would take a moment to leave a rating below. Thank you so much! ❤️️
Strawberry-Rhubarb Pie Recipe
Ingredients
For the Crust:
- 2¼ cups (281.25 g) all-purpose flour
- 1 teaspoon salt
- 2 tablespoons granulated sugar
- 11 tablespoons butter, cut into ¼-inch cubes
- 7 tablespoons vegetable shortening, chilled
- ⅓ cup (83.33 ml) ice water
For the Pie Filling:
- 3 cups (432 g) sliced strawberries
- 3 cups (366 g) sliced rhubarb, (1/2 to 1-inch pieces)
- ¾ cup (150 g) granulated sugar
- 1 tablespoon grated orange zest
- 2 teaspoons lemon juice
- ¼ teaspoon (0.25 teaspoon) vanilla extract
- 4 tablespoons quick-cooking, instant tapioca
- 2 tablespoons unsalted butter, cut into small pieces
Instructions
- Make the Crust: Place the flour, salt and sugar in a food processor and pulse a few times to combine. Scatter the pieces of butter over the flour mixture, using your fingers to toss and coat the butter with some flour. Cut the butter into the flour mixture with five 1-second pulses. Add the shortening and continue to pulse until the flour is ple yellow and resembles coarse cornmeal with butter bits no larger than small peas, about four more 1-second pulses. Turn the mixture into a medium bowl.
- Sprinkle all but 1 tablespoon of the ice water over the mixture. Use a rubber spatula to fold the water into the flour mixture. Press down on the dough with the spatula until the dough sticks together, adding up to 1 tablespoon of remaining ice water if the dough does not come together. Divide the dough into two balls, one slightly larger than the other. Flatten each into disks, dust lightly with flour, wrap separately in plastic wrap and refrigerate for at least 30 minutes.
- Remove dough from the refrigerator; let stand at room temperature to soften slightly, about 10 minutes. Preheat oven to 400 degrees.
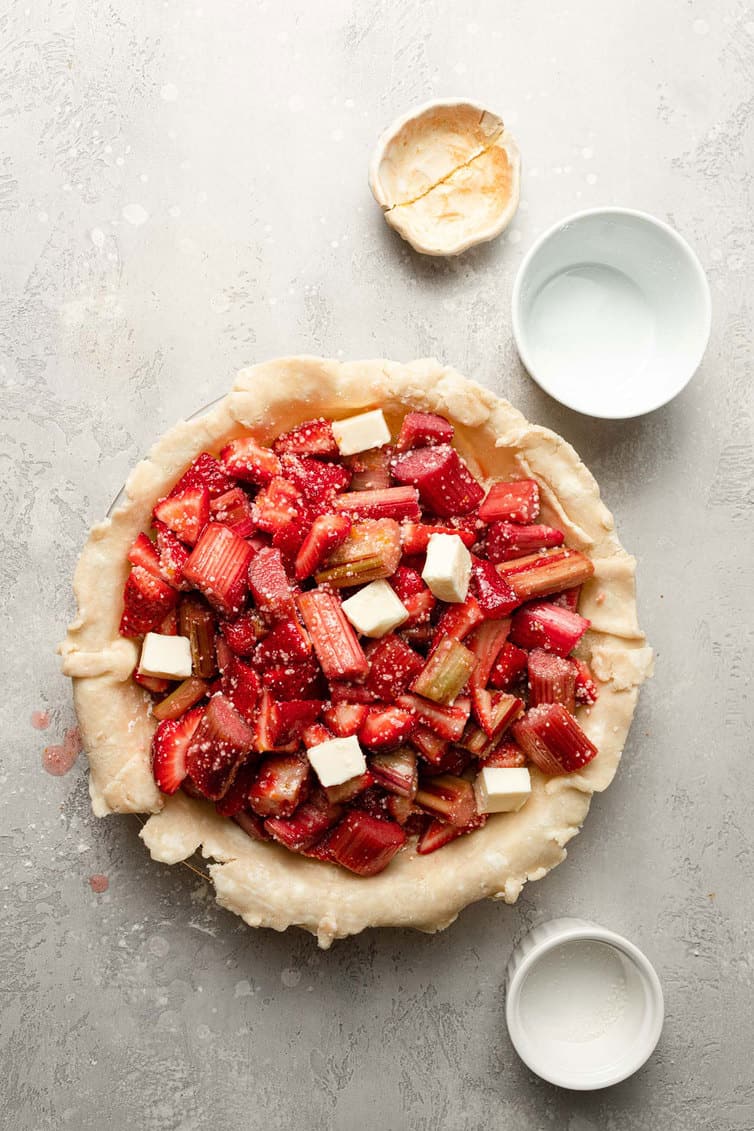
- Make the Filling: Toss the fruit with sugar, orange zest, lemon juice, vanilla extract and tapioca; let stand for 15 minutes.
- Assemble the Pie: Roll the larger dough disk on a lightly floured surface into a 12-inch circle, about 1/8-inch thick. Transfer and fit dough into 9-inch pie plate, leaving dough that overhangs the lip in place. Turn the fruit mixture, including juices, into the pie shell. Scatter the butter pieces over the fruit. Refrigerate until ready to top with the remaining dough.
- Roll the smaller disk on a lightly floured surface into a 10-inch circle. Lay over the fruit. Trim the top and bottom dough edges to ½-inch beyond the lip of the pie plate. Tuck this rim of dough underneath itself so that the folded edge is flush with the edge of the pie plate. Flute the dough or press with a fork to seal. Cut four slits at right angles on the top of the dough to allow steam to escape. Place in the freezer for 10 minutes before baking.
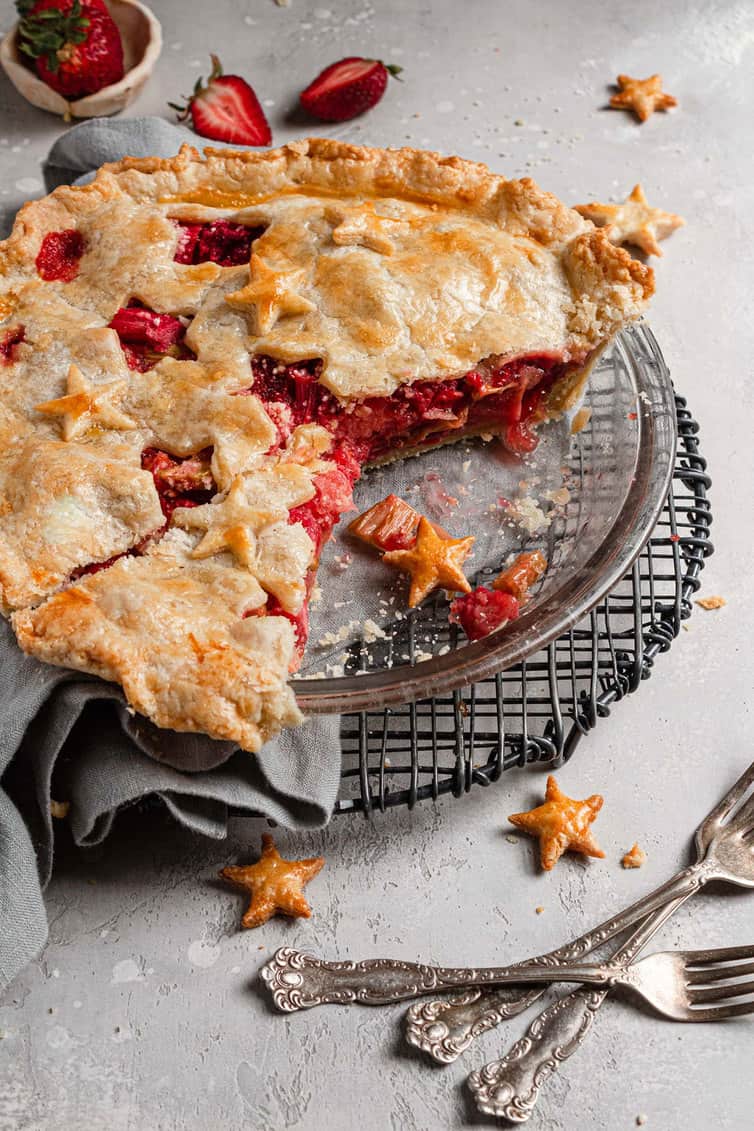
- Place the pie on a baking sheet; bake until the top crust is golden, 20 to 25 minutes. Reduce the oven temperature to 350 degrees and continue to bake until the juices bubble and the crust is golden brown, 30 to 40 minutes longer.
- Transfer the pie to a wire rack; let cool for at least 2 hours before serving so the juices have time to thicken. Leftovers can be stored at room temperature, covered, for up to 3 days.
Notes
- Pie Crust - You can make the pie crust without a food processor; whisk together the dry ingredients, cut in the shortening and butter with a pastry blender or forks, then add the water and mix with a rubber spatula.
- Pie Plate - I use and recommend this glass pie plate.
- Strawberries - You can use fresh or frozen strawberries for this pie; if using frozen, use pre-sliced frozen strawberries and thaw completely before using.
- Rhubarb - You can use fresh or frozen rhubarb; if using frozen, measure the rhubarb frozen, then thaw completely and drain in a colander, but do not press liquid out.
- Instant Tapioca - This is sometimes labeled as "quick-cooking tapioca" or "minute tapioca" and has the texture of fine granules.
- Crumb Topping - You can halve the pie crust and use a crumb topping instead of a pie crust for the top. I love the topping from my Dutch apple pie.
- Allow the pie to cool COMPLETELY - The filling of the pie needs all of that cool-down time to thicken and set up properly. If you cut into before it is completely cool, you risk a runny, watery pie.
- Make-Ahead Entire Baked Pie - Since the pie enjoys massive benefits from allowing to cool completely before serving, it is a perfect pie to make a day in advance of serving. Store at room temperature until ready to serve.
- Make-Ahead Pie Crust - The pie crust can be prepared and refrigerated for up to 5 days or frozen for up to 3 months. Thaw in the refrigerator overnight.
- Make-Ahead Pie Filling - The pie filling can be mixed together and then frozen for up to 3 months. Thaw overnight in the refrigerator before using it.
- Freezing Whole Pie - Once the pie has been baked and cooled completely, wrap in plastic wrap, then in foil and place in a freezer-safe ziptop bag and freeze for up to 3 months. Thaw in the refrigerator overnight and then allow to come to room temperature before serving.
- Recipe from Cook's Illustrated
Did you make this recipe?
Leave a review below, then snap a picture and tag @thebrowneyedbaker on Instagram so I can see it!
[Photography by Dee of One Sarcastic Baker]


This pie looks amazing! I love baking with fresh fruit. By the way, if you ever need to convert colors for printing recipes or labels, check out RGB to CMYK formula online free – it’s super handy.