Homemade Strawberry Pop Tarts
These easy, yet totally impressive homemade strawberry pop tarts are the perfect addition to your morning breakfast. Flaky pastry surrounds strawberry filling for a tender breakfast pastry that will disappear in a matter of minutes. Get ready to go completely berserk over this amazing homemade version of one of my childhood favorite treats!
Growing up, my parents kept our home relatively junk food- and sweets-free. We weren’t allowed to have the “cool” sugary cereals, no fruit rollups, no potato chips, no pop. So naturally, no Pop Tarts.
BUT! There was a steady supply of frosted brown sugar cinnamon Pop Tarts at grandma’s house, and they were always my breakfast of choice during weekend sleepovers. I hadn’t had them in probably decades and then got hit with a serious craving for them when I was pregnant with Joseph. They totally hit the spot, but they definitely weren’t as good as I remembered.
Enter: Homemade Pop Tarts!
How to Make Homemade Pop Tarts
Quite a long time ago, I tackled homemade pop tarts and in the process learned that they are not at all difficult to make, and they will absolutely, positively blow your mind.
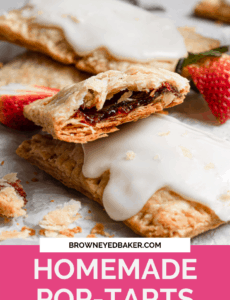
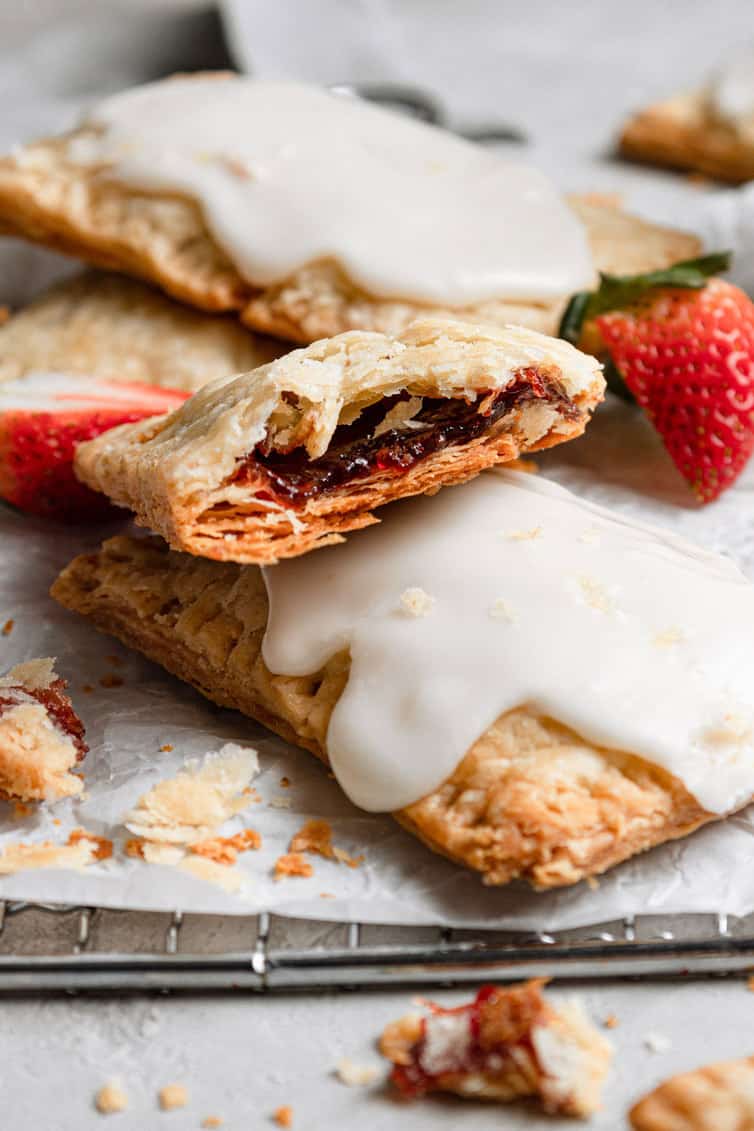
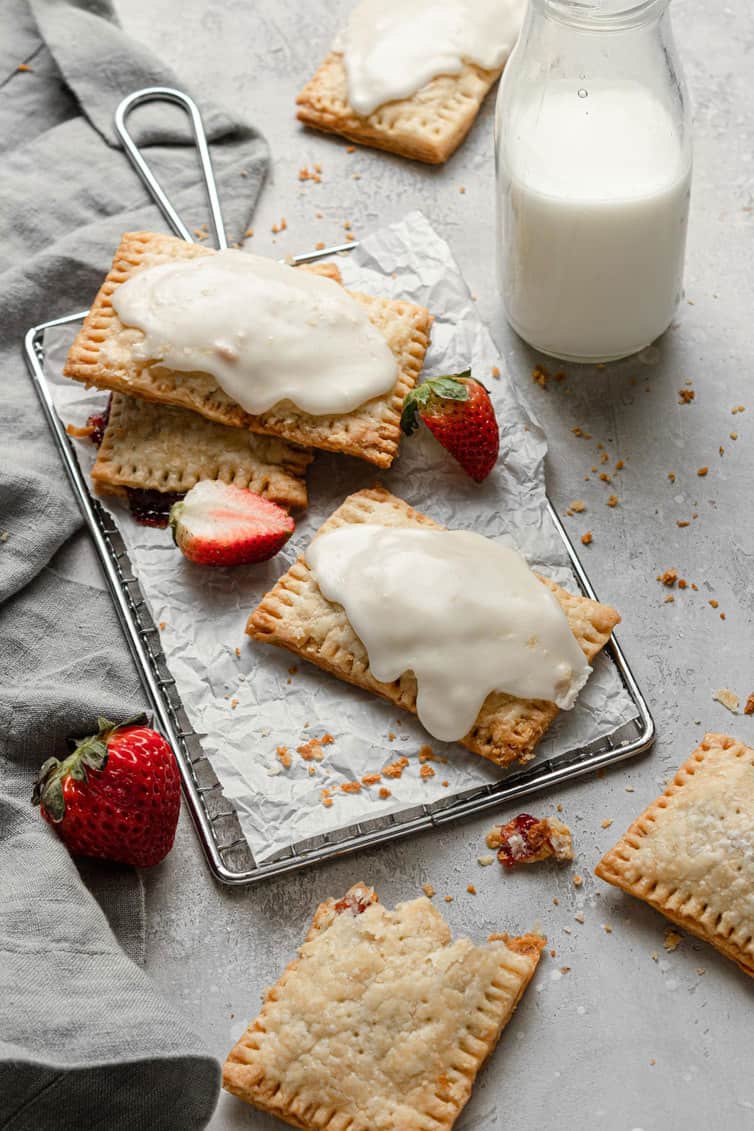
The pastry crust is flaky and buttery, little pieces breaking and fluttering off when you take a bite. Each little pastry pillow is full of sweet strawberry filling, and then frosted with an optional simple vanilla sugar icing.
Prepare the Filling
Everyone seems to have an old favorite when it comes to pop tarts – strawberry or brown sugar cinnamon. For this homemade pop tart recipe, I provide you with instructions to make either or both!
Brown Sugar-Cinnamon Filling
- In a medium bowl, whisk together brown sugar, cinnamon, and flour.
- Set aside until ready to assemble.
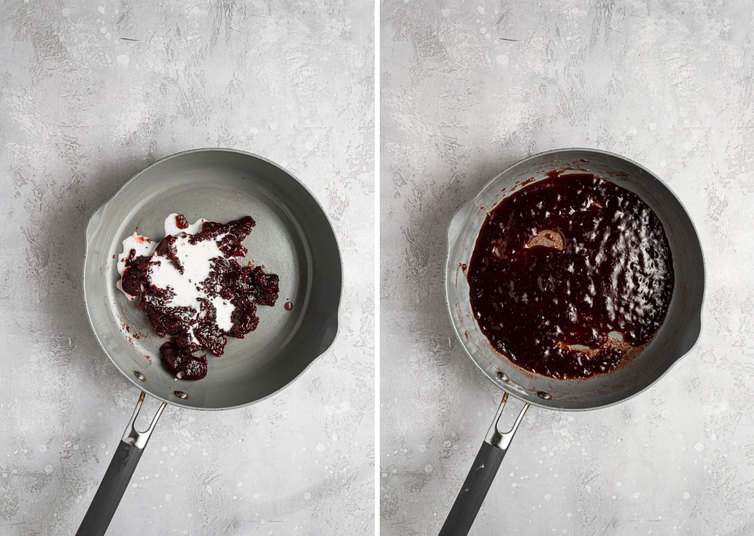
Strawberry Filling
- In a small bowl, whisk together cornstarch and water.
- Combine the cornstarch water with strawberry jam in a small saucepan over medium heat.
- Bring to a boil and simmer for 2 minutes, stirring frequently. Remove from heat and allow to cool.
- Set aside until ready to assemble.
Pastry Crust
For homemade pop tarts, I used a flaky pastry crust. It’s flaky and buttery with little pieces breaking and fluttering off when you take a bite. To make this flaky pastry you will need:
- Flour: The base of the pastry dough, this flour gives structure to the flaky pastry.
- Sugar: Sweetens up the dough, just a bit.
- Salt: Adds a little flavor and balances out the sugar.
- Butte: Unsalted butter that is cold and cubed gives the pastry little pockets of butter that bake into the flakiest dough.
- Egg + Milk: Used to bind the dough together and provides a soft finish to the dough.
Make the Pastry
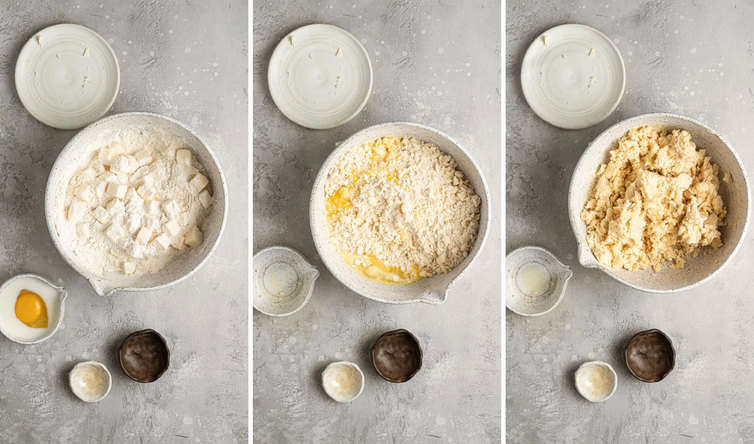
- Mix together dry ingredients: In a large bowl, whisk together flour, sugar, and salt.
- Cut the butter into the flour: Using a pastry blender, cut the butter until it is the size of peas and the mixture holds together when you squeeze it.
- Add wet ingredients: In a small bowl whisk together the egg and milk and add to the dough. Mix together with a fork until everything is evenly moistened.
- Knead the dough: OIf necessary, knead until the dough comes together.
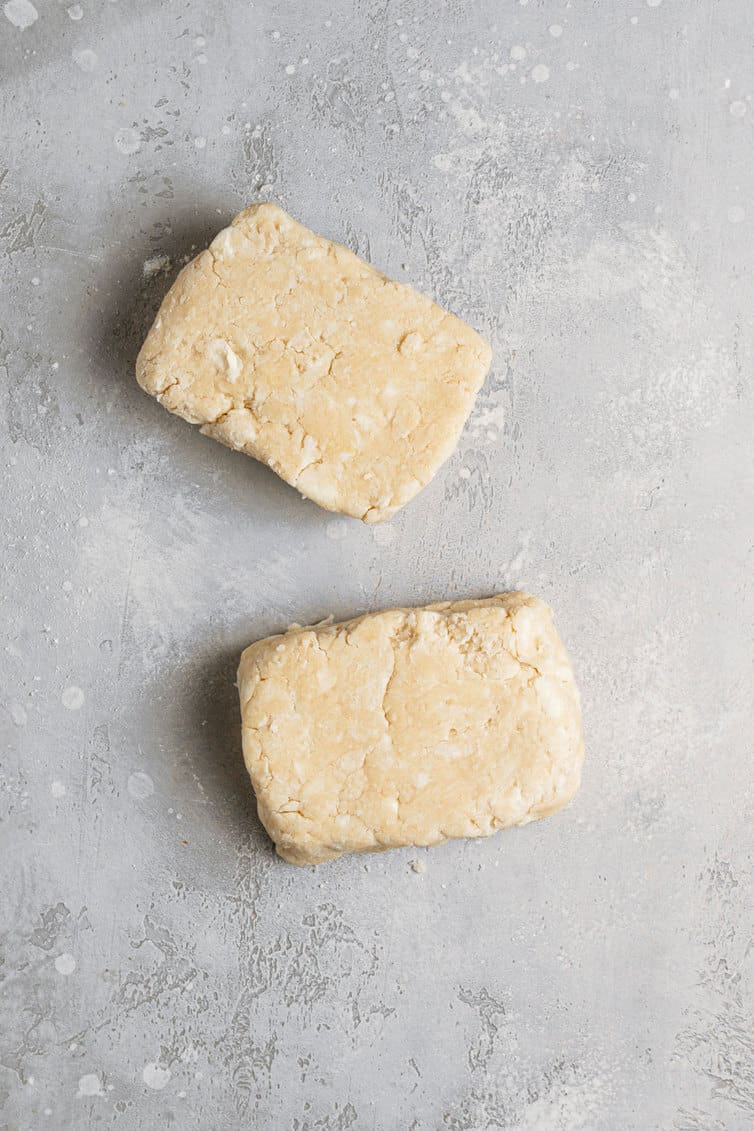
- Divide + store the dough: Divide the dough in half. If you are making the dough in advance, wrap each half in plastic wrap and store it in the refrigerator for up to 2 days. If you are making the pop tarts in one go, prepare to roll the dough.
Save This Recipe
How to Cut the Pastry Dough
- Thaw before rolling: If you made the dough in advance, allow it to come to room temperature for about 15 minutes before rolling and cutting.
- Roll out the dough: Using a rolling pin, roll out one piece of dough to about ⅛-inch thick, in a 9½ by 12½-inch rectangle.
- Trim the edges: Using a sharp knife, pastry wheel, or bench scraper, trim the rectangle to a 9 by 12-inch rectangle.
- Slice into small rectangles: Cut the sheet of dough into nine 3×4-inch rectangles.
- Transfer the dough: Using a spatula, transfer the rectangles to a baking sheet that has been lined with parchment paper or a silicone baking mat.

Filling + Sealing
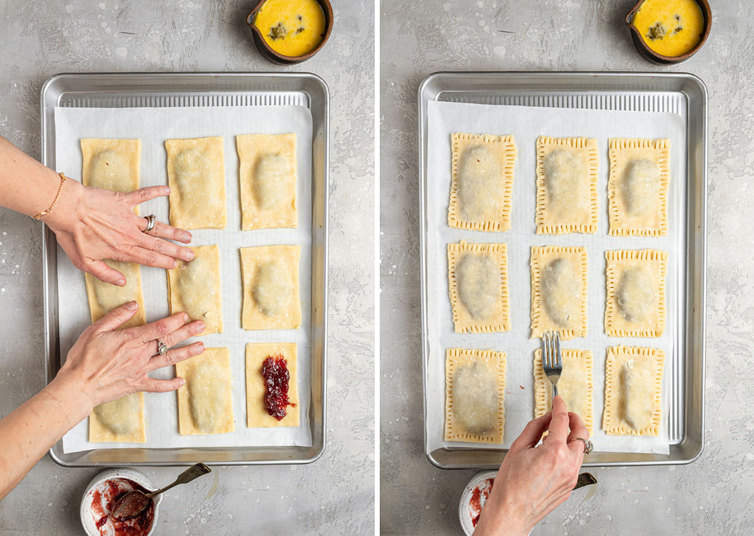
- Make the egg wash: In a small bowl whisk together egg and milk. Brush the egg wash on each of the rectangles.
- Fill the base: Spoon a tablespoon of filling into the center of each rectangle, leaving a 1/2 inch space around the edges.
- Cut the tops: Roll out and cut the second piece of dough in the exact same manner as you did the first.
- Cover the filling: One at a time, place the second rectangle of dough on top of the nine filled ones.
- Press the seams: Using your fingers, press around the seams of the dough to make sure they are sealed. Press the tines of a fork around the edges of the rectangles.
- Vent the dough: Prick the tops of the rectangles in multiple spots to allow steam to escape.
- Chill the pop tarts: Refrigerate the pan with the pastries, uncovered, for 30 minutes.
Baking Homemade Pop Tarts
- Heat the oven: Preheat the oven to 350°F.
- Bake the pastry: Bake the homemade pop tarts for 25 to 30 minutes, or until lightly browned.
- Cool and serve: Cool slightly before serving if you are not using icing on them. If you plan to ice the pop tarts, cool completely before icing.
Tips for Glazing
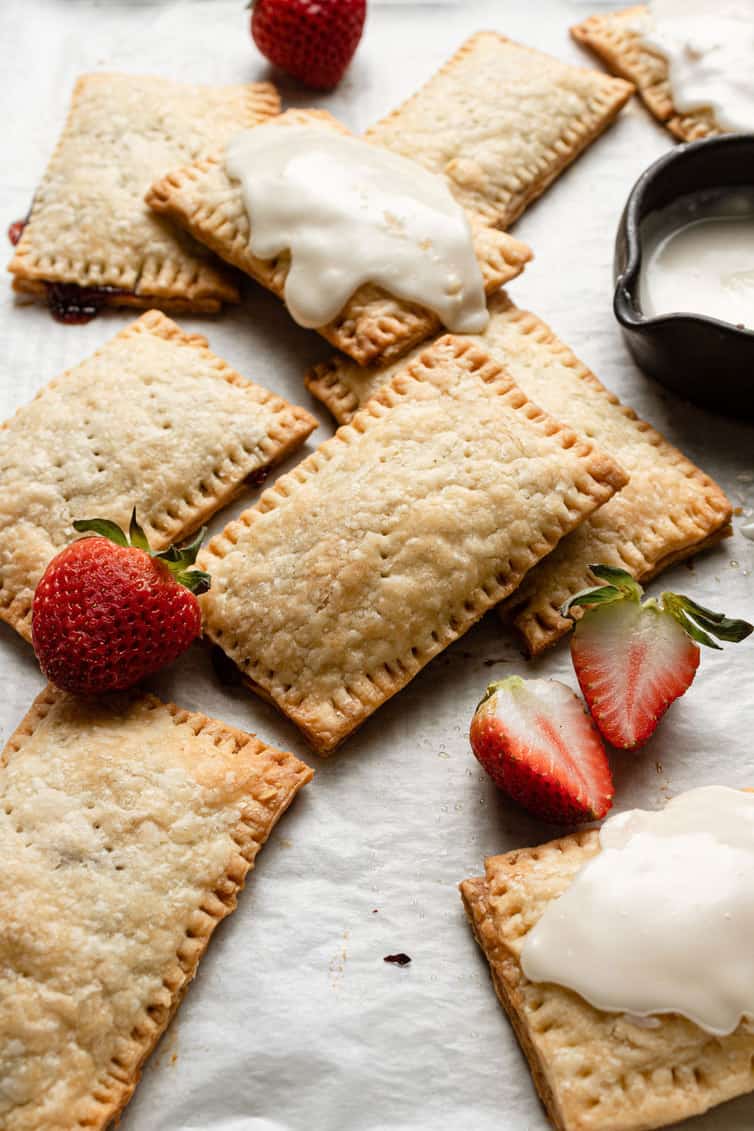
When I originally shared these, they were not frosted, and while it’s not TOTALLY necessary, I think it really ratchets them up a few notches, so I’ve included both a vanilla icing for the strawberry pop tarts and a cinnamon icing for the brown sugar cinnamon ones. Feel free to eat them plain or slather some frosting on!
- Mix together the icing: In a small bowl whisk together powdered sugar, milk, and vanilla extract. Add cinnamon if you are making icing for the brown sugar cinnamon pop tarts.
- Check the consistency: The icing should have a very thick, but still spreadable, consistency. If necessary, add a splash of milk at a time, until a spreadable consistency is reached.
- Ice the pop tarts: Spread a spoonful of icing over the top of each pastry and allow to sit for at least 30 minutes so the icing can set.
Serving Your Pop Tarts
If a pop tart or two won’t be enough to keep you full for the morning, here are a few other recipes you can serve with your pop tarts:
- Scrambled Eggs
- Breakfast Sausage, Egg, and Cheese Casserole
- Cheesy Sausage and Spinach Breakfast Casserole
- Sausage and Cheddar Bites
Making Ahead + Storing
- Make-Ahead Dough: You can save time in the morning by prepping the pastry dough up to 2 days in advance. Store pre-made dough in the refrigerator wrapped in plastic wrap for up to 2 days.
- Make-Ahead Baked Pop Tarts: Follow the recipe through baking and cool completely. Store uniced, baked pop tarts in an airtight container for up to 1 week. When you are ready to serve, ice and enjoy!
- Storing Iced Pop Tarts: Keep iced pop tarts in an airtight container for up to 3 days.
- Freezing Unbaked Pop Tarts: Prepare through step #6, then instead of placing the pan in the refrigerator, place in the freezer for up to 2 hours until completely frozen and firm. Transfer to an airtight ziploc bag or container and freeze for up to 3 months. Bake as directed from frozen, allowing for an extra few minutes bake time.
- Freezing Baked Pop Tarts: Bake the pop tarts and allow to cool completely. Place the cooled pop tarts in a single layer on a baking sheet and place in the freezer for 2 hours or until completely frozen. Place in an airtight ziploc bag or container and freeze for up to 3 months. Reheat in the toaster, toaster oven, oven, or microwave.
More Sweet Breakfast Pastry Treats
- Sticky Buns
- Danish Pastries
- Homemade Croissants
- Best-Ever Homemade Cinnamon Rolls
- Monkey Bread (From Scratch)

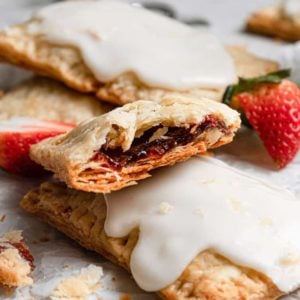
No toaster required! These homemade pop tarts with a generous heaping of vanilla glaze are perfectly crisp and flaky. Filled with sweet strawberry filling, these pop tarts are sure to go fast!
If you make this recipe and love it, remember to stop back and give it a 5-star rating - it helps others find the recipe! ❤️️
Homemade Strawberry Pop Tarts
Ingredients
For the Brown Sugar-Cinnamon Filling
- ½ cup (110 g) light brown sugar
- 1½ teaspoon (1.5 teaspoon) ground cinnamon
- 4 teaspoons all-purpose flour
For the Strawberry Filling
- ¾ cup (255 g) strawberry jam
- 1 tablespoon cornstarch
- 1 tablespoon water
For the Pastry Crust
- 2 cups (250 g) all-purpose flour
- 1 tablespoon granulated sugar
- 1 teaspoon salt
- 1 cup (227 g) unsalted butter, cold and cubed
- 1 egg
- 2 tablespoons milk
For the Egg Wash
- 1 egg
- 1 tablespoon milk
For the Plain Icing
- ¾ cup (90 g) powdered sugar
- 1 tablespoon milk
- ¼ teaspoon (0.25 teaspoon) vanilla extract
For the Cinnamon Icing
- ¾ cup (90 g) powdered sugar
- 1 tablespoon milk
- ½ teaspoon (0.5 teaspoon) ground cinnamon
- ¼ teaspoon (0.25 teaspoon) vanilla extract
Instructions
- Prepare the Brown Sugar-Cinnamon Filling: In a medium bowl, whisk together the brown sugar, cinnamon, and flour.
- Prepare the Strawberry Filling: In a small bowl, whisk together the cornstarch and water, and then combine with the jam in a small saucepan over medium heat. Bring to a boil and simmer for 2 minutes, stirring frequently. Remove from the heat and let cool.
- Make the Pastry Crust: In a large bowl, whisk together the flour, sugar, and salt. Using a pastry blender, cut in the butter until it is the size of peas and the mixture holds together when you squeeze it. In a small bowl, whisk together the egg and milk and add to the dough. Mix together with a fork until everything is evenly moistened. Knead briefly on a floured surface, if necessary, until the dough comes together.
- Divide the dough in half. (At this point you can wrap each in plastic wrap and refrigerate for up to 2 days. If you refrigerate the dough, let it come to room temperature for about 15 minutes before rolling out.) Roll out one piece of dough to about ⅛-inch thick, in a 9½ by 12½ rectangle. Using a sharp knife, pastry wheel or bench scraper, trim the rectangle to 9×12 inches. Cut the sheet of dough into nine 3×4-inch rectangles. Using a spatula, transfer the rectangles to a baking sheet that has been lined with parchment paper or a silicone baking mat.
- Assemble the Pastries: In a small bowl, whisk together the egg and milk. Brush the egg wash on each of the rectangles. Spoon a tablespoon of filling into the center of each rectangle, leaving a ½-inch of space around the edges.
- Roll out and cut the second piece of dough in the exact same manner as you did the first. One at a time, place a second rectangle of dough on top of the nine assembled ones. Using your fingers, press around the seams of the dough to make sure they are sealed. Press the tines of a fork around the edges of the rectangles. Prick the tops of the rectangles in multiple spots to allow steam to escape.
- Refrigerate the pan with the pastries (you don’t need to cover them) for 30 minutes.
- Preheat the oven to 350 degrees F.
- Bake the pastries for 25 to 30 minutes, or until lightly browned. Cool slightly before serving if not using an icing. If you plan to ice the pastries, cool them completely before doing so. Store pastries in an airtight container at room temperature for up to one week.
- Make the Icing: In a small bowl, whisk together the powdered sugar, milk, cinnamon (if using), and vanilla extract. The icing should have a very thick, but still spreadable, consistency. If necessary, add a splash of milk at a time, until that consistency is reached. Spread a spoonful of icing over top of each pastry and allow to sit for at least 30 minutes so the icing can set.
Notes
- Filling: Each filling recipes makes enough for a whole recipe (nine pastries). If you are planning to make a variety of fillings, you can scale them up or down as needed. Same goes for the icing recipes!
- Make-Ahead Dough: You can save time in the morning by prepping the pastry dough up to 2 days in advance. Store pre-made dough in the refrigerator wrapped in plastic wrap for up to 2 days.
- Make-Ahead Baked Pop Tarts: Follow the recipe through baking and cool completely. Store uniced, baked pop tarts in an airtight container for up to 1 week. When you are ready to serve, ice and enjoy!
- Storing Iced Pop Tarts: Keep iced pop tarts in an airtight container for up to 3 days.
- Freezing Unbaked Pop Tarts: Prepare through step #6, then instead of placing the pan in the refrigerator, place in the freezer for up to 2 hours until completely frozen and firm. Transfer to an airtight ziploc bag or container and freeze for up to 3 months. Bake as directed from frozen, allowing for an extra few minutes bake time.
- Freezing Baked Pop Tarts: Bake the pop tarts and allow to cool completely. Place the cooled pop tarts in a single layer on a baking sheet and place in the freezer for 2 hours or until completely frozen. Place in an airtight ziploc bag or container and freeze for up to 3 months. Reheat in the toaster, toaster oven, oven, or microwave.
Did you make this recipe?
Leave a review below, then snap a picture and tag @thebrowneyedbaker on Instagram so I can see it!
Photography by Dee Frances


Delicious! Thank you for the detailed directions which were easy to follow.
Love your recipes, but your site is absolutely cancerous on mobile – which I use when actually cooking.
Far too many words and ads
You might want to take up proof reading
Unfortunately, these like most other “Pop-Tart” recipes, are great little hand pies, but they are not Pop-Tarts. Your recipe is for a flakey pie dough, not the short crust that define Pop-Tarts. Will continue search for a true Pop-Tart recipe.
Try Bravetart’s Poptarts – they’re in the Bravetart cookbook, but I’m sure you could find them online somewhere. They are as close to the real deal as I’ve seen.
I am so excited to try this recipe! Pop Tarts have been one of my favorite treats since I was a kid, but I’ve been trying to stay away from processed snacks. This homemade version is such a great alternative. Thank you for sharing!
Made these today and absolutely fell in love! They are now my family’s favorite. They were so creamy and delicious. The crust was amazing, so perfect!! They were too good! I can’t stop making your recipes, everything is amazing. This was by far the easiest and most successful recipe I have ever attempted. Thank you so much for sharing. Can’t wait for the next recipe you are going to share. Best wishes to you! You are doing such a great job.
So I’ve made these twice now using this recipe! The end product is quality AND alot less time than other recipes. I substituted the filling listed with our own homemade cherry jam which has big chunks of cherries and loved it. I used lemon extract instead of vanilla (my family loves citrus) also added 2 tbsp of cherry jam to the icing to make it pink and with cherry specks were pretty.
Anytime I make poptarts, ill continue to use this recipe!
Immediate house favorite. I have made these a few times with different variations. I prefer jam filled poptarts. My best version was with homemade jam from Trader Joe’s frozen berries. Still delicious though with a nice quality sore bought jam (I don’t add corn starch). I make mine poptarts a little smaller to portion them out more easily.
These are so delicious! I made mine with raspberry, wild blueberry and cherry filling,
I made these beauties last weekend for my pregnant daughter who craves pop tarts just as I did when I was expecting her. Like mother like daughter! They are now a family favorite. The dough was so flaky and light but held up well with the brown sugar filling. Delish!
I just tried your recipe with Cup 4 Cup gluten free flour. They were perfect and flaky!! I think I needed to add about a tsp more milk and that was the only difference. My celiac husband loved them!
This requires a significant time commitment. Make sure you allow at least 2 hours of lead time from beginning until you can taste the final product.
These were incredibly delicious! So much better than I ever expected!
I love this recipe, these are so good. This is the best crust I ever made. Thanks
Can you use non-dairy milk for this recipe? Like oat or almond?
Hi Emily, Yes, I don’t see why not.
I made both the cinnamon and strawberry last night. They were so delicious and a hit with my family and friends. The crust was amazing, so flaky!!! I’ll have to use it in other sweet and savory dishes. I did not like the taste of the strawberry filling as directed, a little too much cornstarch, so I added more jam.
The dough was so slack and sticky I couldn’t transfer it to the baking tray. I’m going refrigerate the dough and try again.
I was so wrong with this prior review. I’m sorry now that I wrote it. I’ve made these several times and after I got used to handling the dough, they are FANTASTIC. I’ve made them with blackberry, blueberry, and apricot fillings–all terrific.
We have fruit trees in our orchard and just made some Apricot Pie Jam tonight. I’m going to try using it in these pop tarts you’ve posted about. I’m’ hoping to find a way to lower the fat though, because I recently had gallbladder surgery and can’t eat anything high in fat. I know this will degrade the wonderful buttery taste but being able to eat it is better than not being able to eat it. Thank you so much for posting your recipe here for us to use. I’m looking forward to trying it!
God bless you.
Oh, I also wanted to say I’m looking forward to trying your cinnamon filling! I’m allergic to cinnamon, so I haven’t been able to have a brown sugar cinnamon pop tart in years! But I can make these with my spice substitute of allspice, ginger and cardamom and it will be almost as good, without the allergic reaction! :) So, thank you in advance!
Made these before and were so good I’ve come back to make them again! I’m having a lot of fun playing with flavors using locally made jams and jellies. So far I’ve made Strawberry Lime, Apple Cider, BEAR, Black Cherry, and Strawberry Rhubarb poptarts. Sooooo good! Thank you for sharing the recipe with us!!!
Can you use this dough for a pie?
Thank you
Just made these and they came out perfectly! We made the strawberry / vanilla icing version and can’t wait to try the brown sugar / cinnamon version next. Super easy to make and so incredibly flaky and tasty! I should have known that a fellow ‘burgh-er would make something this good!
I made this recipe! Exactly I as directions said! I wanted to have some cinnamon and brown sugar and others strawberry, so I did half a recipe of the brown sugar filling and half a recipe of the strawberry filling! This was way too much! I should’ve only done a quarter of a recipe of each and it would’ve been enough to have half brown sugar and half strawberry! They are currently in the fridge chilling, so I have not baked them yet to find out how they hold up! I’m looking forward to eating them!
These look really good. I have read through comments and see you recommend to reheat in a toaster oven, but would just a normal toaster work? You know the type you put bread in for toast.
Just made these! They are awesome, so flaky and full of flavor! My mouth is happy:)
Made these last night with Polaner All Fruit Raspberry Jam, The intent was to freeze them and have a pop tart for a daily breakfast snack this upcoming week. Ohemgee!!!! These were “slap yo momma good!” We all but inhaled them! I didn’t even get the chance to put the glaze on them!
I made these exactly by the recipe, I used cherry and blueberry filling. Absolutely delicious!! So good right out of the oven! They are light and flaky! Absolutely gonna save this recipe and make them again next week!
Thank you
Can you make the dough the night before and use the next morning? I wasn’t sure if it would work with the dough sitting overnight. Excited to try them!! My kids will be happy “mom said YES to a pop tart!!”
Hi Lindsey, Yes you definitely can. Hope you and the kids enjoy them! :)
Just made them this weekend … exactly as written (except had to refrigerate dough inbeteeen cutting & filling for 30 min) … SO good!!! Quadrupled the recipe and made 1/2 with apricot jam and 1/2 with strawberry jam.