Chocolate Cream Pie
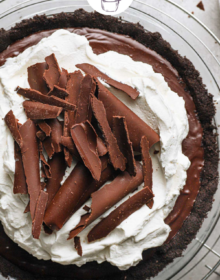
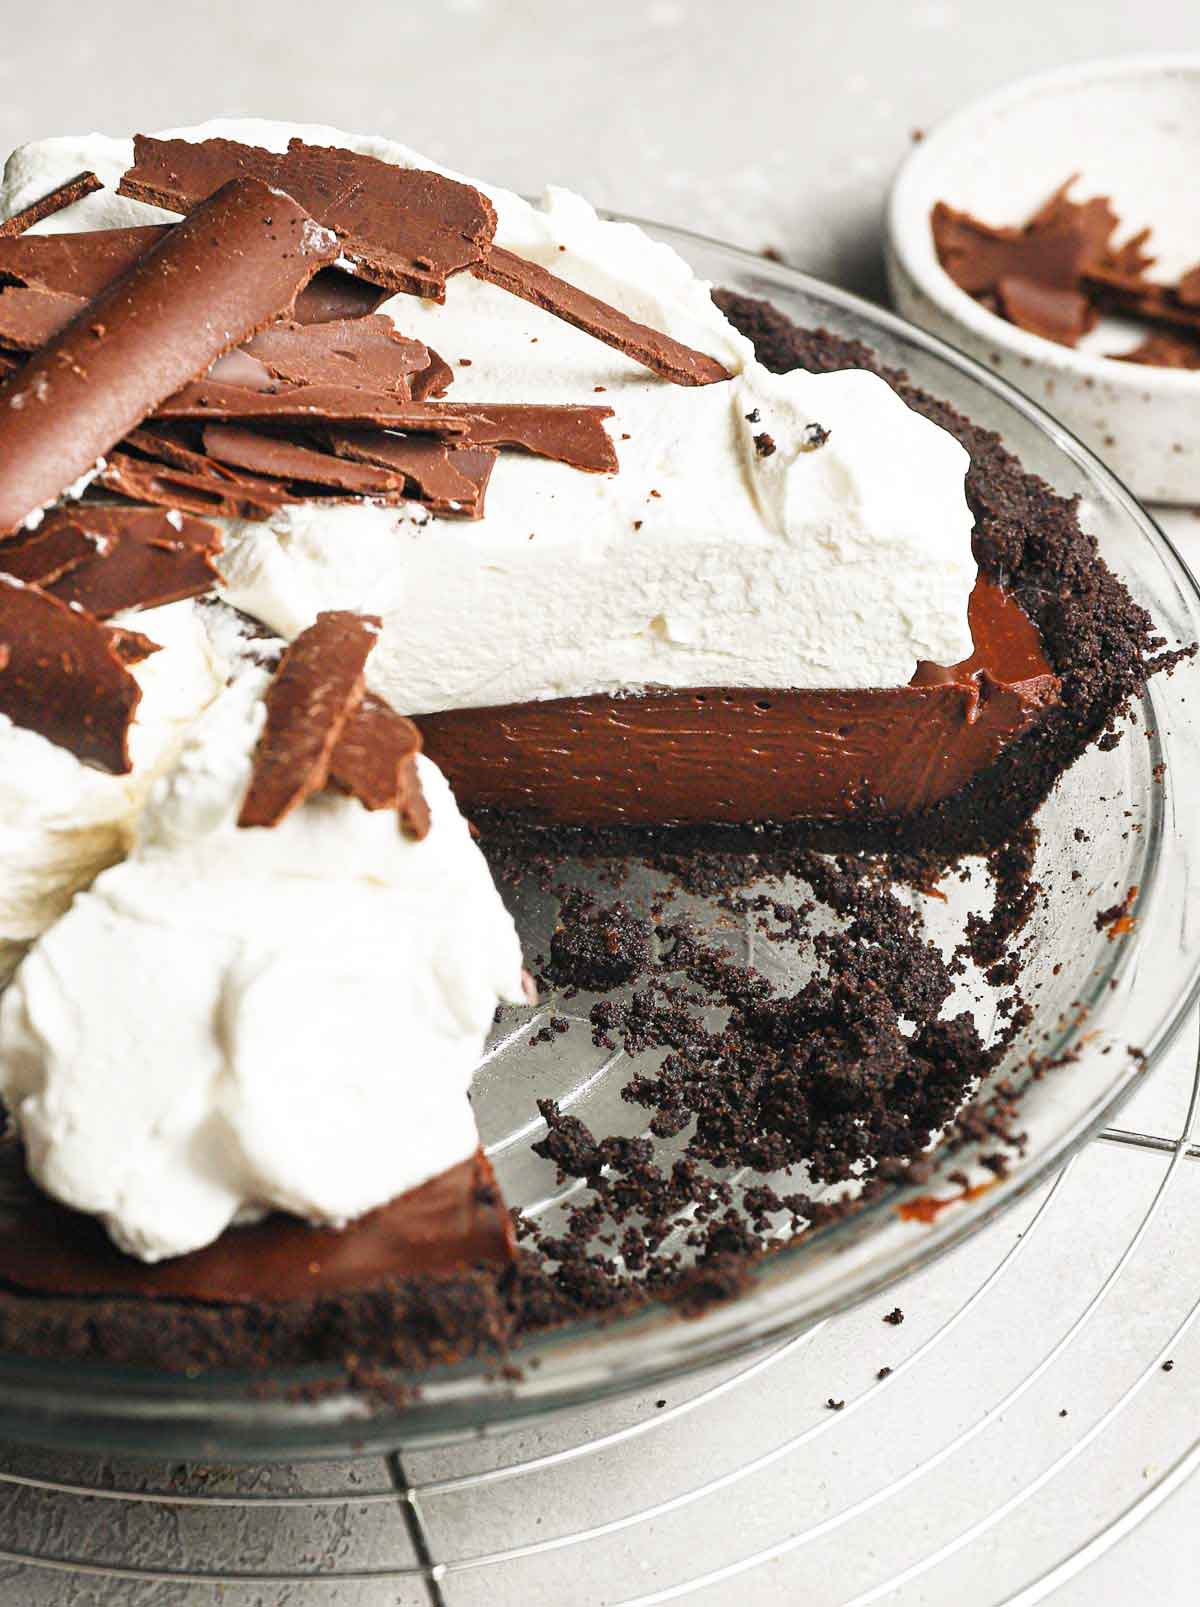
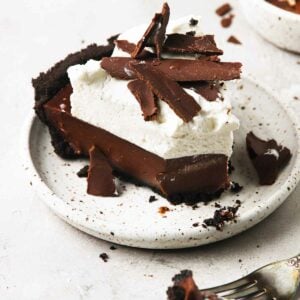
This classic (homemade!) chocolate cream pie recipe features an Oreo cookie crust, a chocolate pastry cream filling, and is topped with fresh whipped cream. This from-scratch version is bursting with rich chocolate flavor and is heads and tails better than the box pudding varieties.
Years ago, I decided that I needed to make more pies. And not just any old pies - I really wanted to focus on some of the old-fashioned pies that had never graced my kitchen. I've made creations like banoffee pie, salted caramel apple cheesecake pie, and s'mores pie, as well as classics like pumpkin pie, blueberry pie, and Dutch apple pie, but I wanted to go back to classic and simple… to cookie crumb crusts and whipped cream toppings.
Enter this chocolate cream pie.
And not just any chocolate cream pie, but by my estimation, the BEST chocolate cream pie you'll find anywhere.

Why It’s the Best
There are a few different options when it comes to a chocolate cream pie in terms of pie crust, chocolate pie fillings, and topping, but there are two main camps - a homemade chocolate pie made with chocolate pastry cream, and a chocolate cream pie made with pudding.
I saw a lot of different types of recipes for chocolate cream pie while researching - some that had a traditional pastry crust, some with an Oreo crumb crust… some with a classic pastry cream filling, some with chocolate pudding filling, some that used gelatin as a stabilizer… some with a whipped cream topping and others with a meringue.
In the end, I went with the Oreo cookie crust over a pastry crust. Homemade pastry cream makes me weak in the knees, so it was no contest when it came to the pie filling. Finally, I'll choose whipped cream over meringue any day of the week so that decision was easy as well.
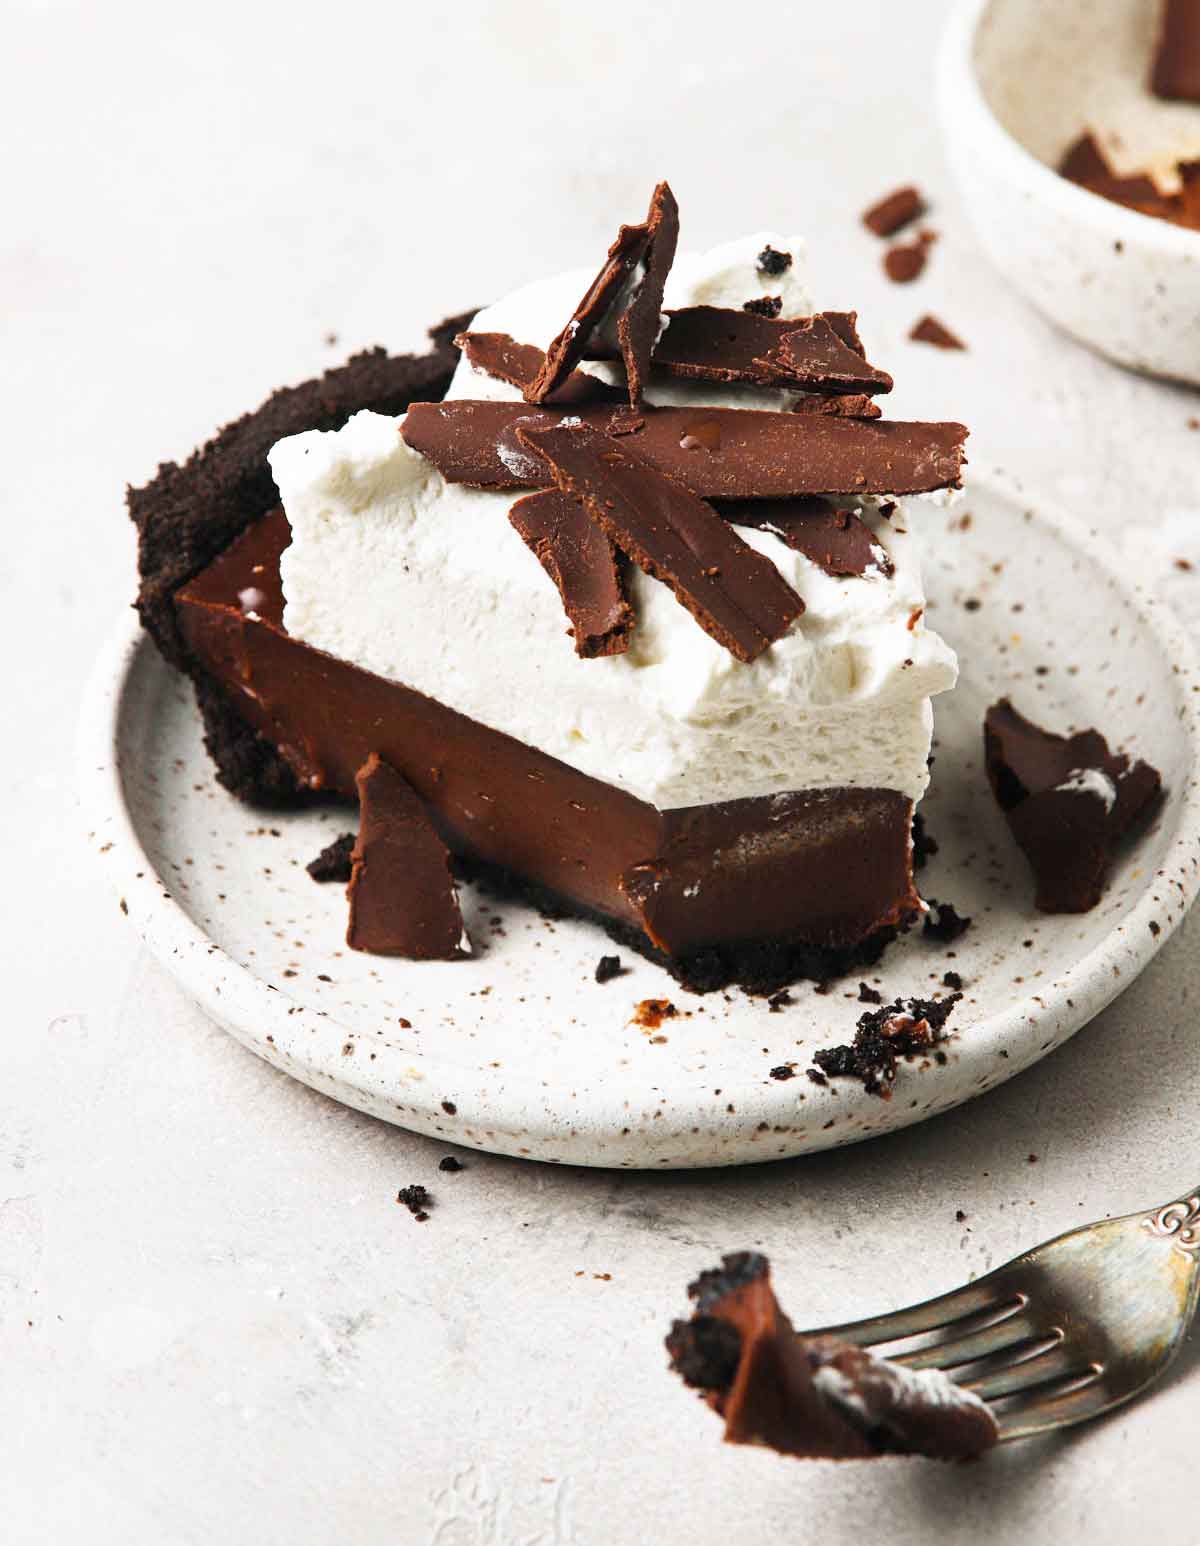
The result is a wonderfully creamy, smooth-as-silk pie loaded with chocolate in every bite. Don't be surprised if you end up standing over the counter, eating it from the pie plate with a fork. Don't say I didn't warn you!
Key Ingredients
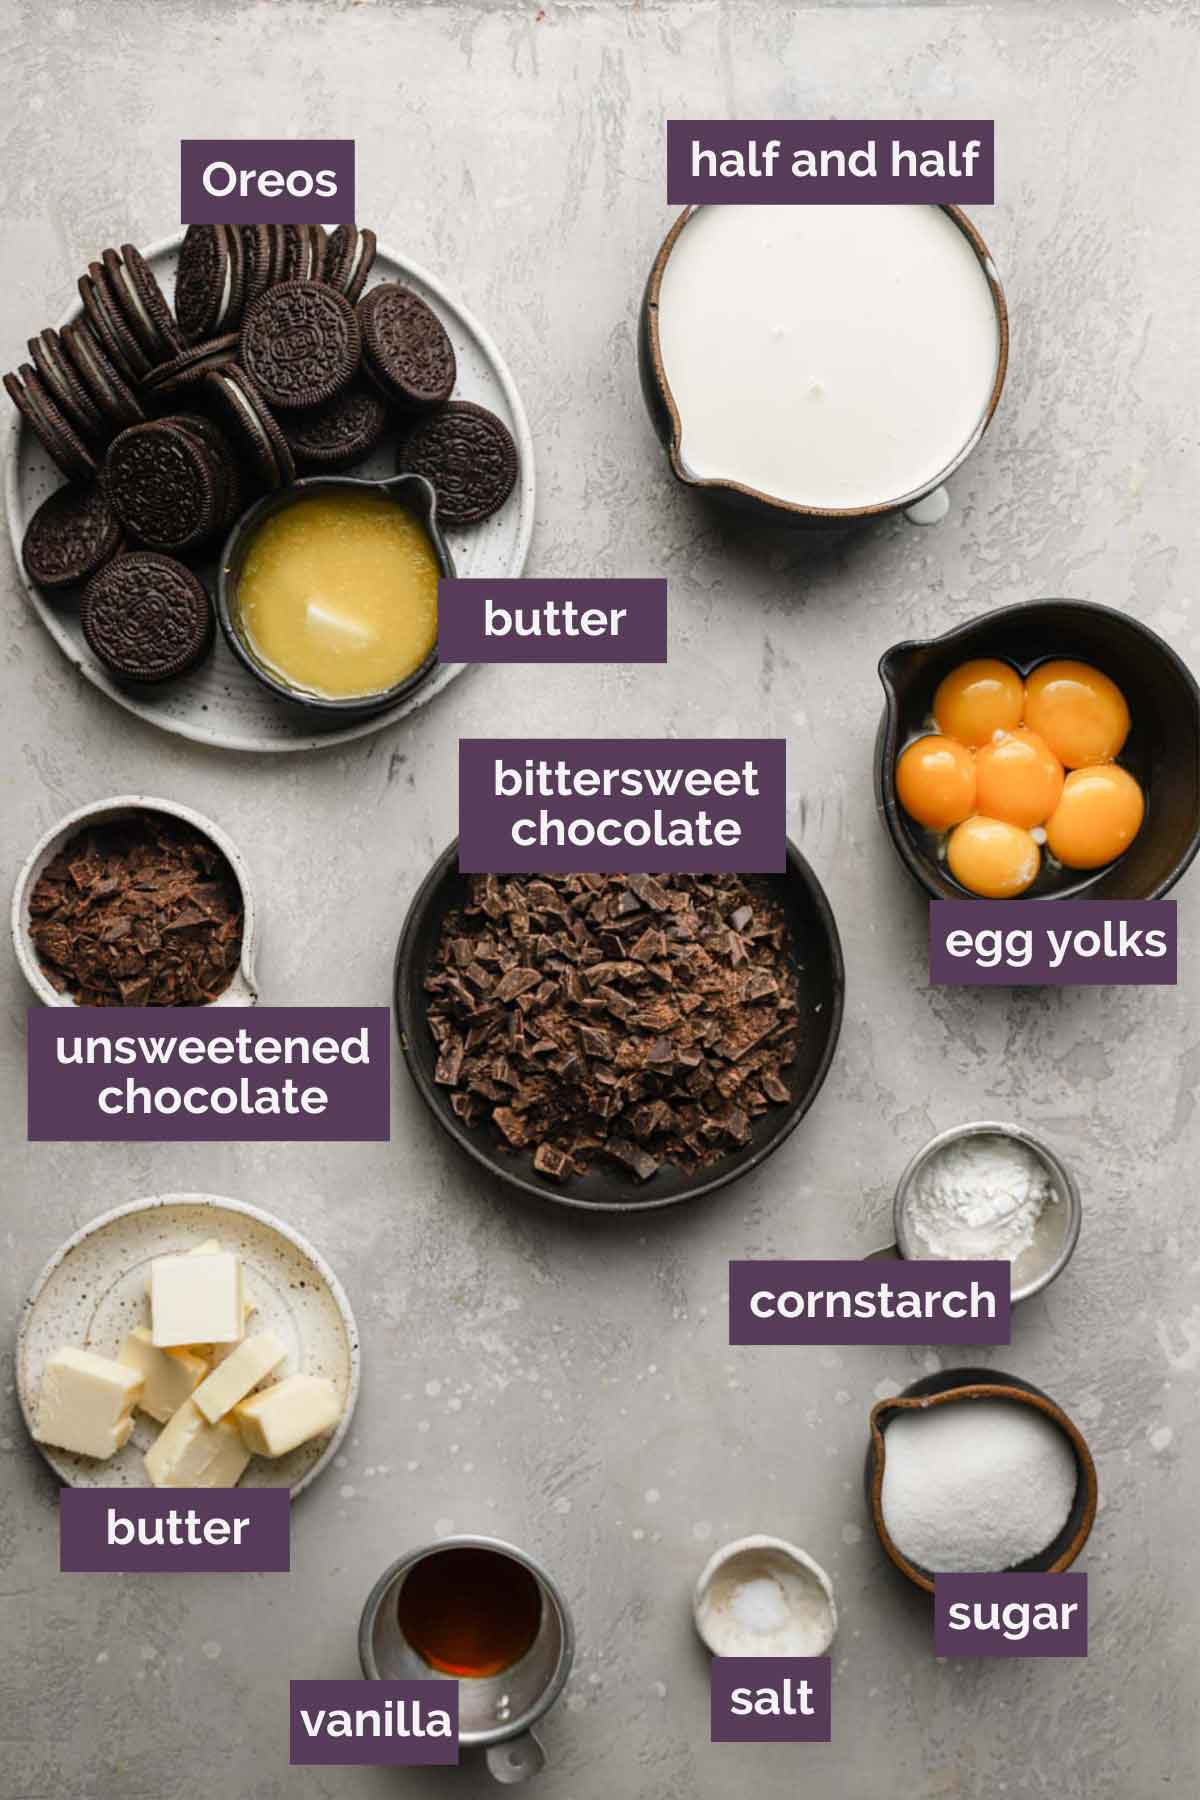
This pie doesn’t require too many ingredients, but there are a few key items you’ll want to make note of:
- Oreo Cookies – We use these for the crust, and we crush the entire cookie (filling included). You can also substitute ready-to-use Oreo cookie crumbs, crushed chocolate graham crackers, or use a store-bought chocolate pie shell.
- Half-and-Half – This is used to make the chocolate pastry cream, however I know it is not readily available in all areas. You can substitute equal amounts of heavy cream and whole milk for the half and half in this recipe.
- Bittersweet or Semi-Sweet Chocolate – If you prefer a richer and more bitter chocolate flavor, opt for the bittersweet chocolate; if you prefer your chocolate flavor a little bit sweeter, then opt for semisweet chocolate. You can chop up a bar of chocolate or use chocolate chips. I use and recommend Ghiradelli brand for baking. If using bittersweet chocolate, I prefer 60% cacao.
- Unsweetened Chocolate – This is easy to find in the baking aisle of almost any grocery store (the most popular grocery store brand is Baker’s). You can also use bars or chips marked “100% cacao”.
Making the Oreo Crust
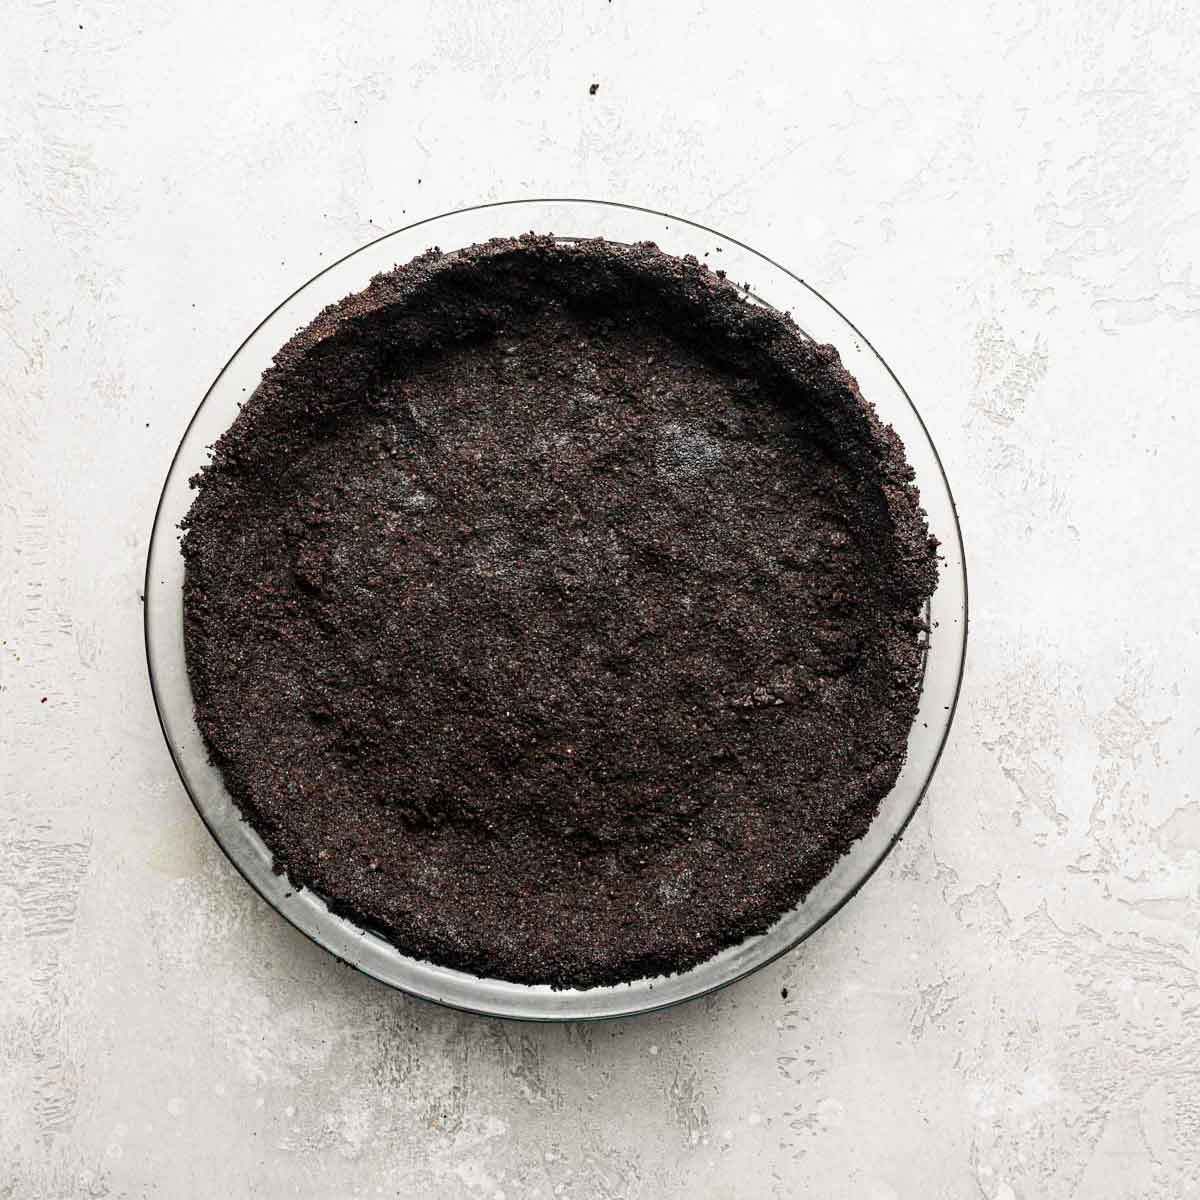
The Oreo cookie crumb crust comes together quickly; here’s all you need to do:
- Crush the Oreos, either in a food processor (this will give you finer, more even crumbs) or place them in a ziploc bag and hit it with a rolling pin or meat pounder (this will give you coarser crumbs).
- In a mediumbowl, combine the crushed Oreos with the melted butter and stir with a fork until the crumbs are evenly moistened.
- Press into a 9-inch pie plate and refrigerate for 20 minutes, then bake for 10 minutes.
- NO-BAKE OPTION: If you prefer to not bake the crust, you don’t have to; simply place it in the freezer while you prepare the filling. A baked crust will be firmer, while the chilled-only crust will crumble a little more when you slice into it.
Making the Pie Filling
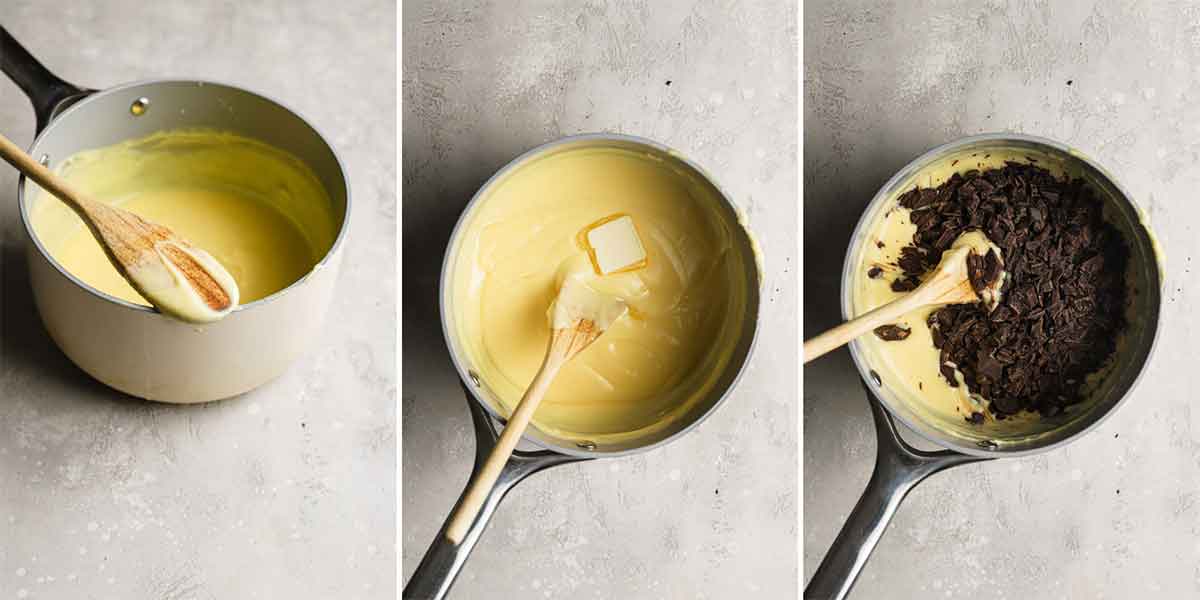
For the filling, we make a homemade chocolate pastry cream, which comes together quickly. Have all of your ingredients ready to go and don’t plan to walk away! Here is a quick overview of the steps:
- Bring the half-and-half, salt, and some of the sugar to a simmer.
- While waiting for it to simmer, whisk together the rest of the sugar and the cornstarch. In a separate bowl, whisk together the egg yolks.
- Add the cornstarch mixture to the egg yolks and whisk until the sugar dissolves.
- Once the half-and-half mixture reaches a simmer, ladle a bit out and whisk into the egg mixture, then scrape all of the egg mixture into the saucepan. Whisk constantly until the mixture thickens, looks glossy, and a few big bubbles burst on the surface. This happens fast!
- Off the heat, whisk in the butter until melted. Then whisk in the chopped chocolate and vanilla until thoroughly combined.
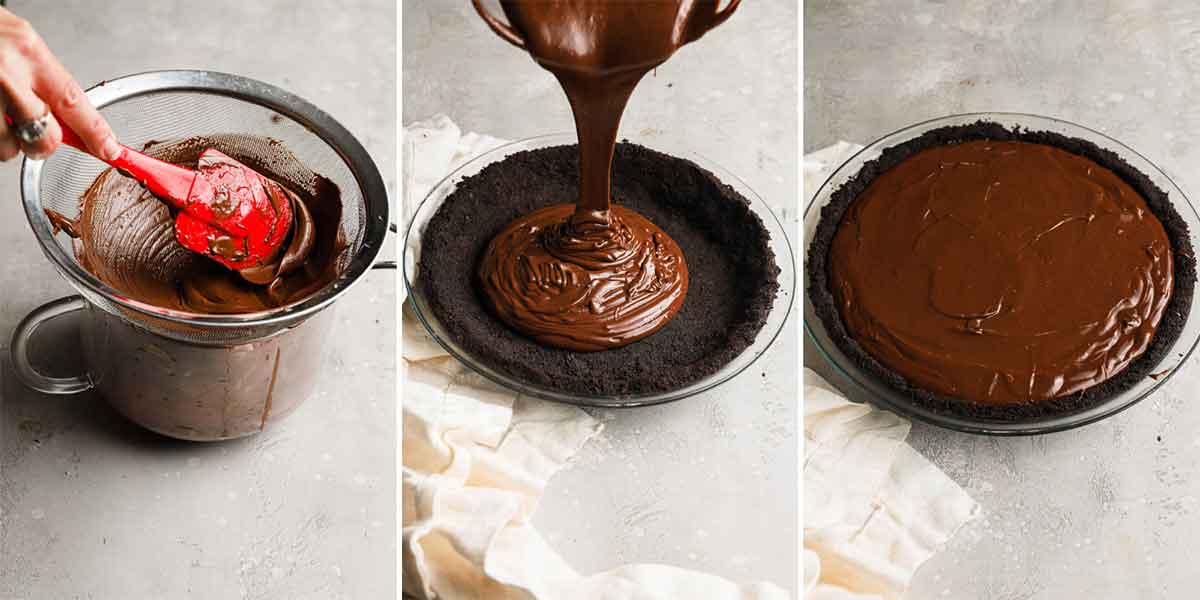
- Pour the filling into the pie crust, place a piece of plastic wrap against the surface, and place in the fridge until completely chilled and firm, at least 3 hours.
Save This Recipe
The Pie Topping
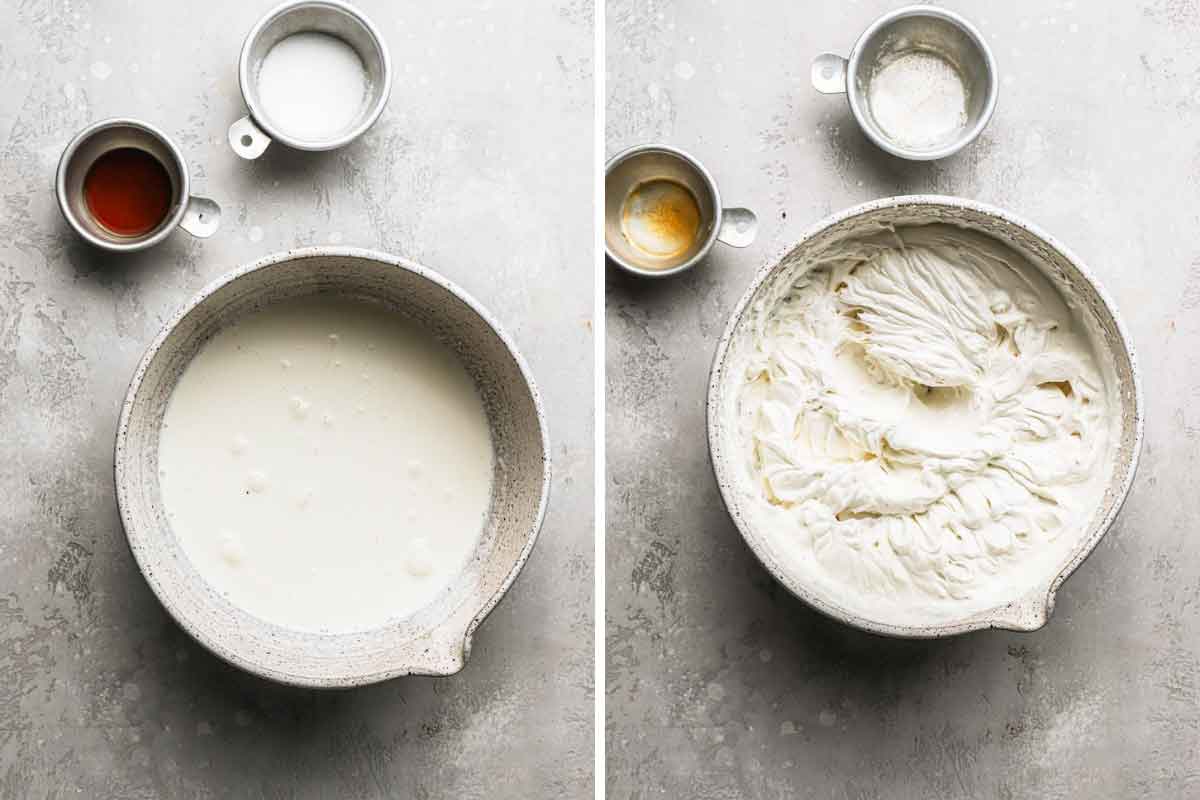
I’m topping this pie with my favorite homemade whipped cream.
Once the pie is completely chilled and ready to be topped, you can use a hand mixer or a stand mixer to whip the cream with the sugar, and vanilla until it is thick and forms stiff peaks.
Spread or pipe the whipped cream over the pie, garnish (if desired), and serve!
Recipe Notes
- Leftover Egg Whites: While I love homemade whipped cream for this pie, you may want to use leftover egg whites to create a meringue topping. Refer to my how to make meringue guide for instructions. You can also save them for omelets, meringue cookies, or pavlova.
- Garnish: I love seeing chocolate curls on the top of the pie; you can also use smaller chocolate shavings, a sprinkle of cocoa powder, more crushed Oreo cookies, or nothing at all!
- Make-Ahead: This pie can be made (without the topping) up to 1 day in advance. Add the whipped cream topping and garnish within a few hours of serving.
- Storing: Leftovers can be kept in the refrigerator, covered, for up to 2 days.
- Freezing Instructions: Chill the pie filling as instructed, then wrap the pie tightly in a double layer of plastic wrap, place the pie in a freezer-safe bag, and freeze for up to 2 months. Thaw in the refrigerator overnight, then top with whipped cream and garnish before serving.
More Cream and Custard Pies You Will Love:
- Homemade Coconut Cream Pie
- Buttermilk Pie
- Banana Cream Pie
- Key Lime Pie
- Lemon Meringue Pie
- French Silk Pie
Watch How to Make Chocolate Cream Pie:
If you make this chocolate cream pie recipe and love it, remember to stop back and give it a 5-star rating - it helps others find the recipe! ❤️️
Chocolate Cream Pie
Ingredients
For the Crust
- 24 Oreo cookies with filling, crushed into crumbs
- 4 tablespoons unsalted butter, melted and cooled
For the Chocolate Cream Filling
- 2½ cups (600 ml) half-and-half
- Pinch salt
- ⅓ cup (66 g) granulated sugar, divided
- 2 tablespoons (14 g) cornstarch
- 6 egg yolks, at room temperature
- 6 tablespoons (85 g) unsalted butter, cold and cut into 6 pieces
- 6 ounces semisweet or bittersweet chocolate, finely chopped
- 1 ounce unsweetened chocolate, finely chopped
- 1 teaspoon vanilla extract
For the Whipped Cream Topping
- 1½ cups (360 ml) heavy cream
- ⅓ cup (38 g) powdered sugar
- ¾ teaspoon vanilla extract
Instructions
- Make the Crust: Preheat oven to 350 degrees F. Combine the Oreo cookie crumbs and the melted butter in a medium bowl and toss with a fork until the crumbs are evenly moistened. Transfer the crumbs to a 9-inch pie plate. Press the crumbs evenly into the bottom and up the sides of the pan, forming a crust. Refrigerate the lined pie plate for 20 minutes. Bake for 10 minutes, until the crust is fragrant and set. Cool on a wire rack while the filling is prepared.
- Make the Chocolate Cream Filling: Bring the half-and-half, salt and 3 tablespoons of the sugar to a simmer in a medium saucepan over medium-high heat, stirring occasionally with a wooden spoon to dissolve the sugar. Stir together the remaining sugar and cornstarch in a small bowl. Whisk the yolks thoroughly in a medium bowl for about 30 seconds, until slightly thickened. Add the cornstarch mixture and whisk until the mixture is glossy and the sugar has begun to dissolve, about 1 minute. When the half-and-half reaches a full simmer, drizzle about ½ cup hot half-and-half over the yolks, whisking constantly to temper; then whisk the egg yolk mixture into the simmering half-and-half. Return to a simmer, whisking constantly, until 3 or 4 bubbles burst on the surface and mixture is thickened and glossy, about 15 seconds longer.
- Off the heat, whisk in the butter, one piece at a time, until incorporated; add the chopped chocolate and whisk until melted, scraping the bottom of the pan with a rubber spatula to fully incorporate. Stir in the vanilla, then immediately pour the filling through a fine-mesh sieve set over a bowl. Using a spatula, scrape the strained filling into the baked and cooled crust and spread into an even layer. Press plastic wrap directly on the surface of the filling and refrigerate the pie until the filling is cold and firm, about 3 hours.
- Make the Whipped Cream Topping: When ready to serve, beat the cream, sugar, and vanilla on medium speed and whip. The cream will start to get frothy, and then will begin to thicken (around the 2-3 minute mark). Increase the speed to medium-high and beat for another 30 seconds to 1 minute, or until the cream looks billowy and there are distinct trails left by the whisk in the whipped cream. If you remove the whisk from the mixer and turn it upside down, the whipped cream should remain upright and not droop off. Spread or pipe the whipped cream over the chilled filling and serve. Leftovers should be stored, covered, in the refrigerator for up to 2 days.
Notes
- Pie Pan: I recommend a 9-inch glass pie plate.
- Half-and-Half: This is a common dairy product in the United States; if you can’t get it where you are, substitute equal parts heavy cream and whole milk.
- Crushing Oreo Cookies: To crush the Oreo cookies, you can use a food processor to grind them into fine crumbs, or you can put them in a resealable ziploc bag and crush them with a rolling pin.
- No-Bake Crust Option: If you prefer to not bake the crust, you don’t have to; simply place it in the freezer while you prepare the filling. A baked crust will be firmer, while the chilled-only crust will crumble a little more when you slice into it.
- Leftover Egg Whites: While I love homemade whipped cream for this pie, you may want to use leftover egg whites to create a meringue topping. Refer to my how to make meringue guide for instructions. You can also save them for omelets, meringue cookies, or pavlova.
- Garnish: I love seeing chocolate curls on the top of the pie; you can also use smaller chocolate shavings, a sprinkle of cocoa powder, more crushed Oreo cookies, or nothing at all!
- Make-Ahead: This pie can be made (without the topping) up to 1 day in advance. Add the whipped cream topping and garnish within a few hours of serving.
- Storing: Leftovers can be kept in the refrigerator, covered, for up to 2 days.
- Freezing Instructions: Chill the pie filling as instructed, then wrap the pie tightly in a double layer of plastic wrap, place the pie in a freezer-safe bag, and freeze for up to 2 months. Thaw in the refrigerator overnight, then top with whipped cream and garnish before serving.
Did you make this recipe?
Leave a review below, then snap a picture and tag @thebrowneyedbaker on Instagram so I can see it!
This recipe was originally published in March 2017.
Photography by Dee of One Sarcastic Baker


This has been my go-to recipe for Thanksgiving and whenever we want to have in the Summer time too! An all year round pie! Thank you so much
The first time I made this recipe was 2007-delicious! I make it every Christmas. Only change-I increase the sugar to 1/2 cup, rather than 1/3 cup.
This is one of the best desserts I’ve ever made! It’s now a family favorite that everyone requests. It is silky smooth with just the right amount of sweet. Don’t be intimidated by the number of ingredients—- it’s pretty easy to make.
It is absolutely fantastic. It is not sugary sweet but rather, sophisticated and delectable. People who I’ve served this to literally close their eyes in enjoyment! Chocolatey, and oozing with texture from the crust and incredible silkiness of the chocolate filling, topped off with the crowning glory, the whipped cream. This is a show stopper. The pie you want to bring to a dinner party.
I made this fabulous pie for the first time for a wide array of friends and family and it was a huge hit! The chocolate pastry cream filling was smooth and silky – it was a great combination of sweet treat and elegance. I’ve got requests to make it again for birthdays. Thank you for a wonderful recipe and detailed instructions for a successful first try!
Easy version: Make Jell-O Chocolate Pudding, add extra chocolate, mix with cream or milk, fold in a full can of whipped cream (Cabot), and pour into graham-cracker crust. Chill.
My filling separated when I added the chocolate. Any thoughts on how to prevent this?
My go-to Thanksgiving pie recipe!
An excellent chocolate pie! Everyone lu-lu-luvs it. I make a recipe and a half and use a deep dish pie plate – pie slices are nice and thick, Yum!!!
Hey, Thanks for sharing this awesome recipe
Do you think it’d work if I tried using toasted marshmallows instead of shaved chocolate for garnish?
Oooh absolutely, sounds delicious!
This pie is amazing! The chocolate filling has a nice rich flavor without being bitter, and it set up and sliced beautifully. Next time I will use a pastry crust because I prefer the texture contrast.
I have made this pie SO MANY times… it’s an extended family favourite… almost a legend, really… for all special occasions. Thanks for sharing.
Could I make the pie and freeze it to save time around the holidays? So much to bake, so little time!
Hi Erin, I think it would freeze just fine, I would just wait to add the whipped cream until the day you serve.
I made this for Thanksgiving for the second year in a row and received rave reviews both times. Thank you!
Hi Michelle! Do you think this pie would make it in an hour-long car ride (without whipped topping) if I kept it in a cooler bag?
Also, my filling didn’t set, but after discovering my corn starch expired three years a go (yeesh!), I think that may have been the culprit. But, I’m wondering how you define “simmer”?
Hi Samantha, Yes, I think it would be fine! Simmer is when there are just little bubbles around the outside.
Do you have to strain it? I don’t have that tool
Hi Kate, Straining it makes it silky smooth and ensures that there are no little bits of cooked egg in the filling, but you could get by without doing it.
Going to make this for Thanskgiving (:: fingers crossed::)! Can I make it the night before?
Yes, totally! Althought I might do the whipped cream layer the day of (could still do it in the morning and put it in the fridge till you’re ready to serve.
Can I just use whole milk and cook it down a little bit more?
Thanks!
I must have done something wrong, hasn’t set :( should I try heating mixture??let it simmer?? Ty Sandy