Red Velvet Whoopie Pies with Cream Cheese Filling
Red velvet whoopie pies (or gobs, depending on where you live) are filled with cream cheese frosting and are perfect for Valentine’s Day dessert!
Nothing screams Valentine’s Day dessert quite like red velvet, am I right?!
It seems that it was created specifically with this holiday in mind. Although many variations of red velvet are sold year-round, Valentine’s Day is the perfect time to dust off the red velvet recipes and let them shine!
In the past, I’ve also made red velvet cupcakes (which far surpassed any I have found in bakeries!), red velvet cheesecake (a Cheesecake Factory copycat!), a red velvet roll cake, and a red velvet poke cake… all huge hits!
So naturally I wanted to keep the red velvet train rolling… Cue the whoopie pie!
Red Velvet Whoopie Pies!
I’ve mentioned before that I grew up eating the chocolate cake and white filling version of whoopie pies known as “gobs” in the Pittsburgh area, but I love all of the variations that have sprouted up in recent years. There’s pumpkin, s’mores, and a whole host of others. The possibilities are limited only by your imagination!
However, if an easy recipe for red velvet whoopie pies is what you’re looking for, you’ve come to the right place!
Save This Recipe
Can You Make Red Velvet Whoopie Pies Without Buttermilk?
So, you want to make red velvet whoopie pies, but you don’t have buttermilk. No problem – you can make your own!
Using soured milk is a key component to red velvet cake batter, as the acidic liquid is needed to combine with the baking soda and cocoa powder to get the rise and texture right, so if you don’t have buttermilk on hand, use the following substitution:
- Pour 1 teaspoon lemon juice or white vinegar to a measuring cup. Add enough milk (I recommend 2% or whole) to measure 1 cup total. Stir together and let sit for 5 minutes, then use as directed in the recipe below.
While these gorgeous red velvet whoopie pies are amazing as-is, here are some ideas for switching them up!
- Use a peppermint filling (and maybe roll in green sanding sugar) for a perfect Christmas dessert.
- Make the batter in a cake pan and then cut out heart shapes and fill to amp up the Valentine’s factor!
- Instead of cream cheese frosting, try using a marshmallow frosting (skip the toasted marshmallows!) or 7 minute frosting to change up the flavor.
- Use a chocolate frosting for the filling, because… chocolate.
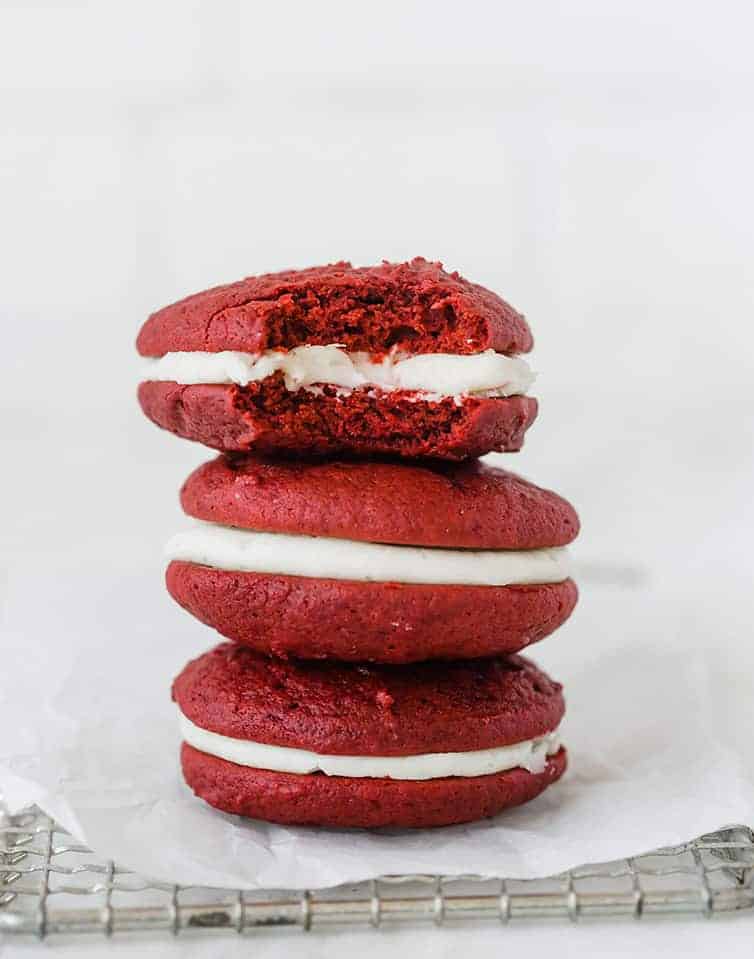
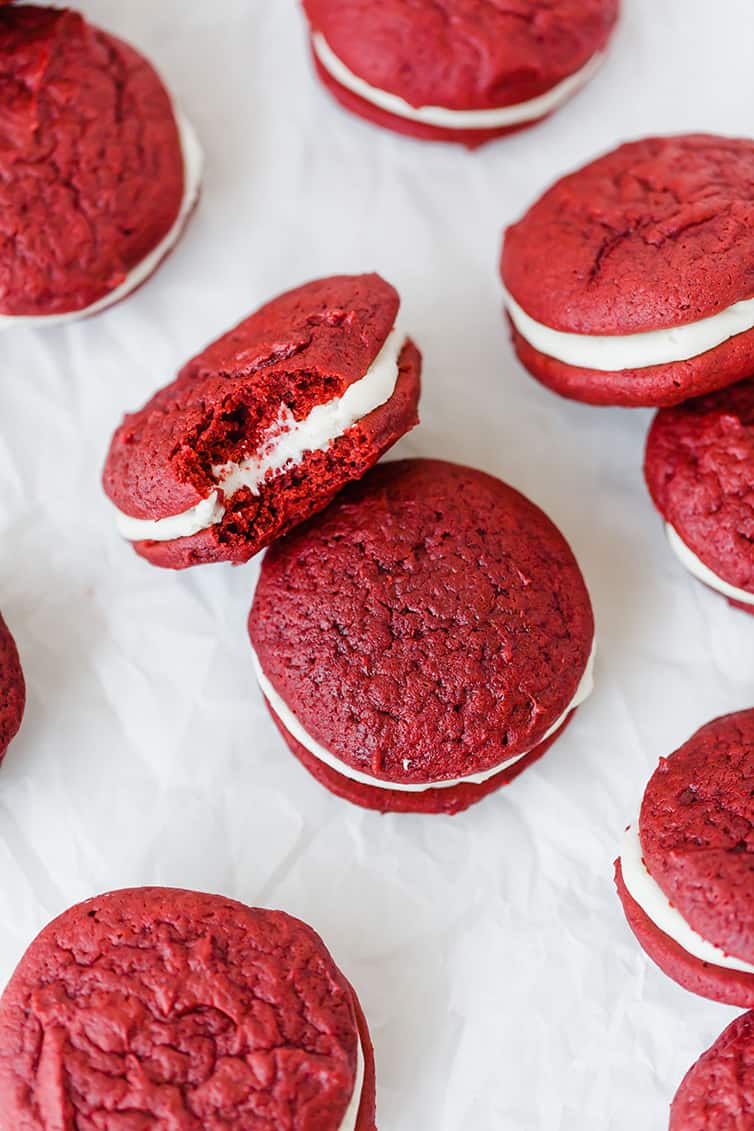
If you’re looking for the best recipe for red velvet whoopie pies for Valentine’s Day, you’ve found it!
These are fluffy, a little chocolatey, a deep, gorgeous red, and filled with sinfully sweet cream cheese frosting. Totally dreamy!
Four years ago: Homemade Chocolate Pudding
Five years ago: Buckeye Brownies
Seven years ago: Sausage Dip
Eight years ago: Cappuccino Cinnamon Squares
Red Velvet Whoopie Pies with Cream Cheese Filling
Ingredients
For the Whoopies
- 3 cups (375 g) all-purpose flour
- ⅓ cup (28.67 g) unsweetened cocoa powder
- 1 teaspoon baking powder
- ½ teaspoon (0.5 teaspoon) baking soda
- ½ teaspoon (0.5 teaspoon) salt
- ½ cup (113.5 g) unsalted butter, at room temperature
- ½ cup (102.5 g) vegetable shortening
- ½ cup (110 g) light brown sugar
- 1 cup (200 g) granulated sugar
- 2 eggs
- 2 teaspoons vanilla extract
- 3 teaspoons red food coloring
- 1 cup (240 ml) buttermilk
For the Cream Cheese Filling
- 4 ounces (113.4 g) cream cheese, at room temperature
- ¼ cup (56.75 g) unsalted butter, at room temperature
- 3½ cups (420 g) powdered sugar
- 1 teaspoon vanilla extract
Instructions
- Make the Whoopies: Position a rack in the center of the oven and preheat the oven to 350 degrees F. Line two baking sheets with parchment paper; set aside.
- In a medium bowl, whisk together the flour, cocoa powder, baking powder, baking soda, and salt; set aside.
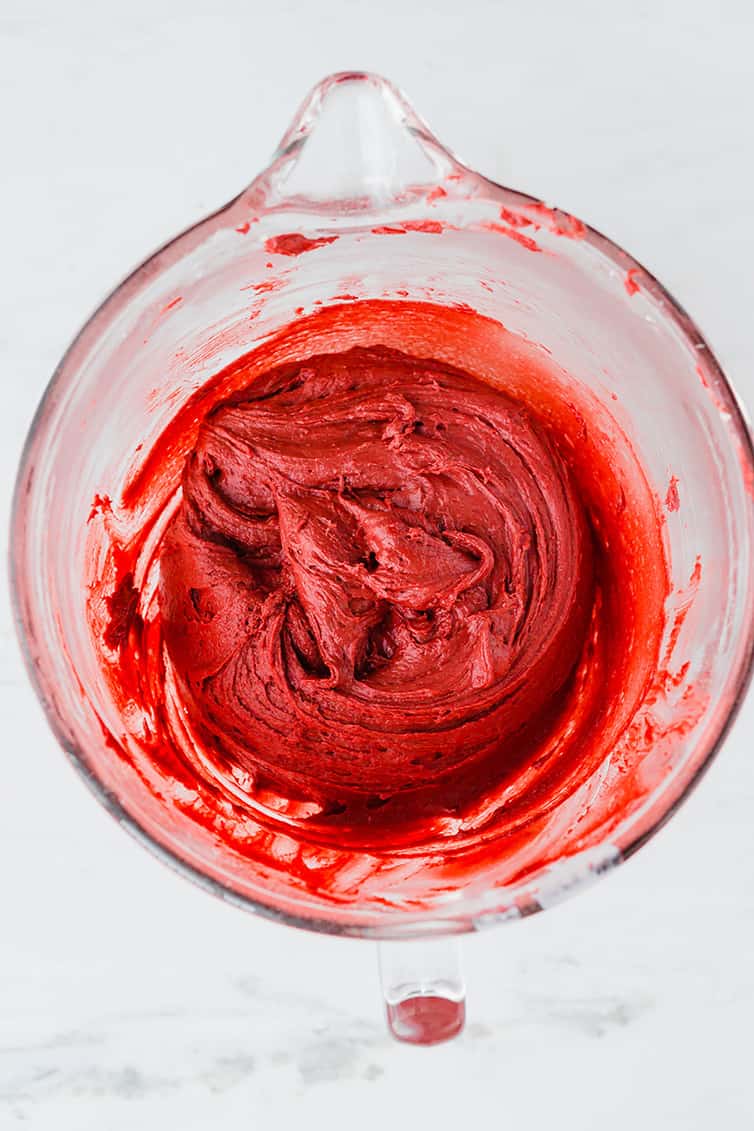
- In the bowl of a stand mixer with a paddle attachment, beat together the butter, shortening and both sugars on low speed until just combined. Increase the speed to medium and beat until fluffy and smooth, about 5 minutes. Add the eggs one at a time, beating well after each addition. Add the vanilla and the red food coloring and beat until just blended.
- Add half of the flour mixture and half of the buttermilk to the batter and beat on low until just incorporated. Scrape down the sides of the bowl. Add the remaining flour mixture and remaining ½ cup buttermilk and beat until completely combined.
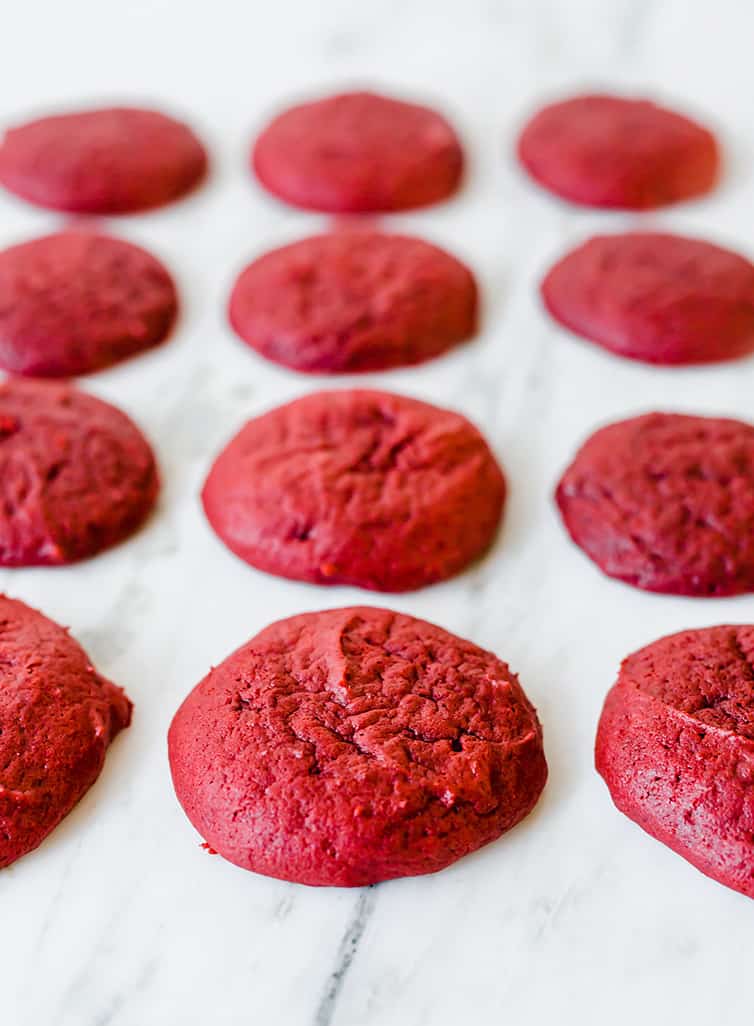
- Using a spoon (or a medium cookie scoop, which is what I used), drop a tablespoon of batter onto one of the prepared baking sheets and repeat, spacing them at least 2 inches apart. Bake one sheet at a time for about 10 minutes each, or until the cakes spring back when pressed gently. Remove the baking sheet from the oven and let the cakes cool on the sheet for 5 minutes before transferring them to a rack to cool completely.
- Make the Cream Cheese Filling: In the bowl of a stand mixer with the paddle attachment, beat together the cream cheese and butter on medium speed. Add the sugar and beat on low speed until combined. Add the vanilla and increase the speed to medium-high; beat until creamy and smooth, about 4 minutes.
- Assemble the Whoopie Pies: Spread the filling onto the flat side of one cake using a knife of spoon. Alternatively, you can use a pastry bag with a round tip (I used a #12 Wilton tip) to pipe the filling onto the cake. Top it with another cake, flat-side down. Repeat with the rest of the cakes and filling. Assembled whoopie pies can be stored in an airtight container at room temperature for up to 3 days. If you need to stack layers, place a piece of wax paper between layers.
Notes
Did you make this recipe?
Leave a review below, then snap a picture and tag @thebrowneyedbaker on Instagram so I can see it!
[photos by Whitney Wright]
This recipe was originally published on February 10, 2011.


These were pretty good, but I’m not gonna lie I was a little disappointed. I’m a seasoned baker and follow new recipes to a T. These came out flat (still had a little puff don’t get me wrong) and not at all like the photos. After exploring the reviews I came across a conversation had between the author and a viewer where she explicitly states she discourages the use of dutched cocoa as it’ll severely affect the rise. I know her recipe doesn’t say it had to be Dutch Process, just unsweetened – however but 99% of recipes use Dutch Process Unsweetened cocoa, it’s very much the norm. I’m not a pro but I’m just bummed given this is apparently a crucial aspect that it wasn’t noted somewhere as it’s an easy “mistake” to make.
All in all though these still tasted great, just not as fluffy and tall as I had hoped!
These are fantastic! I love pretty much every type of gob, and surprisingly have never tried a red velvet one. Yum! I shared them with family and neighbors for Valentine’s Day.
Hi, I just just wondering if you could possibly share with me you red velvet cake recipe. I made red velvet cake twice before and both times they came out so stodgy. Not sure why because I followed both recipes right. I’m looking for a really moist one to make my husband on Valentine’s Day. Thanks and I would really appreciate it.
If i make this in a cake pan what size pan and how long to bake it? What temp?
I’m an experienced baker and these turned out great in looks but I thought they were way too dry. My red velvet cake recipe is very moist, and so are my pumpkin woopie pies. A sweeter buttercream also would be better I think. Just my opinions. I have made several BEB recipes that are really good and appreciate your web page.
A delicious whoopie pie and Buttermilk is he secret ingredient. I ran short on the food coloring, but it still came out tasty!
Hi!! I tried to make these….but they somehow kind of turned out like biscuits? I thought I did everything according to the recipe, but maybe I went wrong somewhere. Do you have any ideas as to what might have happened?
I made these for dessert on Christmas. They were really tasty, but they spread way more in the oven than I was anticipating and didn’t rise nearly as much as I’d been hoping. They were like flat pancakes rather than small cakes/cookies. They were also really sticky and you had to eat them with a fork instead of just holding them in your hand.
If they weren’t so sticky, had more poof and less spread, I’d give them a much higher rating, because they were delicious.
These did not work out for me. I know Amelia thinks you shouldn’t say anything if you don’t have something nice to say but as a baker, I am trusting the commenters to tell me how things go over. These were flat. I’ve made whoopie pies before and these were not anywhere near what yours looked like. I followed the weights exactly and my baking powder is fresh so I have no idea. I think they need a lot more flour and I wonder about your measurements weight wise being completely off as someone else noted. Follow the measurements by cups and maybe you’ll be fine?
Thanks for sharing this amazing recipe :) :)
I’m looking over the ingredients for this recipe and it states 3 cups or 425 grams all purpose flour. Three cups of APF weighs in at 120g per cup or 360 grams for 3 cups. A 65g difference is about 1/2 cup, so I’d like to know which amount is correct.
Hi Ginny, It actually depends on the source that you use… different companies/cookbooks/chefs use anywhere from 4.25 ounces to 5 ounces per 1 cup all-purpose flour. I use the 5 ounce measurement, as that’s the standard measurement used by America’s Test Kitchen. For this recipe, 425 grams is correct.
These are little gems. Although I didn’t have enough red food coloring to make them red, they were fantastic little treats with great surprise in the middle. All my tasters loved them. Thanks for this recipe.
Can you substitute the vegetable shortening? It’s not available in my country.
Thanks
Hi April, You can use butter, but the consistency will come out differently (they may not be as soft or hold their shape as well).
If I use Guittard Cocoa Rouge (https://www.guittard.com/our-chocolate/detail/bake_cocoa-rouge), which is a Dutch processed cocoa, would I need to change the leaveners in the recipe?
I can’t wait to try these. Thanks!
Hi Kelsey, I would really discourage using Dutch process cocoa in this recipe, as you would need to do quite a bit of tinkering with the ingredients… the natural unsweetened cocoa, baking soda, and buttermilk all react together for the rise you need.
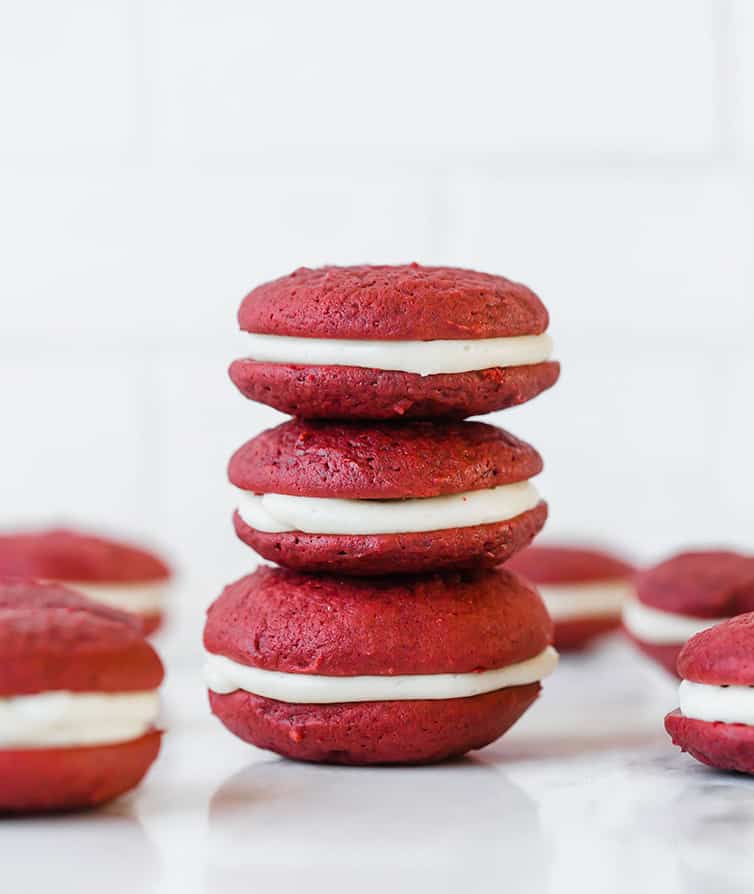
About how big is the Whoopie pie?
Hi Vanessa, About 3-4 inches in diameter.
YUM! These whoopie pies look delicious – just in time for Valentine’s day!
Please help me. Im having a whoopie pie emergency. I tried a recipe for someone and they came out flat. I can make regular whoopies but this red velvet whoopie is takin a toll on my nerves… Not this recipe another one. Anyways i was wondering since iv ran out of butter can i substitute anything for it. To achieve the same results?
.
Hi Keshia, Unfortunately, it would be near impossible for me to comment on a recipe that I have never tried before. Shortening can sometimes be substituted for butter, but the texture may be a bit different.
I made these to take as a treat for a class I am taking and doubled the batch. Wow! These are amazing! Why did I wait so long to make whoopie pies? Well, you can be sure I will be making these on a regular basis. And now I want to try other whoopie versions. I’m thinking a classic chocolate with some peanut butter filling would be pretty good. Thanks for the recipe, Michelle!
I made these today and after all that work they really ended up being as dry as a popcorn fart. Which is really disappointing because I wanted to take them to work but will throw away instead
Hi!
Where I live, I can’t buy vegetable shortening… Any substitutes? Thanks!
Hi Amelia, Unfortunately, I am not aware of a good substitute for the shortening in this recipe.
These were awful. They were flat and tasted only like the crisco. Will not be attempting again. Burned easily when put in for 10 minutes. I don’t think I will be visiting this website for recipes again.
If you don’t have anything nice to say, don’t say it at all
The pictures are beautiful. I was looking for a 4th of July recipe for our 4th of July Picnic at our church, and these will be perfect, with a tiny flag standing on top of each Whoopie.
A gluten free adaptation of these whoopie pies are presently “en route” in my kitchen! Come and visit my blog during the coming week to see them! Thanks for that recipe!
I made these last year and they were a huge hit, so I am repeating it this year!
I am curious at the lack of vinegar in the recipe. Does the inclusion make the pie too soft? Thanks for all the great recipes and inspiration!
I made these today – and posted about them. Your recipe was great – I linked back here. Thanks again for the inspiration.
Hi, i have a question. once i cooled my pie on the wire rack i took a bite. it is so fluffy in the inside and lil bit crispy on the outside. however, on the next day when im acout to fill the pie with its filling, i taste another pie and it turn out to be very dense and not fluffy and crisp at all.
i dont know what went wrong. i had to reheat the pie in the microwave prior to serving to make it a lil bit fluffy. but then the filling will melt due to the heat.
i can only think of two reasons; i) its because of the climate coz i live in Malaysia. Or 2) because once baked i cool it on a wirerack directly infront of fan.
I appreciate if u could help me with my problem. Thanks!
Hi Haniza, They should have a soft and fluffy texture, so my guess is that if they turned dense it may have been caused by the air temperature/humidity.
It sounds amazing…except for the cream cheese filling, I’ll have to try this w/ a rendition of the original butter roux frosting :)
can i make this without a mixer?
Yes, you could use a whisk and wooden spoon, along with some elbow grease! :)
Thanx :)
I love whoopie pies! Do you have any ideas on how I could make Blue whoopie pies? Im from Kentucky and every year we have a big March madness party for Kentucky basketball and this year I would love to make Kentucky Blue whoopie pies. Thanks!
Hi Heather, Although I don’t have a recipe here on the site, I would suggest a vanilla whoopie pie and use blue food coloring. Sounds fun!
I think that European Butter has more fat than American, from what I know. That could definitely have an effect on the recipe. There is more water in American butter, and more air. The water causes steam when you bake which can make things puff more.